So, you've created an Oracle Cloud Database (which is pluggable). You can connect to it and copy files to it using Secure FTP.
Now you've got a pluggable database at <your company>, and you want to clone it and put it your Oracle Cloud Database server. How do you do that? Well, I’m glad you asked, and I’ll show you how to do that using Toad.
Note: The source and target container databases need to be the same versions (or at least close), and there are some other compatibility requirements too (I've tried, but failed, to find a document that details what they are). Oracle will do a check for these requirements as you're going through the "Pluggable Database" wizard in Toad. If there are any incompatibilities, Toad will let you know. I ran into some of them myself while writing this, but they were relatively easy to correct. In this blog, my source database is running on Windows and my target is Unix. It's possible to plug a "normal" (non-pluggable) database into a container, but in my example, I'll use a pluggable.
Where is my Cloud Container Database?
Oracle's web interface just gives information that you need to connect to one of the pluggable databases. But to plug another database into the cloud, you'll need to connect to the container. I had to do some poking around to find it. So I logged into the server using PuTTY, and did a "lsnrctl status“, and got this result:
Services Summary...
Service "ORCLOUD.toadoracle2015.oraclecloud.internal" has 1 instance(s).
  Instance "ORCLOUD", status READY, has 1 handler(s) for this service...
Service "ORCLOUDXDB.toadoracle2015.oraclecloud.internal" has 1 instance(s).
  Instance "ORCLOUD", status READY, has 1 handler(s) for this service...
Service "demos.toadoracle2015.oraclecloud.internal" has 1 instance(s).
  Instance "ORCLOUD", status READY, has 1 handler(s) for this service...
Service "pdb1.toadoracle2015.oraclecloud.internal" has 1 instance(s).
  Instance "ORCLOUD", status READY, has 1 handler(s) for this service...
The command completed successfully
The interesting parts are bolded and underlined. These are the service_names that we use for our TNSNames.ora entries. When I created my cloud database, I named it ORCLOUD, and Oracle's web interface told me that the service name of my (pluggable) database was "pdb1.toadoracle2015.oraclecloud.internal". So the first entry, "ORCLOUD.toadoracle205.oraclecloud.internal" must be the service name for my container database, and my TNSNames.ora entry for the it will look like this:
ORCLOUD_CONT =
  (DESCRIPTION =
    (ADDRESS_LIST = (ADDRESS = (PROTOCOL = TCP)(HOST = localhost)(PORT = 9999)))
    (CONNECT_DATA = (SERVICE_NAME = ORCLOUD.toadoracle2015.oraclecloud.internal )))
If you aren't sure why I used 'localhost' and '9999' for host and port, read this.
OK, now let's set the cloud database aside for a bit and get the source database cloned.
Cloning the Source Pluggable Database
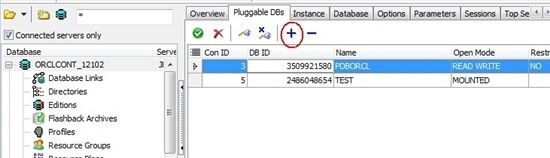
Connect to the container database with Toad and go to the Database Browser. For me, the container is ORCLCONT_12102, and I'll be cloning the PDBORCL pluggable database and plugging it into the cloud.
So here we are in the Database Browser. Select the database to clone and click the "+" to get started.
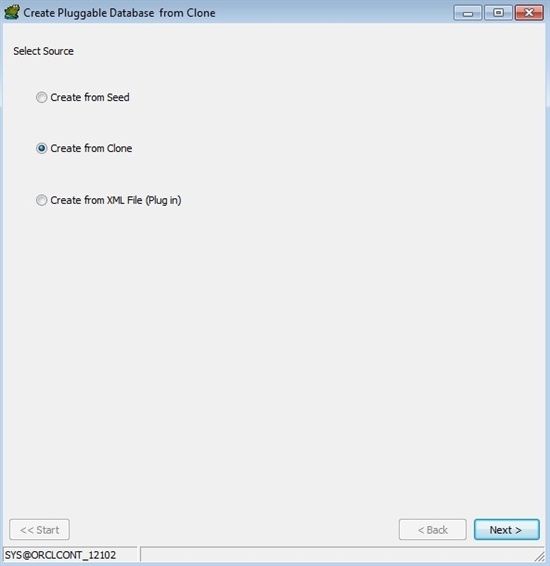
This dialog will appear. Great. Just click "Next".
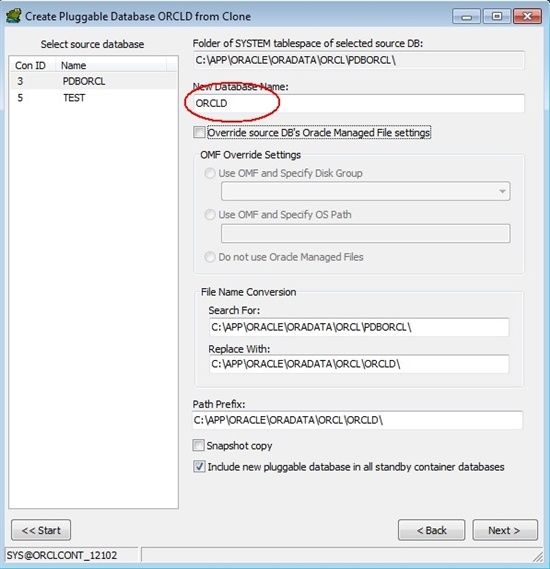
Enter the new DB's name and tab off the field. I'm calling mine ORCLD for "ORacle CLouD". The other values will get filled in for you when you tab off of the "New Database Name" field. Then click "Next".
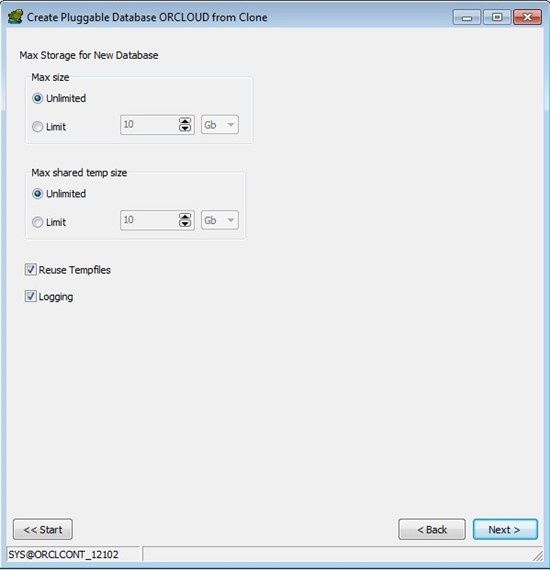
Nothing to see here. Move along. Click "Next".
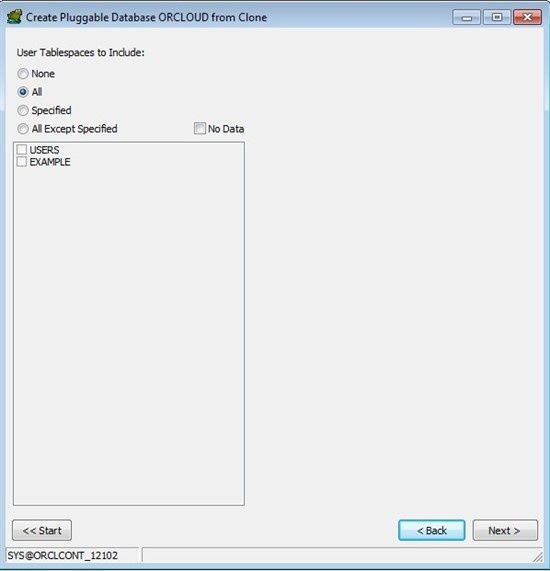
These options could be helpful if you don't want to clone the entire database (and have your schemas broken out by tablespace, as you should), or want to clone the database but with no data. I want all tablespaces/schemas and all data, so I'll just click "Next".
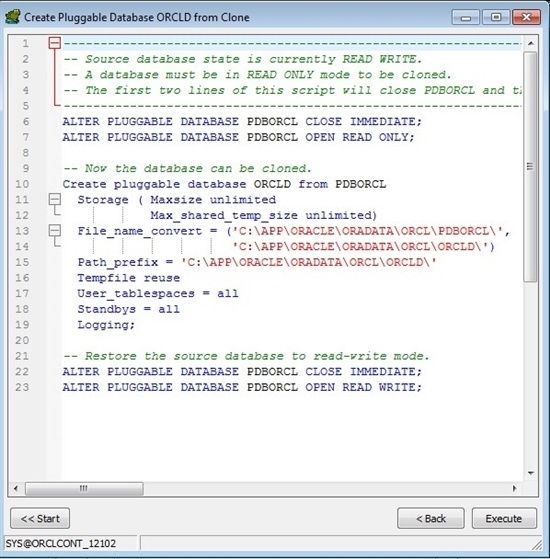
Toad generates a script to run in the container database which will clone the pluggable. Note that the database has to be in READ-ONLY mode for the database to be cloned, and it will be restored to READ-WRITE afterwards. Click "Execute".
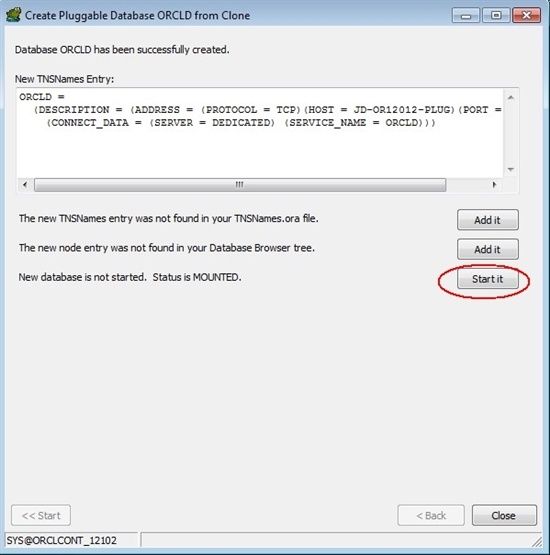
When it's done, you'll see this. Since we're just going to disconnect this clone and move it to the cloud, there's no need to add it to our TNSNames.ora or Database Browser files, but we do want to start it, as this will actually make the unplugging step a little easier. So click "Start It" and then close this dialog, and you'll land back in the Database Browser.
]
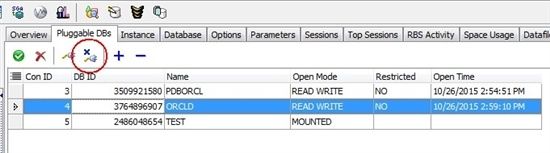
The pluggable PDBORCL database has now been cloned as ORCLD. Now we need to unplug ORCLD from its container before we can copy it to the cloud and plug it in.
Unplugging the Cloned Database
Back in the Database Browser, still connected to the source container database, select the database to unplug and then click the "unplug" button.
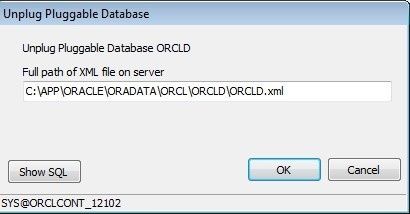
You'll see a prompt like this, and the path of the XML file is already filled in. Toad did that for you (starting the database made that possible). The path is the same as the datafile for the SYSTEM tablespace (and in my case, all of the database's datafiles are in the same place). This XML file contains information that the receiving container database is going to need in order to plug this database in. Just click OK.
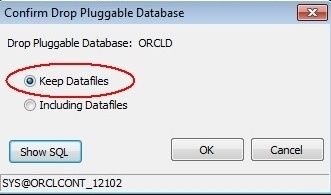
The database has been unplugged, but we still need to drop it from the container. I'm not really sure why "unplugging" doesn't include "dropping", but it doesn't. Click the "minus" button to drop the database.
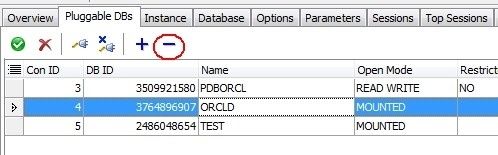
Be sure to check "Keep Datafiles". Otherwise, all of the datafiles will be deleted. We don't want to delete them, we just want the container database to forget about them.
Copying the files from the server at <your company> to the cloud
I've got a separate blog entry about copying files to the cloud, so I’m not going to say too much about how to do it, just where the files are and where they need to go.
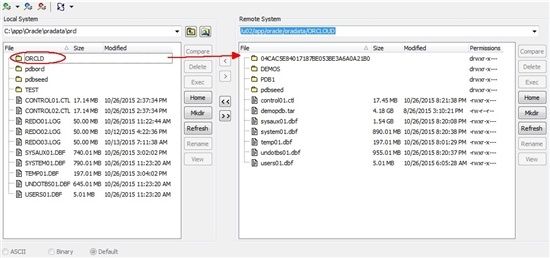
On the source server, they're in the folder shown on that "unplug pluggable database" dialog a few screen shots up.
On the target server, they should ideally go in a folder next to the folder that the pluggable cloud database is in, BUT, you can put them wherever you want.
So, for me, the folders are as shown below: (by the way, you can double-click these images to see them bigger)
For me, the file transfer was by far the slowest part of the process. It took me several hours to upload about 2.5 Gb of files. This is just on my home internet connection. Hopefully your upload speed is faster than mine!
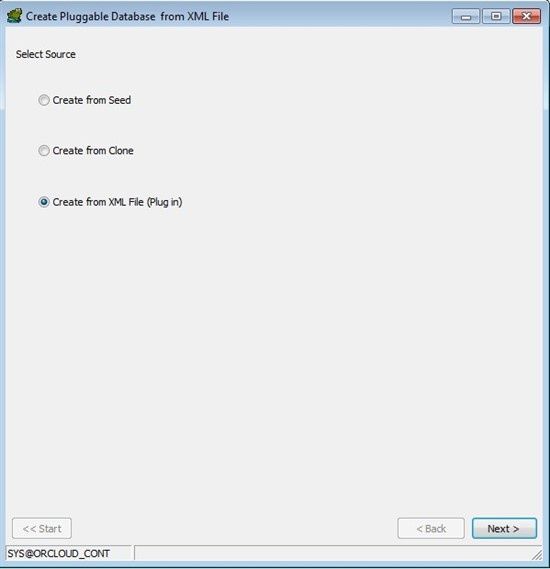
Plugging the database into the cloud
In Toad, connect to the Cloud's container database. Open the Database Browser and click the "Plug in" button.

This dialog will appear. Just click "Next".
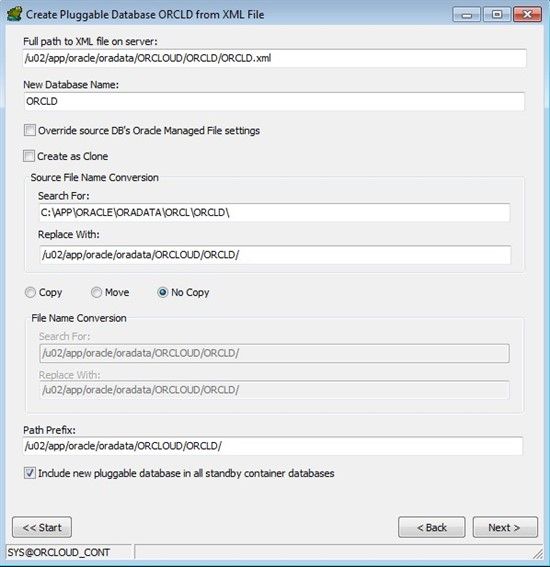
Next, you'll come to this rather daunting dialog with lots of blank fields. Don't worry. Toad will do the heavy lifting. The only thing you need to fill in is the first field "Full path to XML file on server".
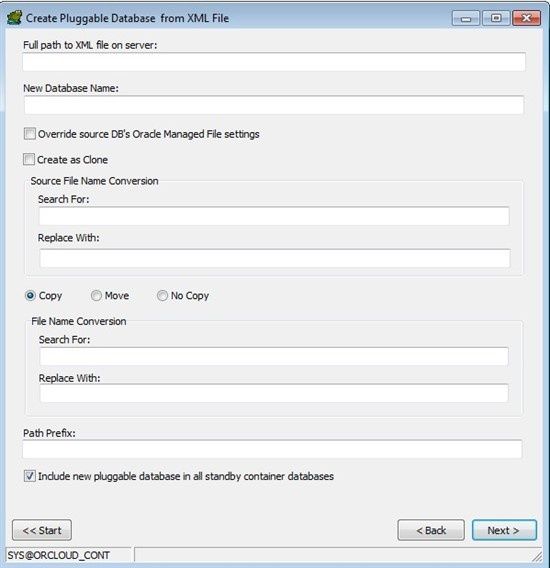
When you enter the path (remember, it's case sensitive), Toad will pull the XML file from the server and parse it to find the database name and fill it in. You can change it if you want. When you tab off of the database field, the rest of the fields on the form will be filled in for you. Click "Next" after that.
At this point, Oracle will perform a compatibility check between the database that you are trying to plug in, and the one you are trying to plug it in to. If there's a problem, Toad will let you know, and you won't be able to continue until you correct it. I had three problems.
1) The EXCLUDE_SEED_CDB_VIEW parameter didn't match. This just affects if you see the SEED database in some of the CDB views. I didn't mind changing this one on the cloud database.
2) The MEMORY_TARGET parameter didn't match. They were pretty close in values between the two databases, so I didn't mind changing this one on the cloud database either.
3) APEX mismatch: PDB installed version 4.2.5.00.08 CDB installed version 5.0.0.00.31. Ugh! To correct this one, I had to upgrade APEX in the source database, then re-clone and re-transfer my source database. Hmmm….I wonder how to upgrade APEX. Google to the rescue! It actually turned out to be a pretty simple process. I found this, and it worked perfectly.
The next time around, when I clicked "Next", there were no more compatibility problems, and Toad showed me the script to plug in the database:
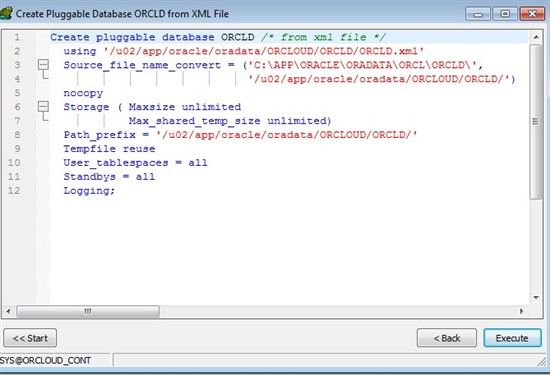
So I clicked "Execute" and HOORAY! It worked!
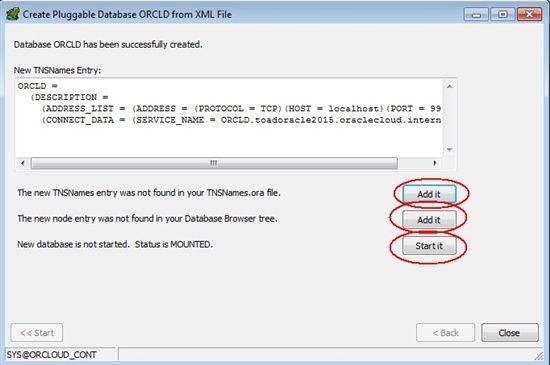
To have Toad add an entry for the new database in your TNSNames.ora and Database Browser files, and then start the new database, click the buttons circled above.
There were a lot of GUI clicks and things like that in this process, but in the end, it really boils down to just a few steps that wouldn't be that hard to automate.
1) Run a script on the source container database to clone the source pluggable database.
2) Run some more commands to unplug and drop it.
3) Copy the files to the cloud.
4) Run a script to plug it in and start it.
Start the discussion at forums.toadworld.com