In my previous blog post, I described how to create an Oracle Cloud Database.
Before we continue, you should have private key file. Whoever made the database should have given it to you. There are details about it in my previous blog post.
After the Cloud Database is created, you can go to https://dbaas.oraclecloud.com/dbaas/faces/dbRunner.jspx to see the a list of your databases.
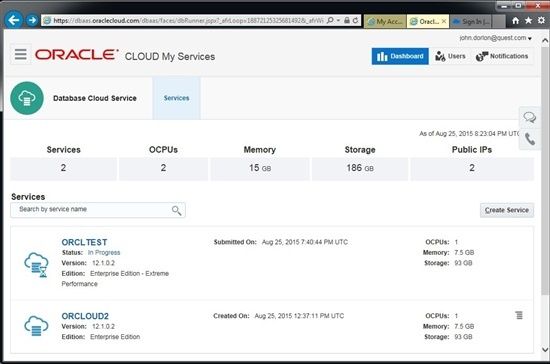
And, clicking on one of them will show you the details for that database.
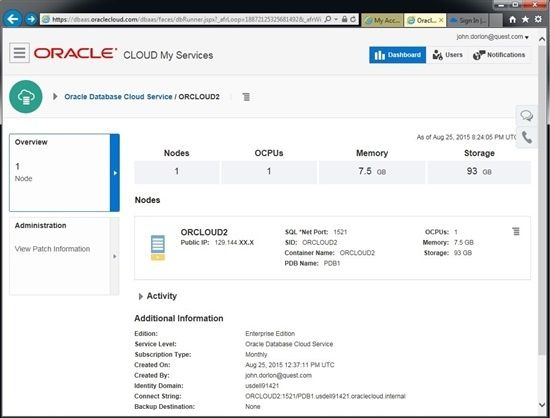
From this information, we can construct a TNSNames entry for a database that looks like it's on the local computer: I'm using port 9999 locally to avoid ambiguity, since the server is using 1521 (see where it says “SQL*Net Port in the screenshot above?). Notice for HOST, I’m specifying localhost, not the IP address in the screen shot above. The service name came from the “Connect string” in the screen shot above.
(DESCRIPTION = (ADDRESS_LIST = (ADDRESS = (PROTOCOL = TCP)(HOST = localhost)(PORT = 9999)))
(CONNECT_DATA = (SERVICE_NAME = PDB1.usdell91421.oraclecloud.internal)))
Save your version of this TNSNames entry to your TNSNames.ora file.
If you don't have PuTTY installed, you're going to need it. Go here to download it. http://www.chiark.greenend.org.uk/~sgtatham/putty/download.html.
Click putty-0.65-installer.exe and install it. Note that that file name will change when they release a new version.
From this point, there are two different ways to get PuTTY to connect to your database server and open up a tunnel. For me, they both worked, but for a coworker, only one of them did. So if one doesn't work, try the other. I'll do the easy one first.
The easy way is:
Go to a DOS prompt, go to the folder where you installed PuTTY, and run this command:
plink -N -L <Local Port>:<remote host>:<remote port> oracle@<remote host> -i <private key file>
where:
<local port> is the port that you specified in your TNSNames.ora for that database.
<remote host> is the IP address that Oracle gave you for "Public IP address"
<remote port> is the port that Oracle gave you for "SQL*Net Port"
<private key file> is your private key file.
So for me, the command would look like this:
plink -N -L 9999:129.144.13.1:1521 oracle@129.144.13.1 -i C:\Keys\key.ppk
After you run that command, you'll get a message prompting you about storage a key in cache. Choose Y or N and Enter. It should respond with a "Using username "oracle"". Leave that window open, and you should be able to go to Toad or SQL*Plus and use the TNSNames entry that you created to connect to the database.
The other way to connect, using PuTTY's GUI, is:
1) Browse to the folder where you installed PuTTY and run putty.exe.
2) In PuTTY,
a) enter the Public IP address that Oracle gave you where it says "Host Name (or IP address)" Leave everything else on that page (including port) as the default
b) On the left, under "Connection", click "Data". On the right, enter "oracle" (no quotes) as "Auto-login username".
c) On the left, expand the SSH node and click "Auth". On the right, use "Browse" button to locate your private key file.
d) On the left, click "Tunnels". On the right, for "Source Port", enter the port that you've specified in your TNSNames entry (from my example above, 9999). For "Destination" enter the Public IP Address and port used on the server (from my example above, 129.144.13.1:1521). Then click "Add" so it's added to the listbox above.
e) If you want to save these settings, go back to the "Session" node on the LHS, then on the right, enter a name in the "Saved Sessions" edit box, and click "Save".
f) Press "Open" at the bottom to connect. If all goes well, you should get a window that resembles a Dos prompt that says something like this:
Using username "oracle".
Authenticating with public key "rsa-key-20150825"
Authorized uses only. All activity may be monitored and reported.
[oracle@ORCLOUD2 ~]$
Leave that window open, and you should be able to go to Toad or SQL*Plus and use the TNSNames entry that you created to connect to the database.
Come to think of it, the 2nd method may be the way to go if you intend to do this more than once. Once the profile is saved, you can reconnect in just a few clicks.
Start the discussion at forums.toadworld.com