In three articles we are exploring data preparation using Toad Data Point. In the first article we created a data source as a MySQL database table. The data we stored had some shortcomings such as extra spaces, null values, blank values, wrong data types, and duplicate values. We profiled the data to find the issues with the data. In the second article we extracted the data to Toad Data Point. We started to transform the raw data by running auto transform, which trims the extra spaces and performs data type conversions. In this third article we shall remove duplicate data, find and replace missing data, and find and replace blank values, among other transformations.
This article has the following sections.
Transforming Data
Removing Duplicates
Finding and Replacing Null Values
Finding and Replacing Missing Data
Sorting Data
Formatting Data
Converting Data Types
Extracting Date
Exporting Data Report
Transforming Data
We shall continue with other transformations on the raw data in sub-sections.
Removing Duplicates
Duplicate values are not erroneous by default, as some data values may need to be duplicate, such as a server name being the same across all the data or a message code being the same across multiple rows of data. Duplicate data in the msg column is likely erroneous data, as most log messages are unique. While profiling data we found some duplicate values in the msg column. The values were exactly the same in three rows of data, other than being lowercase/uppercase in some rows, as shown in Figure 1. In this section we shall remove the duplicate data.

Figure 1. Duplicate Data
Select the msg column, right-click and select Deduplicate as shown in Figure 2. Alternatively, select Deduplicate from Transform and Cleanse.
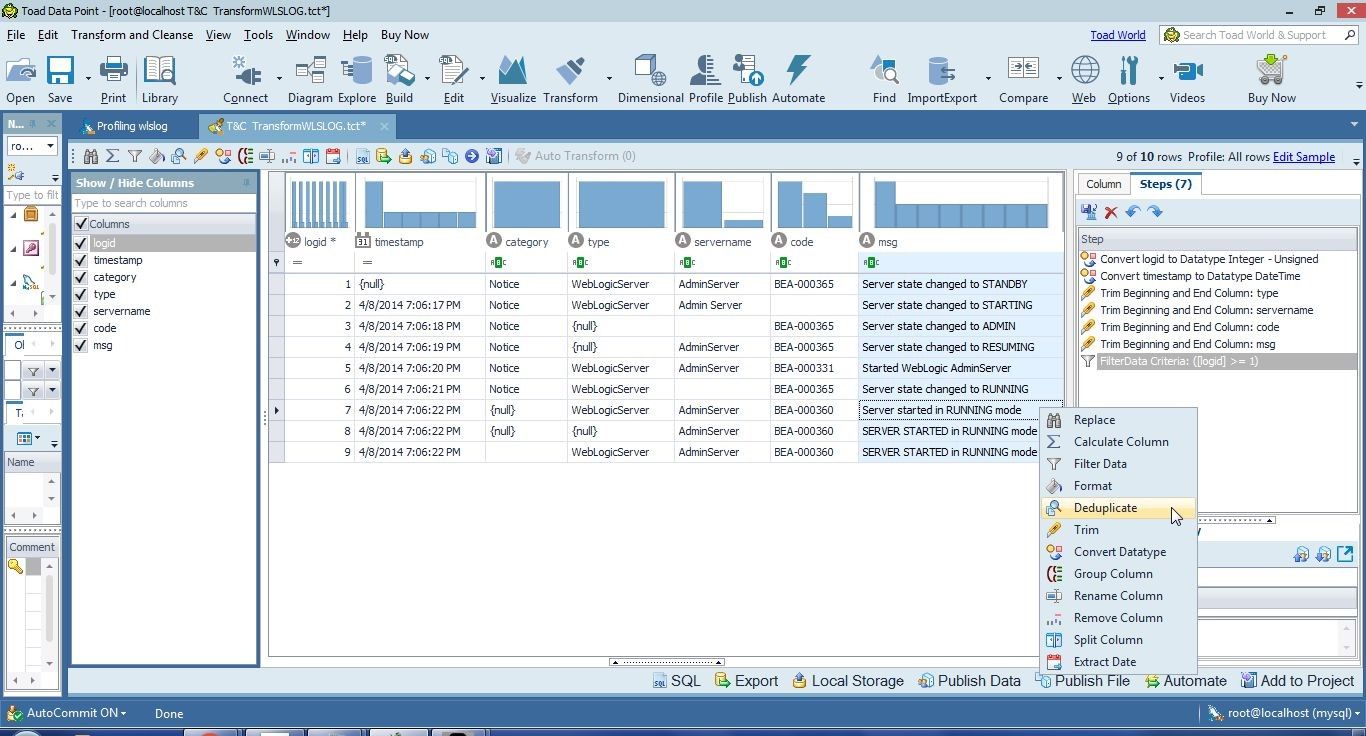
Figure 2. Selecting Deduplicate
Another option is to select Deduplicate from the toolbar as shown in Figure 3.
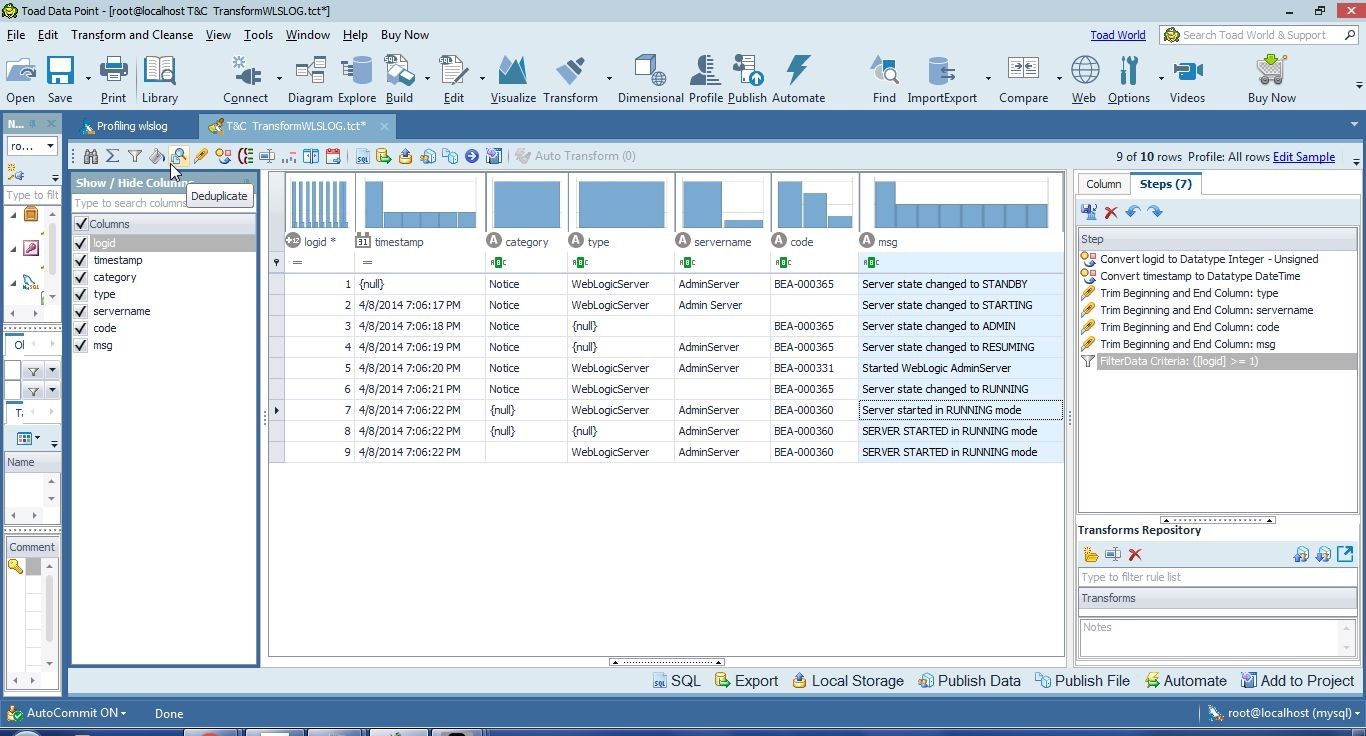
Figure 3. Selecting Deduplicate from Toolbar
The Duplicate Step tab gets opened, as shown in Figure 4. Because we had selected the msg column, only the msg column checkbox is selected to find duplicates. Other columns may also be selected. Exact is selected by default for deduplication. The Filter To is set to Distinct Rows by default, which implies that when deduplication transformation is applied all unique rows are kept, in addition to one row from the duplicate set. The first row from a duplicate set is kept and the other rows are deleted. If Unique Rows is selected in Filter To, all rows with duplicates are excluded. If Duplicate Rows is selected, only duplicate rows are kept, which is contrary to the “Deduplicate” transformation, but the option to keep only the duplicate rows and delete all other rows is available. Another option is to Export Duplicates separately, which exports duplicates to a separate .csv file when the transformed data is exported.
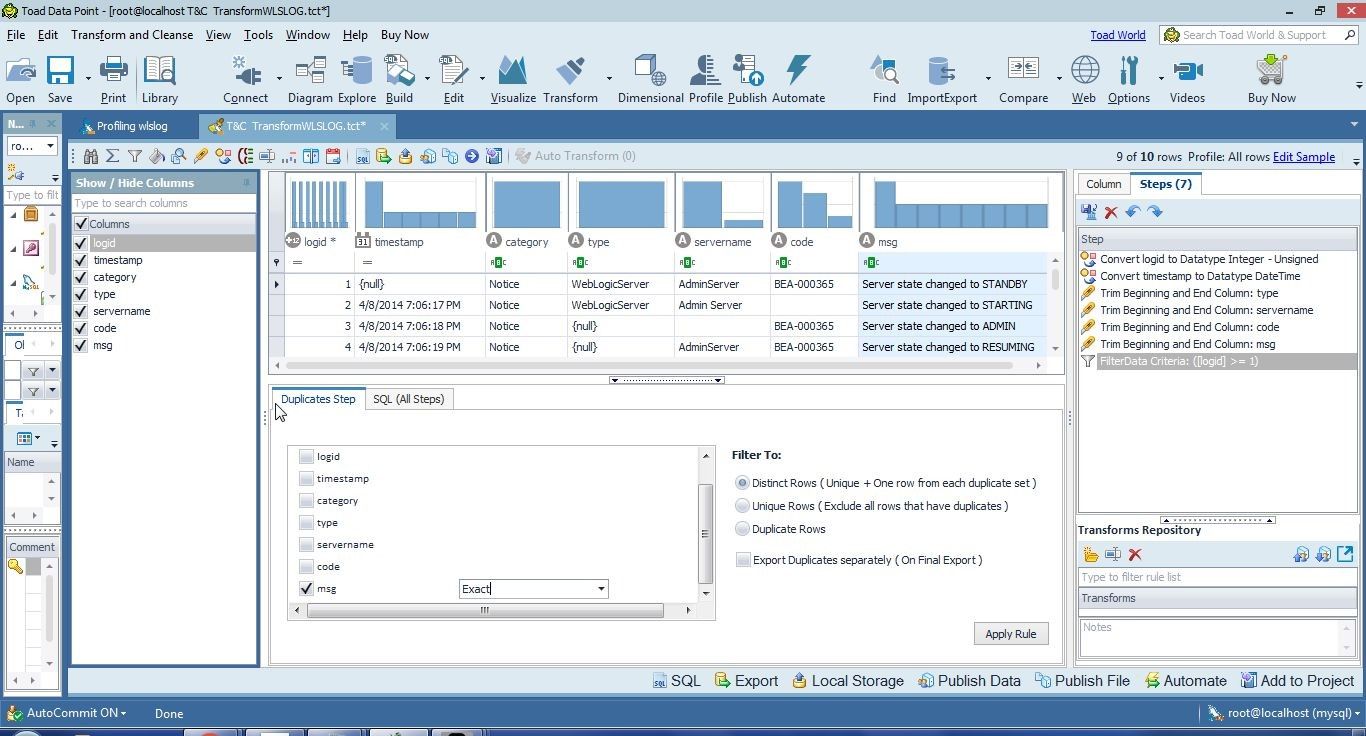
Figure 4. Duplicates Step
Select Case Insensitive, which makes the data comparison to find duplicates case insensitive, as shown in Figure 5.
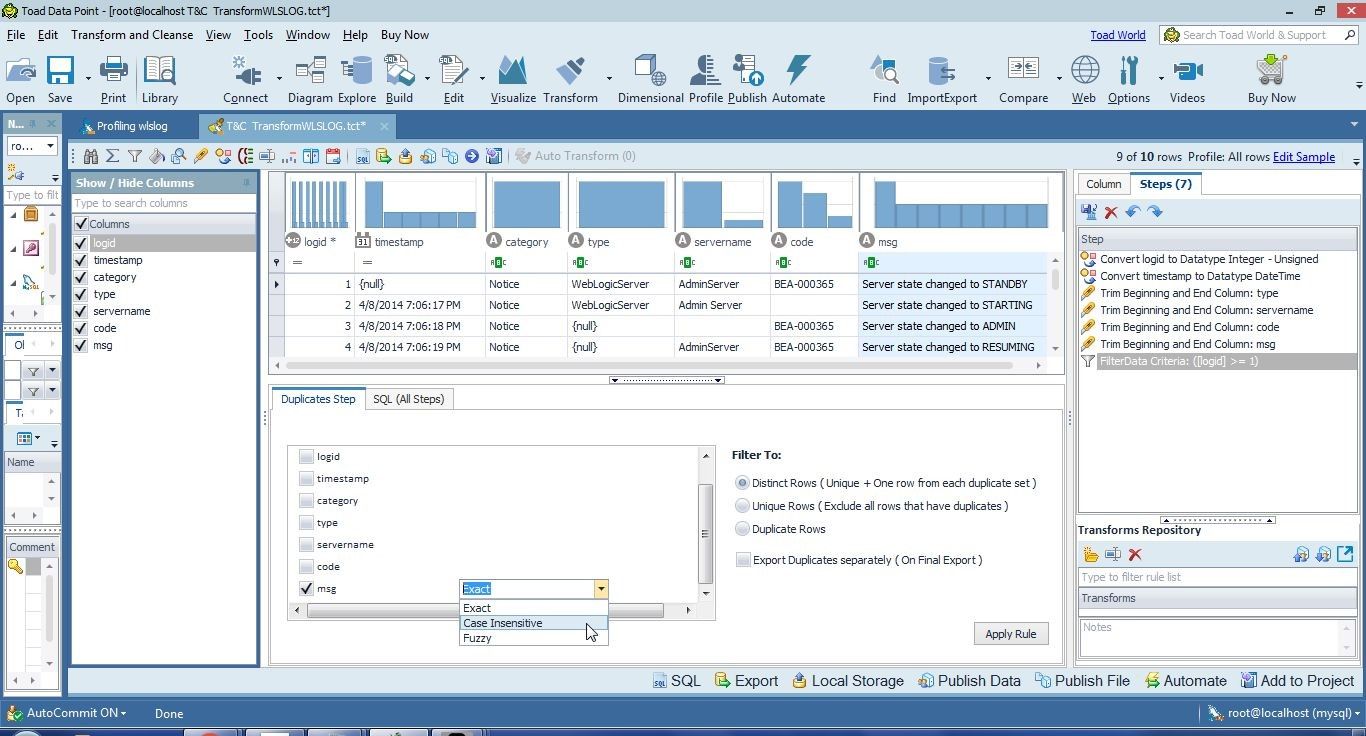
Figure 5. Selecting Case Insensitive
Click on Apply Rule as shown in Figure 6 to start the transformation and remove the duplicates.
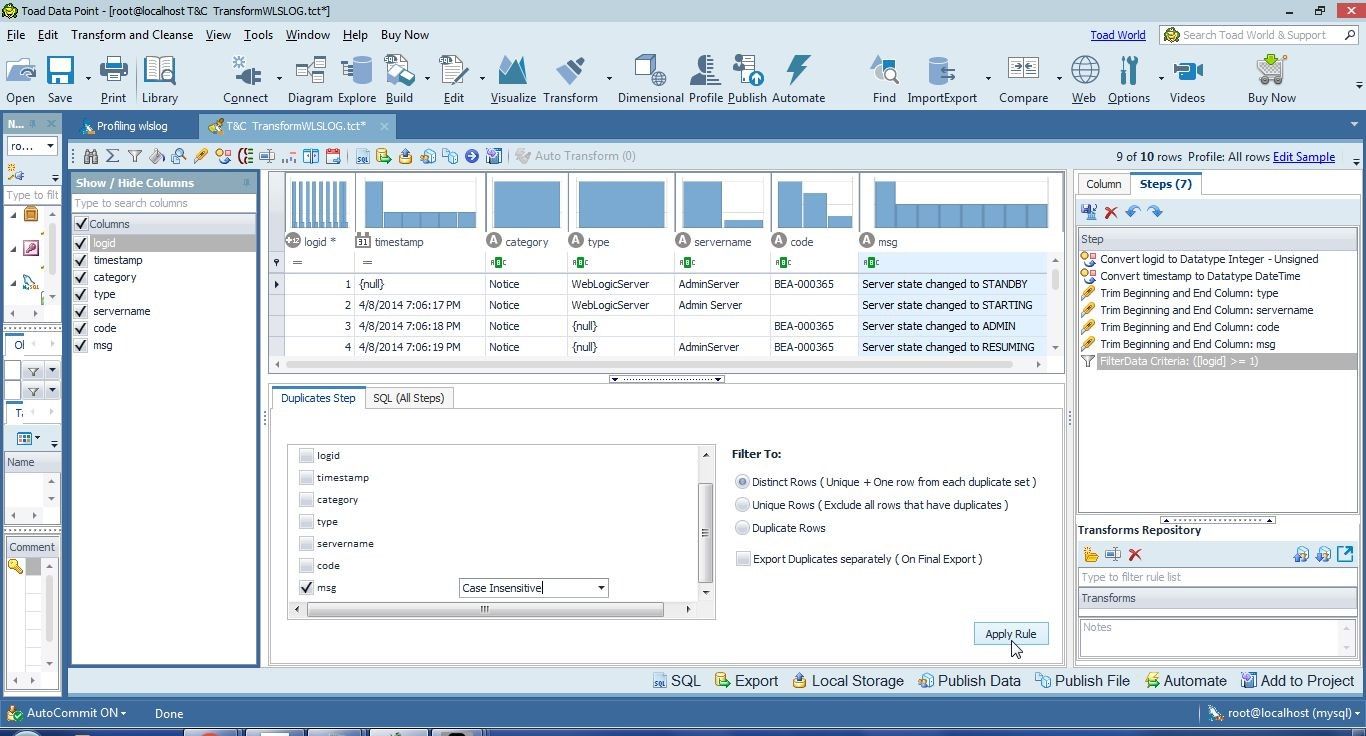
Figure 6. Apply Rule
Only one of three rows that have the same value in the msg column is kept and the other two rows are removed. A Duplicates tab gets opened with a list of duplicate rows that have been removed, as shown in Figure 7.
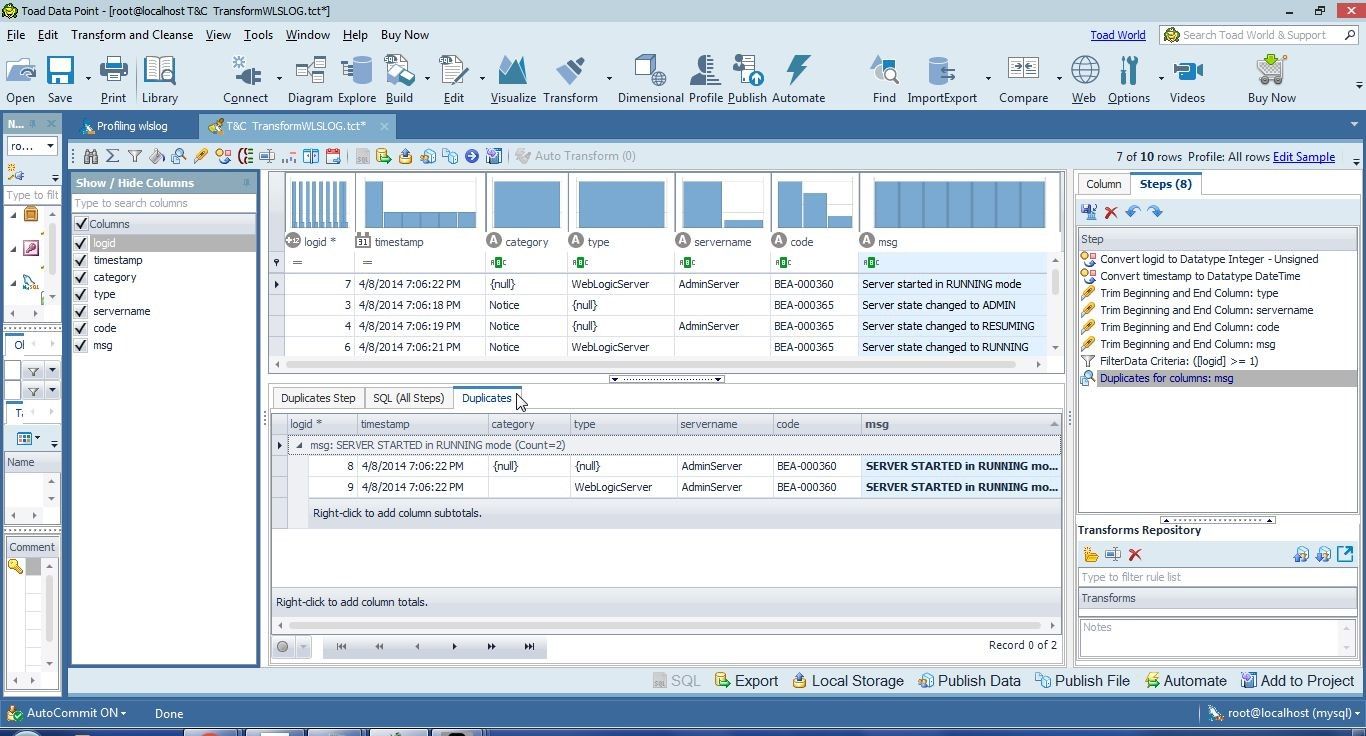
Figure 7. Duplicates Tab
Finding and Replacing Null Values
Next, we shall find and replace null values. Three columns have null values: timestamp, category and type, as shown in Figure 8.

Figure 8. Three Columns with null Values
The replacement values have to be user supplied. Each column’s values must be replaced separately, as different replacement values may have to supplied for different columns. To replace the category column null value select the column, right-click and select Replace as shown in Figure 9.
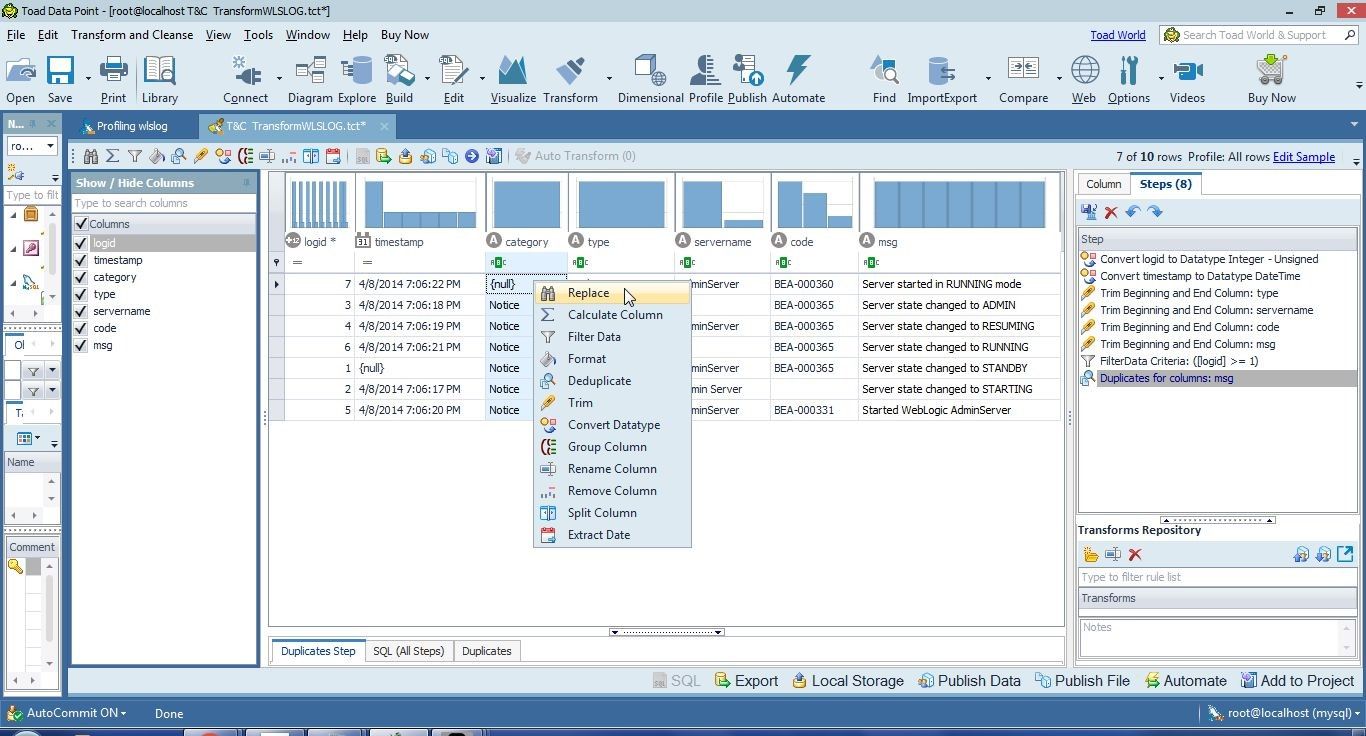
Figure 9. Selecting Replace option
Alternatively, select Find and Replace from the toolbar as shown in Figure 10. Another alternative is to select the Replace option from the Transform and Cleanse drop-down.

Figure 10. Selecting Find and Replace from toolbar
The Find and Replace Step tab gets opened, as shown in Figure 11.
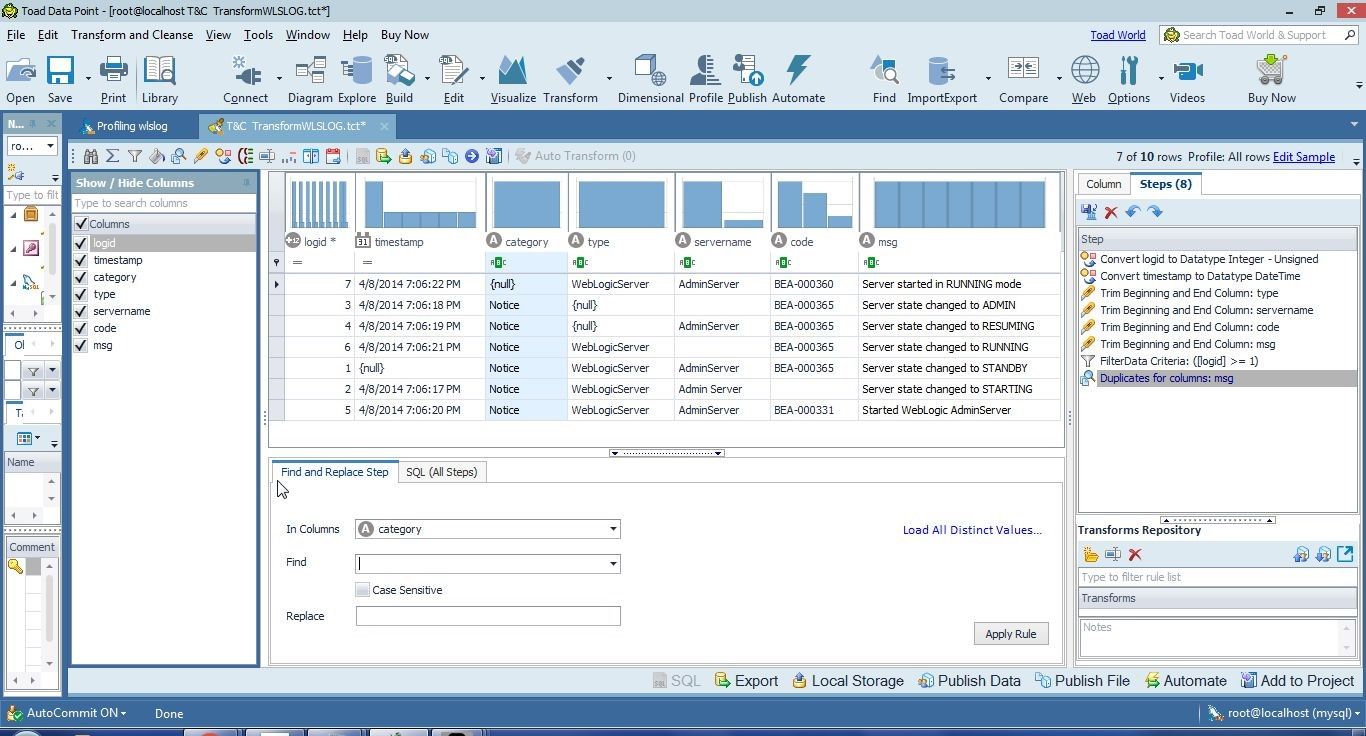
Figure 11. Find and Replace Step
In the Find drop-down select Null as shown in Figure 12. A message gets displayed Found in 1 rows. The Case Sensitive checkbox is available but we don’t need to make the find-and-replace Case Sensitive as all null values are added as null. Null values by default are lowercase null. Add a replacement value Notice in the Replace field and click on Apply Rule.
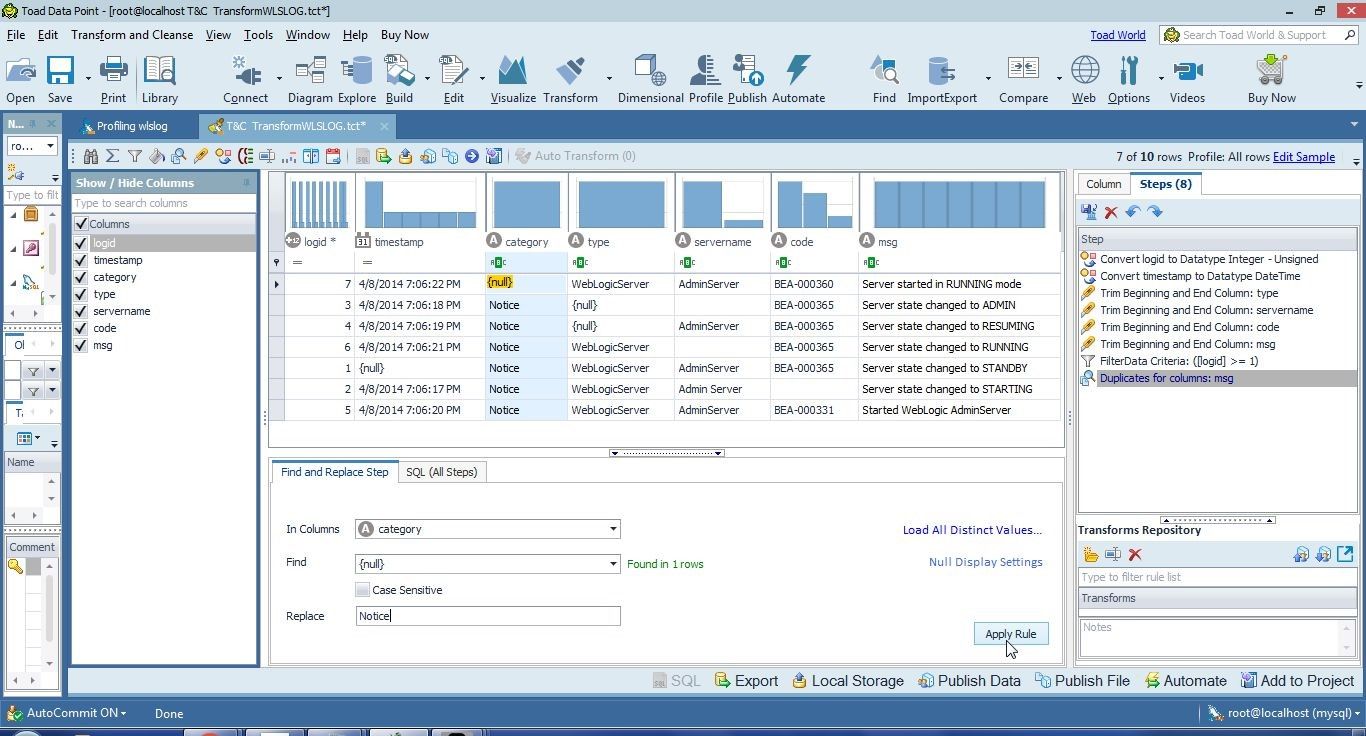
Figure 12. Find and Replace Step – Clicking on Apply Rule
The null value gets replaced with Notice, as shown in Figure 13.
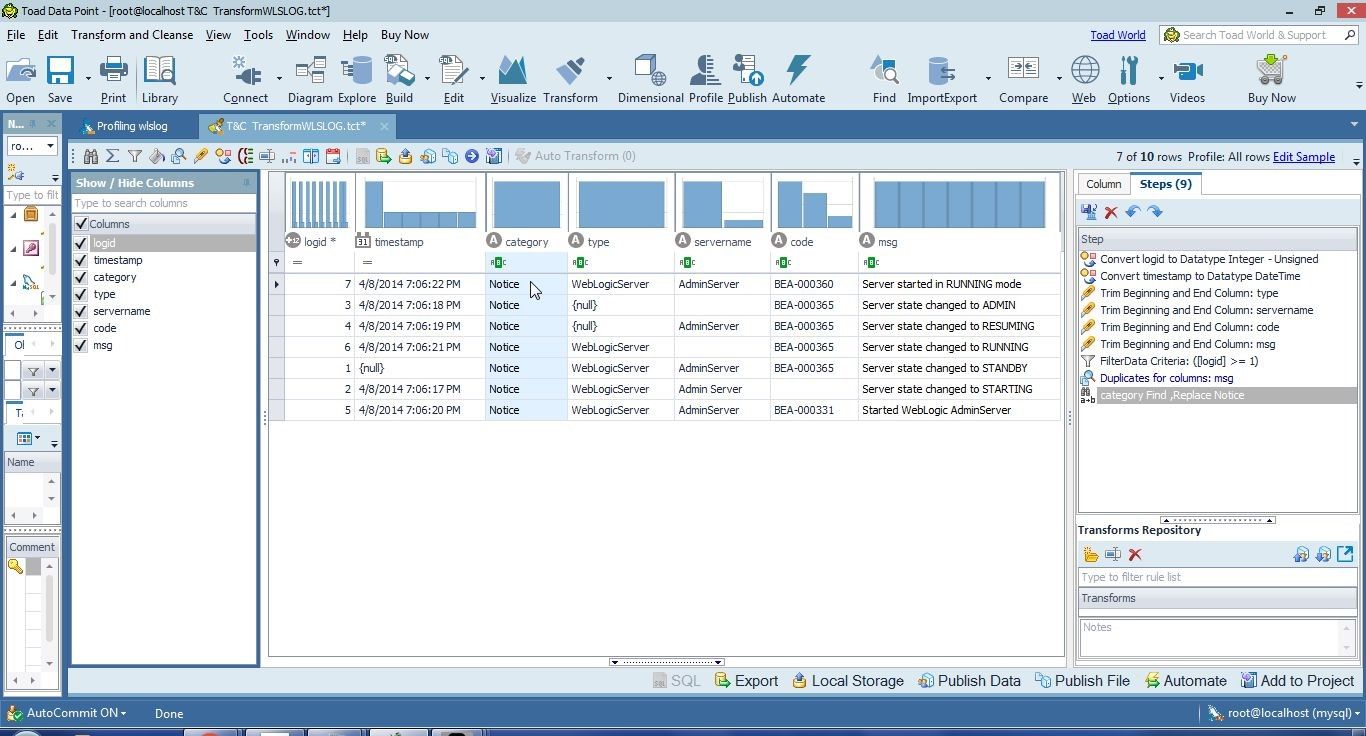
Figure 13. Null Values Replaced
Similarly replace the null values in the timestamp andtype columns as shown in Figure 14.
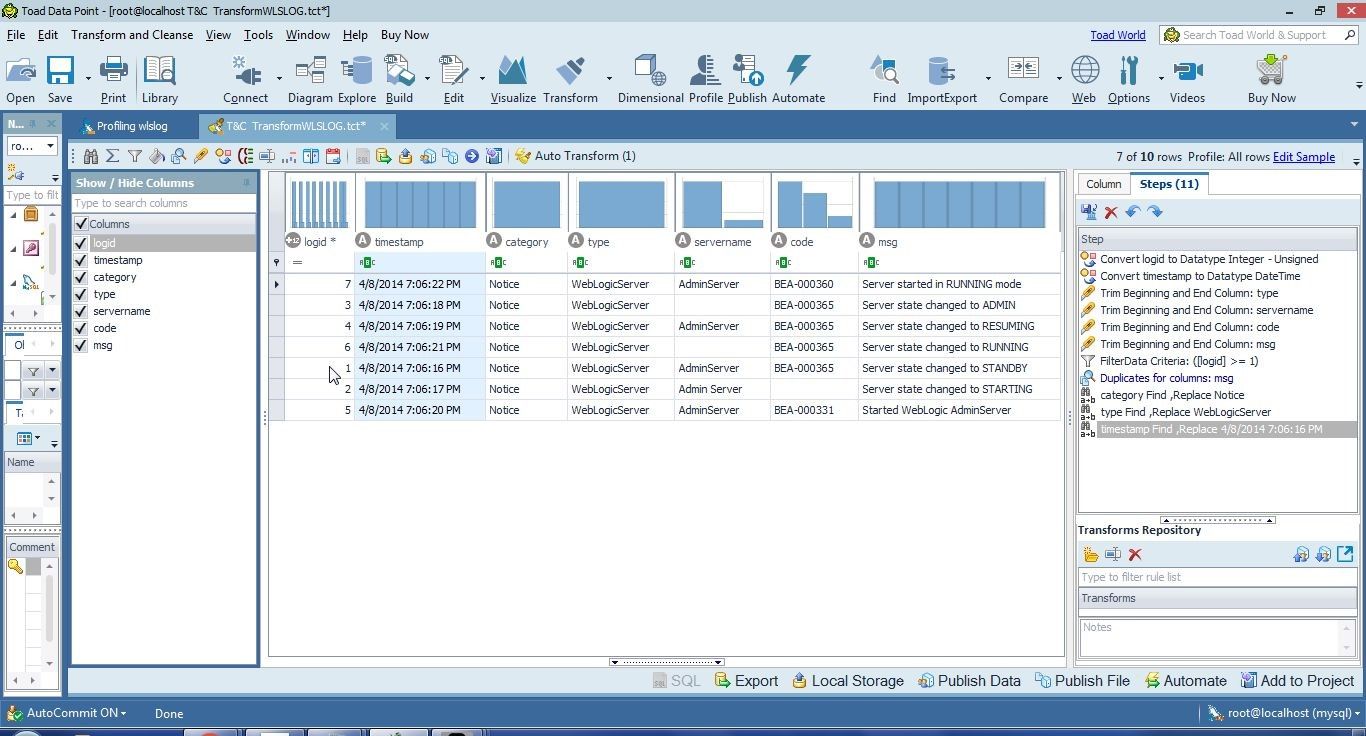
Figure 14. All Null Values Replaced
Any auto transforms applied earlier do not get applied to the replacement value. Earlier we applied auto transform to convert the data type for the timestamp column to Date Time but the new value added does not have the Date Time value. Auto Transform displays one available auto transform that may be applied, as shown in Figure 15. Click on Auto Transform.

Figure 15. Auto Transform lists one suggestion
In the Auto Transform window the timestamp column Convert Type is recommended as Date Time, as shown in Figure 16. Click on Auto Transform.
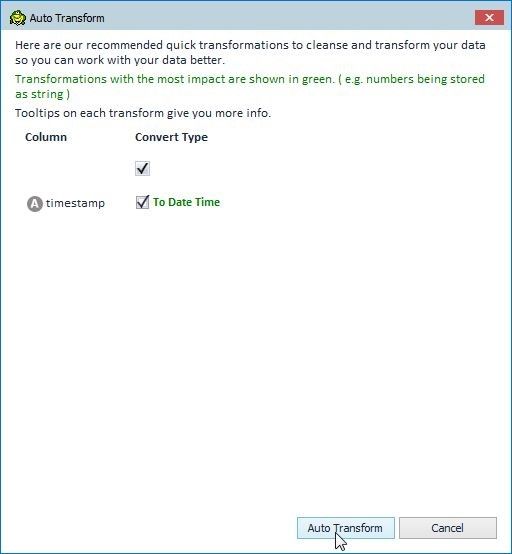
Figure 16. Running Auto Transform
Finding and Replacing Missing Data
Finding and replacing missing data is slightly more complex than finding and replacing null values. No such option as Find “missing data” is provided. An option to find Blank values is available. A Blank value is a value with an extra space. We added some values as‘ ‘, which would get found as Blank values. Blank values have several issues, such as:
- Blank values get trimmed with Auto Transform. Trimming removes extra spaces at the beginning and end of a value. Blank values may also be trimmed separately.
- The first extra space in a value is considered a Blank value. We have a servername column value set as “Admin Server” and searching for Blank values would find the “Admin Server” value extra space.
Supplying data for missing data could involve several transformations, as we shall discuss next. We added missing data with ‘ ‘ for servername to two rows of data and missing data for code to one row of data. When we trimmed data with Auto Transform the extra space we added as missing data got removed as well. To replace missing data with a value we need to untrim the column/s that were supposed to contain missing data. Select the code column and select the transformation step applied to the column as shown in Figure 17. The Trim Step tab gets opened and displays the Trim Options as Remove Beginning Spaces and Remove Ending Spaces.
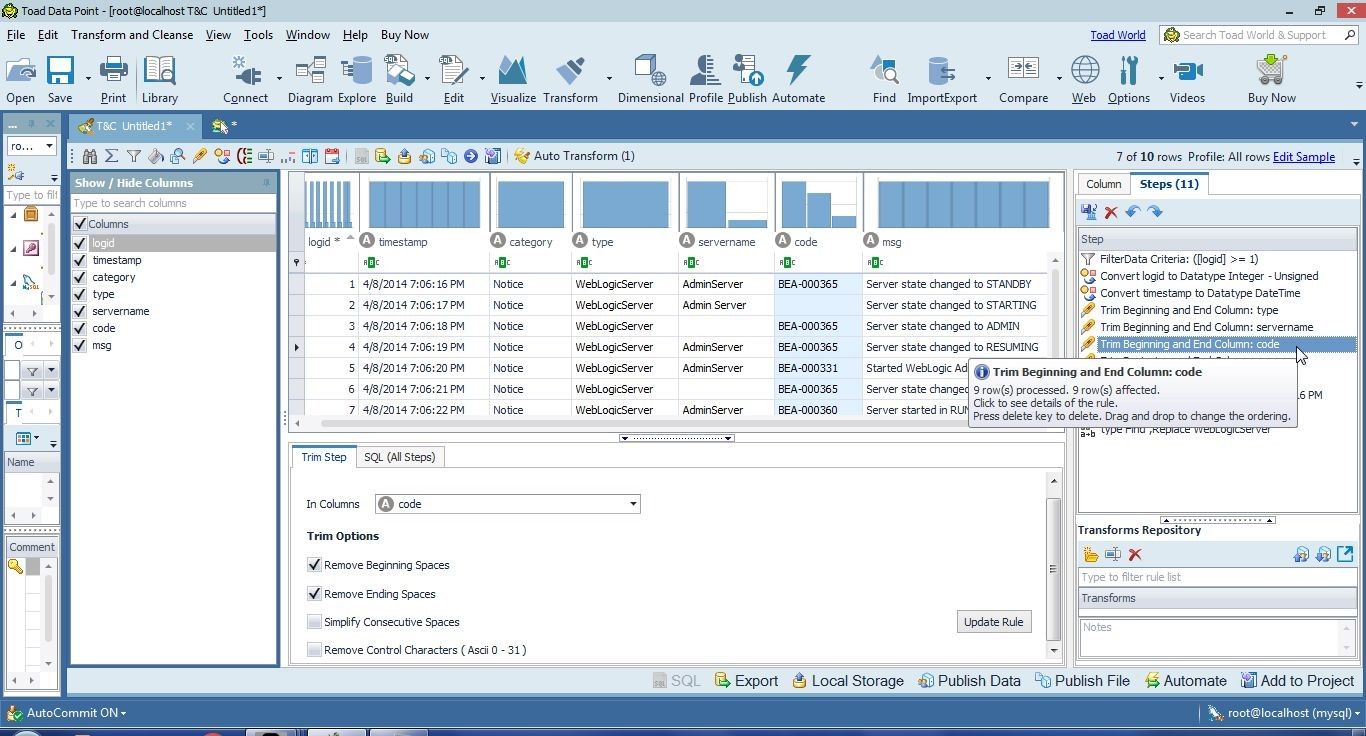
Figure 17. Selecting Transformation Step for code
Deselect the Trim Options and click on Update Rule as shown in Figure 18.
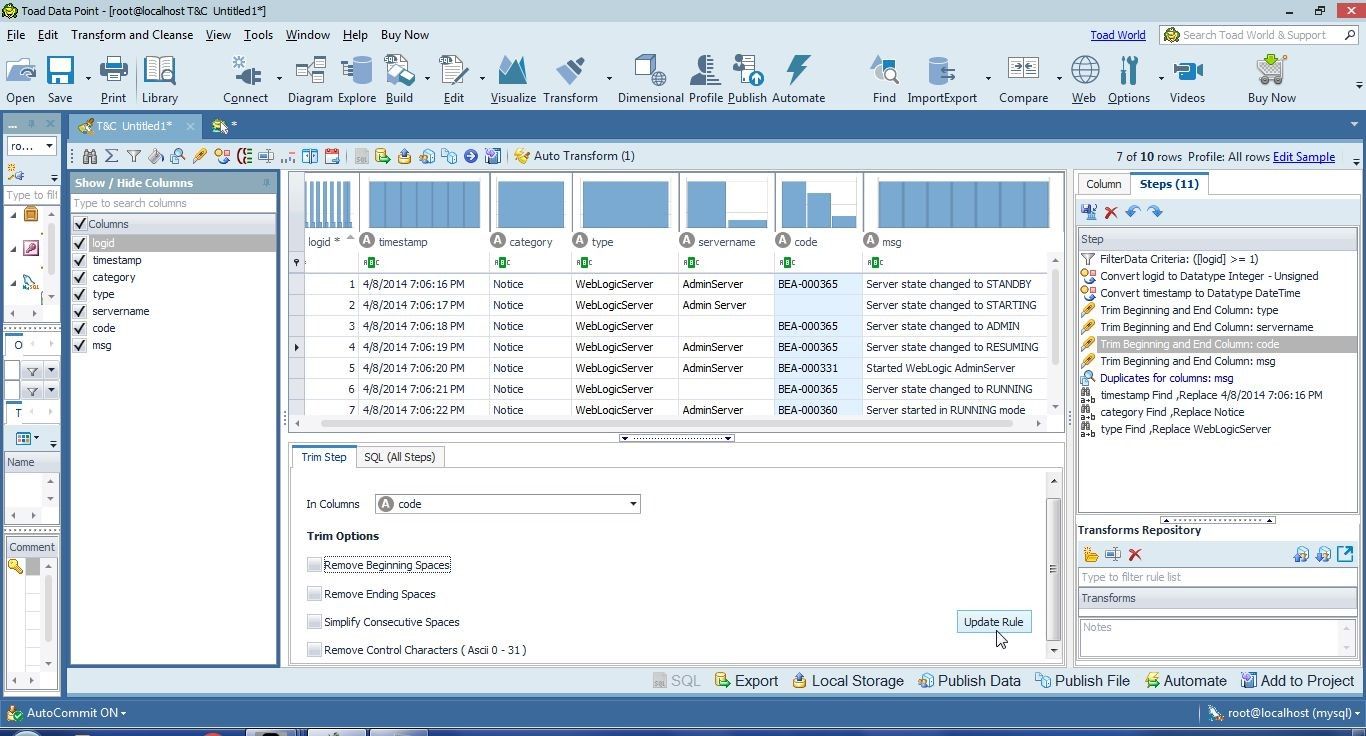
Figure 18. Updating Rule
Right-click on the code column and select Replace as shown in Figure 19.

Figure 19. Right-Click>Replace
In the Find drop-down select the missing data row as shown in Figure 20. The missing data value, third from the top, is different from Null and the same as Blank.

Figure 20. Selecting to Remove Missing Data
Add a replacement value in Replace field and click on Apply Rule as shown in Figure 21.
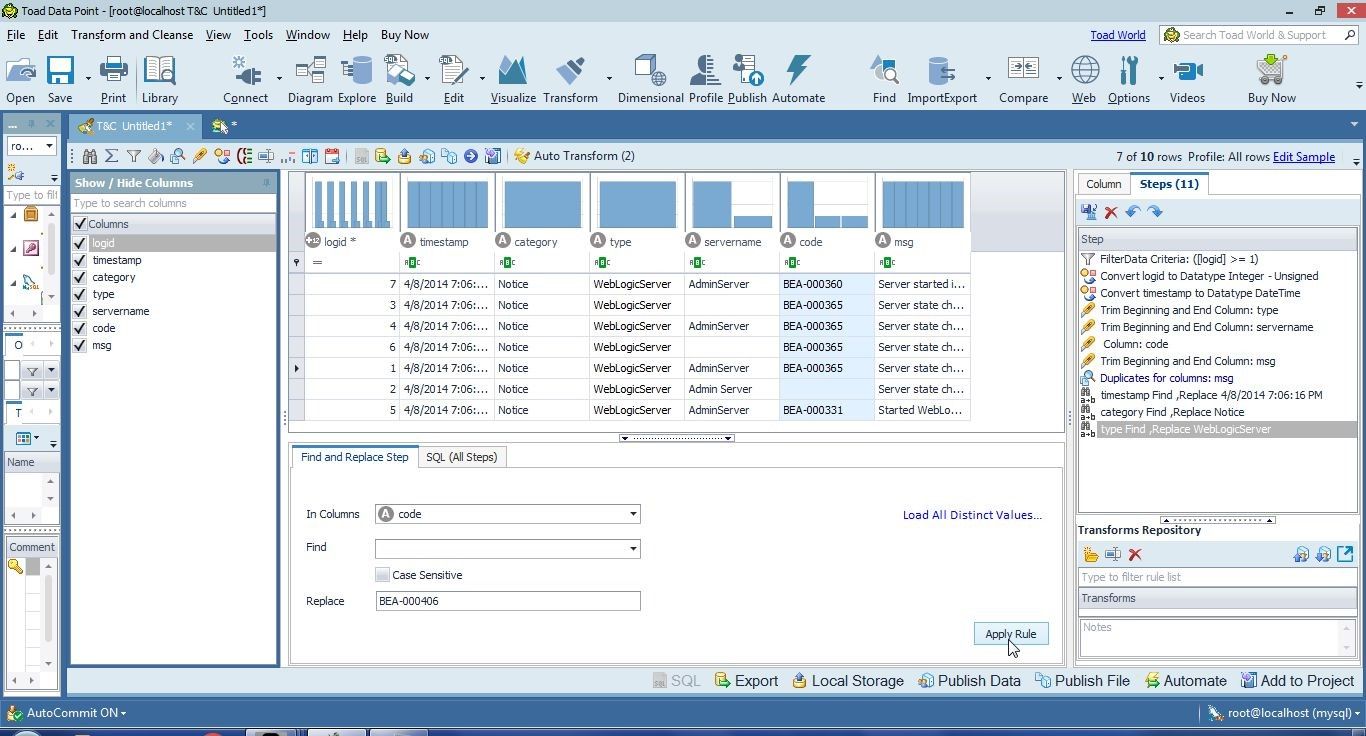
Figure 21. Replacing Missing Data
Missing data gets replaced with a value, as shown in Figure 22.
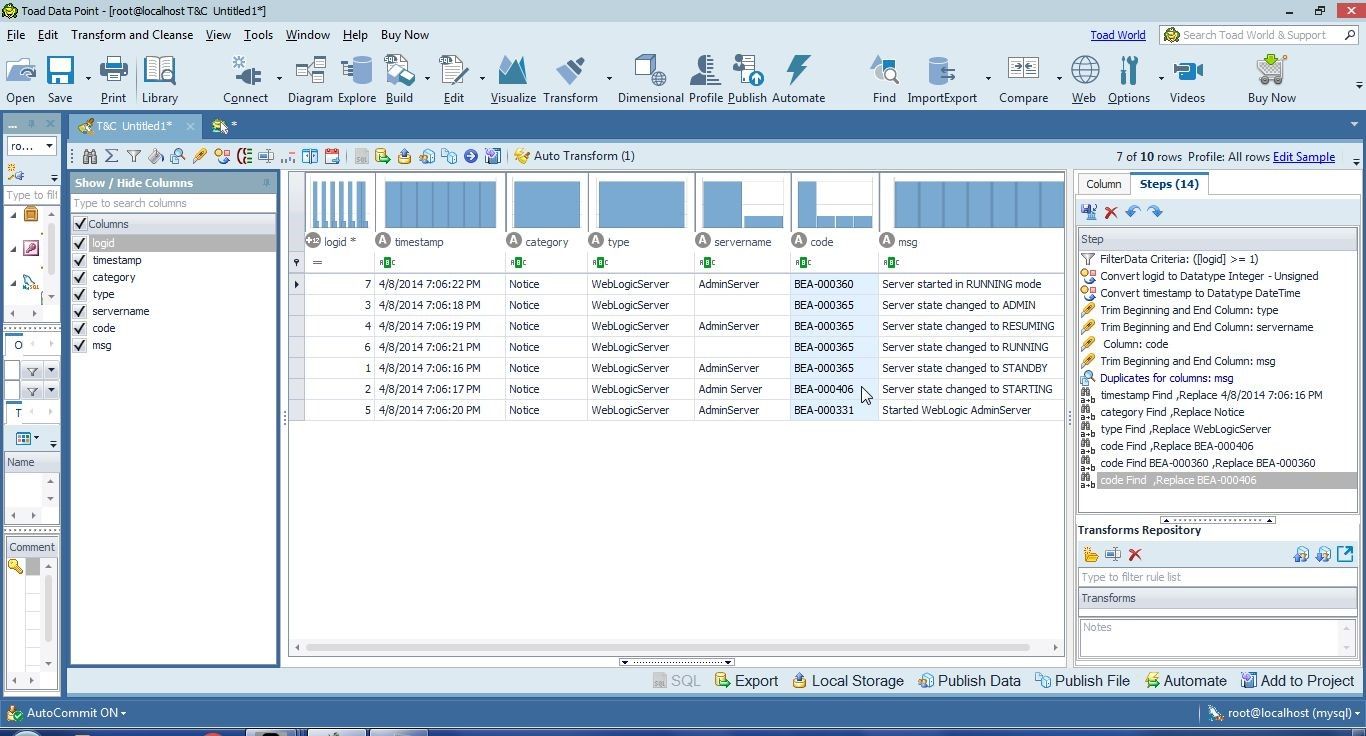
Figure 22. Missing Data Replaced
We were able to replace an empty value ‘ ‘ with a value. But what if another value contains an empty space ‘ ‘ at the beginning/end/within the value, as “Admin Server” and “AdminServer “ in servername do? Next, we shall replace missing data in the servername column with a value. Select the transformation step for the servername column as shown in Figure 23.
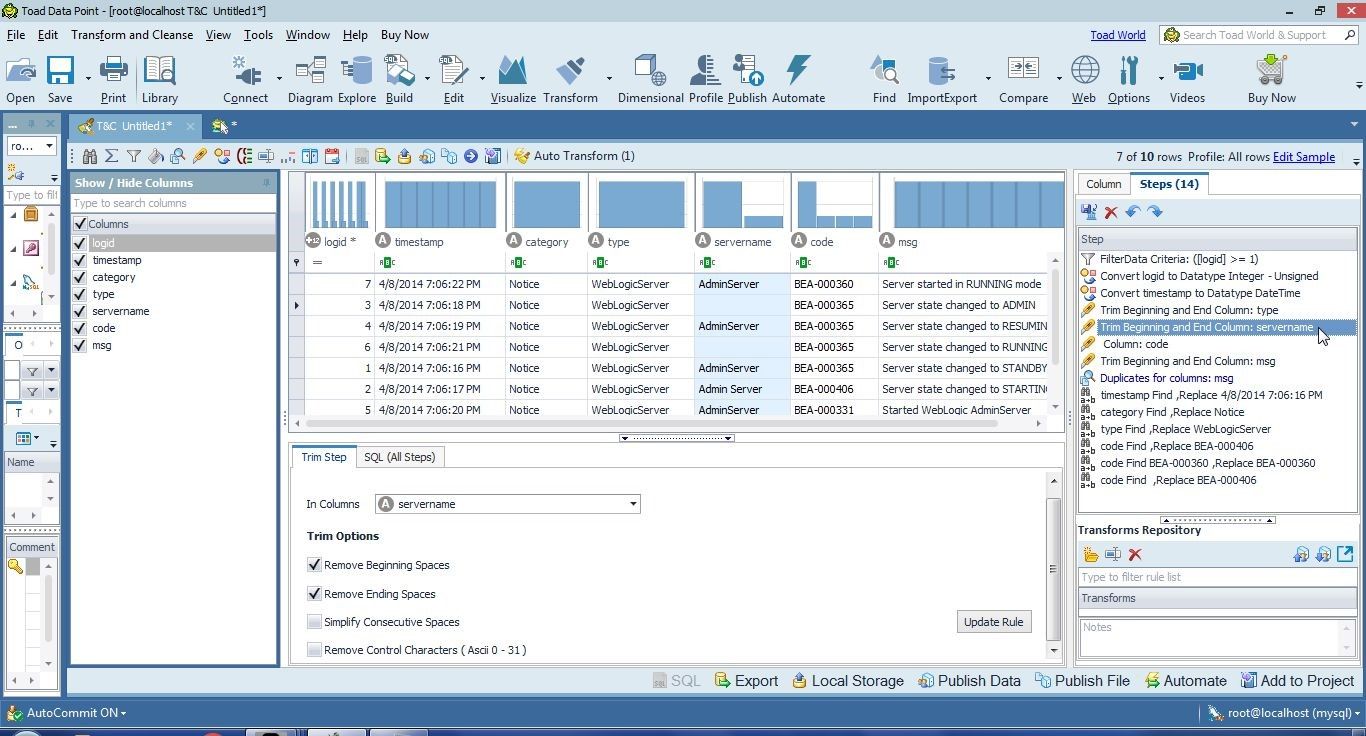
Figure 23. Selecting Transformation Step to trim servername Column
Deselect the Trim Options and click on Update Rule as shown in Figure 24.
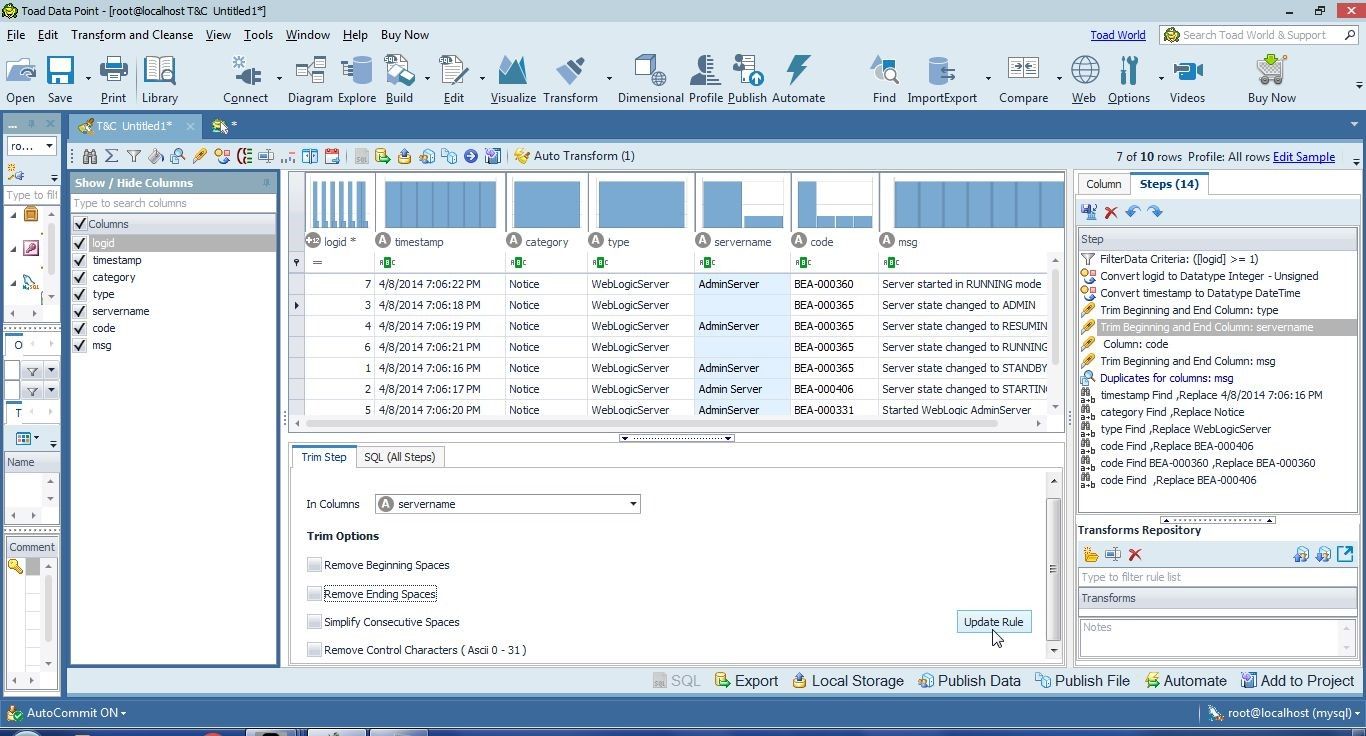
Figure 24. Updating Rule for servername
Before replacing missing data in the servername column we need to replace the “Admin Server” value with “AdminServer”. Right-click on the servername column and select Replace as shown in Figure 25.
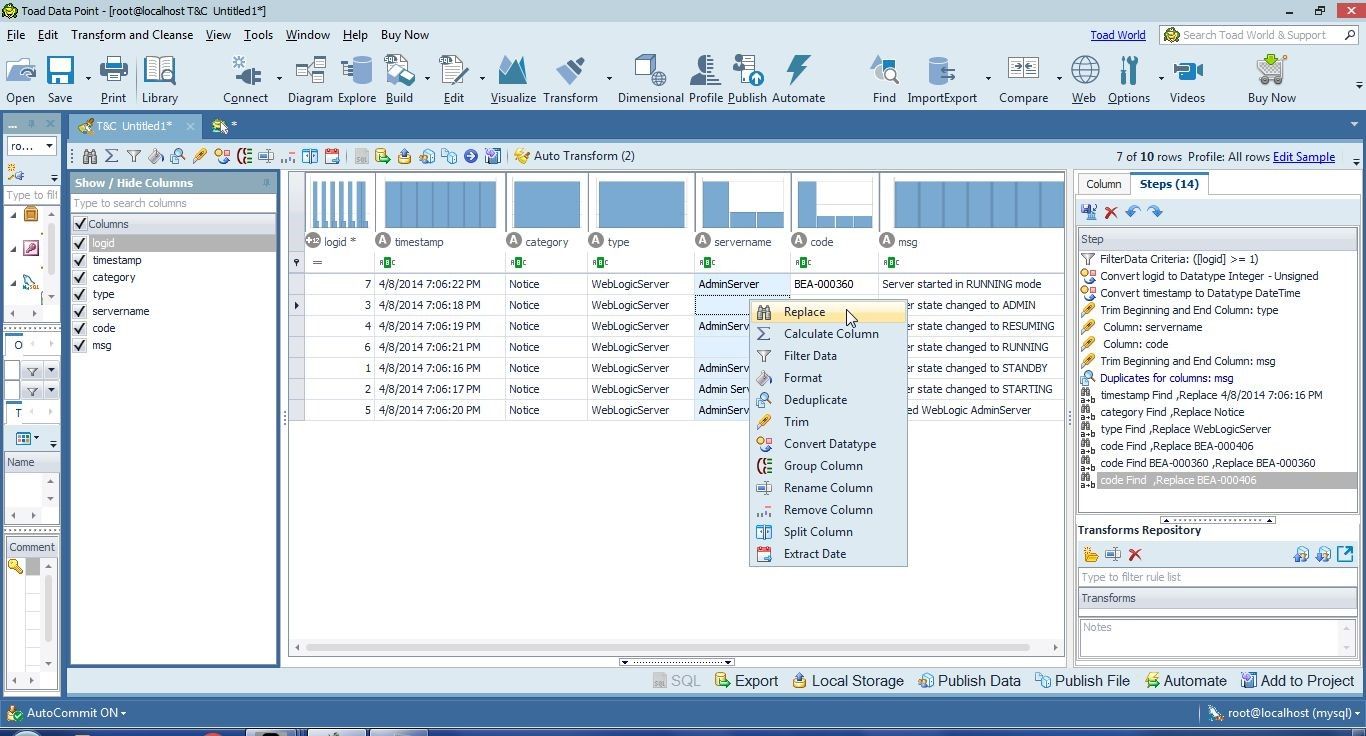
Figure 25. Selecting Replace for servername
Select the Admin Server value in the Find drop-down as shown in Figure 26.
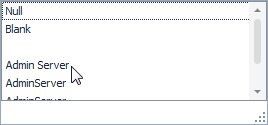
Figure 26. Selecting “Admin Server”
Add a replacement value “AdminServer” in Replace and click on Apply Rule as shown in Figure 27.
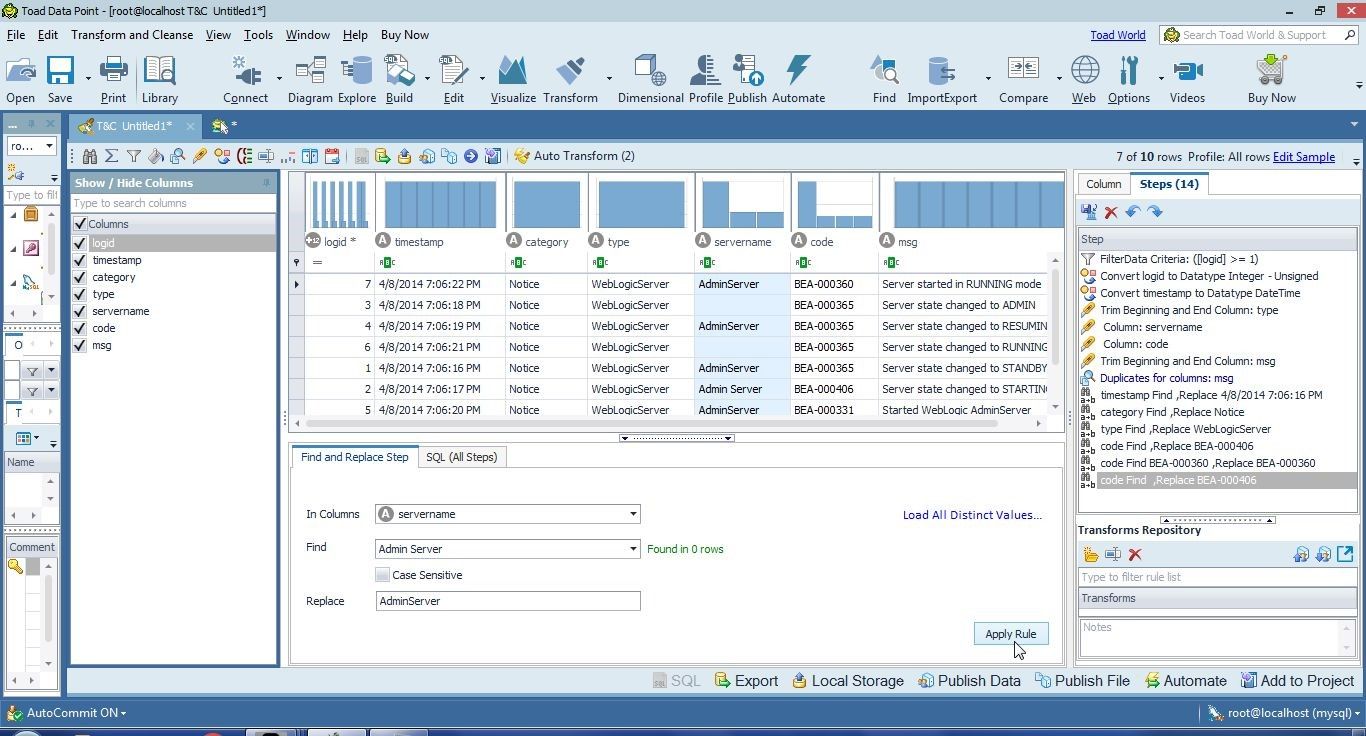
Figure 27. Replacing “Admin Server” with “AdminServer”
The “Admin Server” value gets replaced with “AdminServer” as shown in Figure 28.
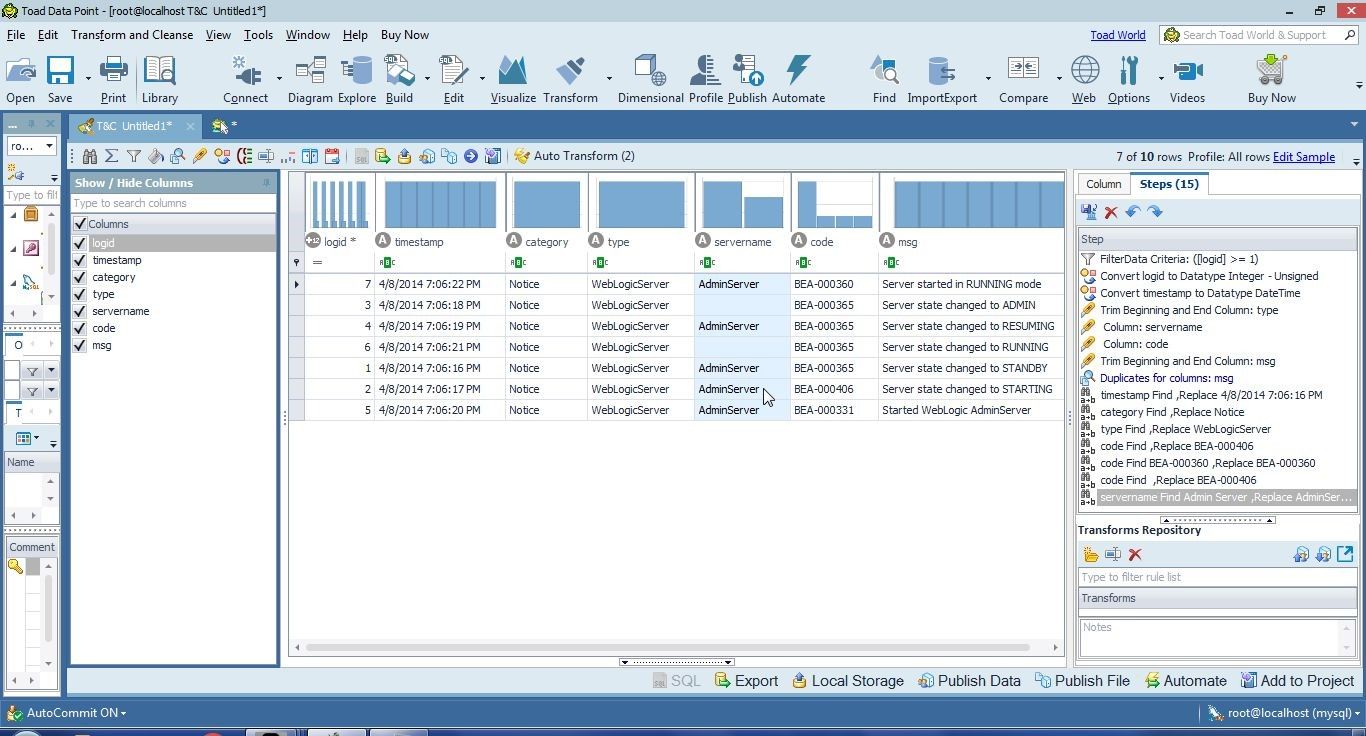
Figure 28. AdminServer added as a replacement value
Next, we shall trim the servername values with a value separately before replacing missing data. Right-click and select Replace again. In Find select Blank. Five rows are found, as indicated in Figure 29.
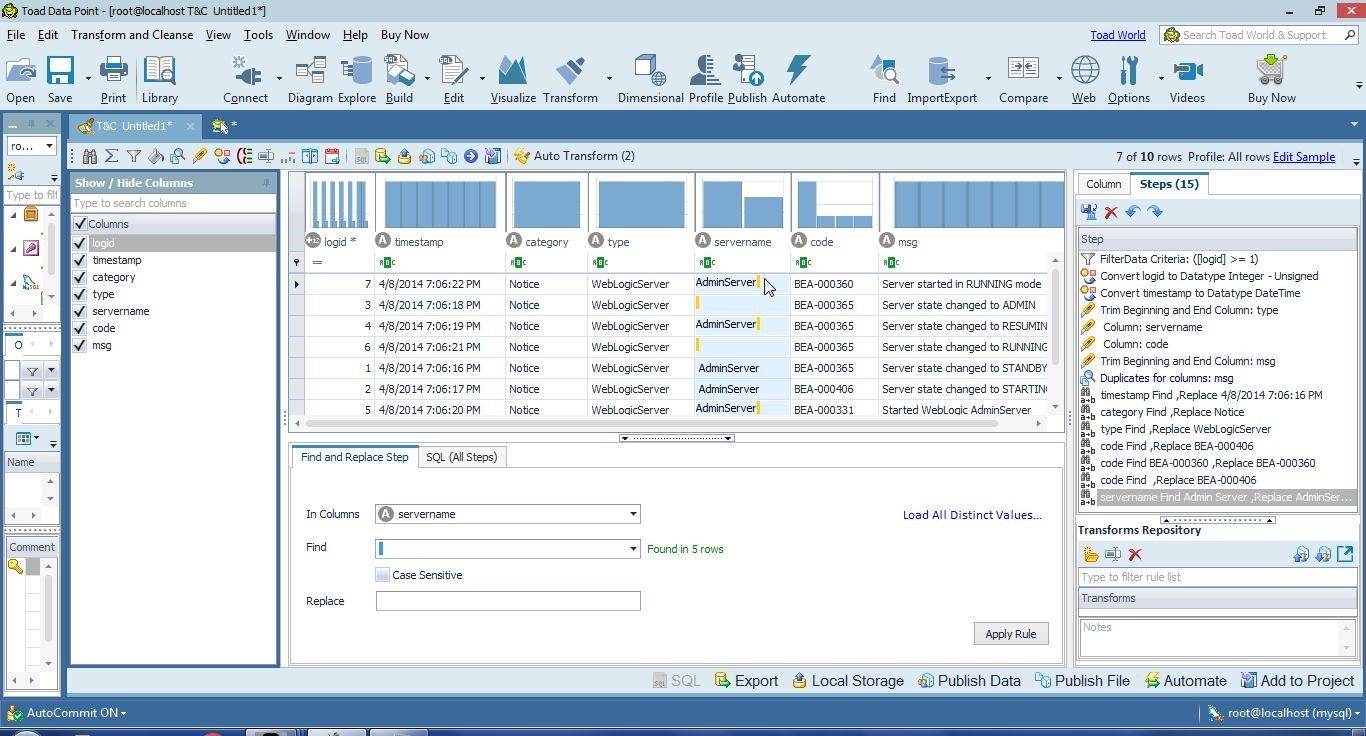
Figure 29. Found Five Rows with a Blank
If we replaced all Blank spaces to replace missing data we would be adding an extra value at the end of “AdminServer “ values. First, we need to replace “AdminServer “ with “AdminServer” separately as shown in Figure 30.
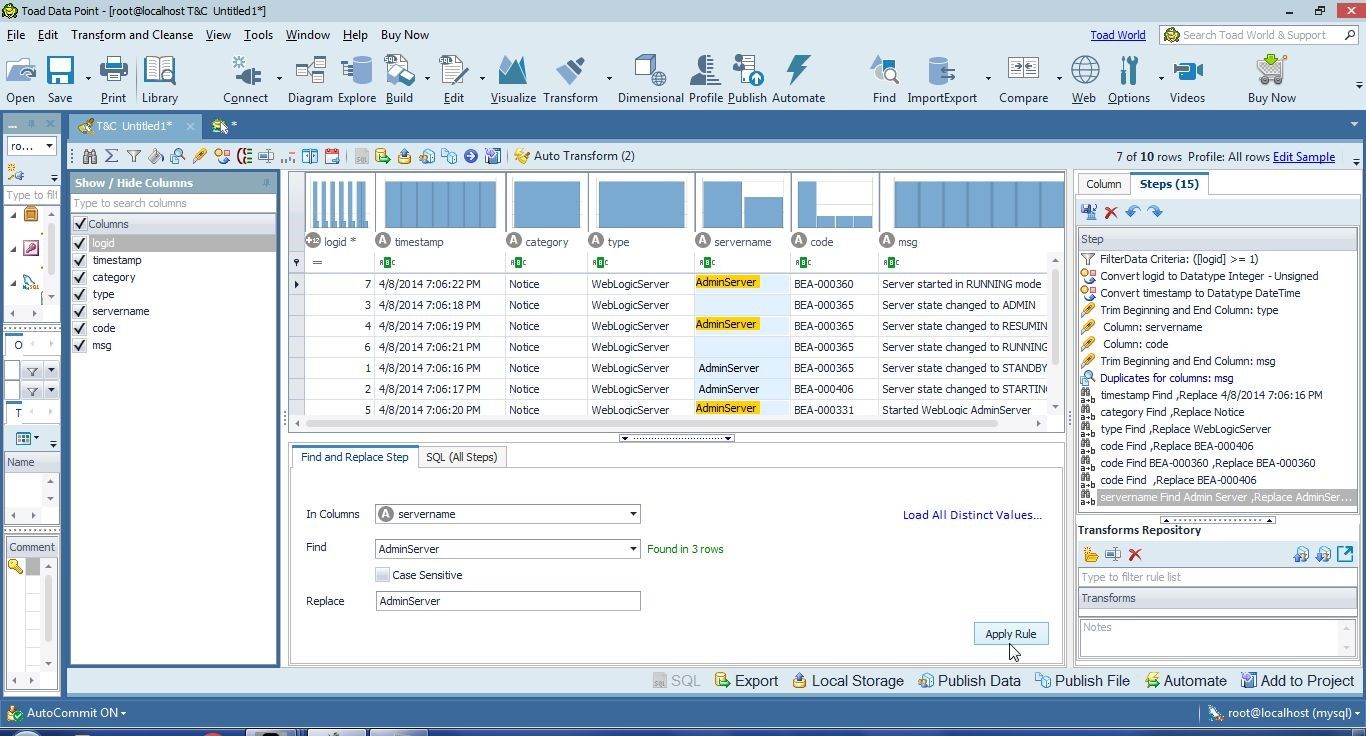
Figure 30. Replacing “AdminServer “ with “AdminServer”
Having replaced “AdminServer “ with “AdminServer” we shall replace missing data next. Right-click and select Replace for the servername column once again as shown in Figure 31.
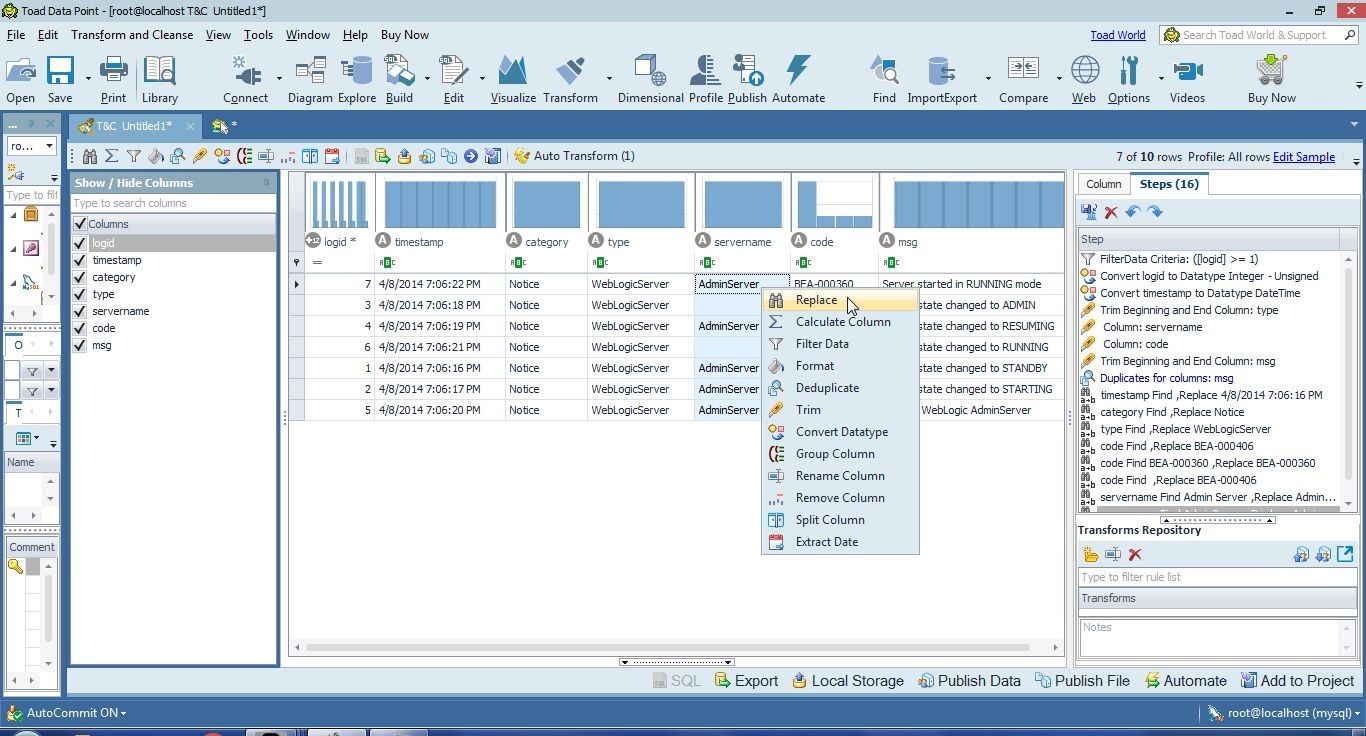
Figure 31. Selecting Replace for servername
Select the Blank value as shown in Figure 32. Selecting Blank or the empty third row has the same effect.
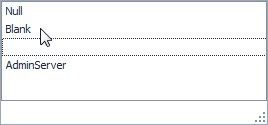
Figure 32. Selecting Blank
Specify a replacement value AdminServer in Replace and click on Apply Rule as shown in Figure 33.
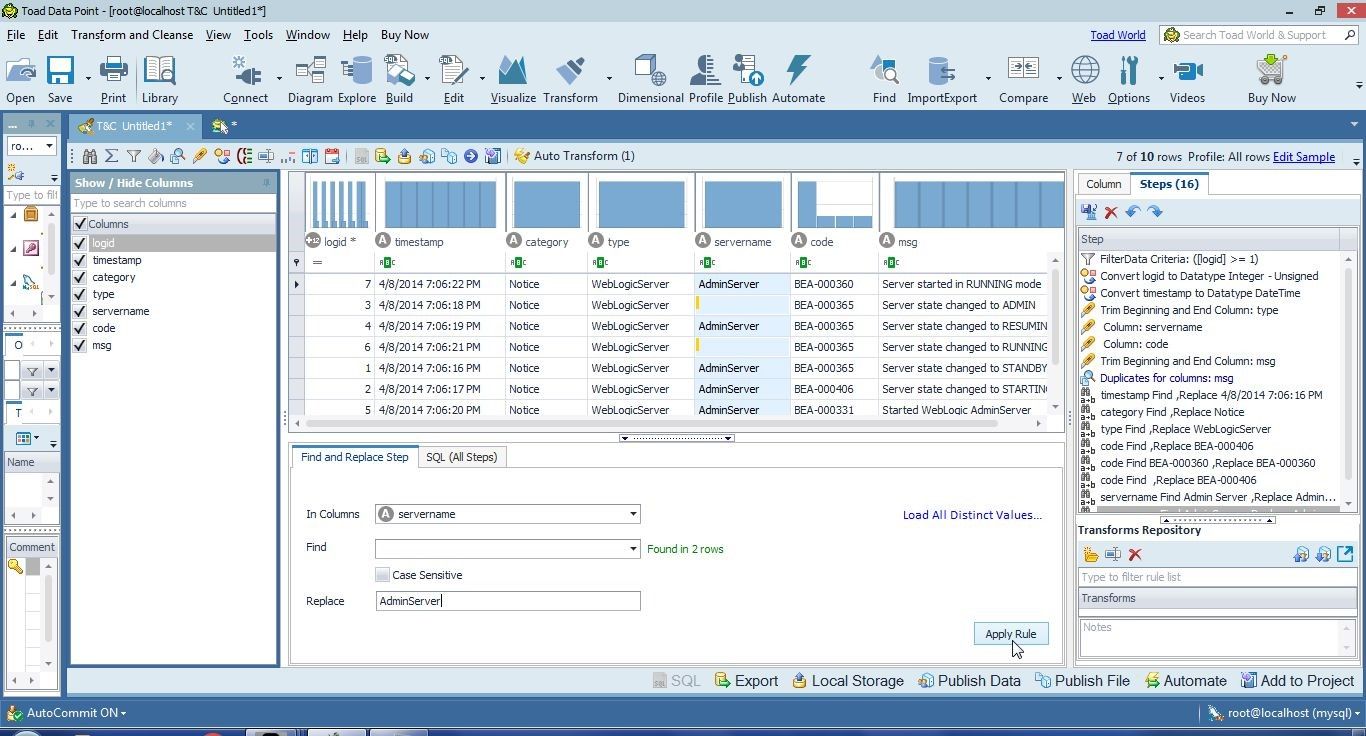
Figure 33. Replacing Missing Data with a Value
The missing data gets replaced with a value, as shown in Figure 34. All the transformations applied get listed in the Steps tab.
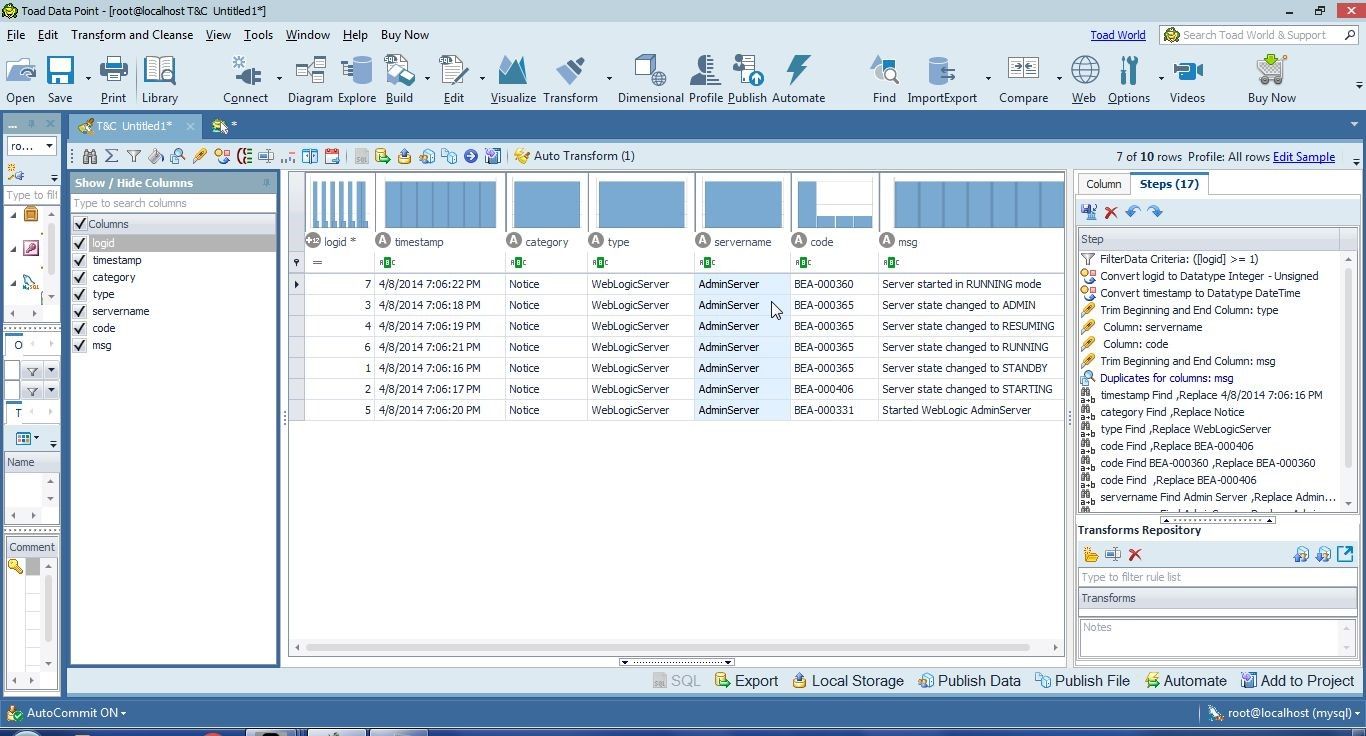
Figure 34. Missing Data Replaced with a Value
Sorting Data
Data may be sorted at any stage during data preparation. Thetimestamp column values are shown in descending order from top to bottom in Figure 35.
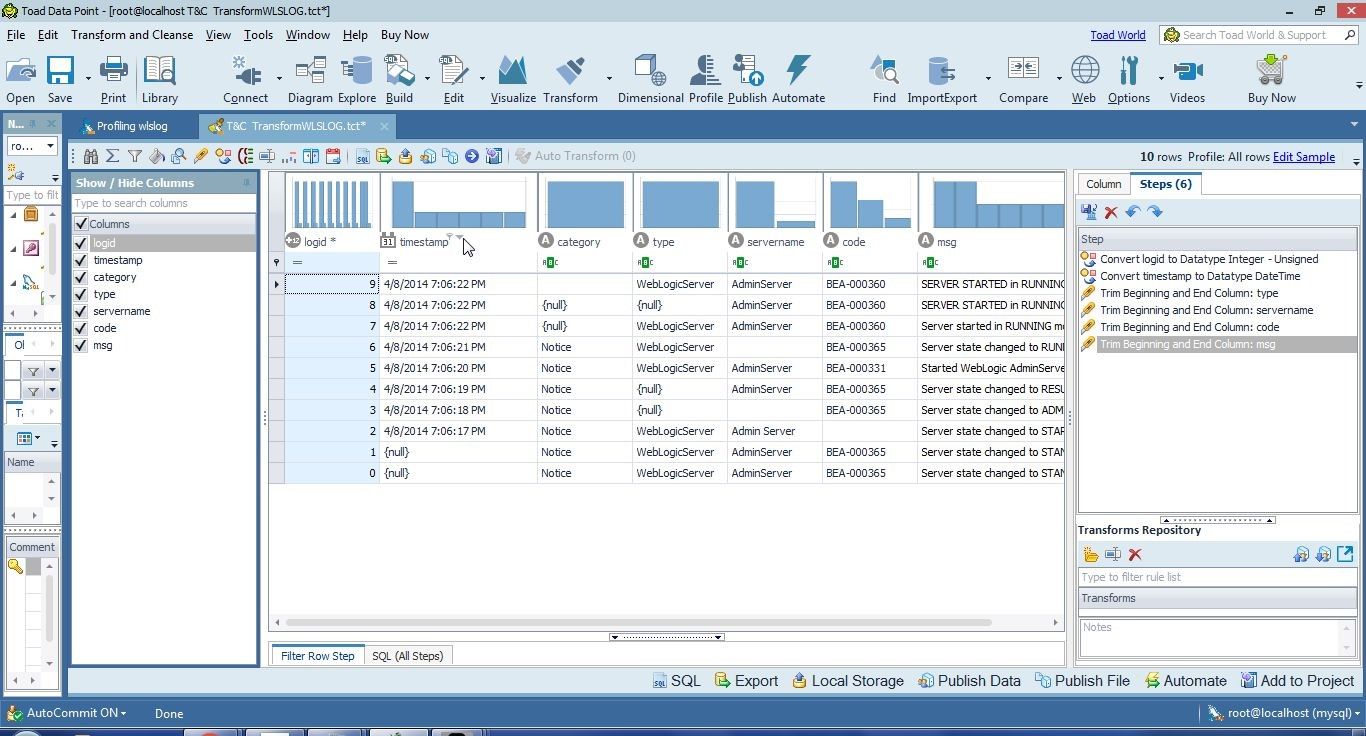
Figure 35. Timestamp values in Descending Order
Click on the sort icon to reverse the sort direction to ascending from top to bottom as shown in Figure 36.
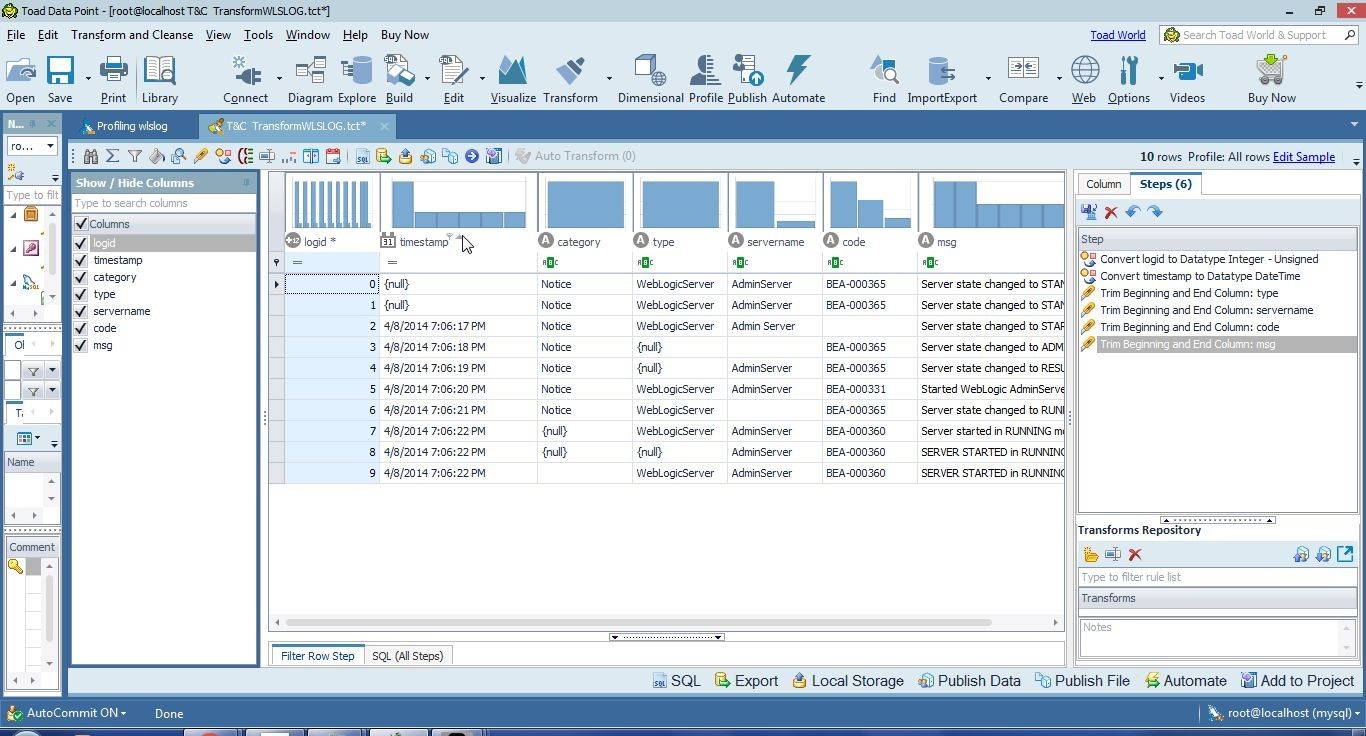
Figure 36. Setting Sort to Ascending from Top to Bottom
Formatting Data
Numeric data may be formatted to convert to String type. As an example, a Number value of 10123 would get converted to 10,123. Formatting does not apply to the String type of columns. To format a numeric column such aslogid right-click on the column and select Format. Formatting options for the logid column are shown in Figure 37.
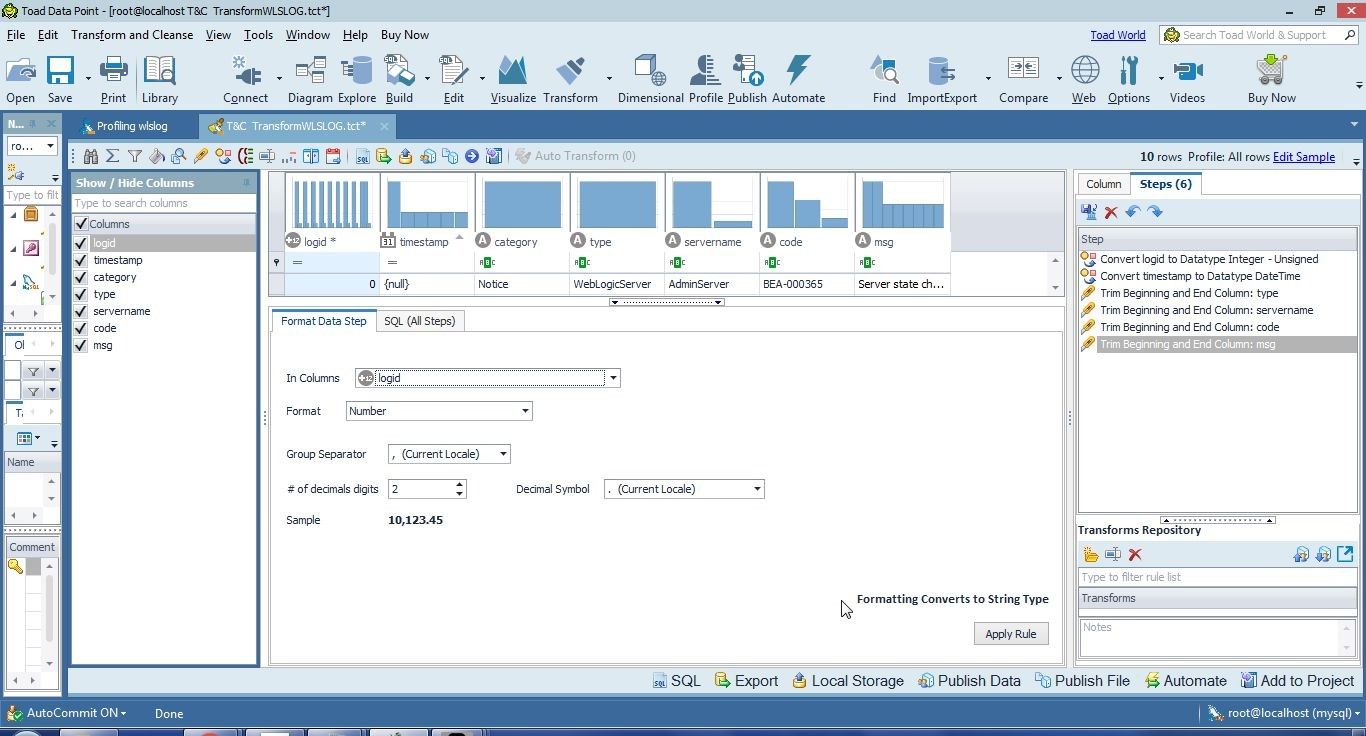
Figure 37. Formatting Options for logid
Converting Data Types
Auto Transform suggested some data type conversions which we applied in the second article. Data types may also be converted explicitly by selecting Convert Datatype in the toolbar, as shown in Figure 38.
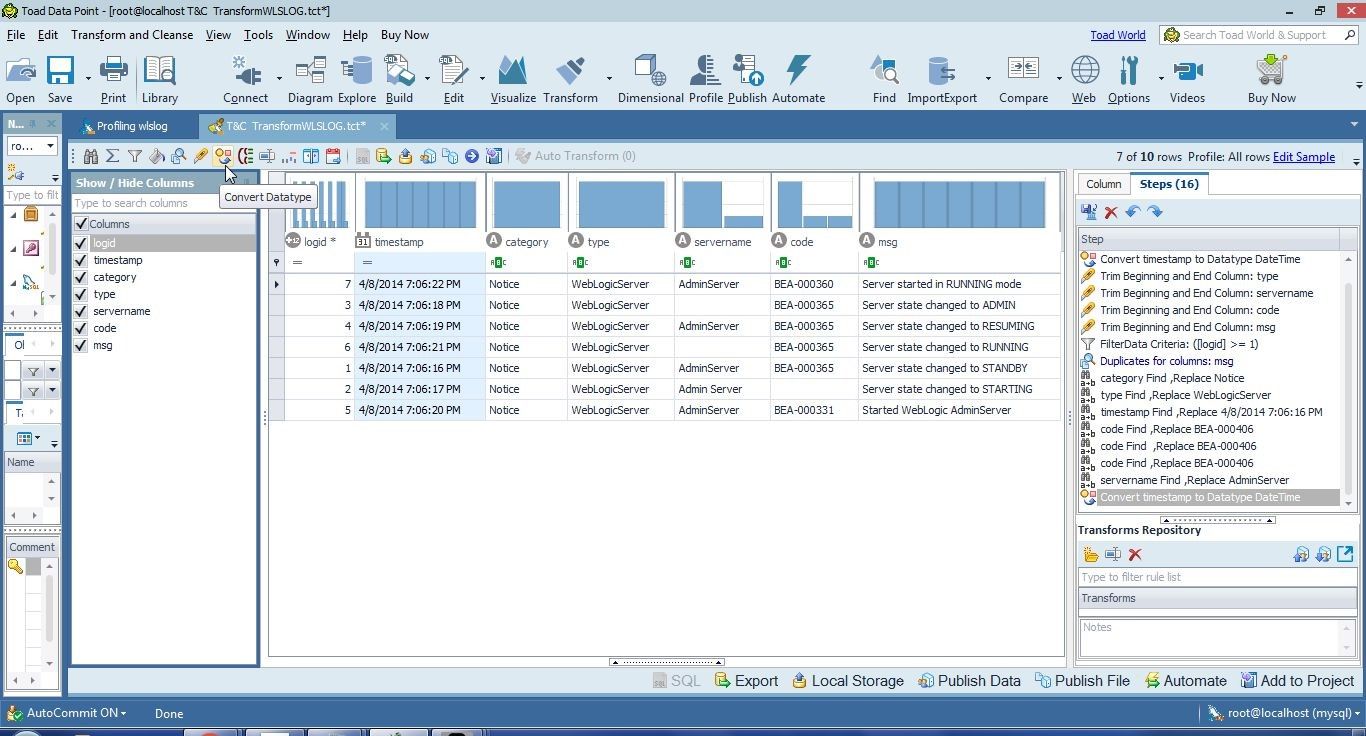
Figure 38. Convert Datatypes
As an example, timestamp could be converted to String as shown in Figure 39. (We wouldn’t actually need to convert timestamp to String because Date Time is a more appropriate data type.)
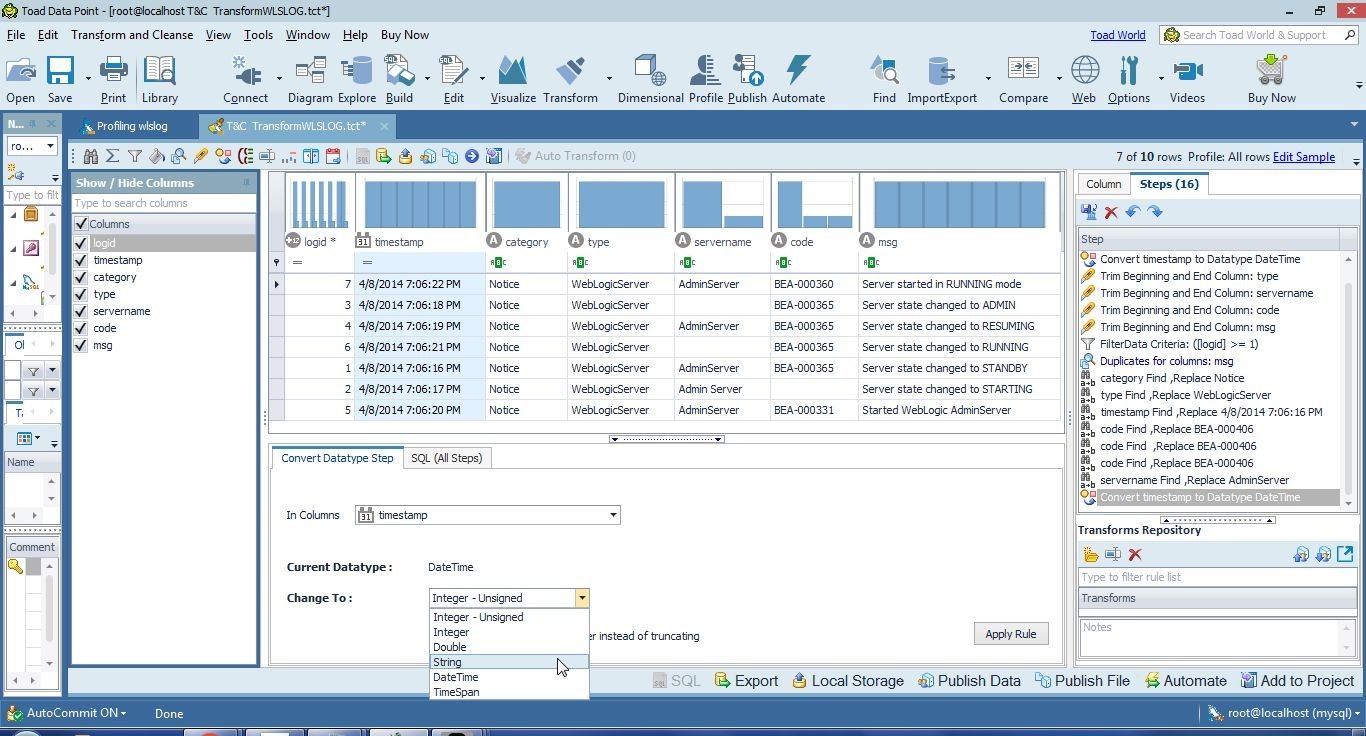
Figure 39. Converting timestamp to String
Extracting Date
Another transformation feature that can be made use of is to extract values from a Date Time column such as timestamp. To demonstrate, click on Extract Date in the toolbar as shown in Figure 40.
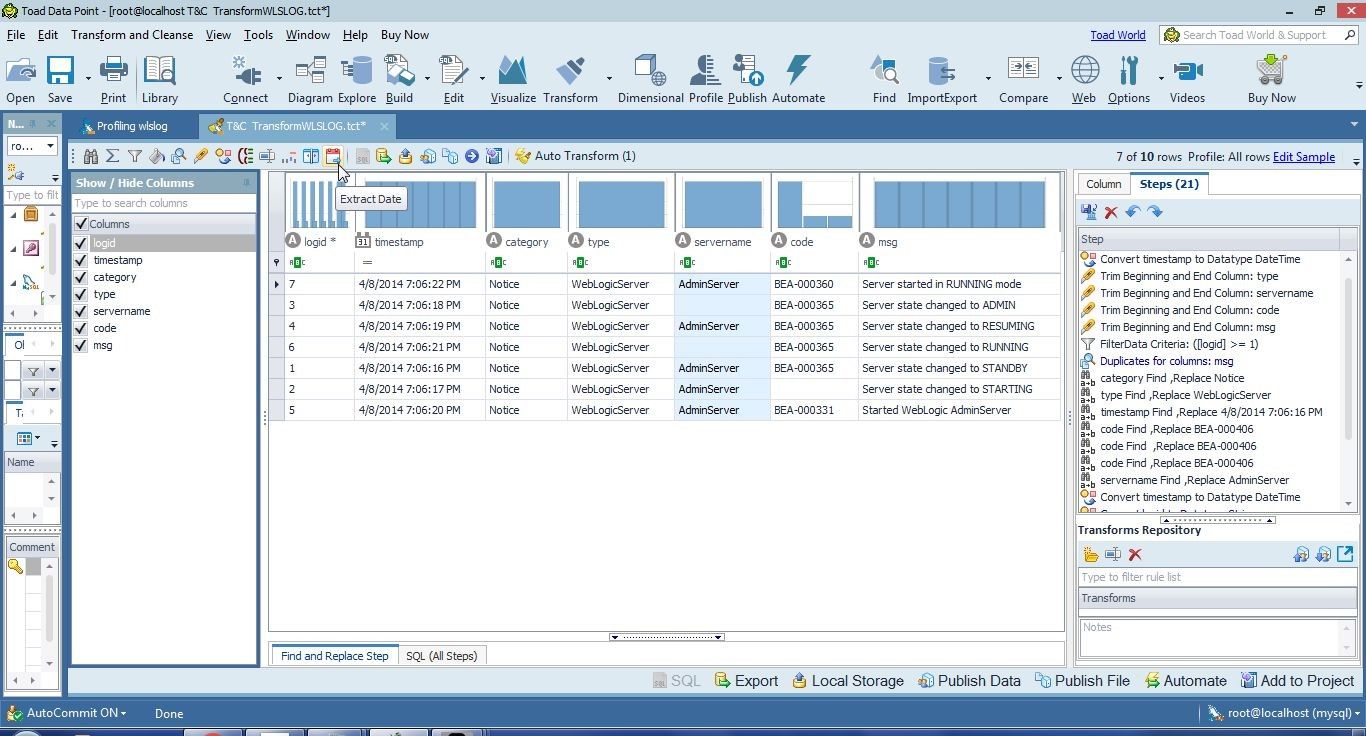
Figure 40. Extract Date
In the Extract Date Step select Week of Month to extract as shown in Figure 41. Click on Apply Rule.
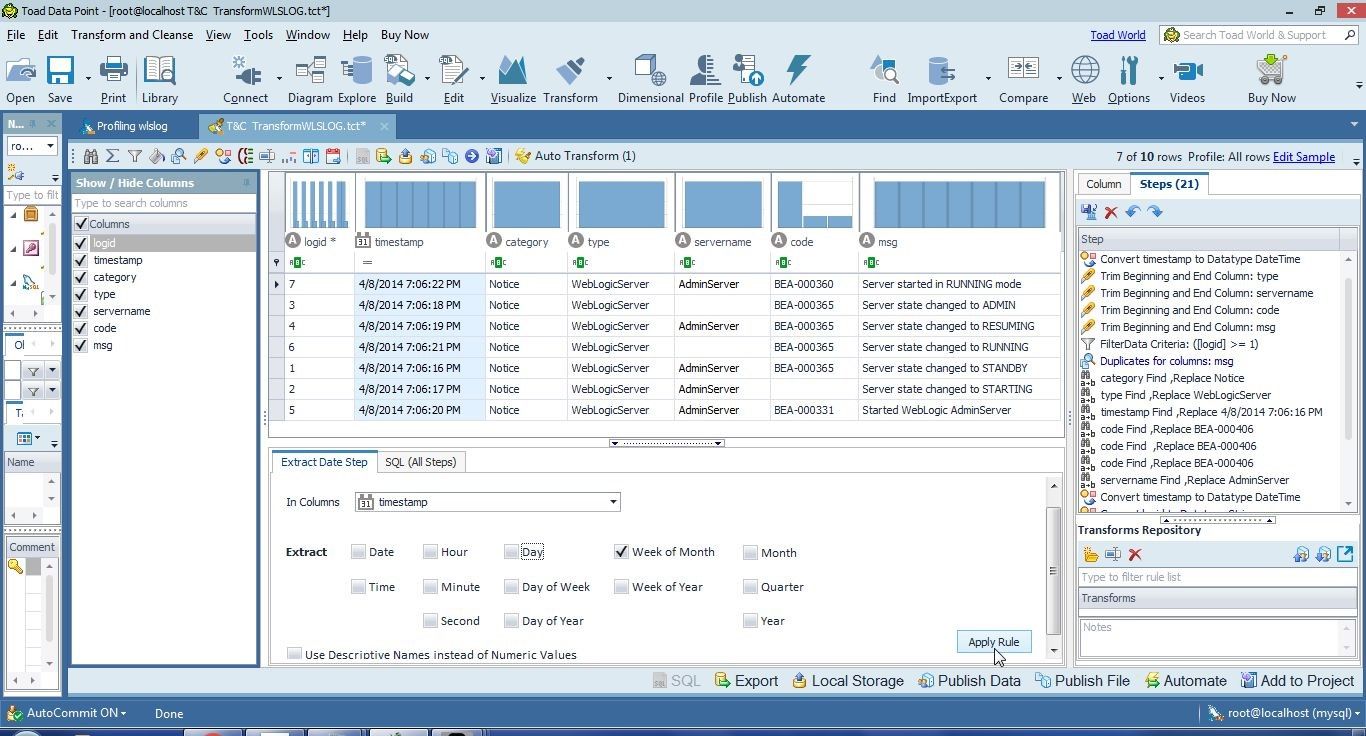
Figure 41. Extracting Date
A new column for WeekOfMonth gets added, as shown in Figure 42.
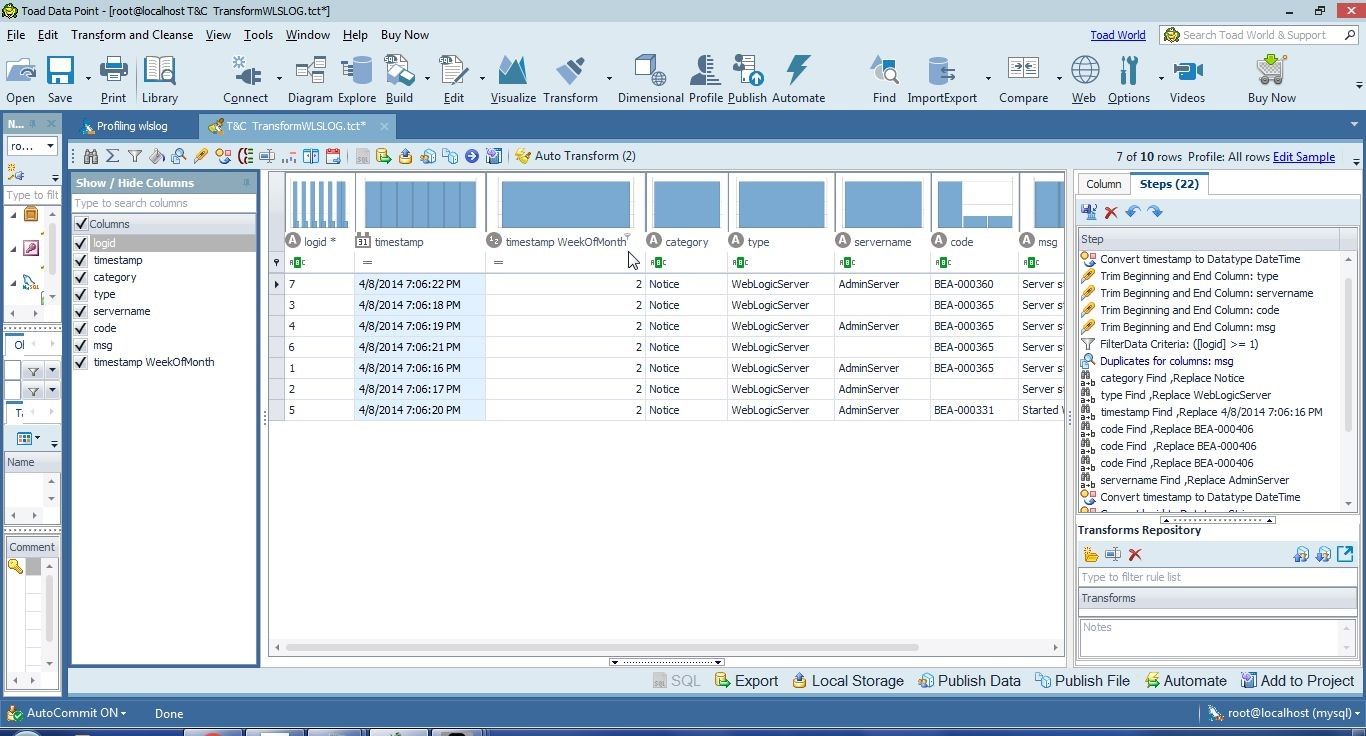
Figure 42. WeekOfMonth Column
We won’t be using the WeekOfMonth column in the Excel report; this transformation may be undone.
Exporting Data Report
Having prepared the data, we shall export it to an Excel report. Select Export in the toolbar as shown in Figure 43.
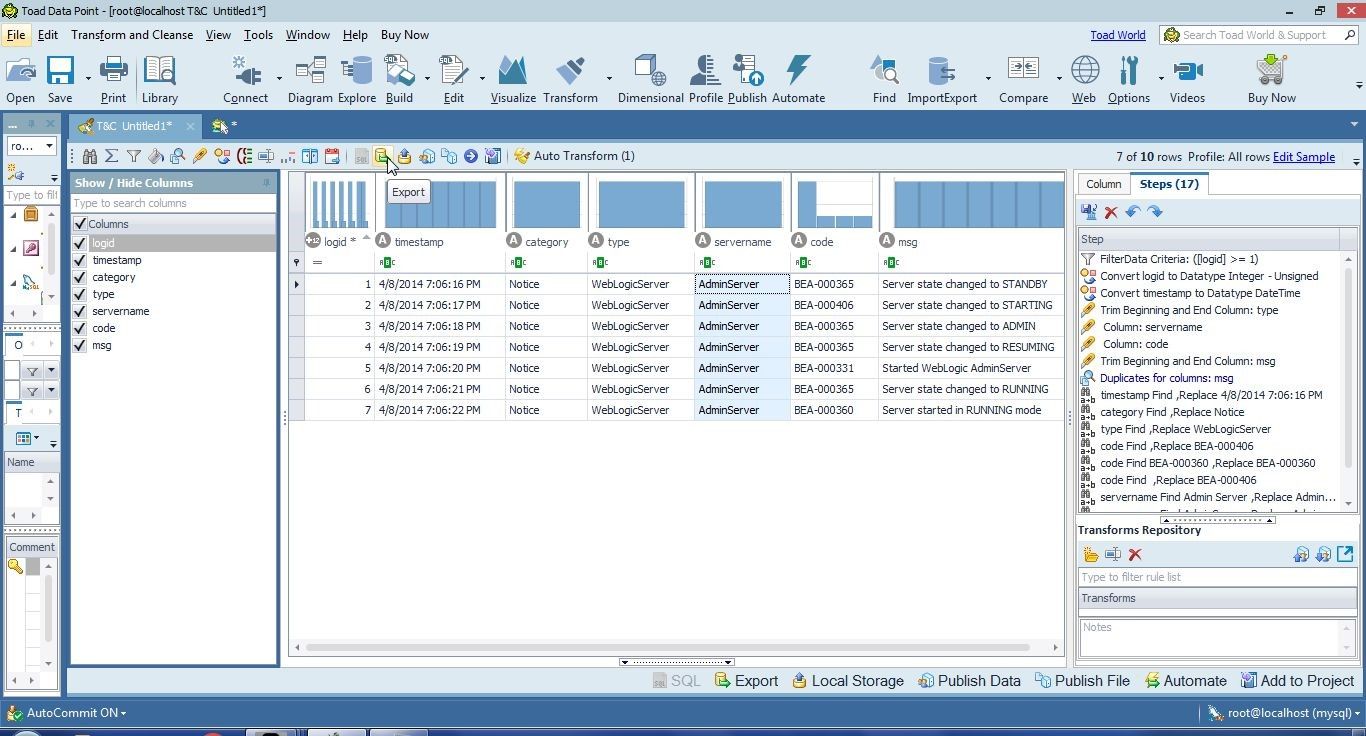
Figure 43. Export
In the Export window select Export As: Excel as shown in Figure 44. The File Name and Path field specifies the file name and directory path of the exported file. Optionally select Overwrite. Specify a Worksheet name and select the two options Use column names for header row and Autofit columns. Click on Export.
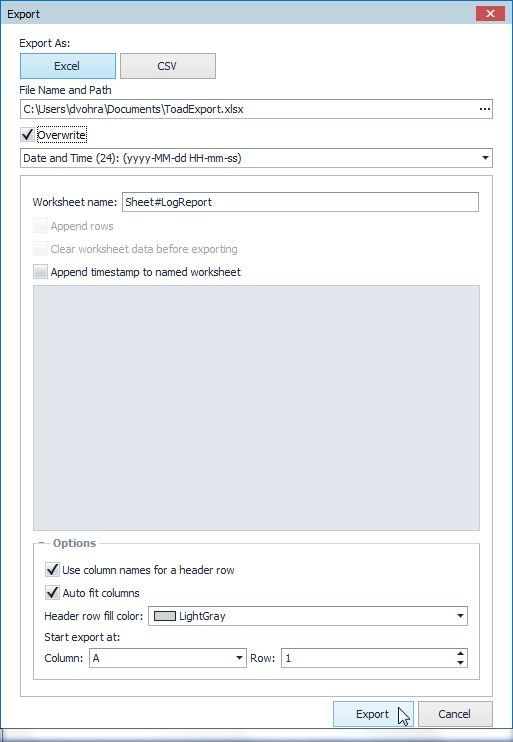
Figure 44. Export Wizard
The export gets completed, as shown in the Export Finished dialog in Figure 45. Click on the Output File link to display the Excel report.
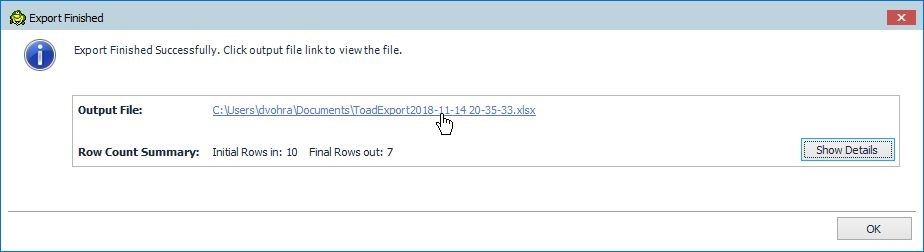
Figure 45. Output File
The Excel report is shown in Figure 46.
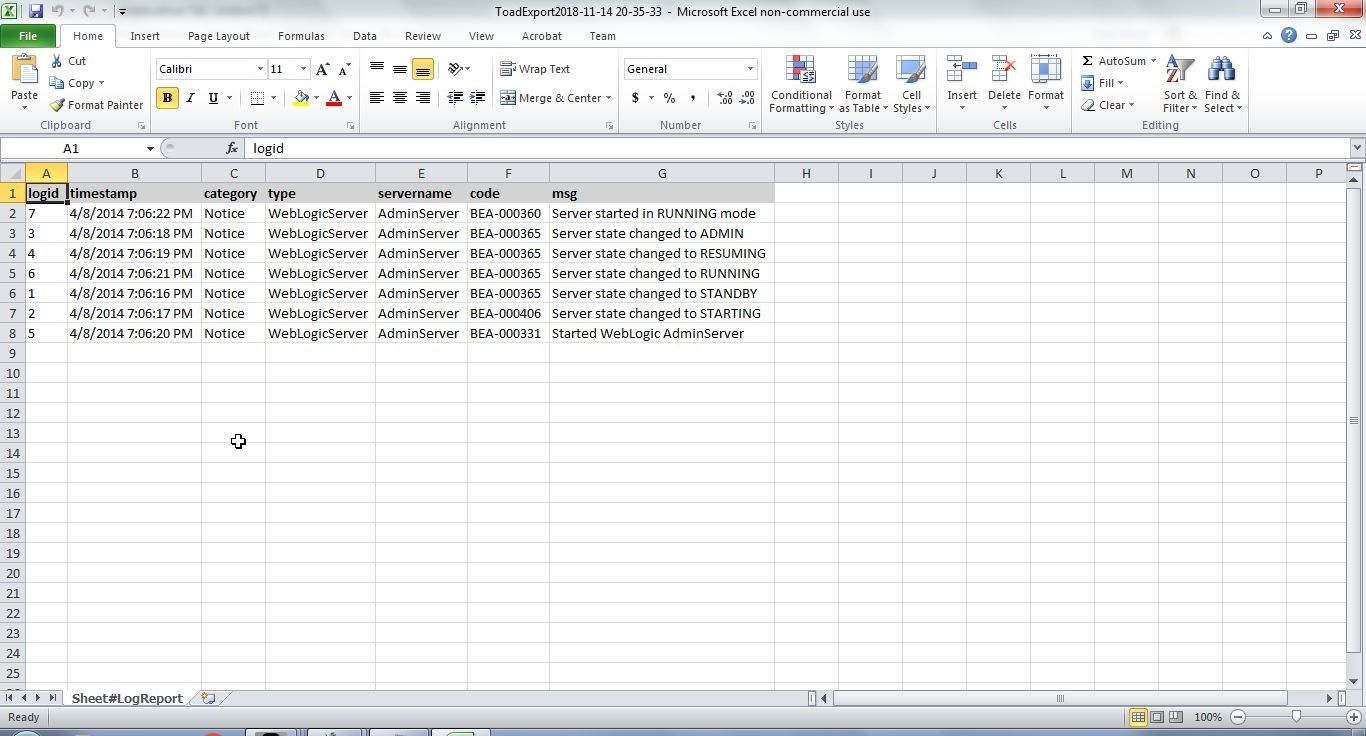
Figure 46. Excel Report
Slight modifications may also be made in the Excel spreadsheet. As an example, data exported might not be sorted. Click on Sort to sort the data as shown in Figure 47.
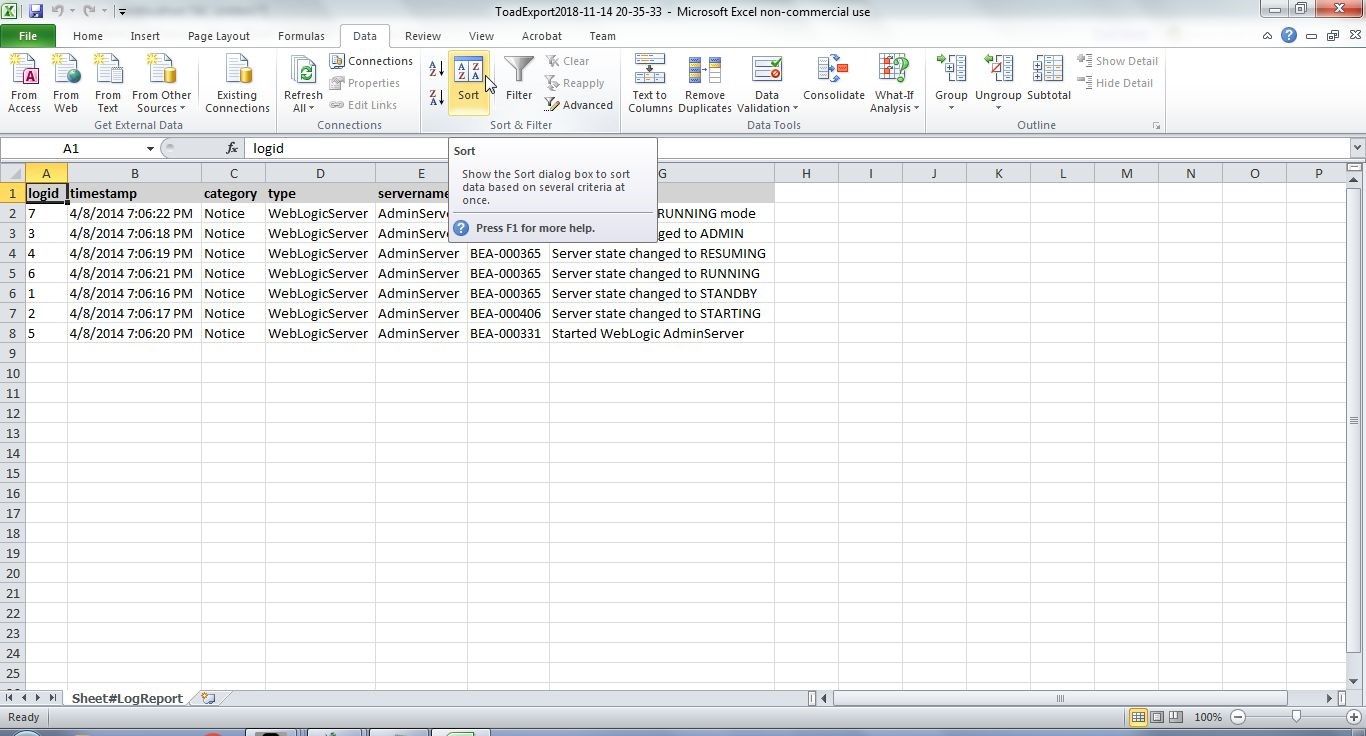
Figure 47. Sorting Data
In the Sort dialog select the Sort By, Sort On and Order settings. Sorted data is shown in Figure 48.
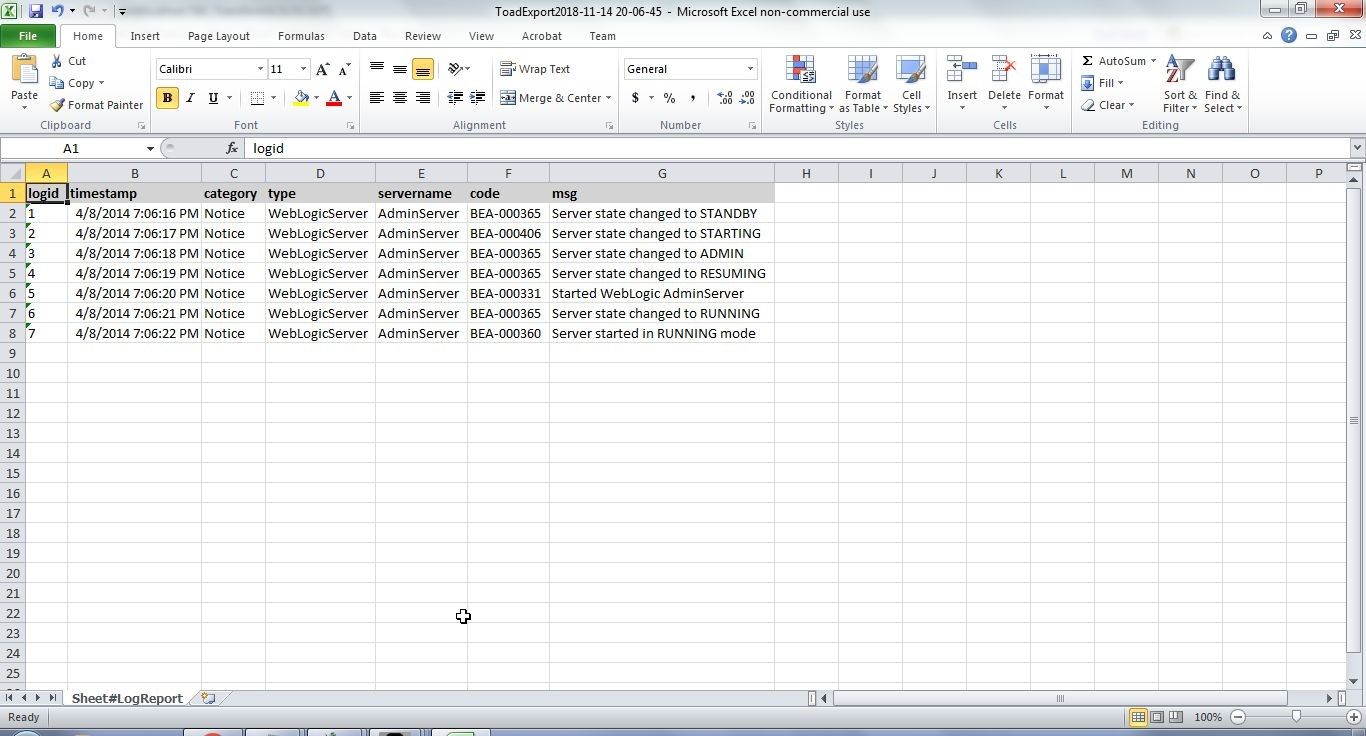
Figure 48. Sorted Excel Report
Conclusion
In three articles we have discussed preparing raw data stored in a MySQL database table in Toad Data Point to generate an Excel report. Data preparation transformations we performed included trimming data, filtering data, removing duplicates, supplying missing data, and replacing null values. Toad Data Point provides a Profile Data wizard to profile raw data to find shortcomings in data that needs to be fixed. Toad Data Point also provides a Transform and Cleanse wizard to transform data for data analysis and report generation.
Start the discussion at forums.toadworld.com