Data preparation is an essential task whenever raw data is to be transformed to a usable form. The end use could be data analysis, report generation, or SQL query. In three articles we are exploring preparing raw data, stored in MySQL database, for an Excel report using Toad Data Point. In the first article we created a data source by adding raw data to a MySQL table. The data has several issues that need to be fixed, including erroneous data, missing data, null values, inappropriate data types, extra spaces, and duplicate data. We profiled the data to find all the issues, with the data displayed in a histogram. We identified the issues that need to be fixed by profiling the data. In this continuation article we shall extract data from the database and transform the data to a usable form.
This article has the following sections.
Extracting Data to Transform
Transforming Data
Running Auto transform
Filtering Data
Extracting Data to Transform
To extract raw data from the MySQL table and start the transformation click on Transform and Cleanse Data as shown in Figure 1.
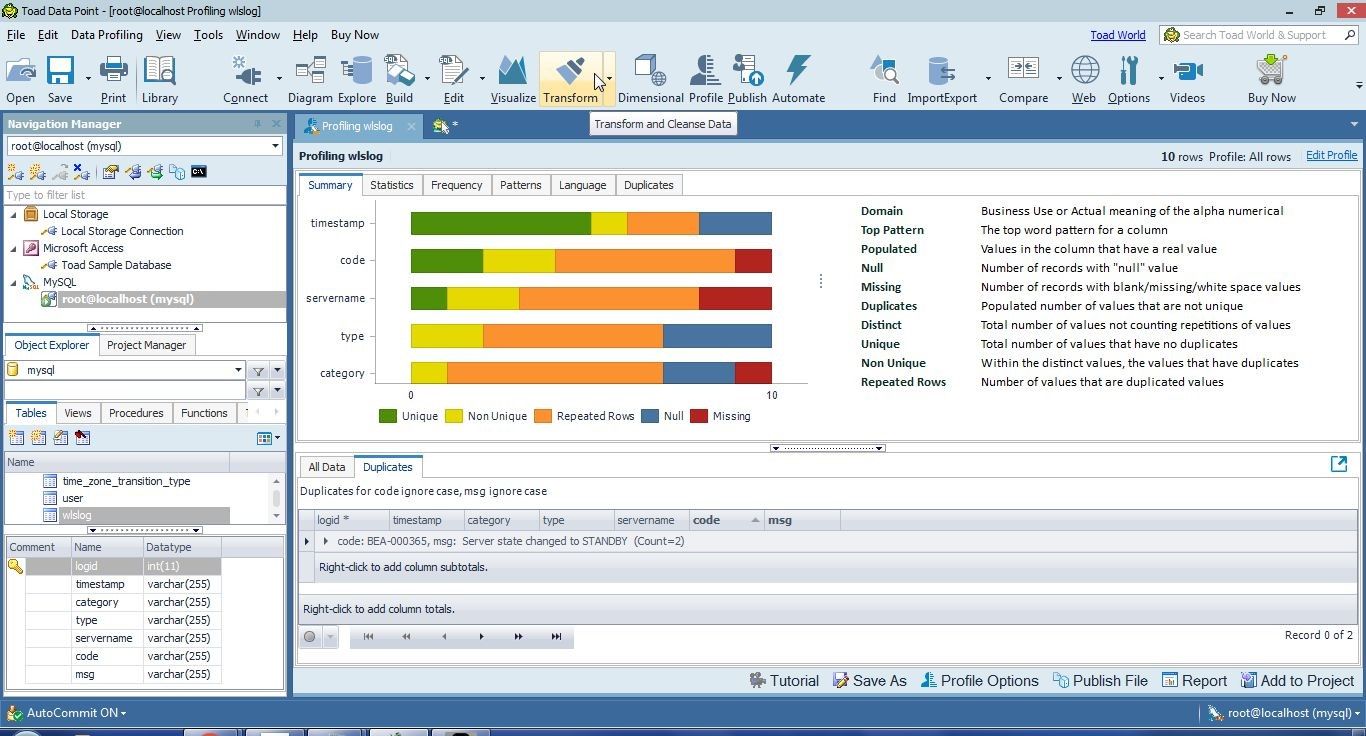
Figure 1. Transform and Cleanse Data
The Transform wizard gets started, as shown in Figure 2. Select a connection from which a data object is to be selected for extraction and transformation. Select database asmysql. The System Objects folder lists the data objects in the mysql database.
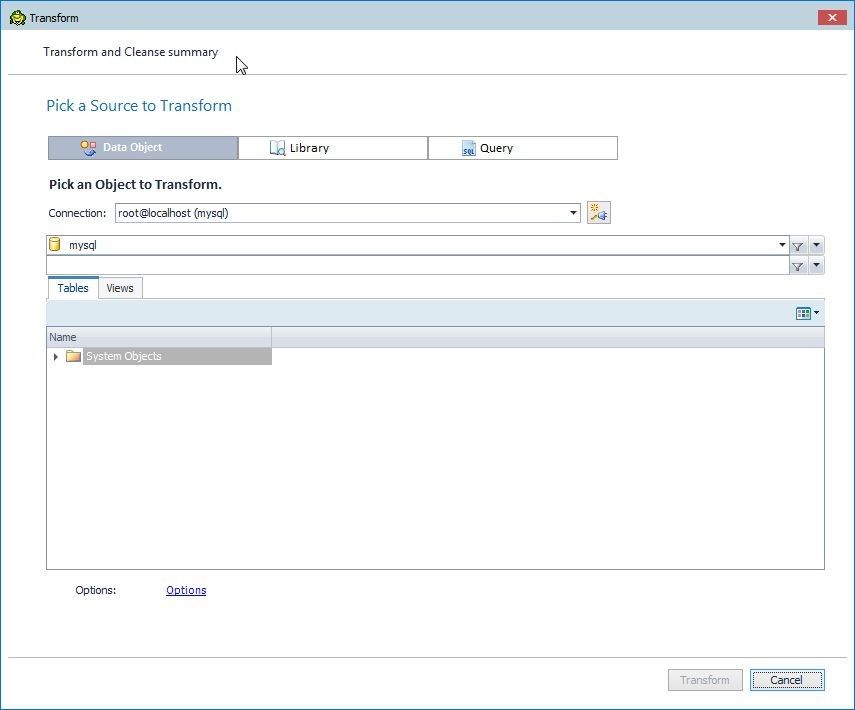
Figure 2. Transform Wizard
Select the Query tab and add a query using aSELECT statement as shown in Figure 3. Toad Data Point provides code-assist to select the database and table to query. Select database as mysql.
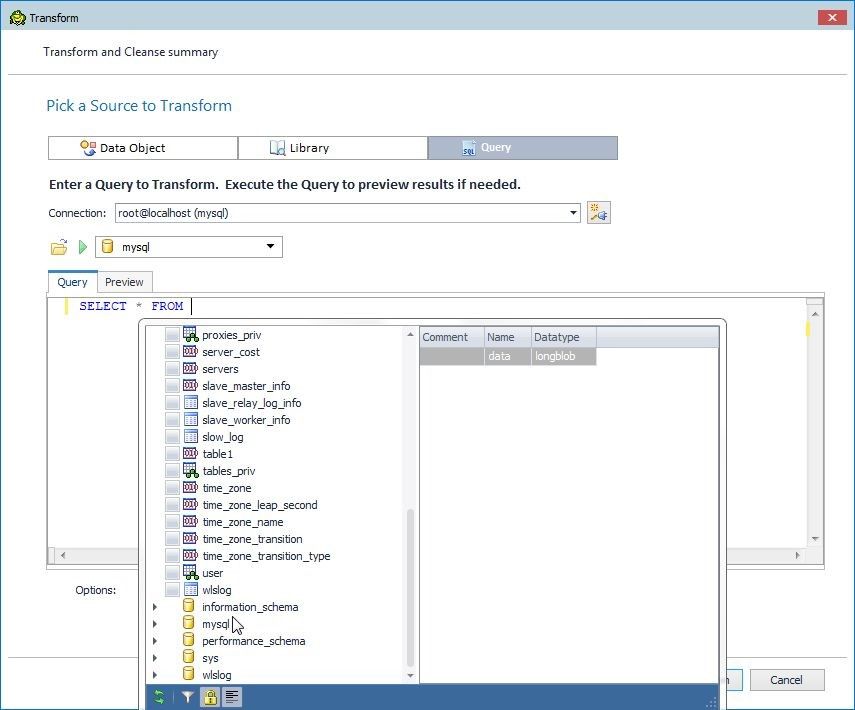
Figure 3. Selecting Database as mysql
Select the mysql.wlslog table as shown in Figure 4.
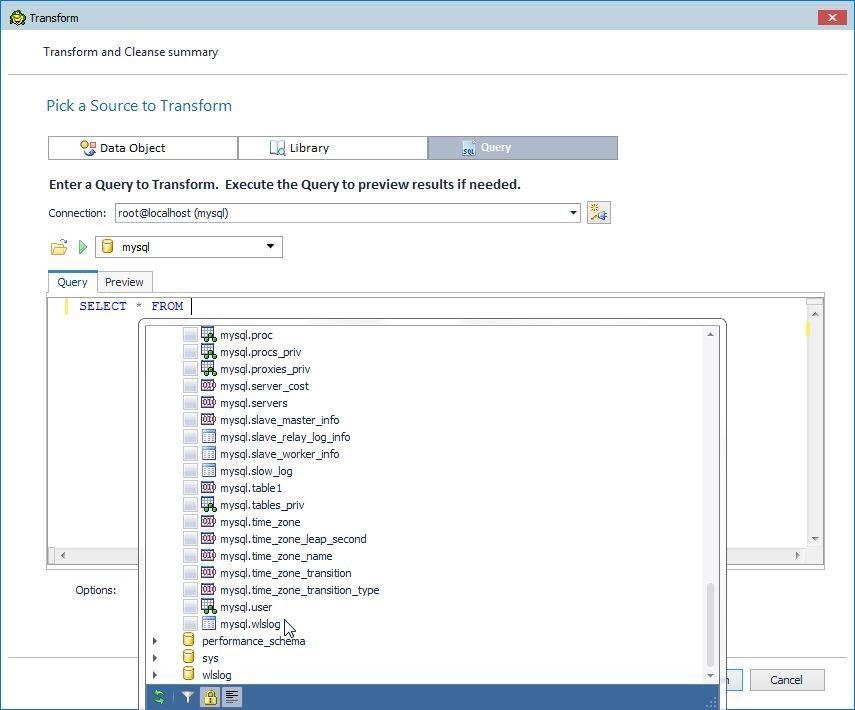
Figure 4. Selecting the mysql.wlslog Table
Click on Options as shown in Figure 5 to display the transformation options.
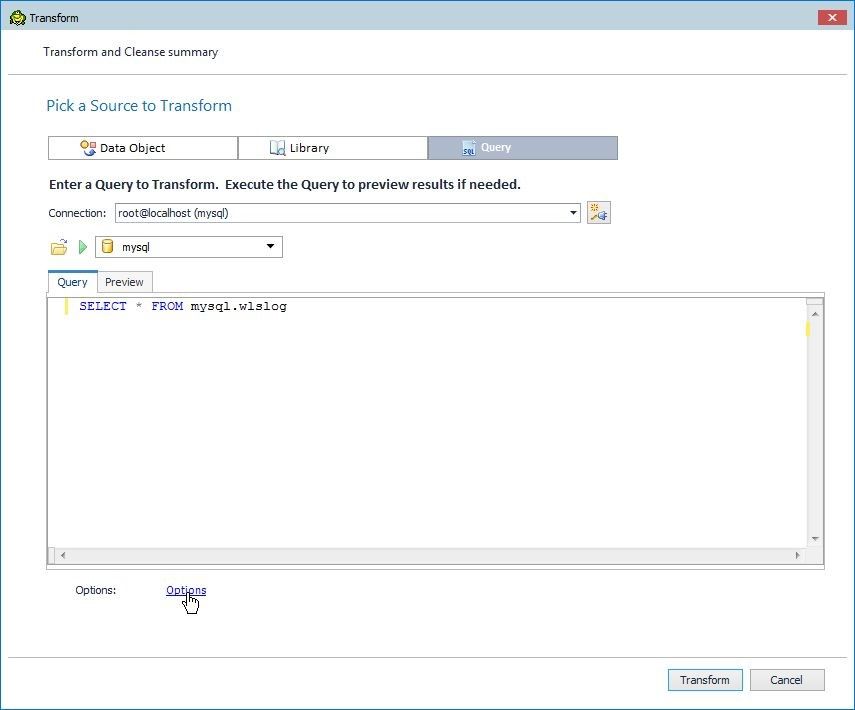
Figure 5. Transform>Options
In Options first select Sampling data. The three options are All Rows, First n rows, and Random x% sample of rows, as shown in Figure 6. Select Sampling as First 1000 rows. Also select Error Options. Select the checkbox Always export rows with exceptions to csv files in the following folder with the default folder setting. Default values for Numeric columns (0), DateTime columns (11/14/2018 12:00:00 AM), and Text columns({null}) are provided. Click on Apply.
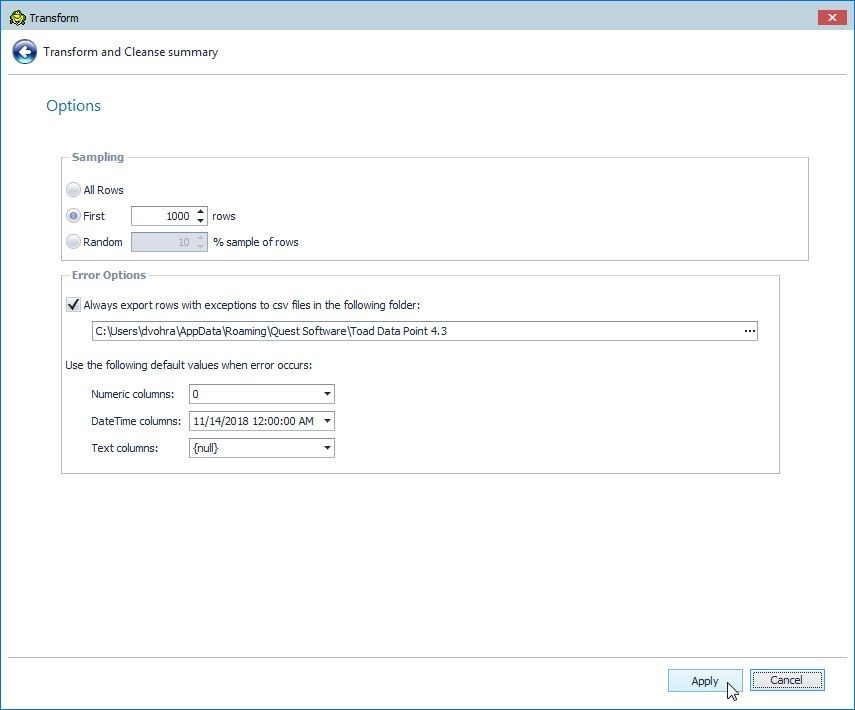
Figure 6. Transform Options
Click on Transform to start the transformation as shown in Figure 7.
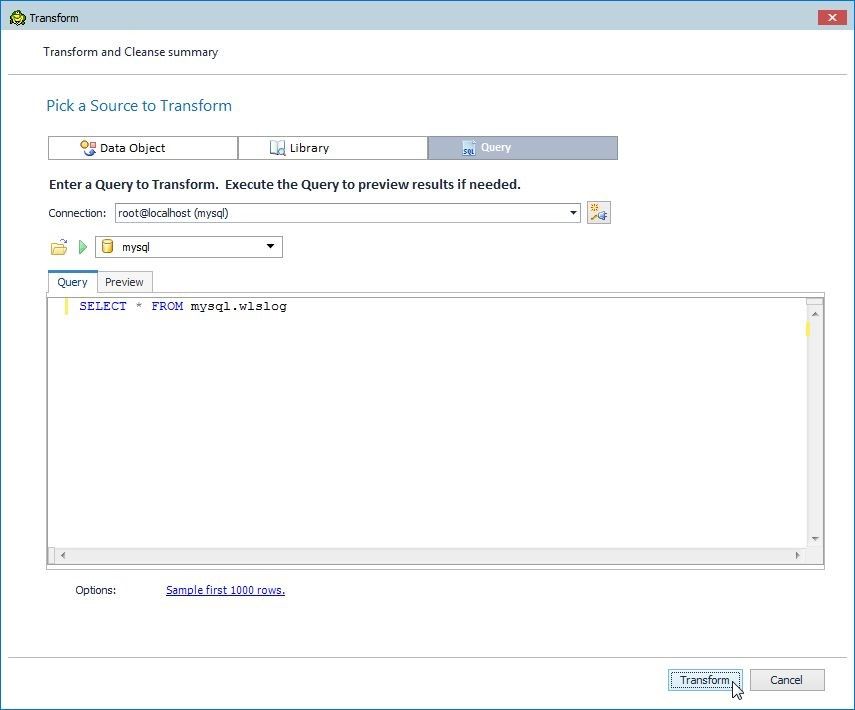
Figure 7. Transform>Transform
A T&C (Transform & Cleanse) wizard gets launched, as shown in Figure 8.
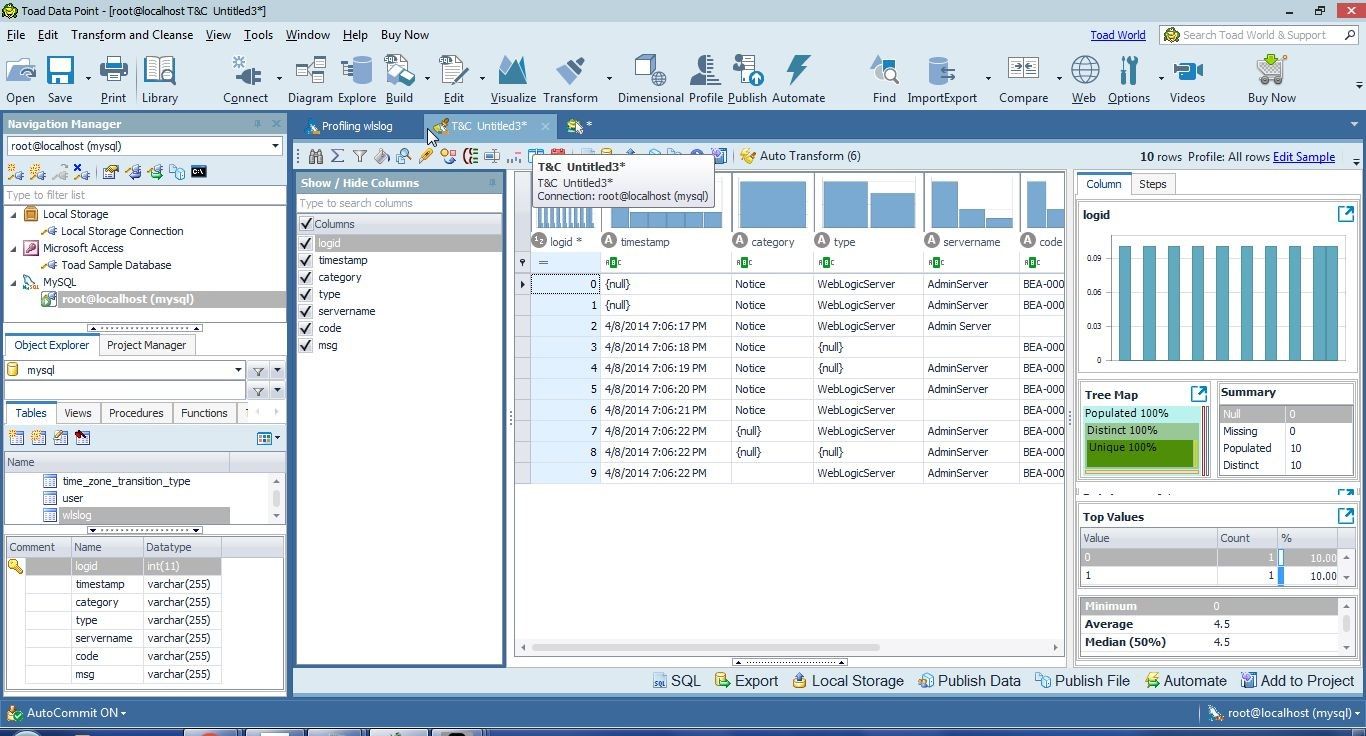
Figure 8. Transform & Cleanse Wizard
Before performing any transformation right-click on the Untitled3 file tab and select Save File As as shown in Figure 9.
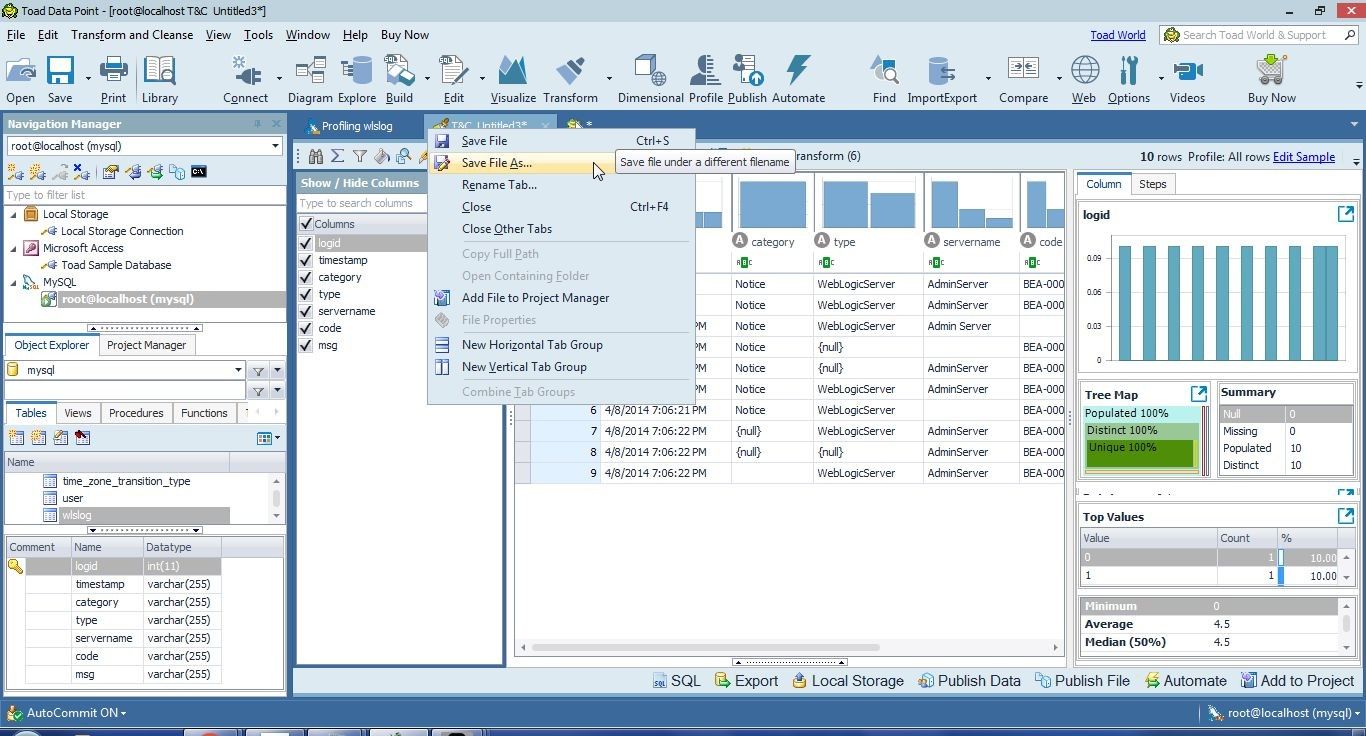
Figure 9. Save File As
Save the T & C file as a .tct file as shown in Figure 10. Click on Save.
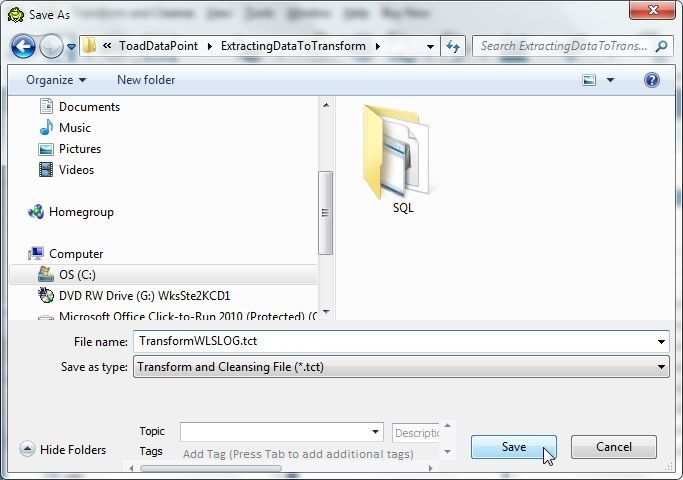
Figure 10. Saving .tct File
We have extracted data to be prepared. The sample data is displayed with a frequency histogram for each column above the column name. The sample data may be modified with the Edit Sample link, as shown in Figure 11.
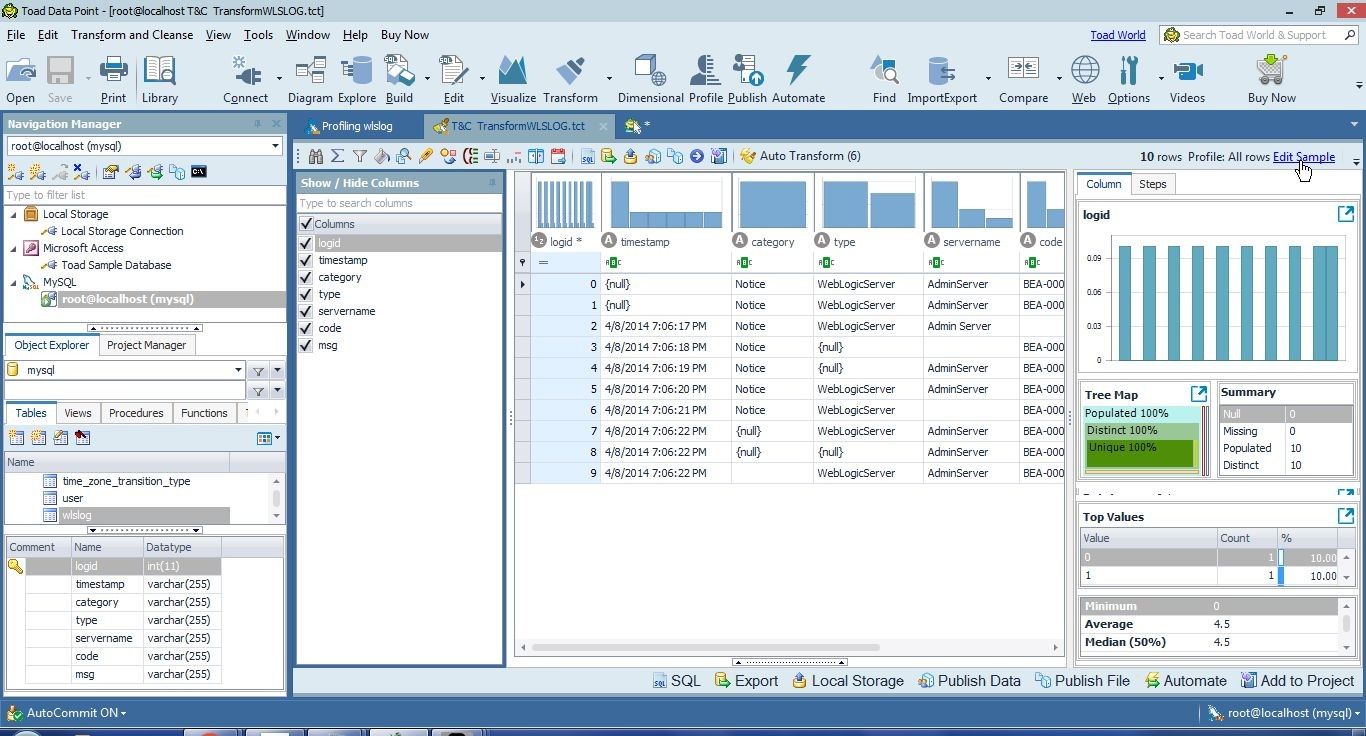
Figure 11. Edit Sample
The Transform and Cleansing Options window gets displayed. The Query tab displays the SQL query used to extract data, as shown in Figure 12. The query may be modified if needed.
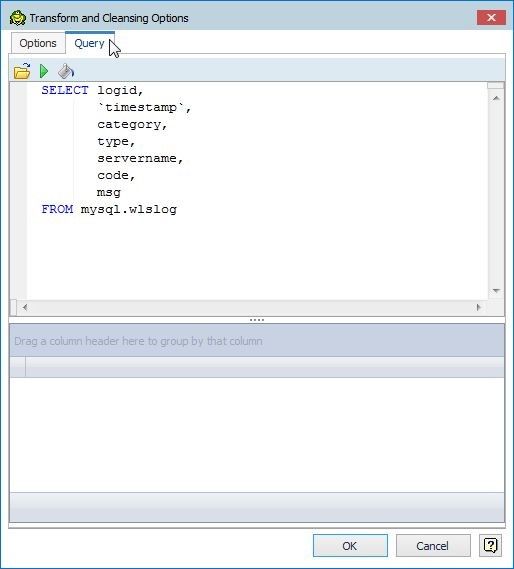
Figure 12. Transform and Cleansing Options>Query
Modify any of the options if needed and click on OK as shown in Figure 13.
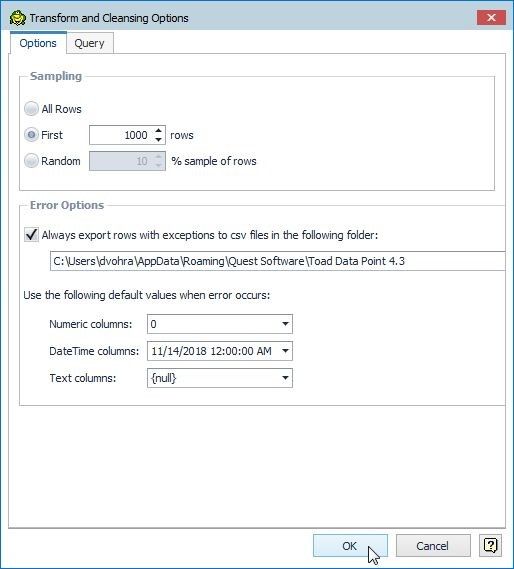
Figure 13. Transform and Cleansing Options >OK
The raw data to be transformed has been extracted and displayed, as shown in Figure 14.
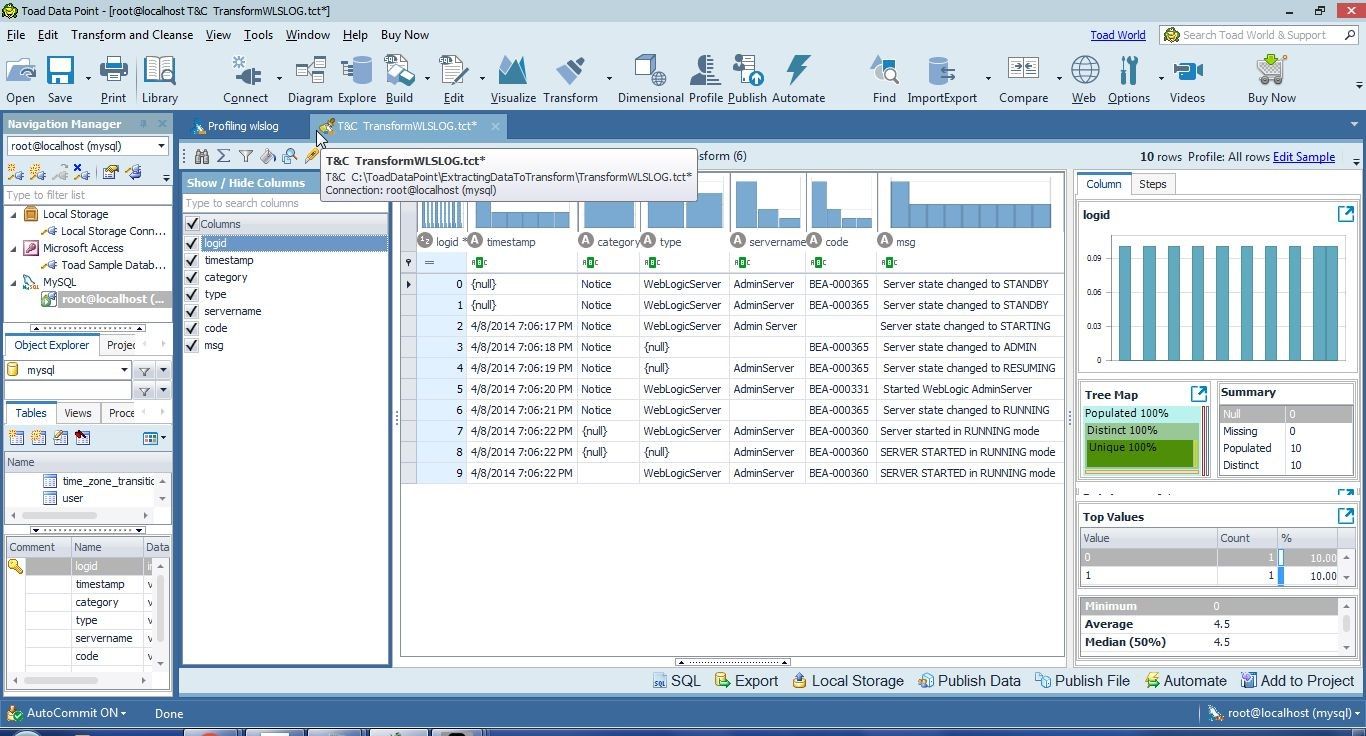
Figure 14. Raw Data Extracted
Transforming Data
Next, we shall transform the data to prepare the data for a report. The different transformation options are available in the toolbar, as shown in Figure 15.
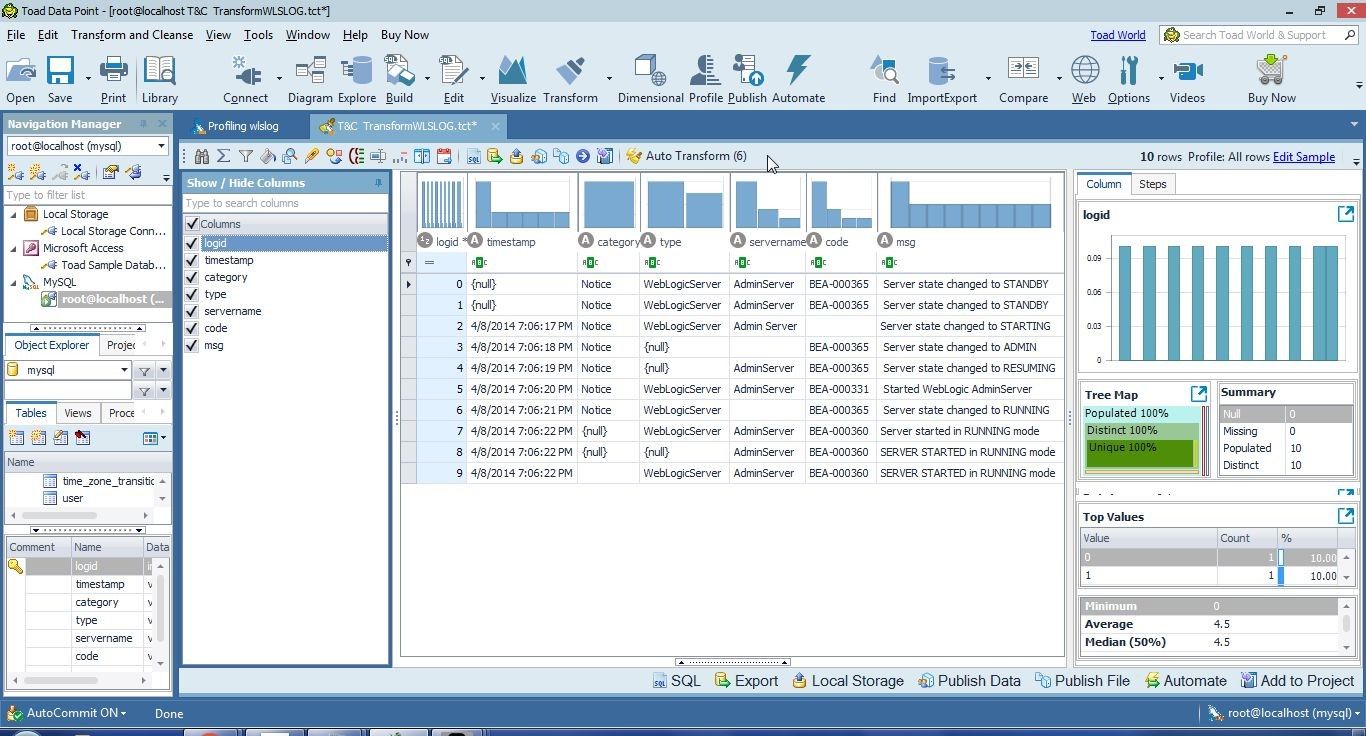
Figure 15. Transformation Options in the Toolbar
The transformation options may also be listed with a right-click in the T & C window, as shown in Figure 16.
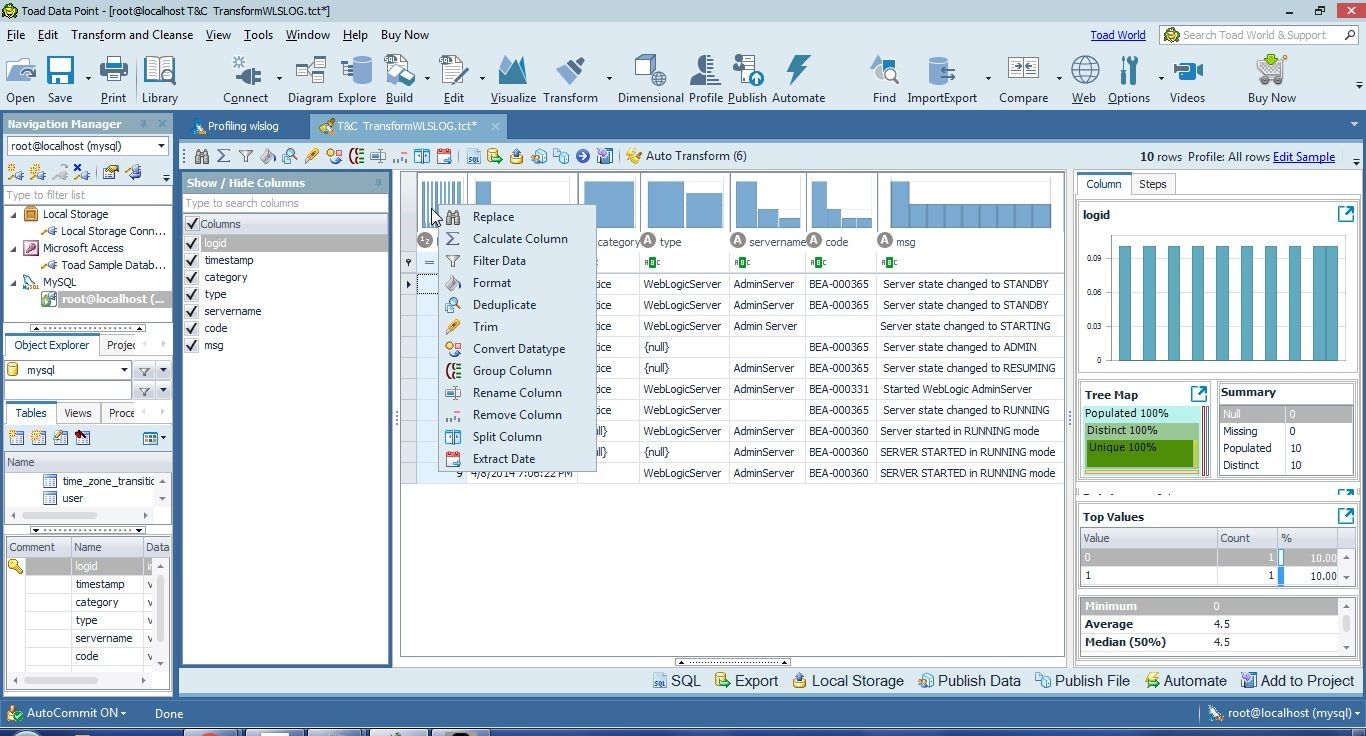
Figure 16. T & C Options
And, the Transform and Cleanse drop-down also displays the T & C options, as shown in Figure 17.
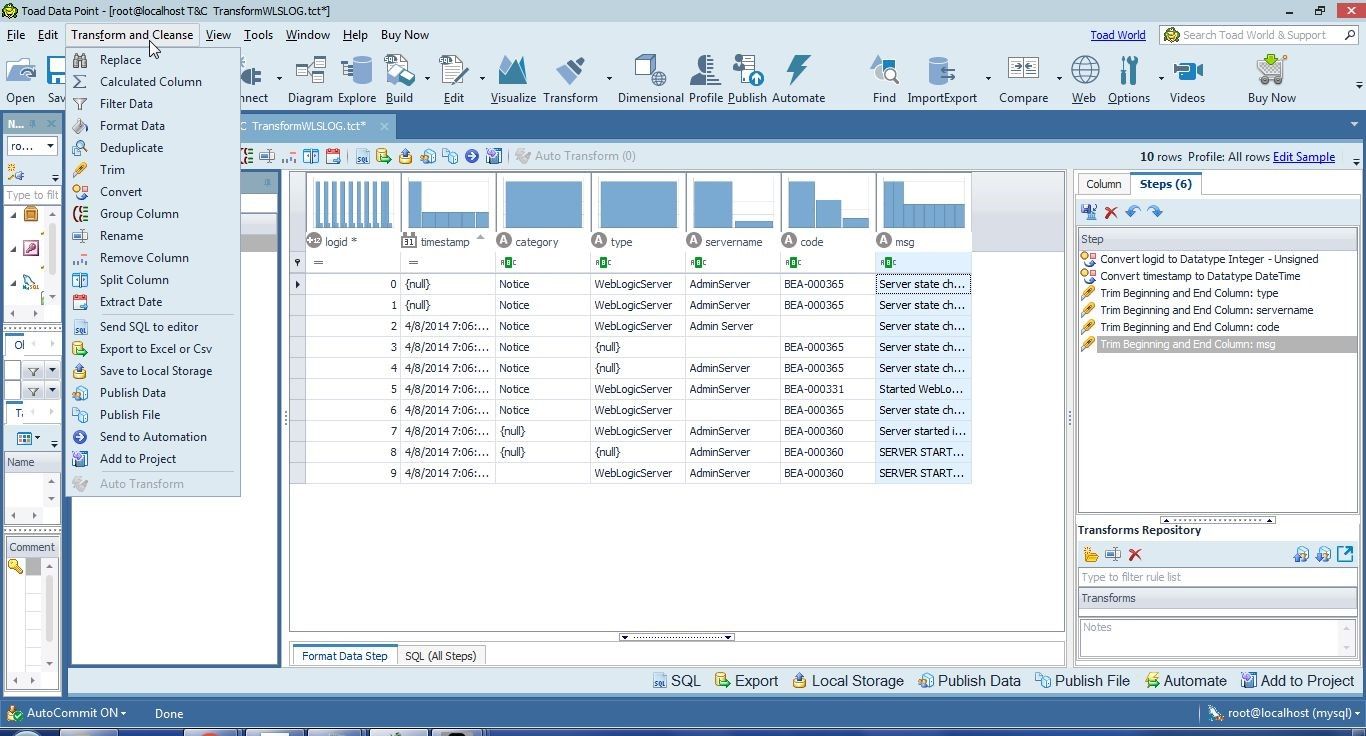
Figure 17. Transform and Cleanse
Running Auto Transform
The most obvious transformations are available to be applied as auto transform. Auto transform transformations include trimming data by removing extra spaces at the start and end of data, and converting data types. Click on Auto Transform as shown in Figure 18.
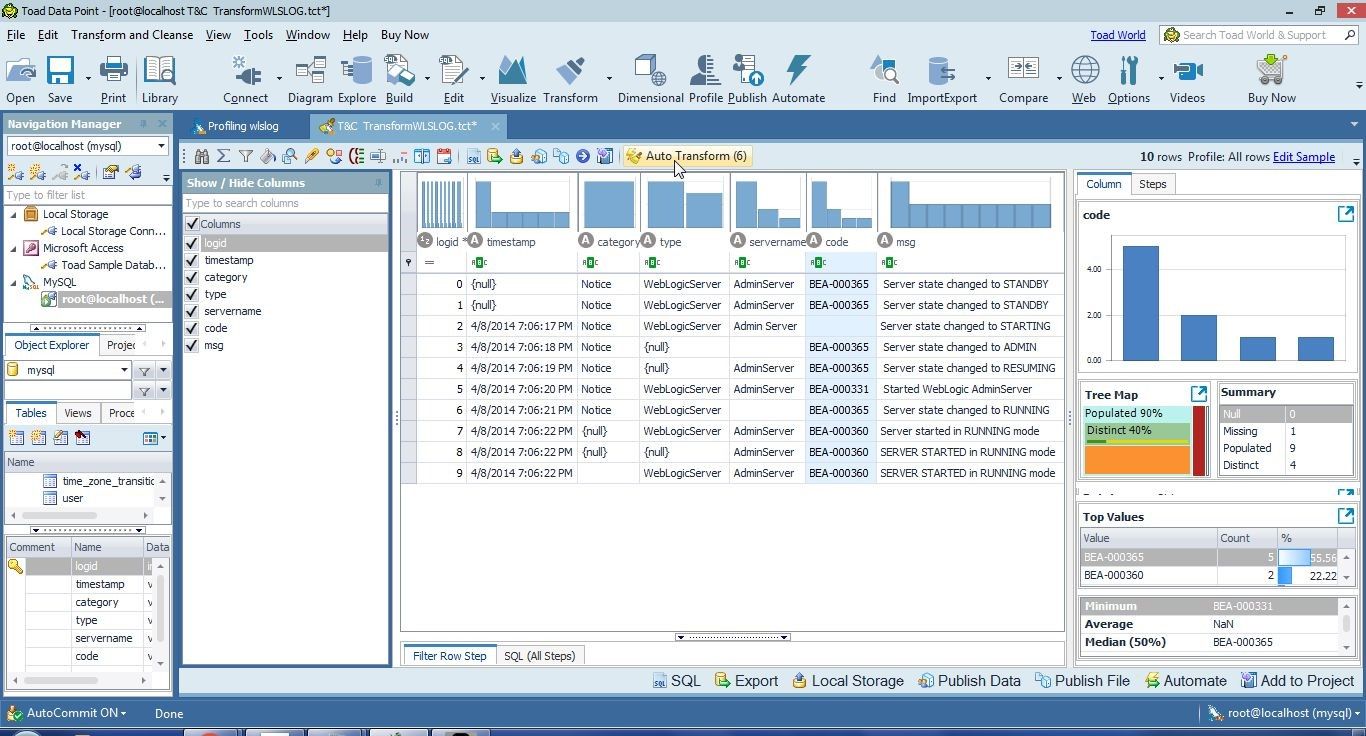
Figure 18. Auto transform
The Auto Transform window lists the recommended quick transformations to cleanse and transform the data, as shown in Figure 19. Transformations with the most impact are shown in green. The Auto Transform transformations for the sample data include converting the logid data type to Integer – Unsigned, converting thetimestamp column data type to Date Time, and trimming the type, servername, code and msg column values. Checkboxes are provided to select/deselect individual transformations and by default all listed transformations are applied or checked. Click on Auto Transform.
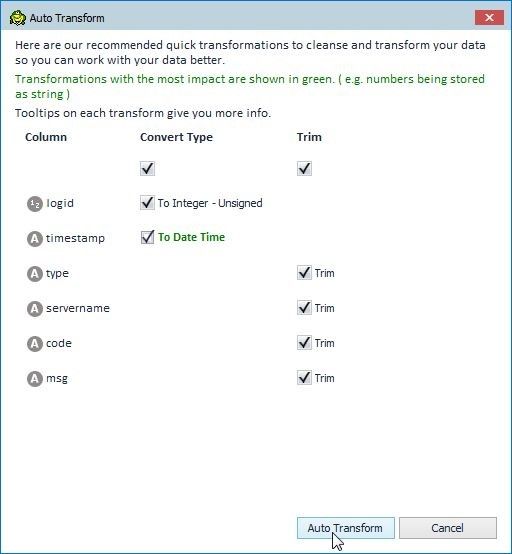
Figure 19. Running Auto Transform
The Auto Transform transformations get applied, as shown in Figure 20.
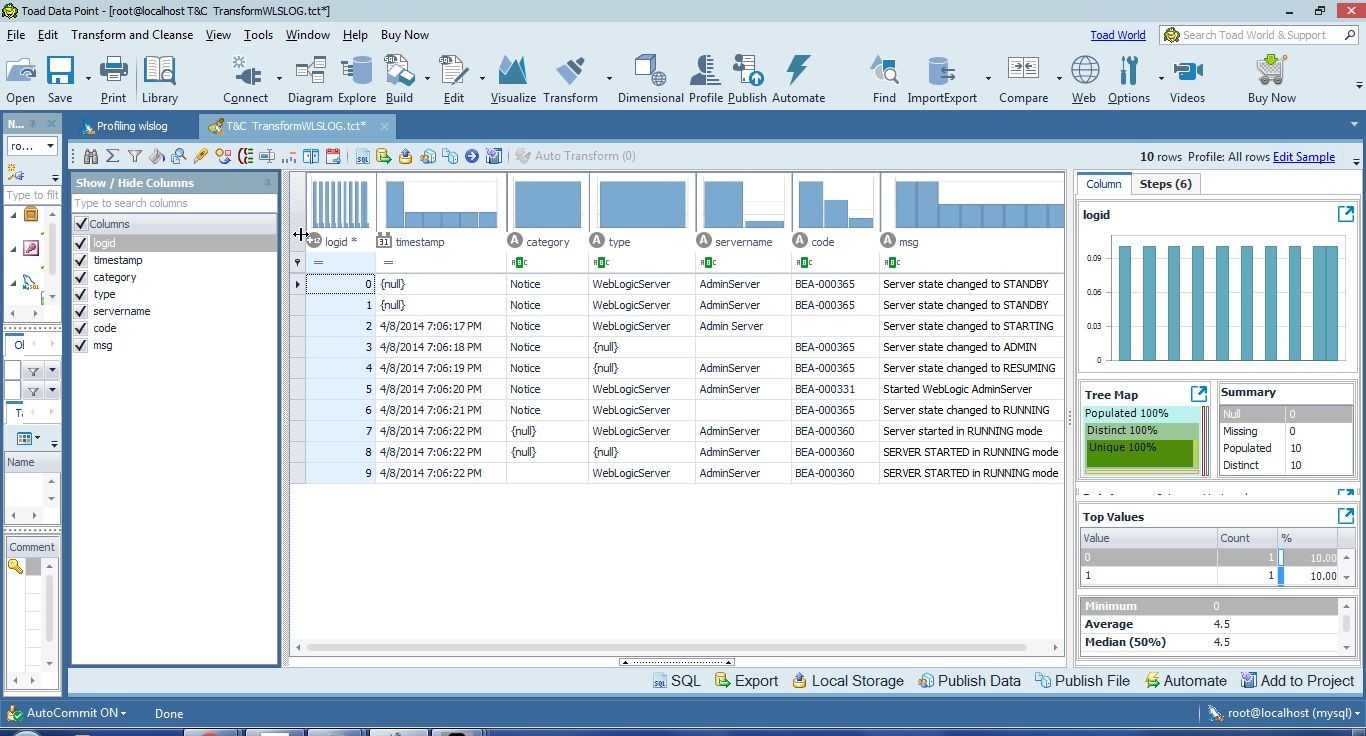
Figure 20. Auto Transform Applied
The Steps tab lists all the transformation steps run, as shown in Figure 21. To delete a transformation step, select the step and click on the Delete button.
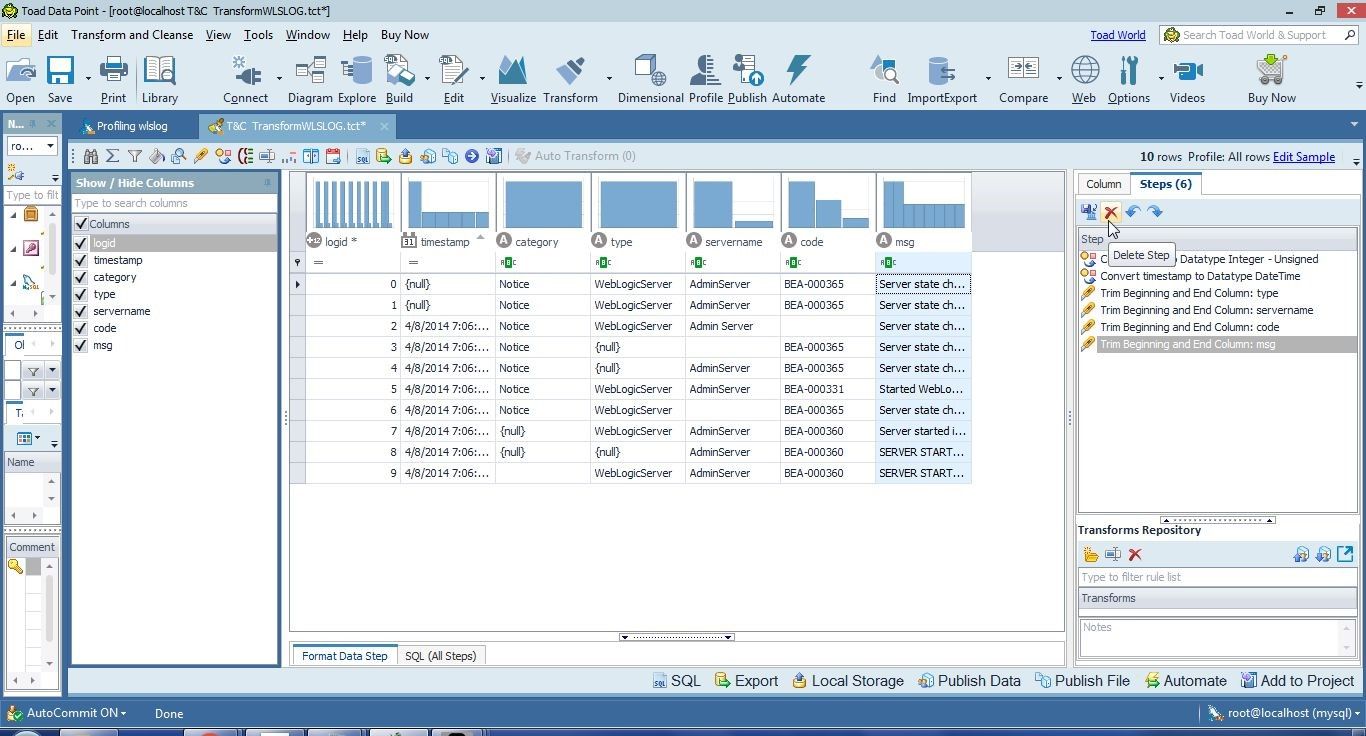
Figure 21. Transformation Steps
The SQL (All Steps) tab lists the SQL run to apply the transformation, as shown in Figure 22.
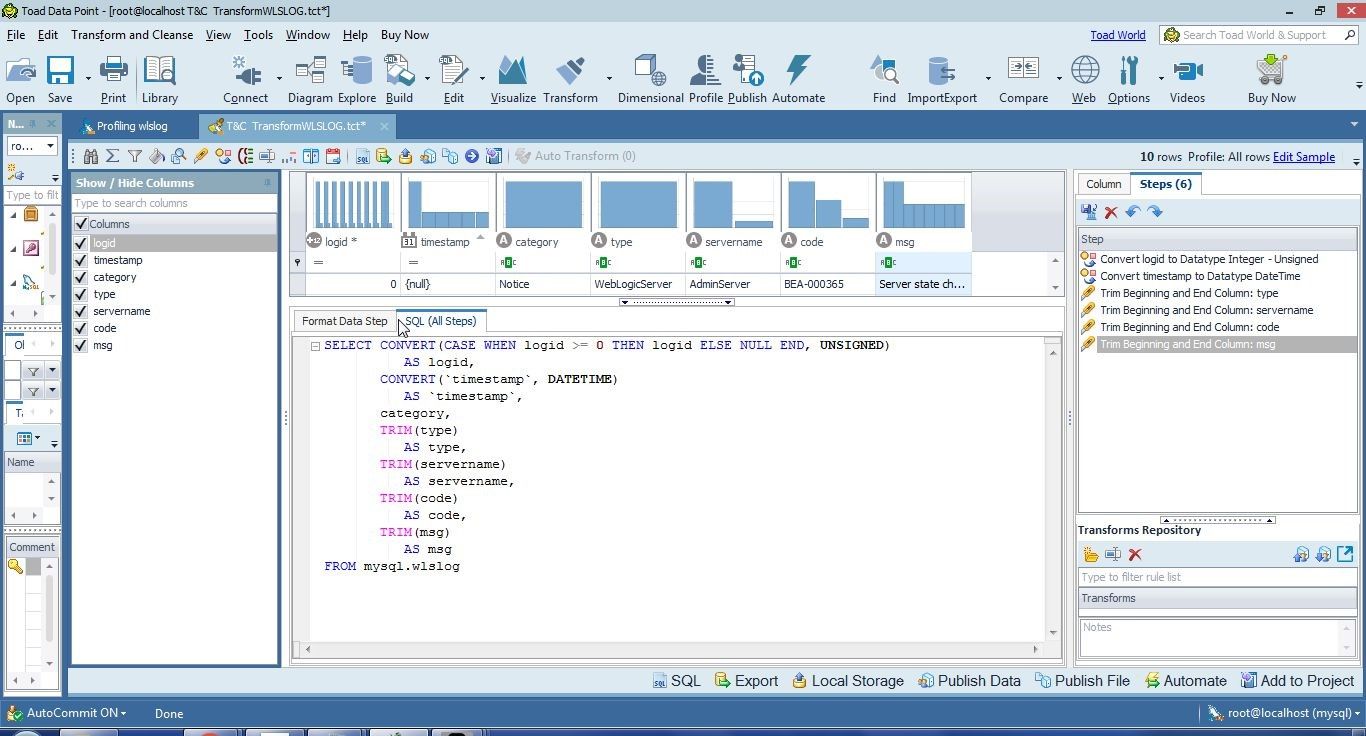
Figure 22. SQL (All Steps)
Filtering Data
Data may be filtered as needed by using the per column filter or the Find and Replace option. We shall discuss each of these options. As an example we shall filter the code column. Click on the filter icon for the code column as shown in Figure 23.

Figure 23. Selecting Filter Icon for code Column
In the window that displays which column values to include select the BEA-000365 as shown in Figure 24.
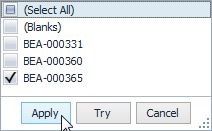
Figure 24. Selecting code Column Value to Include
The code column values get filtered and only the BEA-000365 value gets displayed, as shown in Figure 25.
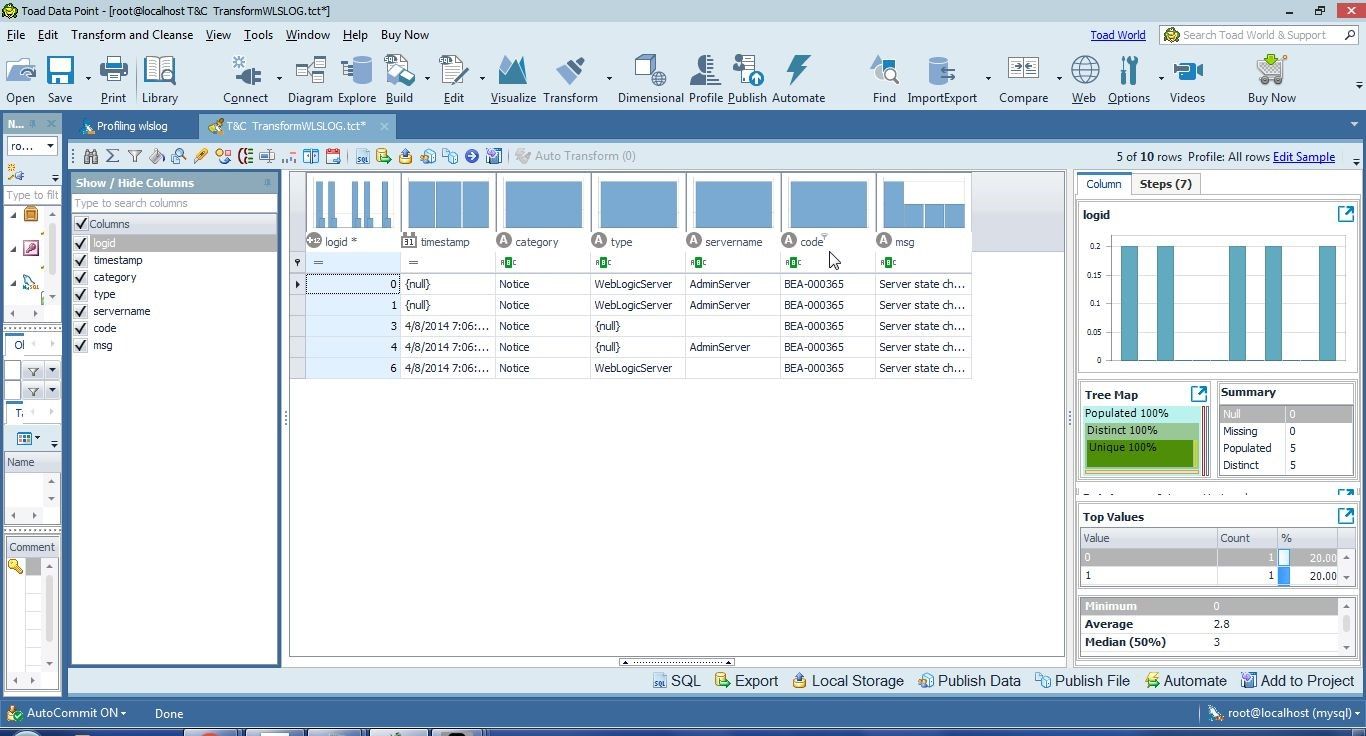
Figure 25. Code Column Values Filtered
We filtered the code column only to demonstrate filtering and we do want to include all the code column values. Select the FilterData transformation step and click on Undo last changed step as shown in Figure 26.
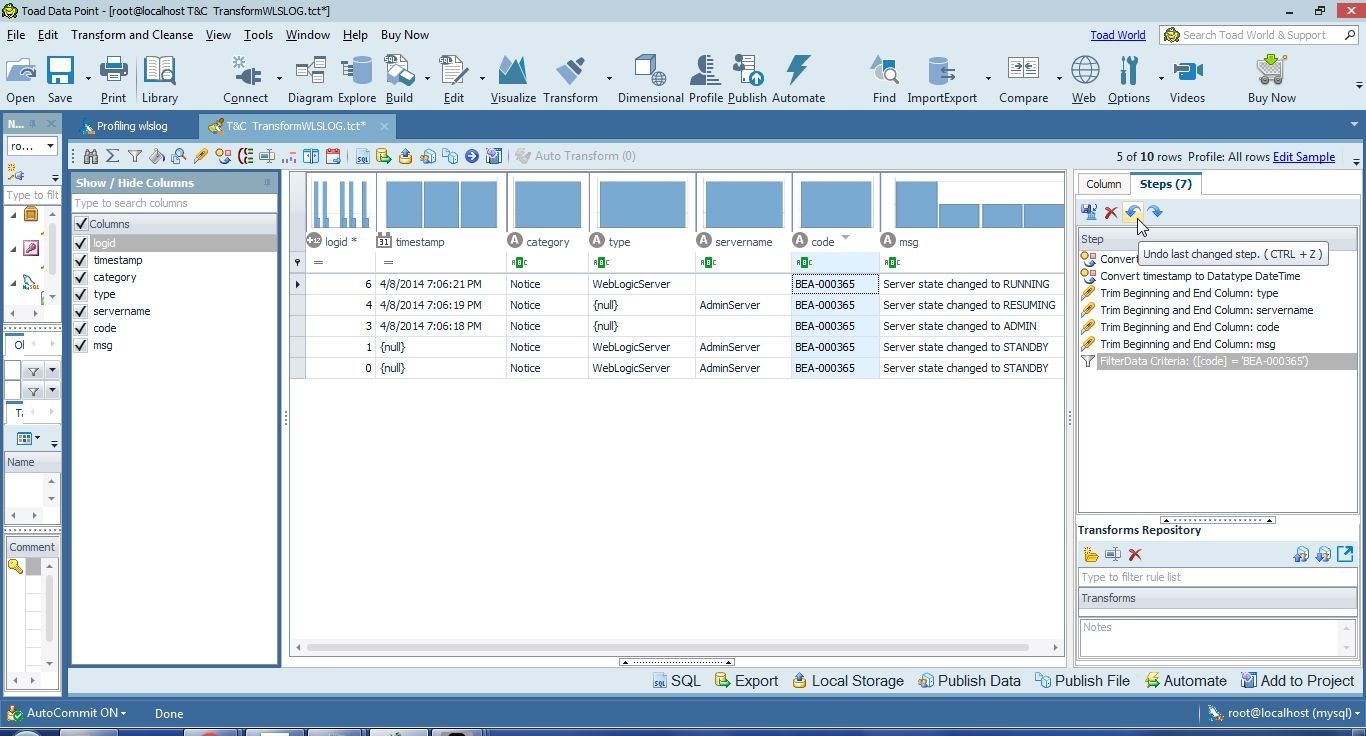
Figure 26. Undo last changed step
All the code column values get displayed. To reapply the FilterData step click on Redo last changed step as shown in Figure 27.
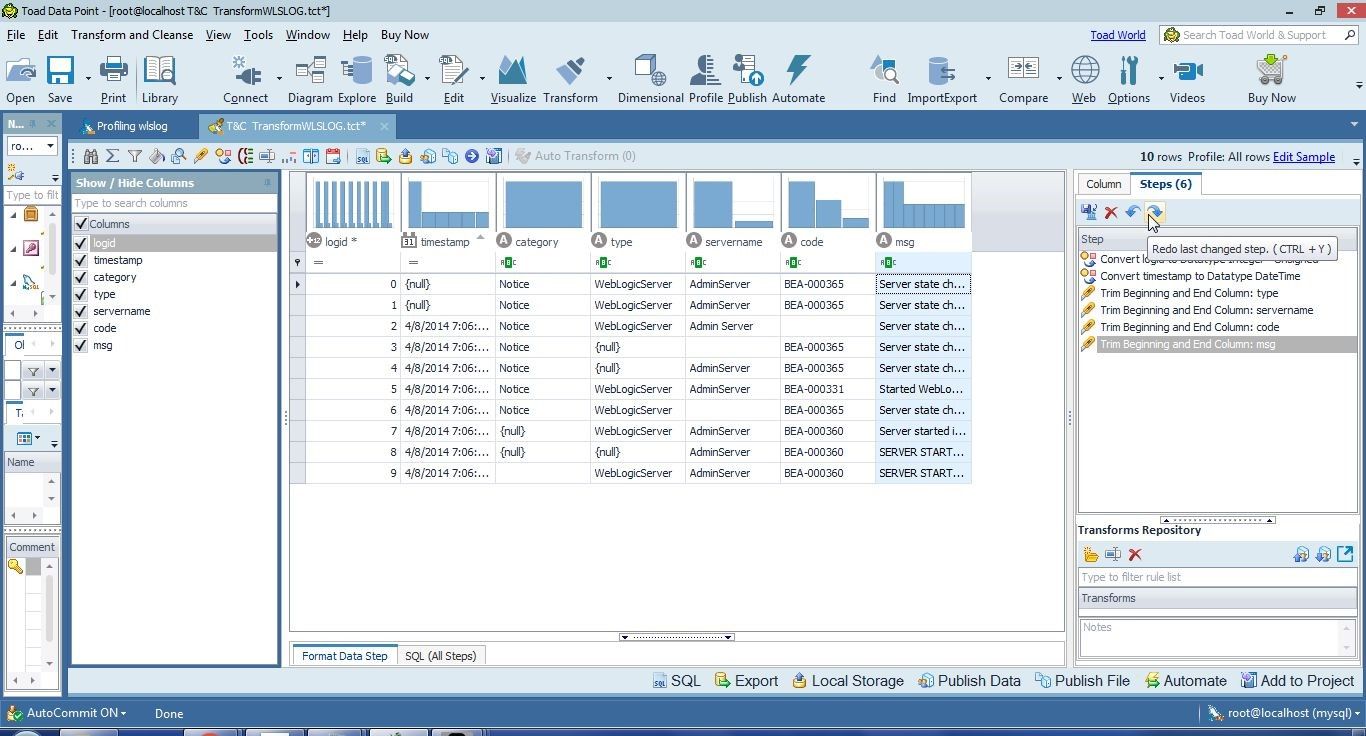
Figure 27. Redo last changed step
We do want to filter an erroneous row of data, the data with primary key logid as 0 as shown in Figure 28.
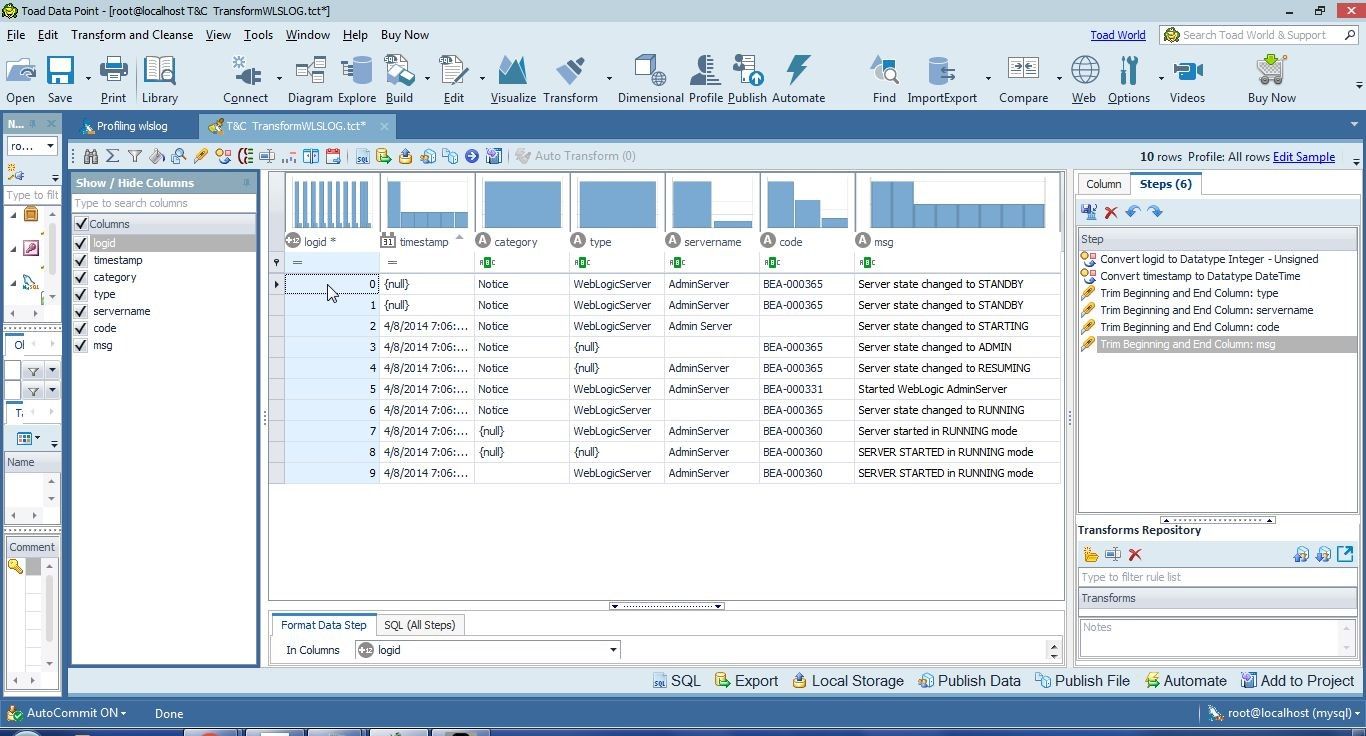
Figure 28. Logid 0
With the logid column selected, select Filter Data from the toolbar as shown in Figure 29. Alternatively, select Filter Data from the Transform and Cleanse drop-down or with a right-click in the T & C window.

Figure 29. Logid>Filter Data
The Filter Row Step window and tab gets displayed, as shown in Figure 30.
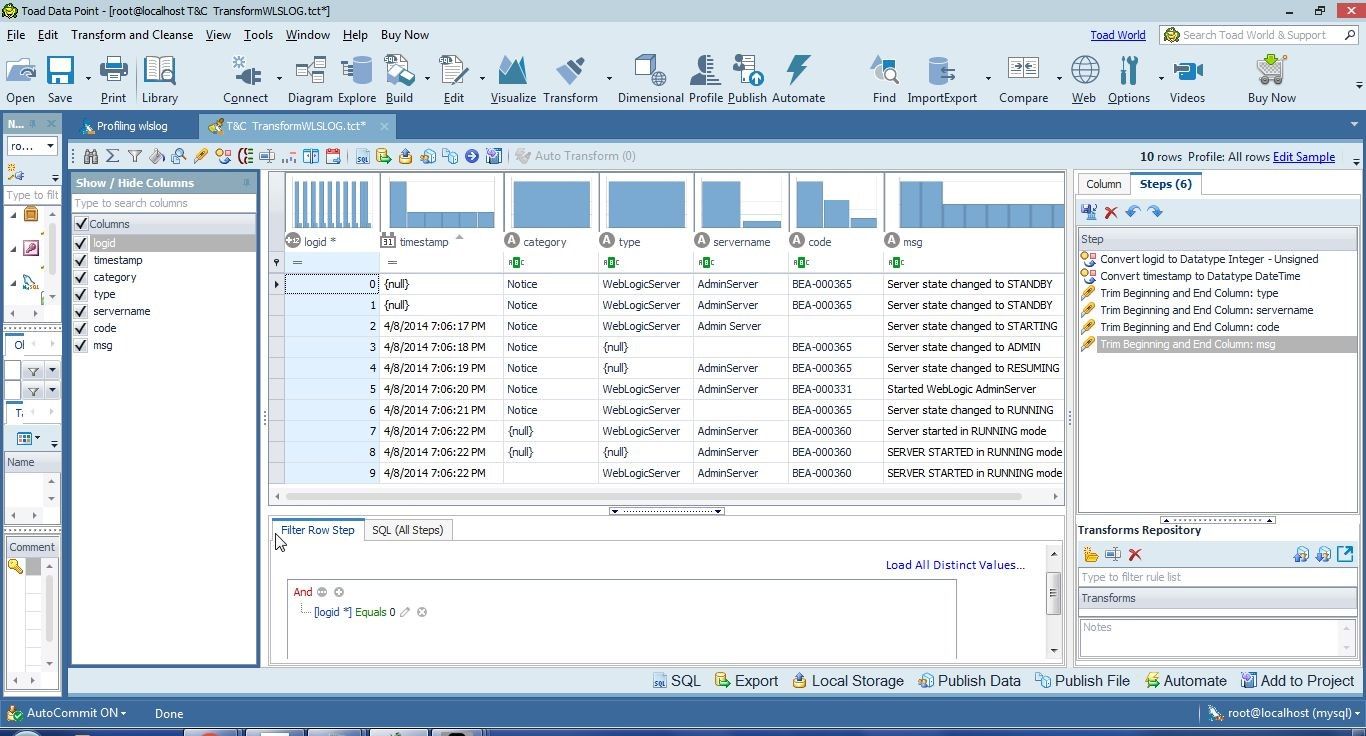
Figure 30. Filter Row Step
Click on the [logid *] Equals link as shown in Figure 31.

Figure 31. [logid *] Equals link
Select the option Is greater than or equal to as shown in Figure 32.

Figure 32. Selecting Is greater than or equal to
Click on the link for the value (0 by default) as shown in Figure 33 to set the value to compare with.

Figure 33. Selecting link for value to Compare With
Select value “1” from the drop-down as shown in Figure 34.

Figure 34. Selecting Value to compare with as 1
Click on Apply Rule as shown in Figure 35.
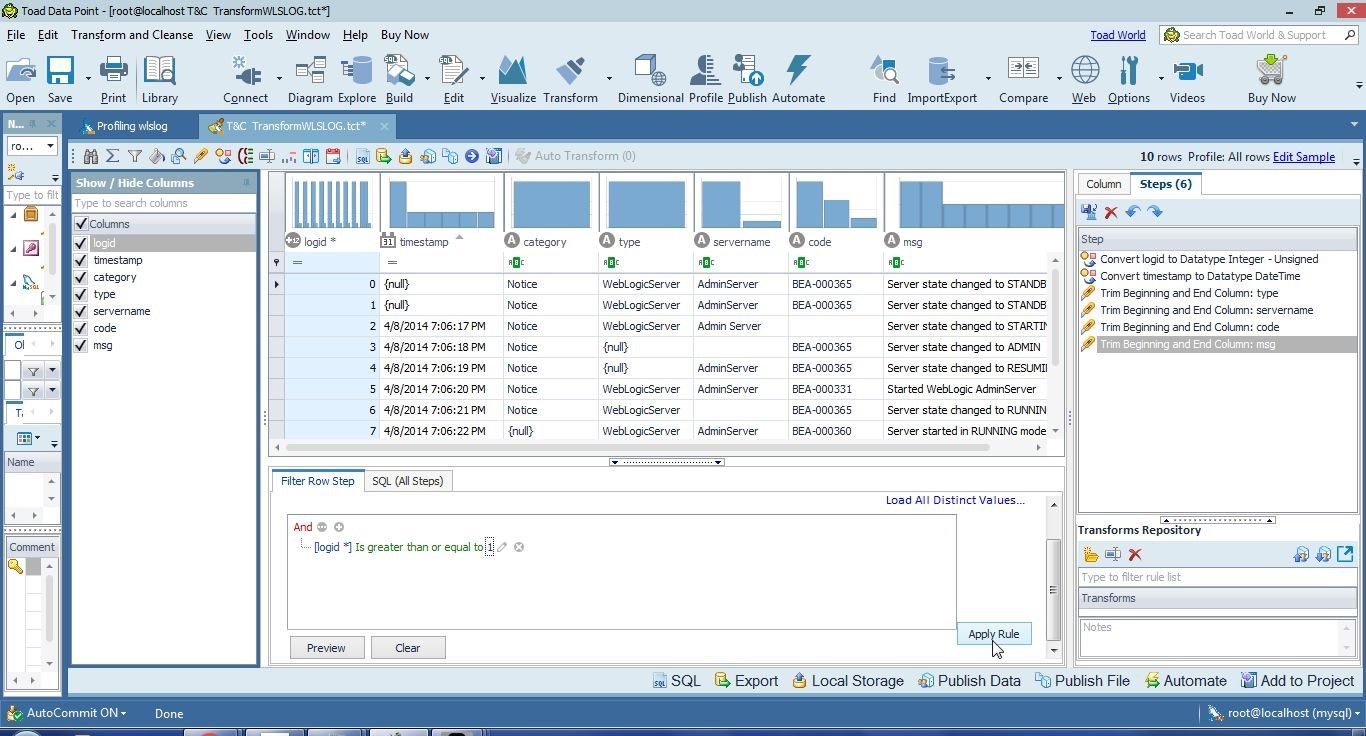
Figure 35. Apply Rule
The data with logid as 0 gets removed, as shown in Figure 36.
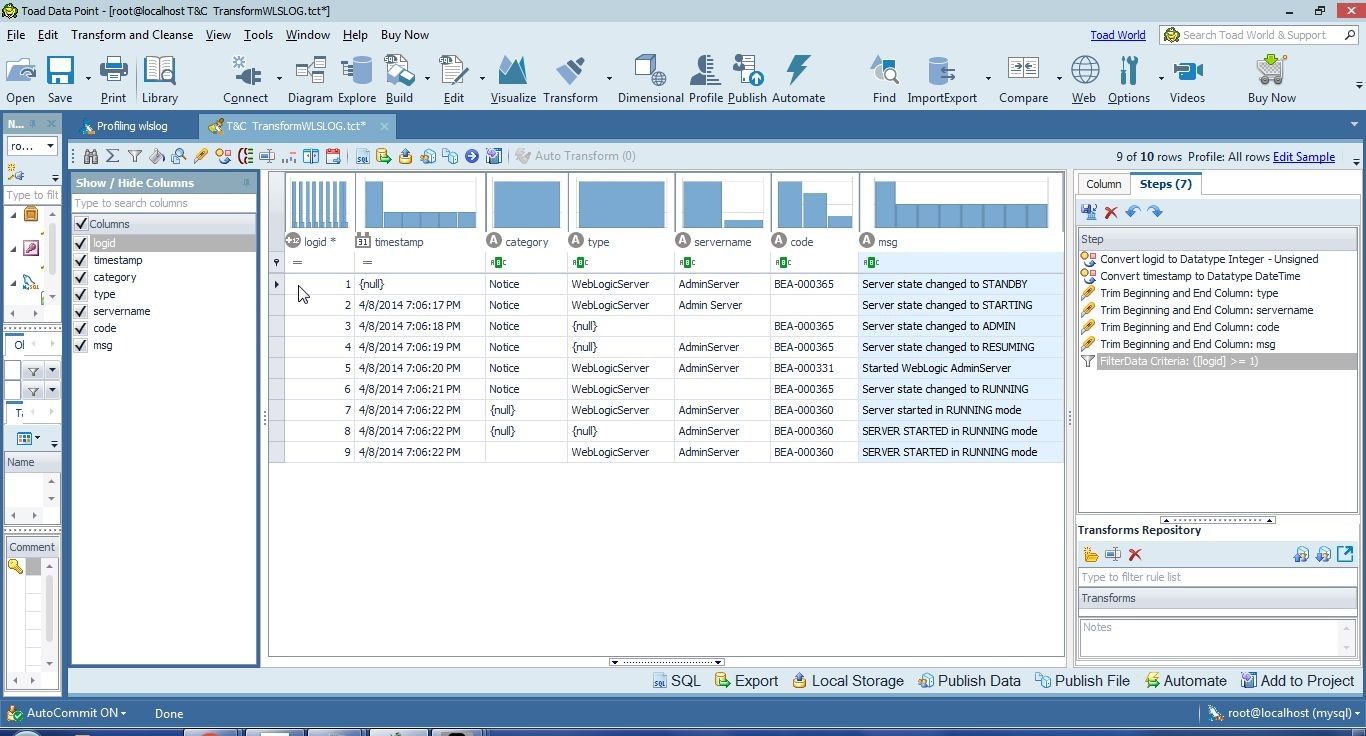
Figure 36. Data with logid 0 Row removed
Summary
In this article we extracted raw data to be transformed from the database and performed some transformations: auto transform to convert two of the data types to more appropriate data types, and filter data to remove an erroneous row of data. In the third article we shall perform some more transformations and export the transformed data to an Excel report.
Start the discussion at forums.toadworld.com