In this continuation article we shall connect with the ECS service using Toad for SQL Server. Previously, in thefirst article of this series on using Toad for SQL Server 6.8 with SQL Server 2017 with Amazon ECS on Fargate launch type, we discussed creating an ECS service using the Docker image for SQL Server 2017. SQL Server 2017 is supported on Linux and Windows OS. SQL Server 2017 also provides Docker images for both Linux and Windows.
This article has the following sections.
Creating a Connection
Creating a Table
Importing Table Data
Creating a Connection
To create a new connection select Connect>New Connection as shown in Figure 1.
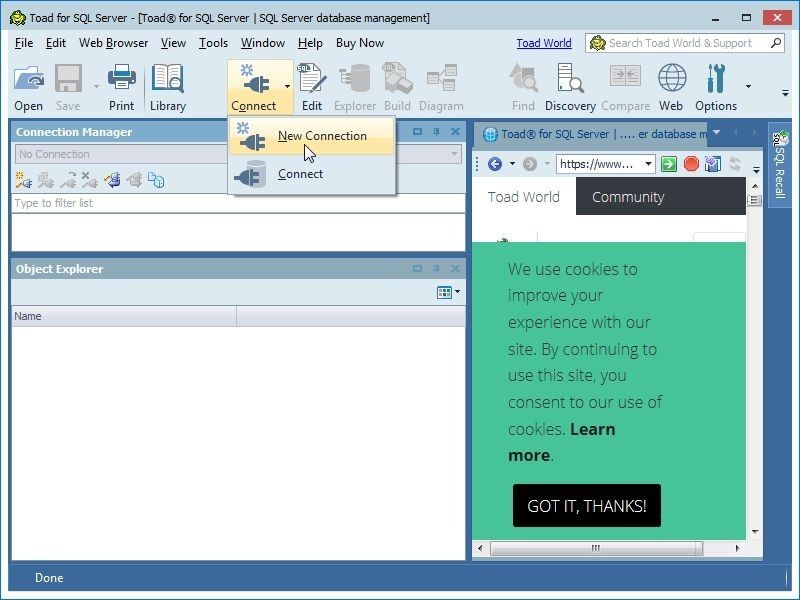
Figure 1. Connect>New Connection
The Create New Connection window gets displayed, as shown in Figure 2. With the Login tab selected specify Server name as the Public IP of the ECS Service instance, which is obtained as discussed in the first article. Select Authentication as SQL Server Authentication. Specify Login as SA and Password as the password configured in theSA_PASSWORD environment variable when creating the container definition for the SQL Server 2017 based ECS service. Next, we need to specify a database; the database name does not have to be known in advance. Click on the … button for the Database field to select a database.
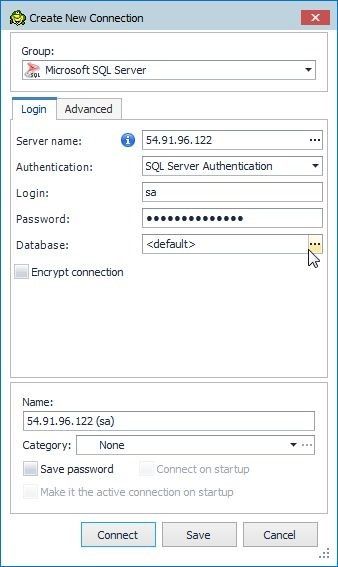
Figure 2. Create New Connection
Select a database (tempdb) from Browse Databases as shown in Figure 3.
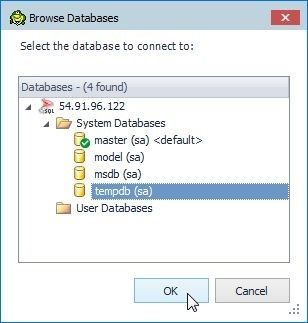
Figure 3. Selecting a Database
From the Category drop-down select the Test category as shown in Figure 4.
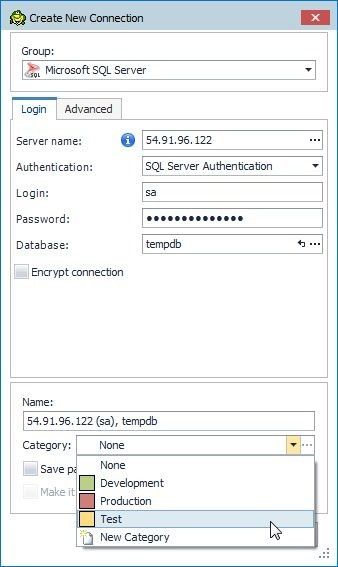
Figure 4. Selecting Category as Test
Click on Connect to create a connection as shown in Figure 5.
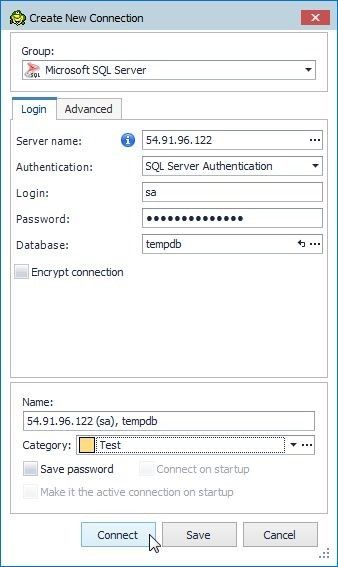
Figure 5. Create New Connection>Connect
A new connection gets created and gets added to the Connection Navigator, as shown in Figure 6.
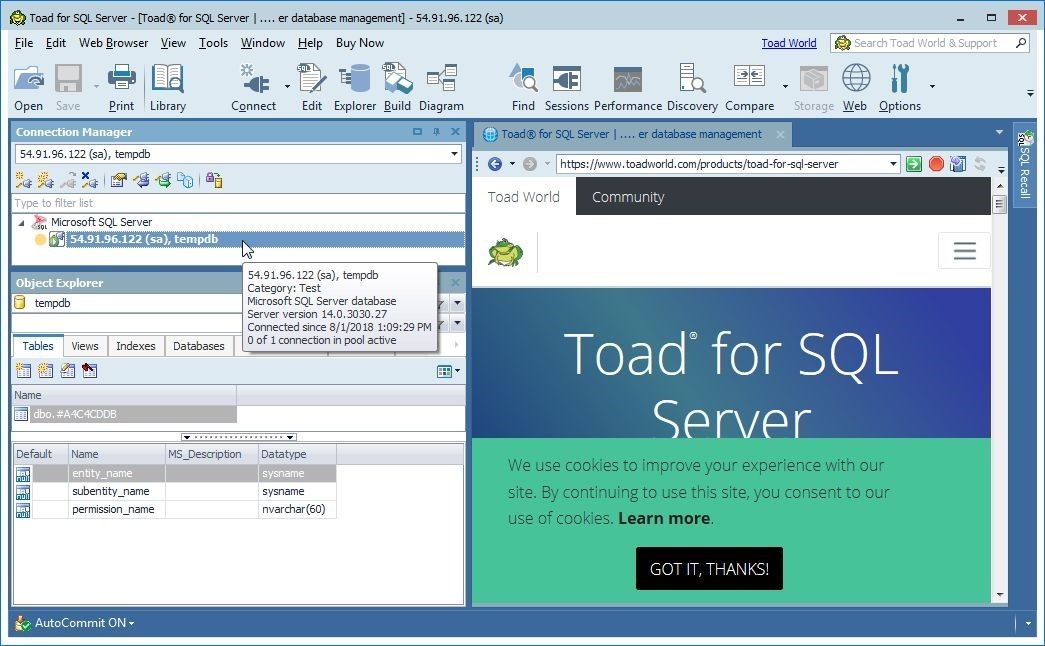
Figure 6. New Connection Created
Creating a Table
In this section we shall create a database table (wlslog) for a WebLogic server log with columns logid, category, type, servername, code, and msg. The database table is an example table; any table may be created using the same procedure. To create a new table click on Create a table in Object Explorer as shown in Figure 7.
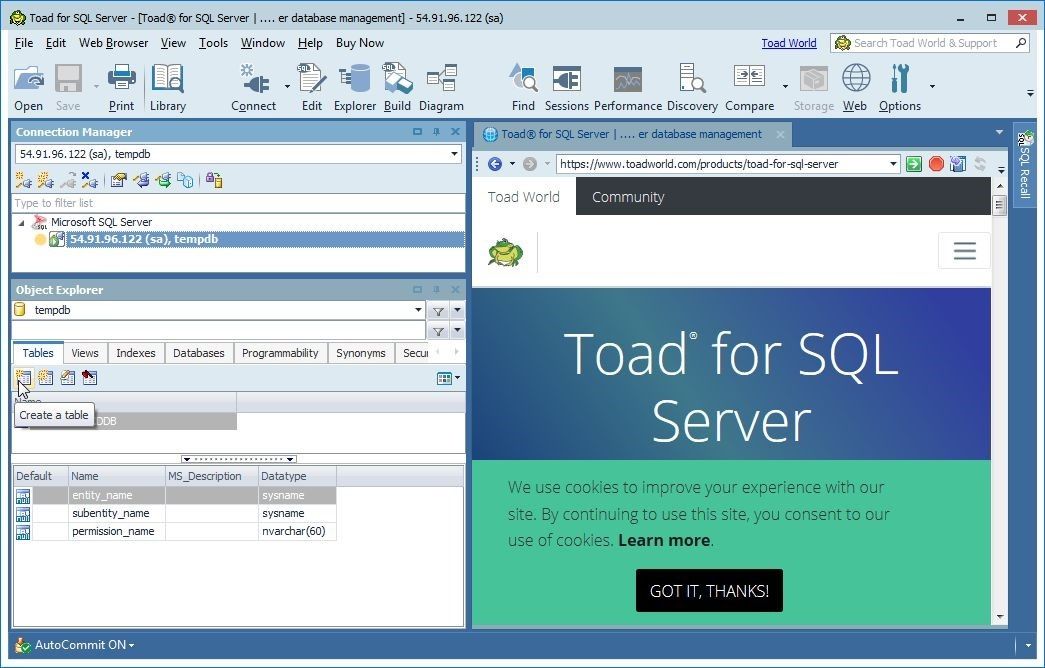
Figure 7. Object Explorer>Create a table
The Create Table wizard gets started, as shown in Figure 8. Specify table name as wlslog in the Name field.

Figure 8. Create Table Wizard
Modify the default column to logid of type int and set the column as a primary key column by clicking in the PK column of the wizard. Select the checkbox in the Not Null column of the wizard. Click on Add to add each of the other columns as shown in Figure 9.
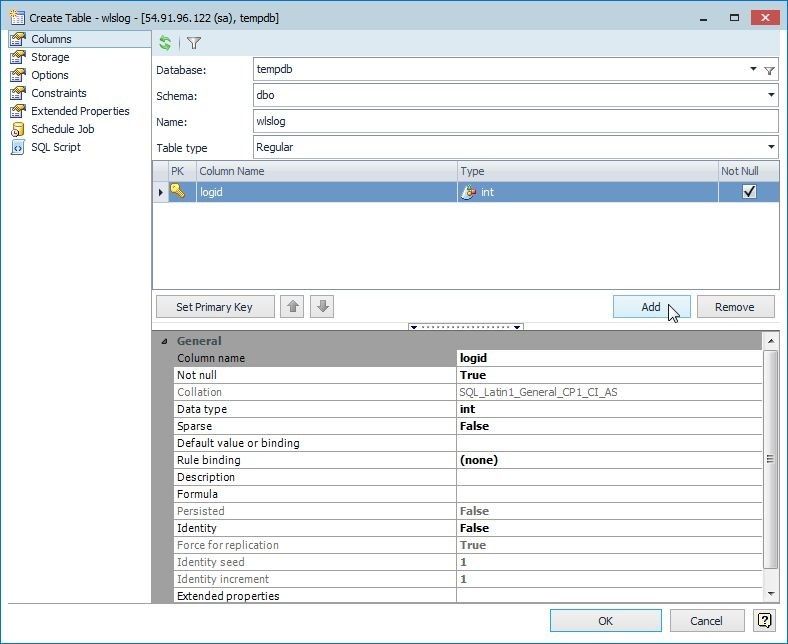
Figure 9. Adding PK Column
After adding all the columns click on OK as shown in Figure 10.
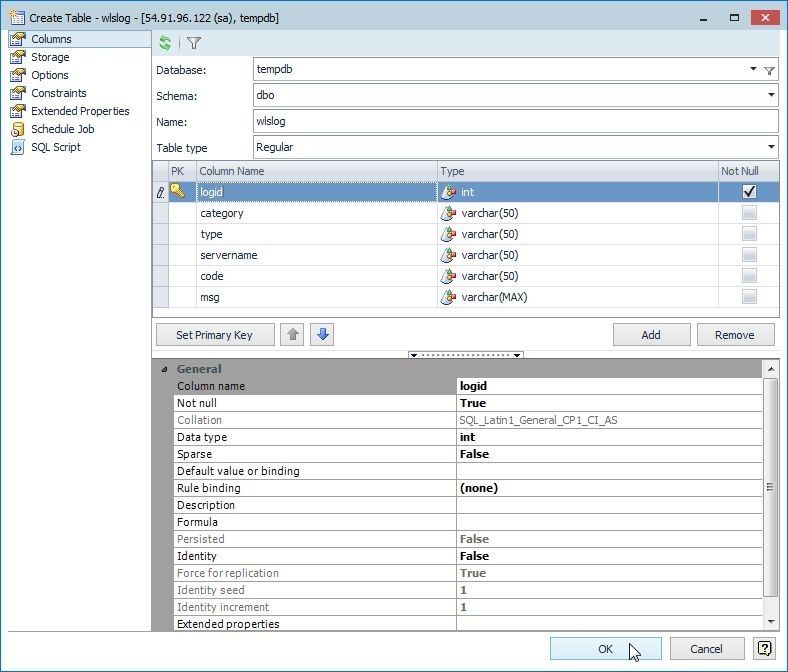
Figure 10. Create Table>OK
A Toad for SQL Server dialog indicates that the table has been successfully created, as shown in Figure 11.
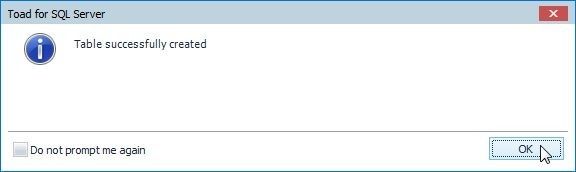
Figure 11. Table successfully created
The new table gets listed in the Object Explorer, as shown in Figure 12.
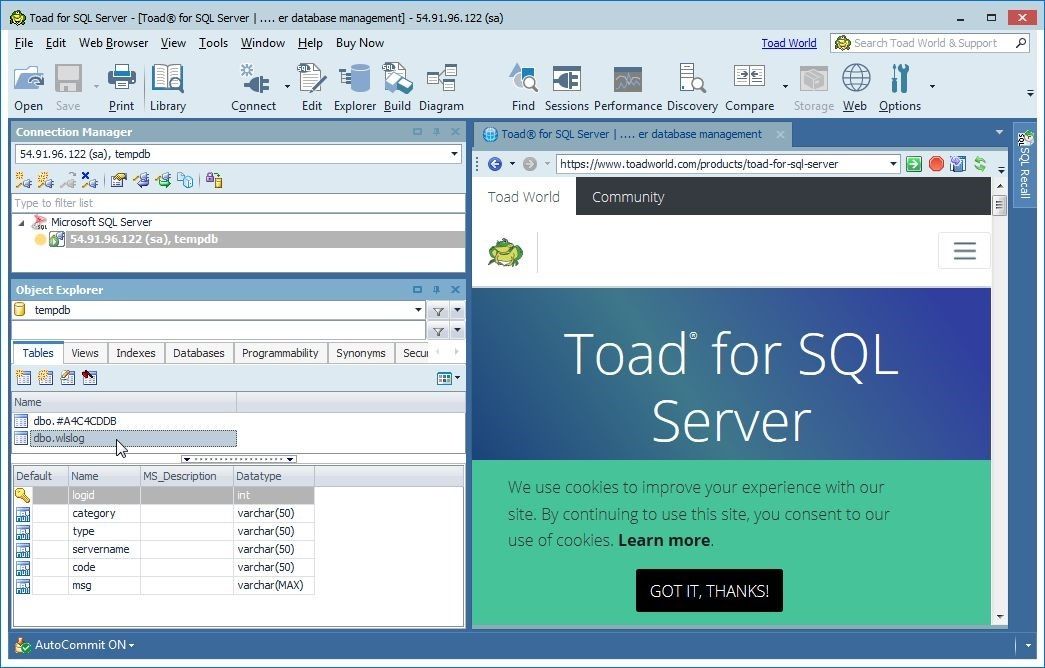
Figure 12. Table added to Object Explorer
Right-click on the table in Object Explorer to display the several options available for the new table as shown in Figure 13.
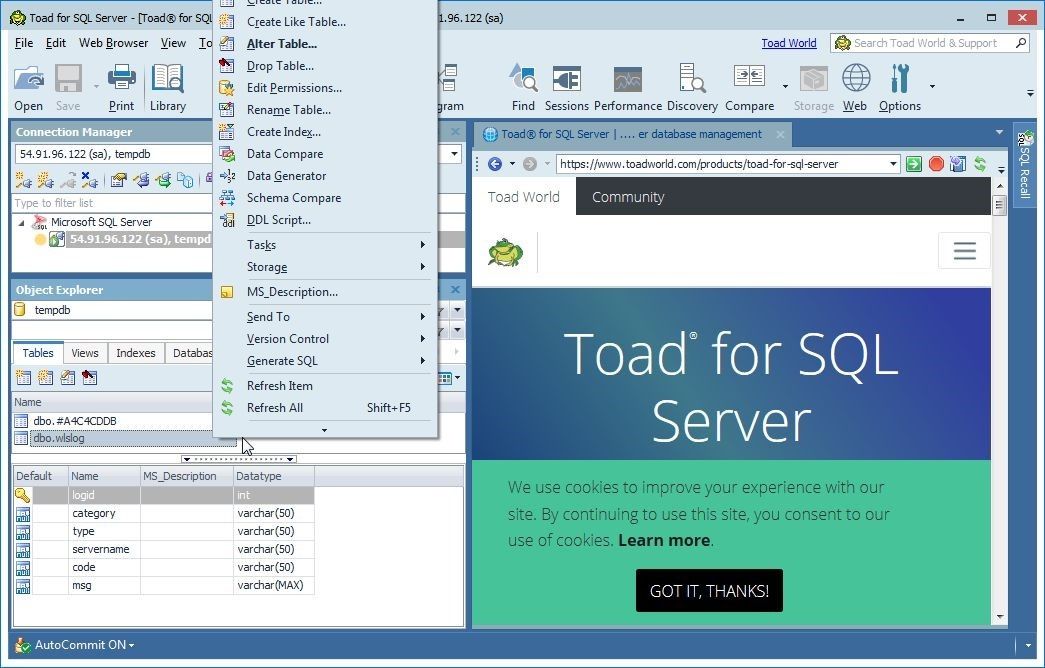
Figure 13. Table Options
Importing Table Data
In this section we shall add data to the wlslog table using the Import wizard. Create a data file wlslog.csv and save the following listing in which the first row is for column headers to the file.
logid,category,type,servername,code,msg
1,Notice,WebLogicServer,AdminServer,BEA-000365,Server state changed to STANDBY
2,Notice,WebLogicServer,AdminServer,BEA-000365,Server state changed to STARTING
3,Notice,WebLogicServer,AdminServer,BEA-000365,Server state changed to ADMIN
4,Notice,WebLogicServer,AdminServer,BEA-000365,Server state changed to RESUMING
5,Notice,WebLogicServer,AdminServer,BEA-000361,Started WebLogic AdminServer
6,Notice,WebLogicServer,AdminServer,BEA-000365,Server state changed to RUNNING
7,Notice,WebLogicServer,AdminServer,BEA-000360,Server started in RUNNING mode
Next, launch the Explorer from the toolbar as shown in Figure 14.
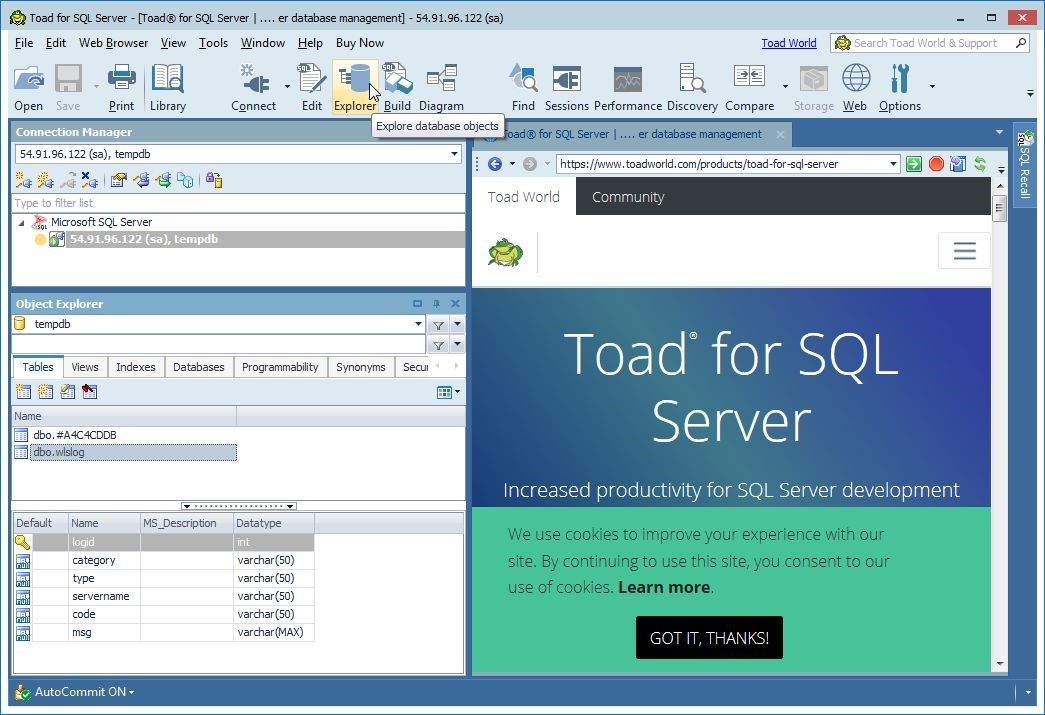
Figure 14. Explorer
Select the dbo.wlslog table in the Explorer as shown in Figure 15.
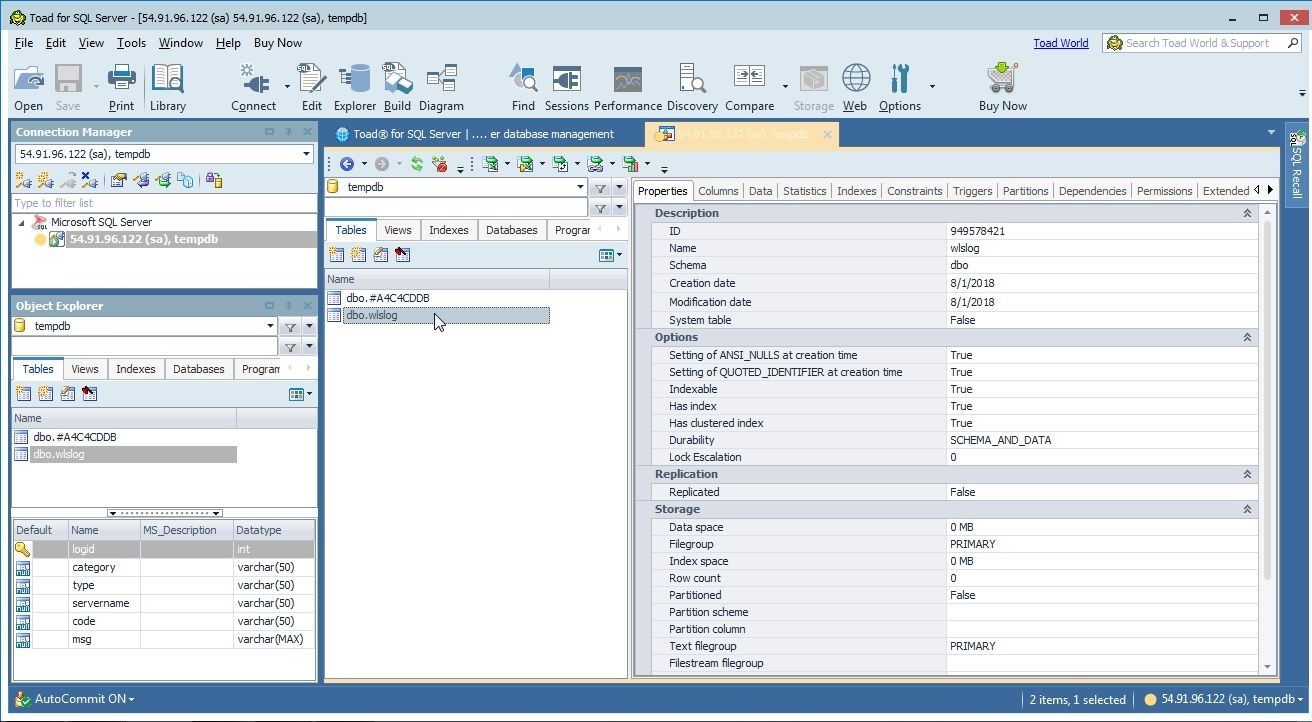
Figure 15. Selecting Table in Explorer
Select the Data tab. Just the column names are listed, as a new table is empty, as shown in Figure 16.
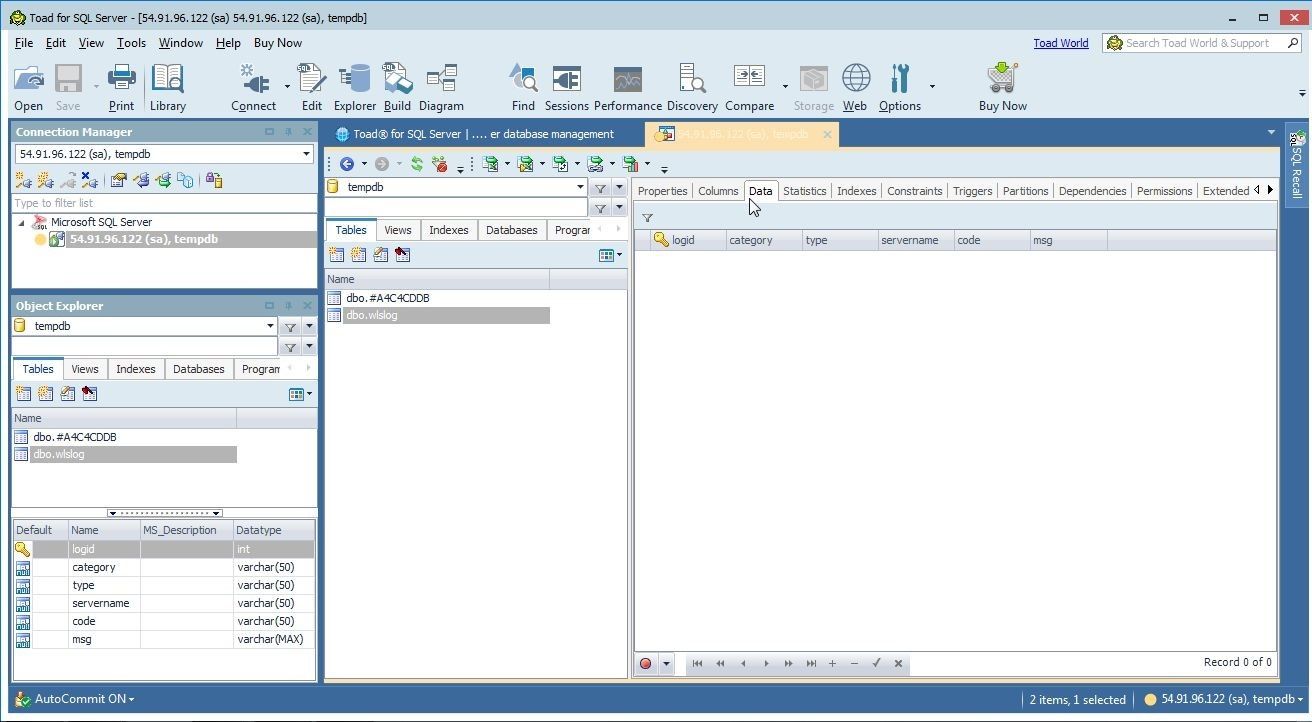
Figure 16. Data Tab
Select Tools>Import>Import Wizard to launch the import wizard as shown in Figure 17.
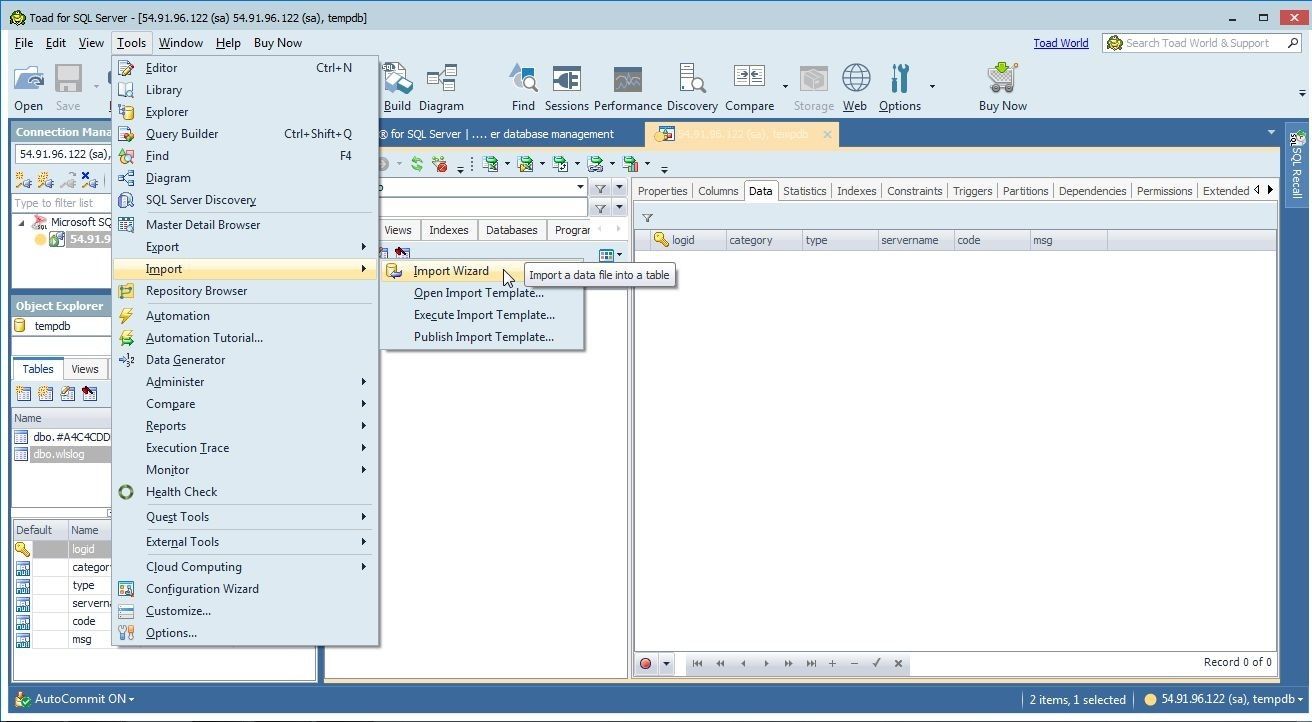
Figure 17. Tools>Import>Import Wizard
The Import Wizard gets launched, as shown in Figure 18. Click on Next in the Welcome screen.
Figure 18. Import Wizard Welcome Screen
Next, the Add Import Source page is displayed, as shown in Figure 19. Click on Add File…
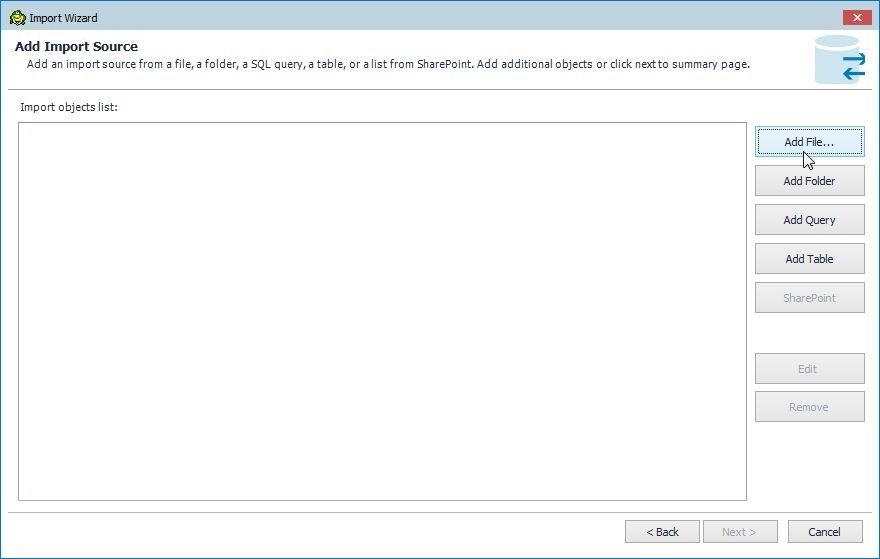
Figure 19. Add Import Source>Add File
Select the wlslog.csv file and click on Open. The File Preview displays a preview of the data to be imported, as shown in Figure 20. Keeping the default settings, click on Next.
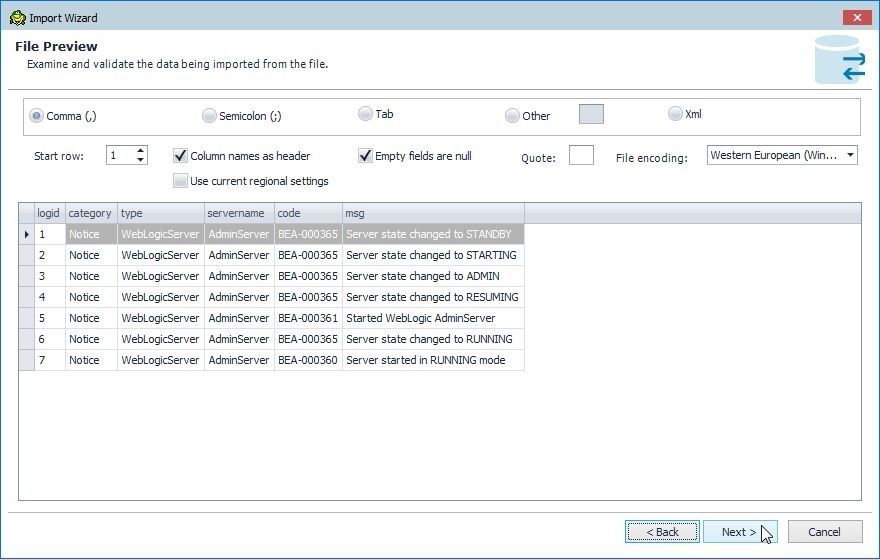
Figure 20. File Preview
Next, define or select the columns to be included in the import. The columns are listed with Sample Data, as shown in Figure 21. A column may be removed with Remove and added with Add. To select all the columns keep the default columns and click on Next.
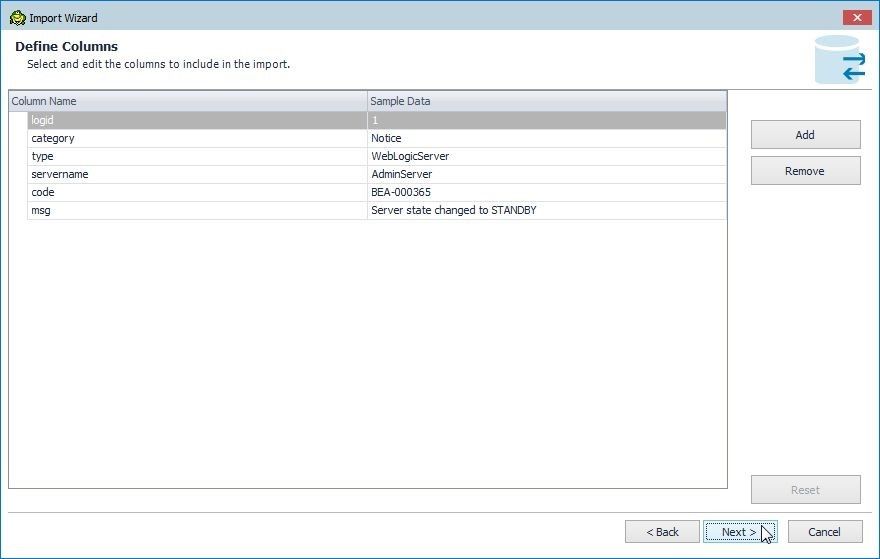
Figure 21. Define Columns
Next, select Target database as dbo.wlslog as shown in Figure 22.
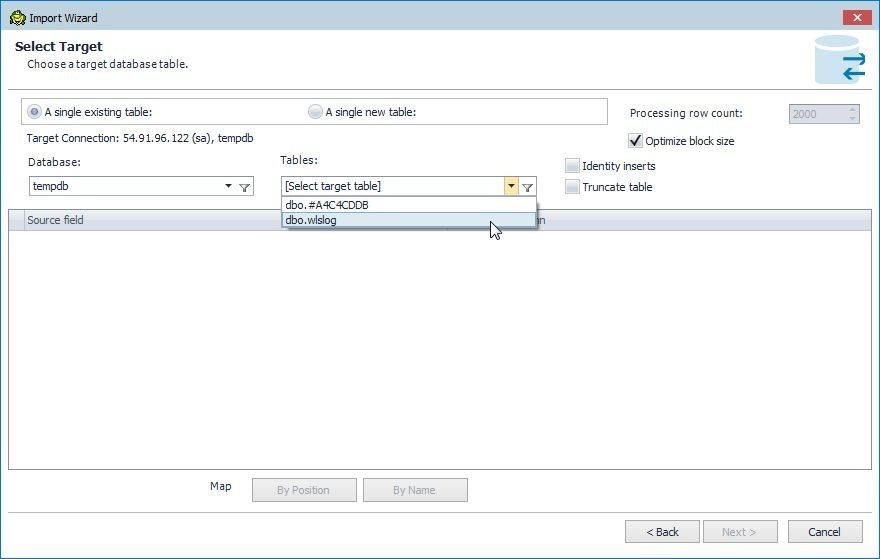
Figure 22. Selecting Target Database
The Source field to Target table column mapping gets displayed, as shown in Figure 23. Click on Next.
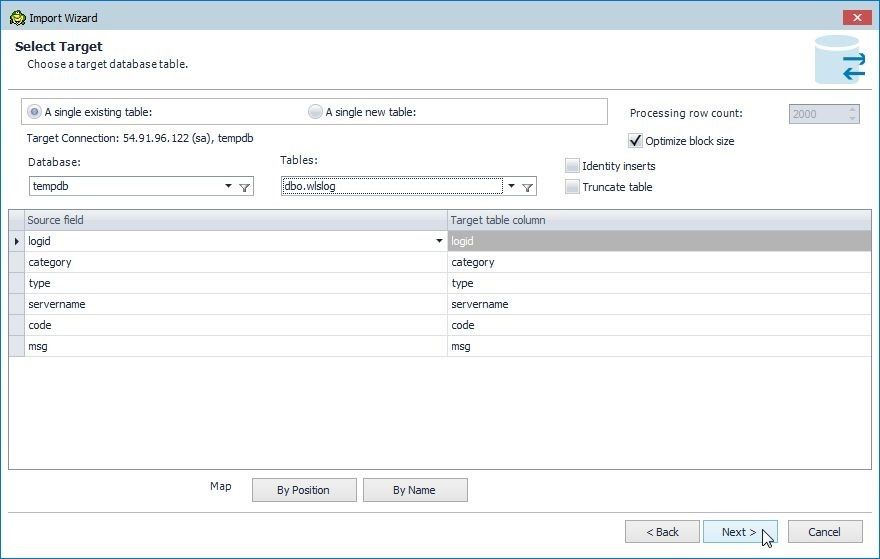
Figure 23. Source Field to Target Table Column Mapping
The db.wlslog file gets added as an import source, as shown in Figure 24. Click on Next.

Figure 24. Source file added
An option is provided to save settings as template or start import, as shown in Figure 25. Keep the default setting of Import Data Now and click on Finish.
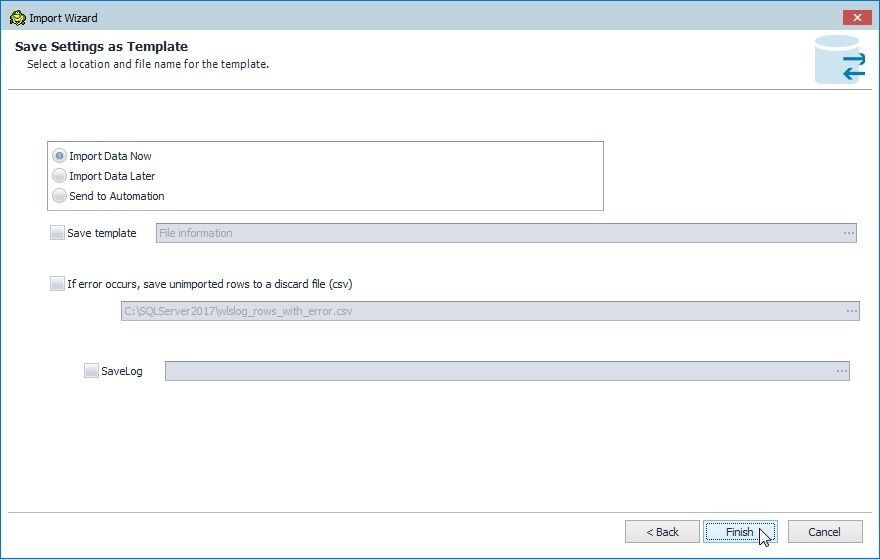
Figure 25. Starting Data Import
The Import Finished dialog indicates that 7 rows have been imported, as shown in Figure 26. Click on OK.

Figure 26. Import Finished
Click on Refresh in the Explorer with the Data tab selected as shown in Figure 27. The data imported gets displayed.
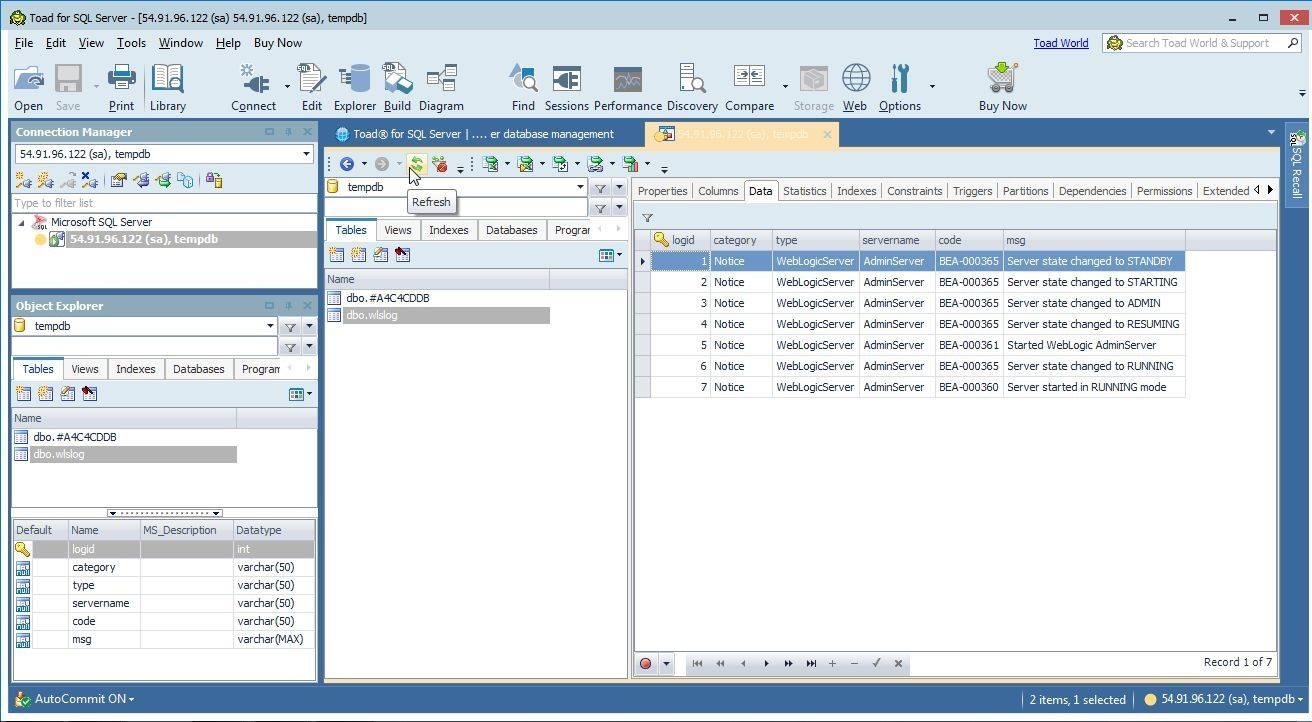
Figure 27. Data Imported
Conclusion
In two articles we have discussed using Toad for SQL Server 6.8 with SQL Server 2017 on AWS ECS with Fargate launch type. The benefit of using AWS ECS is a hosted environment for Docker. The benefit of using Toad for SQL Server is an integrated development environment for connecting to and using SQL Server 2017.
Try Toad for SQL Server nowAre you just starting your journey to evaluate if you should purchase the Toad for SQL Server management tool? If you’re not quite ready to buy, we’re so sure you’ll love Toad for SQL Server, that we’re offering a Toad for SQL Server free 30-day trial. Already in a trial? Buy it now or contact sales. |
Not ready for a free trial? Learn more.
Use the links below to learn how you can use the Toad for SQL Server management tool to resolve issues, manage change and promote the highest levels of code quality, performance and scalability.
Product page: Toad for SQL Server
Tech brief: Solving the SQL Tuning Problem: Secrets of Quest SQL Optimizer
Case study: County enhances critical services for citizens with Toad®
Related blog posts:
Read more Toad World® blog posts on Toad for SQL Server.
Side note: ApexSQL adds to Quest SQL solutions
As an aside, since you’re managing SQL Server, did you know that ApexSQL is now a part of Quest? ApexSQL joined Quest this summer. We’re excited to nod our heads that yes, the ApexSQL portfolio enhances Quest’s already robust set of SQL Server management tools. Make sure to visit ApexSQL.
Got questions?
If you have any questions, please post questions to the Toad for SQL Server forum on Toad World.
Start the discussion at forums.toadworld.com