In two articles we shall use Toad for SQL Server with SQL Server 2017 Linux with Amazon ECS on Fargate. SQL Server 2017 is supported on Linux, which is a first, because previously a SQL Server Linux distribution was not available. Another first is that SQL Server 2017 Linux distribution (and Windows distribution) is supported on Docker; a Docker image is available. Besides the features that are also supported by some of the earlier editions, SQL Server 2017 provides additional performance features, such as Adaptive Query Processing. SQL Server 2017 is a Stretch database, a feature that was introduced in SQL Server 2016. A Stretch database migrates “cold data” to Azure cloud. SQL Server 2017 is the only edition that supports graph data processing.
Amazon ECS is a managed service for containerized applications and Fargate is a new launch type for ECS providing a serverless alternative to the EC2 launch type. The two articles have the following sections.
Setting the Environment
Creating a Task Definition
Creating a Cluster
Creating a Service
Modifying Security Group Inbound Rules
Obtaining Connection Parameters
Creating a Connection
Creating a Table
Importing Table Data
Querying Table
Exporting Result Set
Disconnecting and Removing a Connection
Deleting a Cluster
Setting the Environment
Download and install Toad for SQL Server. Create an AWS account. Create a VPC and two Subnets for the AWS ECS. The procedure to create an ECS service for SQL Server involves the following.
- Create a task definition. A task definition is a definition or template for a container and task and includes configuration information for Docker image, port/s, memory, and CPU resources and environment variables, in addition to other settings.
- Create a cluster. Or, use an existing cluster.
- Create an ECS service that runs one or more tasks.
Next, we shall discuss each of these. But first log-in to AWS and navigate to the ECS console at https://console.aws.amazon.com/ecs/home.
Creating a Task Definition
Select Task Definitions in the margin and click on Create New Task Definition as shown in Figure 1.
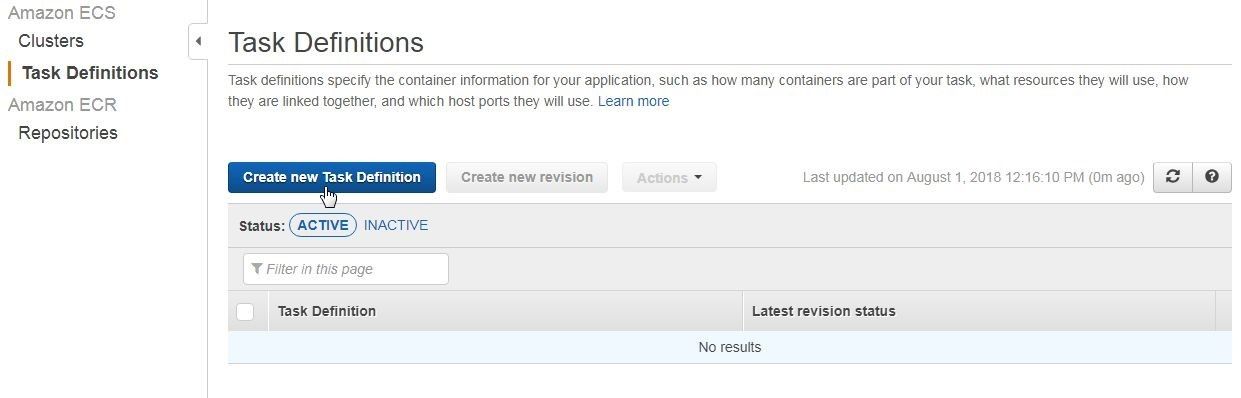
Figure 1. Create New Task Definition
In the Create new Task Definition screen select launch type compatibility as Fargate as shown in Figure 2.
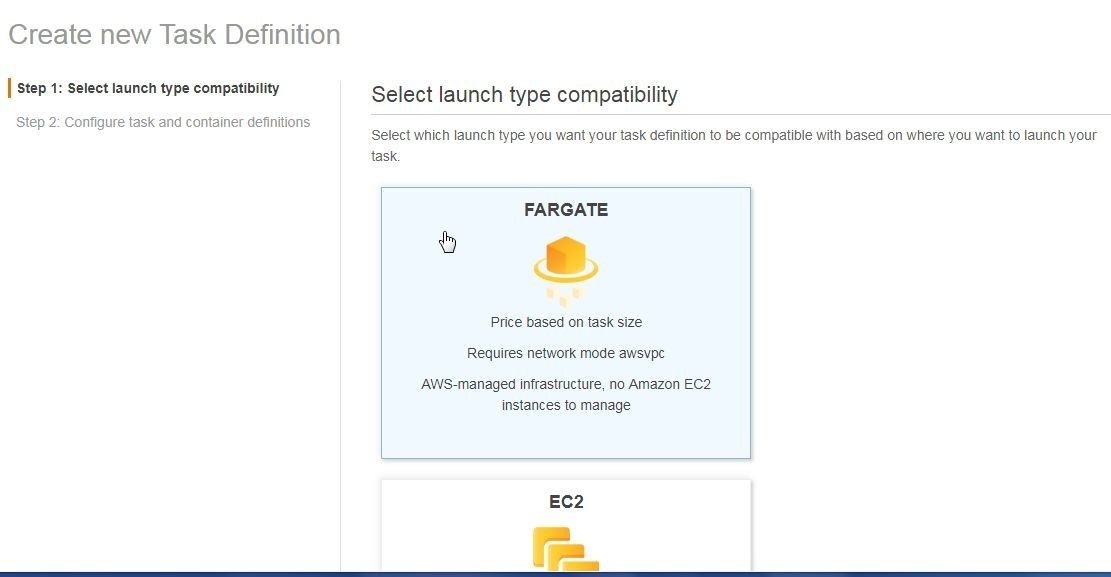
Figure 2. Selecting Fargate Launch type Compatibility
Scroll and click on Next step. In Configure task and container definitions (Figure 3) specify a Task Definition Name (sqlserver-task-definition), and select Task Role, an IAM role, as ecsTaskExecutionRole. A task role is used in making API calls to other AWS services. Selecting a task role is optional. Requires Compatibility is hard-coded as FARGATE and cannot be changed. Network Mode is selected asawsvpc and is the only one supported by Fargate.
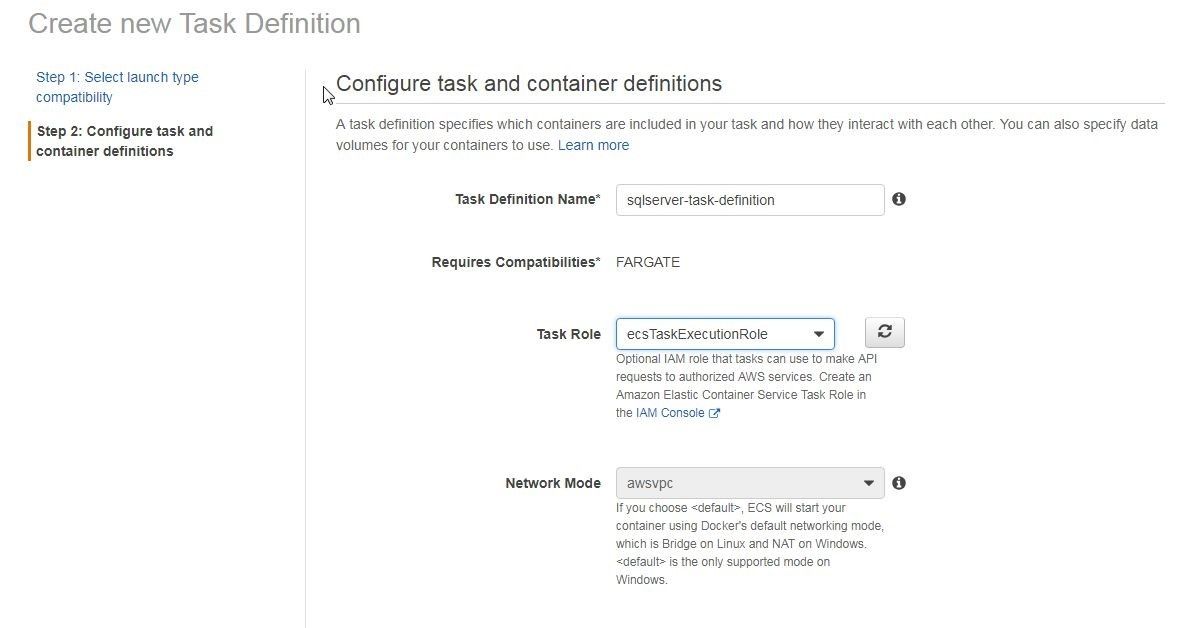
Figure 3. Configure task and container definitions
Keep the default setting for Task execution role as ecsTaskExecutionRole, which is required in creating a service for tasks such as downloading Docker image and sending logs to CloudWatch, as shown in Figure 4.

Figure 4. Setting Task Execution Role
Set a Task size, which comprises the Task memory and Task CPU. While optional for the EC2 launch type, task size is required with the Fargate launch type. To avoid getting an OutOfMemory error which could occur if not enough memory is available for running a task or for downloading a Docker image, select sufficient memory. Task memory must be in a certain range for a selected Task CPU and vice versa. Select Task memory as 8GB and Task CPU as 2 vCPU as shown in Figure 5.
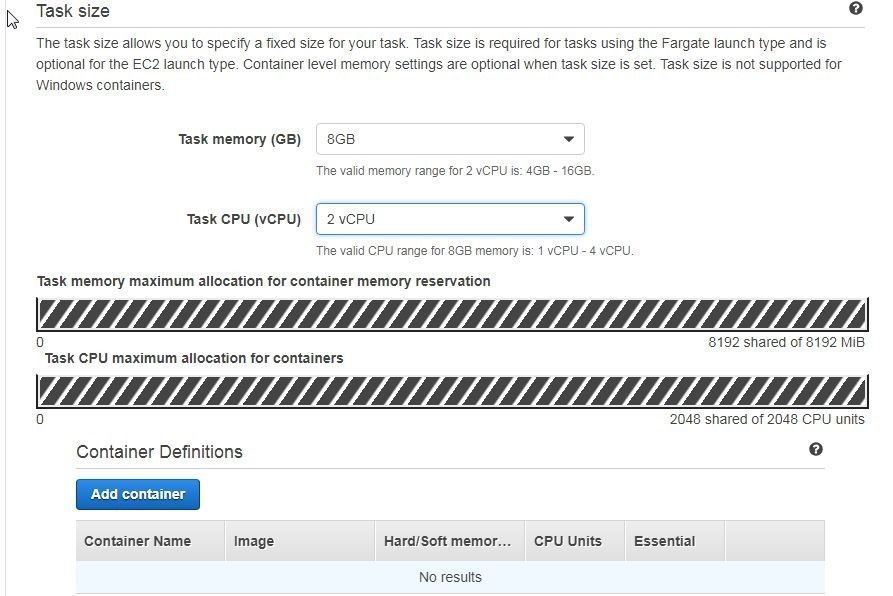
Figure 5. Setting Task Size
Next, click on Add container to add a container definition as shown in Figure 6.
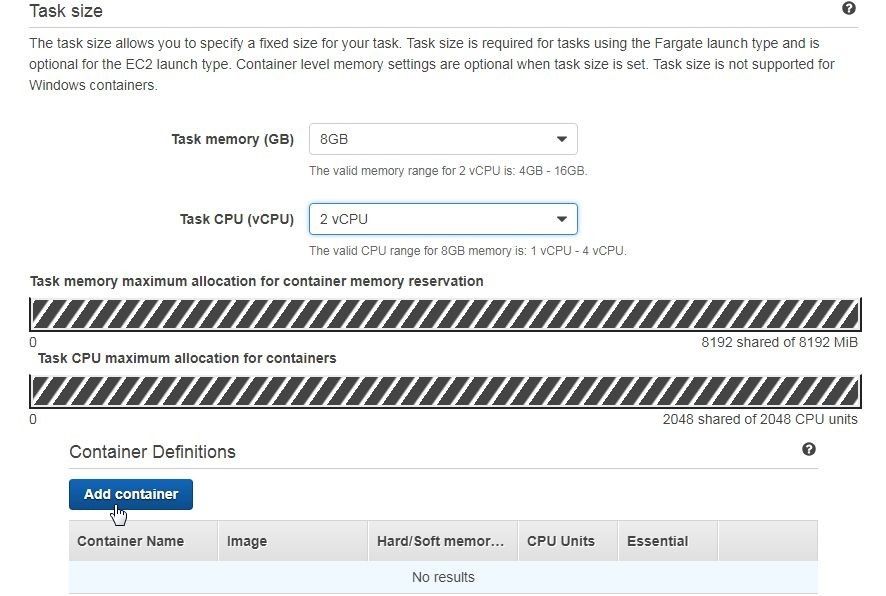
Figure 6. Add container
In the Add container window specify a Container name (sqlserver) and specify Docker Image as microsoft/mssql-server-linux:2017-latest as shown in Figure 7. Set a Soft Memory for memory as 4096 MB. Earlier the task limit for memory was set (8GB). The container memory limit setting must be well below the task memory limit if a task consists of multiple containers. Regardless of the number of container definitions in a task definition, the total of memory limits for container definitions must not exceed the task memory limit.
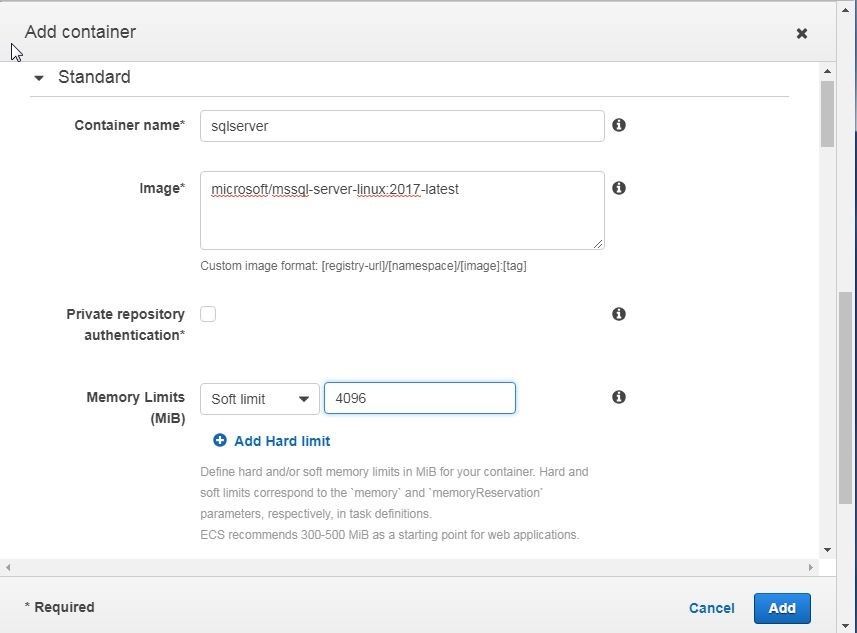
Figure 7. Add Container
Scroll on Add container and set Port mappings as 1433 as shown in Figure 8. Host port mappings cannot be set with Fargate launch type as the awsvpc network mode sets the host port mapping as the same as the container port and the setting is non-modifiable.
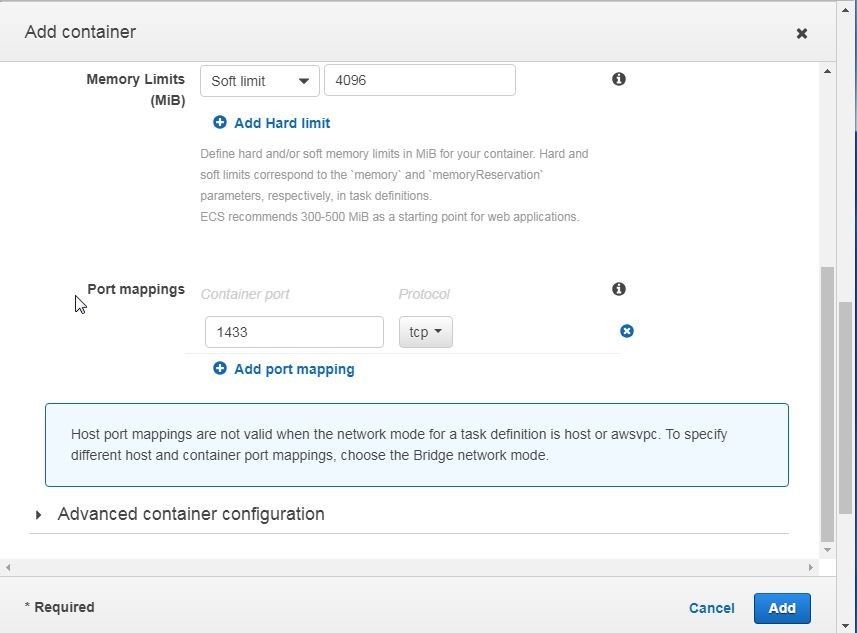
Figure 8. Port mappings
Click on Advanced container configuration to set environment variables for the Docker image. The environment variables are listed in Table 1 .
Table 1. Environment Variables
|
Environment Variable |
Description |
Value Used |
|
ACCEPT_EULA |
Confirms acceptance of end-user licensing agreement.
|
Y |
|
SA_PASSWORD |
Password for SA user. By default, the password must be at least 8 characters long and contain characters from three of the following four sets: Uppercase letters, Lowercase letters, Base 10 digits, and Symbols.
|
SQLServer_2017 |
|
MSSQL_PID |
Product ID or Edition. Acceptable values are Developer, Express, Standard, Enterprise, and EnterpriseCore. |
Express |
The environment variables are set in the Environment section, as shown in Figure 9. The Essential checkbox must be selected. A container marked as Essential is essential for the running of a task, and if the container fails, the task fails. Being the only container in the task, the container must be set as Essential. Click on Add to add the container.
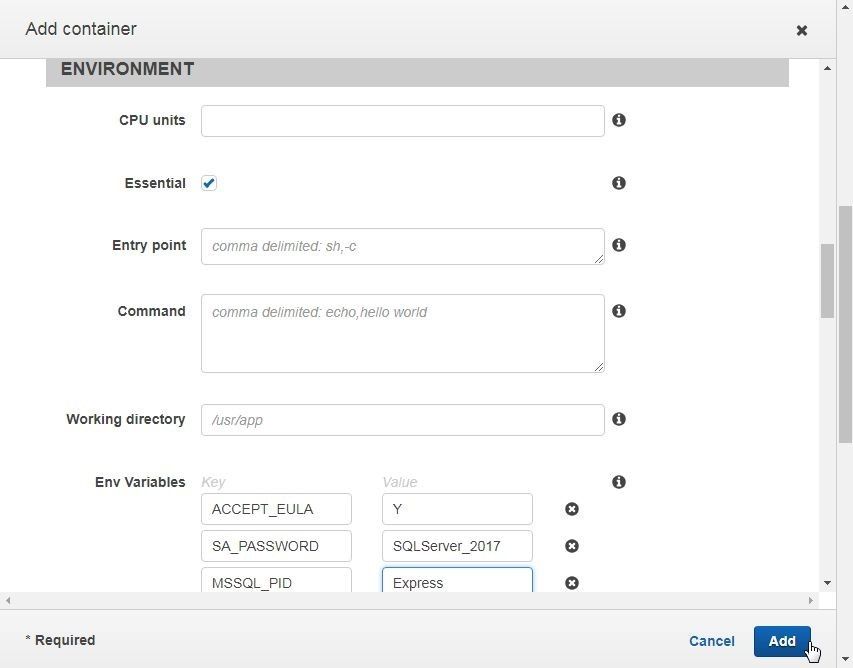
Figure 9. Setting Environment
A new task definition gets added, as shown in Figure 10.
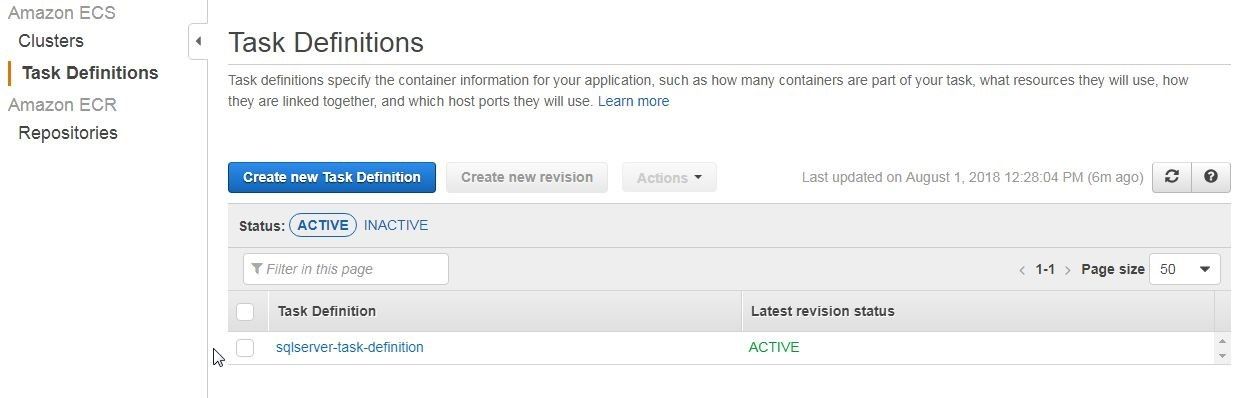
Figure 10. Task Definition
Click on the task definition link to list its detail, including the container definition, as shown in Figure 11. As discussed before, Host Port is same as Container Port in Port Mappings.
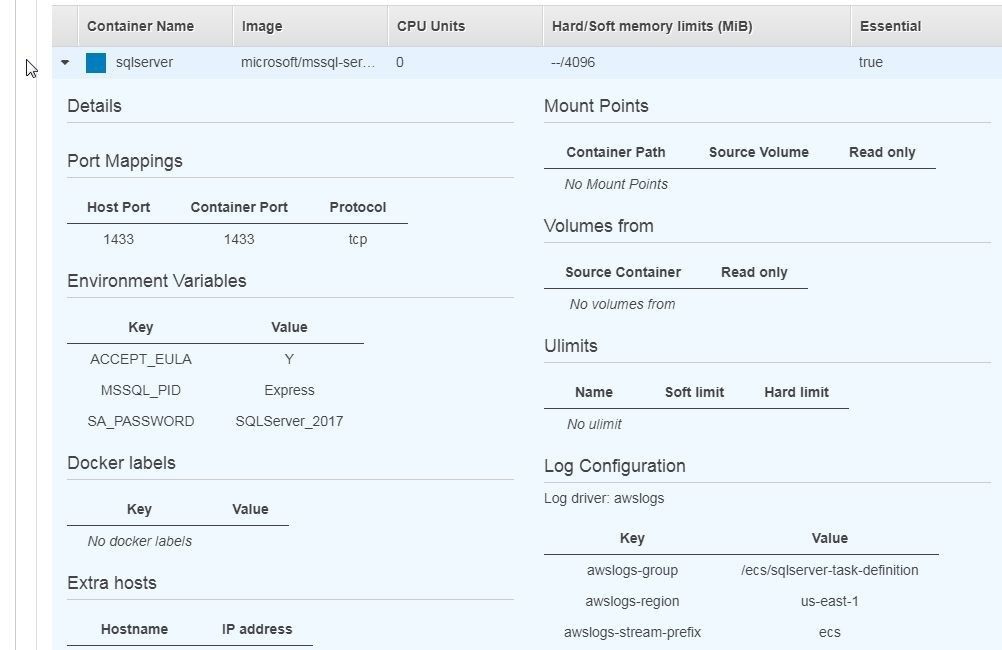
Figure 11. Task Definition Detail>Container Definition
Creating a Cluster
Creating a cluster is optional and the default cluster could be used. We shall create a new cluster especially for the SQL Server service. Select Clusters in the navigation margin. Click on Create Cluster to create a new cluster as shown in Figure 12.
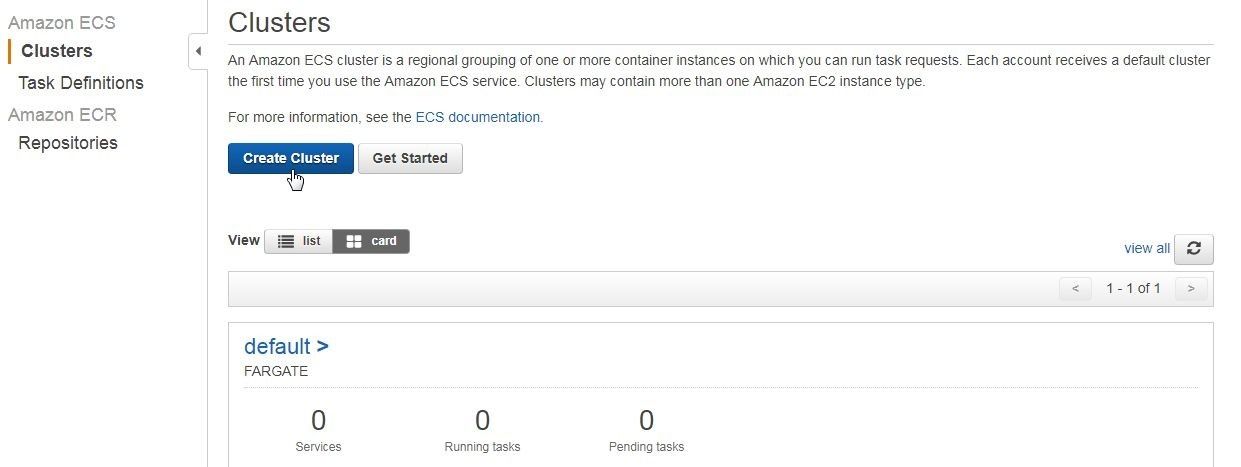
Figure 12. Clusters>Create Cluster
Select Cluster template as Networking only, which is powered by AWS Fargate, as shown in Figure 13. Click on Next step.
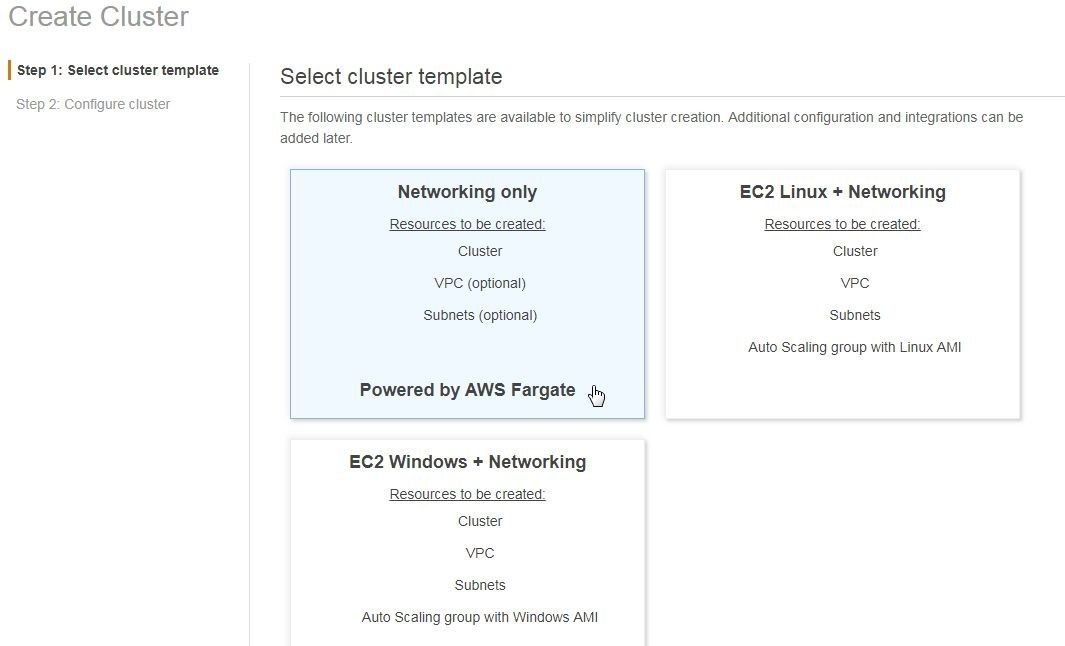
Figure 13. Selecting Cluster template
In Configure cluster specify a Cluster name (sqlserver) as shown in Figure 14. Optionally, the Networking option to Create VPC may be selected. We shall be using an already existing VPC and Subnets. Click on Create.
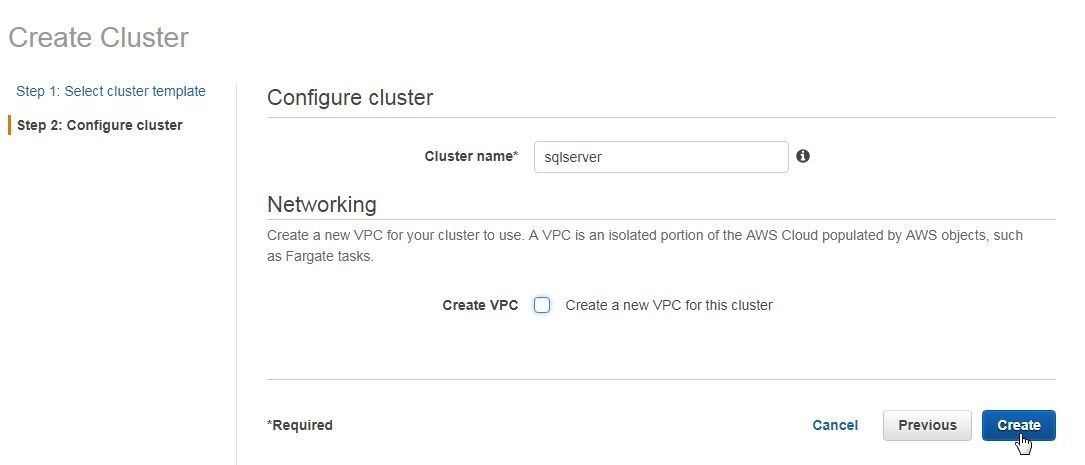
Figure 14. Configuring Cluster
The Launch status indicates that the cluster has been created, as shown in Figure 15. Click on View Cluster to view cluster.
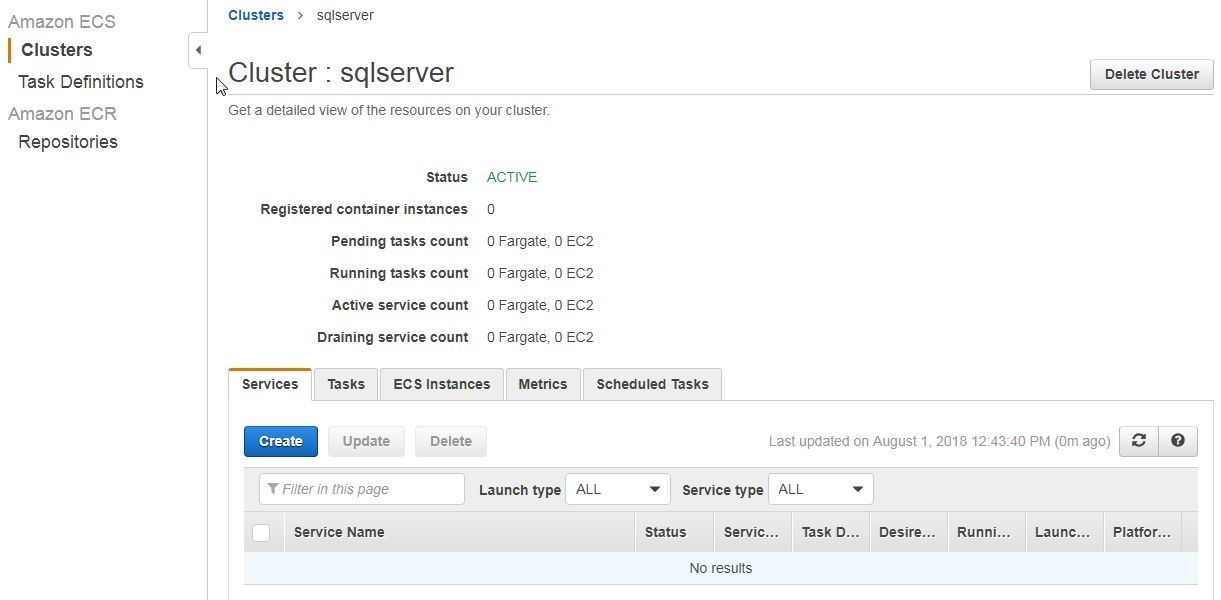
Figure 15. Cluster sqlserver
The cluster has been created and so has the task definition but no running tasks exist yet because a service needs to be created to run tasks.
Creating a Service
To create an ECS service click on Create with the Services tab selected in the cluster details page, as shown in Figure 16.
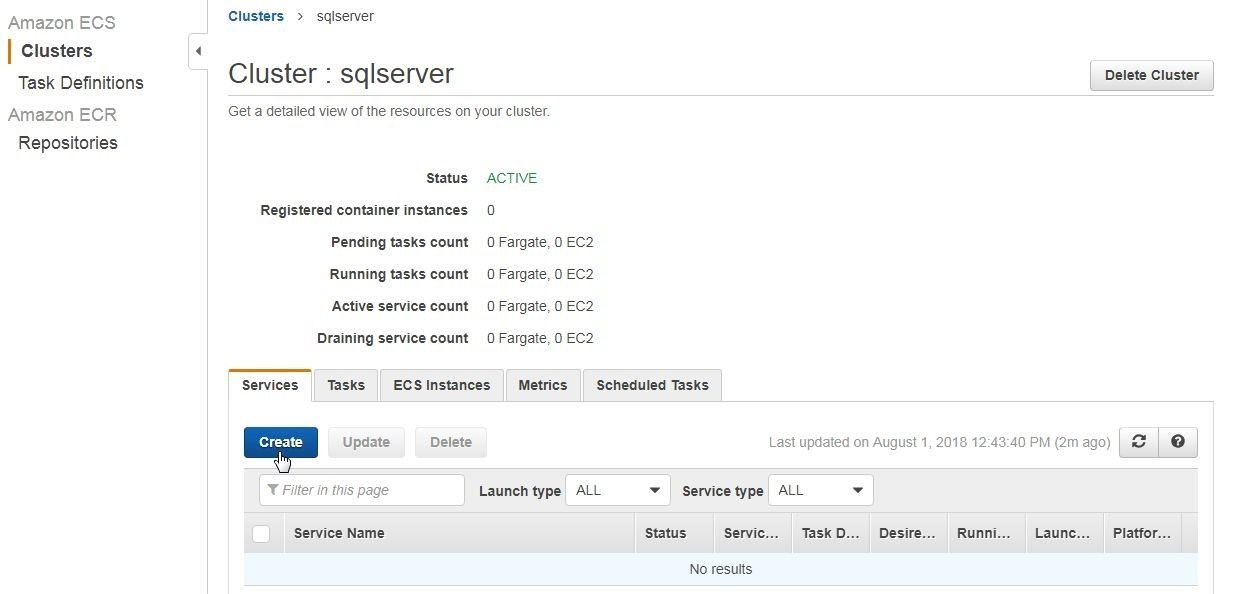
Figure 16. Services>Create
The Configure service page is displayed, as shown in Figure 17. Select Launch type as FARGATE and select Task Definition as the one created earlier. Select task definition revision as 1 (latest). Select Platform version as LATEST. Select Cluster as the sqlserver cluster created earlier.
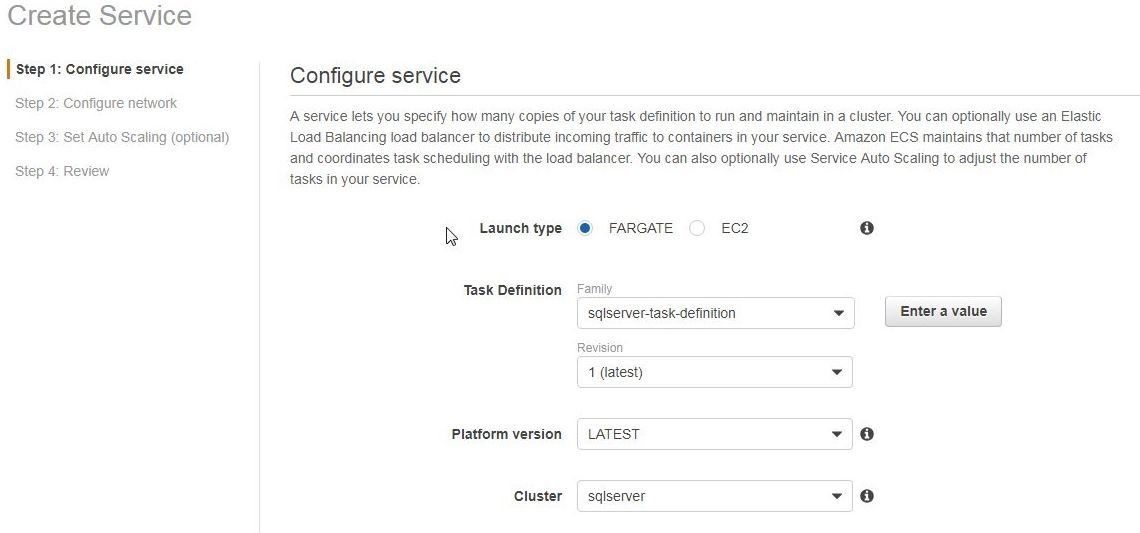
Figure 17. Configure service
Scroll down and specify a Service name (sqlserver-service) as shown in Figure 18. Service type is hard-coded as REPLICA and cannot be changed. Set Number of tasks as 1 and keeping other settings as default, then click on Next step.
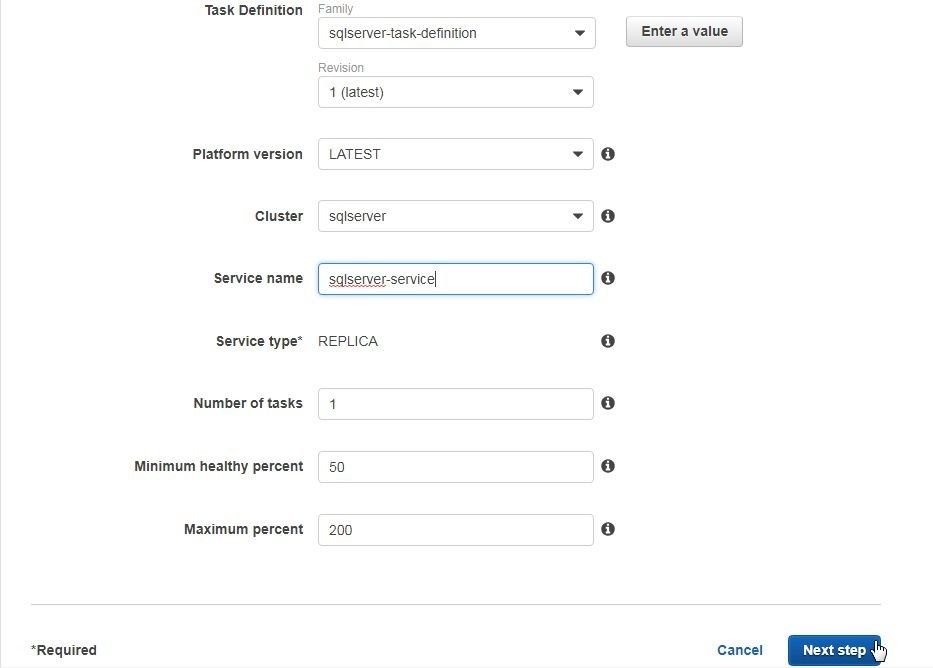
Figure 18. Specifying Service name, number of tasks and other configuration
Next, configure the network in which select a ClusterVPC and two Subnets as shown in Figure 19. The Security group is listed and may be edited with Edit. Set Auto-assign Public IP to ENABLED to assign a public IP automatically when a task is created.
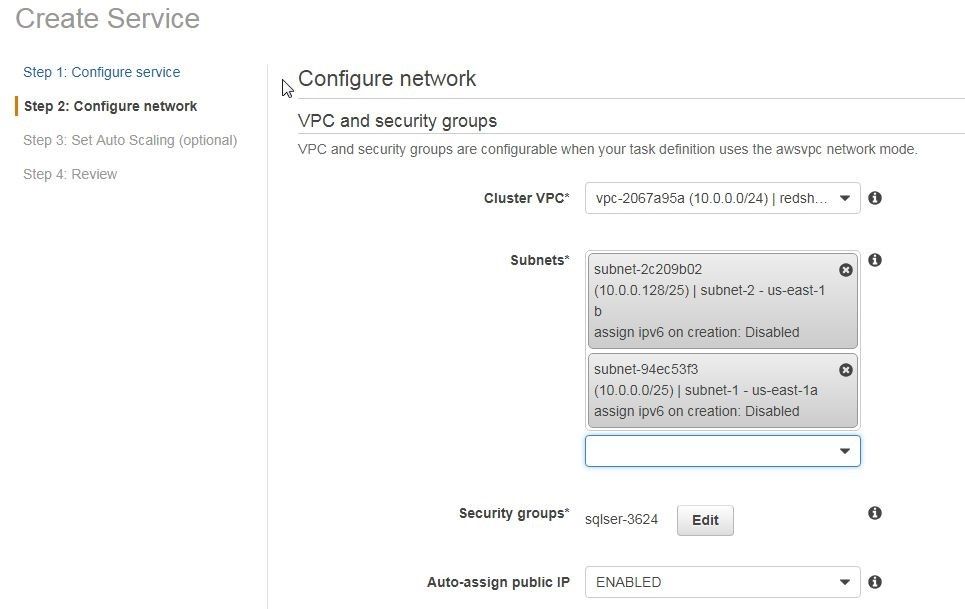
Figure 19. Configuring Networking
Task definitions that use the awsvpc networking mode use the AWSServiceRoleorECS service-linked role, which is created automatically. Select Load balancer type as None, which is the default setting, as shown in Figure 20. Deselect Enable service discovery integration and click on Next step.
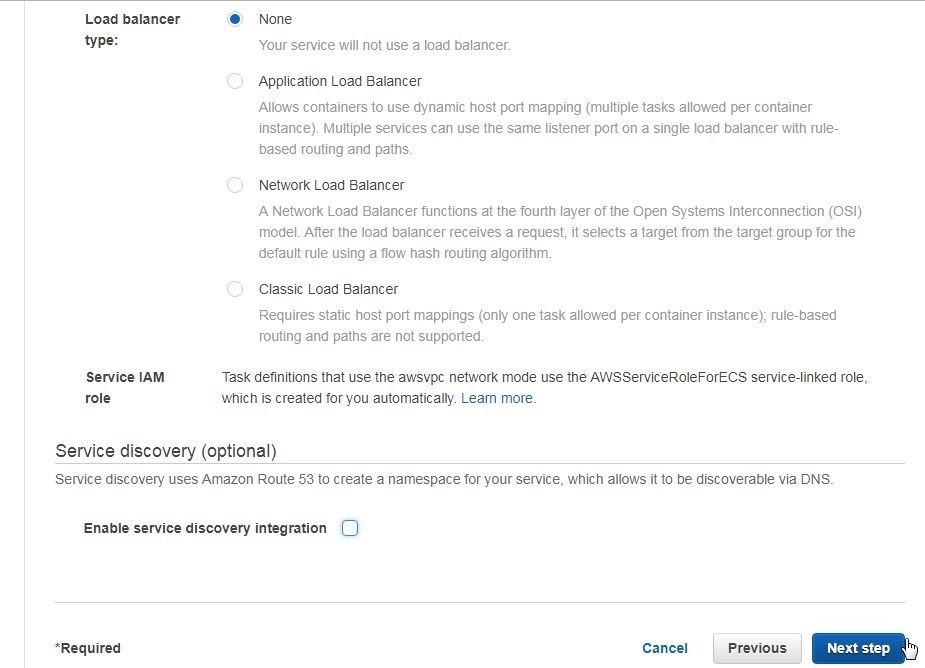
Figure 20. Networking>Next step
In Set Auto Scaling select the default setting of Do not adjust the service’s desired count as shown in Figure 21 and click on Next step.
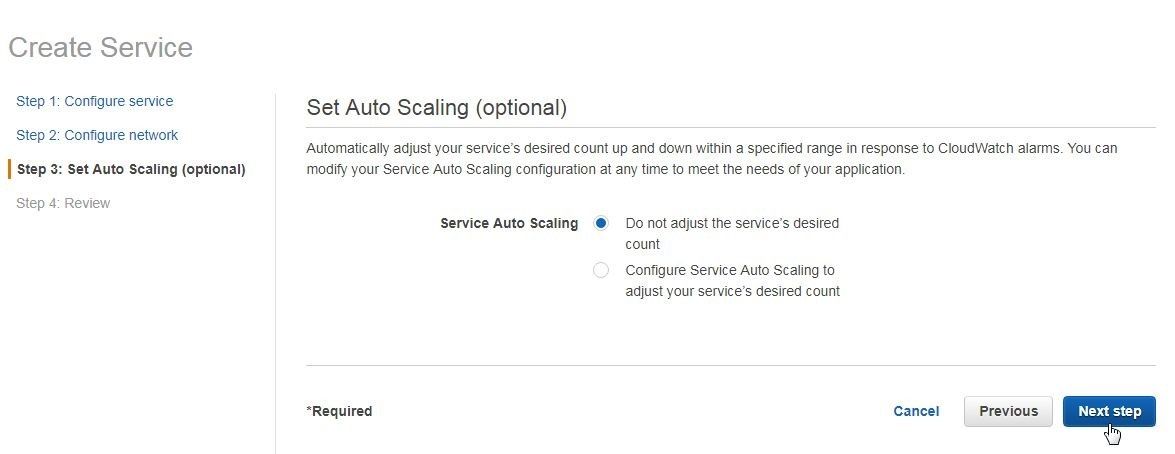
Figure 21. Set Auto Scaling
Review the service settings, as shown in Figure 22. The settings that should be verified are that Launch type is FARGATE, Service type is REPLICA, and Auto-assign IP is ENABLED.

Figure 22. Service Review
Click on Create Service as shown in Figure 23.
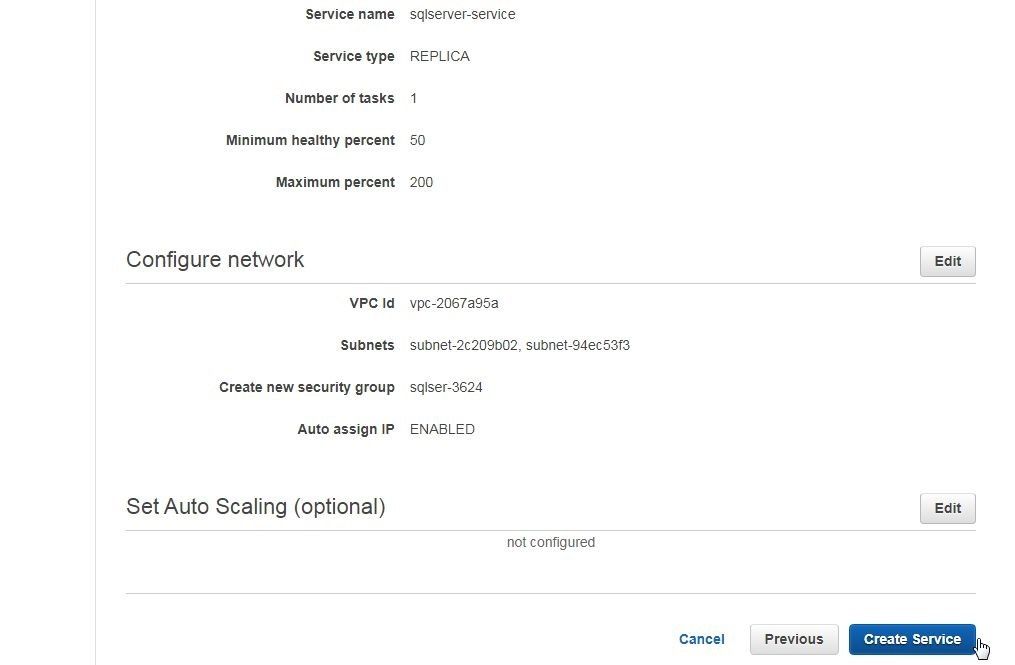
Figure 23. Review>Create Service
The Launch Status indicates that the service has been created, including the security group and the inbound rules set, as shown in Figure 24. Click on View Service to list service detail.
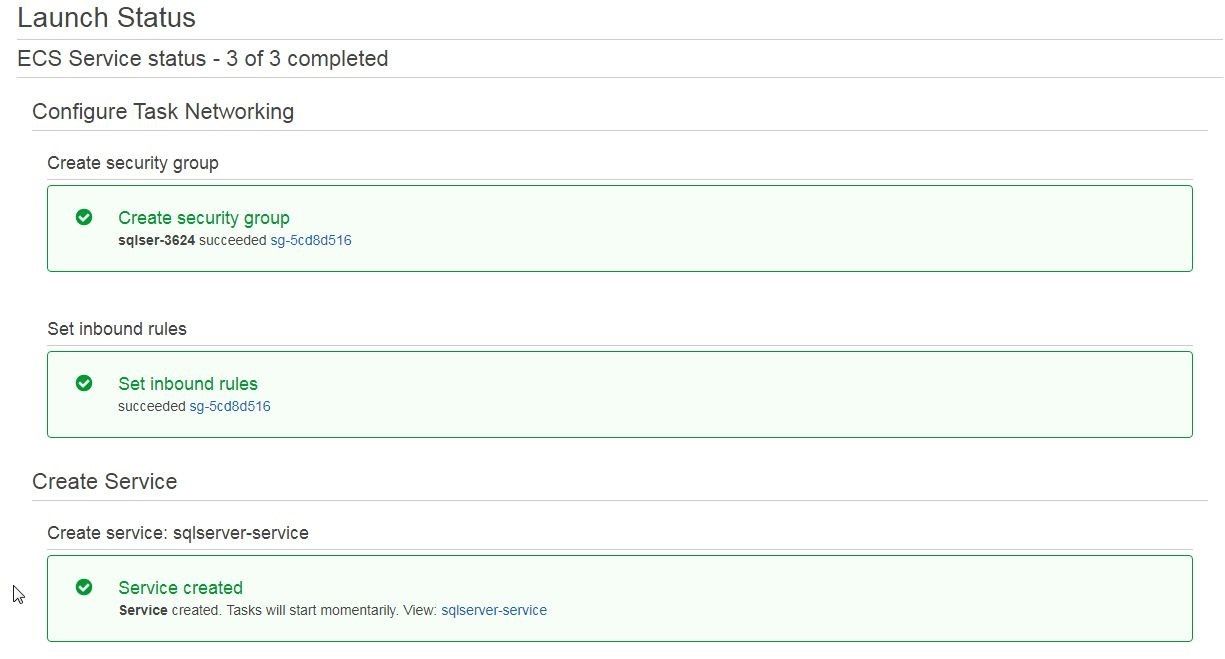
Figure 24. Launch Status
The service detail gets displayed, as shown in Figure 25. The Desired count and Running count are both listed as 1 (or whatever the number of tasks configured). Initially, Running count could be 0 for a while and Pending count 1, as the task is getting created and started.
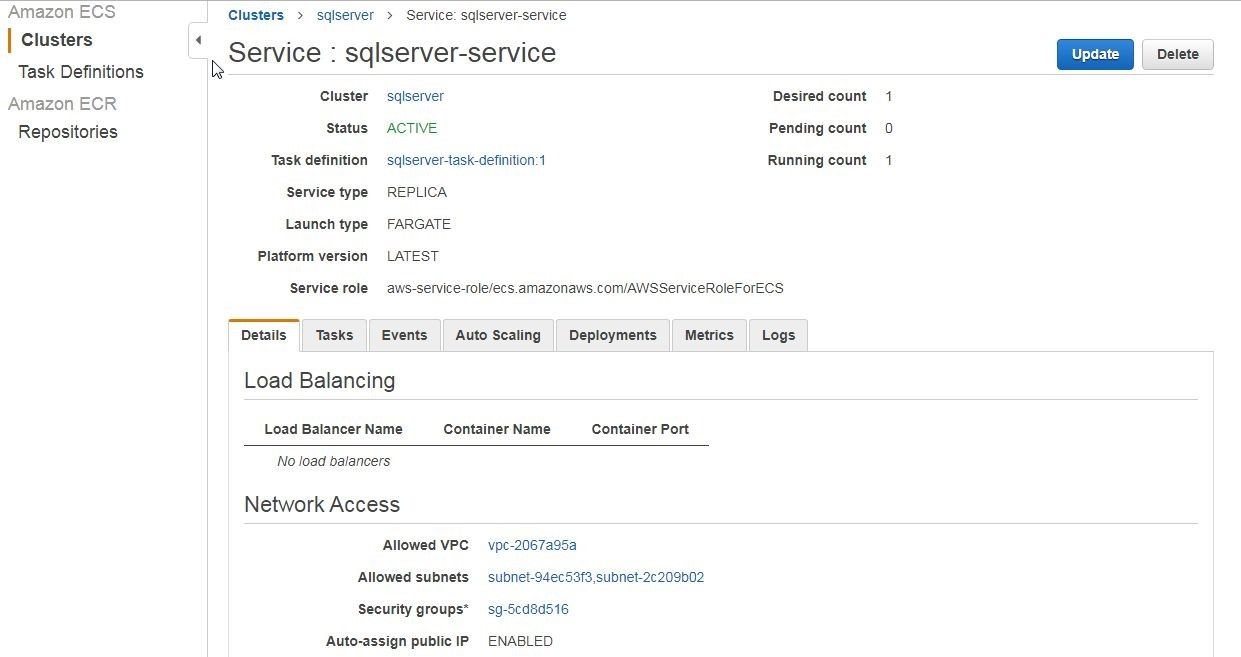
Figure 25. Service Detail
Select the Tasks tab, and the task/s get listed, as shown in Figure 26. The task status (both Last status and Desired status) should be RUNNING for the task to be usable.
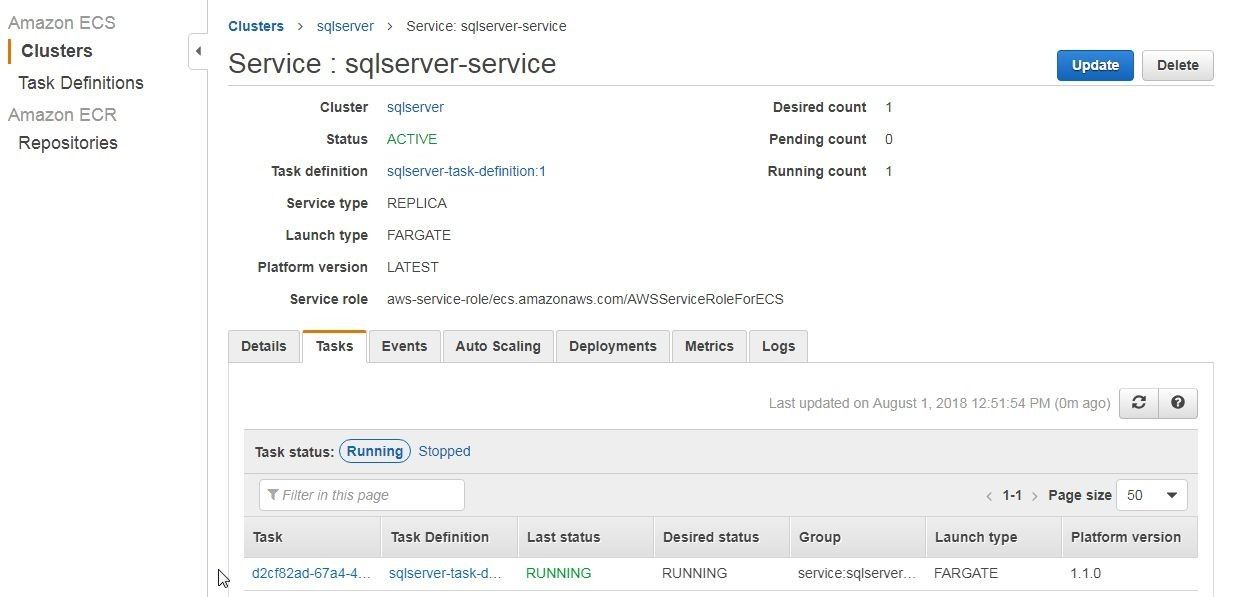
Figure 26. Tasks
The Events tab lists the events, as shown in Figure 27. The two events listed indicate that the service has started a task and reached a steady state. The Events tab could be used for debugging a service that does not start or stops after starting. If the two events are listed multiple times it indicates that the service task/s are not getting started and get stopped.
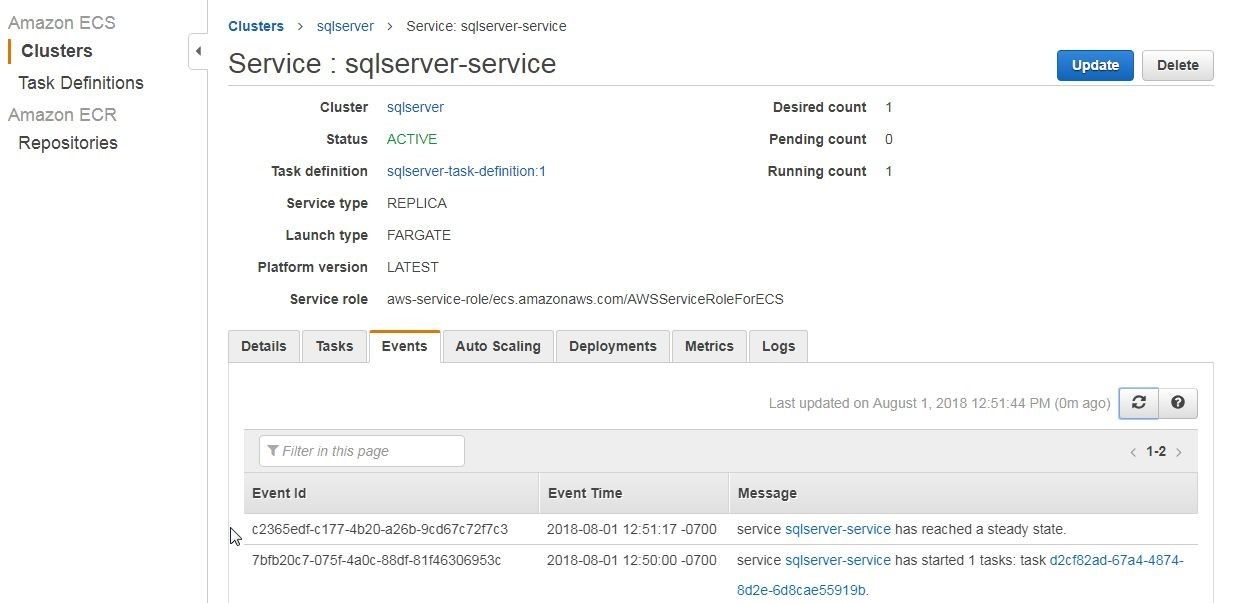
Figure 27. Service Events
Modifying Security Group Inbound Rules
By default the security group created for the ECS service has an access rule for HTTP access but not for TCP access. To allow TCP access click on the Security group link on the service detail page as shown in Figure 28.

Figure 28. Service>Security Group link
On the Security Group page select the Inbound Rules tab and click on Edit to modify the inbound rules as shown in Figure 29.

Figure 29. Security Group>Inbound Rules>Edit
Modify Type to All Traffic, and Protocol should be ALL, Port Range ALL, and Source 0.0.0.0/0,::/0 as shown in Figure 30. Click on Save the new settings.
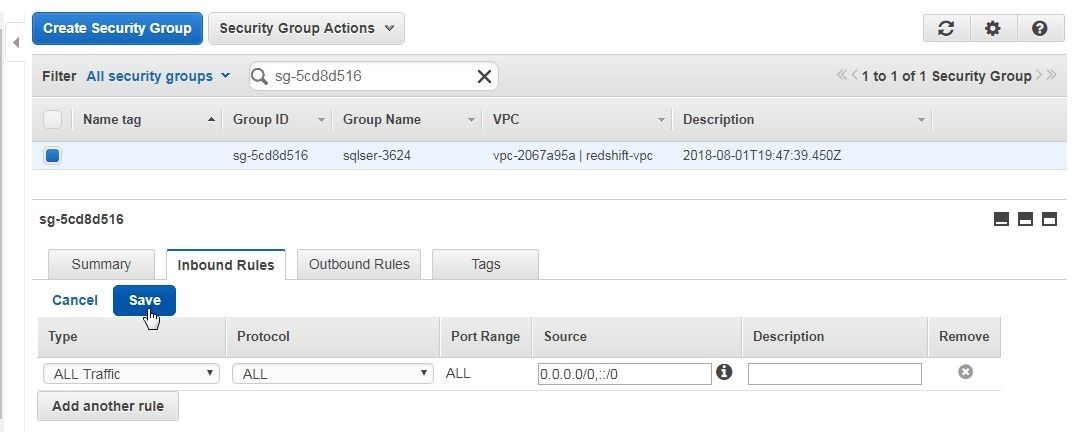
Figure 30. Inbound Rules>Save
The inbound rules get modified, as shown in Figure 31.
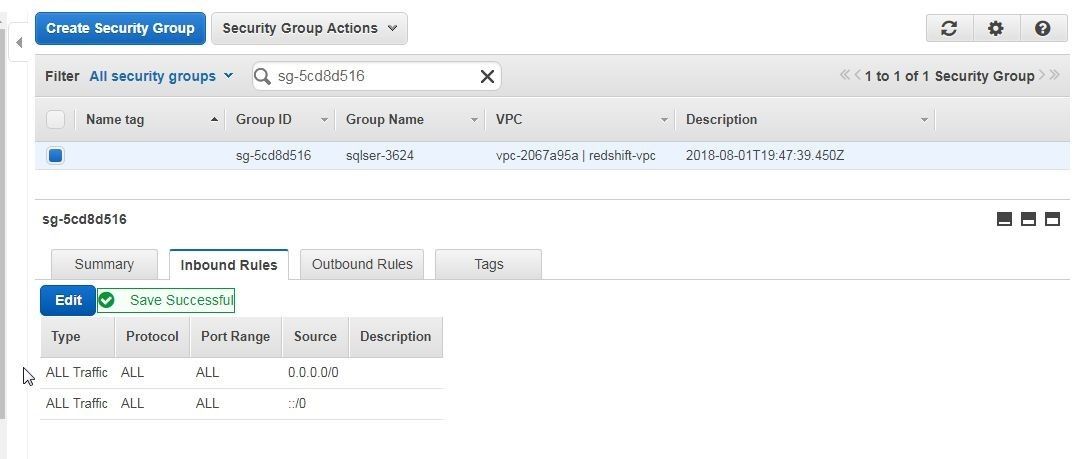
Figure 31. Modified InboundRules
Obtaining Connection Parameters
To be able to connect with SQL Server on ECS we need to obtain the connection parameters, which are the Public IP assigned automatically, port (1433 by default), and database name. The database name we shall obtain when creating a connection. For the Public IP click on the task link as shown in Figure 32.
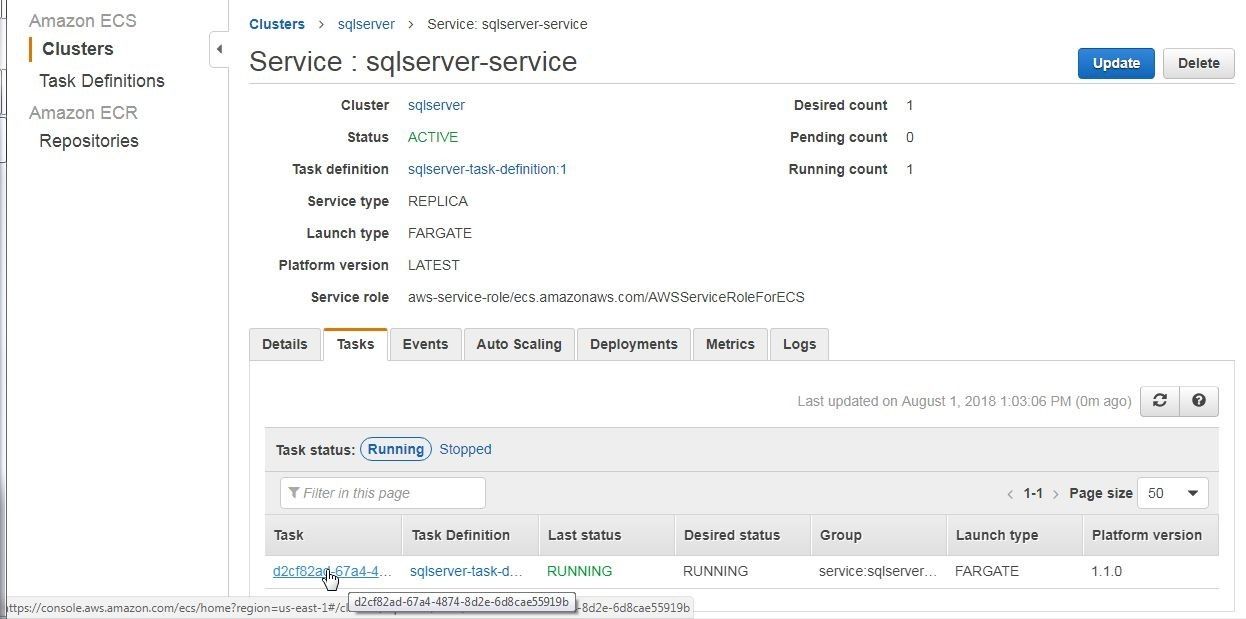
Figure 32. Selecting Task Link
The Public IP is listed on the task detail page, as shown in Figure 33. Copy the Public IP (54.91.96.122), which would be different for different users.
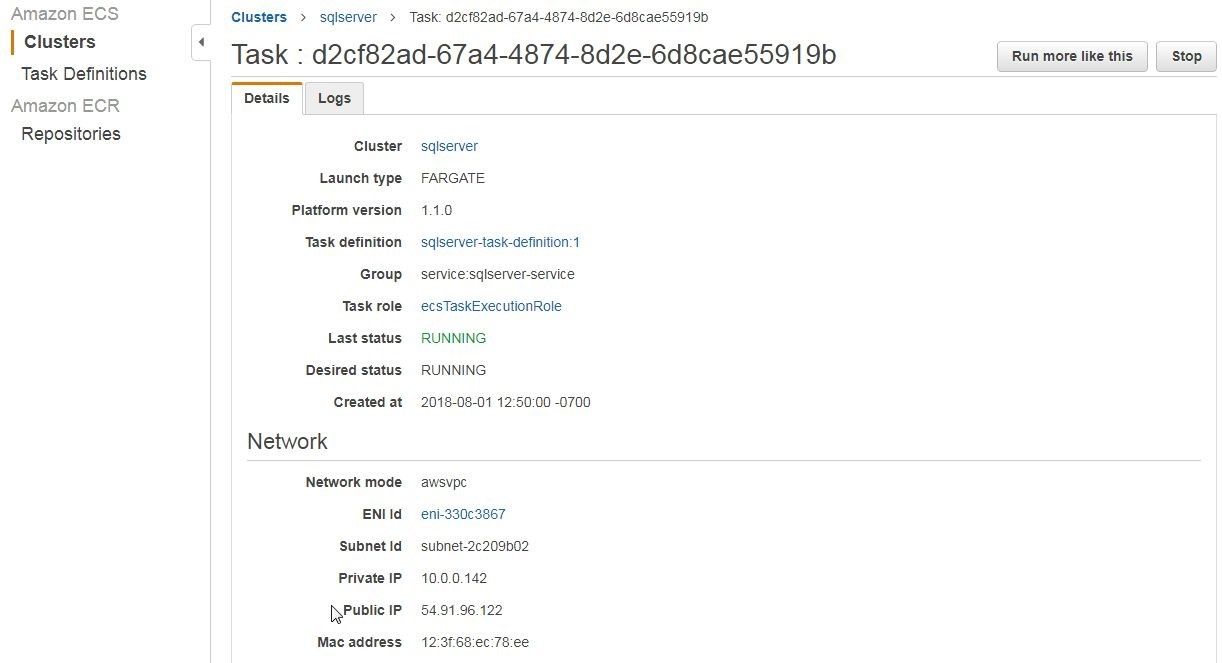
Figure 33. Obtaining Public IP
Summary
In this first of two articles we discussed creating an ECS service for SQL Server 2017 with launch type Fargate. In a subsequent article we shall discuss connecting to the SQL Server 2017 with Toad for SQL Server 6.8.
Try Toad for SQL Server nowAre you just starting your journey to evaluate if you should purchase the Toad for SQL Server management tool? If you’re not quite ready to buy, we’re so sure you’ll love Toad for SQL Server, that we’re offering a Toad for SQL Server free 30-day trial. Already in a trial? Buy it now or contact sales. |
Not ready for a free trial? Learn more.
Use the links below to learn how you can use the Toad for SQL Server management tool to resolve issues, manage change and promote the highest levels of code quality, performance and scalability.
Product page: Toad for SQL Server
Tech brief: Solving the SQL Tuning Problem: Secrets of Quest SQL Optimizer
Case study: County enhances critical services for citizens with Toad®
Related blog posts:
Read more Toad World® blog posts on Toad for SQL Server.
Side note: ApexSQL adds to Quest SQL solutions
As an aside, since you’re managing SQL Server, did you know that ApexSQL is now a part of Quest? ApexSQL joined Quest this summer. We’re excited to nod our heads that yes, the ApexSQL portfolio enhances Quest’s already robust set of SQL Server management tools. Make sure to visit ApexSQL.
Got questions?
If you have any questions, please post questions to the Toad for SQL Server forum on Toad World.
Start the discussion at forums.toadworld.com