In this tutorial we shall discuss using Toad Data Modeler with Oracle Database running on AWS RDS. We shall create an Oracle Database instance on AWS RDS and reverse engineer the database to a model in Toad Data Modeler.
Toad Data Modeler is a tool for modeling data. It supports both logical and physical data modeling. It includes support for modeling Entities, Relationships, Views, Procedures, Functions, Categories, User Groups, Users, Materialized Views, Packages, Sequences, Synonyms, Tablespaces, Data Types and User Data Types, among other data structures and database objects. All the commonly used databases, including Oracle, MySQL, PostgreSQL, SQL Server, DB2, and Redshift, may be forward- and reverse-engineered. This tutorial has the following sections.
Setting the Environment
Creating an Oracle Database Instance on AWS RDS
Obtaining Connection Parameters
Creating a Model
Adding Oracle Database Instance from AWS RDS to Model
Verifying a Model
Exploring Database Objects
Generating DDL for Model
Browsing Generated DDL in Toad Oracle
Saving a Model
Searching for Database Objects
Creating a Report
Converting a Model
Setting the Environment
As we are using Toad Data Modeler, download and install Toad Data Modeler. Create an AWS account, which is the only other prerequisite.
Creating an Oracle Database Instance on AWS RDS
Create an AWS RDS instance at https://aws.amazon.com/rds with Oracle Database engine. The procedure to create an AWS RDS instance with Oracle Database has been discussed in several other articles, such as Using Toad Data Point with Oracle Database on AWS RDS; some of the features may have changed since the tutorial but the procedure is same or similar. Click on Launch database instance as shown in Figure 1.
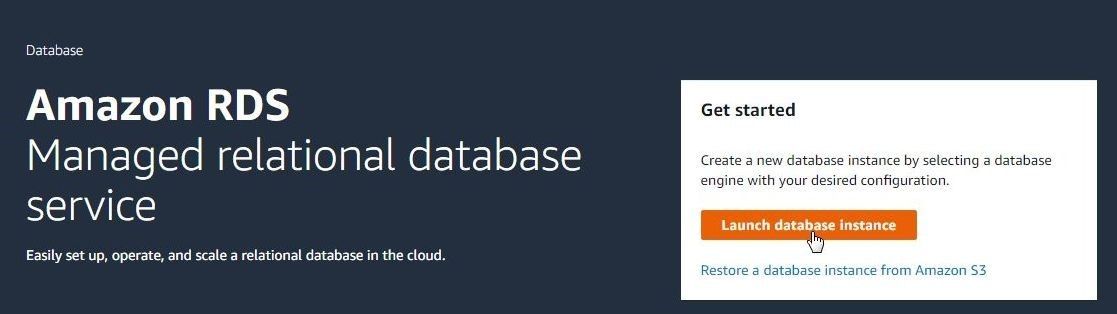
Figure 1. Launch database instance
Select engine as Oracle as shown in Figure 2.
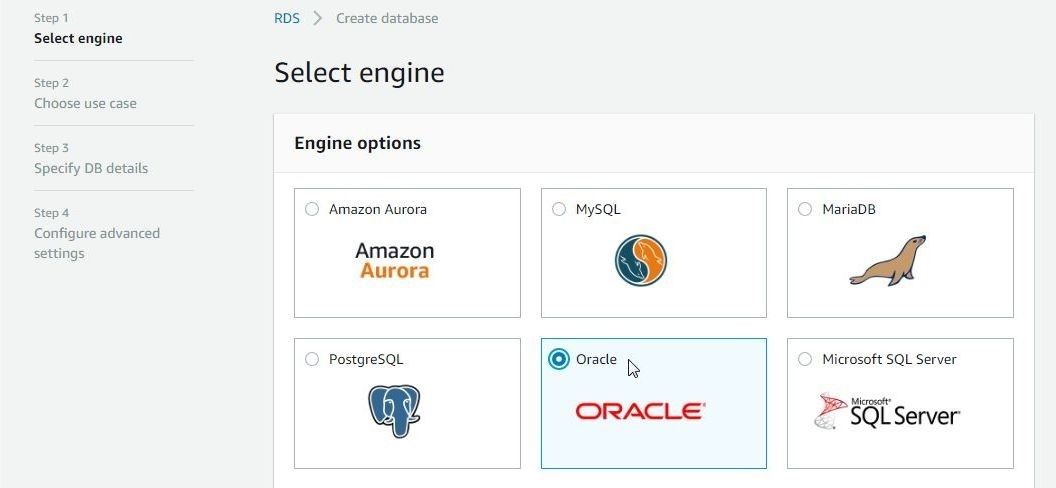
Figure 2. Selecting engine as Oracle
Select one of the editions; Oracle Standard Edition is shown selected in Figure 3. Click on Next.
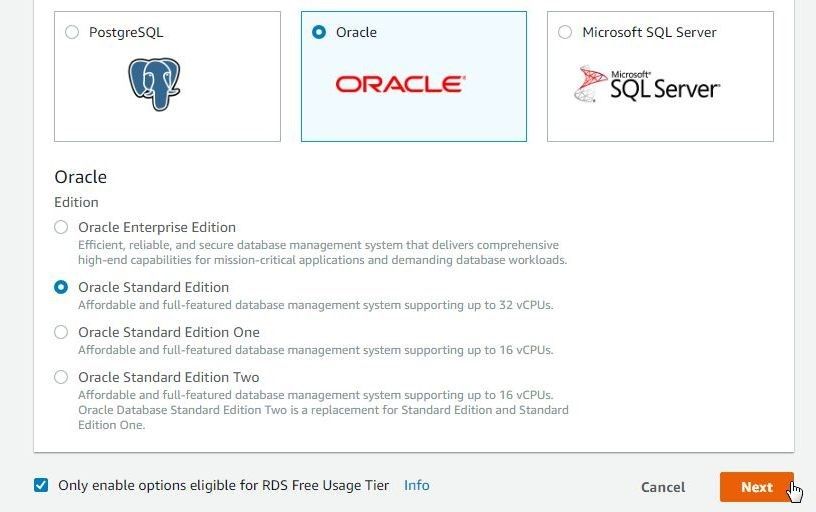
Figure 3. Selecting an Edition
Next, specify DB details as shown in Figure 4. Select License model as bring-your-own-license and, if the Free tier option is selected, Oracle Database 11.2.0.4.v17 is the latest available edition.
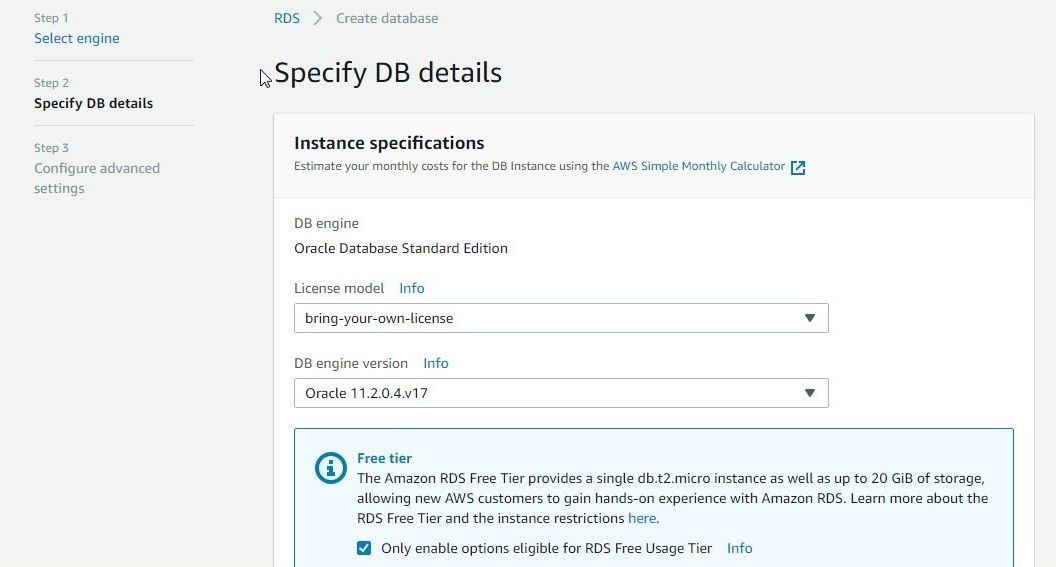
Figure 4. Specifying DB Details
Select a DB instance class as shown in Figure 5. The CPU and RAM are set based on the DB instance class selected. Storage type is SSD for the selected DB instance class and default allocated storage is 20 GiB.
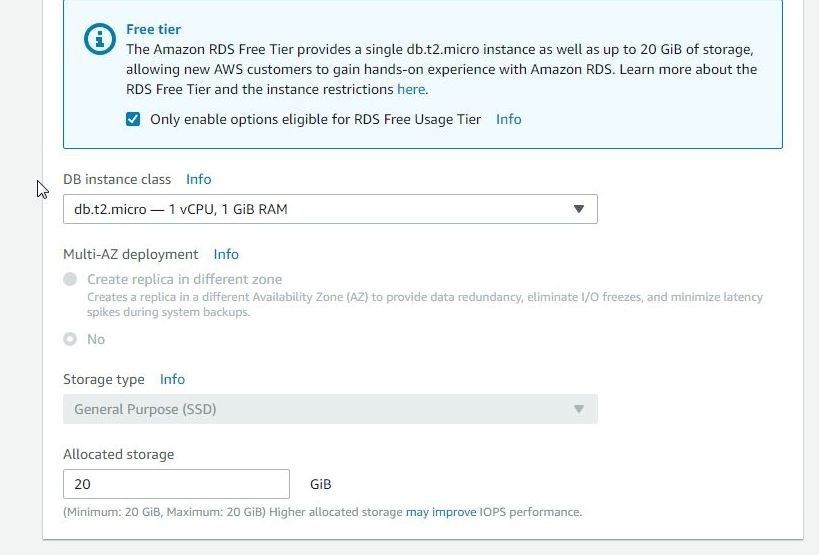
Figure 5. Selecting DB instance Class
In Settings specify DB instance identifier as orcldb as shown in Figure 6. Specify Master username and Master password. Click on Next.
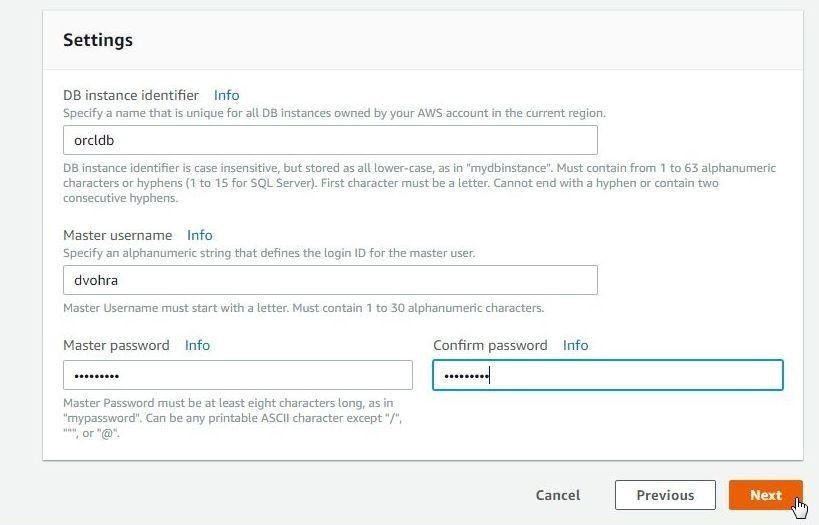
Figure 6. Specifying Database Settings
Next, configure advanced settings, as shown in Figure 7. Select to Create a new VPC. Select to Create a new Subnet group. Public accessibility must be set to Yes.
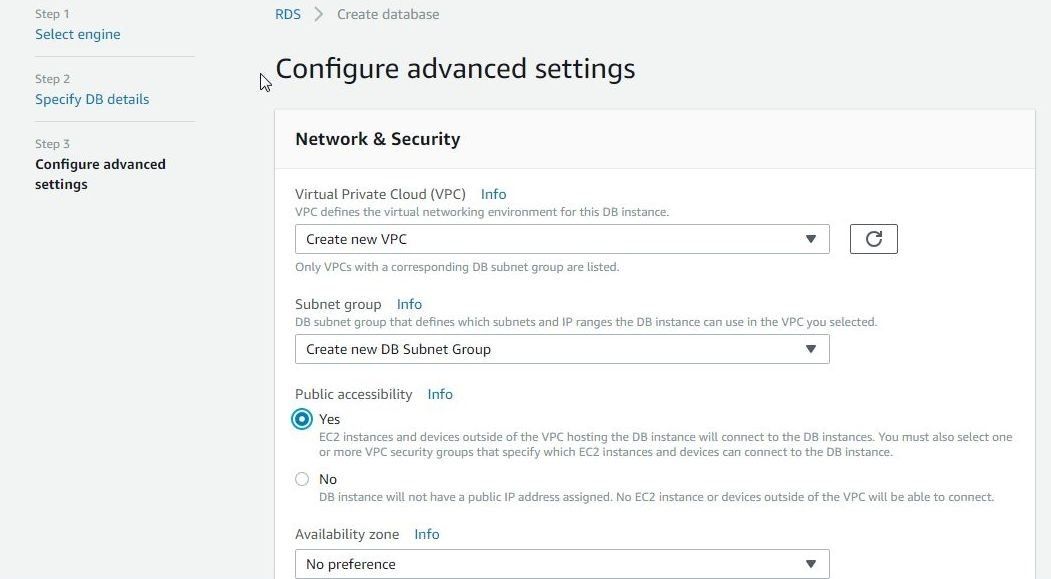
Figure 7. Selecting Network Settings
Set Availability zone to No preference as shown in Figure 8. For VPC security groups select Create new VPC security group.
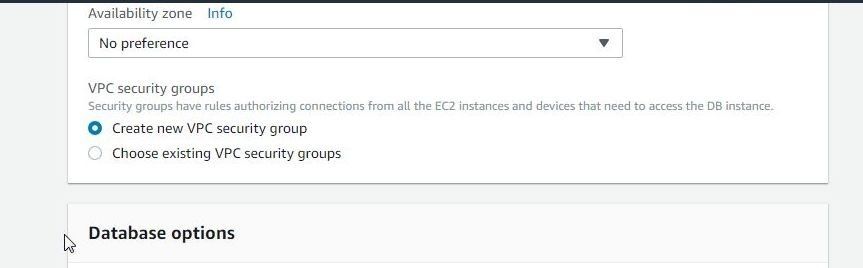
Figure 8. Setting Availability Zone and VPC Security Group
Next, specify Database options as shown in Figure 9. Set Database name (ORCL) and Port (1521). Keep the default settings for DB parameter group, Option group, and Character set name.
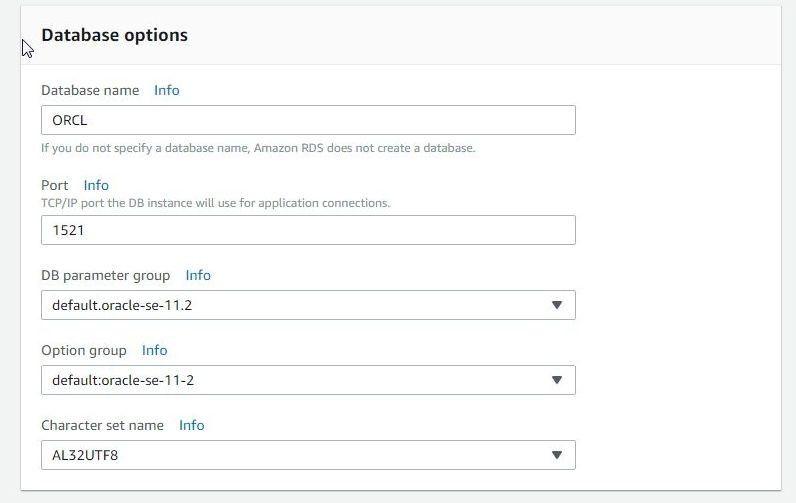
Figure 9. Selecting or setting Database Options
Keep the default settings for Encryption, Backup, Monitoring, Log exports, and Maintenance. Optionally, deletion protection may be enabled. Click on Create database as shown in Figure 10.
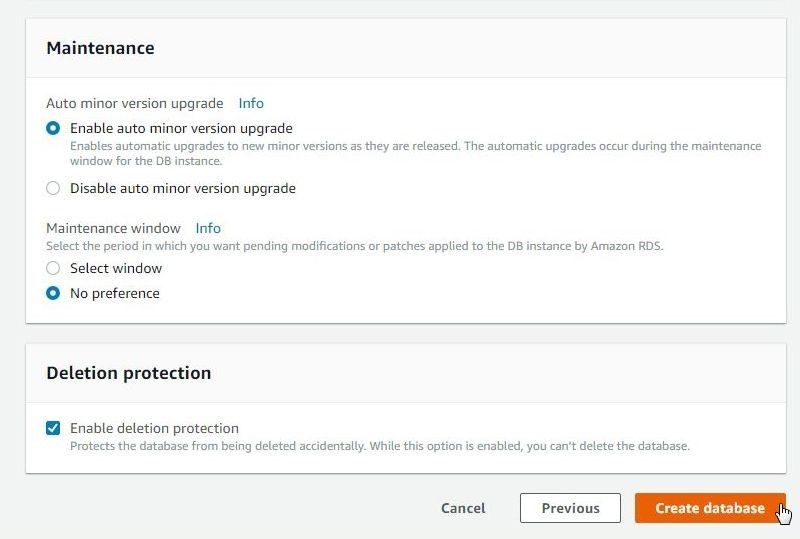
Figure 10. Create database
The DB instance starts to get created, as shown in Figure 11. Click on View DB Instance details.
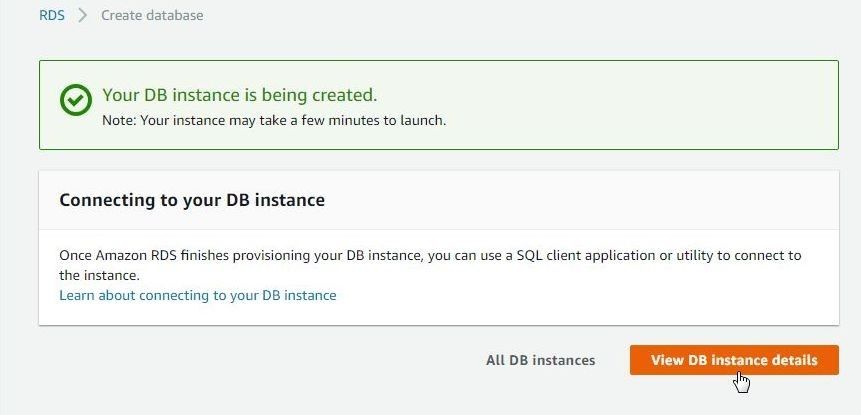
Figure 11. DB Instance being created
When the DB instance has been created its Status becomes available as shown in Figure 12.

Figure 12. DB instance available
Obtaining Connection Parameters
To obtain connection parameters click on the DB instance link as shown in Figure 13.

Figure 13. DB instance link
The summary for the DB instance gets listed. Scroll down to the Connect section, which lists the instance Endpoint, and Port, as shown in Figure 14. Copy the Endpoint value and the Port value. Publicly accessible must be set to Yes.
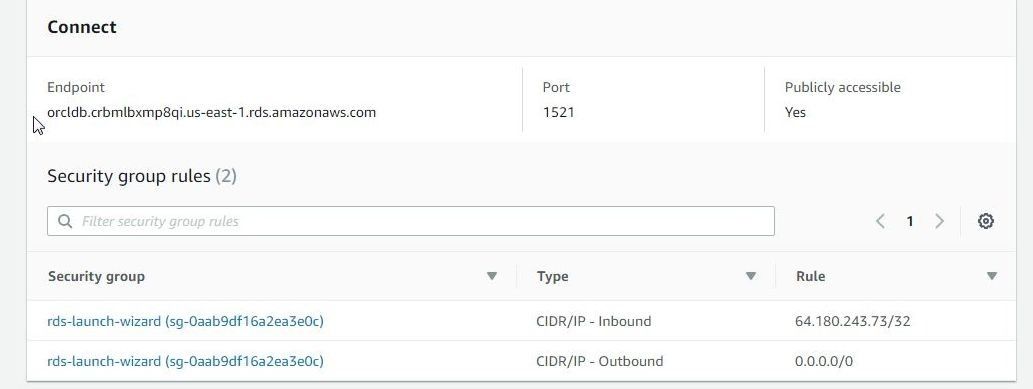
Figure 14. Connect section
We need to enable access to the DB instance security group. Click on the Security group link as shown in Figure 15.
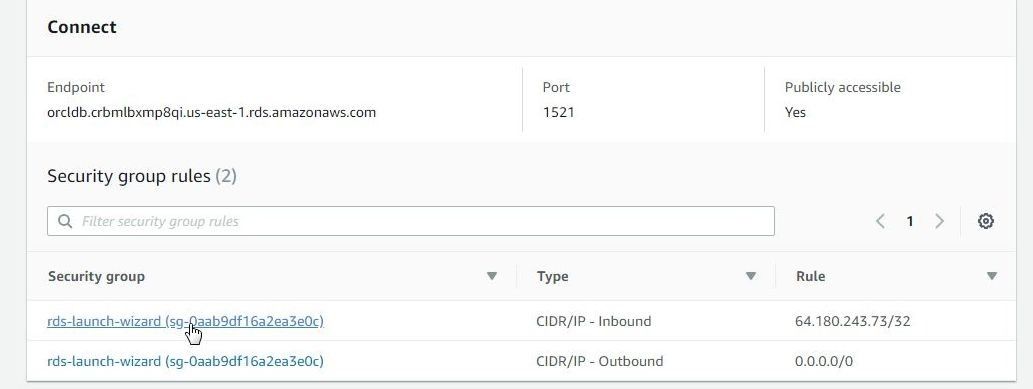
Figure 15. Selecting Security group link
In the Security group select Inbound tab and click on Edit as shown in Figure 16.
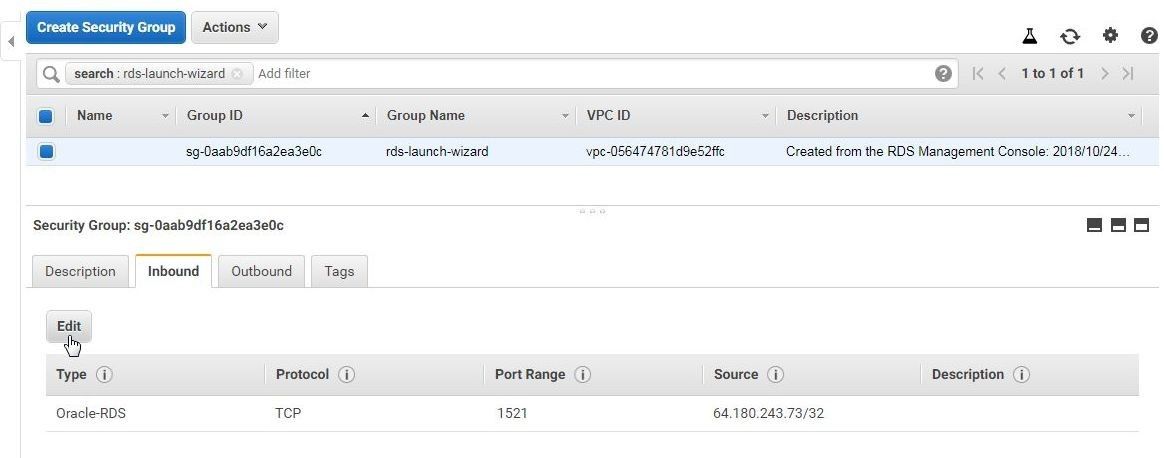
Figure 16. Inbound>Edit
In Edit inbound rules set Type to All traffic, Protocol to All, Port Range to 0-65535, Source to Anywhere and click on Save as shown in Figure 17.
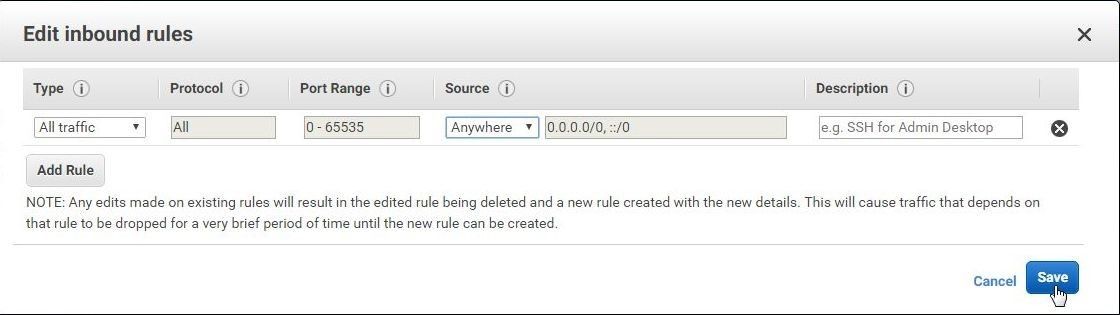
Figure 17. Edit inbound rules>Save
The Inbound rules get set to allow all traffic, as shown in Figure 18.
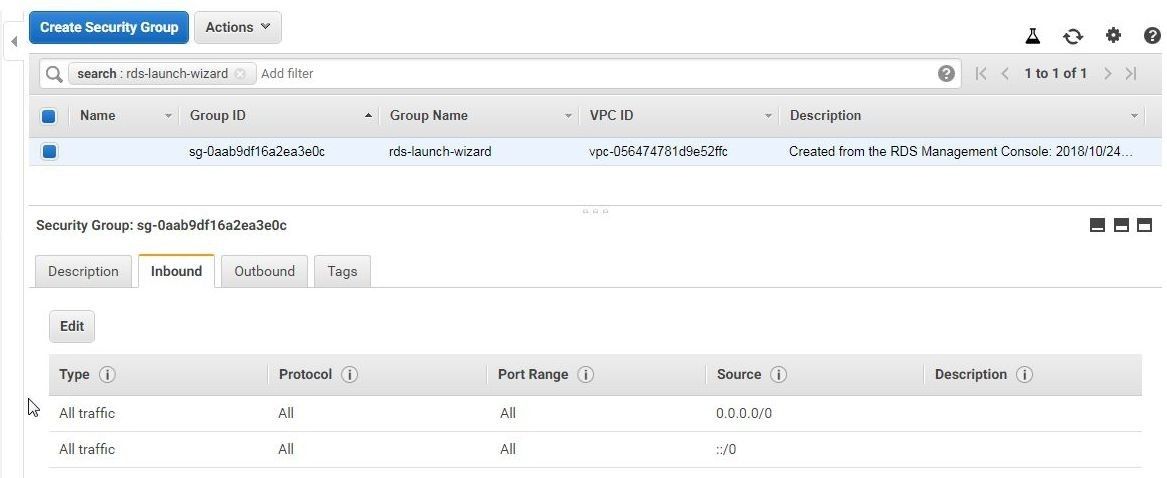
Figure 18. Inbound rules set to allow all traffic
If the DB Name (SID) is not noted when creating the DB instance, obtain its value from the Details section as shown in Figure 19.
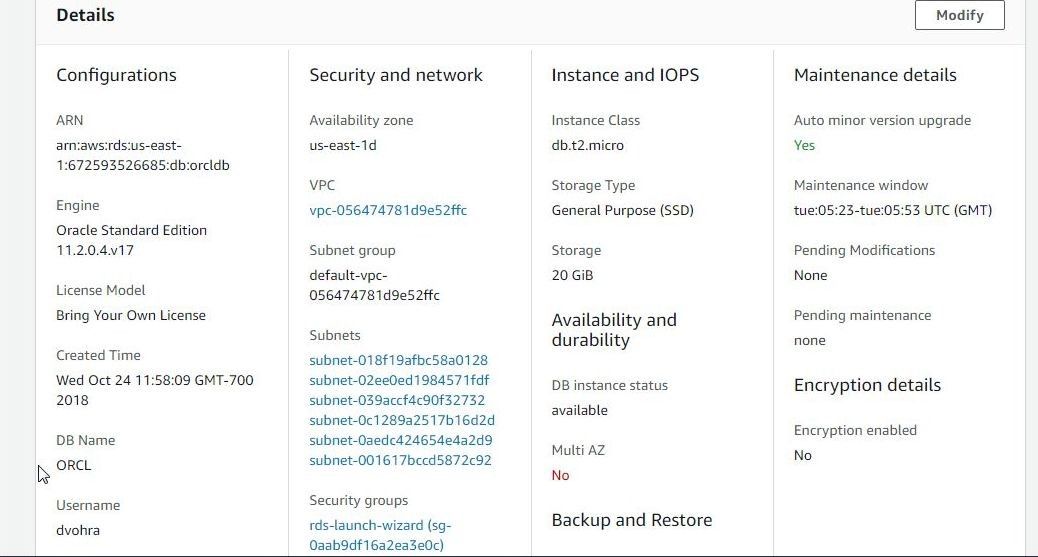
Figure 19. Obtaining DB Name
Creating a Model
To reverse engineer the Oracle Database instance on AWS RDS we need to create a model in Toad Data Modeler. Select File>New>Model as shown in Figure 20.
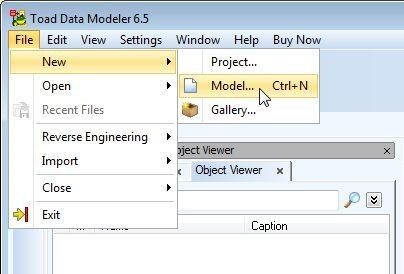
Figure 20. File>New>Model
In New Model window select Physical Data Model as Oracle 11g Release 2 as shown in Figure 21 and click on OK. The Model Name gets set to same as the data model selected.
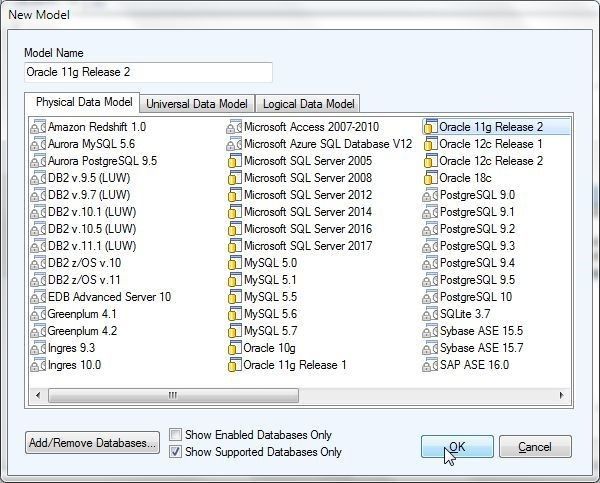
Figure 21. Selecting Physical Data Model
A new data model gets created and added to Data Modeler in Physical Model Explorer, as shown in Figure 22.
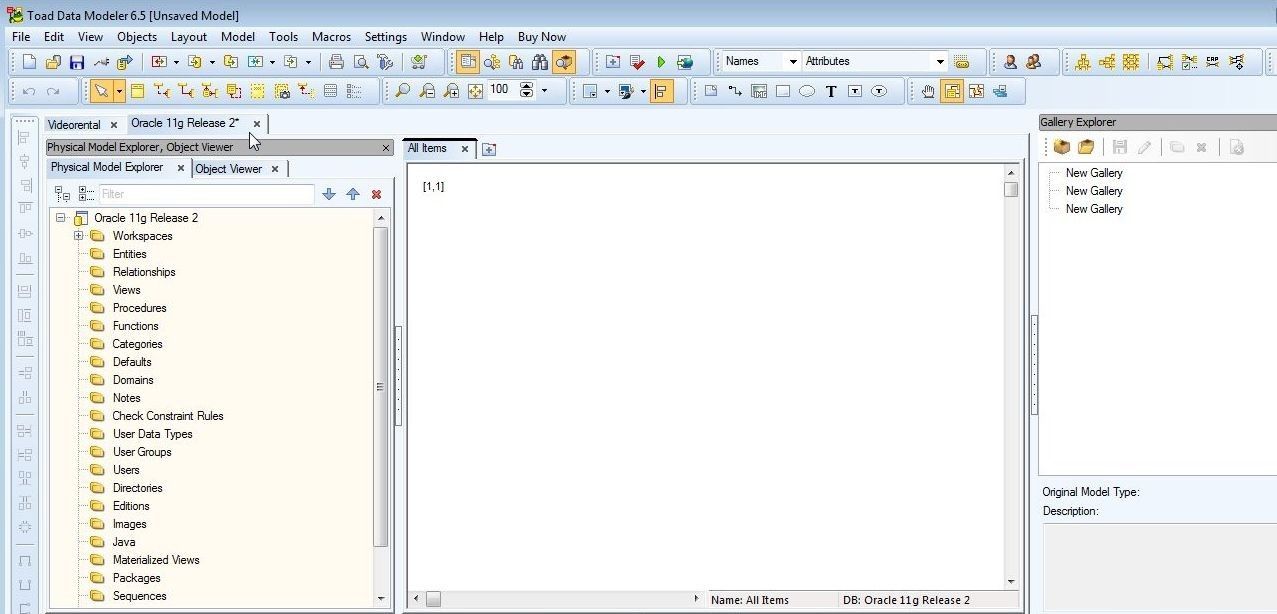
Figure 22. New Physical Data Model Oracle 11g Release 2
Reverse Engineering Oracle Database Instance to Model
We have created an Oracle Database instance on AWS RDS and also created a model in Toad Data Modeler. In this section we shall reverse engineer the Oracle Database instance to the model. With the model tab selected, click on Update Model from Database as shown in Figure 23.
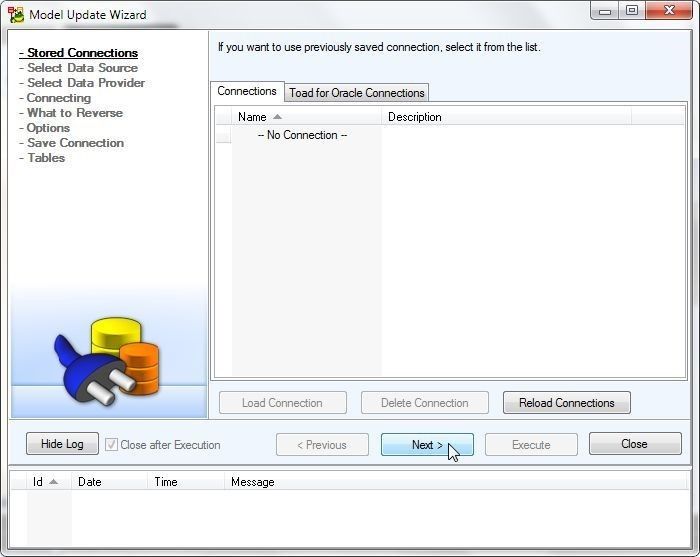
Figure 23. Update Model from Database
The Model Update Wizard gets launched, as shown in Figure 24. Select data source Database RE (Reverse Engineer) as Oracle 11g Release 2 and click on Next.
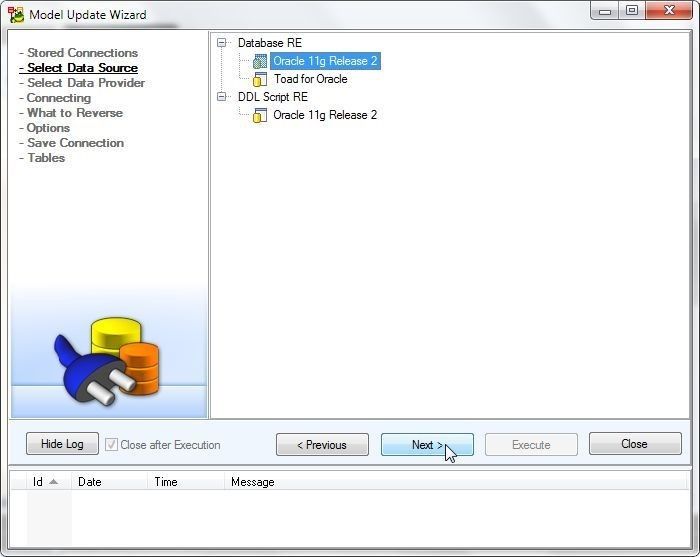
Figure 24. Selecting the Data Source
Next, select the Data Provider. Select Connection via TCP/IP as shown in Figure 25.
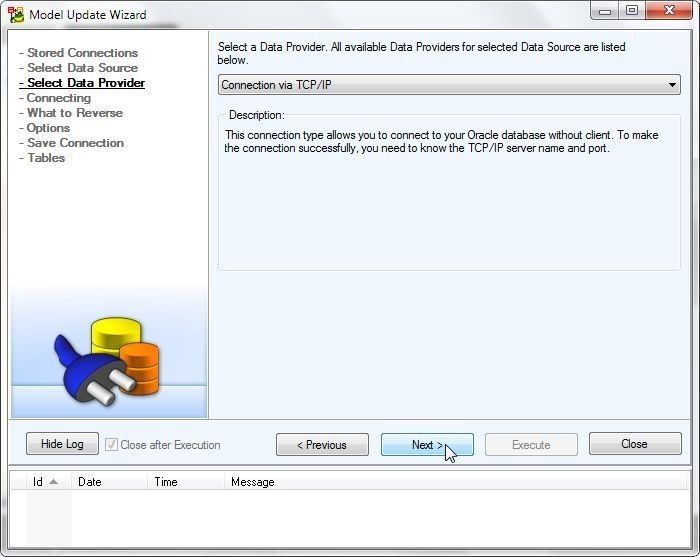
Figure 25. Selecting Data Provider
Next, specify the connection parameters with Connecting selected in the margin as shown in Figure 26. Specify Host as the Endpoint value for the DB Instance on AWS RDS as shown in Figure 13. Specify Port as 1521. Specify SID as ORCL. Specify User Name and Password in Login Information. Set Connect as to Normal. Click on Next.
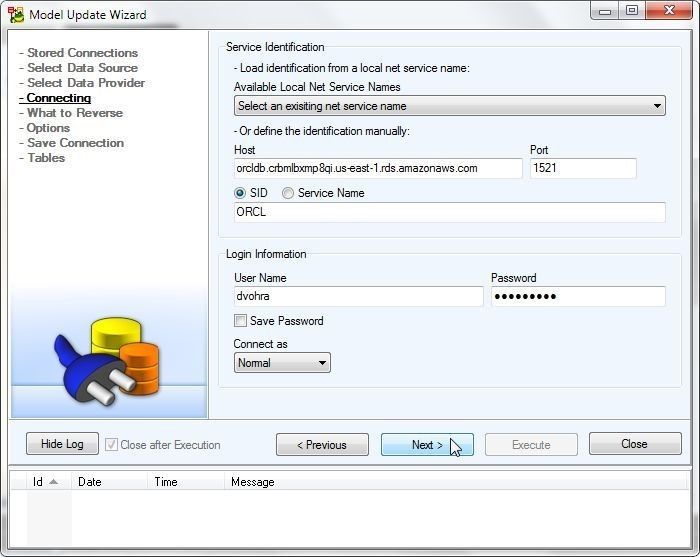
Figure 26. Specifying Connection Parameters
Next, select What to Reverse as shown in Figure 27. Select all the Model properties and click on Next.
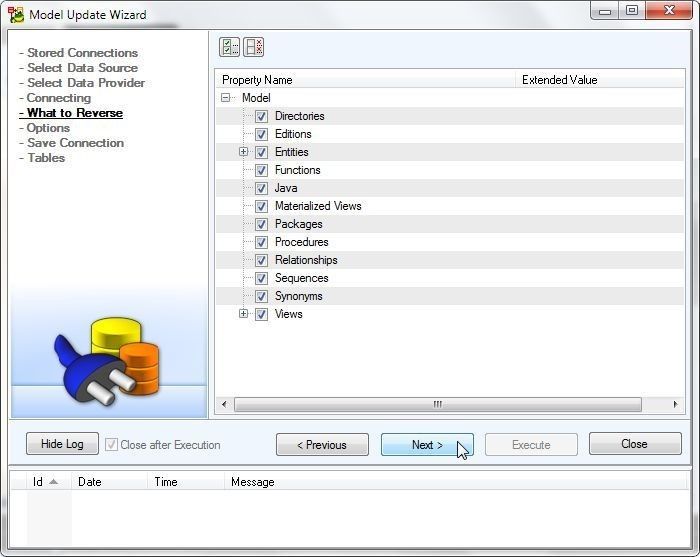
Figure 27. What to Reverse
Next, select the Options for Reverse Engineering as shown in Figure 28.
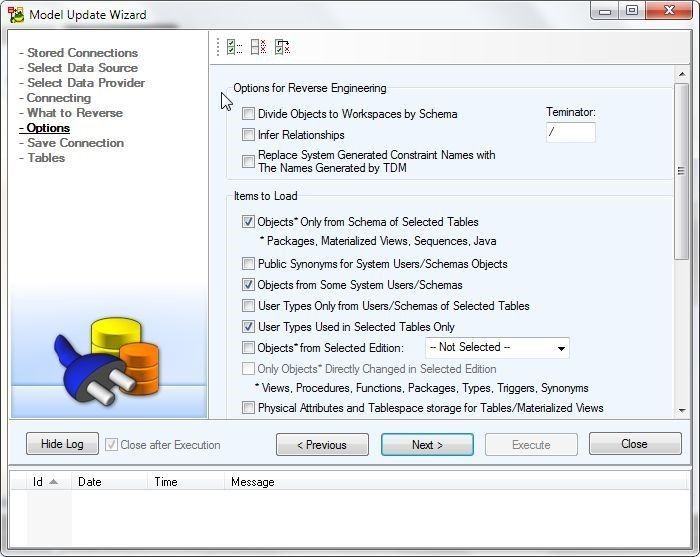
Figure 28. Options for Reverse Engineering
Select all the three options for reverse engineering as shown in Figure 29.
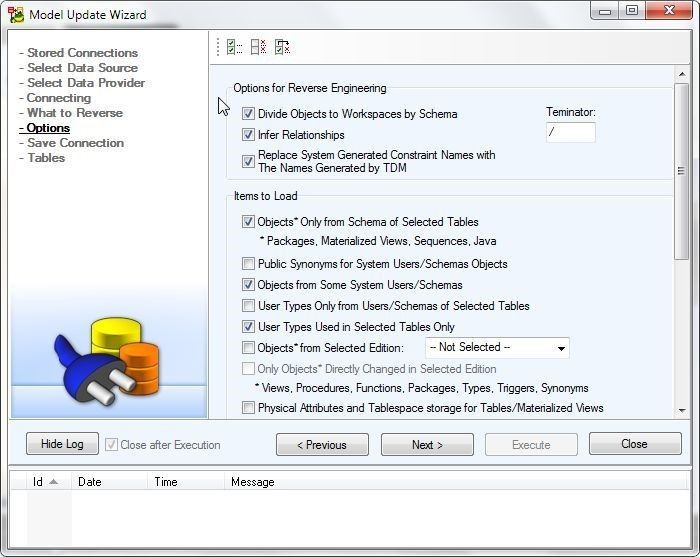
Figure 29. Selecting Options for Reverse Engineering
Select the Items to Load and click on Next as shown in Figure 30.
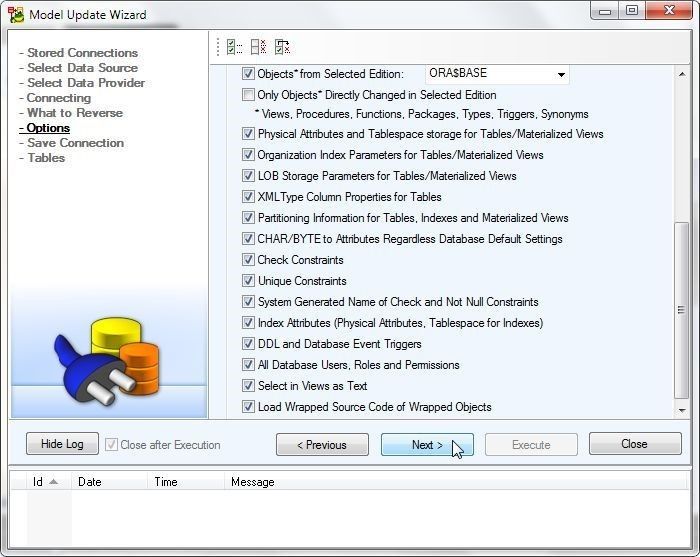
Figure 30. Options>Next
Specify a Connection Name and click on Save as shown in Figure 31.
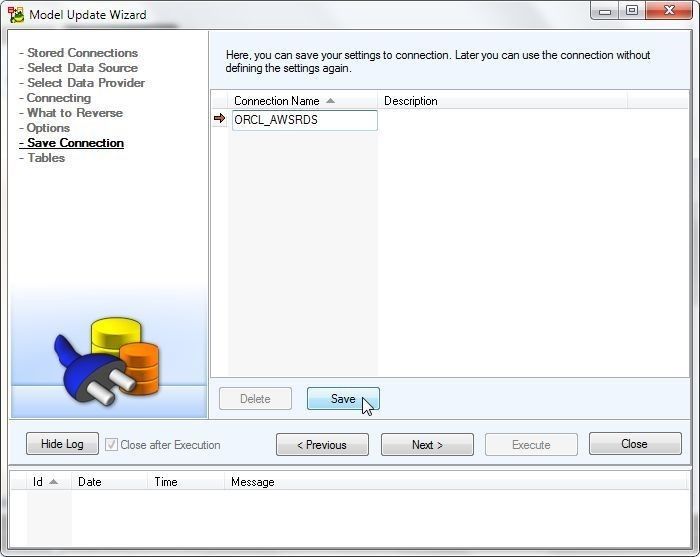
Figure 31. Saving Connection Name
In Save Connection specify a connection name and click on OK as shown in Figure 32.
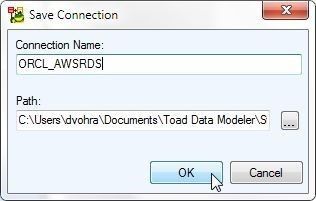
Figure 32. Save Connection
A connection name gets added as shown in Figure 33. Click on Next.
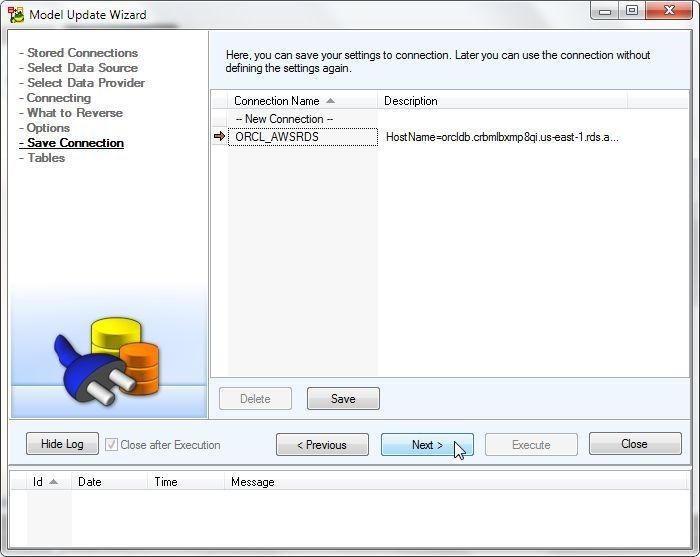
Figure 33. Save Connection>Next
A connection gets established to the Oracle Database instance as shown in log in Figure 34. Next, select the database objects to reverse engineer.
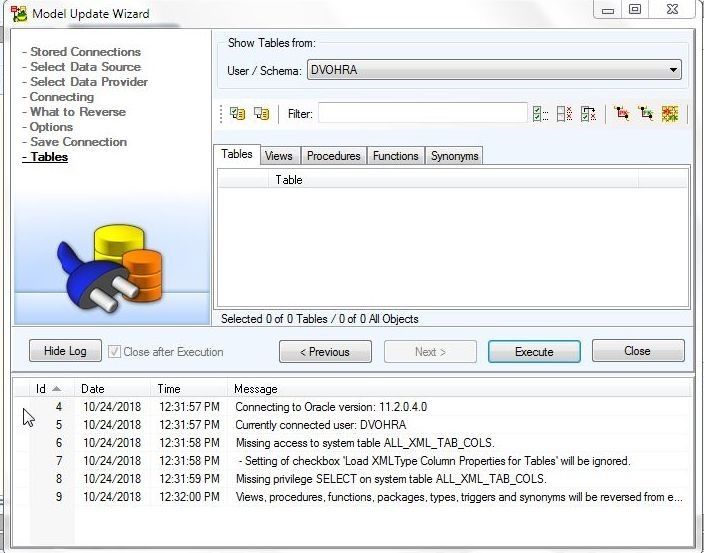
Figure 34. Connection established to Oracle Database on AWS RDS
Select a User/Schema from which database objects are to be reverse engineered. As an example, select User/Schema as SYS as shown in Figure 35.
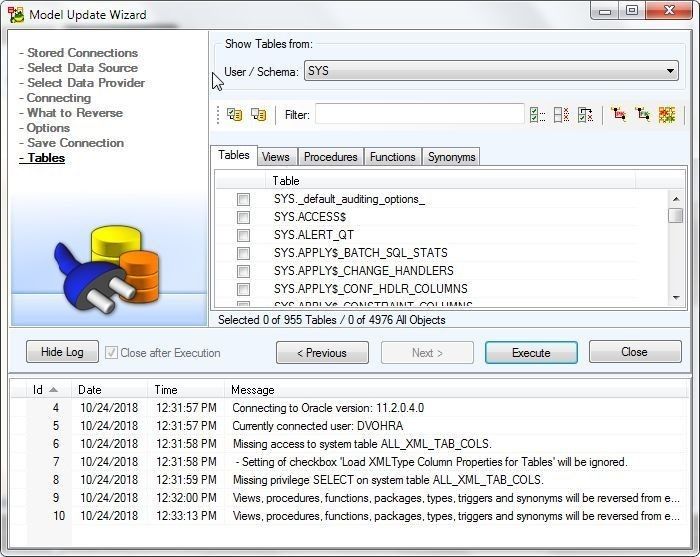
Figure 35. Selecting Schema
The Tables, Views, Procedures, Functions, and Synonyms get listed, as shown in Figure 36. Select the database objects to reverse engineer. To select all tables click on Select All with Tables tab selected.
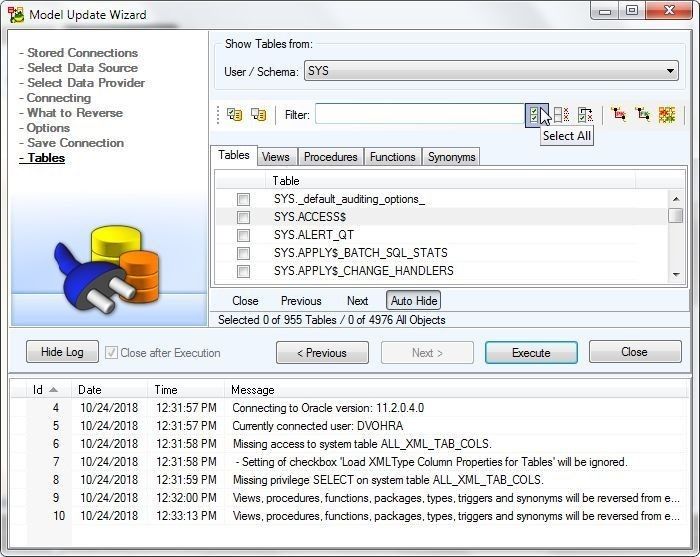
Figure 36. Selecting all tables
All tables get selected, as shown in Figure 37.
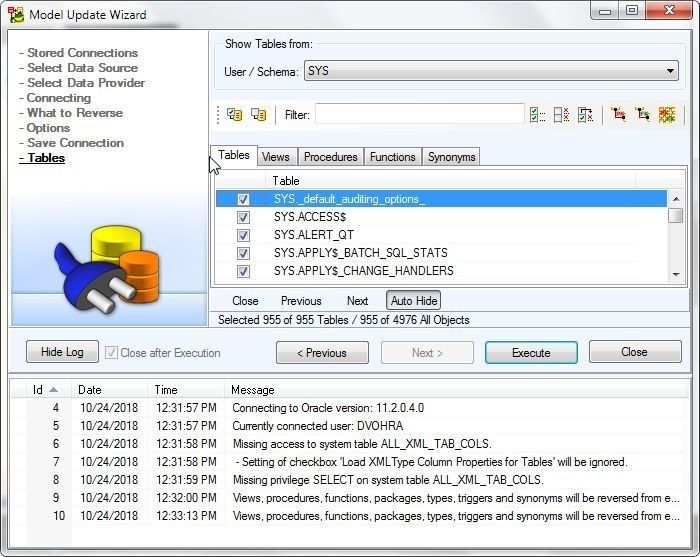
Figure 37. All tables selected
Similarly select Views, Procedures, Functions and Synonyms. The selected Views are shown in Figure 38.
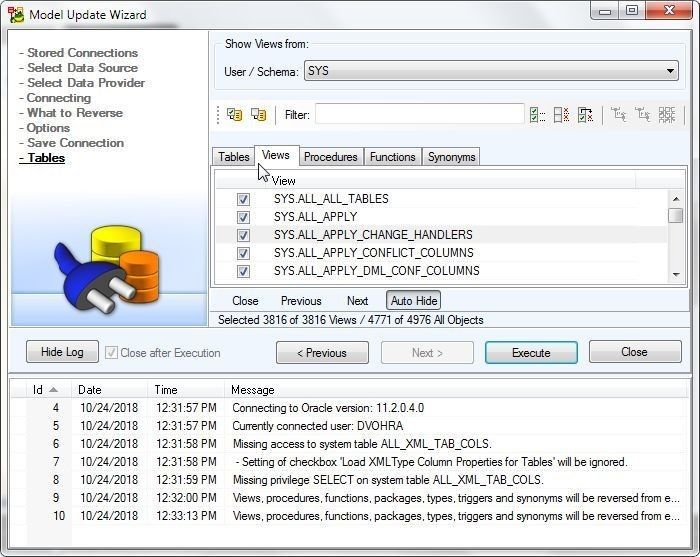
Figure 38. Selected Views
Click on Execute to reverse engineer as shown in Figure 39.

Figure 39. Starting Reverse Engineering
Next, configure the Comparison Settings, which include the Comparison Rules and whether to log progress to file. With default Comparison Settings click on Next as shown in Figure 40.
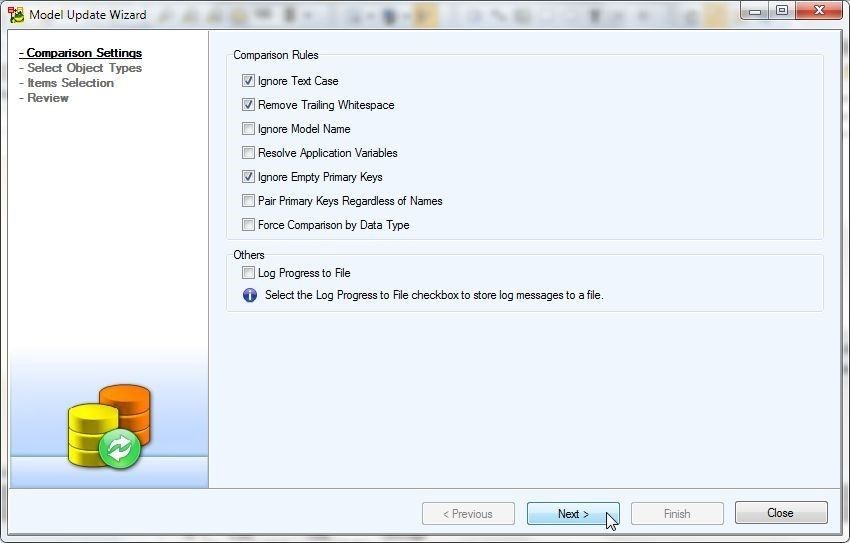
Figure 40. Comparison Settings
Next, select Object Types as shown in Figure 41. Compare All is selected by default. Click on Next.
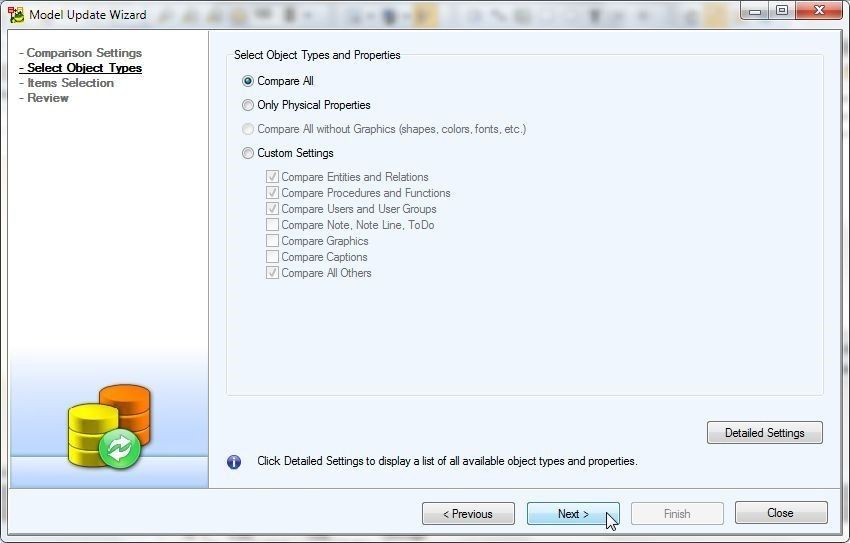
Figure 41. Selecting Object Types
Next, the Source Model and Model to Merge are displayed with the database objects to merge as shown in Figure 42. Click on Next. The Model to Merge is empty because we are merging into a new model.

Figure 42. Source Model and Model to Merge
Next, review the information, which includes the Source and Merge models, number of objects to add/remove/merge/commit as shown in Figure 43. All objects are to be added from the AWS RDS database instance. The objects are listed in the same order as in Source Model/Model to Merge, which is Users, UserGroups, Tablespaces, Directories, and Editions. Click on Finish.
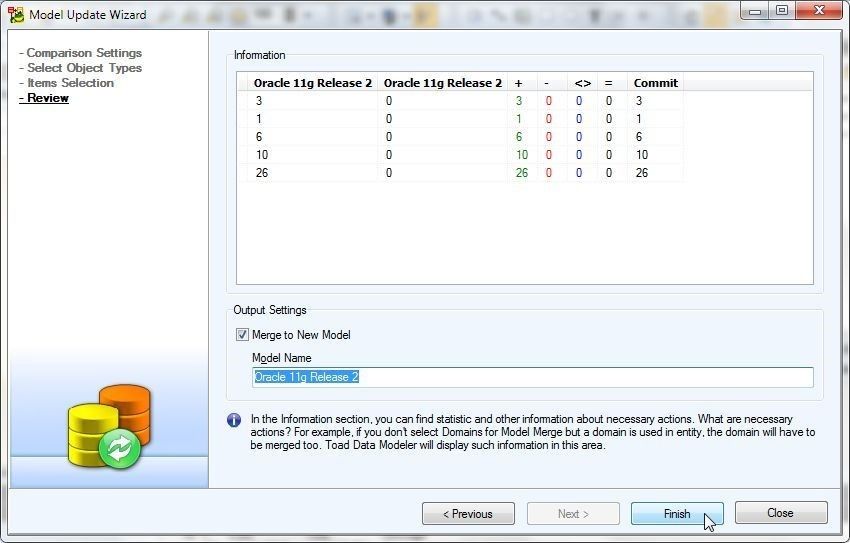
Figure 43. Review>Finish
The reverse engineering gets performed and the database objects get merged as shown in Figure 44.
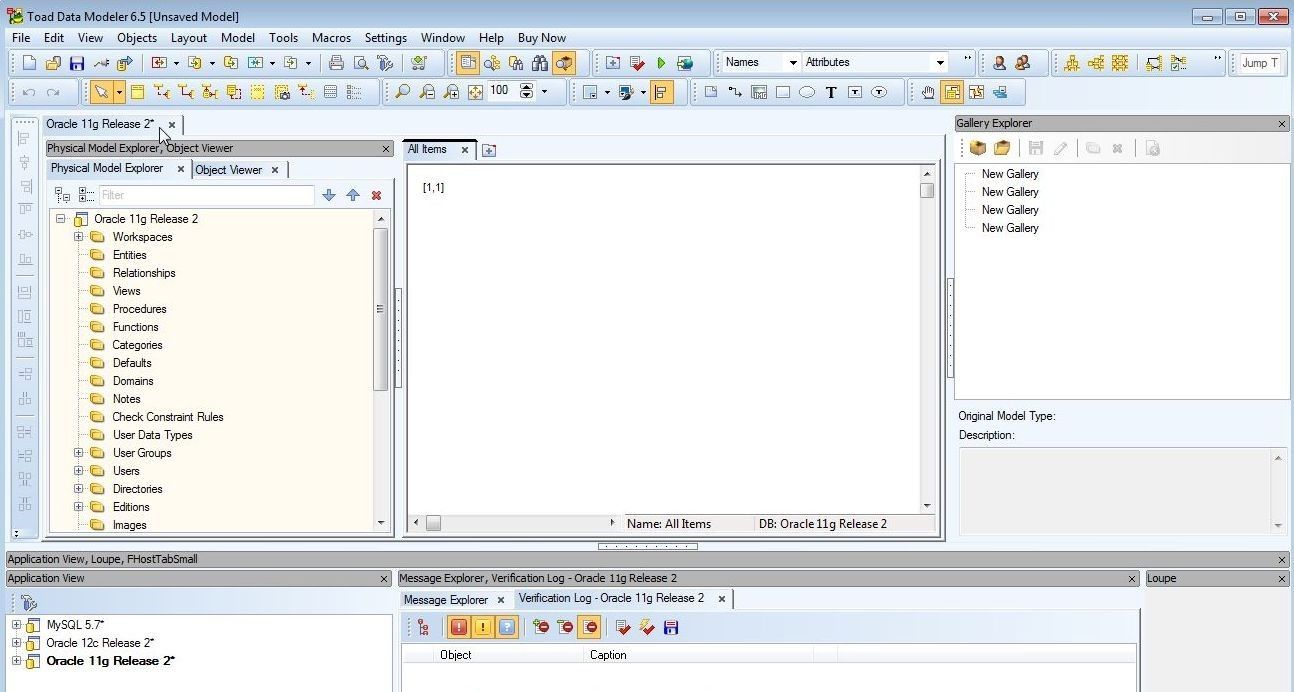
Figure 44. Model Merged
The Message Explorer lists the database objects merged as shown in Figure 45.
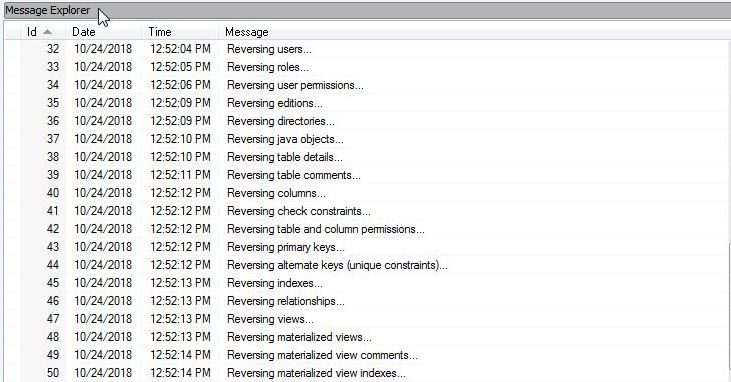
Figure 45. Message Explorer
Click on the folder for a model item type reverse engineered to display the model items, as shown for User Groups in Figure 46.
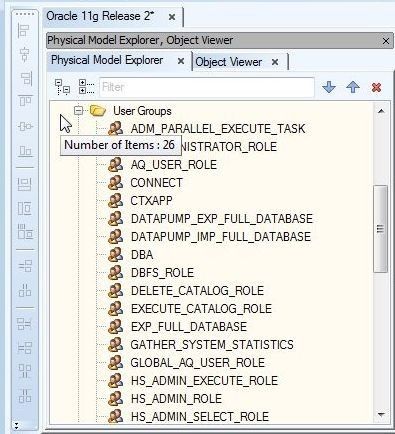
Figure 46. User Groups
The Tablespaces reverse engineered from RDS are shown in Figure 47.
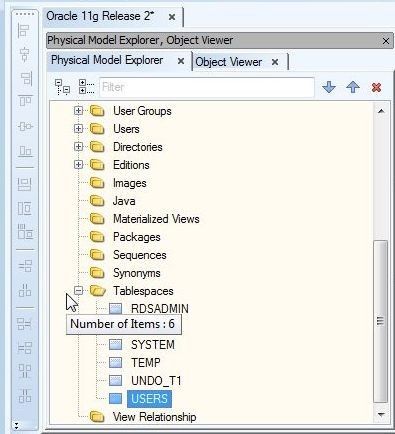
Figure 47. Tablespaces reverse engineered to model
The Users reverse engineered are shown in Figure 48.
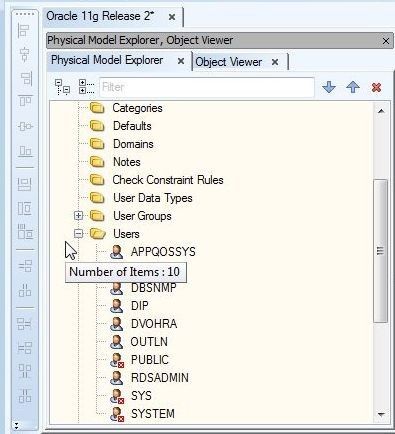
Figure 48. Users reverse engineered to model
The Directories added are shown in Figure 49.
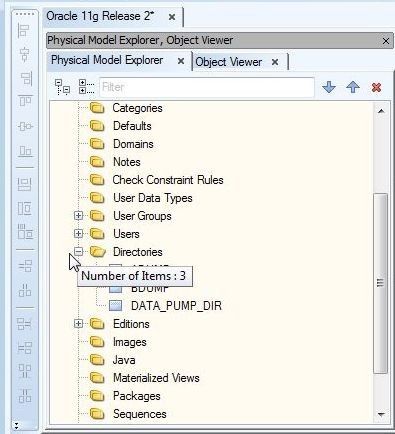
Figure 49. Directories reverse engineered to model
The Object Viewer tab displays the objects as shown in Figure 50.
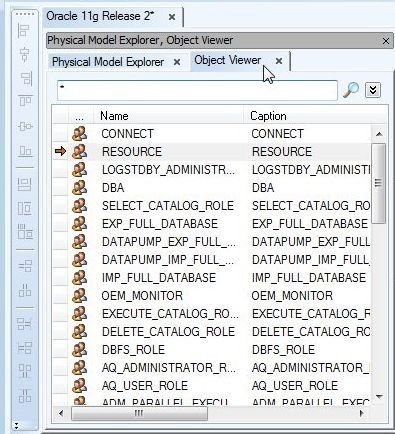
Figure 50. Object Viewer
Summary
In the first of two articles on using Toad Data Modeler to reverse engineer Oracle Database running on AWS RDS we created an Oracle Database instance on AWS RDS, created a model in Toad Data modeler, and reverse engineered the Oracle Database to the model. In a subsequent article we shall explore some of the other features in Toad Data Modeler with the model reverse engineered.
Start the discussion at forums.toadworld.com