Finding and protecting sensitive data within your database is an important task for every business to do. Whether you’re tackling this task due to PCI requirements, GDPR requirements, or simply to protect your customers’ data, it’s an important step to securing your data and keeping it secure. Not only does it protect your company, but it helps instill confidence from your customers knowing that their data is protected.
But what if you have multiple databases? What if each database has hundreds or thousands of tables, each with a dozen or more columns? Where do you even begin to find where sensitive data might be hiding?
Thankfully, Toad® for Oracle makes this a simple task with its Sensitive Data Protection module. Toad’s Sensitive Data Protection module comes bundled with its own built-in library of rules to identify common formats for sensitive information. With a little bit of knowledge of regular expressions, you can also add your own custom rules to identify sensitive data specific to your business. You can then use those rules to find and protect sensitive data within your database and even set up tasks to monitor your database for any new unprotected data that may be added.
In my last blog, How to define sensitive data rules and default policies, I talked about how to create your own custom rules and default policy definitions so you can easily apply them to columns that match your rules. In this tutorial, I’ll walk you through how to use Toad for Oracle’s Sensitive Data Protection Search feature to find and protect the data within your database. I’ll also show you how to set up a recurring task to monitor for additional columns or data added which may not be protected so you can keep on top of changes within your database as you move forward.
How to find sensitive information in your database
Finding sensitive data within Toad for Oracle is easy using the Sensitive Data Protection Search window, which is available with the optional Sensitive Data Protection module. To access this window, simply select Database -> Report -> Sensitive Data Protection Search from the Toad for Oracle main menu. This will open the following window:
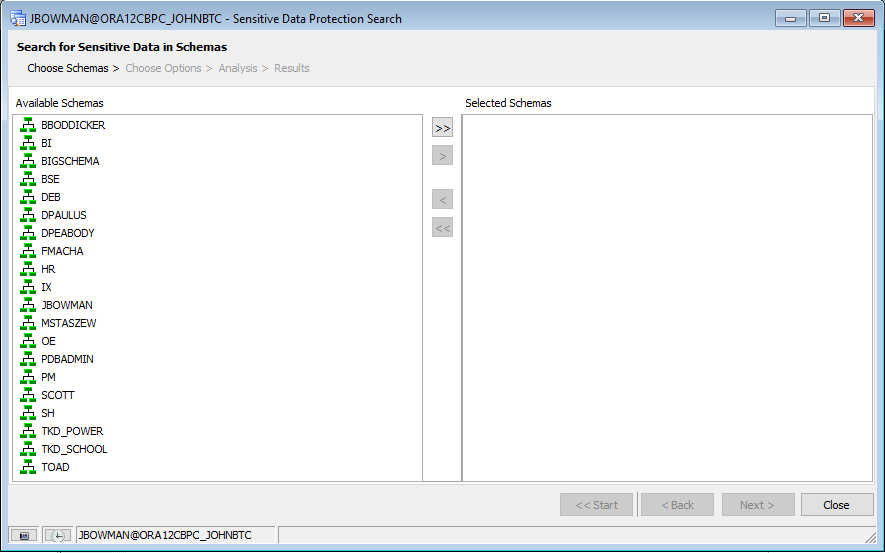
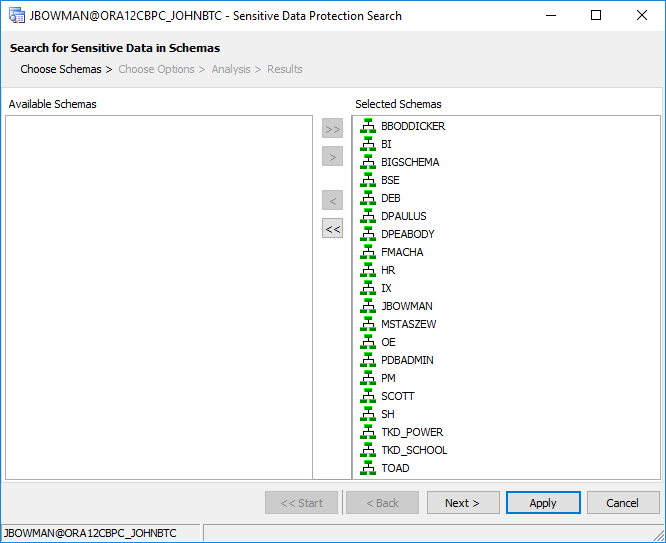
Choosing your schemas
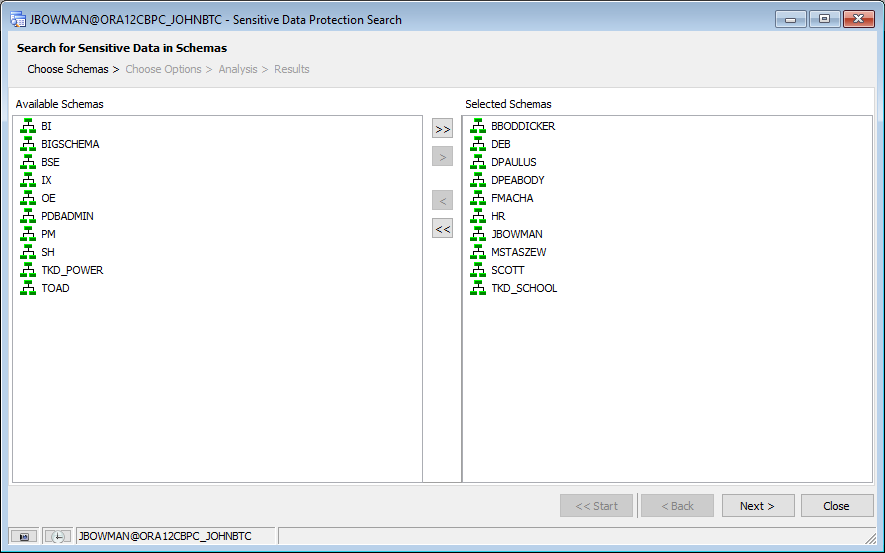
The left-hand column will show the available non-system schemas that can be searched. Simply select the schemas you want to search, or select all of them if desired, and move them over the “Selected Schemas” column. For this example, I’m going to search a few user’s schemas, as well as a few built-in demo schemas within Oracle:
Click the “Next >” button to go to the Options page where we’ll be able to view the search rules we intend to use as well as be able to configure other execution options.
Choosing Rules
The first page of this options window allows us to revisit the list of rules we defined in Toad’s main Options window. Here, we can make any necessary changes we’d like, including unchecking rules we don’t wish to include in this search by default. As you can see in the following example, the “My DOB Rule” we created in the previous tutorial is included, but I’ve unchecked a few rules above it for specific credit card types as an example that aren’t needed for this tutorial.
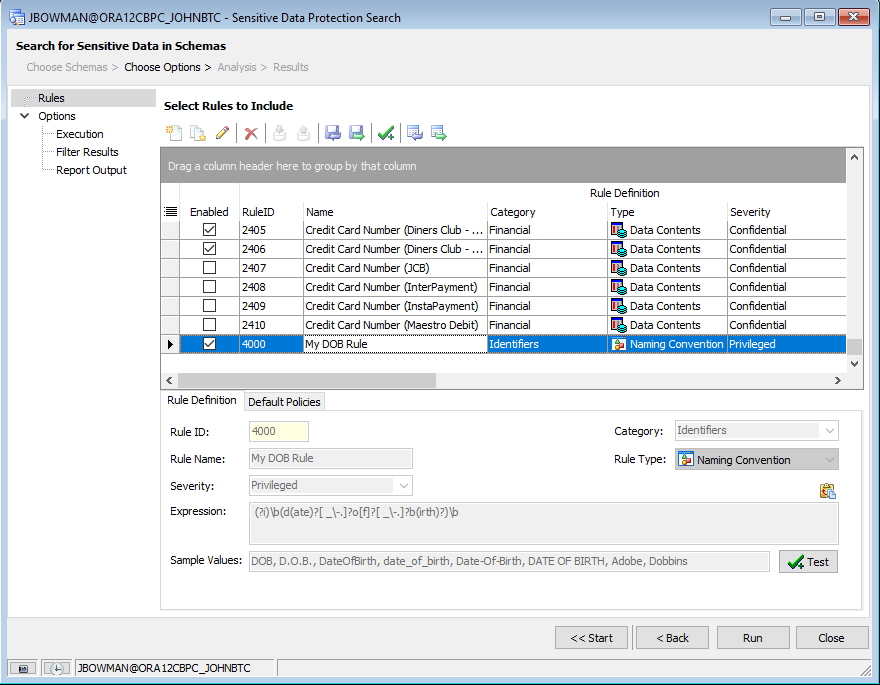
If this list of rules ever becomes out of sync with those defined in Toad’s Options window, we can also reload the default values by selecting the “Load rules from the global rules list” button in the toolbar.
Setting Execution Options
Selecting the “Execution” node in the tree on the left-hand side will let us set options for how the search is to be executed.
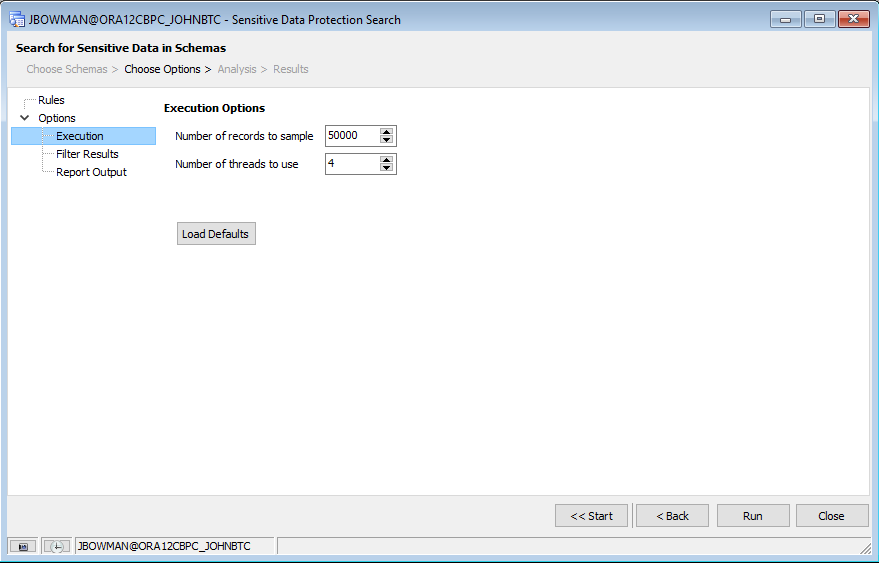
This page allows us to set the number of records to sample in a given table. It also lets us select the number of threads to use in the search. By default, Toad executes its search using multiple threads to improve performance, but we can force it to be single-threaded if desired by setting the number of threads to “1”. For this tutorial, I’ll leave the options to their defaults.
Filtering Results
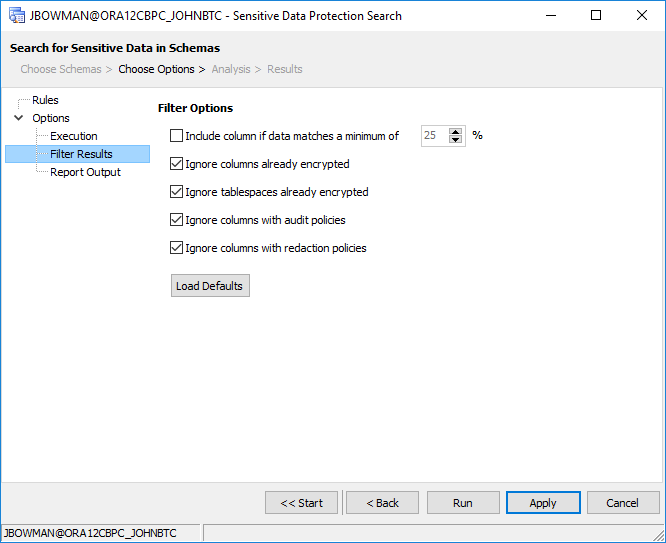
Selecting the “Filter Results” node in the tree on the left-hand side will let us set options to filter the list of columns that are returned.
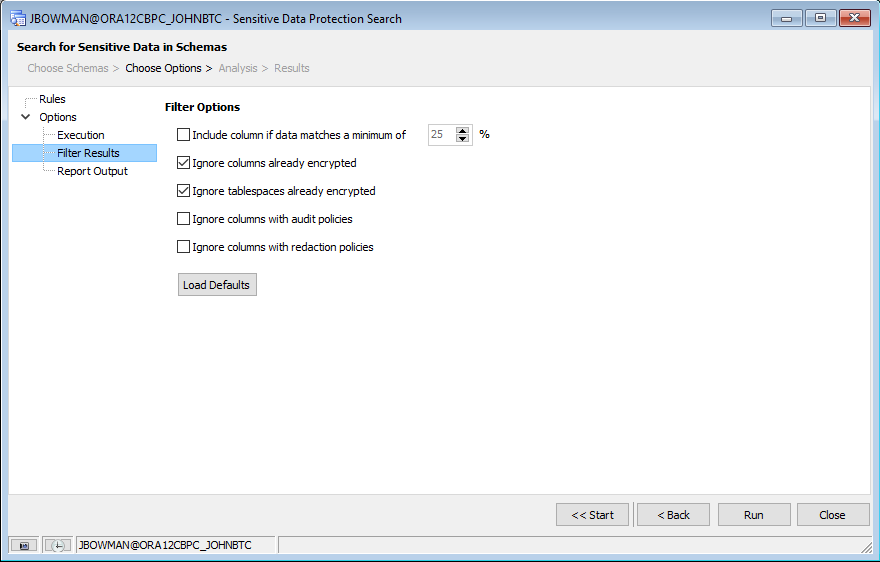
Here, we can define whether to limit the results to columns that contain a minimum threshold of matches. We can also ignore columns and/or tablespaces that are already encrypted, ignore columns that already have audit policies attached, or ignore columns that already have a redaction policy attached to them from the results list. Again, for this tutorial, I’ll leave these options with their defaults.
Setting Report Outputs
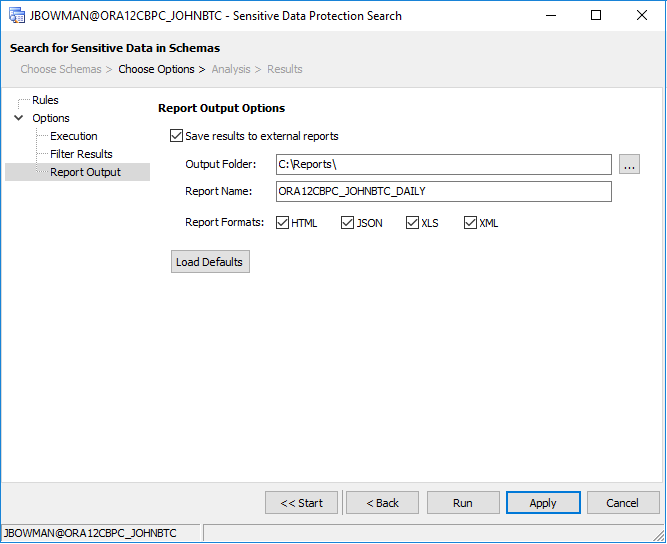
Selecting the “Report Output” node in the tree on the left-hand side will let us set options to output our results to report files that we can view later.
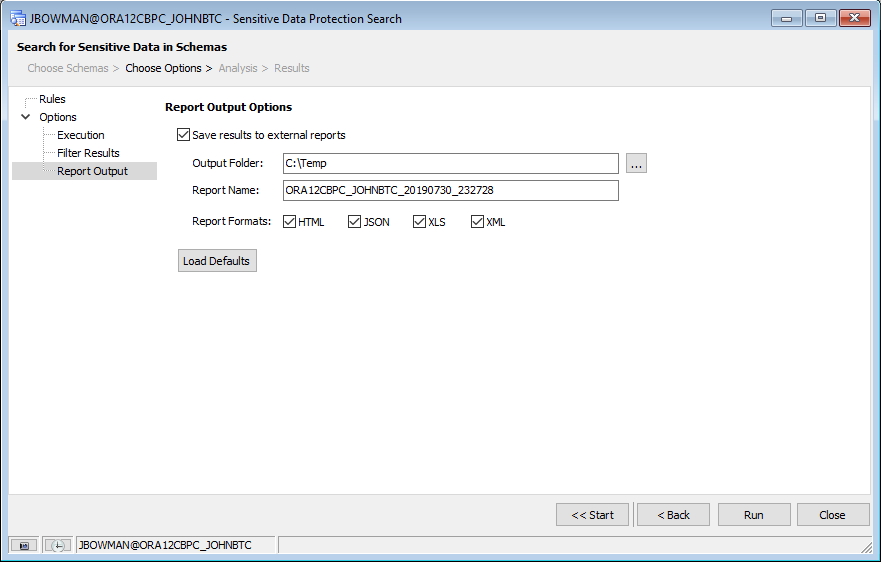
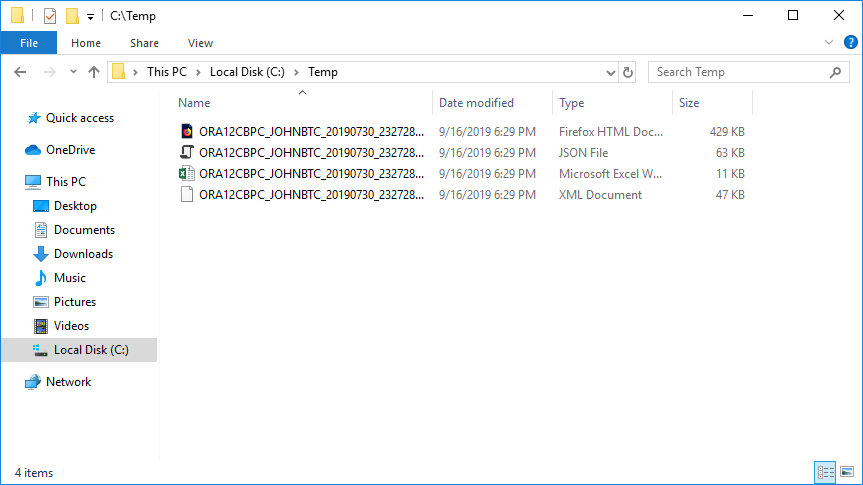
Toad for Oracle gives us the options to create output files in HTML, JSON, XLS, and/or XML format, depending on what we need. For this tutorial, I’ve chosen to output all four formats to my “C:\Temp” directory.
Running the Search
Once we have your desired options set, we can simply click the “Run” button to start the search. Toad for Oracle will go through all tables and views within each selected schema and use the rules we’ve defined to search for potential matches.
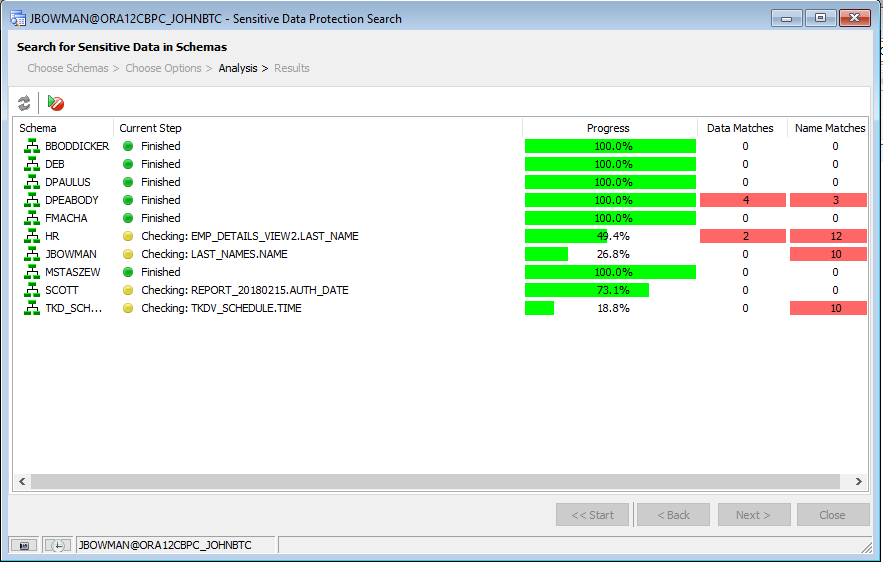
When finished, the Sensitive Data Protection Search will automatically display the results page.
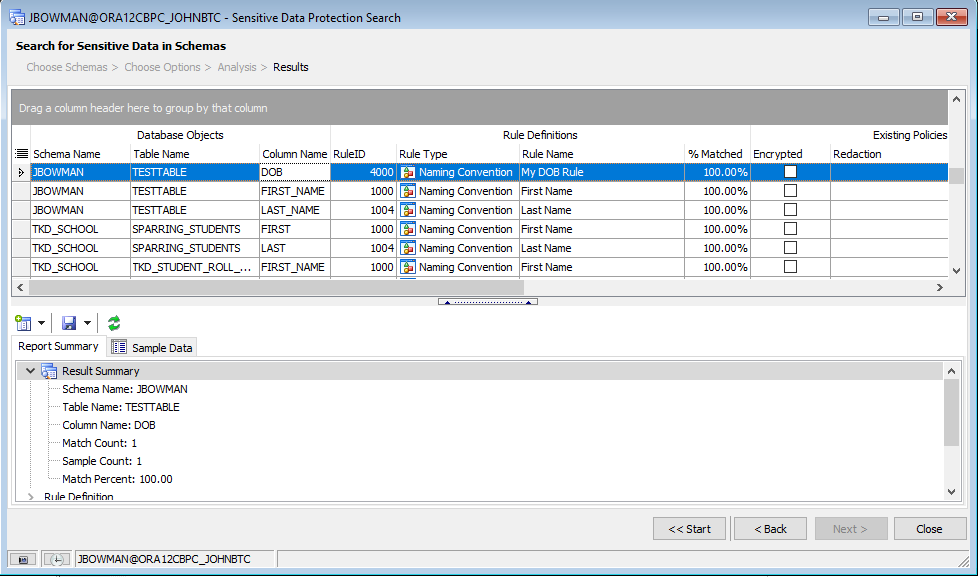
Also, since we selected to output our results to files, the results are also reflected in the reports we selected during the options step above:
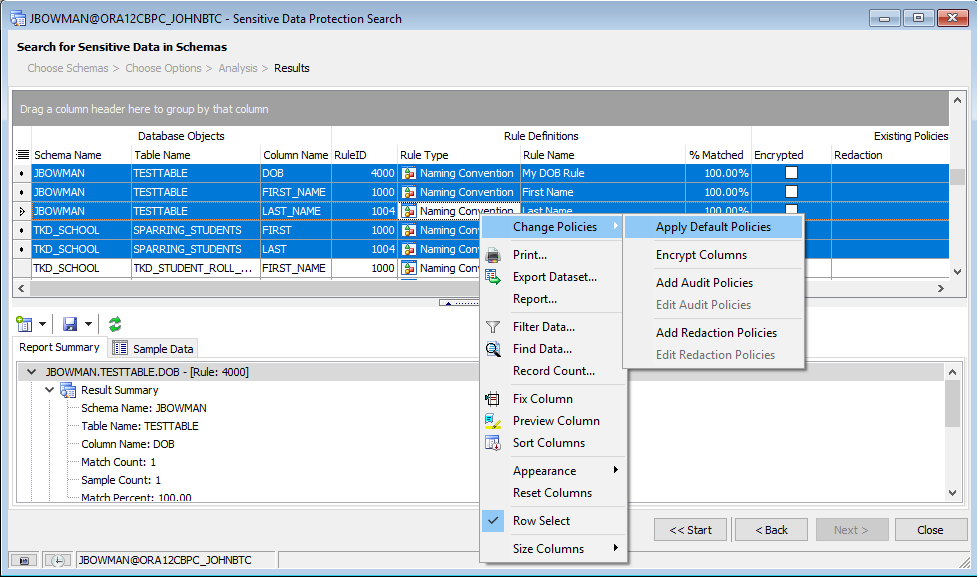
Now that we have these results, we can start to protect the columns in question. There are a couple of ways we can accomplish this.
Applying default policies
If we defined default policies for our rules, as in the previous tutorial, we can select a group of records and apply those default policies in batch mode by selecting the resulting columns, right-clicking, and selecting Change Policies -> Apply Default Policies from the context menu:
Selecting this option will display a new window that shows what policies will and will not be applied based on what we’ve selected and what default policies are defined:
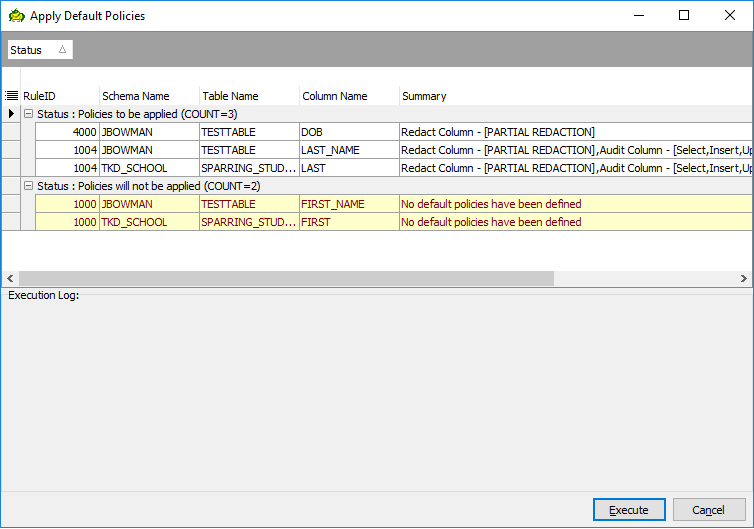
If we’re okay with applying these policies, all we’d need to do is simply click the “Execute” button and the policies will be applied. Otherwise, we can click the “Cancel” button to return to the previous screen.
Applying manual policies
Alternatively, rather than applying default policies in batch mode, we can also manually apply policies to a group of columns by selecting the columns in question and clicking the “Add a policy to a column” button on the report summary toolbar:
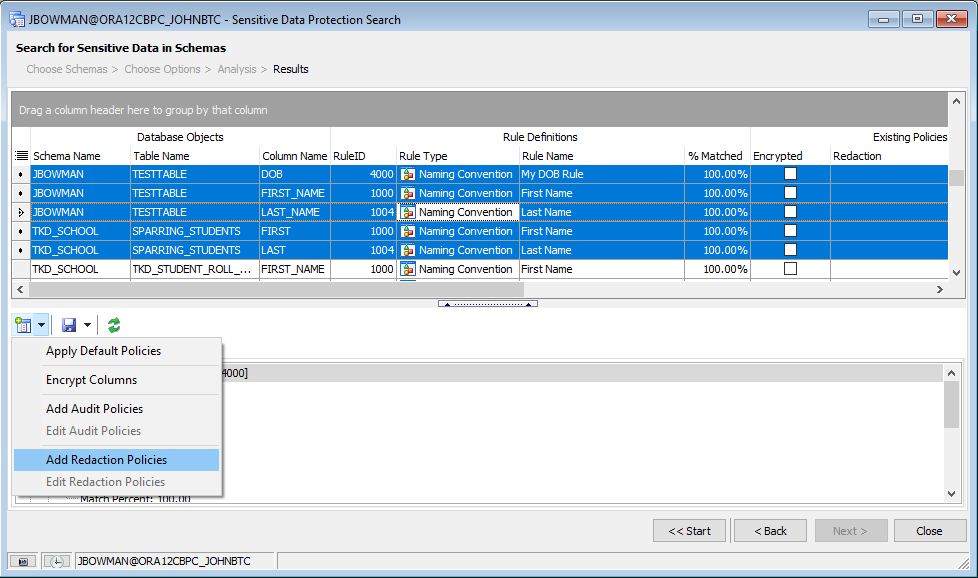
Selecting one of these options will open up separate windows within Toad to allow us to manually configure whatever policy we need for the selected columns.
How to set up a recurring task to monitor for additional columns or data
Now that we’ve searched our database and hopefully protected what data we currently have; how will we know when new columns are added that might be unprotected? What happens if someone inadvertently copies personal information into an otherwise seemingly harmless column, like a comment or notes column, a test column, or a temporary table? How do we catch things going forward?
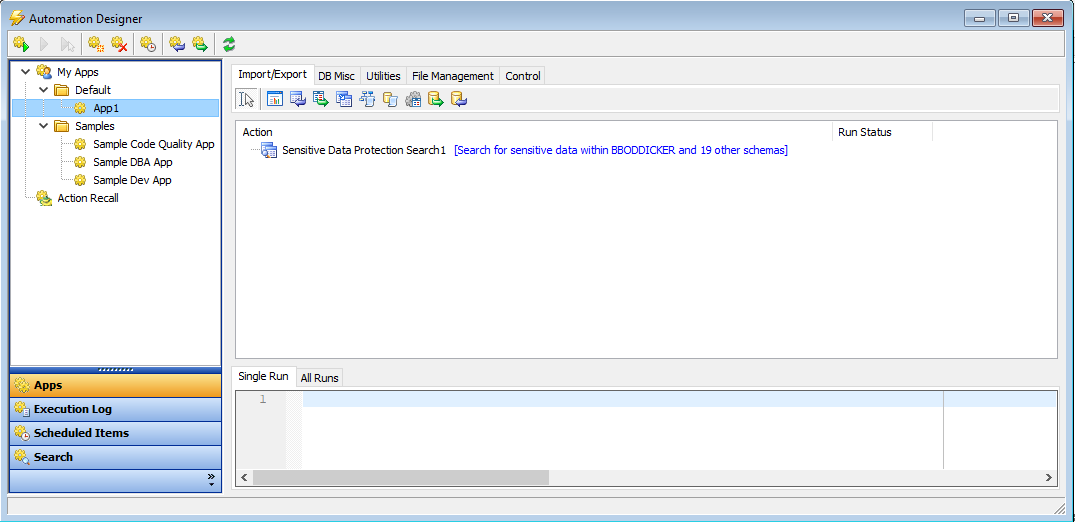
For that, we can use the same screen we’ve been working with, only configured from within Toad for Oracle’s Automation Designer. To access this window, simply select Utilities -> Automation Designer from Toad for Oracle’s main menu. Then create a new App for this automated process or use the default one if it’s empty. Once we have our App created, we can click on the “DB Misc” tab and drop a Sensitive Data Protection Search action onto the App:
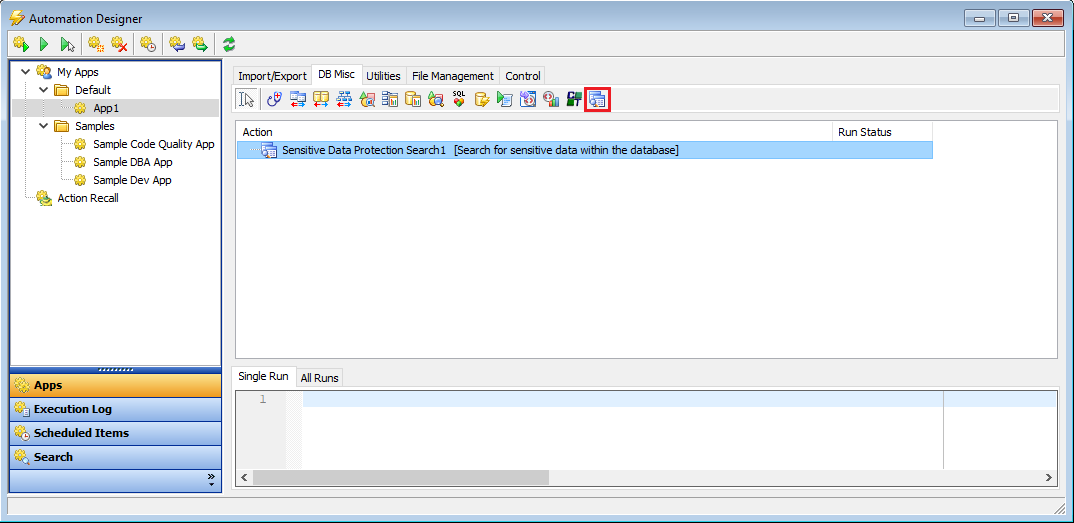
If you double-click on the action, you’ll notice it’s the very same window we’ve been working in above. For this example, we’ll select all schemas available to us and click the “Next >” button to progress to the Options window:
In the Options window, we’ll enable all rules, and on the Filter Results page, we’ll check the following options to ignore columns that have been, in some way, protected:
And finally, on the “Report Output” page, we’ll select the option to save results to external reports, select a default directory, and a default report name:
Since we’re setting this up as an automated task, we don’t need to run it now, although we can if we wanted to test it. For now, we’ll simply click the “Apply” button to save our settings and then close the form. The description for the action should have changed to reflect the schemas that we selected.
Note: If desired, we could also drop additional actions onto our App to process or consume some of the output reports. For example, we could move the report files to a common location for archiving, email them to the Security or Data Protection Officer, or perhaps copy them to an internal reporting server. For more information about the Automation Designer, visit Toad for Oracle’s help file.
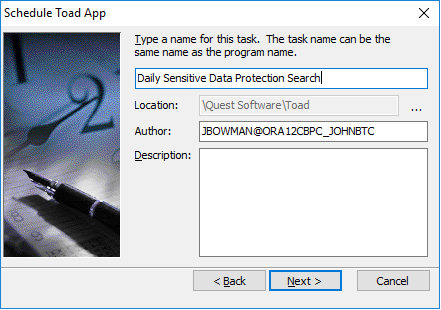
Once we have our App created and our Action defined, we then only need to schedule the app in Windows Task Manager by right-clicking the app and selecting “Schedule”. This will open up the task scheduling wizard. Here, we simply need to enter a name for the task and then click “Next”.
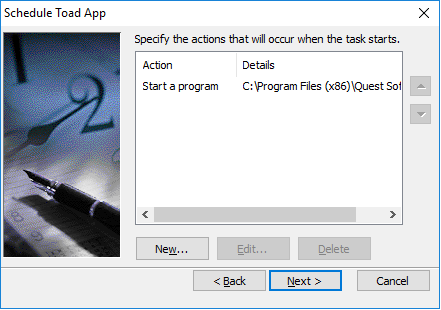
The action to perform is already entered by Toad, so we simply need to click “Next” again.
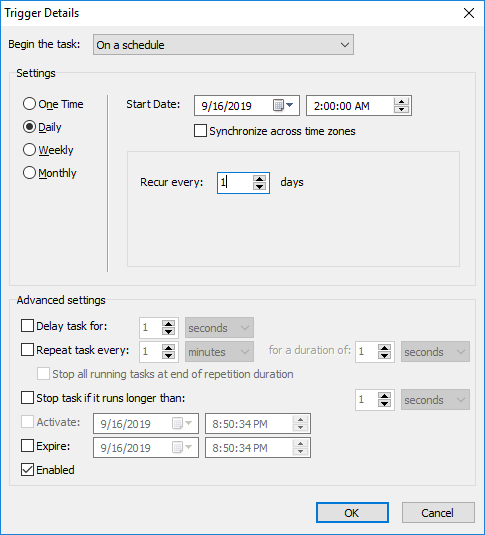
Then, add a new condition to trigger the task. For this example, we’ll set it up to run daily at 2am:
Click “OK” and then “Next”. We’ll leave the default settings for the user account in which to run this app. Click “Next” again to enter your password and then click “Finish” to finish the wizard.
Our app is now scheduled to run every morning at 2am and should be ready for us to view as soon as we get into the office in the morning. Once we view the report, we can then proceed to secure any additional columns or data that need protecting.
Conclusion
In this tutorial, we took a look at how to search for sensitive data within our database; and once found, protect that data by applying default or manual policies to those columns. We also took a look at how to create a recurring task to continue to monitor the database going forward so that we can catch new unprotected tables or data that may be inadvertently created at a later date.
If you'd like to learn more about defining your own custom rules and default policies, visit part one of this two-part blog series, How to define sensitive data rules and default policies.
Free trial
If you don’t currently own a copy of Toad for Oracle or would like to try the features of the Sensitive Data Protection module, please visit our free trial page and download a trial.
Useful resources:
Video:Just learning about sensitive data protection? Watch this 2-minute video.
Tech brief:Find out how you can search for sensitive data in this 2-page tech brief.
White paper:8 Questions DBAs Need to Answer About Data Privacy and Protection.
Product page: Visit our product page on Quest.com to learn how you can find and control sensitive data across all your Oracle databases.
Related Toad World blog posts:
How to define sensitive data rules and default policies
Amphibian Evolution, GDPR and Sensitive Data Protection
Toad for Oracle Sensitive Data Protection Module FAQ
Guide to the Toad for Oracle Sensitive Data Protection Module
Questions? Start a discussion.
Have any additional questions? Click Start Discussion and this blog topic will be transferred to the Toad World Forum.
Start the discussion at forums.toadworld.com