In the first of two articles on Oracle Database 18c we created an instance of Oracle Database 18c on Oracle Database Cloud. In this continuation article we shall connect to the database instance with Toad for Oracle. Two options are available in Toad for Oracle to connect to Oracle Database: using a direct connection and using a TNS Names service. We shall discuss both the options.
Creating a Direct Connection in Toad for Oracle
To create a connection, direct or using TNS service, click on Session>New Connection as shown in Figure 1.

Figure 1. Session>New Connection
In the Toad for Oracle Database Login wizard (Figure 2) a new login record may be configured using either of the two options.
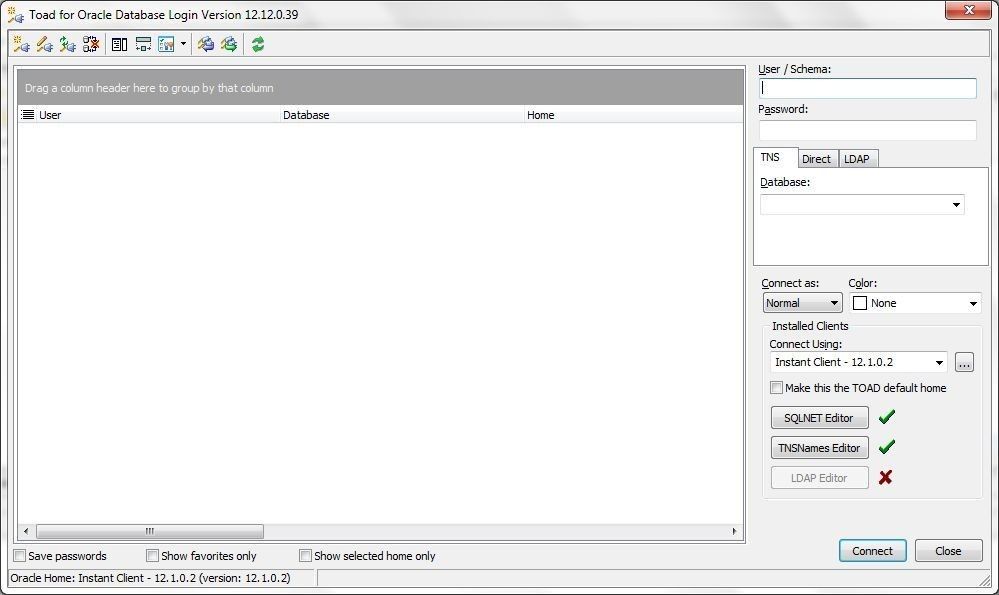
Figure 2. Toad for Oracle Database Login Wizard
Specify User/Schema as SYS and specify the Password for the SYS schema as configured when creating the Oracle Database 18c instance. Select the Direct tab and specify Host as the Public IP of the database instance. Specify port as 1521 (default). Specify Service Name as the service name obtained from the Connect String. Select Connect as SysDBA. In Connect Using select the Oracle Instant Client. Click on Connect as shown in Figure 3.
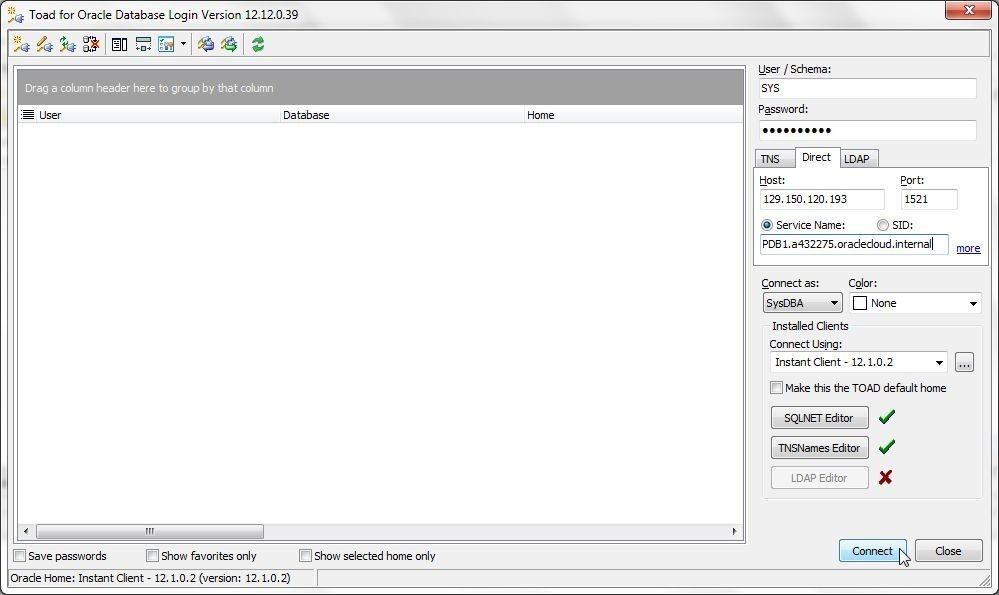
Figure 3. Connecting with a Direct Connection
A new connection gets established and gets listed in Toad for Oracle toolbar, as shown in Figure 4.
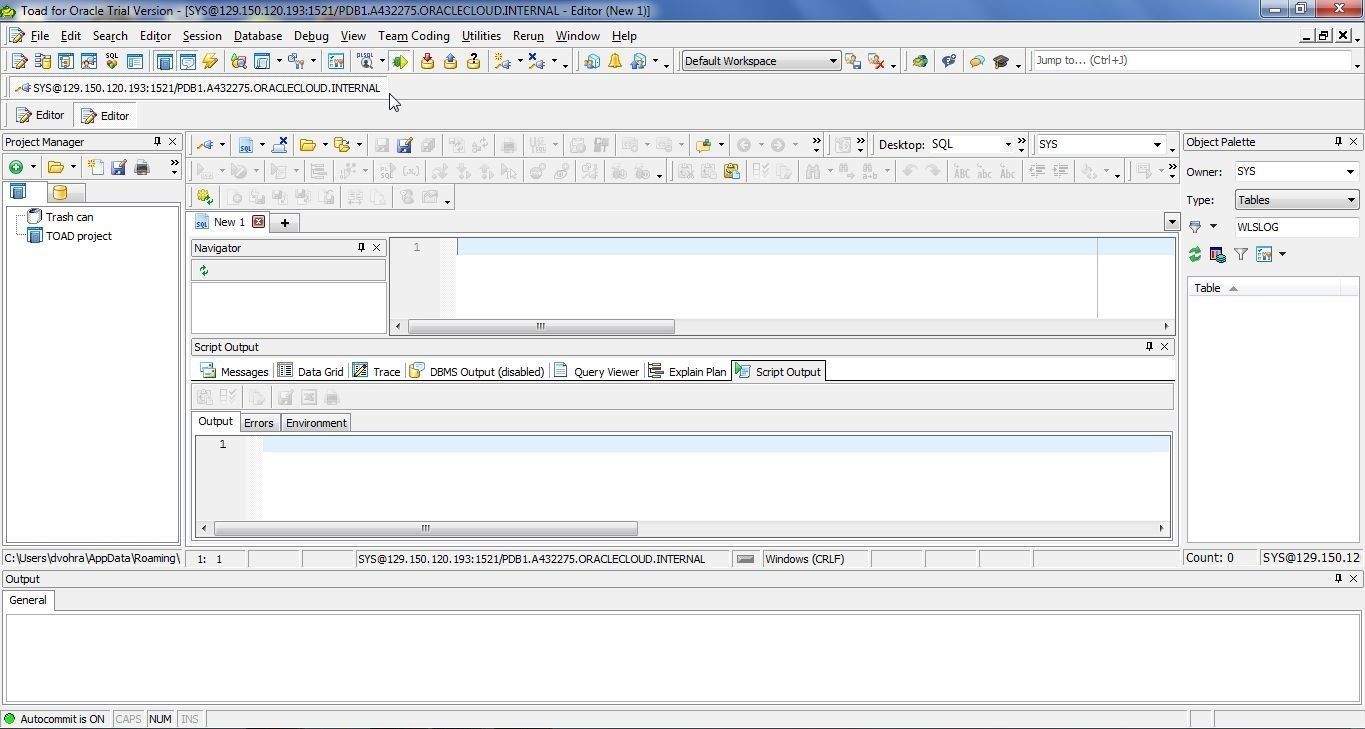
Figure 4. New Connection in Toad for Oracle Toolbar
Creating a Connection using TNS Names Service
To create a connection using TNS Names Service select Session>New Connection as before or select New Connection from the toolbar as shown in Figure 5.

Figure 5. New Connection
In the Login wizard the connection created earlier should be listed. Select the TNS tab and click on TNSNames Editor to create a new network service as shown in Figure 6.
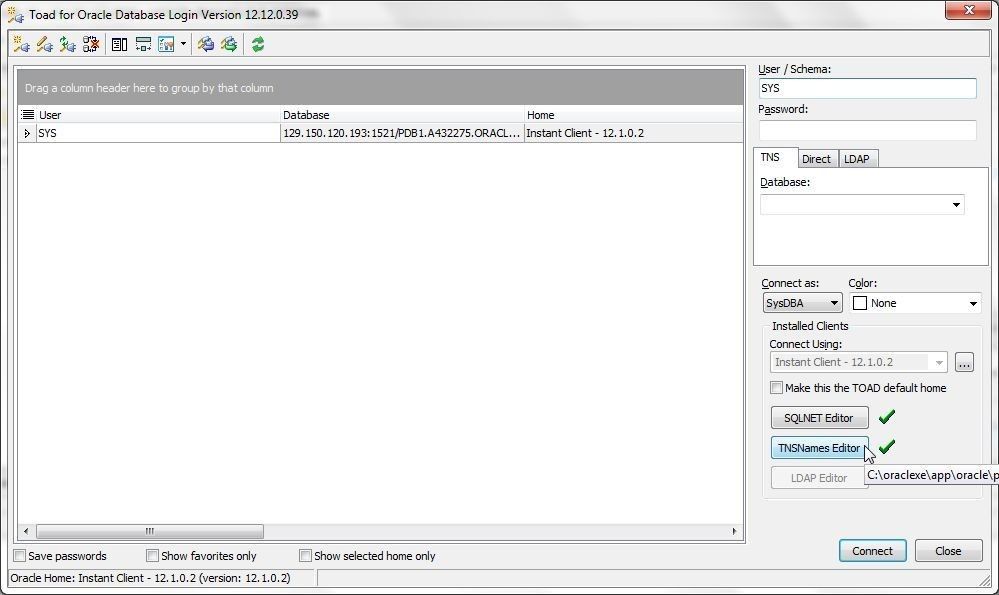
Figure 6. TNSNames Editor
Next, configure a net service name in the TNSNames Editor, which further saves the net service name/s in tnsnames.ora file. The directory path to the tnsnames.ora file that is used must be set in the TNS_ADMIN environment variable as we did in the first article. To add a new net service name select Add Network Service as shown in Figure 7.
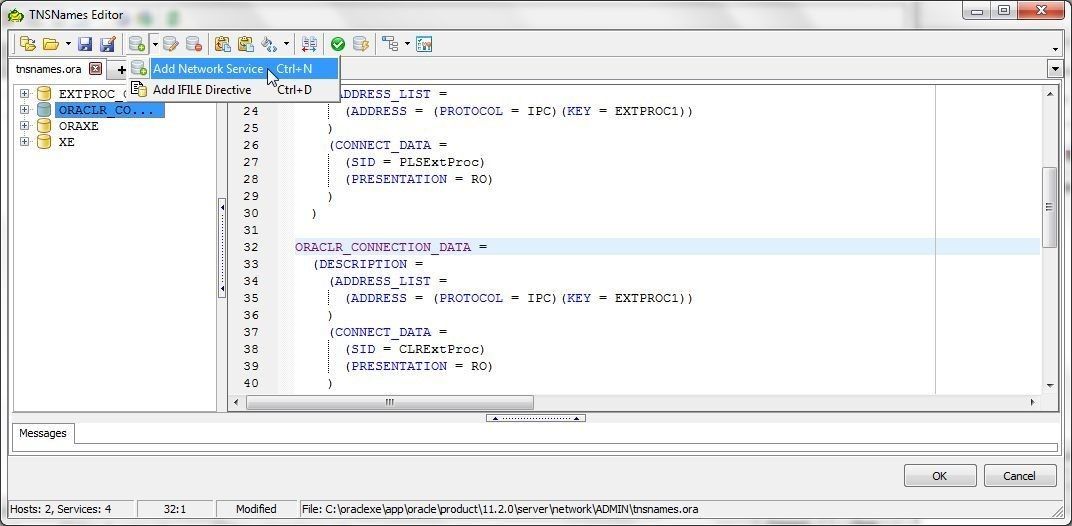
Figure 7. Add Network Service
In the Add service wizard specify a Net Service Name (OraDB18C) and specify the Host name and Port as shown in Figure 8. The Protocol is TCP/IP by default.

Figure 8. Add Service
In Service Information specify Service name as the service name copied from the Connect String. Select Connection Type as Default Database as shown in Figure 9.
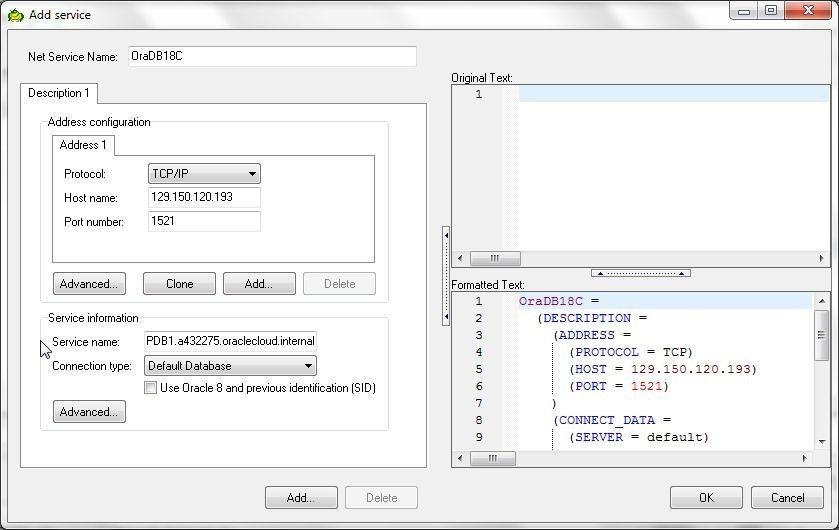
Figure 9. Specifying Service Information
Click on OK as shown in Figure 10 to complete the net service configuration.

Figure 10. Add service>OK
A new net service name gets configured and gets added to the TNSNames Editor, as shown in Figure 11. The tnsnames.ora file also gets updated. Click on OK.
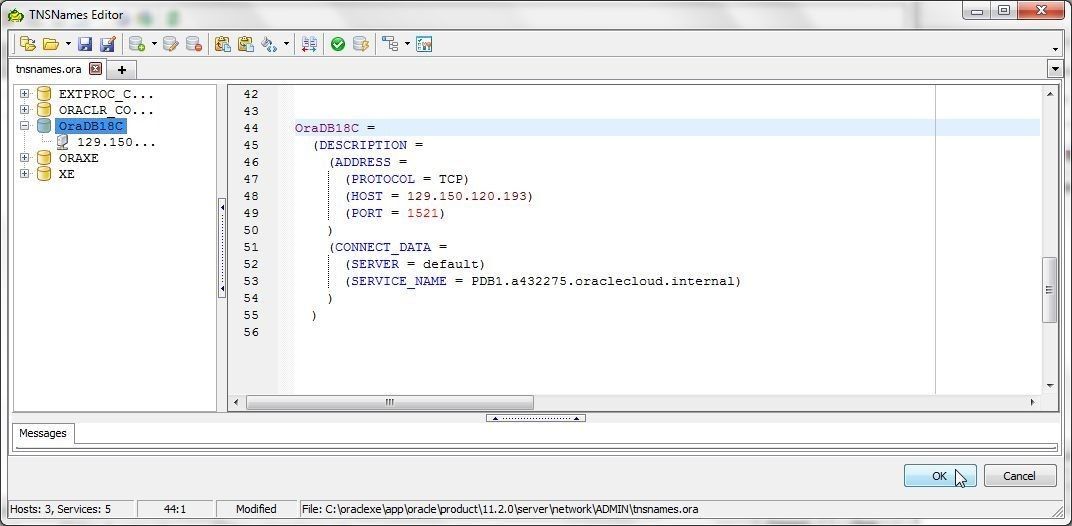
Figure 11. New Net Service Added
In the Login wizard specify Username as SYS and the Password as configured when creating the 18c database instance. With the TNS tab selected select the Database OraDB18C from the drop-down as shown in Figure 12.

Figure 12. Selecting Database Service for TNS
Select Connect as SysDBA and click on Connect as shown in Figure 13.

Figure 13. TNS>Connect
A new connection gets added to Toad for Oracle, as shown in Figure 14.

Figure 14. New Connection SYS@OraDB18C added
Creating a Table by Running a Script in an SQL Editor
In this section we shall create a database table using the following SQL script.
CREATE TABLE wlslog(logid int PRIMARY KEY,category VARCHAR(255),
type VARCHAR(255),servername VARCHAR(255), code VARCHAR(255),msg VARCHAR(255));

INSERT INTO wlslog(logid,category,type,servername,code,msg)
VALUES(1,'Notice','WebLogicServer','AdminServer','BEA-000365','Server state changed to STANDBY');

INSERT INTO wlslog(logid,category,type,servername,code,msg)
VALUES(2,'Notice','WebLogicServer','AdminServer','BEA-000365','Server state changed to STARTING');

INSERT INTO wlslog(logid,category,type,servername,code,msg)
VALUES(3,'Notice','WebLogicServer','AdminServer','BEA-000365','Server state changed to ADMIN');

INSERT INTO wlslog(logid,category,type,servername,code,msg)
VALUES(4,'Notice','WebLogicServer','AdminServer','BEA-000365','Server state changed to RESUMING');

INSERT INTO wlslog(logid,category,type,servername,code,msg)
VALUES(5,'Notice','WebLogicServer','AdminServer','BEA-000361','Started WebLogic AdminServer');

INSERT INTO wlslog(logid,category,type,servername,code,msg)
VALUES(6,'Notice','WebLogicServer','AdminServer','BEA-000365','Server state changed to RUNNING');

INSERT INTO wlslog(logid,category,type,servername,code,msg)
VALUES(7,'Notice','WebLogicServer','AdminServer','BEA-000360','Server started in RUNNING mode');
Each database connection is associated with at least one SQL Editor. Copy the SQL Script to an SQL Editor and click on Execute as script as shown in Figure 15.
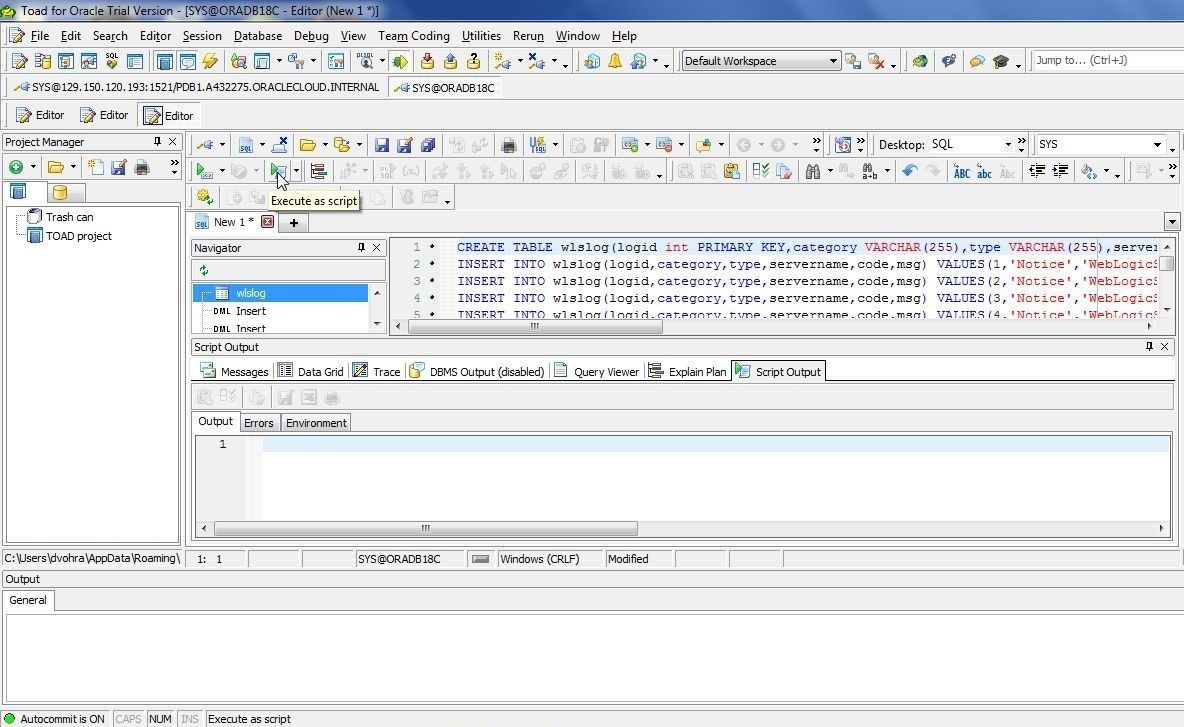
Figure 15. Execute as Script
A table gets created, as indicated in the Script Output in Figure 16.

Figure 16. Table Created
Using the Schema Browser
A schema may be explored using the Schema Browser. Select Database>Schema Browser as shown in Figure 17.
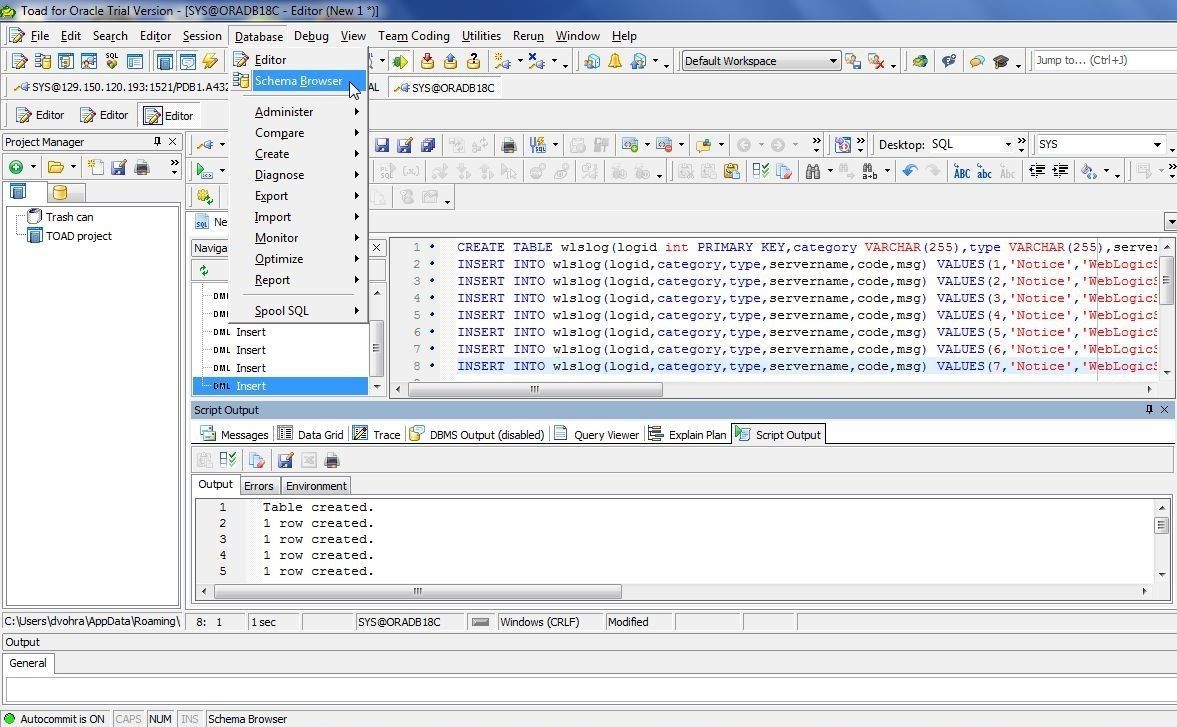
Figure 17. Database>Schema Browser
The Schema Browser gets launched. Select a schema (SYS) and a table (WLSLOG) to display detail on, as shown in Figure 18. The table columns are displayed by default.

Figure 18. Selecting Schema and Table in Schema Browser
Select the Data tab to display the table data as shown in Figure 19.

Figure 19. Displaying Table Data
Exporting Table Data
To export table data select Export dataset in the Schema Browser as shown in Figure 20.

Figure 20. Export Dataset
In the Export Dataset wizard select Export format from the drop-down. Select Excel File as shown in Figure 21.

Figure 21. Export Format>Excel File
Select an Output File as shown in Figure 22.
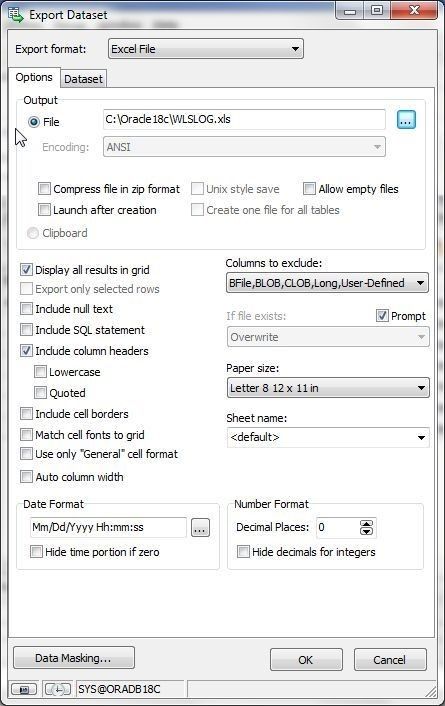
Figure 22. Output File
The SQL statement used to select the data to be exported is displayed in the Dataset tab, as shown in Figure 23.

Figure 23. DataSet SELECT Statement
All the other settings may be kept as the default. Click on OK as shown in Figure 24.

Figure 24. Export Dataset>OK
The dataset gets exported, as indicated by the message output in Figure 25.
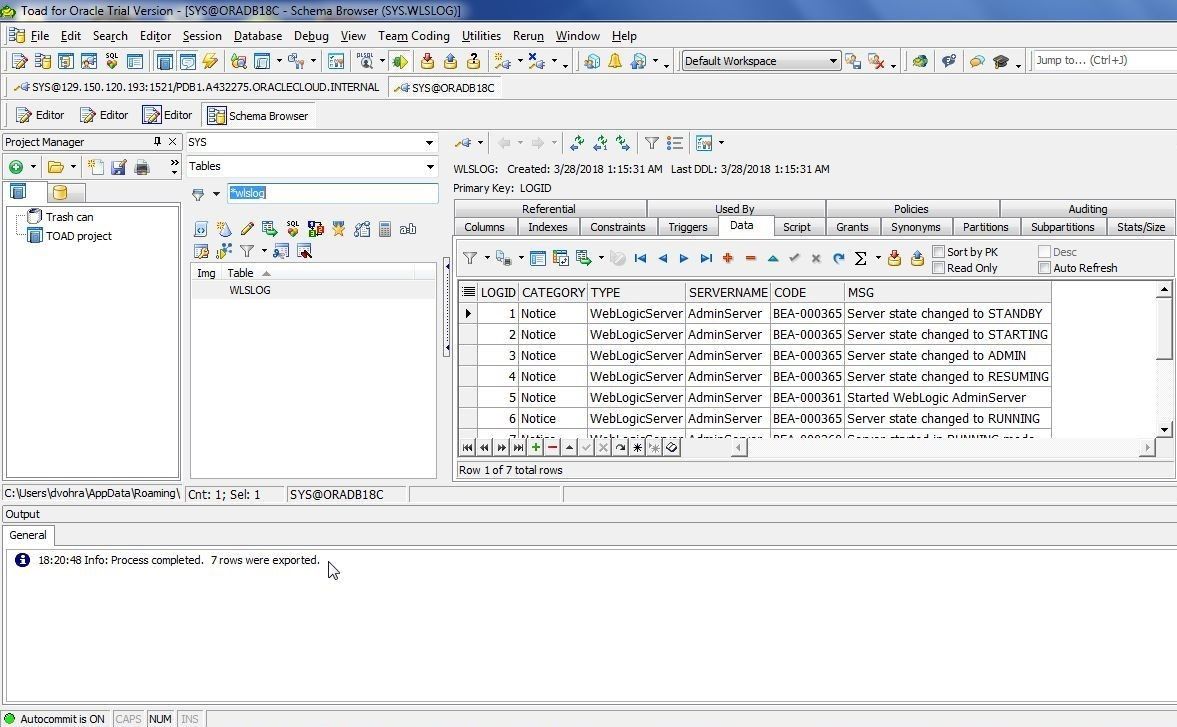
Figure 25. Dataset Exported
The Excel file exported is shown in Figure 26.
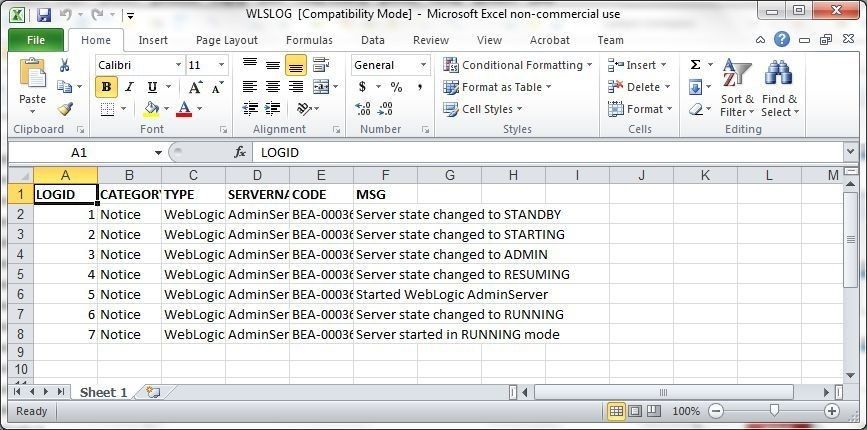
Figure 26. Excel File
Running a SQL Query
To run a SQL query select the other connection in the toolbar. Specify aSELECT statement in the SQL Editor associated with the connection and click on Execute/compile statement at caret as shown in Figure 27.

Figure 27. Execute statement at caret
The Data Grid generated by the SQL query is shown in Figure 28.
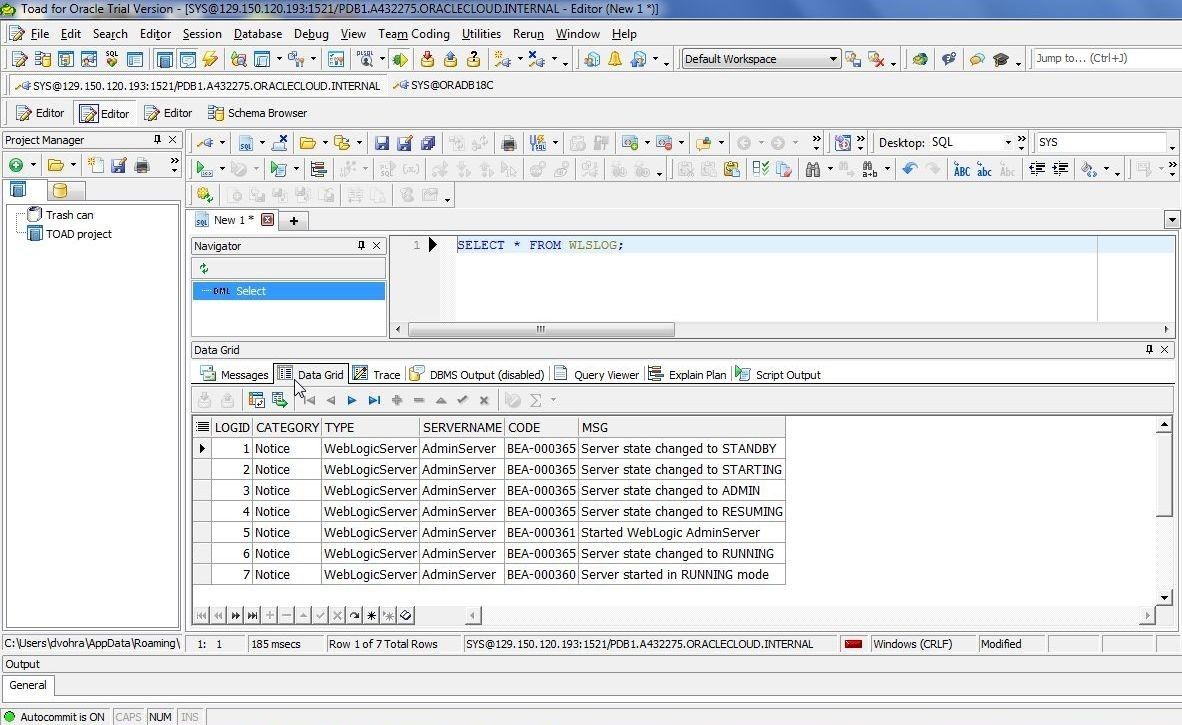
Figure 28. Data Grid
The query detail including status, start time, and stop time is listed in the Query Viewer tab, as shown in Figure 29.

Figure 29. Query Viewer
Connecting and Disconnecting
A connection (also called a session) has several management options available, including connecting, reconnecting, testing, and disconnecting, and these features may be selected from Session, as shown in Figure 30.

Figure 30. Connection or Session Features
Only connected sessions or connections are displayed in the toolbar, as shown in Figure 31.

Figure 31. Connected Sessions
A connection that has a Login record may be connected by selecting Session>Connect, as shown in Figure 32.
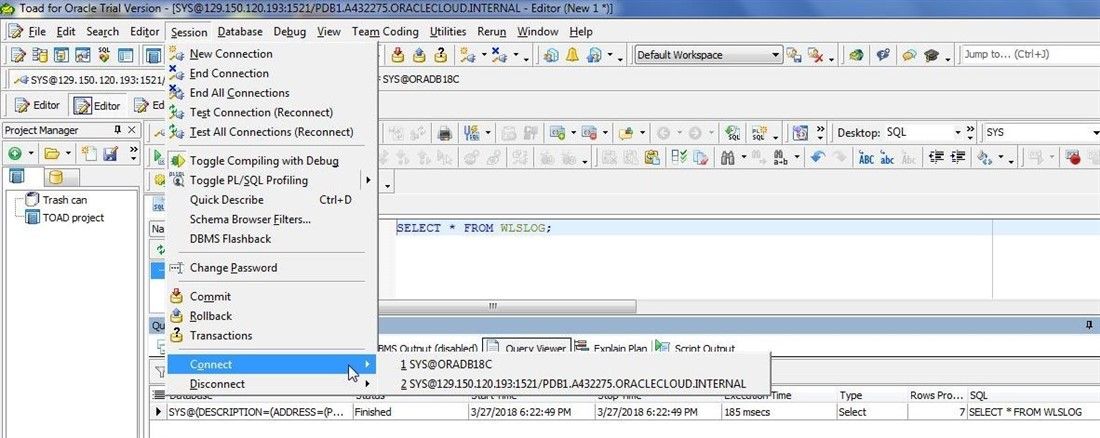
Figure 32. Session>Connect
A connected connection may be disconnected by selecting Session>Disconnect as shown in Figure 33.

Figure 33. Session>Disconnect
A Confirm dialog is displayed when a connection is disconnected, as shown in Figure 34. Click on Yes to disconnect.

Figure 34. Confirm dialog to disconnect
Additional Confirm dialogs are displayed for each open SQL Editor script, as shown in Figure 35 for “New 1” file.

Figure 35. Confirm dialog to save a file
The connection gets disconnected, as shown in Figure 36. Only one of the two connections is listed in the toolbar.
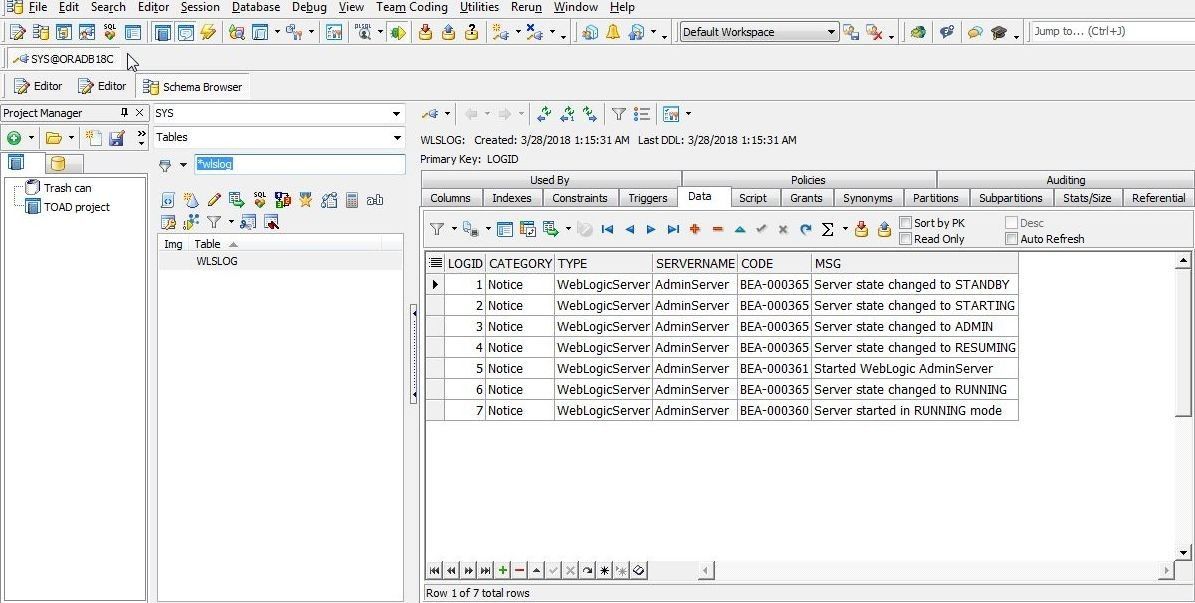
Figure 36. One of the two Connections disconnected
Deleting a Login Record
Disconnecting a session does not delete its login record. The login record may be used to connect again. A Login record may be deleted from the Login wizard. Select Session>New Connection to display the Login wizard. Select the login record to delete, as shown in Figure 37. Select Delete on the keyboard.

Figure 37. Selecting a Connection to delete
In the Confirm dialog Delete record? click on Yes, as shown in Figure 38.
Figure 38. Confirm>Delete record?
The login record gets deleted and only one of the two login records is listed, as shown in Figure 39.

Figure 39. Only one of two login records displayed
Stopping Oracle Database 18c Instance
To stop the Oracle Database 18c instance, select Stop from the ![]() icon (not labeled in the figure) to manage the instance, as shown in Figure 40.
icon (not labeled in the figure) to manage the instance, as shown in Figure 40.

Figure 40. Stop instance
In the Stop Instance confirmation dialog click on OK. The instance starts to get stopped, as indicated by a message shown in Figure 41.

Figure 41. Stopping a Database Instance
Deleting Oracle Database 18c Instance
A database instance may be deleted by selecting Delete from the icon (![]() ) pop-up menu to manage an instance; however, it cannot be deleted if the instance is stopping but not yet fully stopped, as indicated by Delete being grayed out in Figure 42.
) pop-up menu to manage an instance; however, it cannot be deleted if the instance is stopping but not yet fully stopped, as indicated by Delete being grayed out in Figure 42.

Figure 42. Delete grayed out
When an instance has stopped, as indicated by Status Instance Stopped, select Delete as shown in Figure 43.

Figure 43. Delete
In the Delete Service Instance confirmation dialog select Delete as shown in Figure 44.

Figure 44. Delete Service Instance
Conclusion
In two articles we have discussed using Oracle Database 18c, which was introduced recently in Q1 2018, with Toad for Oracle. The benefit of using Toad for Oracle is an integrated development environment (IDE) with all the features to connect to a database , create and manage connections, create and manage database objects, run SQL scripts, browse schemas and generate reports in various output formats including CSV, HTML, and Excel. Oracle Database 18c is also the core component of the Oracle Autonomous Database, a fully automated and managed Oracle Database.
Start the discussion at forums.toadworld.com