Oracle Database 18c is the latest version of Oracle database and introduces a new release model that is based on continuous delivery. Oracle Database 18c is available only on Oracle Exadata and Oracle Database Cloud. The new release model is based on agile development and new features are made available sooner than with the monolithic release model. Oracle Database 18c is the core component of the Autonomous Database Cloud, which is a self-driving database. In two articles we shall discuss using Oracle Database 18c with Toad for Oracle. The articles have the following sections.
- Setting the Environment
- Creating a Storage Container
- Creating an Oracle Database 18c Instance
- Enabling Connectivity to Oracle Database 18c
- Obtaining Connection Parameters
- Creating a Direct Connection in Toad for Oracle
- Creating a Connection Using TNS Names
- Creating a Table by Running a Script in an SQL Editor
- Using the Schema Browser
- Exporting Table Data
- Running an SQL Query
- Connecting and Disconnecting
- Deleting a Login Record
- Stopping Oracle Database 18c Instance
- Deleting Oracle Database 18c Instance
Setting the Environment
Download and install Toad for Oracle. Start Toad for Oracle and select the Default Workspace to load, as shown in Figure 1.

Figure 1. Selecting Default Workspace
In the Confirm dialog click on Yes. From View in the toolbar open some views, including Object Palette and Project Manager. Select View>Toad Options as shown in Figure 2 to set some options.
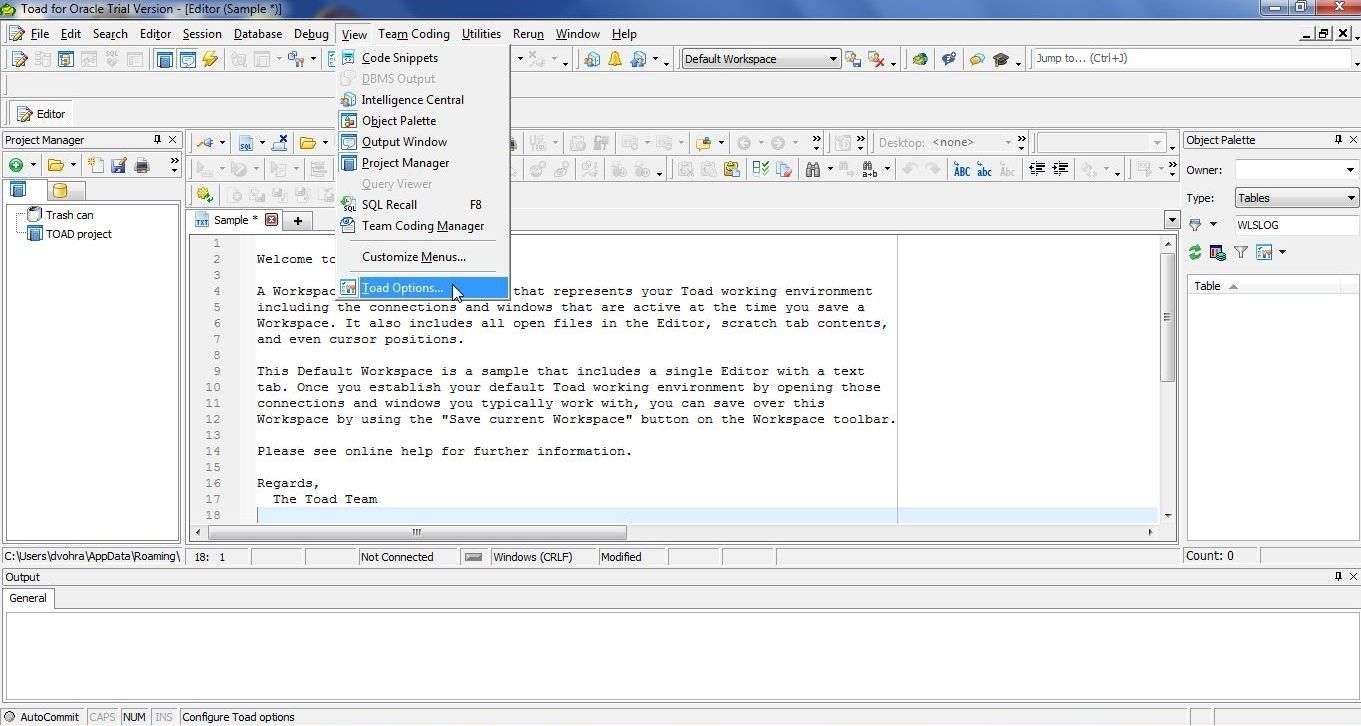
Figure 2. Selecting View>Toad Options
Select Oracle>Transactions and click in the checkbox Commit after every statement as shown in Figure 3.
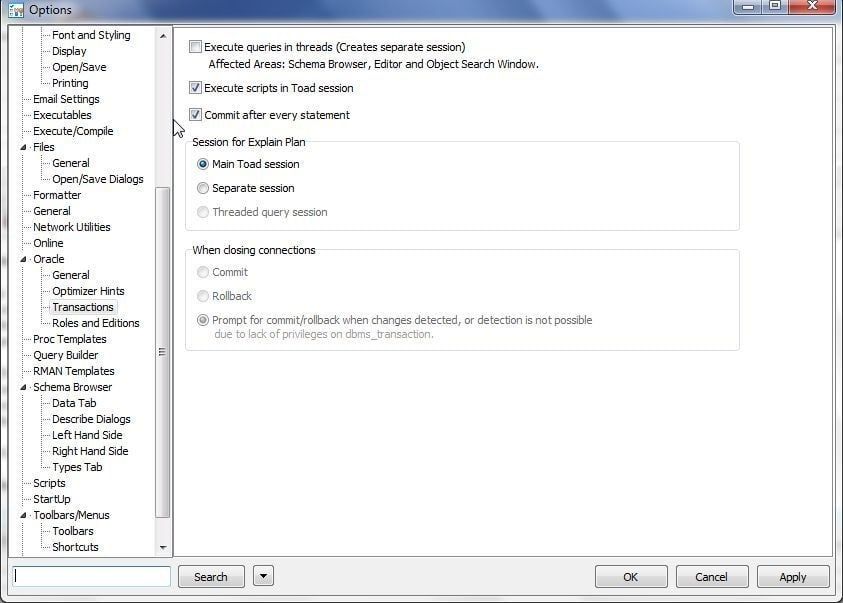
Figure 3. View>Toad Options>Oracle>Transactions>Commit after every Statement
Download and install a local Oracle Database Express Edition (XE) 11g R2 to be able to connect from a local Toad for Oracle using the tnsnames.ora configuration file of the Oracle Database XE 11g. Set the environment variables listed in Table 1.
Table 1. Environment Variables
|
Environment Variable |
Description |
|
TNS_ADMIN |
Specifies the SQL* Net configuration filestnsnames.ora and sqlnet.ora are located. The value would similar to C:oraclexeapporacleproduct.2.0servernetworkADMIN. Add %TNS_ADMIN% toPATH environment variable. |
|
ORACLE_HOME |
The directory in which Oracle Database client software is installed. The value would be similar to C:oraclexeapporacleproduct.2.0server. |
Download and install Oracle Instant Client 11g R2 or later. The Oracle Instant client version must be at least the Oracle Database version installed locally, which in our example is Oracle Database 11g R2.
The only other prerequisite is an Oracle Cloud account, which may be created at https://cloud.oracle.com/tryit.
Creating a Storage Container
A storage container is required for database backups. Even though a storage container could be created automatically while creating a database instance it is recommended to create a storage container in advance. A Georeplication policy must be selected for creating a storage container and using the option to create a storage container automatically could cause an issue.
Select Create Instance in Oracle Cloud Dashboard and click on Create for the Storage Classic service as shown in Figure 4.
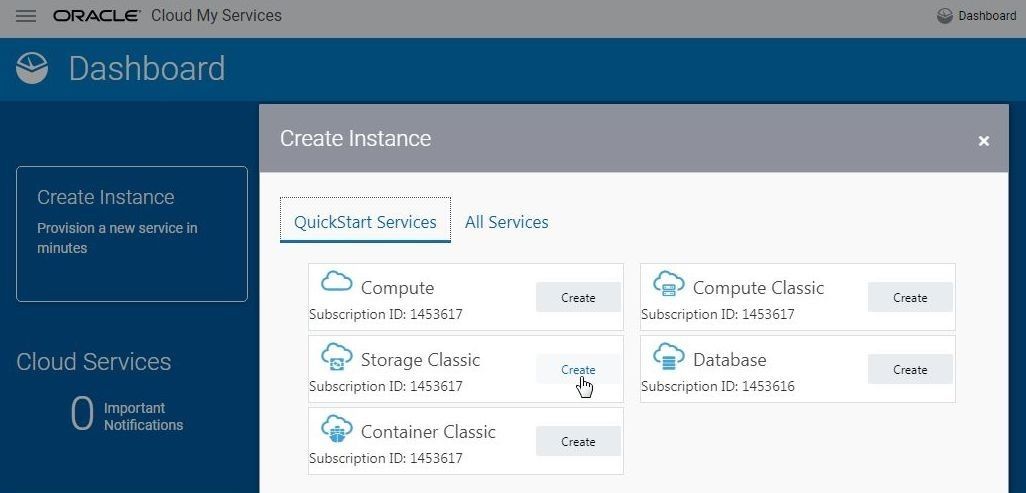
Figure 4. Storage Classic>Create
Next, select a Georeplication policy as shown in Figure 5. The Georeplication policy is used to replicate data to a data center (DC) other than the primary data center. Click on Set Policy with a Georeplication Policy selected, the default selection is shown in Figure 5.
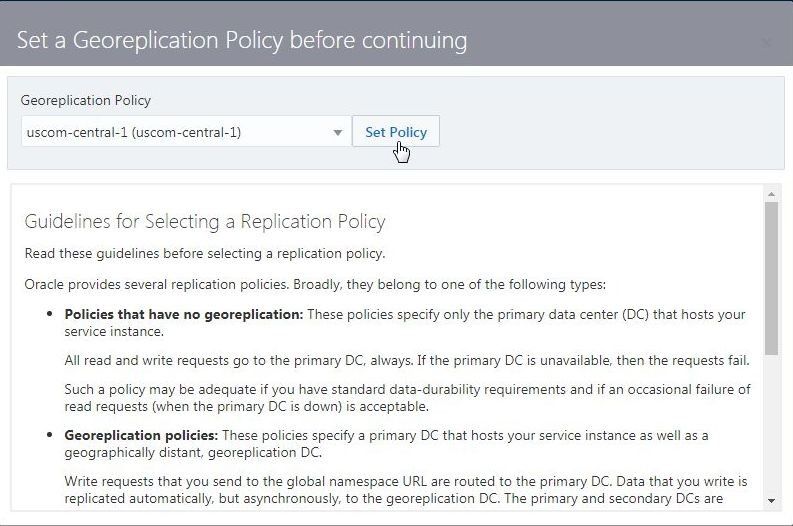
Figure 5. Setting Georeplication Policy
The Storage Classic service wizard gets launched as shown in Figure 6, with the Container List displayed. Click on Create Container to create a new storage container.
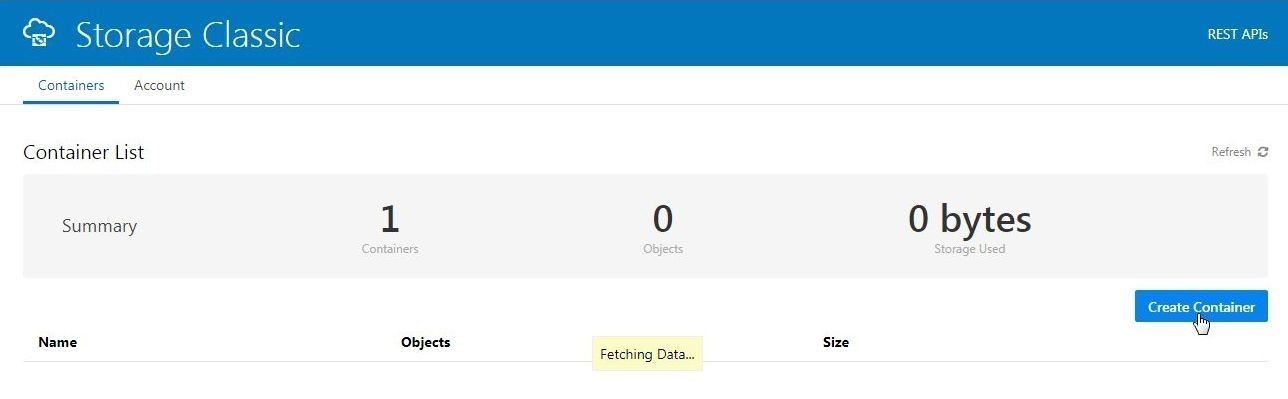
Figure 6. Storage Classic>Create Container
In the Create Storage Container dialog specify a container name (oradb18c) and select Storage Class as Standard as shown in Figure 7. Set the Advanced option to Enable Encryption. Click on Create.
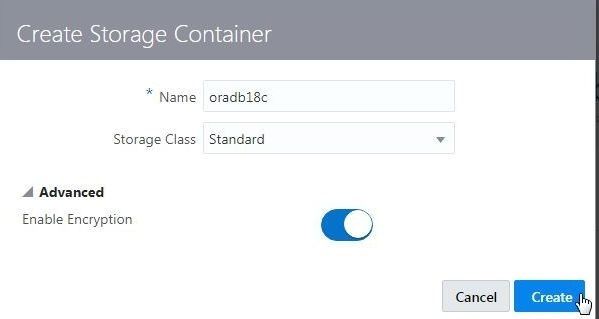
Figure 7. Create Storage Container
A new storage container gets created and listed as shown in Figure 8.
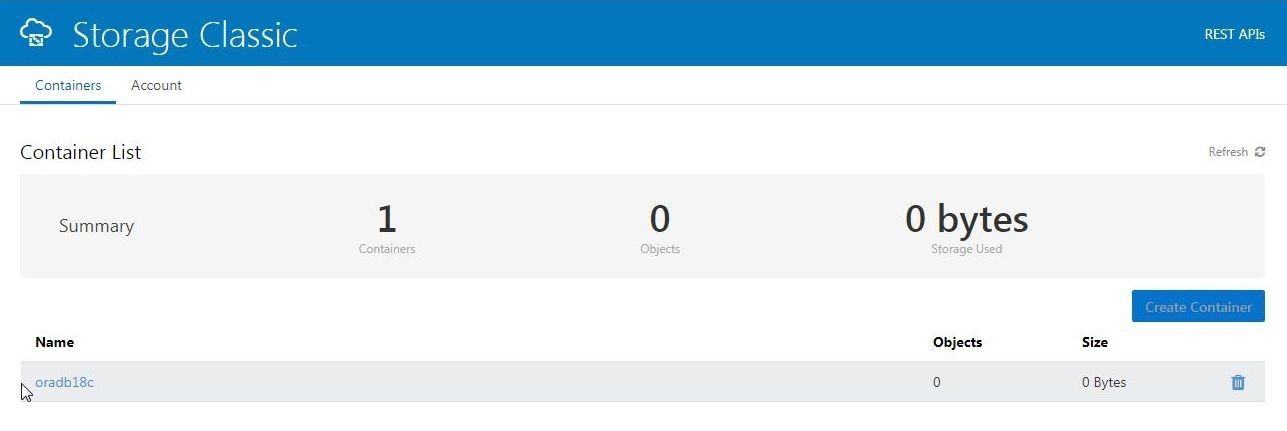
Figure 8. New Storage Container
We shall use the ordb18c container when creating an Oracle Database 18c instance, which is discussed in the next section.
Creating an Oracle Database 18c Instance
An Oracle Database 18c instance is available only on Oracle Exadata and Oracle Cloud Platform. Click on Create Instance in the Oracle Cloud Platform Dashboard as shown in Figure 9.
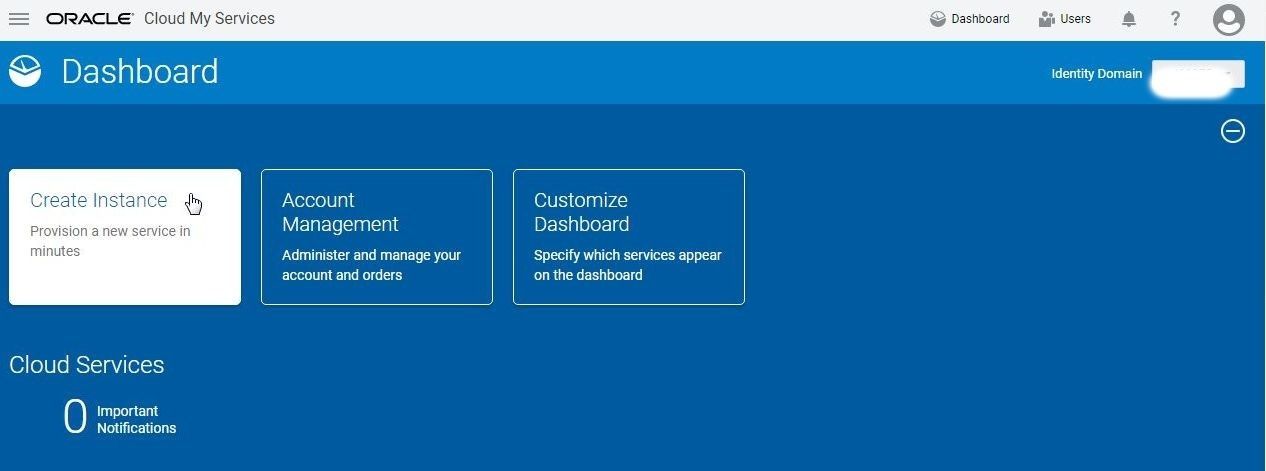
Figure 9. Create Instance
Click on Create for the Database service as shown in Figure 10.

Figure 10. Database>Create
The Oracle Database Cloud Service gets started; in which, Instances is selected by default. Click on Create Instance as shown in Figure 11.
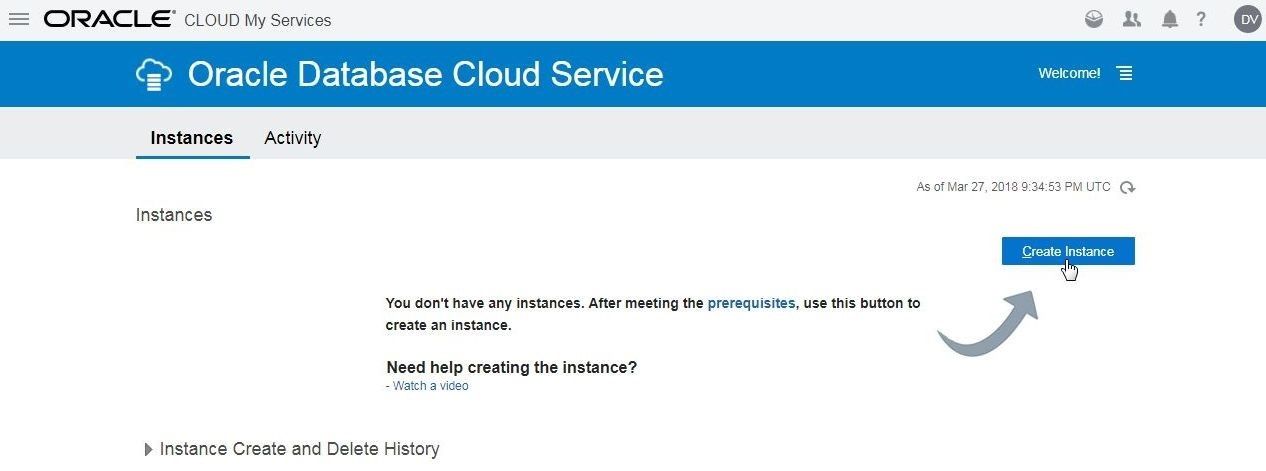
Figure 11. Create Instance
In the Create Instance wizard specify an Instance Name (oradb18c) as shown in Figure 11 and select the default settings for most of other fields, except the Software Release and Edition. Select Software Release as Oracle Database 18c as shown in Figure 12.
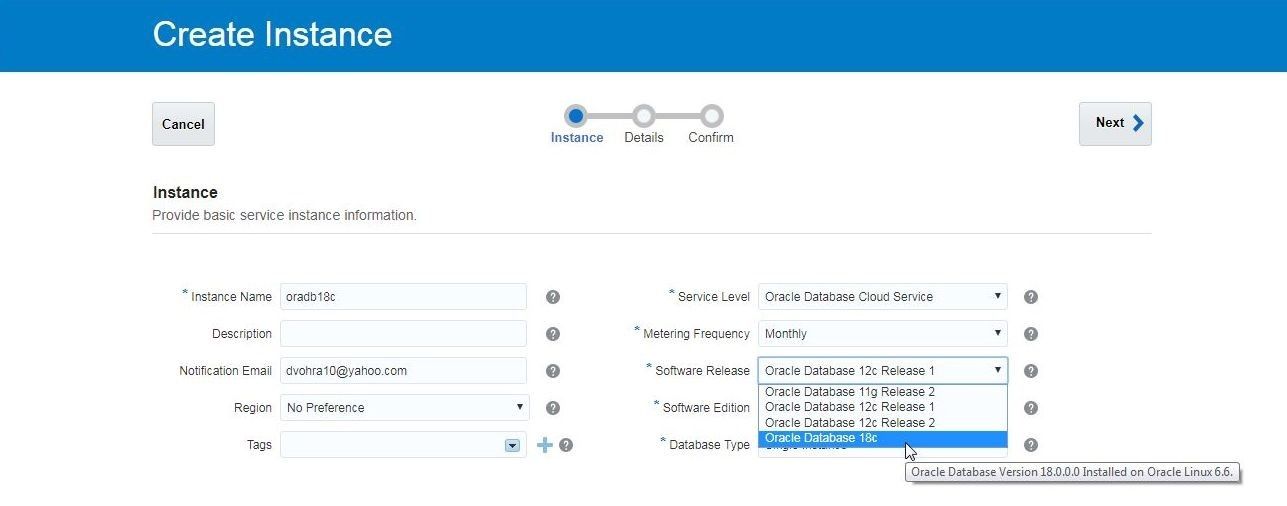
Figure 12. Selecting Software Release as Oracle Database 18c
Select Software Edition as Enterprise Edition High Performance as shown in Figure 13.
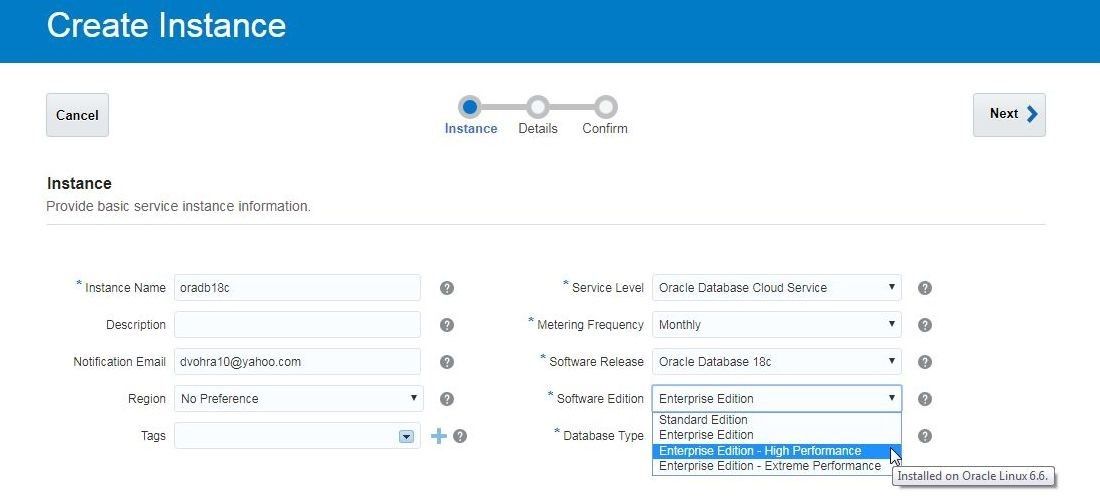
Figure 13. Selecting Software Edition
Click on Next after selecting the Instance configuration as shown in Figure 14.
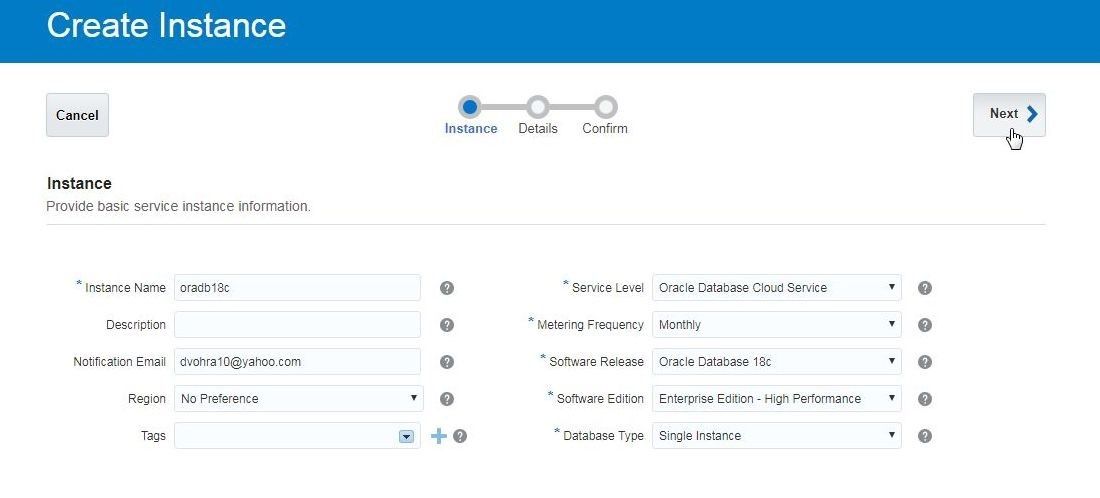
Figure 14. Create Instance>Next
Next, specify the Database Configuration as shown in Figure 15. Some of the fields have default values. Specify or keep the default DB Name (ORCL) and keep the default PDB Name (PDB1). Specify Administrator Password, the required pattern for which is displayed in the Help callout.
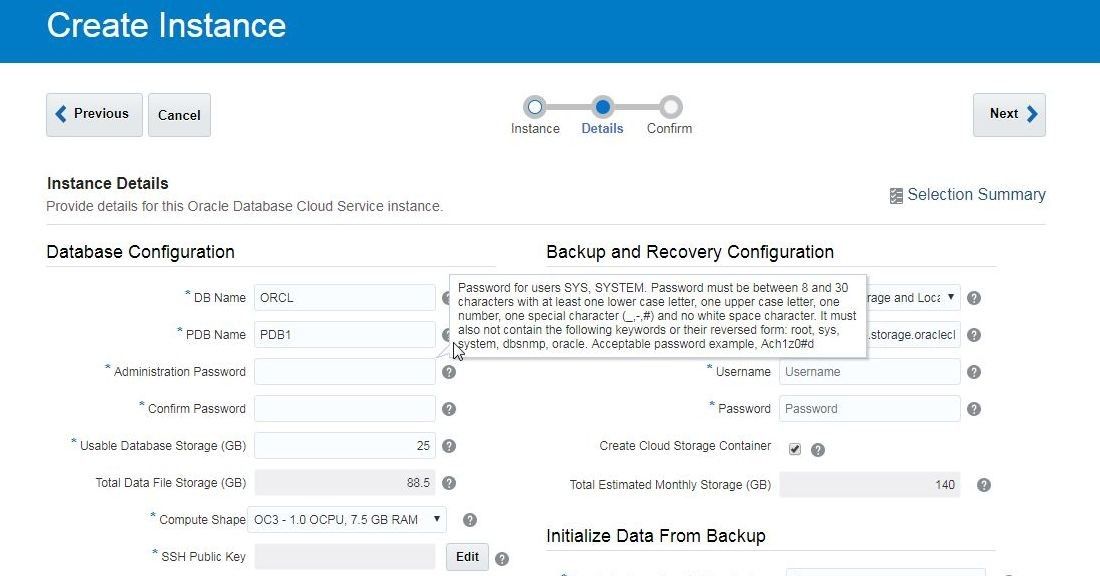
Figure 15. Database Configuration
An SSH Public Key must be generated even though it is not used for connecting with Toad for Oracle. Click on Edit for the SSH Public Key field as shown in Figure 16.
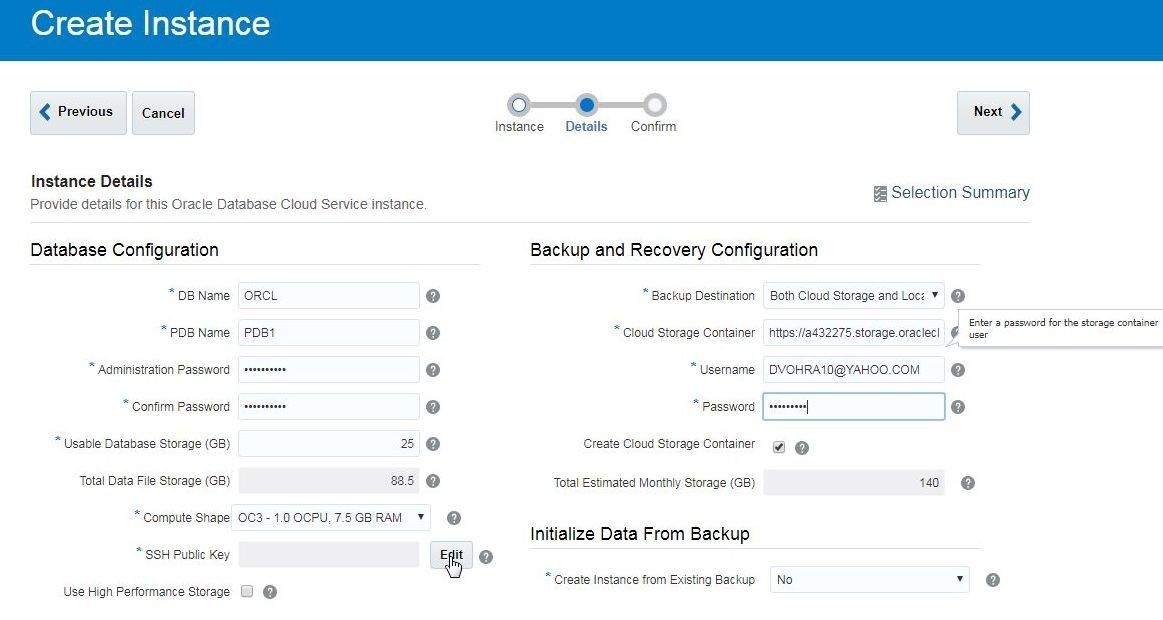
Figure 16. SSH Public Key>Edit
In SSH Public Key for VM Access dialog select the option Create a New Key as shown in Figure 17 and click on Enter.
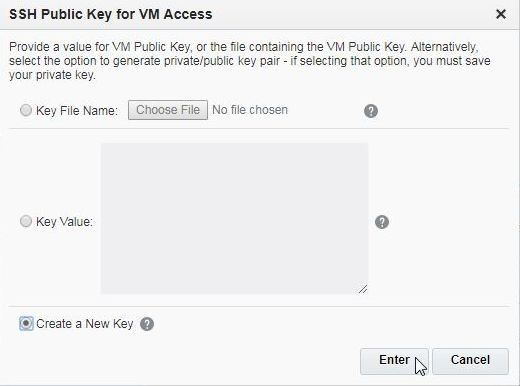
Figure 17. SSH Public Key for VM Access
A key pair gets generated, as indicated in a Download Keys dialog shown in Figure 18. Click on Download to download the public/private key pair. Subsequently click on Done.
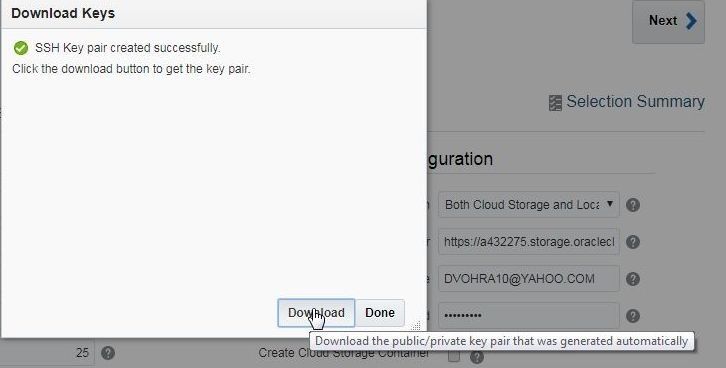
Figure 18. SSH Key Pair Generated
In Advanced Settings the Port is specified with a default value of 1521, as shown in Figure 19. Click in the checkbox Include Demos PDB.
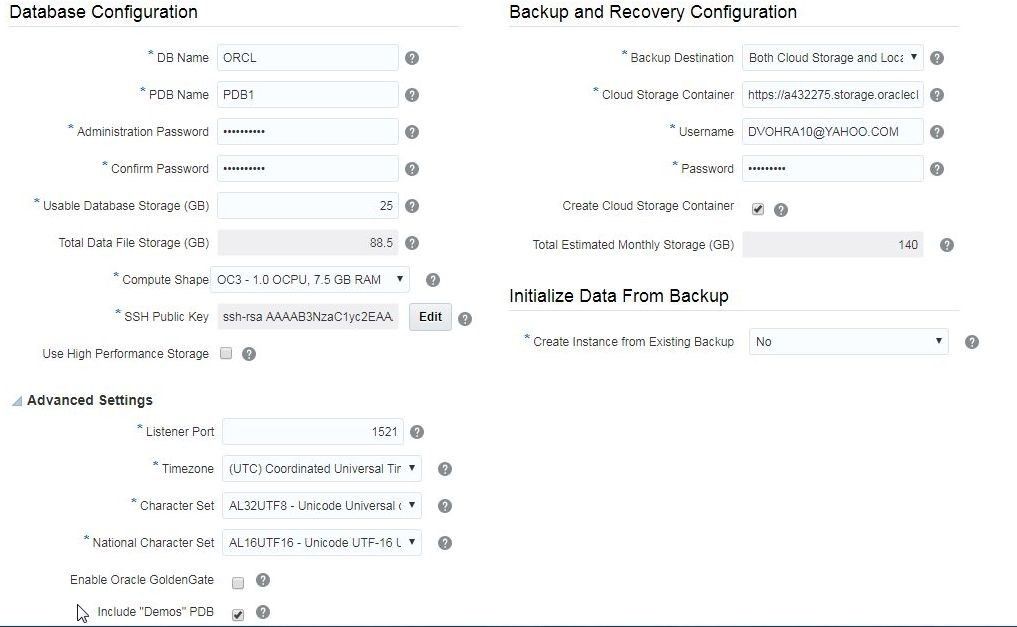
Figure 19. Advanced Settings
Next, specify the URL of the Cloud Storage Container, the default URL is shown in Figure 20.
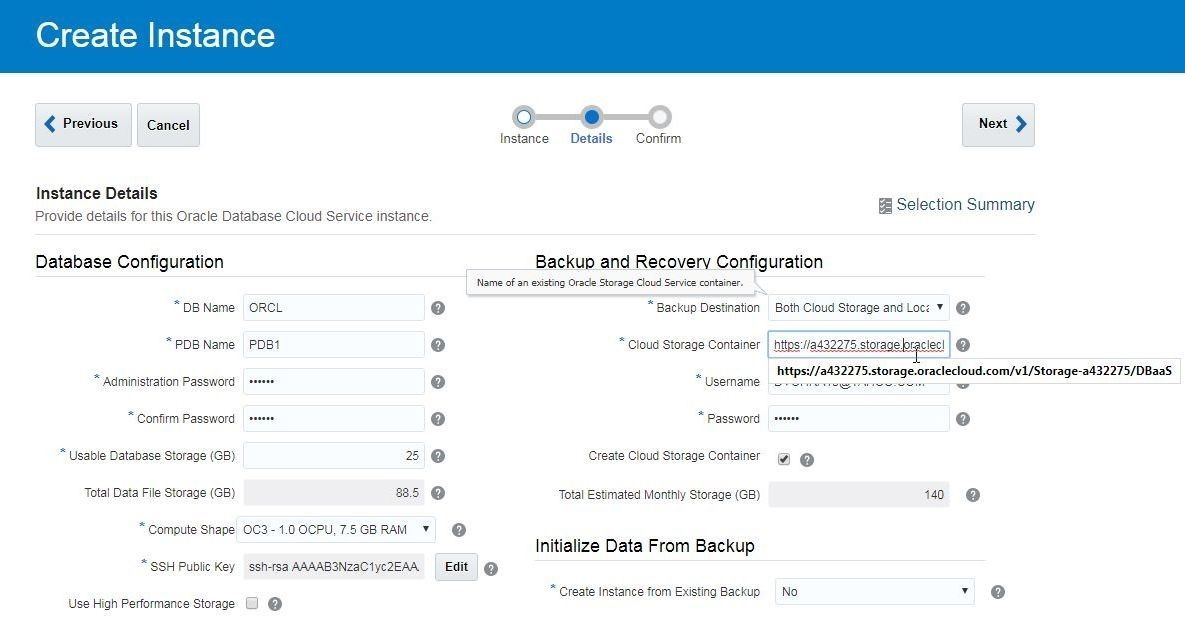
Figure 20. Cloud Storage Container Default URL
We need to modify the default storage container URL and replace the default container name DBaaS with oradb18c as shown in Figure 21.
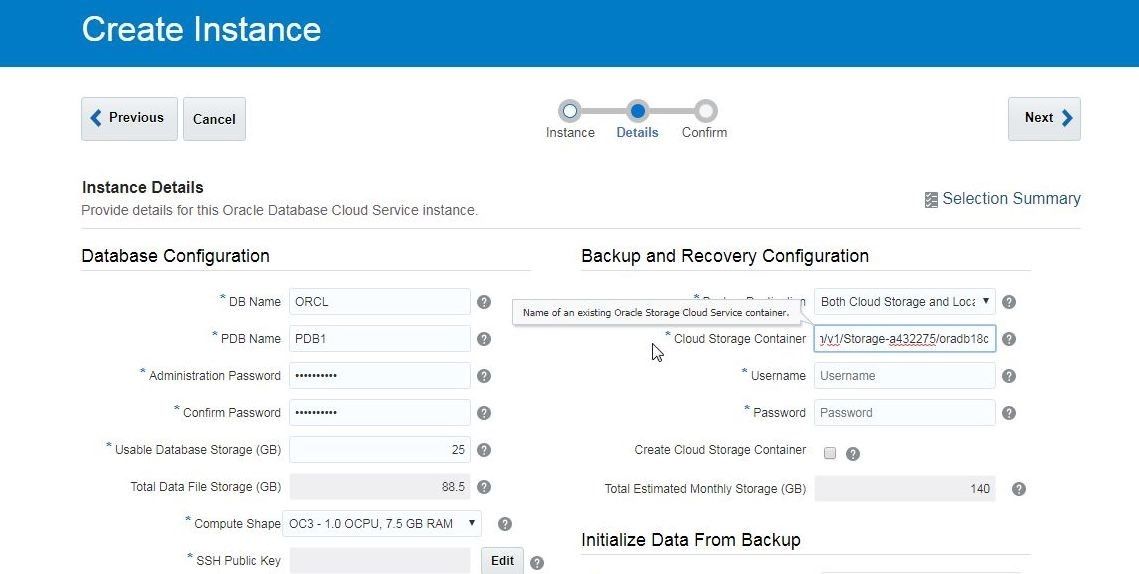
Figure 21. Specifying Cloud Storage Container
Specify Username and Password for the user that is to access the storage container and click on Next as shown in Figure 22.
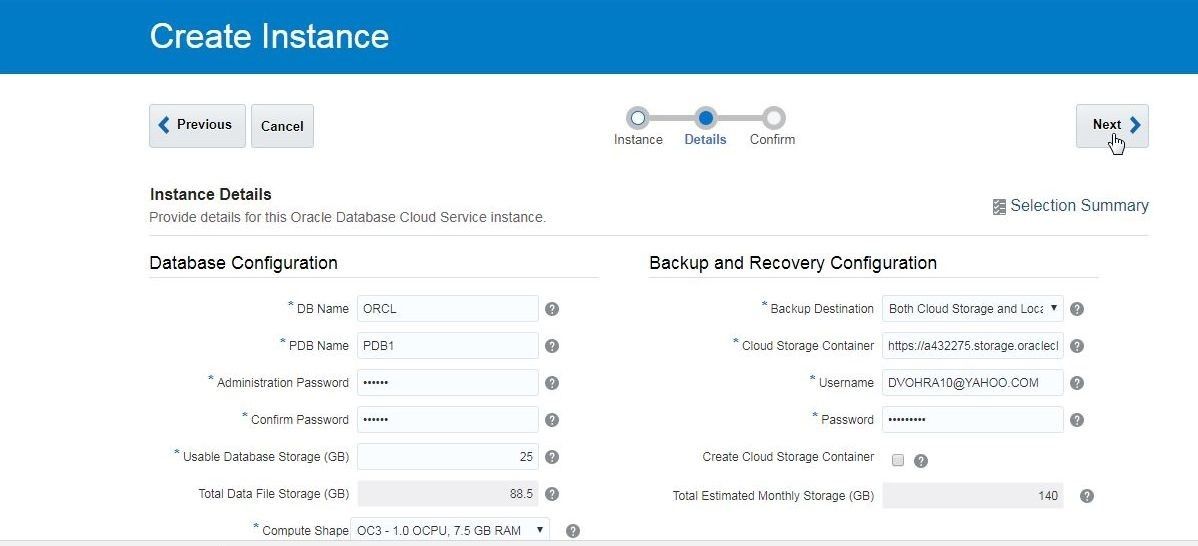
Figure 22. Next
In the Confirmation click on Create the database instance as shown in Figure 23.
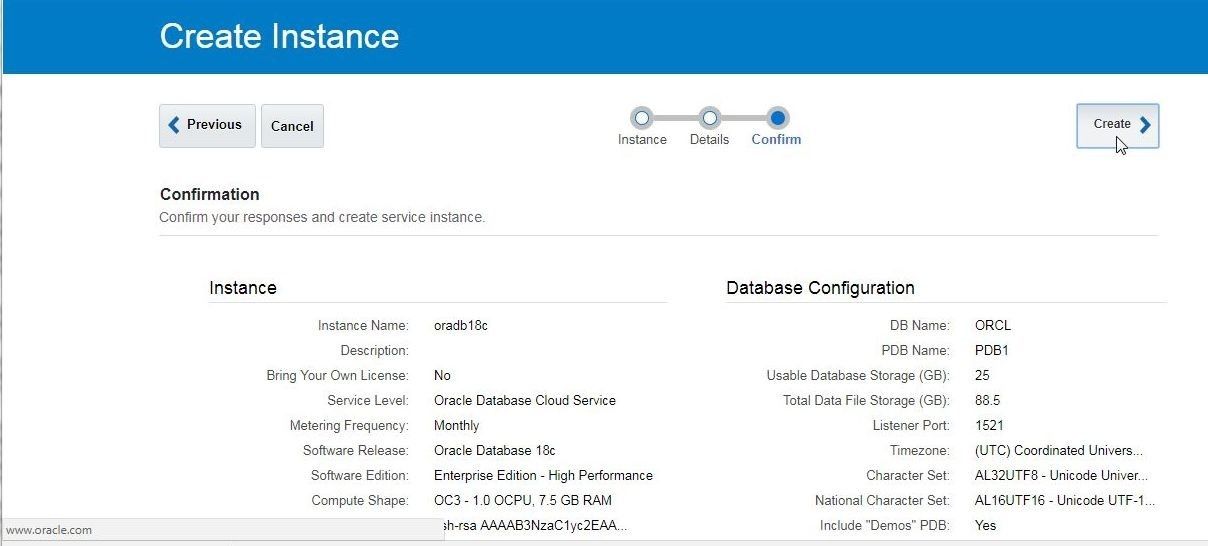
Figure 23. Confirmation>Create
The Database instance oradb18c starts to get created, as shown in Figure 24. Click on Refresh this page periodically to refresh the instance status.
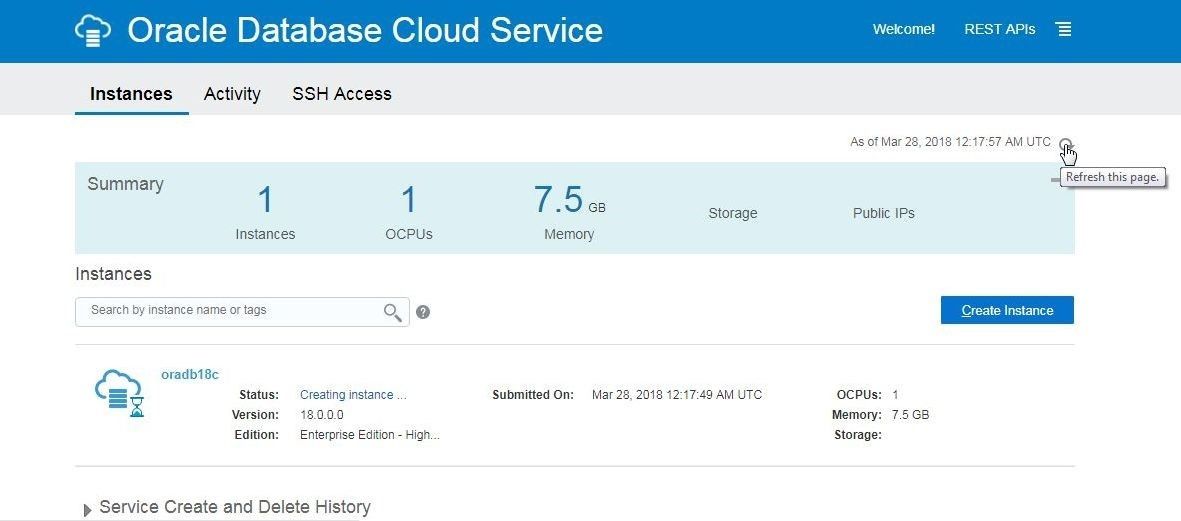
Figure 24. Creating Instance oradb18c
When the instance gets created the Status Creating Instance… is removed and the Submitted On timestamp is replaced with the Created On timestamp as shown in Figure 25.
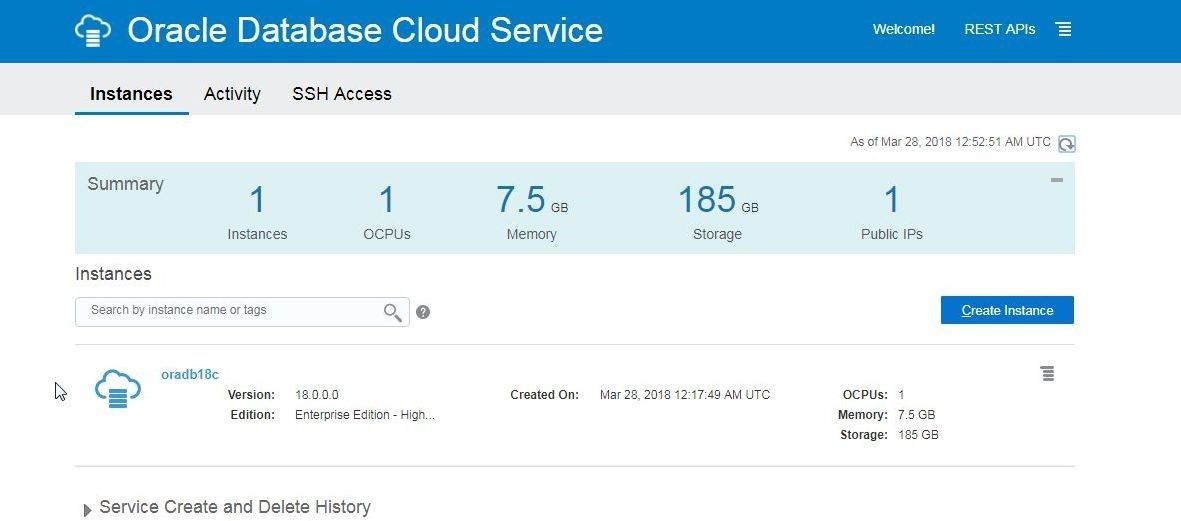
Figure 25. Instance oradb18c Created
Enabling Connectivity to Oracle Database 18c
By default a new Oracle Database instance on Oracle cloud is not accessible on the public Internet. To allow access from the Internet, including Toad for Oracle, we need to modify the access rule. Click on the icon to manage the instance and select Access Rules as shown in Figure 26.
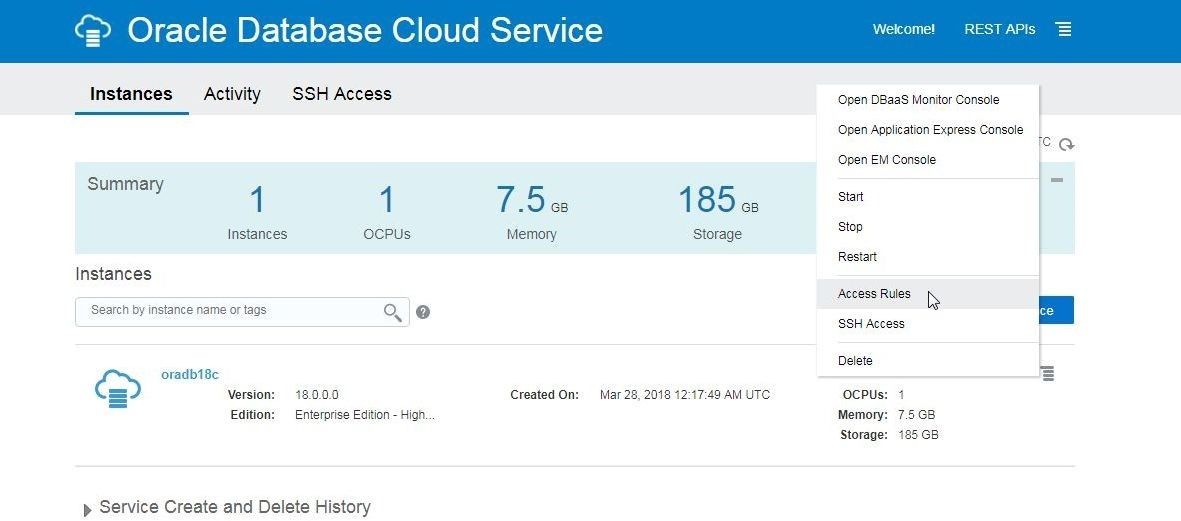
Figure 26. Access Rules
The access rule that needs to be enabled is the ora_p2_dblistener shown in Figure 27.

Figure 27. Access Rule ora_p2_dblistener
Click on the icon to manage the access rule and select Enable as shown in Figure 28.
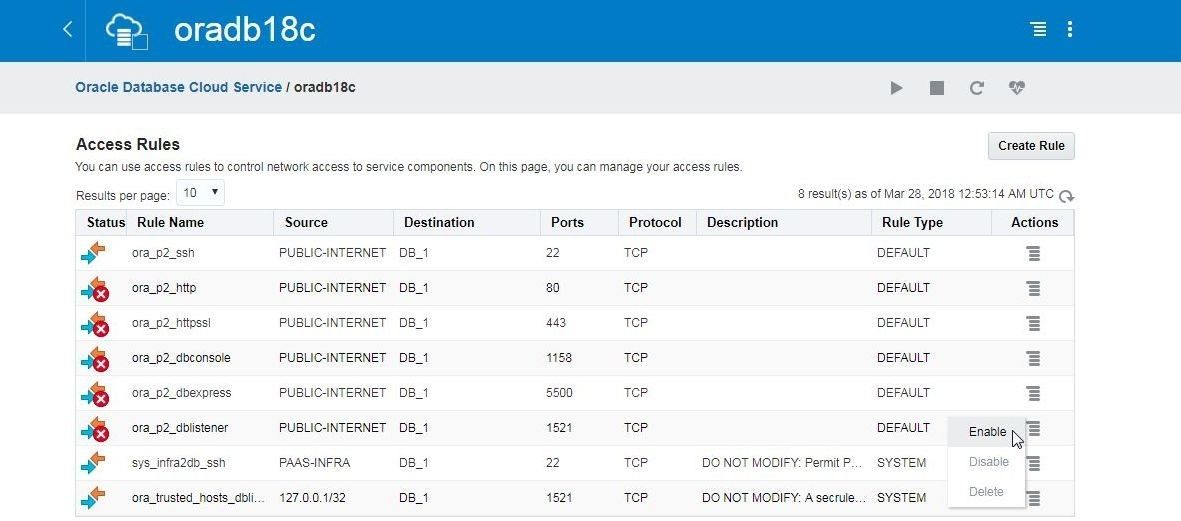
Figure 28. Access rule ora_p2_dblistener>Enable
In the Enable Access Rule click on Enable as shown in Figure 29.
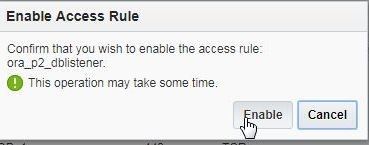
Figure 29. Enable Access Rule
Similarly, enable the other access rules and click on the link to return to the service instance list as shown in Figure 30.
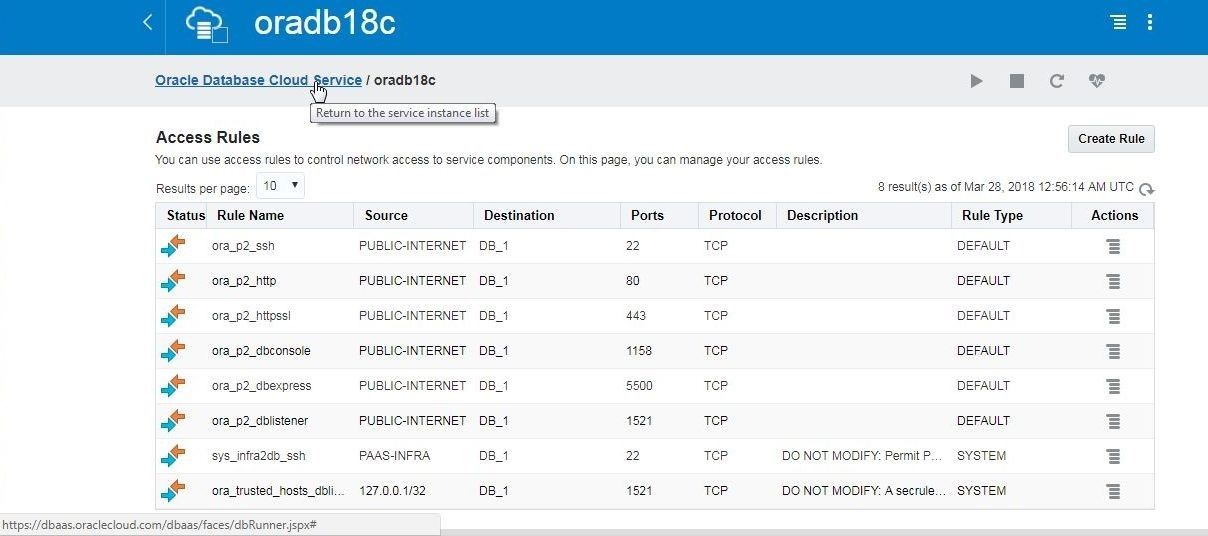
Figure 30. Enabling all access rules
Obtaining Connection Parameters
To obtain the connection parameters click on the Oracle Database 18c link in the services list as shown in Figure 31.
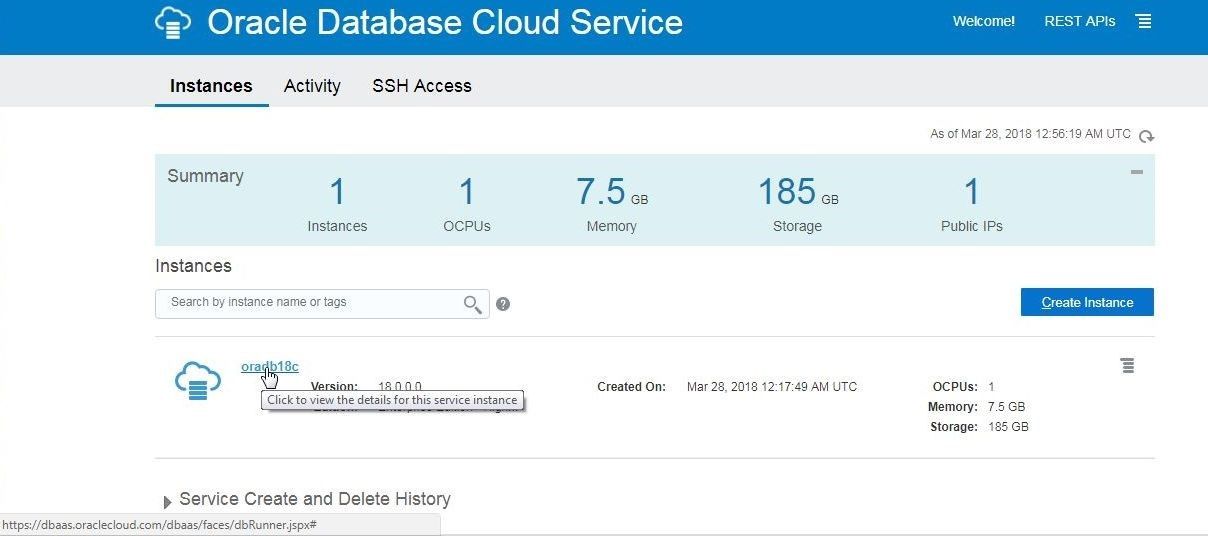
Figure 31. Selecting Instance Link
In the Instance Overview the number of nodes, OCPUs, storage, and RAM are listed. The Connect String includes the service name as used to connect to the database instance with a client. Copy the substring after the “/” as shown in Figure 32. The substring is the service name for the database instance. The port as listed in the connect string is 1521 by default.
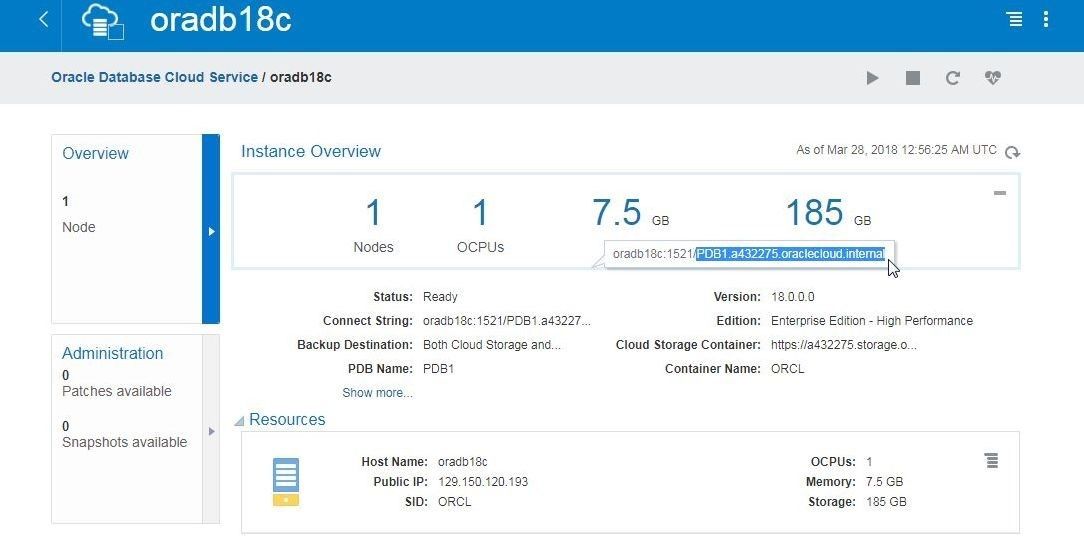
Figure 32. Obtaining the Service Name from the Connect String
Copy the Public IP, which is the Host name for the database, as shown in Figure 33.
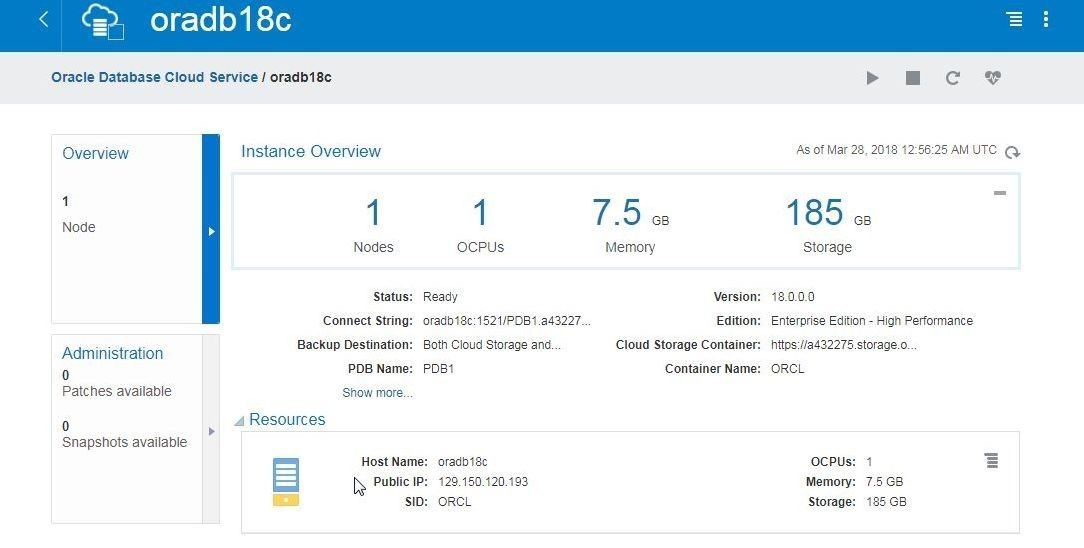
Figure 33. Obtaining the Public IP as the Hostname
In this article we created an Oracle Database 18c instance on Oracle Cloud Platform. In the second article in this two-part series we shall connect to the database instance with Toad for Oracle.
How to get the most out of Toad for OracleMost developers and DBAs use Toad for Oracle to reduce time and effort to develop and manage Oracle databases. But did you know that with Toad for Oracle you can automate administration tasks and proactively manage your databases while embracing performance optimization and risk mitigation? Did you know Toad can now find and control sensitive data across all your Oracle databases? What else can Toad do that you didn’t know about? Which edition will benefit you the most? Whether you are currently a Toad customer or just getting started with our free 30-day trial, learn more and access Toad for Oracle 13.1.1 – Getting Started Guide. |
Start the discussion at forums.toadworld.com