Introduction
In an earlier article we discussed installing Toad DevOps Toolkit, installing PowerShell 3.0, and starting Toad DevOps Toolkit. As discussed in that article, Toad DevOps Toolkit is a command-line shell tool for creating and using COM programmable objects to access the functionality of Toad for Oracle with the objective that the COM objects may used with build automation servers such as Jenkins to develop scripts that automate commonly used tasks such as comparing databases, schemas and tables, static code analysis, and PL/SQL unit testing. To use the Toad DevOps Toolkit features, Oracle Database must be installed. Two instances of Oracle Database are required in order to make use of the compare and sync features of Toad DevOps Toolkit. In this article, which is a continuation of the earlier article, we shall install Oracle Database software, install Oracle Instant Client, and create, configure, and start two Oracle Database instances to set the environment for running Toad DevOps Toolkit. This article has the following sections.
- Setting the Environment
- Installing Oracle Database
- Setting the Environment Variables
- Installing Oracle Instant Client
- Creating a second Database Instance or SID
- Setting Password for the Second Database Instance
- Creating a PFile for the Second Database Instance
- Starting Up Second Instance
- Creating a Second Database
- Configuring the Second Database Service in TNSNAMES.ORA
- Running the Post Install Scripts
- Creating Additional Database Objects in the Target Database
- Starting Both Source and Target Databases
Setting the Environment
As discussed in the earlier article, install and configure the following software:
- Toad DevOps Toolkit
- PowerShell 3.0
For this article download the following software:
- Oracle Database Express Edition 11g Release 2 (OracleXE112_Win64.zip file)
- Oracle Instant Client 12.1 for Windows (instantclient-basic-windows.x64-12.1.0.2.0.zip file – version must be same or greater than the Oracle Database version)
Supported Oracle Database versions are 10g, 10g R2, 11g, 11g R2, and 12c Release 1 and 2. Other hardware requirements include 1-2 GB RAM, and 120-150 MB disk space. Windows 7 is used in this article, but any of the supported Windows platforms may be used. Some of the other prerequisites, which are preinstalled on most Windows OS, are Internet Explorer 9.0 or later, and .NET framework.
Installing Oracle Database
To install Oracle Database 11g XE extract the OracleXE112_Win64.zip file to a directory. Double-click on the setup.exe file to start the Oracle Database 11g XE Install Wizard. First, the Oracle Database 11g XE setup extracts the .msi file to prepare the Oracle Database 11g XE Install Wizard, as shown in Figure 1.
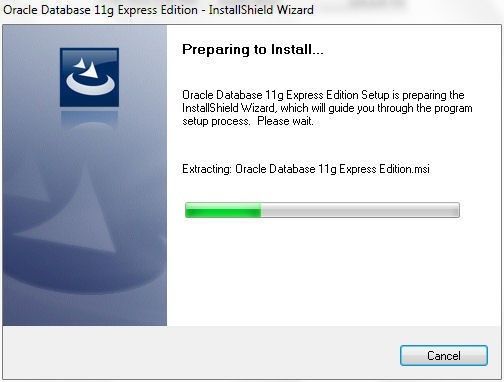
Figure 1. Preparing Oracle Database 11g XE Install Wizard
The Oracle Database 11g Express Edition – Install Wizard gets launched, as shown in Figure 2. Click on Next on the Welcome window.
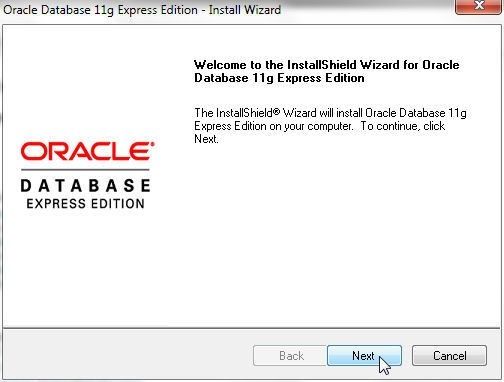
Figure 2. Oracle Database 11g Express Edition – Install Wizard>Welcome
Accept the terms in the license agreement as shown in Figure 3 and click on Next.
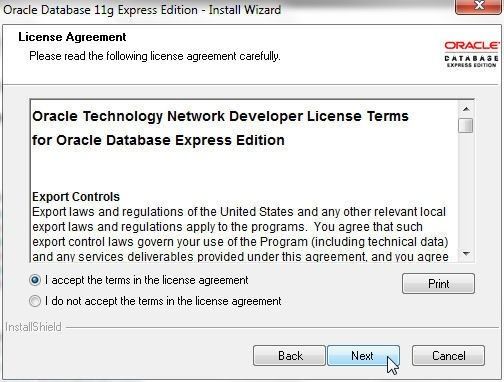
Figure 3. Accepting the Terms of the License Agreement
In the Choose Destination Location window select the default folder C:\oraclexe\ to install the Oracle Database 11g Express Edition as shown in Figure 4. The directory selected could be a non-empty directory, an empty directory, or a non-existent directory. Click on Next. The directory in which Oracle Database is installed must have the required space.
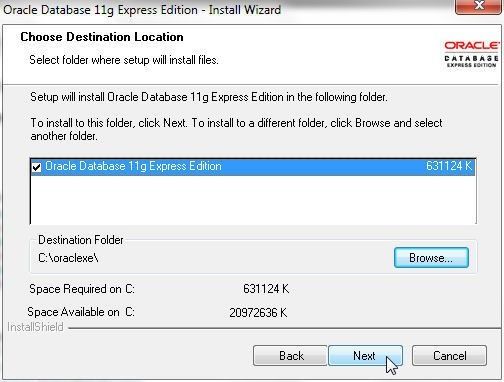
Figure 4. Choosing Destination Directory
In Specify Database Ports select the default ports for TNS Port (1521), MTS Port (2030), and HTTP Port (8021) as shown in Figure 5 and click on Next.
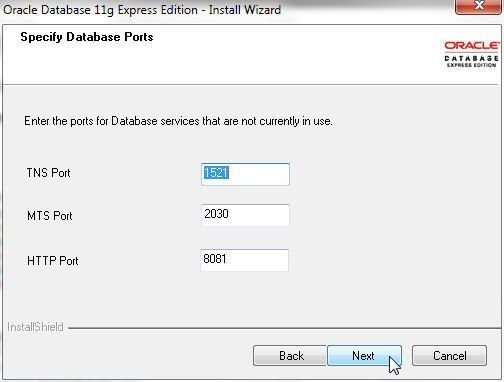
Figure 5. Selecting Database Ports
In Specify Database Passwords specify and confirm a password that is to be used with the SYS and SYSTEM users, as shown in Figure 6. Click on Next.
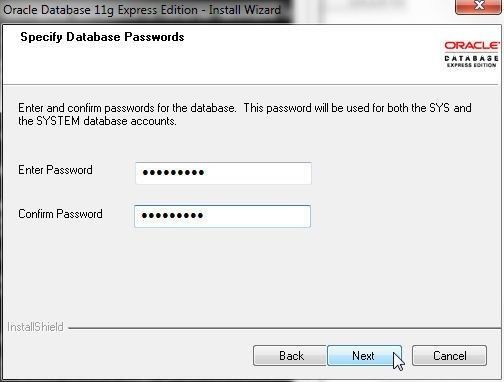
Figure 6. Specifying Database Passwords
In Summary click on Install as shown in Figure 7.
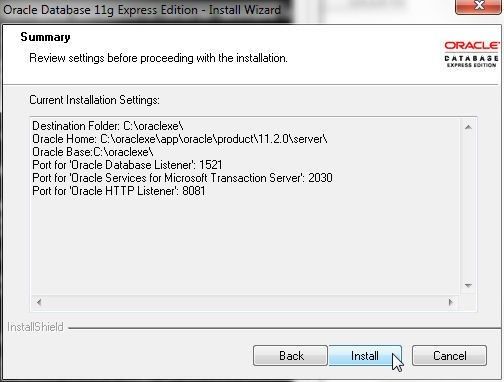
Figure 7. Install
Oracle Database 11g XE starts to get installed. First, the services get created and started, as shown in Figure 8.
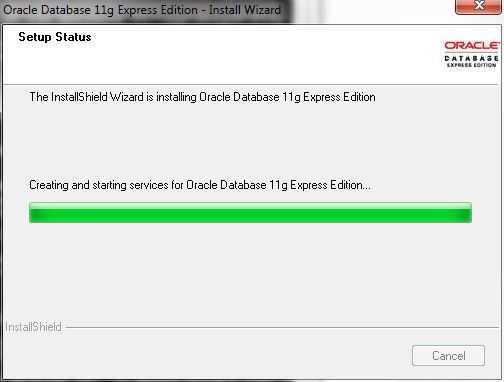
Figure 8. Creating and Starting Services
Next, the database gets configured, as shown in Figure 9.
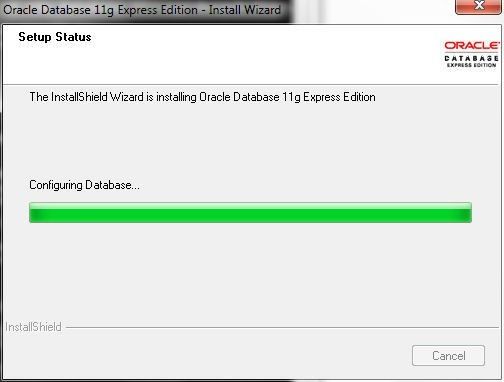
Figure 9. Configuring Database
When the installation completes click on Finish as shown in Figure 10.
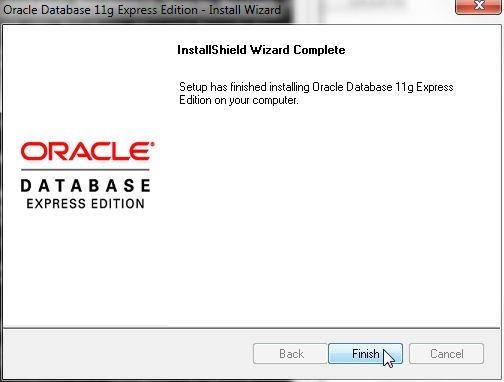
Figure 10. Installation Complete
Setting the Environment Variables
After Oracle Database has been installed the environment variables listed in Table 1 must be set for the Windows user that is used to run the Toad DevOps Toolkit.
Table 1. Environment Variables
|
Environment Variable |
Definition |
Value |
|
ORACLE_HOME |
The directory in which Oracle Database is installed. The directory would be different based on the directory selected in Figure 4 and also based on the Oracle Database version used. |
C:\oraclexe\app\oracle\product\11.2.0\server
|
|
PATH |
Add the SQL*Plus directory to PATH variable. Again, the directory would be different based on the install directory and the Oracle Database version. SQL*Plus directory is used by Toad DevOps Toolkit to access the Oracle Databases automatically. If SQL*Plus directory is not added to PATH the following message gets generated when Toad DevOps Toolkit is used: “SQLPlus.exe could not be located. Install SQL*Plus and add its path to PATH environment variable.” |
C:\oraclexe\app\oracle\product\11.2.0\server\bin
|
Installing Oracle Instant Client
To install Oracle Instant Client extract the instantclient-basic-windows.x64-12.1.0.2.0.zip to a directory and add the root folder (C:\instantclient_12_1) to the PATH environment variable. The root folder would be slightly different based on the Oracle Instant Client version and the directory in which it is installed.
Creating a Second Oracle Database Instance or SID
To use Toad DevOps Toolkit, two Oracle Databases are required: a Source database and a Target database. An Oracle Database comprises an “instance” and a “database”, each of which is sometimes used loosely to refer to an Oracle Database, but they are different artifacts and both are required. An instance is a set of Oracle background processes (threads) and the memory that is shared across those processes (shared memory). An instance by itself does not consist of any of the database files for storage or any disk storage. A database is the collection of operating system database files including datafiles, control file/s and the disk storage. An instance is associated with a single database, what is referred to as mounting an opening a database. To use multiple Oracle Databases (instance+database) we would need to create two instances and two databases. One Oracle Database instance and database is created when we installed Oracle Database 11g XE. We need to create only one more instance and associate a database with the instance.
The ORADIM command-line tool is used to create a new Oracle Database instance. ORADIM has the following syntax in which –NEW is the only required parameter.
oradim [-NEW -SID SID] | -SRVC service_name | -ASMSID SID | -ASMSRVC service_name
[-SYSPWD password] [-STARTMODE auto | manual] [-SRVCSTART system | demand]
[-PFILE filename | -SPFILE] [-SHUTMODE normal | immediate | abort] [-TIMEOUT
secs] [-RUNAS osusr/ospass]
Each Oracle database instance is associated with a SID (System Identifier), which must be unique on a system or machine. The default SID created when Oracle Database 11g Express Edition is installed is XE. Create the second instance with SID as ORAXE with the following command; the only output from the command is to indicate that an instance has been created.
C:\Windows\system32>oradim -new -sid oraxe
Instance created.
C:\Windows\system32>
An Oracle Database net service with service name of format OracleServiceSID gets created when a new database instance is created. The service name is used in thetnsnames.ora (the local naming parameters) file to create a unique connect descriptor for a database instance. For the database instance oraxe a net service OracleServiceoraxe gets created and started.
Setting Password for the Second Database Instance
Next, create a password file for the SYS user with the orapwd utility. The following command creates the password file C:\oraclexe\app\oracle\product\11.2.0\server\database\PWDoraxe.ora, sets the SYS password to OraDB11XE and stores the password in the password file. If no password was specified when the orapwd utility was run, the user is prompted to specify a password for the SYS user. The orapwd does not generate any output.
C:\Windows\system32>orapwd file=C:\oraclexe\app\oracle\product\11.2.0\server\database\PWDoraxe.ora password=OraDB11XE
C:\Windows\system32>
Creating a PFile for the second Database Instance
Each Oracle Database instance is associated with an initialization parameter file (pfile), which is a plain-text file and is used to initialize a database when first started. The default pfile, called init.ora, is created in the C:\oraclexe\app\oracle\product\11.2.0\server\dbs directory. A binary file called the SPFile that contains the same information as the pfile is also created. The default SPFILEXE.ora is created in the same directory C:\oraclexe\app\oracle\product\11.2.0\server\dbs.
The default initialization parameter file (pfile) may be used to create the pfile for the second database instance. The DB_NAME, which is the local name component of the database name, must be different for the second pfile. The Oracle Net listener is configured in a pfile with the local_listener parameter. The listener receives client requests and forwards them to one of the database services configured in the tnsnames.ora (the local naming parameters file), which we shall discuss later in this article. A database service could be associated with a dedicated server or multiple services could be associated with the same Oracle Net listener. We have used the same listener for the two Oracle Database services used with Toad DevOps Toolkit.
For a new database oraxe, create the following directories: pfile (pfile), adump (audit files), and dpdump (data pump).
C:\oraclexe\app\oracle\admin\oraxe\pfile
C:\oraclexe\app\oracle\admin\oraxe\adump
C:\oraclexe\app\oracle\admin\oraxe\dpdump
The oracle_base parameter in a pfile is the root of the Oracle directory hierarchy and is set to ‘C:\oraclexe\app\oracle‘ in the pfile for the second database. Also create the C:\oraclexe\app\oracle\oradata\ORAXE directory for the Oracle database files (.dbf files), which include the control file/s and the tablespace datafiles.
The pfile used for the second Oracle Database may be created in any directory as the pfile is to be specified on the command line when starting up the second database. Create the second pfile initORAXE.ora in the C:\oraclexe\app directory. The initORAXE.ora file is listed (and may be modified to requirements):
xe.__db_cache_size=117440512
xe.__java_pool_size=4194304
xe.__large_pool_size=8388608
xe.__oracle_base='C:\oraclexe\app\oracle'#ORACLE_BASE set from environment
xe.__pga_aggregate_target=188743680
xe.__sga_target=566231040
xe.__shared_io_pool_size=92274688
xe.__shared_pool_size=335544320
xe.__streams_pool_size=0
*.audit_file_dest='C:\oraclexe\app\oracle\admin\ORAXE\adump'
*.compatible='11.2.0.0.0'
*.control_files='C:\oraclexe\app\oracle\oradata\ORAXE\control.dbf'
*.db_name='ORAXE'
*.DB_RECOVERY_FILE_DEST_SIZE=10G
*.DB_RECOVERY_FILE_DEST='C:\oraclexe\app\oracle\fast_recovery_area'
*.diagnostic_dest='C:\oraclexe\app\oracle'###########################################
*.dispatchers='(PROTOCOL=TCP) (SERVICE=ORAXEDB)'
*.job_queue_processes=4
*.local_listener='(ADDRESS=(PROTOCOL=TCP)(HOST=dvohra-PC)(PORT=1521))'
*.open_cursors=300
*.os_authent_prefix=''
*.pga_aggregate_target=180M
*.remote_login_passwordfile='EXCLUSIVE'
*.sessions=20
*.sga_target=540M
*.shared_servers=4
*.undo_management='AUTO'
*.undo_tablespace='UNDOTBS1'
Starting Up the Second Instance
Having created the second database instance and the pfile to initialize the instance startup, next we shall start the second instance with the STARTUP command in SQL*Plus. When the STARTUP command is used to start a database the pfile is specified on the command-line as follows.
STARTUP PFILE=<path to pfile>
Default initialization parameters are configured in the binary file spfile.ora (or spfile$ORACLE_SID.ora) and/or the init.ora (or init$ORACLE_SID.ora), which are at the default location (C:\oraclexe\app\oracle\product\11.2.0\server\dbs). Initialization parameters for additional Oracle database instances are configured in the binary file spfile$ORACLE_SID.ora and/or init$ORACLE_SID.ora. While the binary initialization parameters file is created automatically the pfile may be created in any directory, including the default directory C:\oraclexe\app\oracle\product\11.2.0\server\dbs. The following sequence is used to get the initialization parameters when the STARTUP command is run to start a database instance.
- Use the pfile specified on the command-line with PFILE arg, if PFILE arg is specified
- Use the default SPFILE associated with a SID with name derived using format spfile$ORACLE_SID.ora (SPFILEXE.ora) at the default location (C:\oraclexe\app\oracle\product\11.2.0\server\dbs)
- Use the spfile.ora at the default location (C:\oraclexe\app\oracle\product\11.2.0\server\dbs)
- Use the default PFILE associated with a SID with name derived using format init$ORACLE_SID.ora (initXE.ora) at the default location (C:\oraclexe\app\oracle\product\11.2.0\server\dbs)
- Use the default initialization parameter file init.ora at the default location (C:\oraclexe\app\oracle\product\11.2.0\server\dbs)
Not all of these pfiles and spfiles are required to start a database instance. The first of these files found is used. When Oracle Database 11g XE is installed only the init.ora file is available at C:\oraclexe\app\oracle\product\11.2.0\server\dbs. The spfile SPFILEXE.ora gets created when the XE instance is first started. Similarly, to start the second Oracle Database instance only the pfile initORAXE.ora is required.
Next, we shall start the second database instance, for which we shall use the following sequence:
- Set the current SID to ORAXE using the ORACLE_SID environment variable.
- Start a SQL*Plus session with administrative privileges to connect to an idle instance ORAXE.
- Run the STARTUP command with the PFILE arg to start the ORAXE instance. Because the new database instance is not yet associated with a database (the database files) we need to start up with the NOMOUNT option, which does not mount any database. When we have later created a database using the CREATE DATABASE command we shall mount and open the Oracle Database instance.
First, set the current Oracle SID with the following command run at the Windows command line.
C:\Windows\system32>SET ORACLE_SID=ORAXE
Connect to an idle instance (ORAXE instance not yet started) with a SQL*Plus session using administrative privileges with the SYS user, which must be run by including AS SYSDBA. As the output indicates ,the SQL*Plus session is started and connected to an idle instance. The instance connected to is obtained from the ORACLE_SID environment variable.
C:\Windows\system32>sqlplus SYS/OraDB11XE AS SYSDBA;
SQL*Plus: Release 11.2.0.2.0 Production on Wed Dec 6 16:59:41 2017
Copyright (c) 1982, 2014, Oracle.  All rights reserved.
Connected to an idle instance.
SQL>
Next, startup the ORAXE instance using the STARTUP command; in which, specify the pfile to use with the PFILE arg. The STARTUP command must be run with the NOMOUNT option, as we have not yet created a database to mount the instance. As the output indicates, an Oracle instance gets started.
SQL> startup nomount pfile='C:\oraclexe\app\initORAXE.ora';
ORACLE instance started.
Total System Global Area  563691520 bytes
Fixed Size                  2255192 bytes
Variable Size             348128936 bytes
Database Buffers          209715200 bytes
Redo Buffers                3592192 bytes
In the next section we shall create a database and mount the instance.
Creating a Second Database
Next, we shall create an Oracle Database using the CREATE DATABASE SQL statement. The database name used must be the same as the db_name parameter value in the pfile; using which, the second database instance is started. Create a SQL script createdb.sql in any directory (C:\oraclexe\) and copy the following SQL script to createdb.sql. The CREATE DATABASE command includes clauses for the following settings.
- Creates the datafiles (.dbf) for the database which include the tablespace files. The directory (C:\oraclexe\app\oracle\oradata\ORAXE) in which the datafiles are to be created must be created before running the CREATE DATABASE command is run, as mentioned before. And, the datafiles directory must be empty, as the datafiles are generated with the CREATE DATABASE command.
- Creates the control file/s. The control file name and directory are obtained from the initialization parameters file pfile that is used to start the database instance. Again, the control file/s directory must be created before running the CREATE DATABASE command and must be empty. We have specified the same directory for the control file and the datafiles, as is the default configuration for a default instance.
- Creates the redo log files with the LOGFILE clause in which the redo logfile groups are specified using the GROUP 1 and GROUP 2 sub-clauses. The redo log files directory (C:\temp\redolog) must be created before running the CREATE DATABASE command and must be empty.
- Creates the SYSTEM, SYSAUX and UNDO tablespaces.
- Creates the data dictionary.
- Sets the character set to use to store data in the database.
- Mounts and opens the database.
The CREATE DATABASE SQL statement to be copied to a createdb.sql script is as follows and may be modified to requirements.
create database ORAXE MAXLOGFILES 16 MAXLOGMEMBERS 3 MAXDATAFILES 100 MAXINSTANCES 8 MAXLOGHISTORY 292 LOGFILE GROUP 1
    'C:\temp\redolog\REDO01.LOG'  SIZE 50M BLOCKSIZE 512, GROUP 2
    'C:\temp\redolog\REDO02.LOG'  SIZE 50M BLOCKSIZE 512 DATAFILE
    'C:\oraclexe\app\oracle\oradata\ORAXE\SYSTEM.DBF' size 100m autoextend on sysaux datafile
    'C:\oraclexe\app\oracle\oradata\ORAXE\SYSAUX.DBF' size 100m autoextend on undo tablespace undotbs1 datafile
    'C:\oraclexe\app\oracle\oradata\ORAXE\UNDOTBS1.DBF' size 100m autoextend on CHARACTER SET AL32UTF8;
Next, run the SQL script createdb.sql with the following command in SQL*Plus. As the output indicates, the database gets created.
SQL> @C:\oraclexe\createdb.sql
Database created.
The database created also gets mounted and opened. Select and output the database name with the following command, which may be run only for a mounted database, and the database name ORAXE gets output.
SQL> select name from v$database;
NAME
---------
ORAXE
List the database status with the following command, also run in SQL*Plus. As the command output indicates, the database is open.
SQL> select status from v$instance;
STATUS
------------
OPEN
Output the database version.
SQL> select * from v$version;
BANNER
--------------------------------------------------------------------------------

Oracle Database 11g Express Edition Release 11.2.0.2.0 - 64bit Production
PL/SQL Release 11.2.0.2.0 - Production
CORE    11.2.0.2.0      Production
TNS for 64-bit Windows: Version 11.2.0.2.0 - Production
NLSRTL Version 11.2.0.2.0 - Production
SQL>
Configuring the second Database Service in TNSNAMES.ORA
The local naming parameters file (tnsnames.ora) is a configuration file that specifies the net service names that are mapped to connect descriptors, or net service names mapped to listener protocols. The default tnsnames.ora file is in the C:\oraclexe\app\oracle\product\11.2.0\server\network\ADMIN directory along with the listener.ora and the sqlnet.ora files. By default a single net service name XE is configured to a dedicated (one-to-one mapping) database server as follows.
XE =
  (DESCRIPTION =
    (ADDRESS = (PROTOCOL = TCP)(HOST = dvohra-PC)(PORT = 1521))
    (CONNECT_DATA =
      (SERVER = DEDICATED)
      (SERVICE_NAME = XE)
    )
  )
As we have created a second net service name oraxe we need to replace the preceding listing with two net service configurations as follows because neither of them is dedicated to a single server.
XE =
  (DESCRIPTION =
    (ADDRESS = (PROTOCOL = TCP)(HOST = dvohra-PC)(PORT = 1521))
    (CONNECT_DATA =
      (SERVICE_NAME = XE)
    )
  )

ORAXE =
  (DESCRIPTION =
    (ADDRESS = (PROTOCOL = TCP)(HOST = dvohra-PC)(PORT = 1521))
    (CONNECT_DATA =
      (SERVICE_NAME = ORAXE)
    )
  )
If while running Toad DevOps Toolkit the error message "TNS: could not resolve the connect identifier specified” is generated, it is probably because a net service for the database service has not been configured in tnsnames.ora file. Another TNS error “TNS: listener does not currently know of service requested in connect descriptor” is also probably due to the service not being configured in tnsnames.ora file.
Restart the LISTENER service OracleXETNSListener if modifying the listener.ora file; restart is not required after modifying the tnsnames.ora file. Only the application that accesses a database service needs to be restarted.
Running the Post Install Scripts
Having created, mounted, and opened the second database, run the post install scripts catalog.sql and catproc.sql. The post install scripts recreate all the PL/SQL packages and also recreate all the data dictionary views.
SQL> @C:\oraclexe\app\oracle\product\11.2.0\server\rdbms\admin\catalog.sql
SQL> @C:\oraclexe\app\oracle\product\11.2.0\server\rdbms\admin\catproc.sql
Creating Additional Database Objects in Target Database
To be able to use the second database created with Toad DevOps Toolkit we need to create the following database objects in the ORAXEdatabase.
1. USERS and TEMP tablespaces
2. Role AUTHENTICATEDUSER
First, find out if the AUTHENTICATEDUSER role is already created with the following command.
SELECT * FROM DBA_ROLES;
If the role is not listed, create the role in SQL*Plus.
SQL> CREATE ROLE AUTHENTICATEDUSER;
Role created.
SQL>
Create the USERS and TEMP tablespaces, also with SQL*Plus.
SQL> create tablespace users datafile 'C:\oraclexe\app\oracle\oradata\ORAXE\USERS.DBF' size 50m;
Tablespace created.
SQL>
SQL>
SQL> create tablespace TEMP datafile 'C:\oraclexe\app\oracle\oradata\ORAXE\TEMP.DBF' size 50m;
Tablespace created.
If the role AUTHENTICATEDUSER and the tablespaces USERS and TEMP are not created, Toad DevOps Toolkit generates an error when any of the supported DevOps features or modules is used, including when the PowerShell examples are run.
Starting Both Source and Target Databases
Toad DevOps Toolkit requires two databases, one for Source and one for Target, when using any of the DevOps feature such as comparing and syncing databases, schemas and tables. Before you can use Toad DevOps Toolkit, both the source and target databases must be started. The database services OracleServiceXE and OracleServiceoraxe must be running in addition to the OracleXETNSListenerservice, as shown in Figure 11.
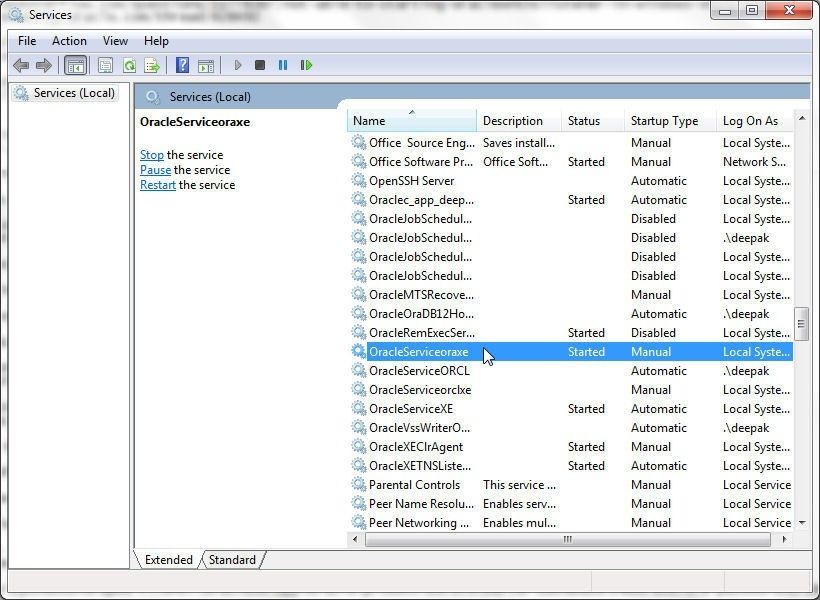
Figure 11. Oracle Services and Listener must be running
Start two different SQL*Plus sessions to start the two databases. To start the default database with Oracle SID XE, launch a SQL*Plus session with Run SQL Command Line as shown in Figure 12.
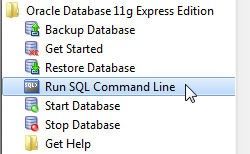
Figure 12. Run SQL Command Line
By default, the SQL*Plus session started with Run SQL Command Line is not connected to the default database. To connect, run the following command, in which the SYS password is a variable that could be different for different users.
CONNECT SYS/OraDB11XE AS SYSDBA;
Subsequently, output the database name and global database name. And those should both be XE, the default database name for Oracle Database 11g XE.
SQL*Plus: Release 11.2.0.2.0 Production on Sat Dec 9 11:07:03 2017
Copyright (c) 1982, 2014, Oracle.  All rights reserved.
SQL> CONNECT SYS/OraDB11XE AS SYSDBA;
Connected.
SQL>  select name from v$database;
NAME
---------
XE
SQL> SELECT * FROM GLOBAL_NAME;
GLOBAL_NAME
--------------------------------------------------------------------------------
XE
SQL>
A database instance started with the STARTUP command in SQL*Plus also starts the default database XE if the current SID is XE.
C:\Users\dvohra>SET ORACLE_SID=XE
C:\Users\dvohra>sqlplus SYS/OraDB11XE AS SYSDBA;
SQL> STARTUP;
ORACLE instance started.
Total System Global Area 1068937216 bytes
Fixed Size                  2260048 bytes
Variable Size             616563632 bytes
Database Buffers          444596224 bytes
Redo Buffers                5517312 bytes
Database mounted.
Database opened.
SQL> select name from v$database;
NAME
---------
XE
SQL>
The second instance ORAXE was started using the pfile initORAXE.ora on the SQL*Plus command line when the instance is started in NOMOUNT mode to create the database ORAXE, as discussed earlier.
If the second instance is stopped, you can start it as follows: (1) set the current SID to ORAXE; (2) connect to an idle instance using SQL*Plus with the SYS/<password> specified as SYSDBA; (3) run the STARTUP command as follows:
C:\Users\dvohra>SET ORACLE_SID=ORAXE
C:\Users\dvohra>sqlplus SYS/OraDB11XE AS SYSDBA;
SQL*Plus: Release 11.2.0.2.0 Production on Sat Dec 9 11:23:14 2017
Copyright (c) 1982, 2014, Oracle.  All rights reserved.
Connected to an idle instance.
SQL> STARTUP;
ORACLE instance started.
Total System Global Area  563691520 bytes
Fixed Size                  2255192 bytes
Variable Size             171968168 bytes
Database Buffers          385875968 bytes
Redo Buffers                3592192 bytes
Database mounted.
Database opened.
SQL> select name from v$database;
NAME
---------
ORAXE
SQL>
The LISTENER status should list both the XE and ORAXE instances and the associated services, XE and ORAXE respectively, as running. The LISTENER status is output with the following command.
C:\Windows\system32>lsnrctl status
LSNRCTL for 64-bit Windows: Version 11.2.0.2.0 - Production on 06-DEC-2017 19:04
:27
Copyright (c) 1991, 2014, Oracle.  All rights reserved.
Connecting to (DESCRIPTION=(ADDRESS=(PROTOCOL=IPC)(KEY=EXTPROC1)))
STATUS of the LISTENER
------------------------
Alias                     LISTENER
Version                   TNSLSNR for 64-bit Windows: Version 11.2.0.2.0 - Production
Start Date                06-DEC-2017 19:04:20
Uptime                    0 days 0 hr. 0 min. 7 sec
Trace Level               off
Security                  ON: Local OS Authentication
SNMP                      OFF
Default Service           XE
Listener Parameter File   C:\oraclexe\app\oracle\product\11.2.0\server\network\admin\listener.ora
Listener Log File         C:\oraclexe\app\oracle\diag\tnslsnr\dvohra-PC\listener
\alert\log.xml
Listening Endpoints Summary...
  (DESCRIPTION=(ADDRESS=(PROTOCOL=ipc)(PIPENAME=\\.\pipe\EXTPROC1ipc)))
  (DESCRIPTION=(ADDRESS=(PROTOCOL=tcp)(HOST=dvohra-PC)(PORT=1521)))
  (DESCRIPTION=(ADDRESS=(PROTOCOL=tcp)(HOST=dvohra-PC)(PORT=8081))(Presentation=
HTTP)(Session=RAW))
Services Summary...
Service "CLRExtProc" has 1 instance(s).
  Instance "CLRExtProc", status UNKNOWN, has 1 handler(s) for this service...
Service "ORAXEDB" has 1 instance(s).
  Instance "oraxe", status READY, has 1 handler(s) for this service...
Service "PLSExtProc" has 1 instance(s).
  Instance "PLSExtProc", status UNKNOWN, has 1 handler(s) for this service...
Service "XEXDB" has 1 instance(s).
  Instance "xe", status READY, has 1 handler(s) for this service...
Service "oraxe" has 1 instance(s).
  Instance "oraxe", status READY, has 1 handler(s) for this service...
Service "xe" has 1 instance(s).
  Instance "xe", status READY, has 1 handler(s) for this service...
The command completed successfully
C:\Windows\system32>
Each of the databases must list the SYSTEM, SYSAUX, USERS,UNDOTBS1 and TEMP as being ONLINE.
SQL> SELECT TABLESPACE_NAME, STATUS FROM USER_TABLESPACES;
TABLESPACE_NAME                STATUS
------------------------------ ---------
SYSTEM                         ONLINE
SYSAUX                         ONLINE
UNDOTBS1                       ONLINE
USERS                          ONLINE
TEMP                           ONLINE

SQL>
Conclusion
Toad DevOps Toolkit requires two databases, one each for the source and target of Toad DevOps Toolkits. In this article we discussed installing Oracle Database 11g Express Edition and Oracle Client, and creating a second database instance and mounting the instance on a new database. We also discussed starting both the database instances. With Toad DevOps Toolkit & two Oracle Database instances installed and running, the Toad DevOps Toolkit is ready to be used. In a subsequent article we shall discuss running PowerShell examples.
Start the discussion at forums.toadworld.com