Introduction
In the first part of this two-article tutorial, we introduced using Oracle Database 12c CDB and PDBs on Oracle Cloud service with Toad for Oracle. In part two of the tutorial we shall discuss the same further. In addition to using an alternative method for connecting to Oracle Database 12c on Oracle Cloud Platform with Toad for Oracle we shall explore some of the other features in Toad for Oracle. Part two of the tutorial has the following sections.
- Creating an Oracle Database Table using a SQL Script
- Committing a Transaction
- Enabling AutoCommit
- Querying an Oracle Database Table using a SQL Script
- Querying an Oracle Database Table using Query Builder
- Creating an Oracle Database Table using the Create Table Wizard
- Exploring the Database
- Exporting Database
- Comparing Database Objects
- Team Coding
- Using the Schema Browser
- Creating a Direct Connection in Toad for Oracle using Oracle Instant Client
- Adding a Login Record
Creating an Oracle Database Table using a SQL Script
Picking up where we left off at the end of part one, we shall create a database table. Copy the following SQL Script to the SQL Editor for the SYS@PDB1 connection.
CREATE TABLE wlslog(time_stamp VARCHAR2(255) PRIMARY KEY,category VARCHAR2(255),type VARCHAR2(255),
servername VARCHAR2(255), code VARCHAR2(255),msg VARCHAR2(255));

INSERT INTO wlslog(time_stamp,category,type,servername,code,msg) VALUES('Apr-8-2014-7:06:16-PM-PDT',
'Notice','WebLogicServer','AdminServer','BEA-000365','Server state changed to STANDBY');

INSERT INTO wlslog(time_stamp,category,type,servername,code,msg) VALUES('Apr-8-2014-7:06:17-PM-PDT',
'Notice','WebLogicServer','AdminServer','BEA-000365','Server state changed to STARTING');

INSERT INTO wlslog(time_stamp,category,type,servername,code,msg) VALUES('Apr-8-2014-7:06:18-PM-PDT',
'Notice','WebLogicServer','AdminServer','BEA-000365','Server state changed to ADMIN');

INSERT INTO wlslog(time_stamp,category,type,servername,code,msg) VALUES('Apr-8-2014-7:06:19-PM-PDT',
'Notice','WebLogicServer','AdminServer','BEA-000365','Server state changed to RESUMING');

INSERT INTO wlslog(time_stamp,category,type,servername,code,msg) VALUES('Apr-8-2014-7:06:20-PM-PDT',
'Notice','WebLogicServer','AdminServer','BEA-000361','Started WebLogic AdminServer');

INSERT INTO wlslog(time_stamp,category,type,servername,code,msg) VALUES('Apr-8-2014-7:06:21-PM-PDT',
'Notice','WebLogicServer','AdminServer','BEA-000365','Server state changed to RUNNING');

INSERT INTO wlslog(time_stamp,category,type,servername,code,msg) VALUES('Apr-8-2014-7:06:22-PM-PDT',
'Notice','WebLogicServer','AdminServer','BEA-000360','Server started in RUNNING mode');
Click on Execute as script as shown in Figure 1.
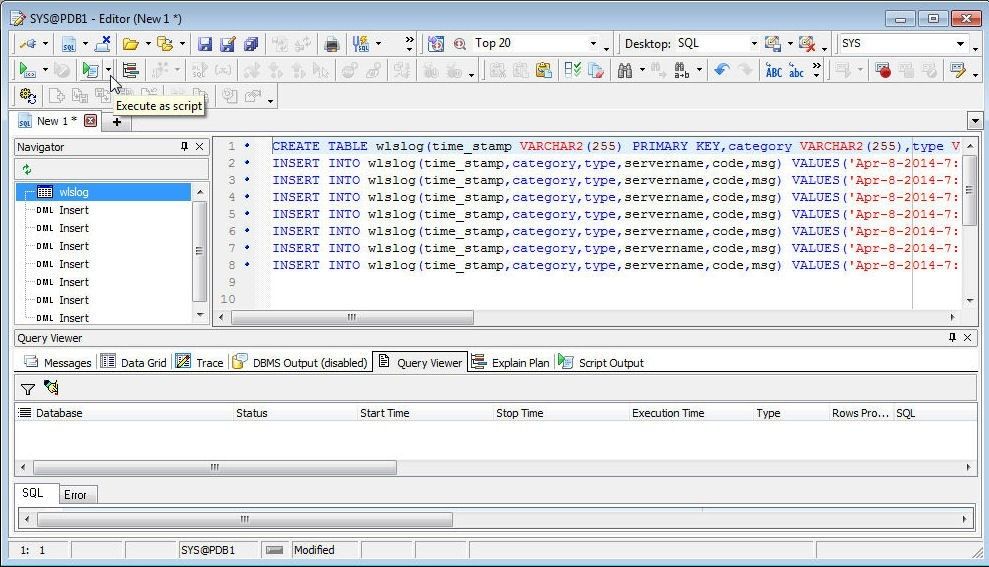
Figure 1. Execute as SQL Script to Create a Database Table
As the output in Figure 2 indicates, a database table gets created and data gets added.
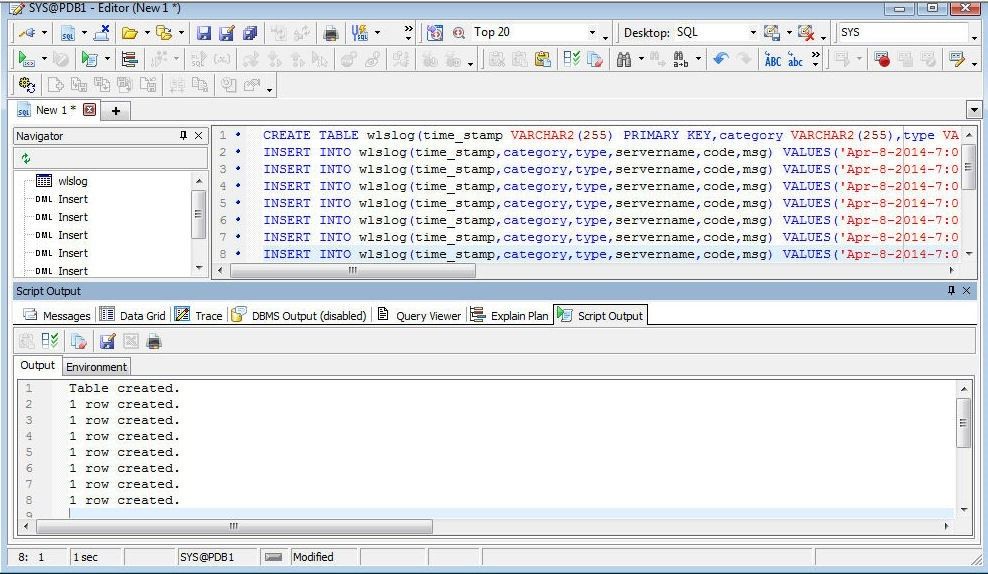
Figure 2. Table Created and Data Added
Alternatively, a single SQL statement may be run at a time with Execute/compile statement at caret as shown in Figure 3.
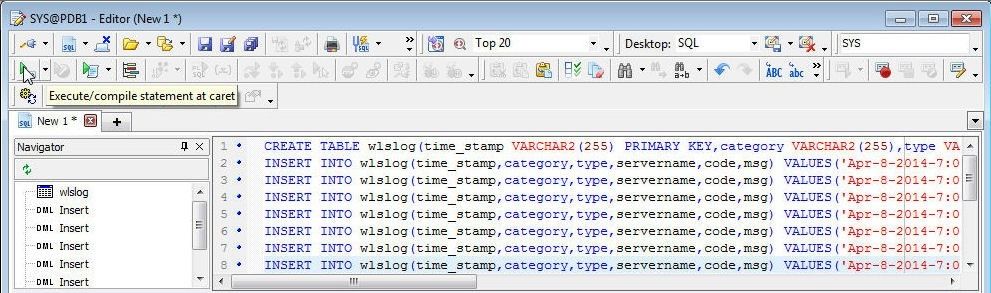
Figure 3. Execute /compile single statement at caret
Committing a Transaction
As mentioned earlier, Auto-commit is Off by default. To commit the transaction click on the Commit button with arrow downwards as shown in Figure 4. The adjacent button with arrow upwards is for Rollback.

Figure 4. Commit
The transaction gets committed …as indicated by the message in Figure 5.
–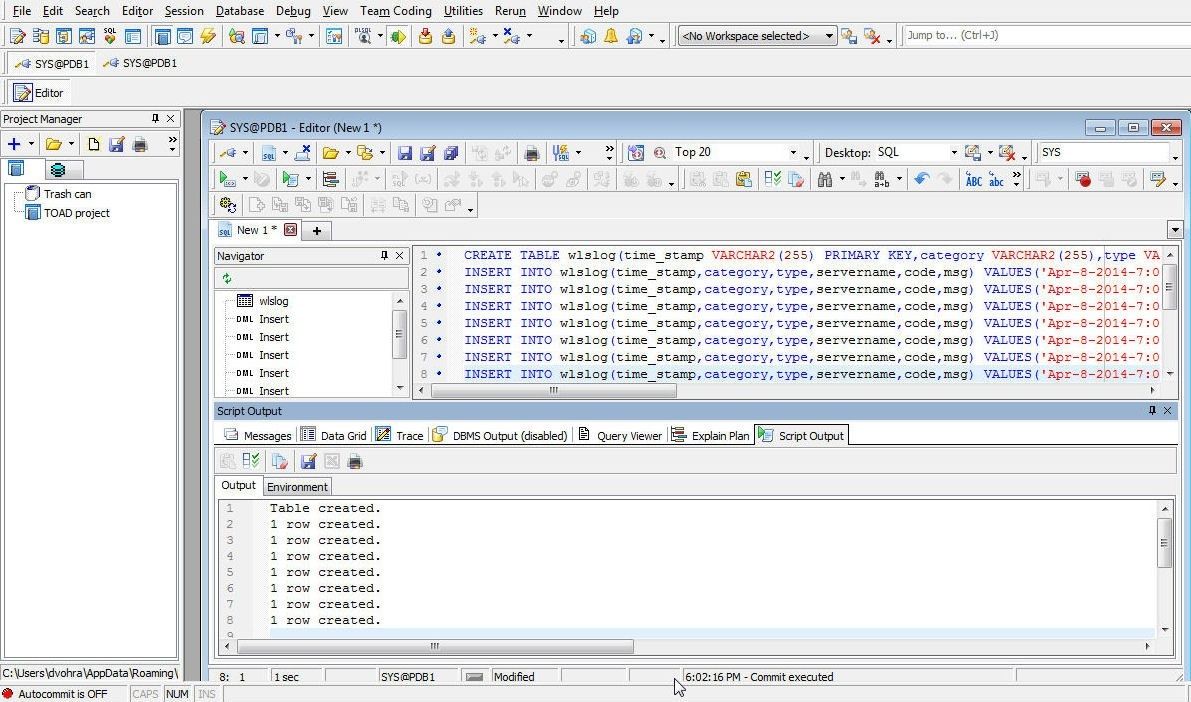
Figure 5. Transaction Committed
If the Rollback button is clicked the transaction gets rolled back, as indicated by the message in Figure 6.

Figure 6. Transaction Rolled Back
The Commit and Rollback options may also be selected from the Connection bar, as shown in Figure 7.

Figure 7. Commit Option may also be selected from Connection Bar
Enabling AutoCommit
AutoCommit may be enabled by configuring the default Toad for Oracle options. Select View>Toad Options as shown in Figure 8.
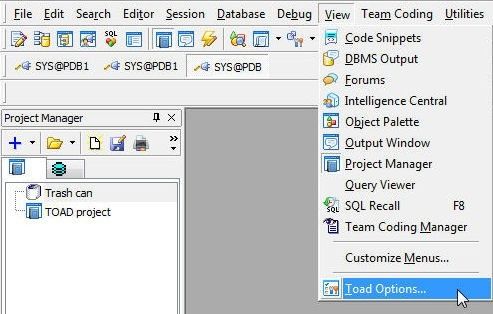
Figure 8. View>Toad Options
In Options select Oracle>Transactions as shown in Figure 9.
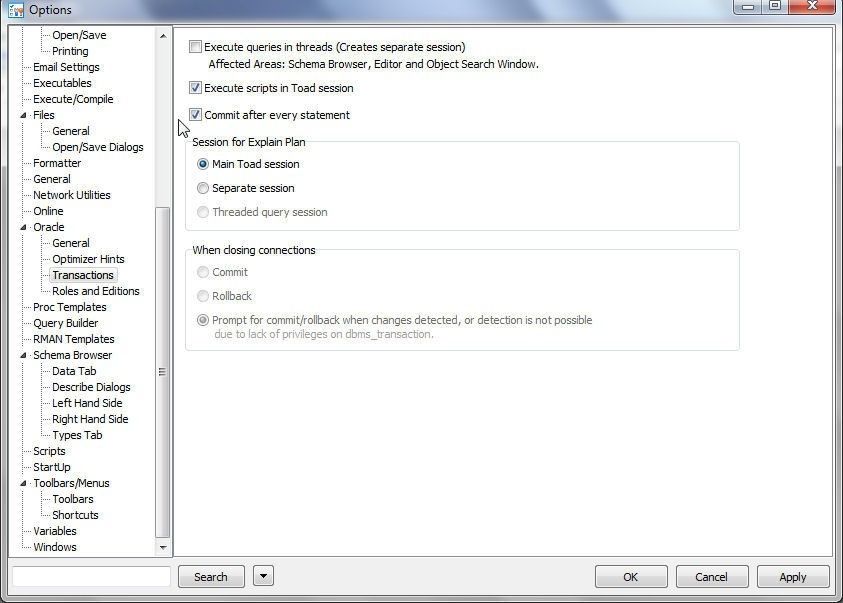
Figure 9. Options>Oracle>Transactions
Select the option “Commit after every statement”, which is deselected by default, as shown in Figure 10. Click on Apply and click on OK.
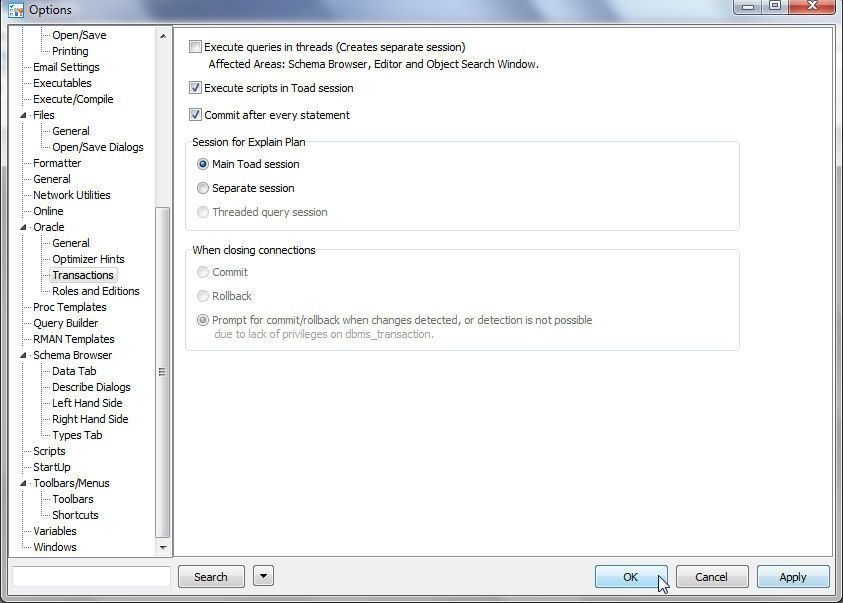
Figure 10. Selecting Commit after every statement
Autocommit gets set to on, as indicated by the message “AutoCommit is ON” in Figure 11.
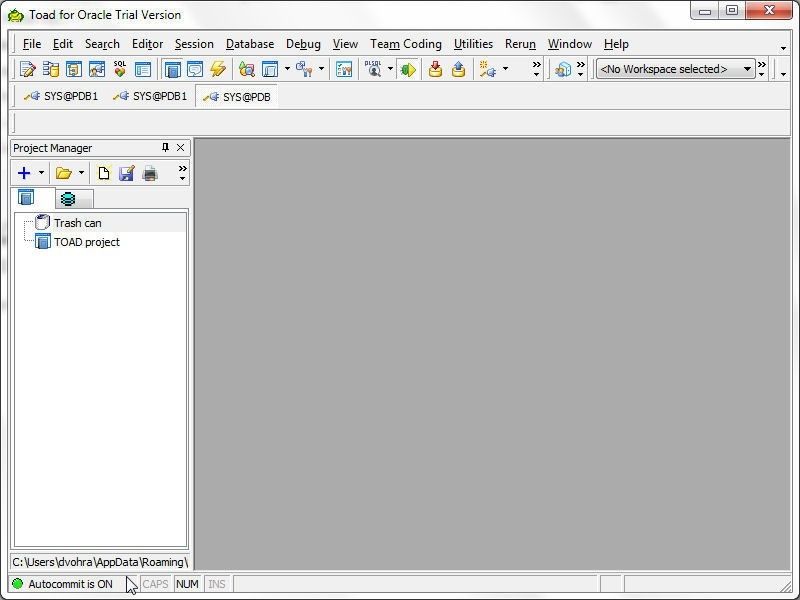
Figure 11. AutoCommit is ON
Other Toad Options may be configured in the Options. The Data Grids>Data options are shown in Figure 12.

Figure 12. Data Grid>Data Options
Having created a database table, next we shall query the table. Two options are available for querying a database table. The first is to use a SQL script and the other is to use the Query Builder. We shall discuss each of these options.
Querying an Oracle Database Table using a SQL Script
Select the connection in the Connection bar on which a SQL query is to be run. In a SQL Editor specify a SQL SELECT statement, as shown in Figure 13, and click on Execute/compile statement at caret.
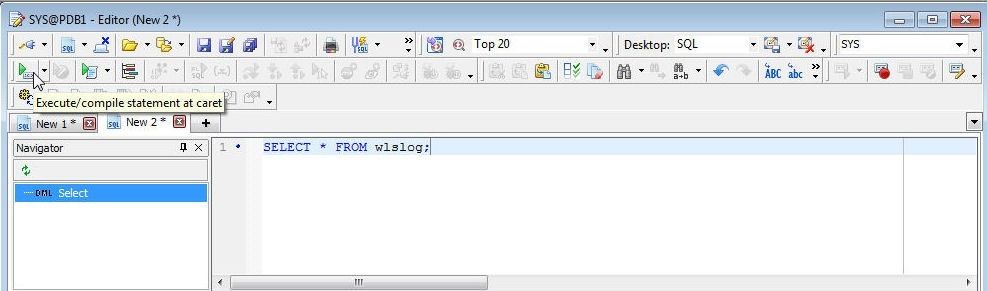
Figure 13. Running a SQL Statement
A result set gets displayed as a Data Grid, as shown in Figure 14.
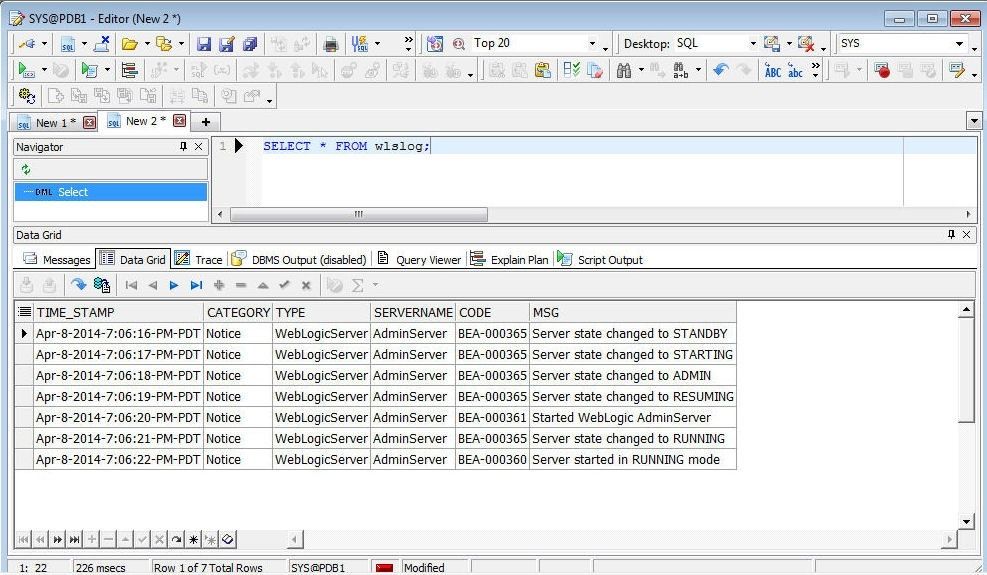
Figure 14. SQL Query Result Data Grid
To find which queries have been run select View>Query Viewer as shown in Figure 15.
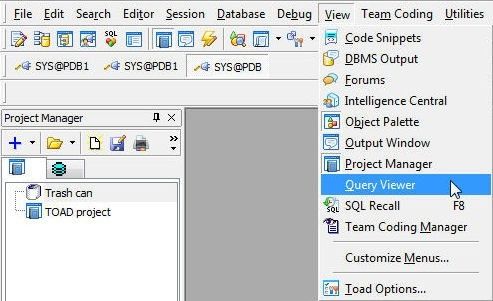
Figure 15. View>Query Viewer
The Query Viewer lists the different queries that have been run, including Status, as shown in Figure 16. The SQL for a query is also displayed. The SQL may be copied to clipboard for reuse. The Error tab lists the errors if any, and the error may also be copied to clipboard.
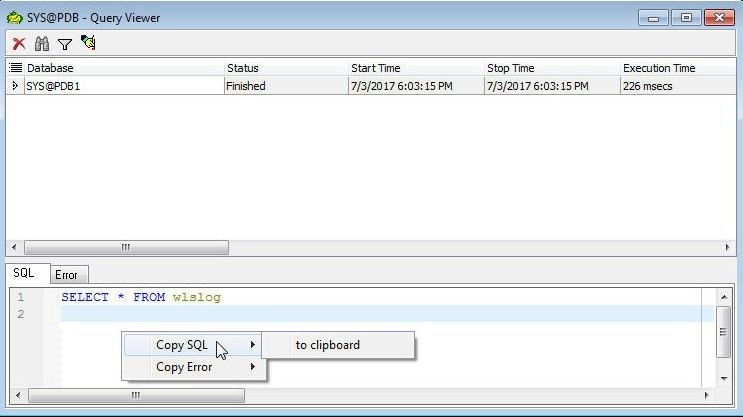
Figure 16. Query Viewer
Querying an Oracle Database Table using Query Builder
A database may also be queried using the built-in Query Builder. Start the Query Builder from the toolbar as shown in Figure 17.
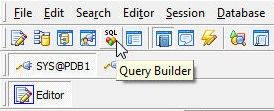
Figure 17. Selecting Query Builder
The Query Builder and an Object Palette get opened, as shown in Figure 18.
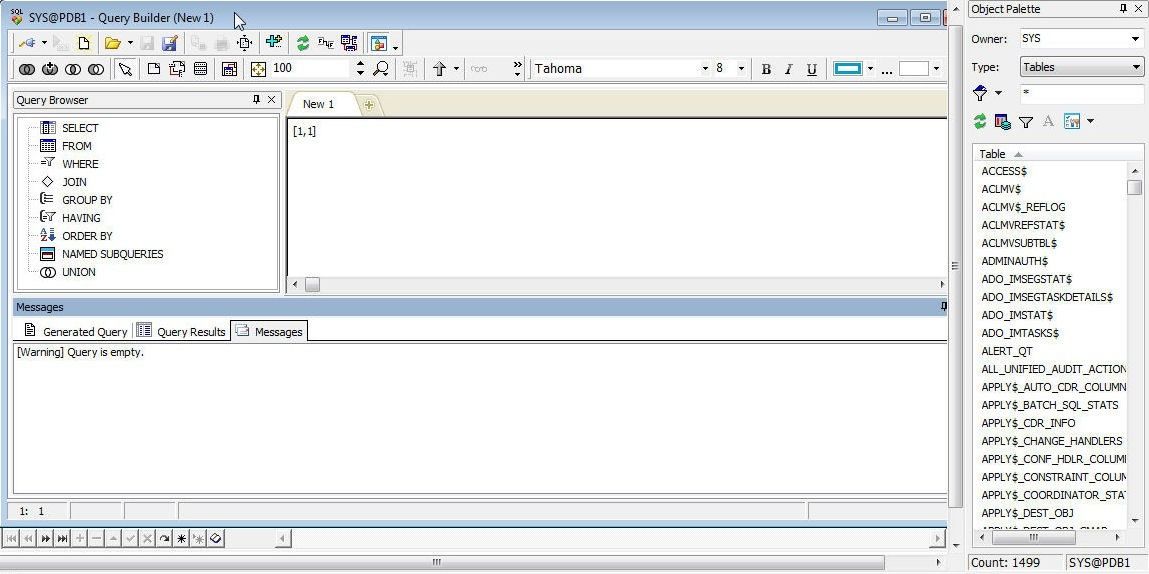
Figure 18. Query Builder and Object Palette
The Object Palette may also be opened separately with View>Object Palette, as shown in Figure 19.
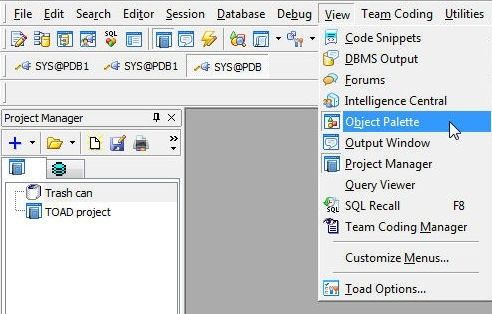
Figure 19. View>Object Palette
Select the WLSLOG table in the Object Palette as shown in Figure 20 and drag the table to the Query Builder pane.
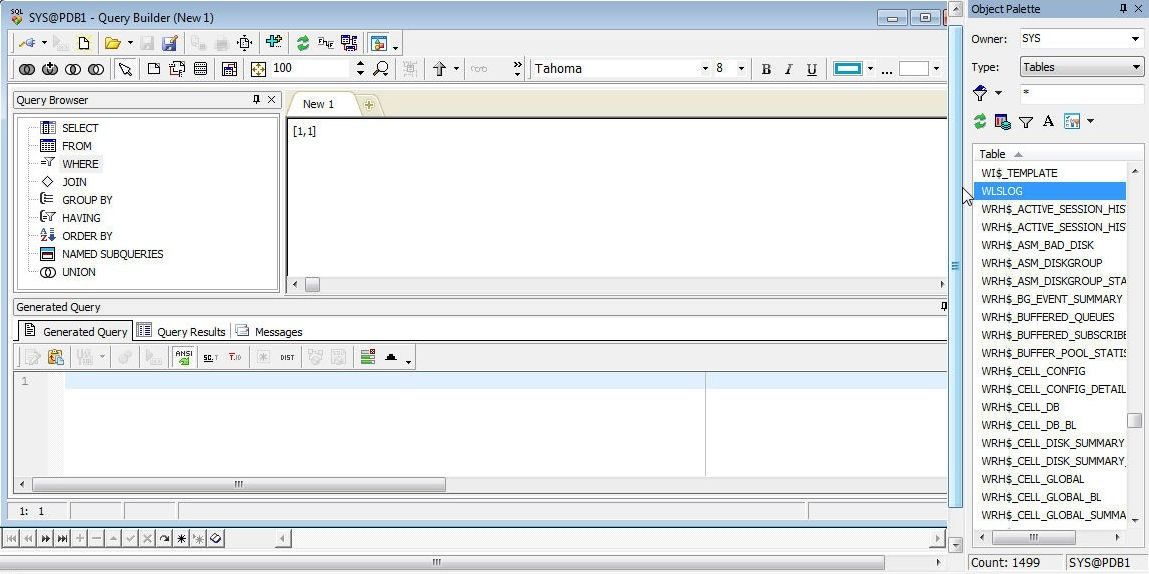
Figure 20. Selecting WLSLOG Table in Object Palette
The table diagram gets added to the Query Builder, as shown in Figure 21.

Figure 21. Adding a Table to Query Builder
Select the table columns to be included in the query as shown in Figure 22. Click on Execute Query, also shown in Figure 22.
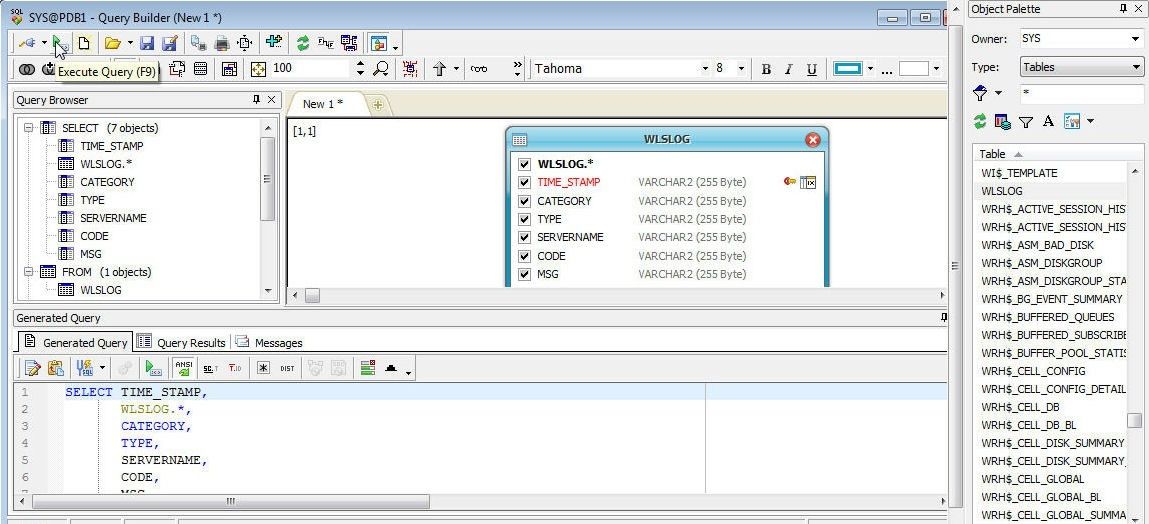
Figure 22. Selecting Columns in Table Diagram and selecting Execute>Query
The query result gets displayed, as shown in Figure 23.
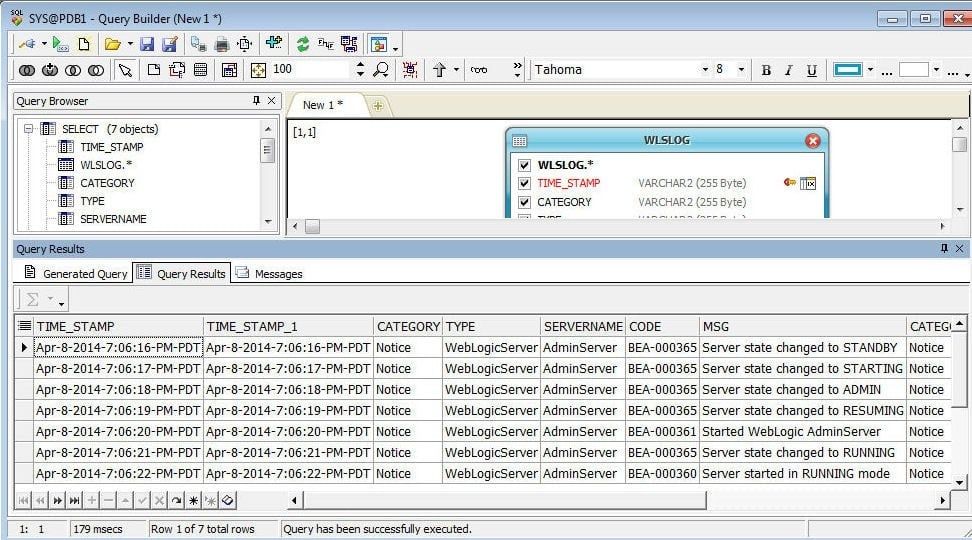
Figure 23. Query Result
The Query Builder provides several options for constructing a query, which may be listed with a right click, as shown in Figure 24.
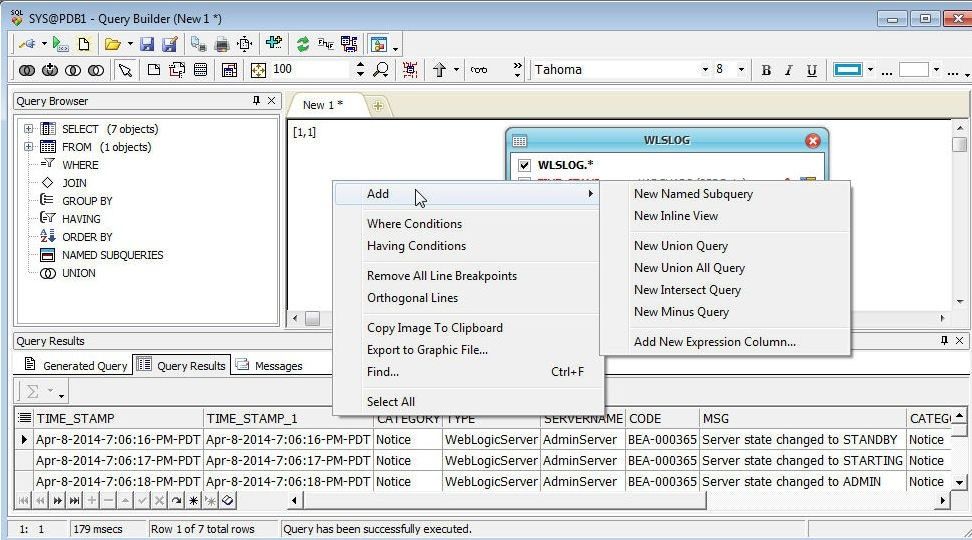
Figure 24. Query Builder Options
To find the SQL statements run including those run with Query Builder select View>SQL Recall as shown in Figure 25.

Figure 25. View>SQL Recall
The SQL Recall lists the SQL statements run, as shown in Figure 26.
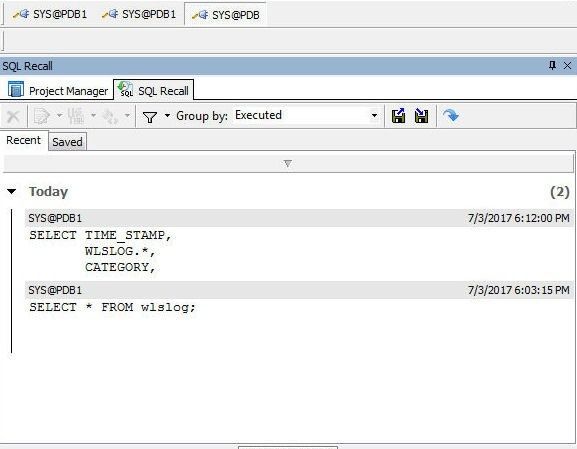
Figure 26. SQL Recall
Creating an Oracle Database Table using the Create Table Wizard
Database objects may be created using the Database>Create dropdown, as shown in Figure 27. Select a connection in the Connections toolbar, and to create a database table select Database>Create>Table.
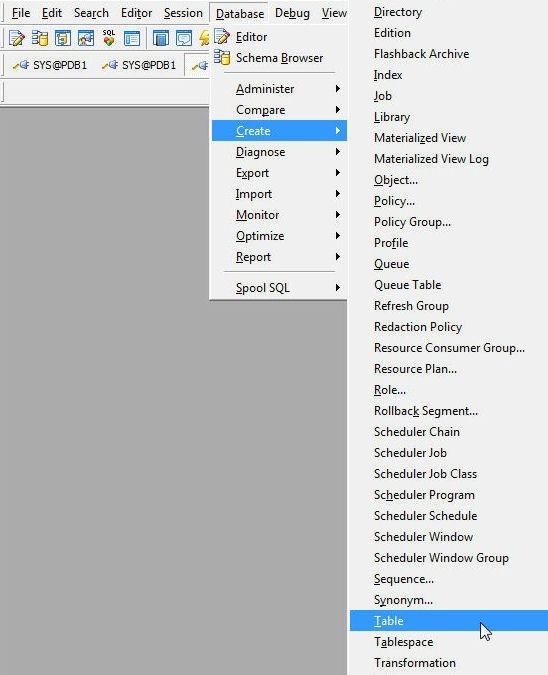
Figure 27. Database>Create>Table
In the Create Table wizard select a Schema (SYS) and specify a Table Name (weblogiclog) as shown in Figure 28.
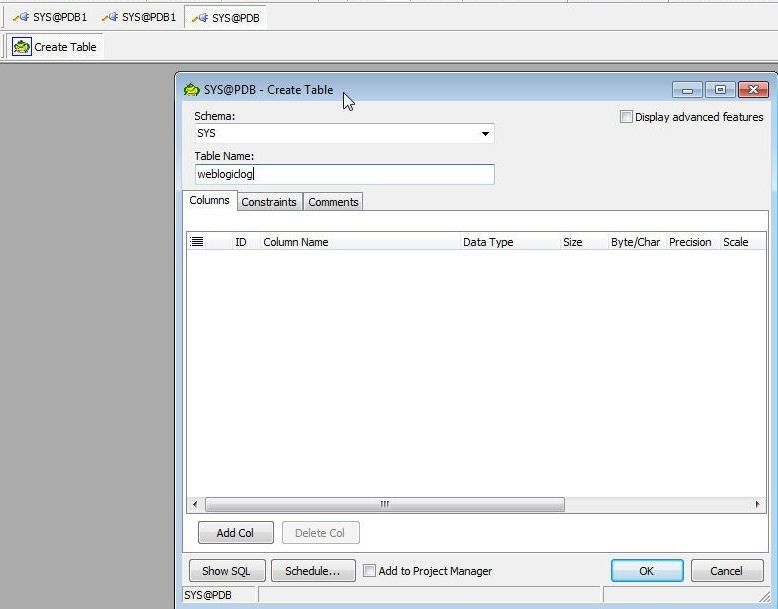
Figure 28. Create Table Wizard
To add a table column select the Columns tab and click on Add Col as shown in Figure 29.
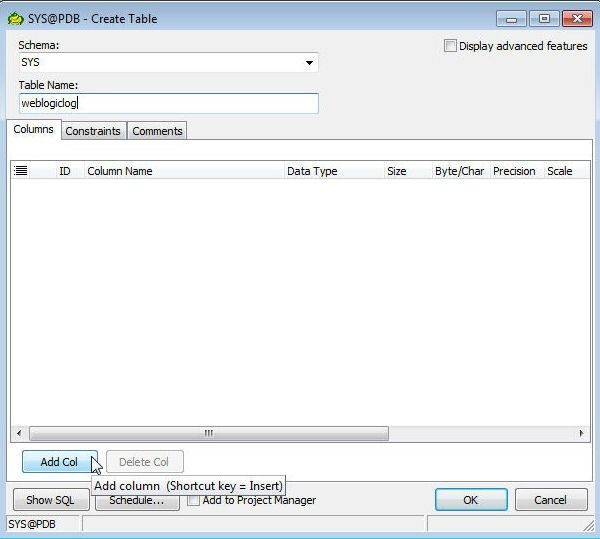
Figure 29. Add Col
A column row gets added. Specify a Column Name and select a Data Type as shown in Figure 30.
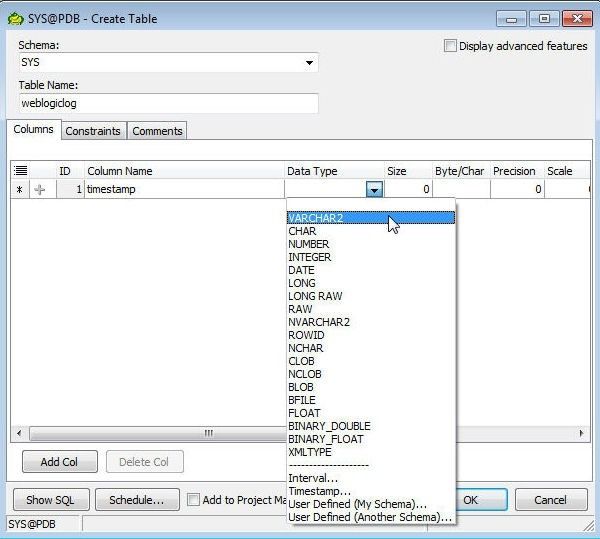
Figure 30. Adding Column Name and Column Type
Select/specify other options, including whether the column is a pk (primary key) and Not Null, as shown in Figure 31. Click on OK.
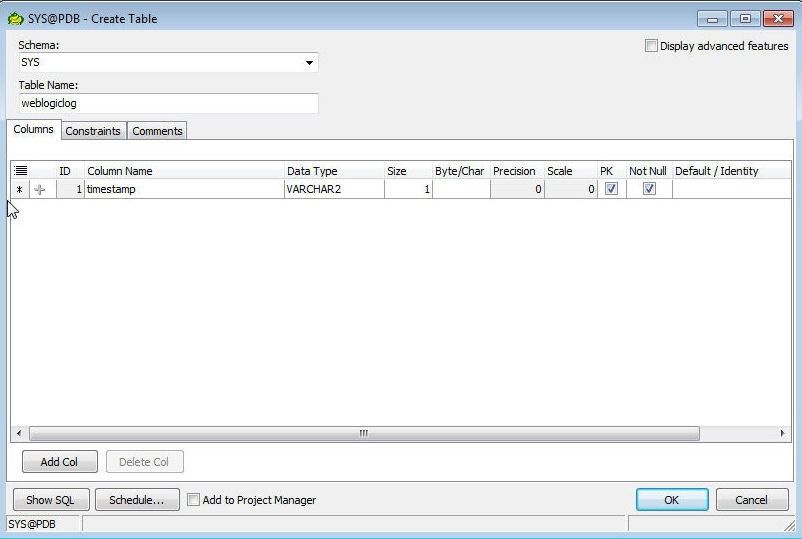
Figure 31. Adding a Primary Key Column
Similarly, add other columns as shown in Figure 32.

Figure 32. Adding more Columns
By default only Columns, Constraints, and comments may be added. Select the Display advanced features option as shown in Figure 33 to display other features to add.
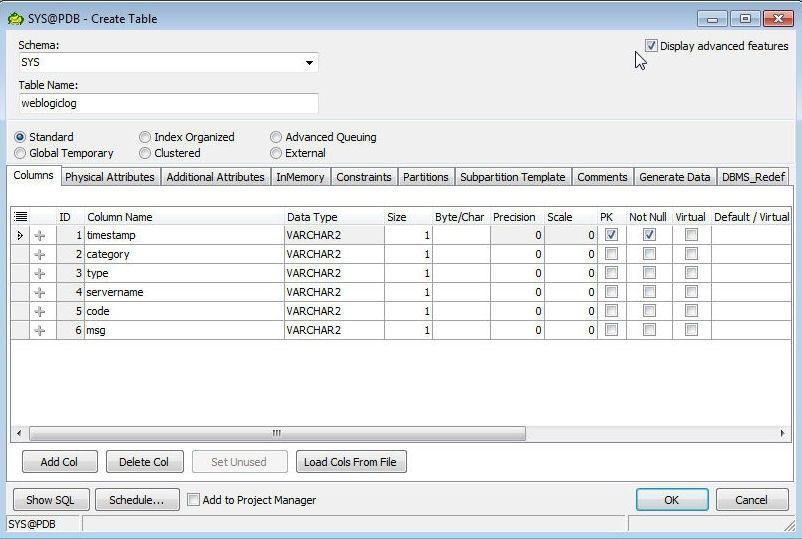
Figure 33. Display Advanced Table Features
Exploring the Database
Toad for Oracle provides several options for exploring and administering a database. To connect to an ASM Instance select Database>Administer>ASM Manager as shown in Figure 34.
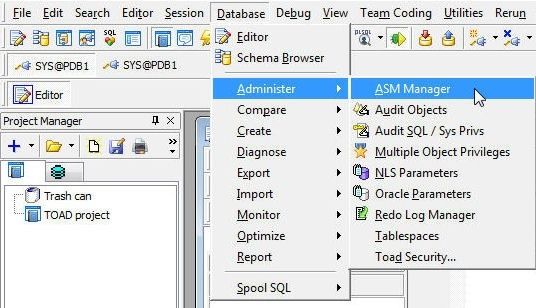
Figure 34. Database>Administer>ASM Manager
In Connect to ASM Instance specify Username, Password, and Database and select Connect As> SYSASM, and click on OK as shown in Figure 35.
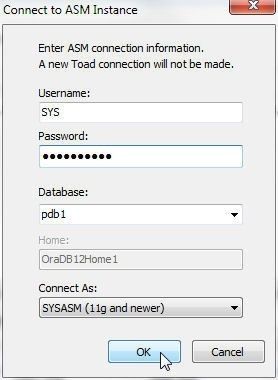
Figure 35. Connect to ASM Instance
The ASM Manager gets started, as shown in Figure 36.
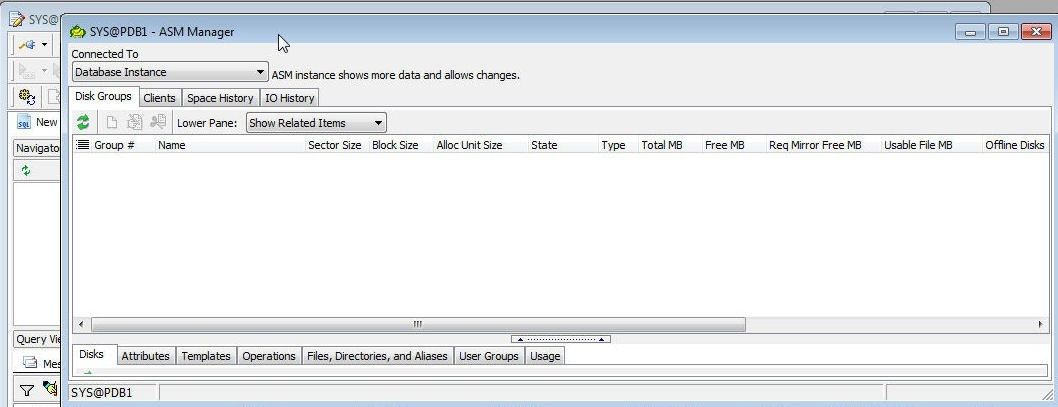
Figure 36. ASM Manager
Similarly, select Database>Administer>Multiple Object Privileges to display the Multiple Object Privileges wizard, as shown in Figure 37.
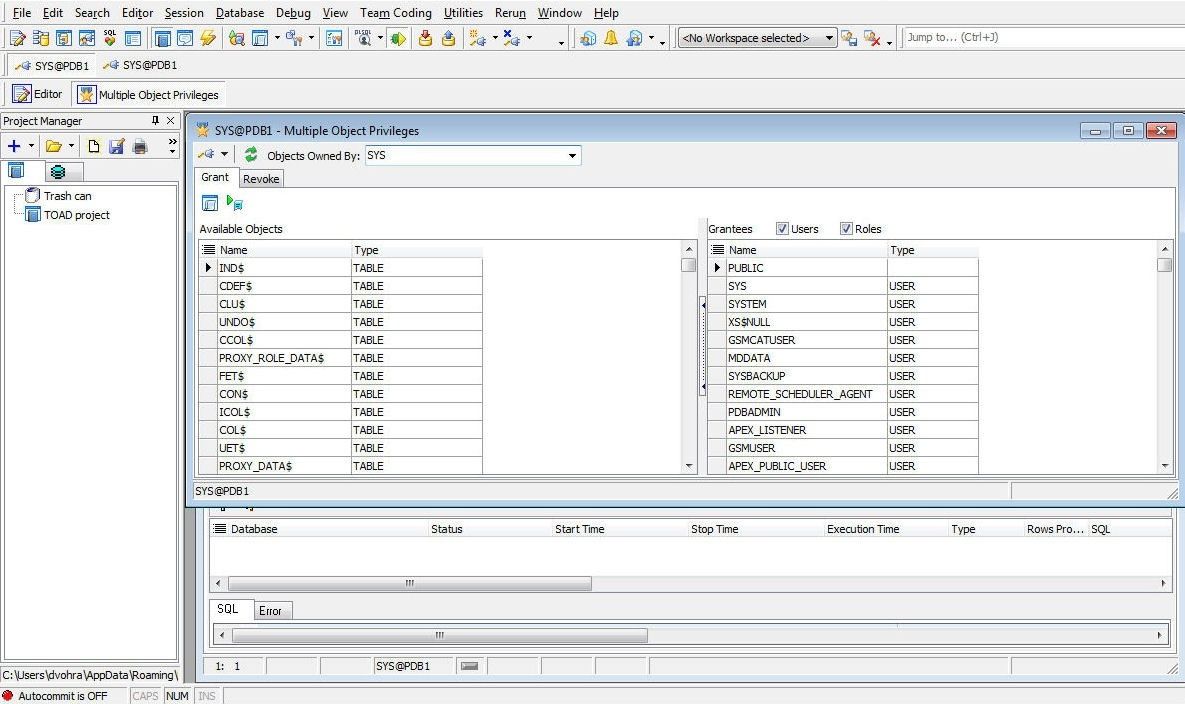
Figure 37. Multiple Object Privileges
Oracle Parameters may be displayed, as shown in Figure 38.
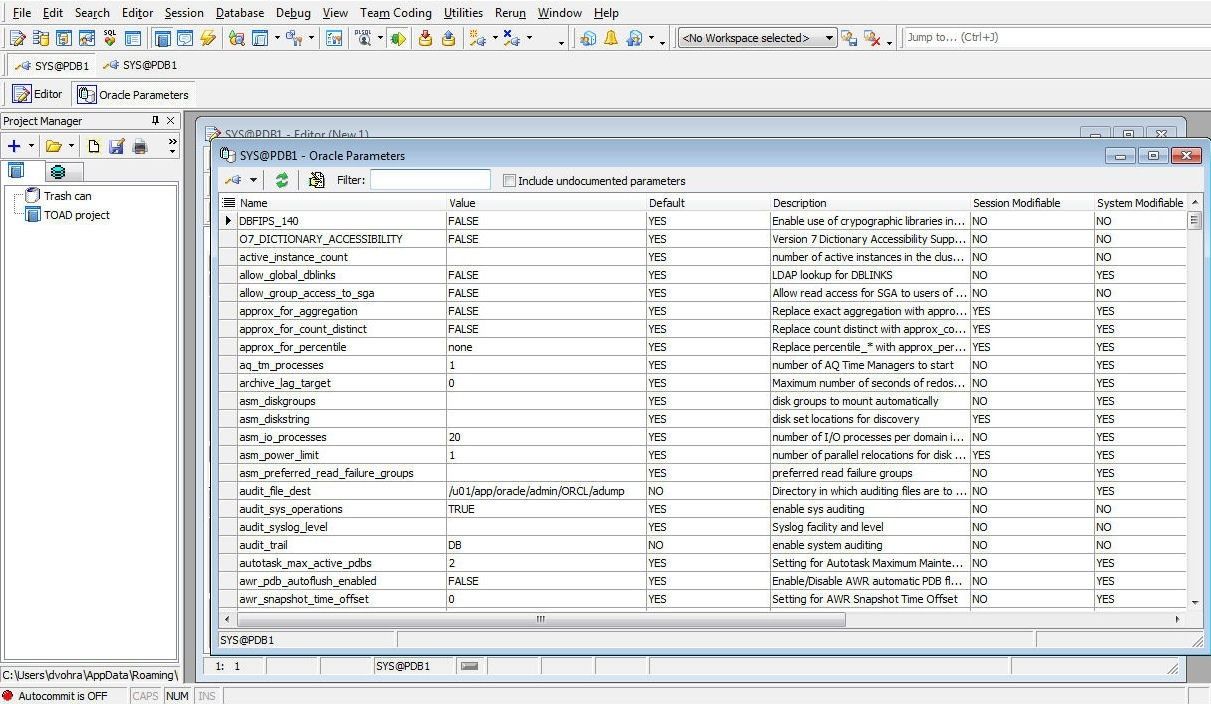
Figure 38. Oracle Parameters
Tablespaces are displayed in Figure 39.
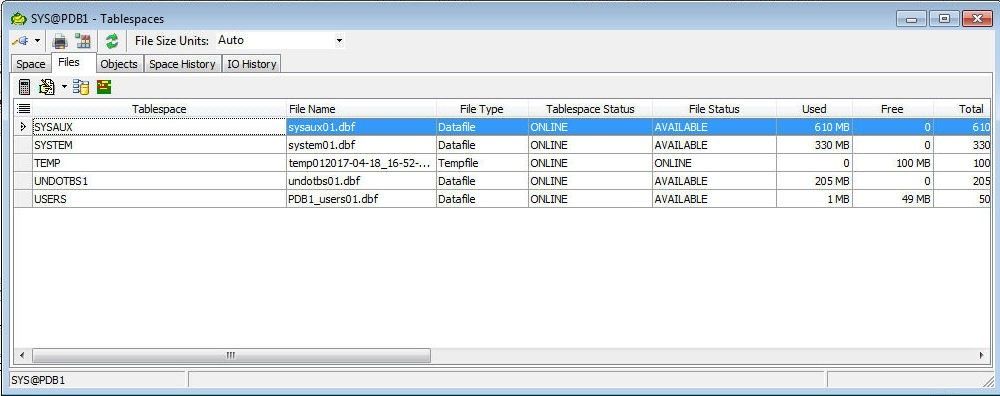
Figure 39. Tablespaces
Redo Log Manager is displayed in Figure 40.
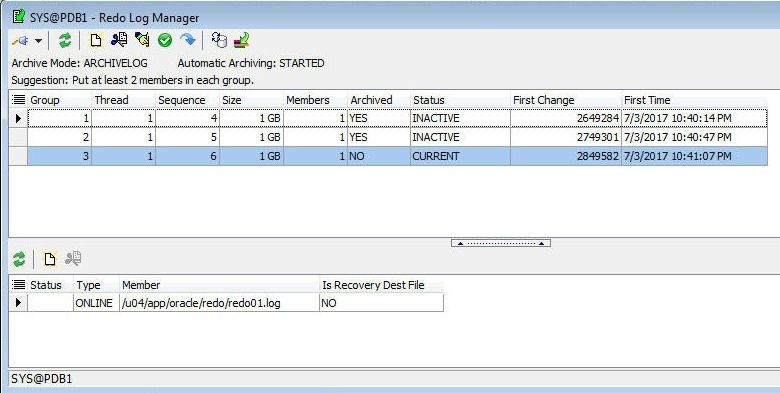
Figure 40. Redo Log Manager
Various options are provided for monitoring a database, as shown in Figure 41.
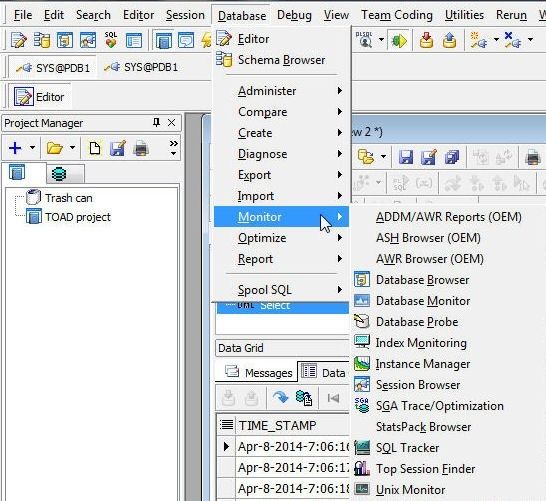
Figure 41. Monitoring a Database
To search for database objects select Search in the toolbar. In the Object Search specify a Search term (wlslog as an example) and click on Search for database objects as shown in Figure 42.

Figure 42. Object Search
The Object Search result gets displayed, as shown in Figure 43.
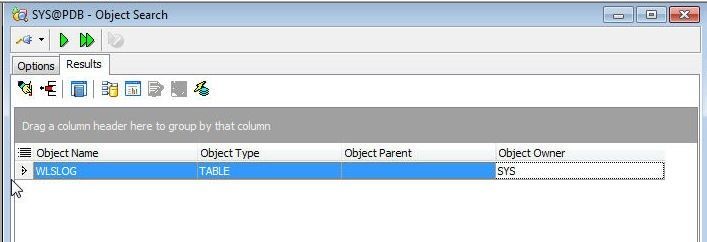
Figure 43. Object Search Result
Exporting Database
To export database objects select Database>Export and select one of the options as shown in Figure 44. Select Export DDL to export the DDL.
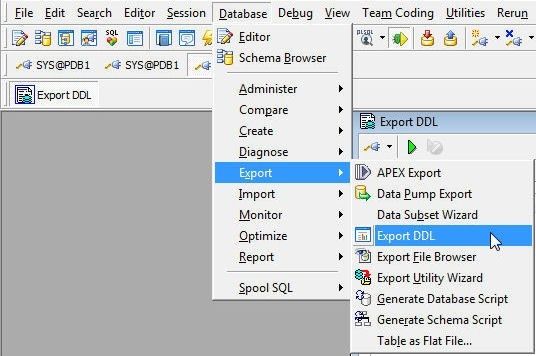
Figure 44. Database>Export>Export DDL
In Export DDL add and select Objects for which DDL is to be exported. The script options may be selected with the Script Options tab. Click on Export object DDL as shown in Figure 45.
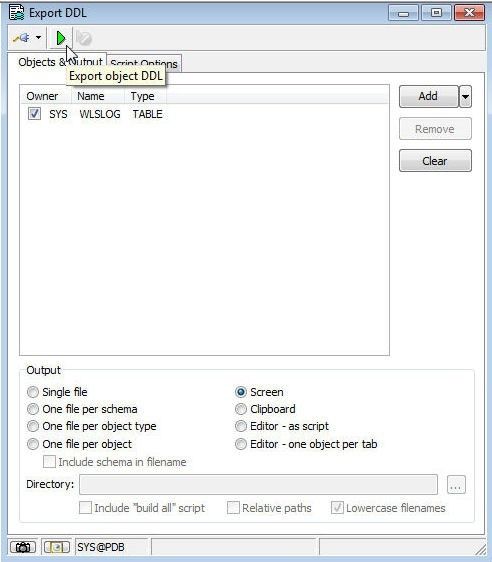
Figure 45. Export DDL
To export as a flat file select Database>Export>Table as Flat File as shown in Figure 46.
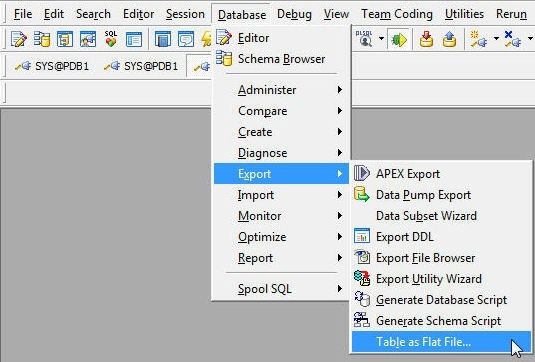
Figure 46. Database>Export>Table as Flat File
In Export Tables as Flat File select the Options tab to select the Schema (SYS), Table (WLSLOG), and To File as shown in Figure 47.
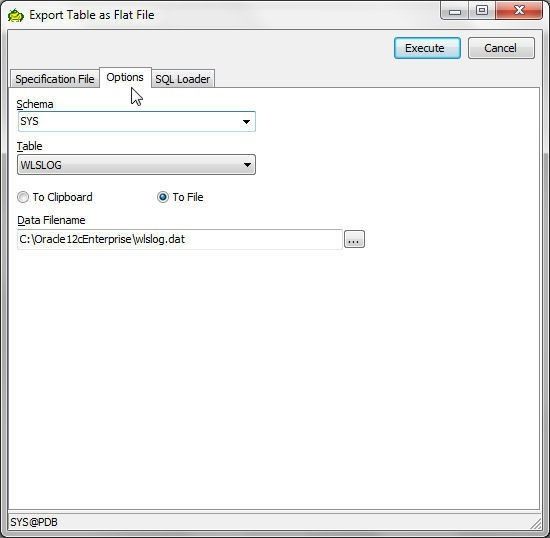
Figure 47. Export Table As Flat File
The Specification File gets displayed, as shown Figure 48.
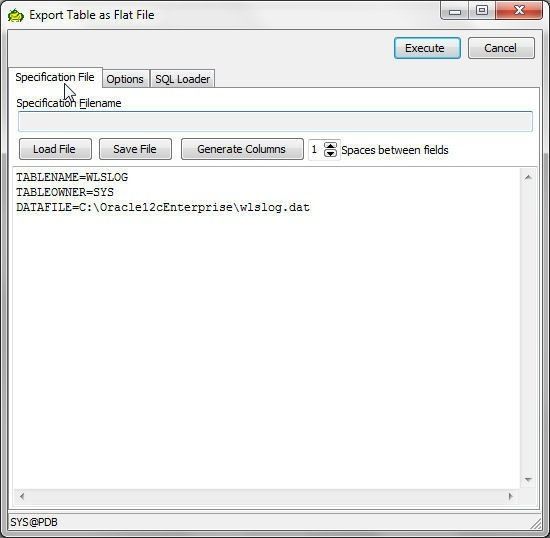
Figure 48. Specification File
Two files get generated and exported: a data file and a spec file. Click on Save File to specify the data file. In Save As specify a data file (wlslog.dat) and click on Save as shown in Figure 49.
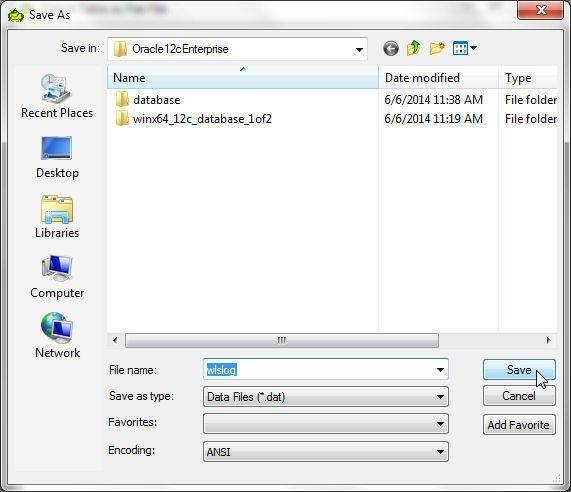
Figure 49. Specifying a Data File
For the spec file, first generate the columns with Generate Columns as shown in Figure 50.
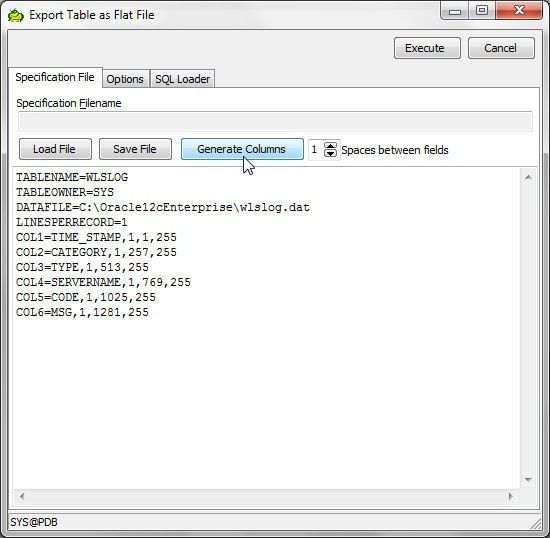
Figure 50. Generate Columns
In Select export spec file specify a spec file (wlslog.spec) and click on Save as shown in Figure 51.
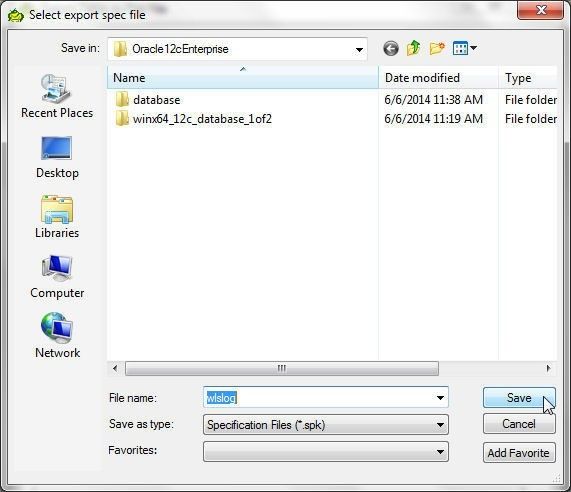
Figure 51. Specifying a Spec File
Having specified a data file and a spec file, click on Execute to export the table, as shown in Figure 52.
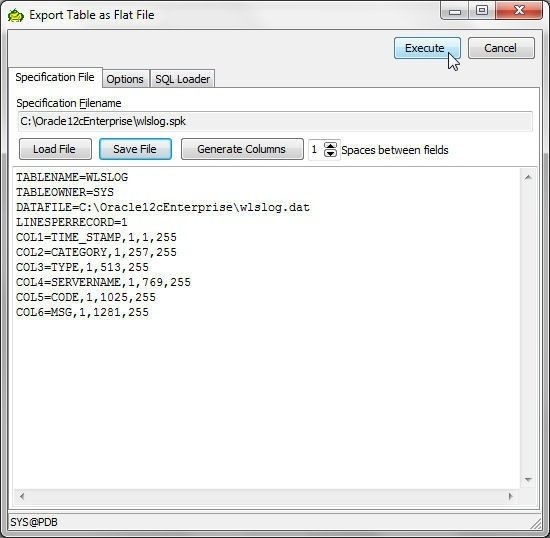
Figure 52. Exporting a Database Table
As the Output in Figure 53 indicates, the database table gets exported.
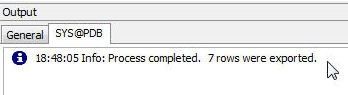
Figure 53. Database Table Exported
The database table data gets exported to the wlslog.dat data file, as shown in Figure 54.
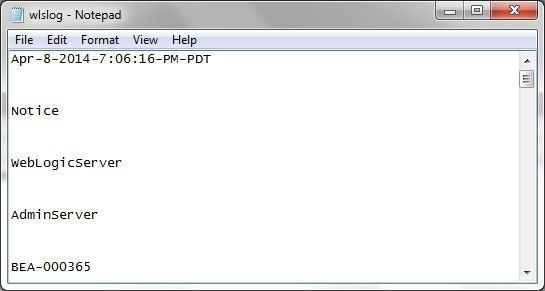
Figure 54. Data File wlslog.dat
The table specification gets exported to the wlslog.spec file, as shown in Figure 55.
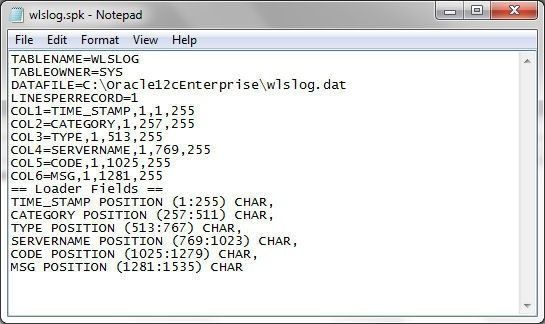
Figure 55. Spec File wlslog.spec
Comparing Database Objects
To compare database objects select Database>Compare; to compare data select Database>Compare>Data as shown in Figure 56.
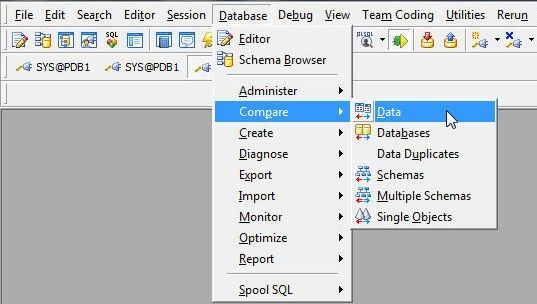
Figure 56. Database>Compare>Data
In the Compare Data dialog select the Source Dataset Connection (SYS@PDB), Object Type (Table), Object Owner (SYS) and Object Name (WEBLOGICLOG) as shown in Figure 57. Click on Next.
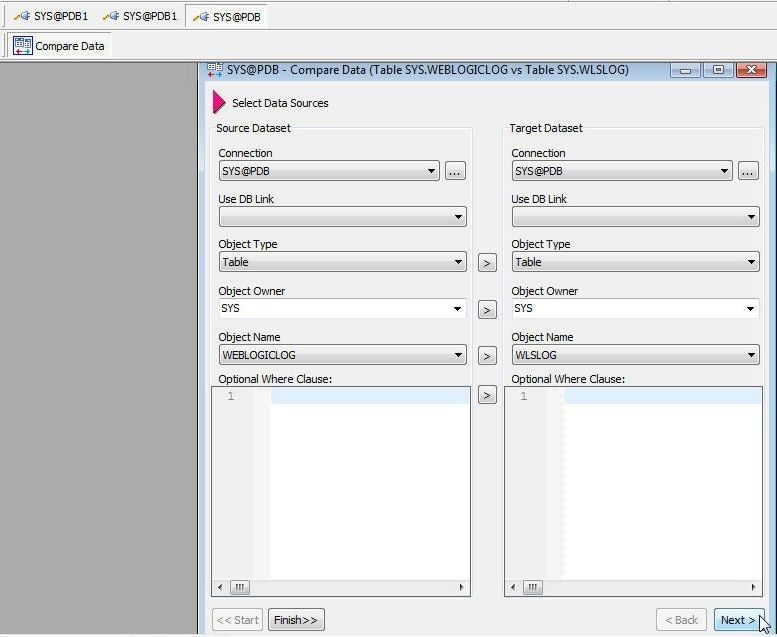
Figure 57. Compare Data Wizard
In Options select a Comparison Method from the two options: Row by Row and Minus. Select Row by Row as shown in Figure 58; this is the best choice for small tables. With default settings for other options click on Next.
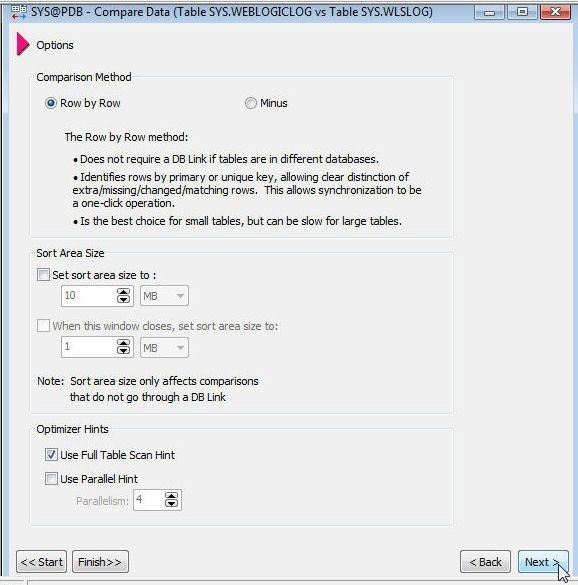
Figure 58. Selecting Data Compare Options
Next, select the columns for comparison, as shown in Figure 59. Only columns that appear in both the source and target tables are comparable. Click on Next.

Figure 59. Selecting Columns
Optionally select Key Columns that uniquely identify a row and click on Next as shown in Figure 60.
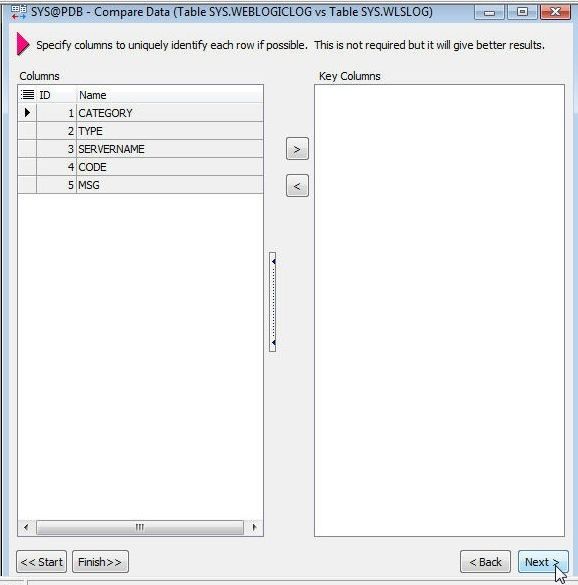
Figure 60. Selecting Key Columns
Click on Perform Comparison as shown in Figure 61. The Row Counts for source and target tables are also shown in Figure 61.
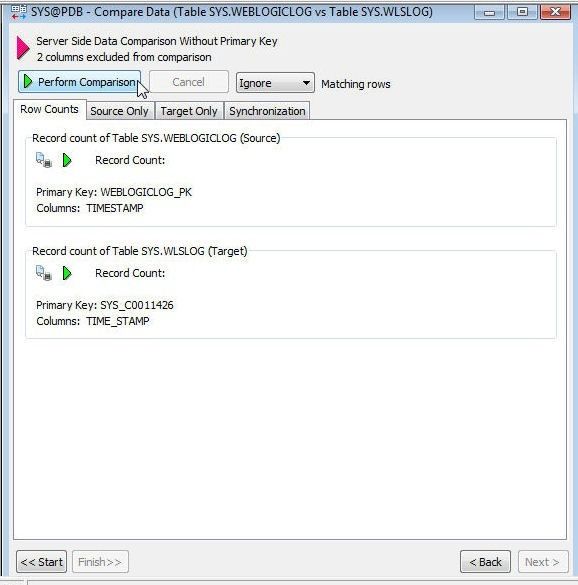
Figure 61. Row Counts
The Source Only tab lists the source dataset, as shown in Figure 62.
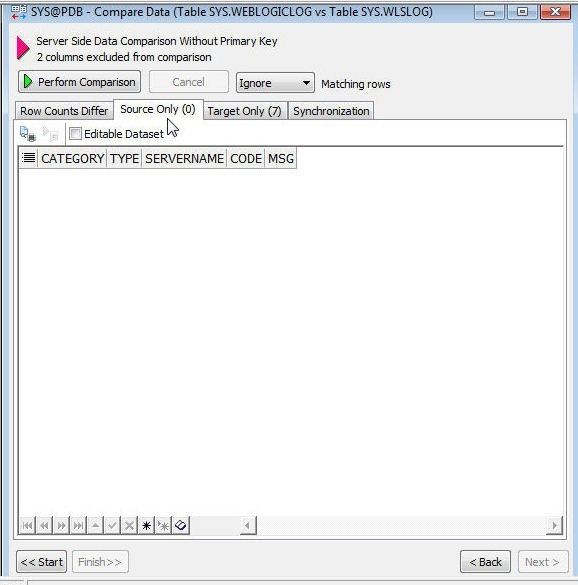
Figure 62. Source Only Dataset
The Target Only tab lists the target table dataset, as shown in Figure 63.
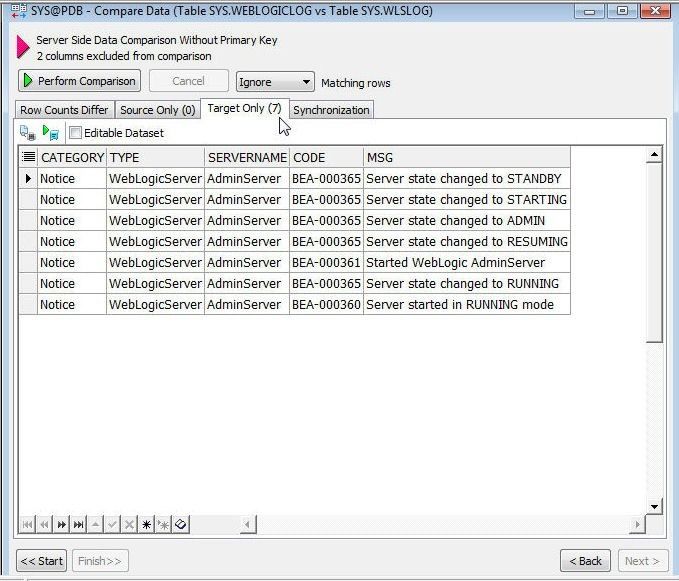
Figure 63. Target Only Dataset
The Synchronization tab shown in Figure 64 may be used to Sync Target with Source.
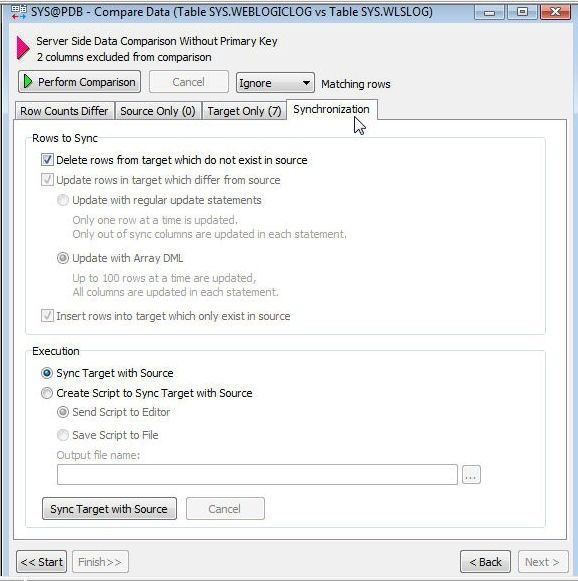
Figure 64. Synchronization
Team Coding
For team coding select Team Coding as shown in Figure 65.

Figure 65. Team Coding
Select Team Coding>Configuration to configure team coding as shown in Figure 66.
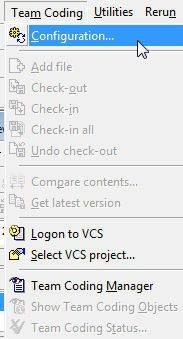
Figure 66. Team Coding>Configuration
In Team Coding Configuration select a VCS (Version Control System) Provider, Git as an example, as shown in Figure 67. Select from Local Options and VCS Logging Options. Click on Apply. Click on OK.
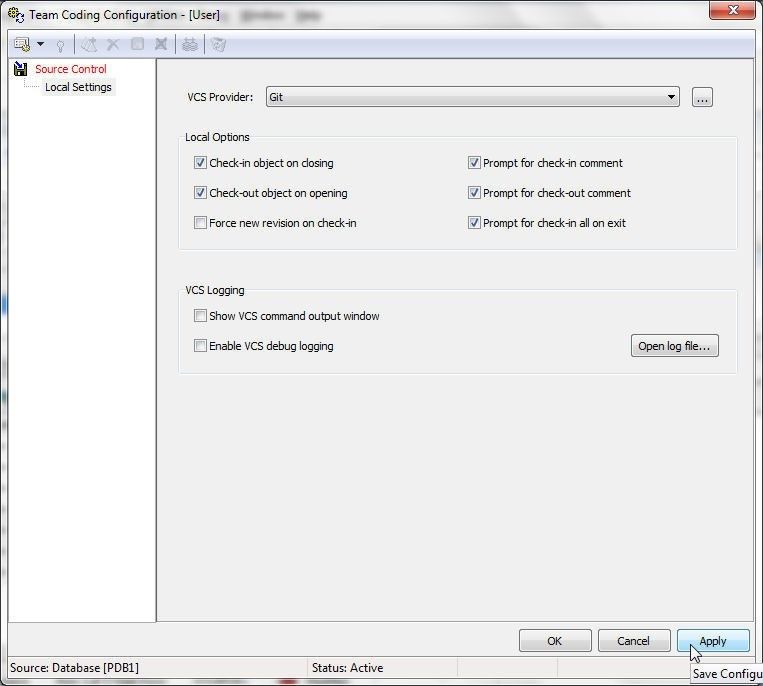
Figure 67. Selecting Git as VCS Provider
Using the Schema Browser
The Schema Browser may be used to browse a database schema. Right-click on a connection and select Schema Browser as shown in Figure 68.

Figure 68. Schema Browser
In Schema Browser select a schema to browse; SCOTT as an example, as shown in Figure 69.
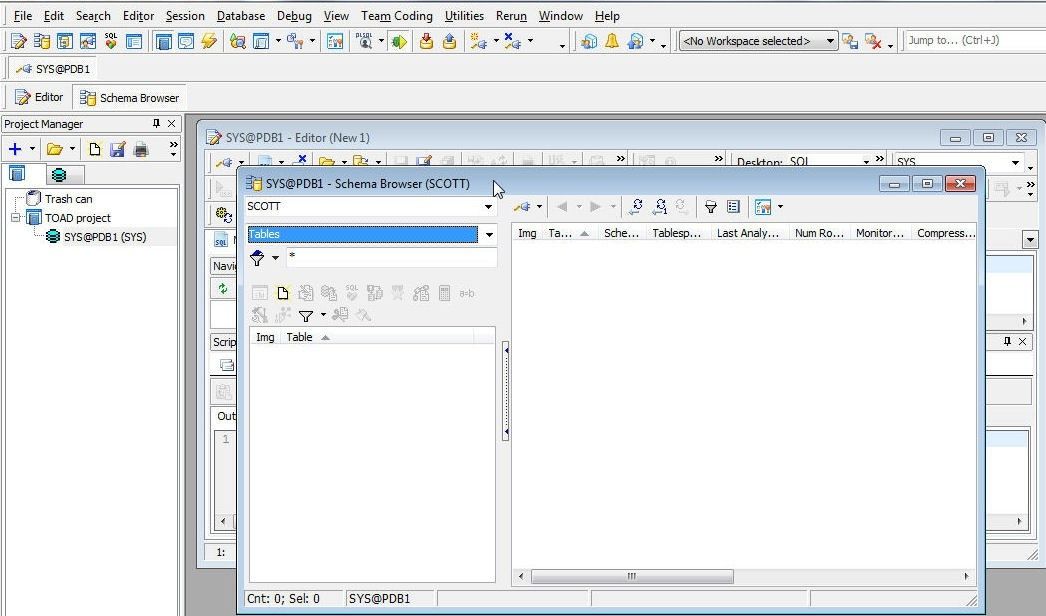
Figure 69. Selecting a Schema (SCOTT) to browse
The Schema Browser may also be launched from the toolbar, as shown in Figure 70.
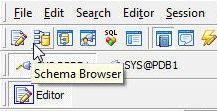
Figure 70. Selecting Schema Browser
The Database Browser may also be selected, as shown in Figure 71.
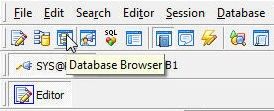
Figure 71. Database Browser
The Session Browser option is also provided, as shown in Figure 72.
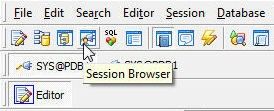
Figure 72. Session Browser
Creating a Direct Connection in Toad for Oracle using Oracle Instant Client
As mentioned earlier, Toad for Oracle provides two options for connecting to Oracle, using the tnsnames.ora file, which we have already discussed, and using a direct configuration of the connection parameters, which we shall discuss next. For the Direct option a “Direct” tab is provided in the same New Connection wizard to create a connection using a tnsnames.ora file. To be able to use the Direct option we need to download and install the Oracle Instant Client. The version of the Oracle Instant Client should be the same as the Oracle Database version. Delete the Oracle Database Cloud Service previously created and create another database service using version 12.1.0.2, as shown in Figure 73. Enable the Access Rules as before.
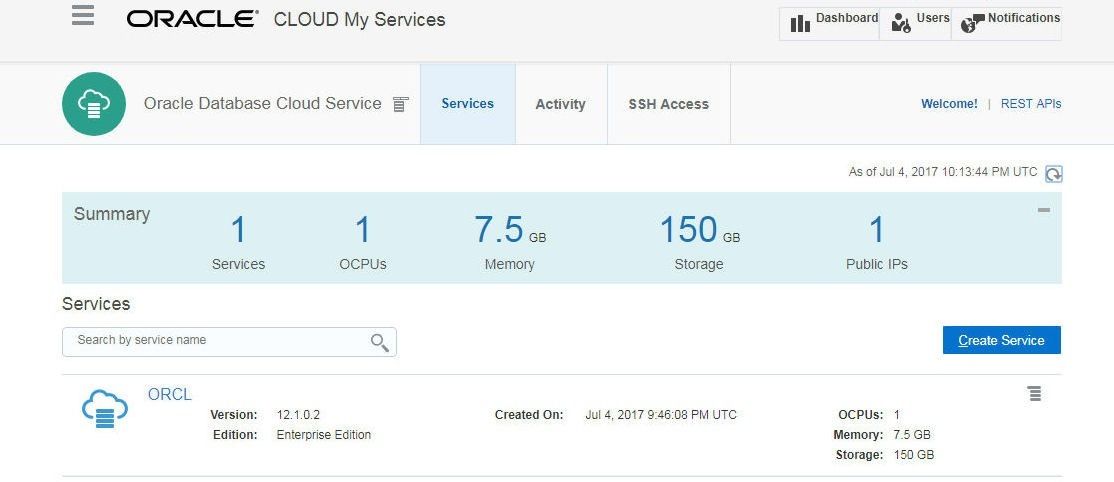
Figure 73. Oracle Database Cloud Service with Version 12.1.0.2
Download the Instant Client for Microsoft Windows (x64) for Version 12.1.0.2.0 (instantclient-basic-windows.x64-12.1.0.2.0.zip) from http://www.oracle.com/technetwork/topics/winx64soft-089540.html. Extract the instantclient-basic-windows.x64-12.1.0.2.0.zip file and double-click on the .exe file to install the Oracle Instant Client in the C:instantclient_12_1 directory. The VC10, VC11 and VC12 directories should be subdirectories of theC:instantclient_12_1 directory. Add the directory C:instantclient_12_1 to the beginning of the PATH environment variable. Delete the local Oracle Database 12c installation, which was used to connect using tnsnames.ora file.
Adding a Login Record
Start the New Connectionwizard from Session in the toolbar as discussed earlier. In the New Connection wizard click on Add Login Recordas shown in Figure 74.

Figure 74. Add Login Record
Select the Direct tab as shown in Figure 75. Specify Host, Port, and Service Name. Select Connect as: SYSDBA. The connection parameters’ values shown in Figure 75 are discussed subsequently.

Figure 75. Selecting the Direct tab
Obtain the Public IP Address for the Oracle Cloud Service and specify in the Host field for the Direct tab as shown in Figure 75. Obtain the service name and specify it in the Service Name field in the Direct tab. Obtain the Service name and the Public IP Address from the Oracle Database Cloud Service dashboard as shown in Figure 76. The Public IP (129.150.78.47) is listed in the Resources section of Service Overview. The service name is obtained from the Connect String; the service name is the substring following the “/”. Specify Port as 1521.
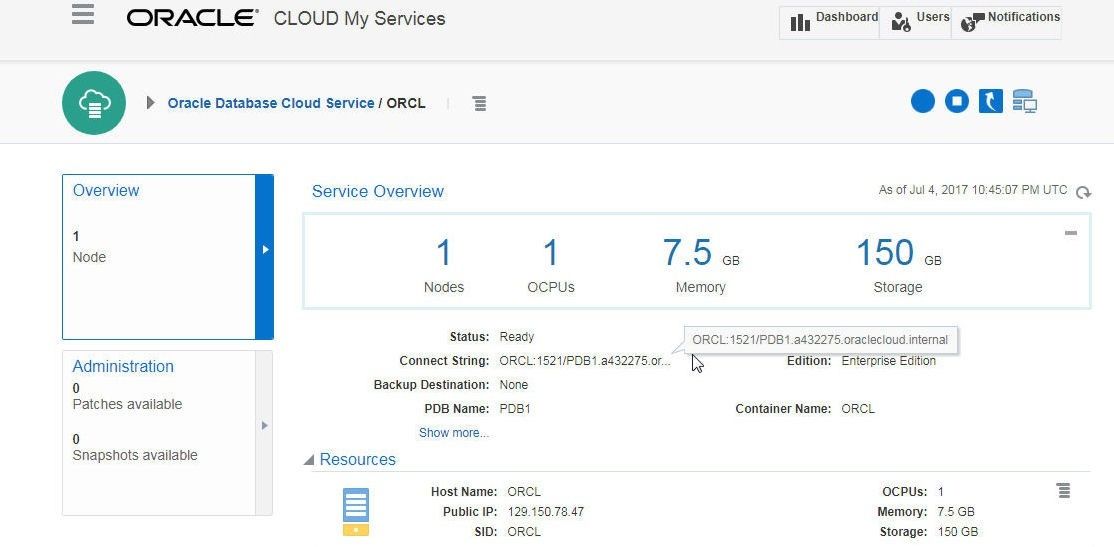
Figure 76. Getting the Connect String
In Connect Using select the Instant Client 12.1.0.2 option, which should be available if the Instant Client has been installed, as also shown in Figure 75. Select the button for the Instant Client to display the settings used, as shown in Figure 77.
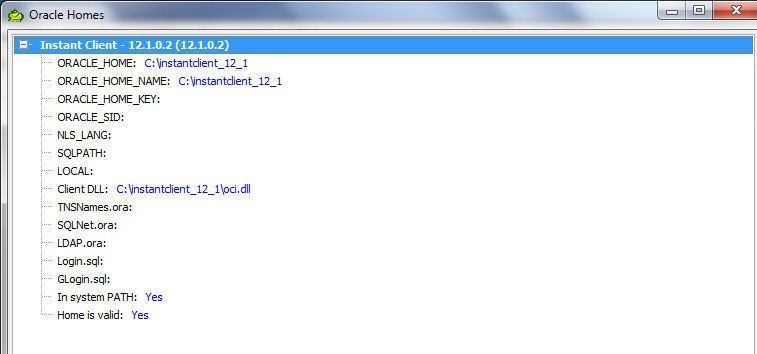
Figure 77. Oracle Instant Client Settings
Specify User/Schema as SYS, and the Password, and click on Connect as shown in Figure 78.
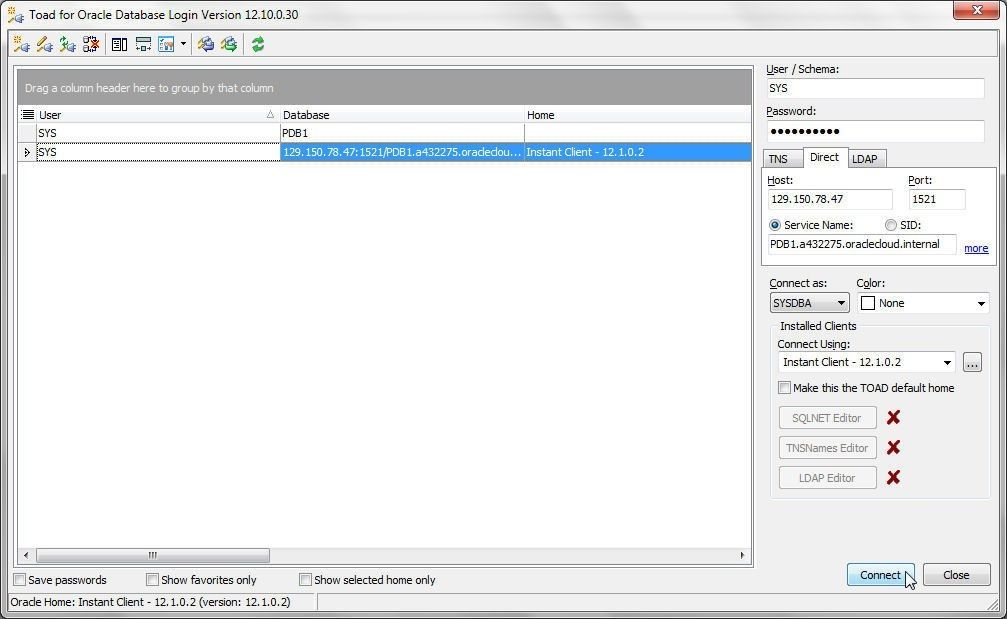
Figure 78. Connect using Oracle Instant Client
A connection gets added, as shown in Figure 79.

Figure 79. Connection added using Oracle Instant Client
Conclusion
In two tutorial articles we have discussed using Toad for Oracle with Oracle Database 12c Cloud Service on Oracle Cloud Platform. The benefits of using a managed service for Oracle Database are combined with the benefits of using a database management tool, Toad for Oracle.
Start the discussion at forums.toadworld.com