Introduction
Oracle Database 12c was added to Oracle Cloud Platform about a year ago in Q3-Q4 2016. Oracle Database 12c introduced the CDB and PDBs, which make it feasible to run multiple pluggable databases in a container database. Using Oracle Database 12c as an Oracle Cloud service with Toad for Oracle is not the same as using a local installation of Oracle Database. In this two-part tutorial we shall discuss using Oracle Database 12c on Oracle Cloud Platform with Toad for Oracle.
Part I of tutorial has the following sections.
- Setting the Environment
- Creating an Oracle Database 12c Service
- Enabling Access Rules
- Creating a Connection in Toad for Oracle using a Tnsnames.ora
- Adding Environment Variables
- Configuring tnsnames.ora Network Configuration File
- Creating a new Connection in Toad for Oracle
- Adding Multiple Connections
Setting the Environment
The only pre-requisites are the following:
-Toad for Oracle
-Oracle Cloud Service account and a subscription to the Database Service package
Download Toad for Oracle from https://www.quest.com/products/toad-for-oracle/software-downloads.aspx. Creating an Oracle Cloud account and subscribing to the Database Service package were introduced in an earlier article. Login to the Oracle Cloud using the login credentials provided, as shown in Figure 1.
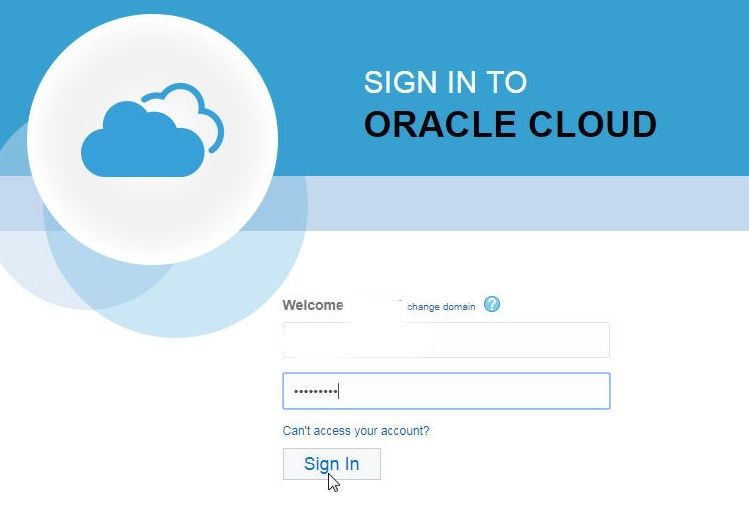
Figure 1. Logging in to Oracle Cloud
Creating an Oracle Database 12c Service
First, an Oracle Database 12c Service needs to be created on Oracle Cloud Platform. After logging into Oracle Cloud Services click on Create Instance in the Dashboard as shown in Figure 2.
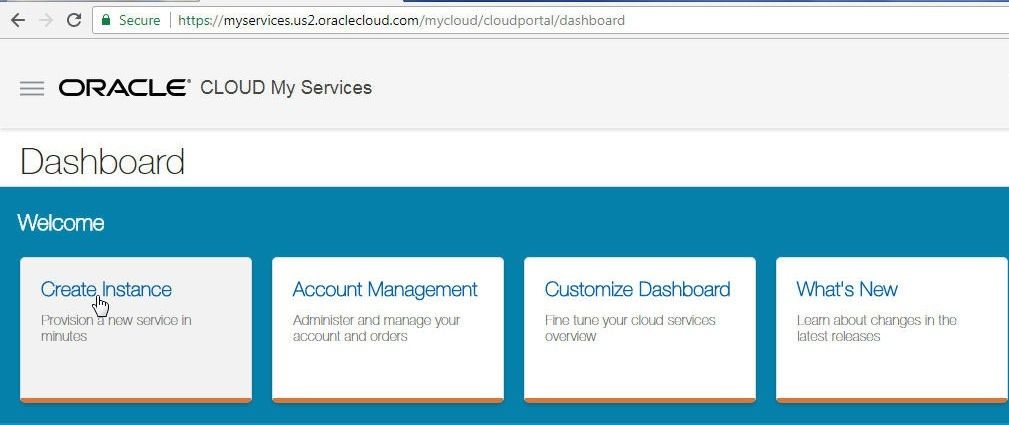
Figure 2. Dashboard>Create Instance
In the Create Instance dialog click on Databases> Create as shown in Figure 3.
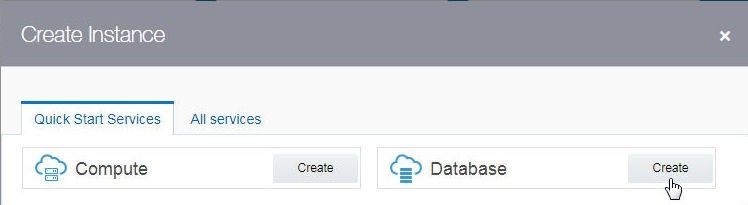
Figure 3. Database>Create
The Oracle Database Cloud Service wizard gets launched. Click on Services as shown in Figure 4.
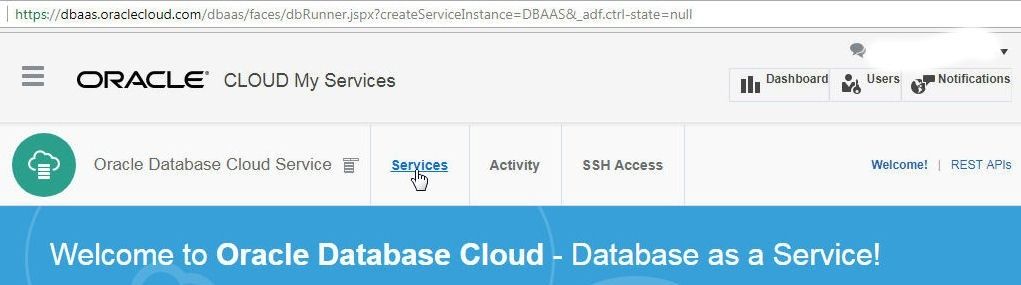
Figure 4. Services
In Services click on Create Service as shown in Figure 5.
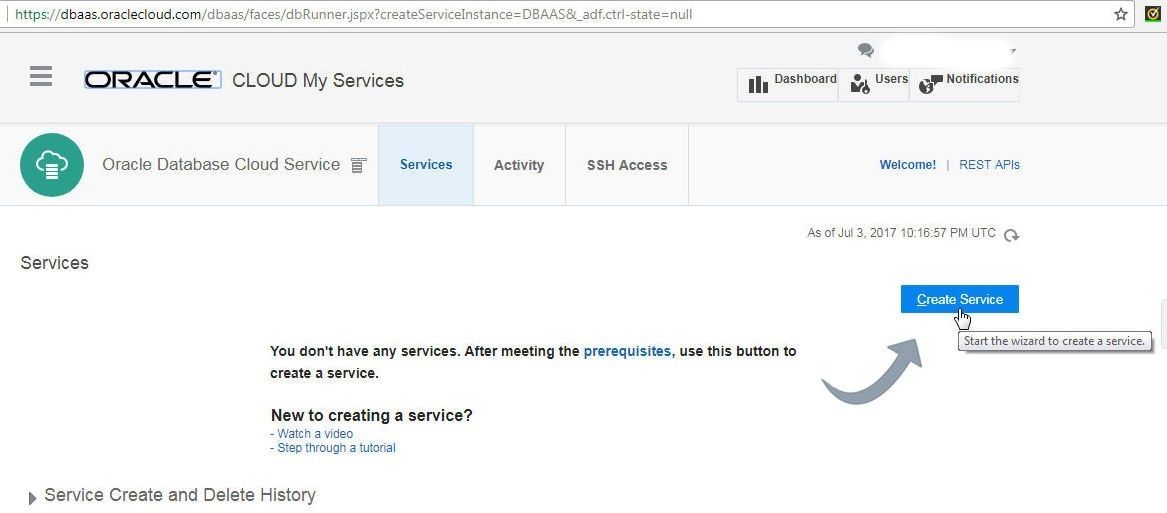
Figure 5. Create Service
In the Create Service dialog specify a Service Name (ORCL), select Region as No Preference, and select Service Level as Oracle Database Cloud Service. Select Metering Frequency as Monthly. Select Software Release as Oracle Database 12c Release 1 or Release 2 as shown in Figure 6. Select Database Type as Single Instance. Most of these are default settings, except that the Service Name has to be specified and the Software Edition has to be selected.
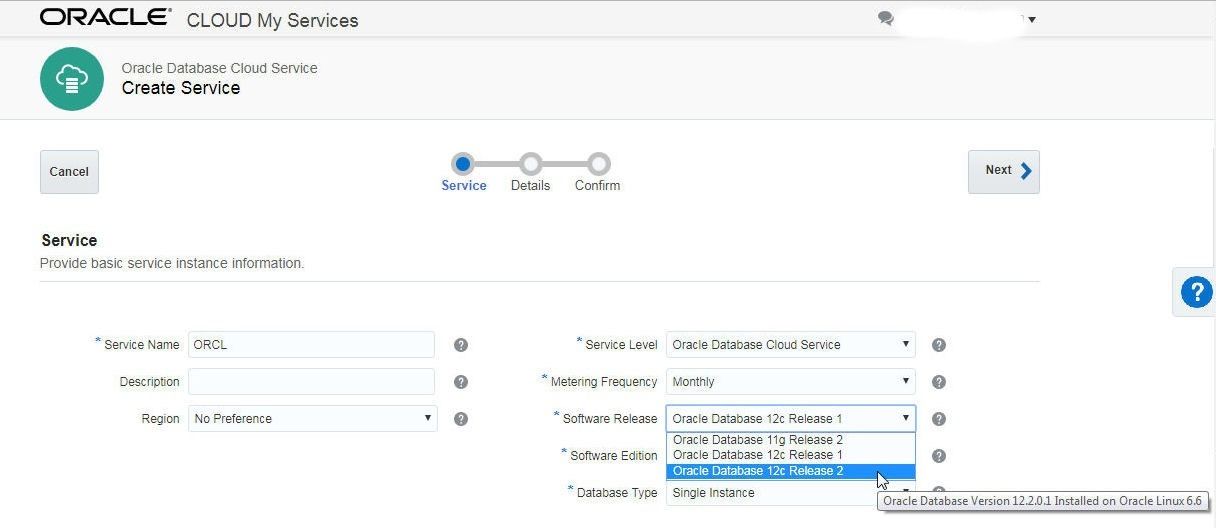
Figure 6. Providing Basic Service Instance Information
Click on Next as shown in Figure 7.
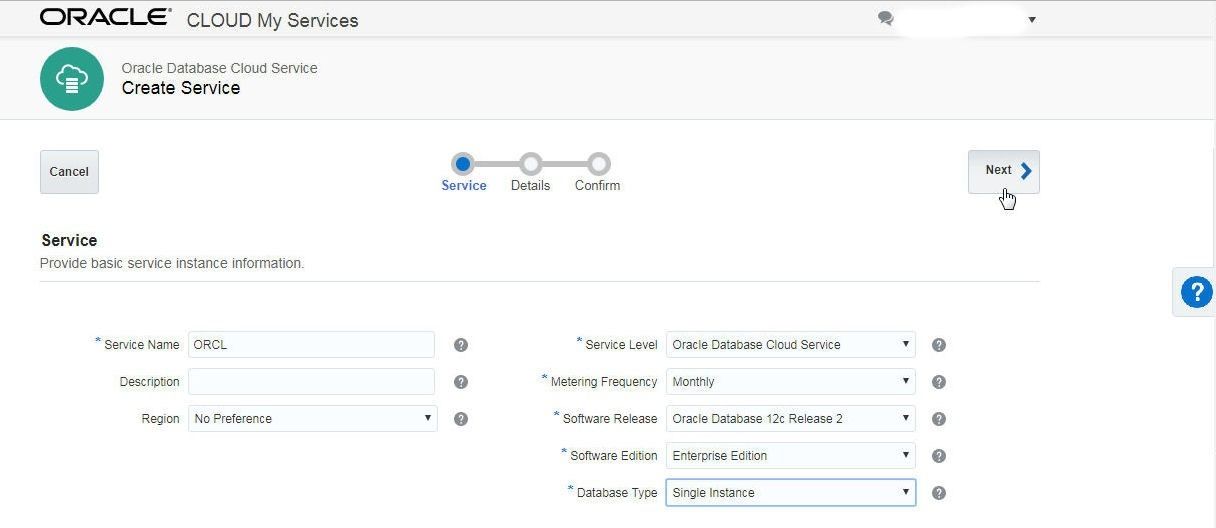
Figure 7. Next
In Service Details provide the Database Configuration, including DB Name (SID), PDB Name, Administration password, Usable Database Storage, Total Data File Storage, and Compute Shape, as shown in Figure 8. For Backup and Recovery Configuration select Backup Destination as “None” and in Initialize Data from Backup designate Create Instance from Existing Backup as “No”.
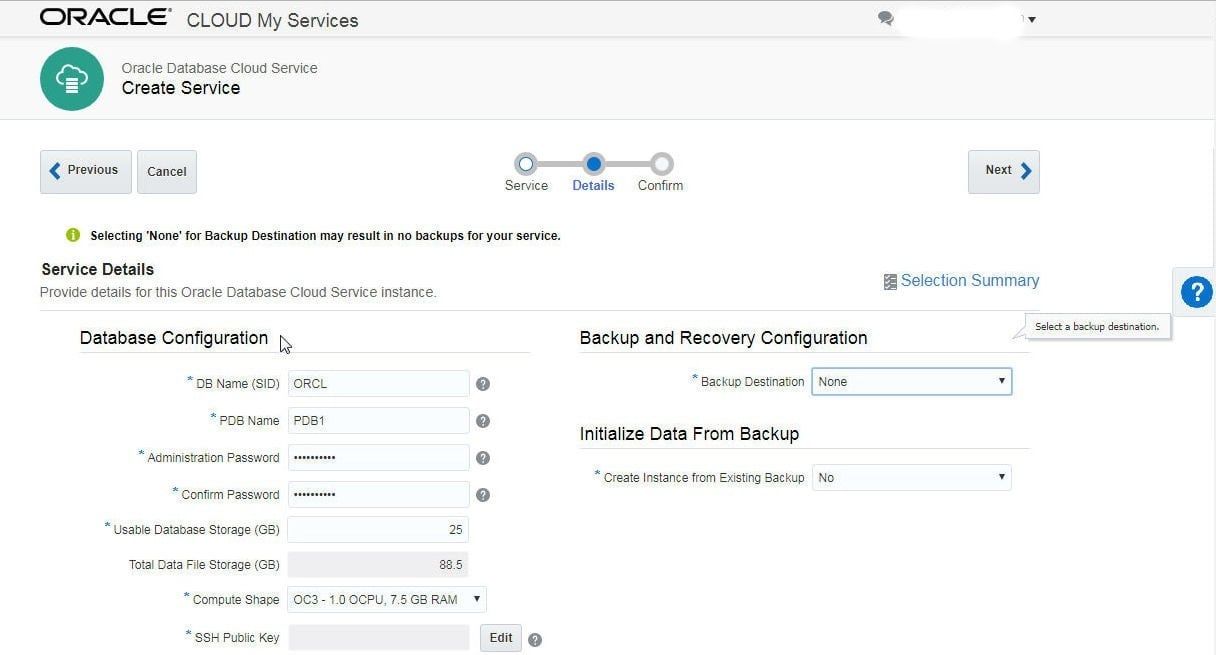
Figure 8. Service Details>Database Configuration
Click on Edit for SSH Public Key to create a new public key as shown in Figure 9.
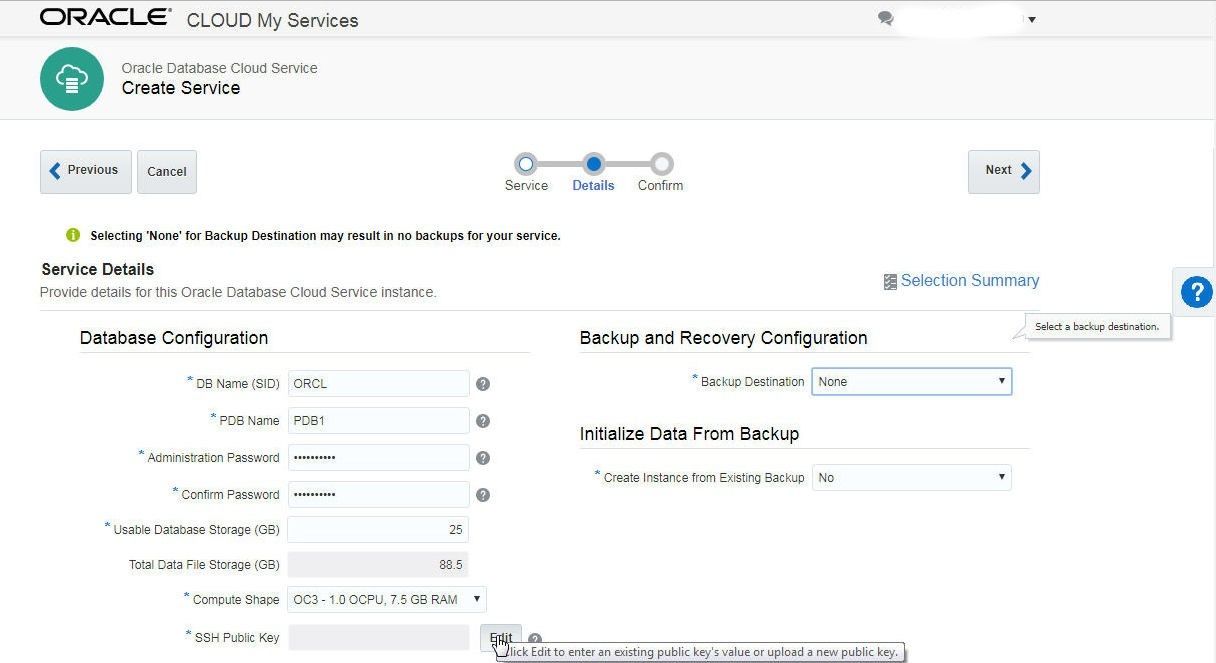
Figure 9. SSH Public Key>Edit
In SSH Public Key for VM Access select the Create a New Key option as shown in Figure 10. Click on Enter.
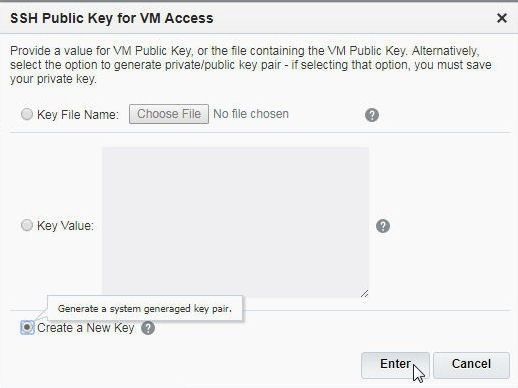
Figure 10. Create a New SSH Public Key for VM Access
An SSH Key pair gets created as shown in Figure 11. Click on Download.
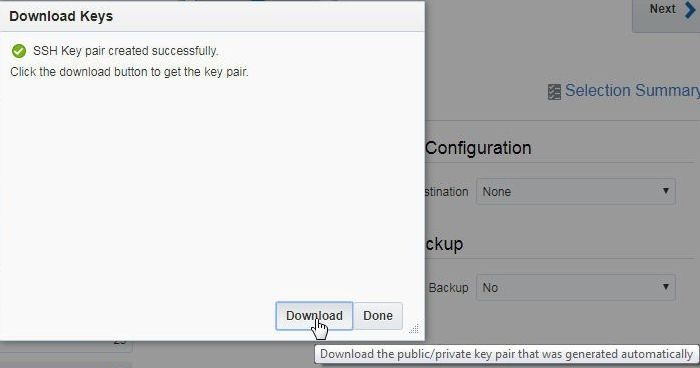
Figure 11. Download SSH Public Keys
An SSH Key gets specified in the SSH Public Key field, as shown in Figure 12. Click on Advanced Settings, in which the Listener Port is 1521 by default. The Timezone may be modified if required. Keep the default settings for Character Set and National Character Set. Select the Include “Demos” PDB option as shown in Figure 12.
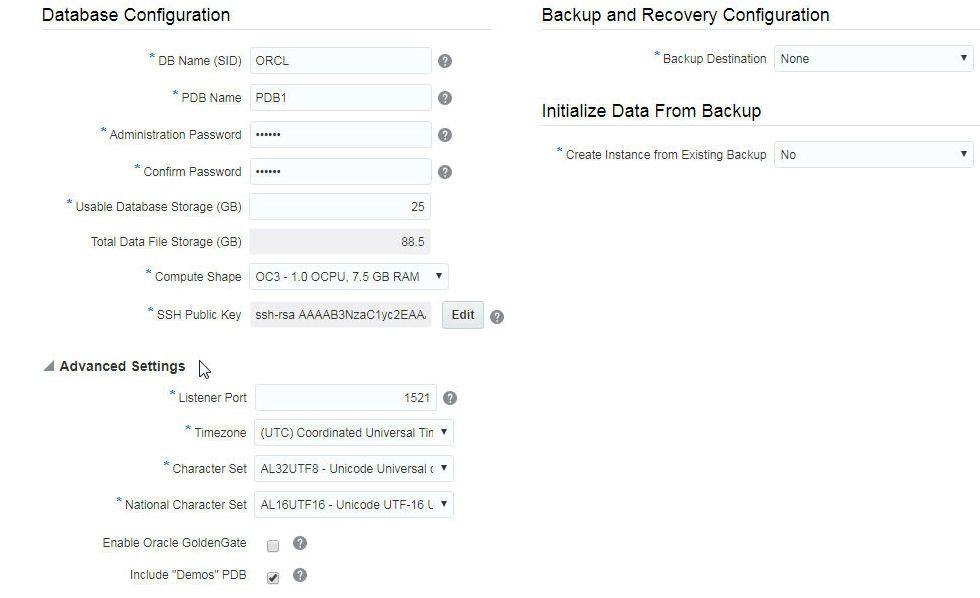
Figure 12. Database Configuration>Advanced Settings
Click on Next as shown in Figure 13.
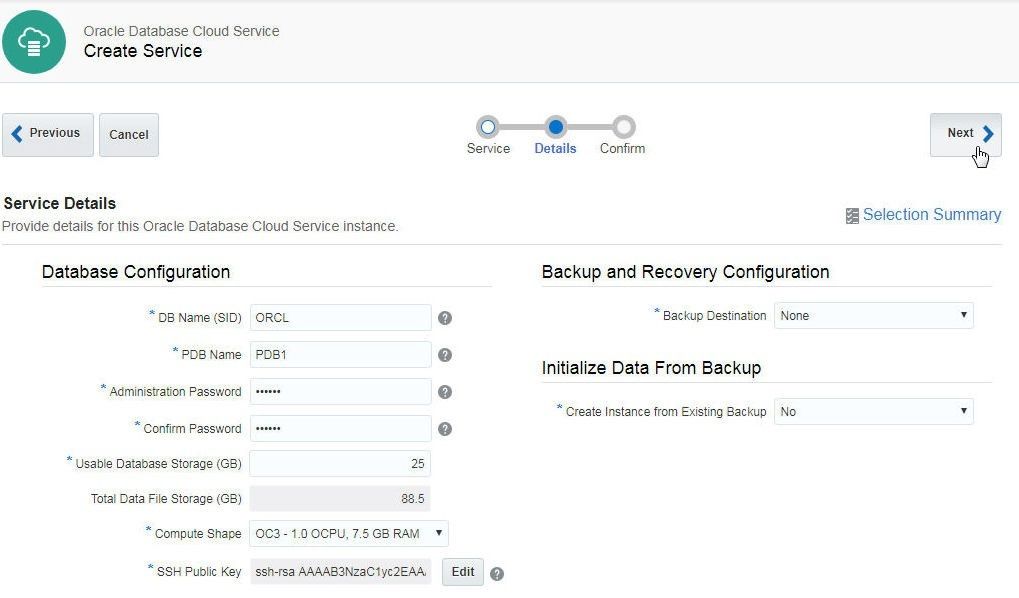
Figure 13. Database Configuration>Next
In Confirmation the Database service summary is displayed, as shown in Figure 14. Click on Create.
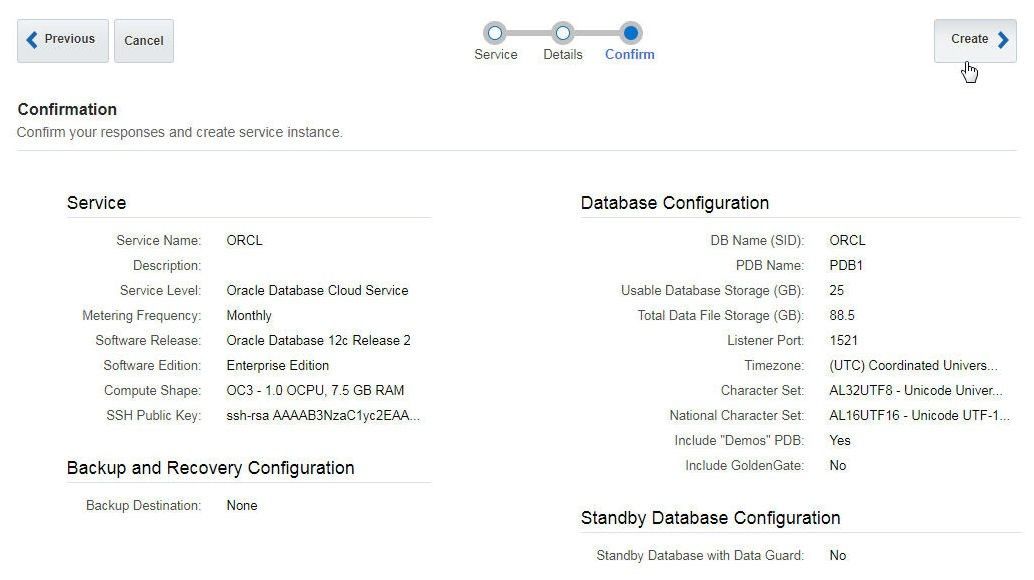
Figure 14. Confirmation and Service>Create
The Oracle Database service gets added to Services table and is initially listed with Status as Creating service… as shown in Figure 15. Click on Refresh this page periodically to update the status.
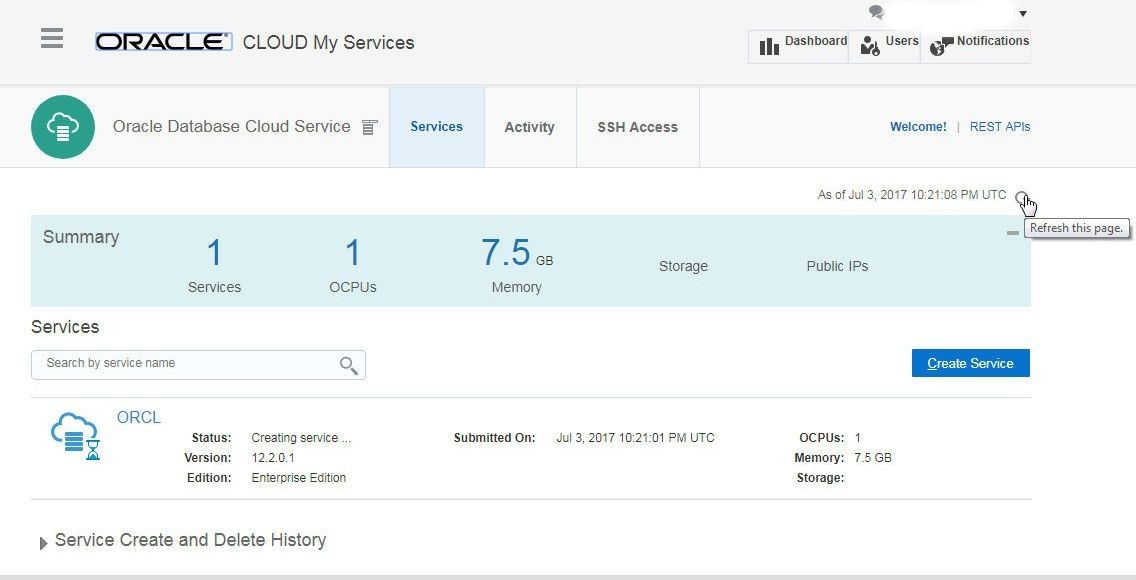
Figure 15. Oracle Database Service Creating
When the Service is configured the status becomes “Configured”, as shown in Figure 16. The Submitted On lists the timestamp when the service request was submitted.
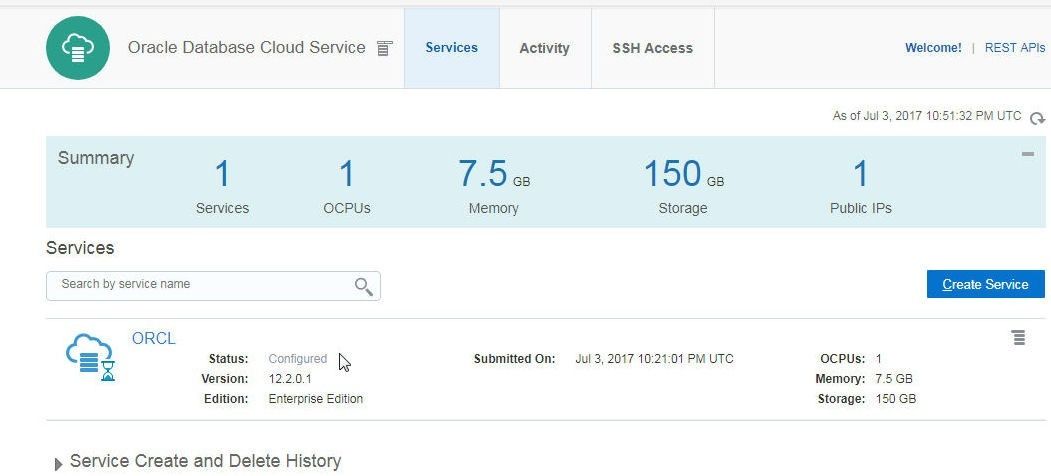
Figure 16. Service Configured
When the service gets created the Status is removed and Submitted On timestamp gets replaced with a Created On timestamp as shown in Figure 17 and service icon also changes.
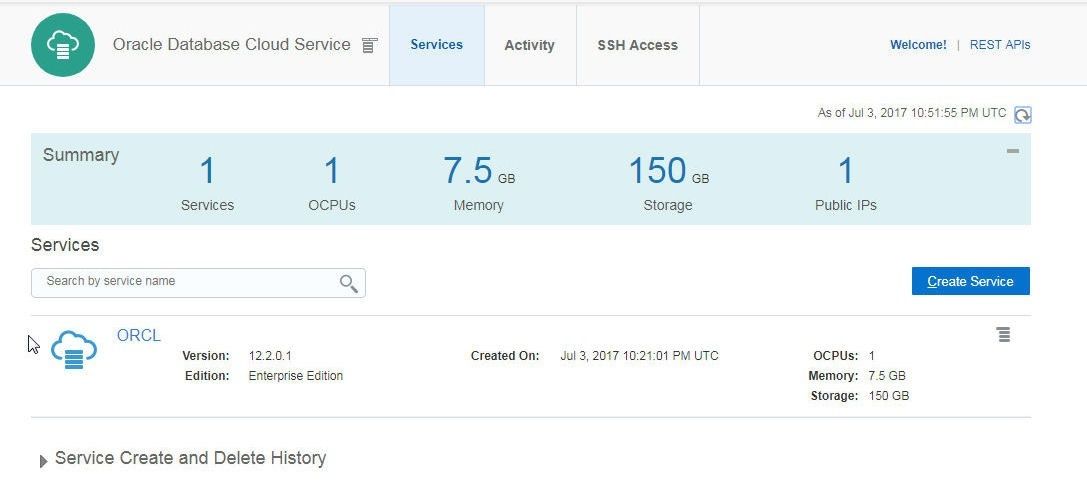
Figure 17. ORCL Service Created
Click on the ORCL service link to list service details, including the Status (should be Ready), Connect String, PDB Name, Host Name, Public IP Address and SID, as shown in Figure 18.

Figure 18. Service Overview
Enabling Access Rules
An Oracle Database Cloud Service is a managed service on the web; to access it from a local database IDE such as Toad for Oracle we need to enable access rules for the service. Click on the multi-lined icon in the ORCL service section and select Access Rules as shown in Figure 19.
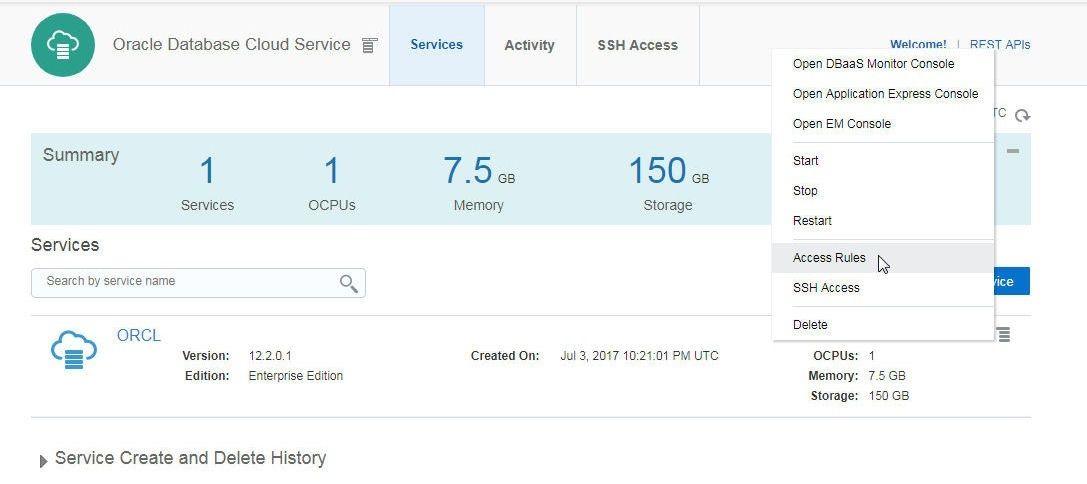
Figure 19. Access Rules
In the Access Rules page all the access rules except the SSH access rules and the trusted hosts access rule are disabled, as shown in Figure 20.
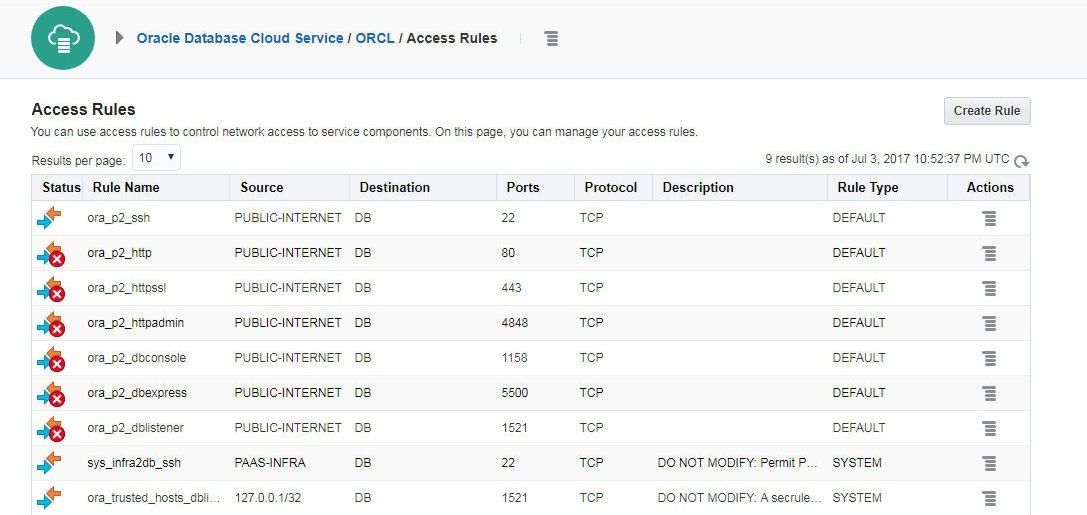
Figure 20. Most Access Rules are Disabled
Enable all the access rules. To enable an access rule right-click on the multi-lined icon and select Enable as shown for the ora_p2_dblistener access rule in Figure 21.
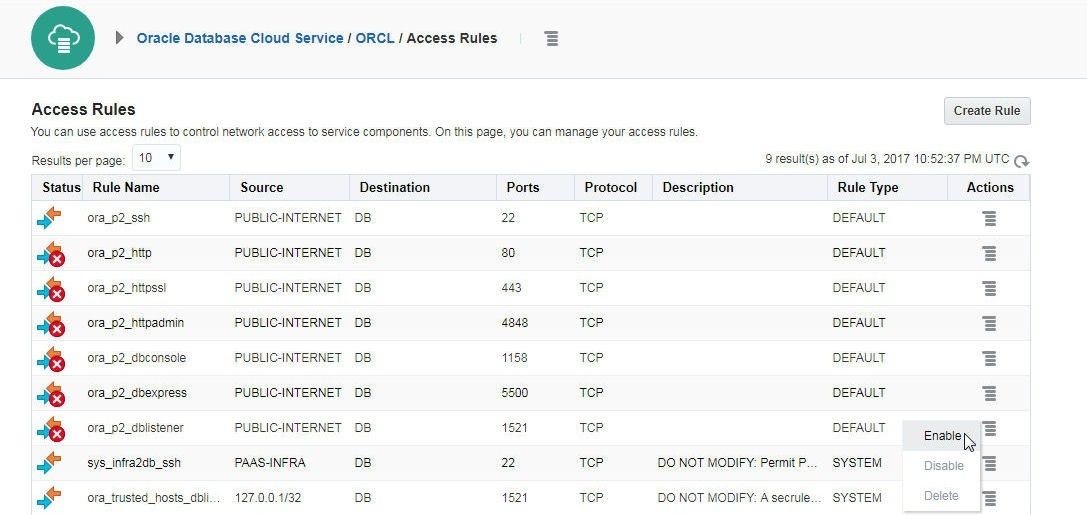
Figure 21. Selecting Enable for an Access Rule
in the Enable Access Rule confirmation dialog click on Enable as shown in Figure 22.
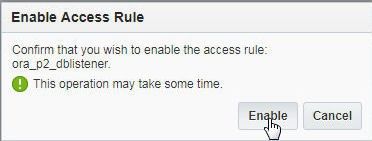
Figure 22. Enable Access Rule Confirmation Dialog
Similarly enable the other access rules. All the access rules are listed as enabled, as shown in Figure 23.
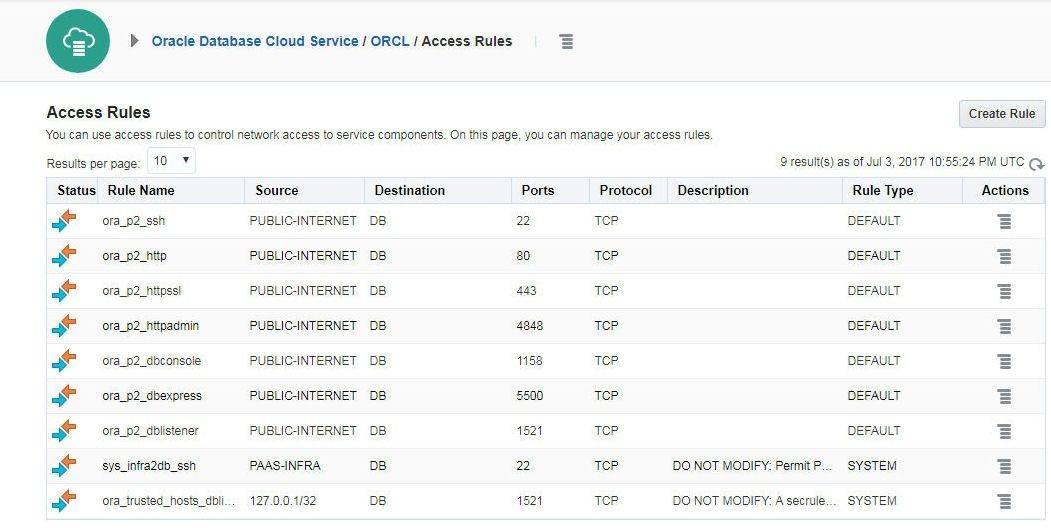
Figure 23. All Access Rules Enabled
Toad for Oracle provides two options to connect to an Oracle Database. One option makes use of a tnsnames.ora file and the other option makes use of a direct configuration of the connection parameters. We shall discuss each of these in subsequent sections. In addition we shall discuss Toad for Oracle features such as creating a database table using an SQL Script and with the Create Table wizard, committing a transaction, enabling auto-commit, querying a database table using an SQL script and also with the Query Builder, exploring database, exporting database, comparing database objects, team coding, using the Schema Browser, and creating multiple connections.
Creating a Connection in Toad for Oracle using a Tnsnames.ora
First, we shall add a connection from Toad for Oracle using a tnsnames.ora file. A local Oracle Database 12c installation is required for the tnsnames.ora approach. Download Oracle Database 12c for Windows from http://www.oracle.com/technetwork/database/enterprise-edition/downloads/oracle12c-windows-3633015.html.
Adding Environment Variables
To be able to use tnsnames.ora from the local installation of Oracle Database to connect to the Oracle Database 12c service on Oracle Cloud Platform we need to set the following environment variables.
| Environment Variable | Description |
| TNS_ADMIN | Specifies the SQL* Net configuration files tnsnames.ora and sqlnet.ora are located. |
| ORACLE_HOME | The directory in which Oracle Database client software is installed. |
The TNS_ADMIN environment variable setting is shown in Figure 24.

Figure 24. TNS_ADMIN Environment Variable
The ORACLE_HOME environment variable setting is shown in Figure 25.
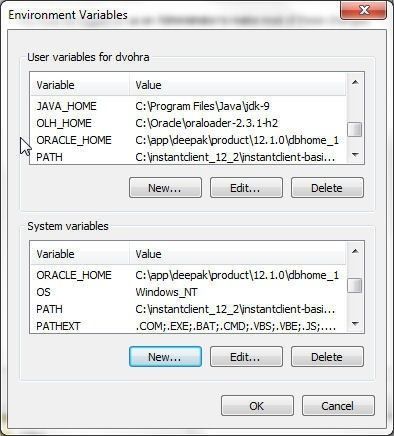
Figure 25. ORACLE_HOME Environment Variable
In a command line shell run the SET TNS_ADMIN and SET ORACLE_HOME commands to verify that the environment variables have been set, as indicated by the variables’ values getting listed, as in Figure 26.

Figure 26. Environment Variables TNS_ADMIN and ORACLE_HOME
Configuring tnsnames.ora Network Configuration File
Next, configure the connection parameters for Oracle Database 12c on Oracle Cloud in the tnsnames.ora file in the local installation of Oracle Database. The connection settings are obtained from the Service Overview page shown in Figure 27.

Figure 27. Service Overview
A tnsnames.ora file without the connection settings is listed:
# tnsnames.ora Network Configuration File: C:appdeepakproduct.1.0dbhome_1networkadmintnsnames.ora
pdb1=
  (DESCRIPTION=
   (ADDRESS=(PROTOCOL=tcp)(HOST=)(PORT=1521))
   (CONNECT_DATA=
     (SERVICE_NAME=)))
# Generated by Oracle configuration tools.
In PROTOCOL specify the Public IP address of the Oracle Database Cloud Service ORCL, which is obtained from Resources, as shown in Figure 28.
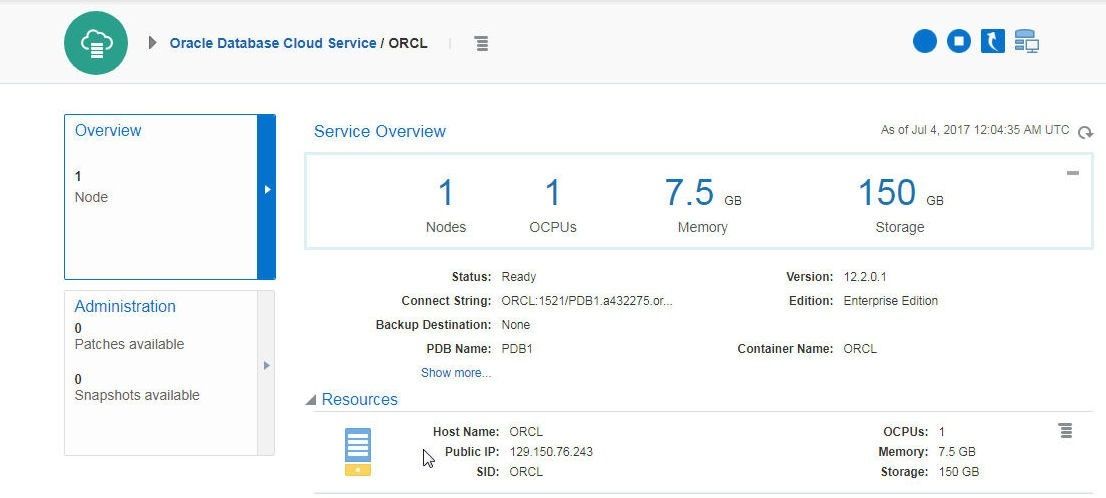
Figure 28. Public IP Address
The SERVICE_NAME is the Connect String in the Service Overview, as listed in Figure 28. The tnsnames.ora with connection parameters specified is listed:
pdb1=
  (DESCRIPTION=
   (ADDRESS=(PROTOCOL=TCP)(HOST=129.150.76.243)(PORT=1521))
   (CONNECT_DATA=
     (SERVICE_NAME=PDB1.a432275.oraclecloud.internal)))
Copy the tnsnames.ora to the TNS_ADMIN/tnsnames.ora file.
Creating a new Connection in Toad for Oracle
Next, we shall create a connection to the Oracle Database 12c instance on Oracle Cloud Services using the tnsnames.ora file. In Toad for Oracle click on Session>New Connection as shown in Figure 29.
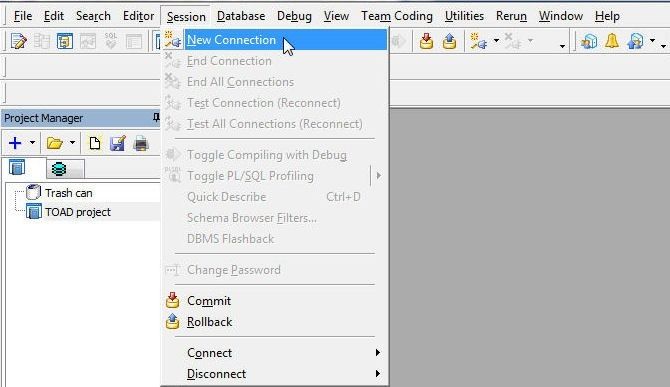
Figure 29. Session>New Connection
In the Toad for Oracle New Connection wizard specify User/Schema as SYS as shown in Figure 30. In Connect Using select the OracleDB12Home1 (value could be different) for the local installation of Oracle Database 12c. Select the TNS tab and select the Database as the PDB1, which is configured in the TNS_ADMIN/tnsnames.ora file of the local Oracle Database 12c. The local Oracle Database 12c is not used; only the TNS_ADMIN and ORACLE_HOME configuration from the local Oracle Database 12c are used. Click on the TNSNamesEditor button to list/modify the TNS names settings if required, as shown in Figure 30.
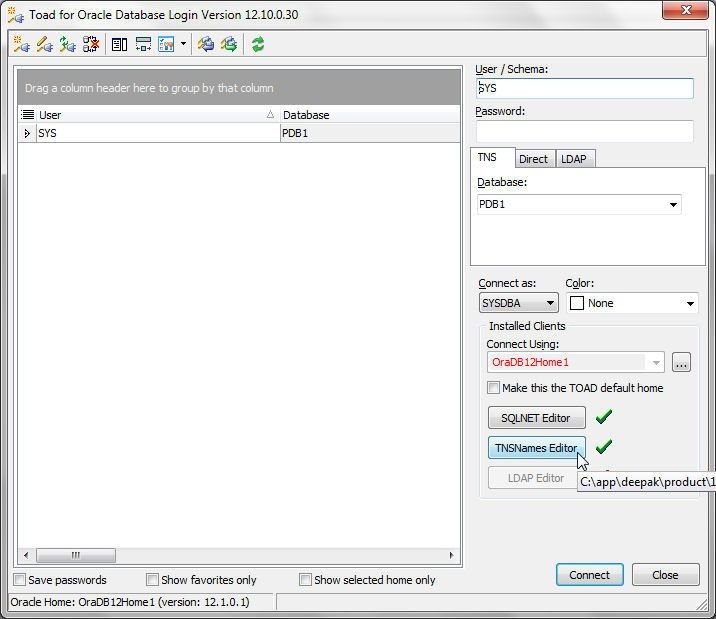
Figure 30. Configuring a TNS Connection
The tnsnames.ora file configured in the local ORACLE_HOME gets listed, as shown in Figure 31.
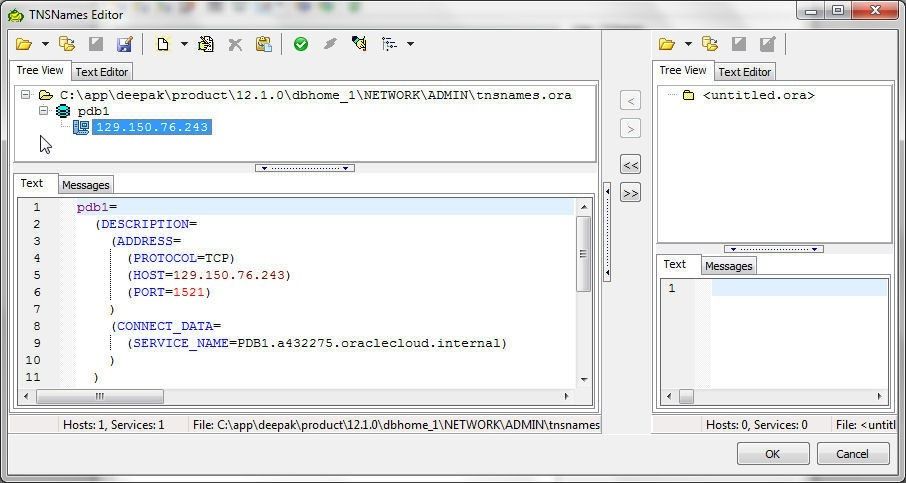
Figure 31. Tnsnames.ora File
The OracleDB12Home lists the ORACLE_HOME, ORACLE_SID, Client DLL, and SQLNet.ora files, as shown in Figure 32.

Figure 32. OracleDB12Home
Specify the Password and click on Connect as shown in Figure 33.
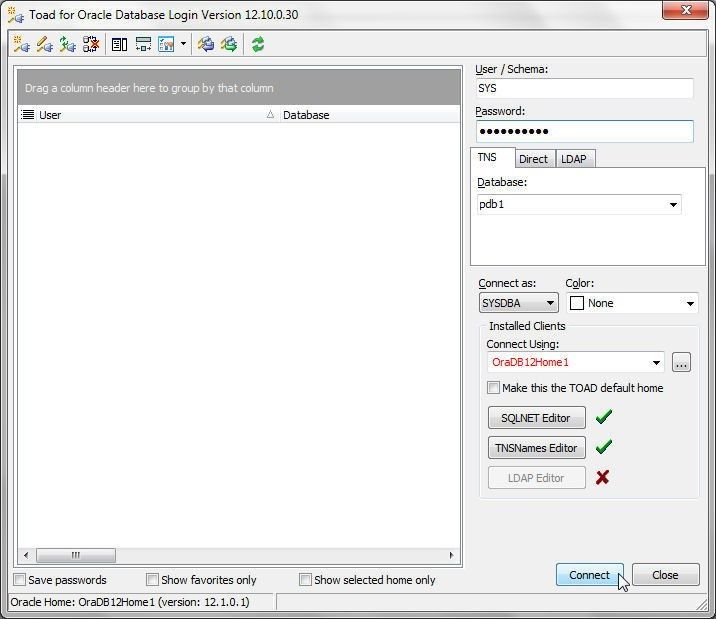
Figure 33. Connect
A new connection gets added to Toad for Oracle, as shown in Figure 34. A SQL Editor also gets opened. As indicated by the message in lower margin, “Autocommit is OFF”.
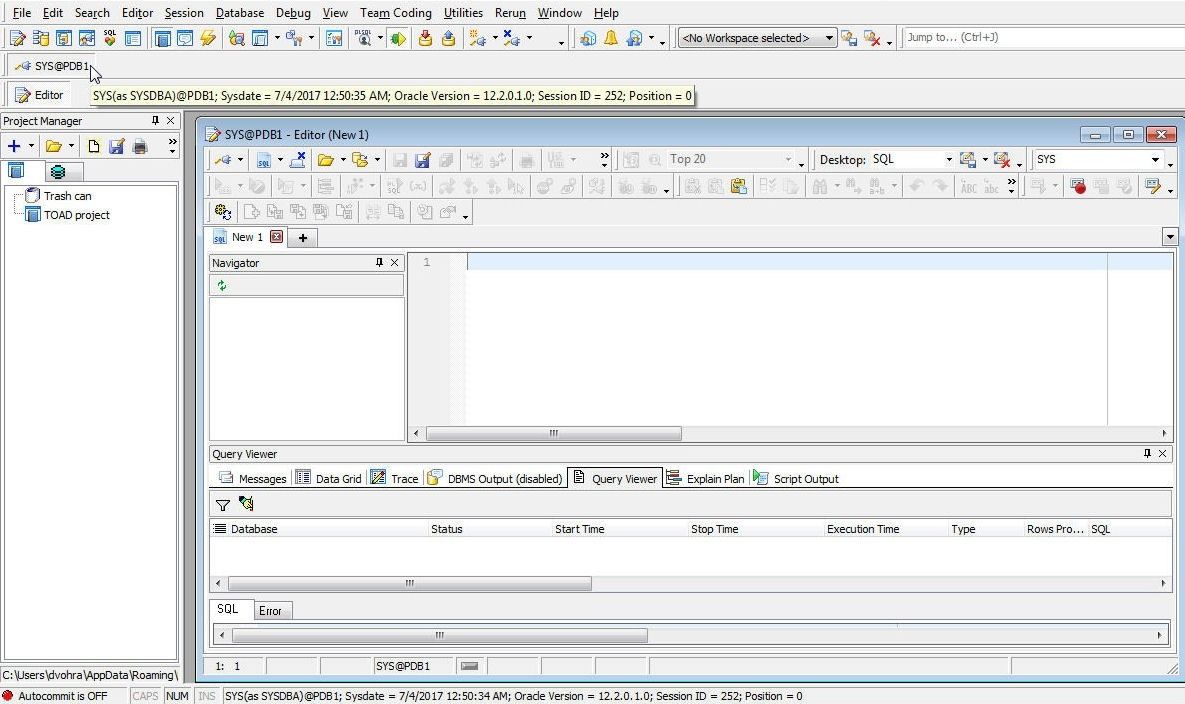
Figure 34. New Connection SYS@PDB1
A new connection also gets added in the New Connection wizard, as shown in Figure 35.
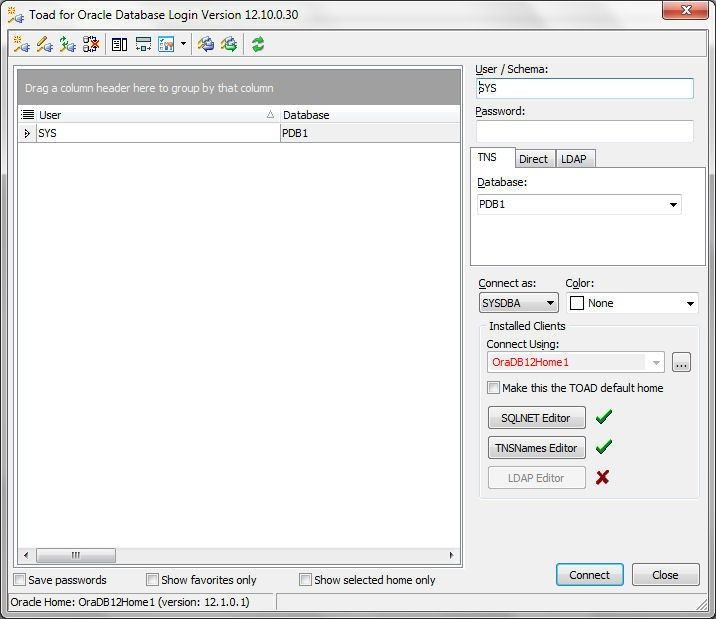
Figure 35. New Connection SYS@PDB1
Adding Multiple Connections
Multiple connections to the same or different database may be added similarly. After a connection has been created the Session dropdown lists all options as enabled, as shown in Figure 36.
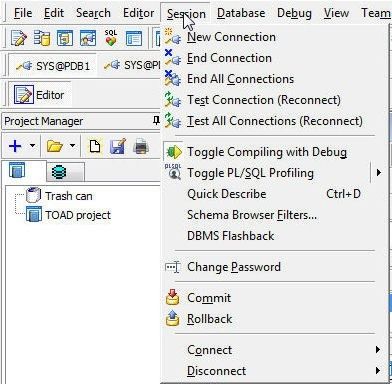
Figure 36. Session Drop-Down
Additional connections may be added with Session>New Connection or using the TNSNames Editor. The TNSNames Editor may be opened from a New Connection wizard or directly from Utilities, as shown in Figure 37.
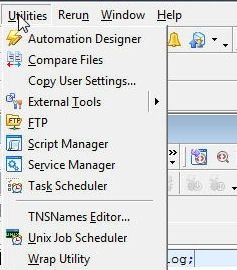
Figure 37. Utilities>TNSNames Editor
In the TNSNames Editor click on Add Service as shown in Figure 38.
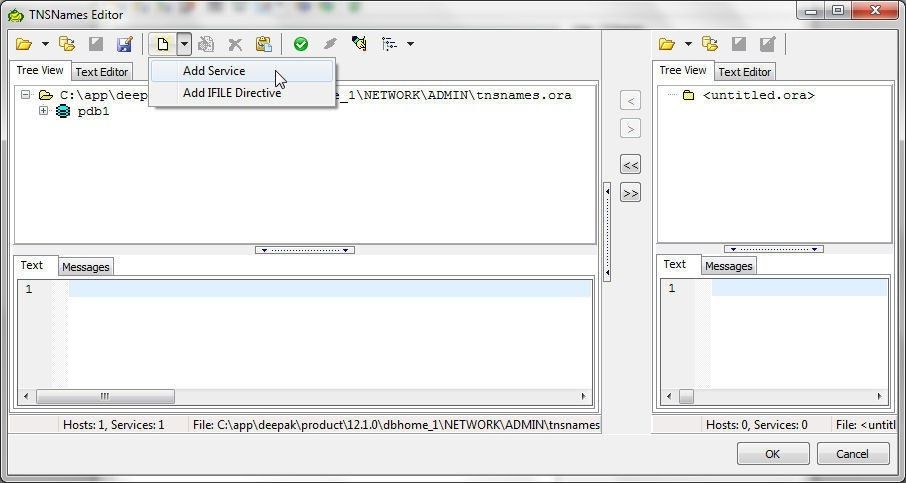
Figure 38. Selecting TNSNames Editor>Add Service
In Add service dialog specify a New Service Name (pdb), and specify the Description>Address configuration as shown in Figure 39. Using the same connection parameters as for the pdb1 service, specify Host name, Port and Service name. Select Connection type as Default Database. The Formatted Text lists the service description. Click on OK.
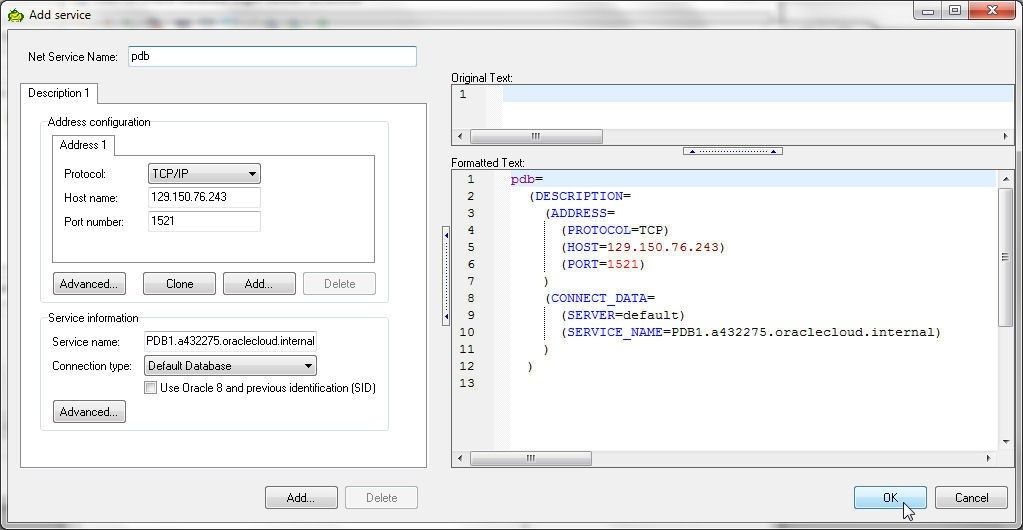
Figure 39. Add service dialog
A new service gets added as shown in Figure 40.
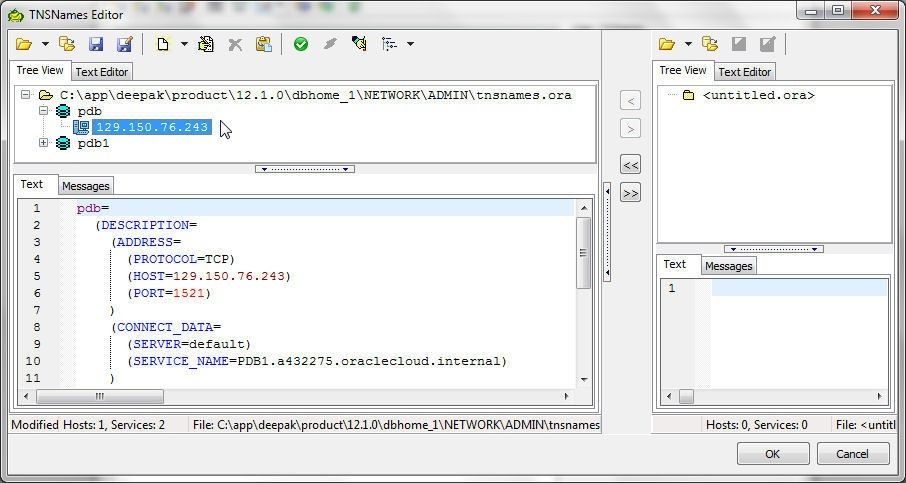
Figure 40. New Service pdb
Multiple services are shown in the TNSNames Editor in Figure 41.
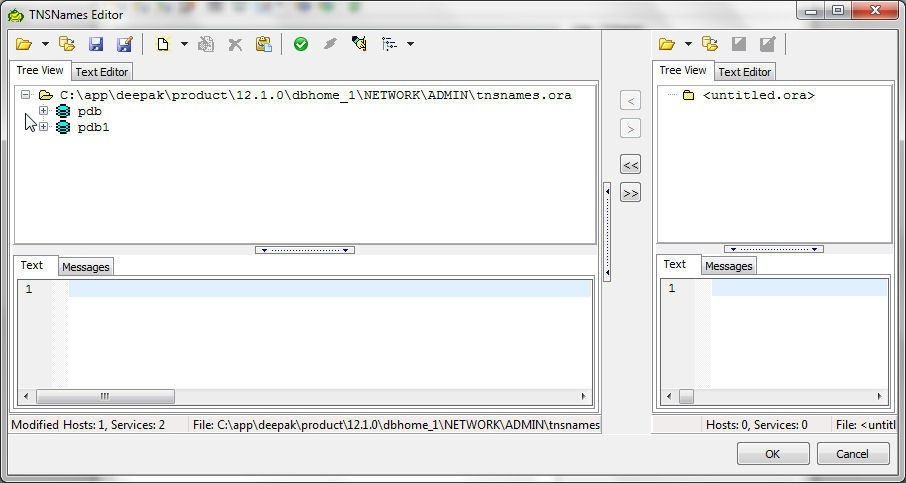
Figure 41. Multiple Services
To create a new connection using the new service “pdb” select Database as “pdb” as shown in Figure 42 and click on Connect.
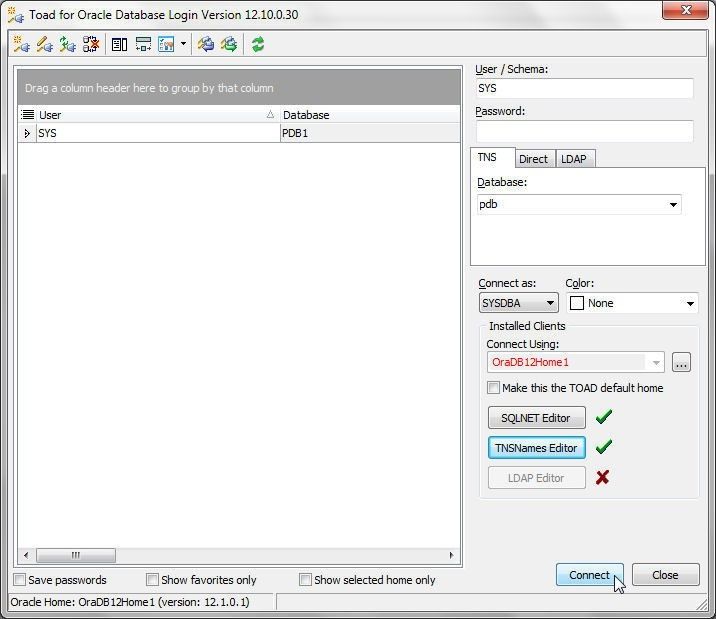
Figure 42. Connecting to Database “pdb”
In the Login dialog specify the Username if not already specified; SYS as an example, as shown in Figure 43. In Connect As select SYSDBA or SYSOPER. Connection as SYS must be as SYSDBA or SYSOPER.
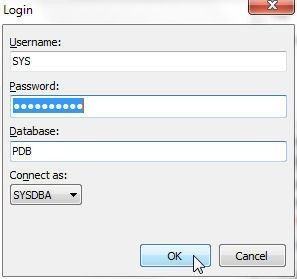
Figure 43. Login
A new connection gets added to Toad for Oracle, as shown in Figure 44. A new SQL Editor also gets opened.
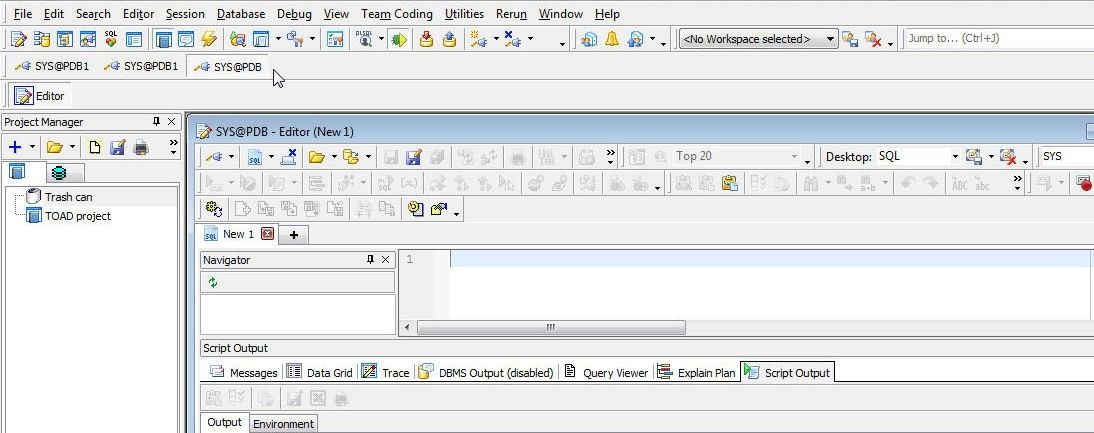
Figure 44. New Connection SYS@PDB
A new connection gets added in Toad for Oracle as shown in Figure 45.
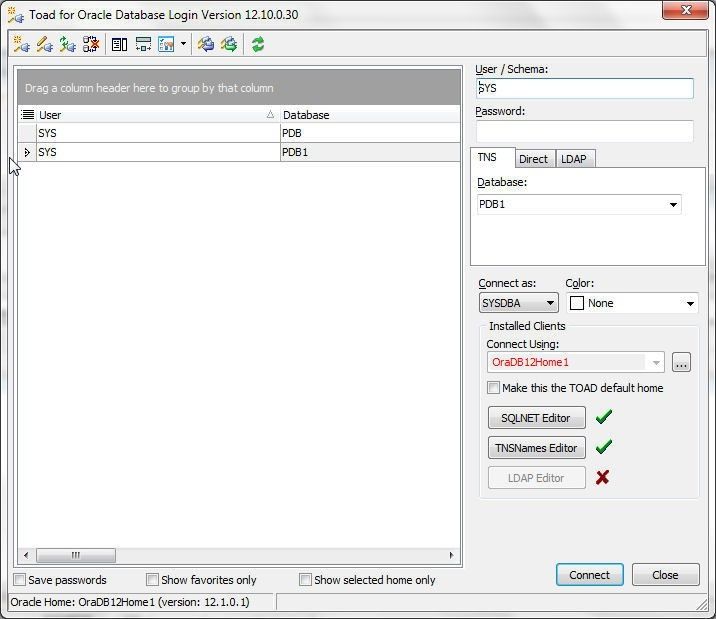
Figure 45. Multiple Connections in New Connection Wizard
Conclusion
So far in this tutorial we have introduced using Toad for Oracle with Oracle Database 12c Cloud Service on Oracle Cloud Platform. We started by creating an Oracle Database 12c Service on Oracle Cloud Platform. Subsequently, we created a connection using a tnsnames.ora file.
In the second part of this two-article tutorial, we shall discuss discuss using Oracle Database on Oracle Cloud Platform further, including creating a database table using a SQL script, committing a transaction, enabling auto commit, querying a database table, using the Create Table wizard, exploring the database, exporting the database, comparing database objects, team coding, and using the schema browser. We shall also discuss connecting to Oracle Database from Toad for Oracle with Oracle Instant Client.
Start the discussion at forums.toadworld.com