Continuing the Tutorial
In the first of our two tutorial sessions on using Amazon Redshift with Toad Data Point we discussed the prerequisites, including creating a VPC for Redshift, creating a Redshift cluster, and modifying the route table for a VPC. The present tutorial session is a continuation of the first and has the following sections:
- Configuring Connection in Toad Data Point
- Creating a Database Table
- Disconnecting and Connecting
- Setting the Current Connection
- Deleting the Redshift Cluster
Configuring Connection in Toad Data Point
In this section we shall add a new connection in Toad Data Point for a Redshift cluster. Click on Connect>New Connection as shown in Figure 1.
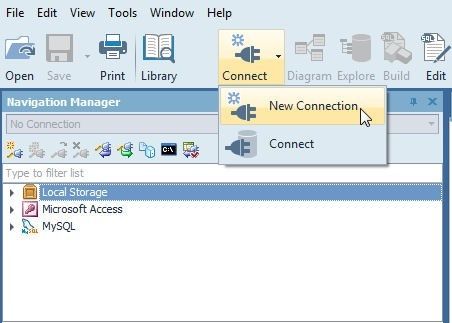
Figure 1. Connect>New Connection
In the list of data sources displayed select Amazon Redshift, as shown in Figure 2.
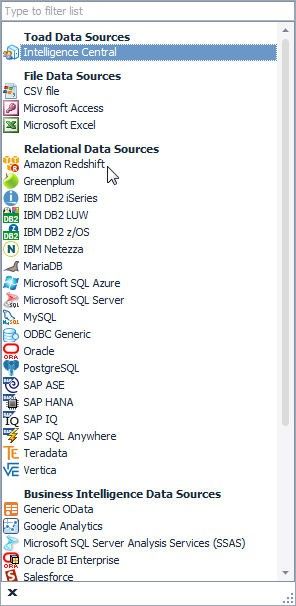
Figure 2. Selecting Amazon Redshift
In the Create New Connection window, shown in Figure 3, configure the connection parameters. The Group is pre-selected as Amazon Redshift because we selected data source as Amazon Redshift. In the General tab tick the Use data source name checkbox.

Figure 3. Create New Connection
For Driver name select the Amazon Redshift (x64) driver as shown in Figure 4.
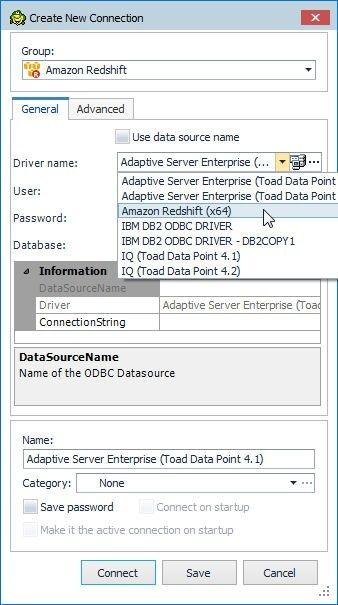
Figure 4. Selecting Driver as Amazon Redshift (x64)
Specify User and Password. Obtain the Redshift Database name from the Redshift cluster console as shown in Figure 5.

Figure 5. Obtaining the Database Name
Specify the Database name (redshiftdb) in the Create New Connection window as shown in Figure 6.
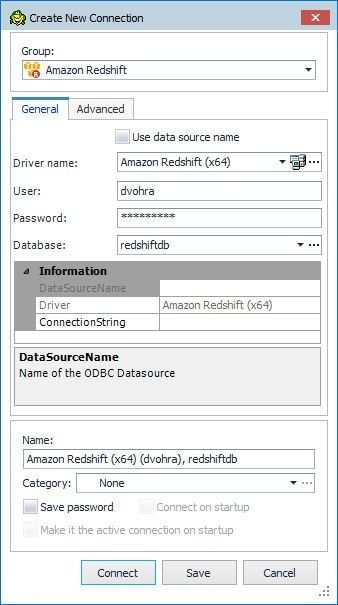
Figure 6. Specifying Database name
Next, we need to add the connection string for the Redshift cluster in the ConnectionString field. Again, obtain the connection string from the Redshift console. Click on the Redshift cluster link redshift-instance as shown in Figure 7.

Figure 7. Redshift Cluster link
The Cluster detail gets displayed, as shown in Figure 8.
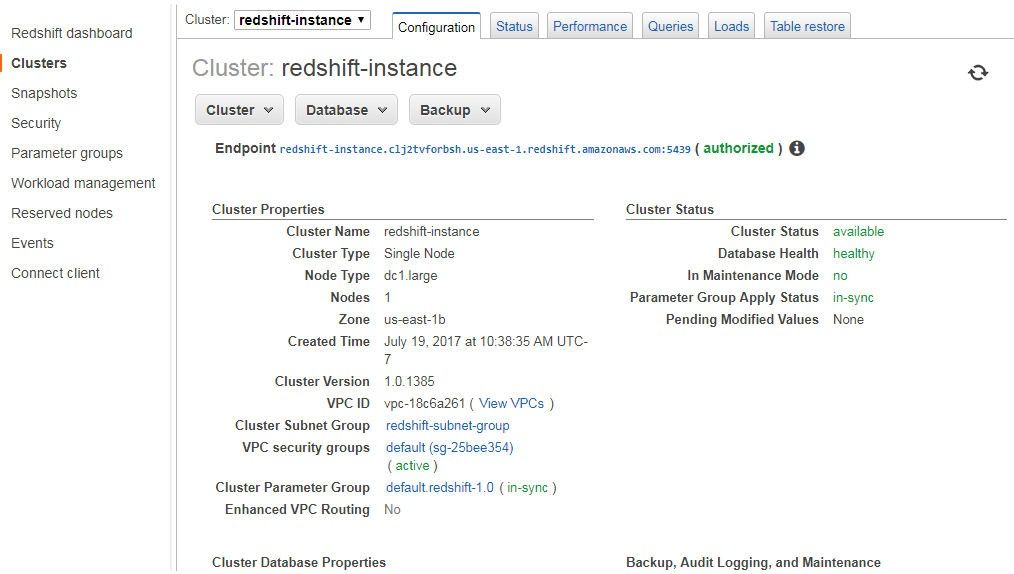
Figure 8. Cluster: redshift-instance
Scroll down, and from Cluster Database Properties copy the ODBC URL, as shown in Figure 9.
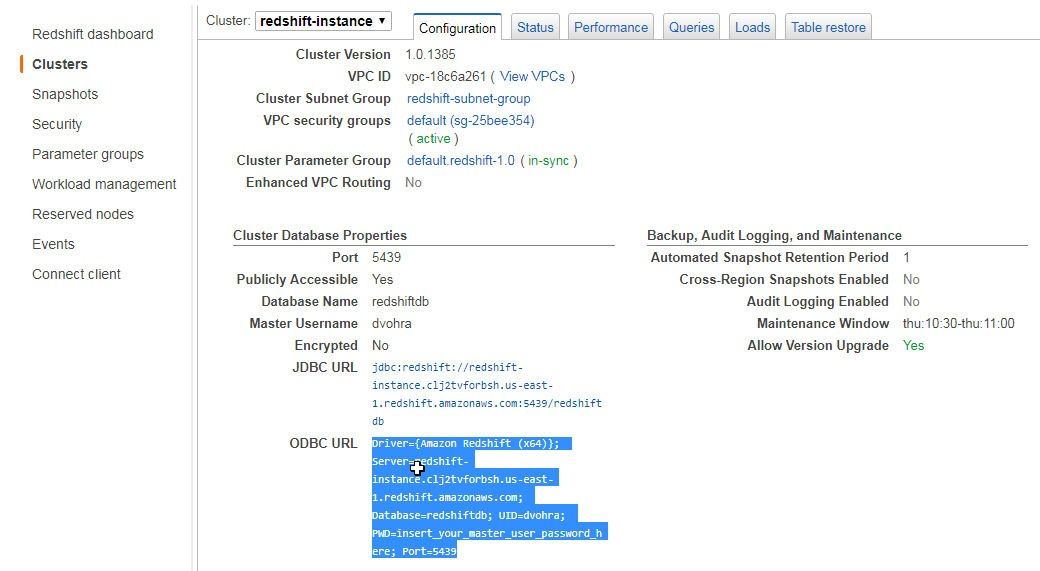
Figure 9. Copying the ODBC URL
Add the password string to the PWD= setting in the ODBC URL and paste the ODBC URL to the ConnectionString field.
Driver={Amazon Redshift (x64)};Server=redshift-instance.clj2tvforbsh.us-east-1.redshift.amazonaws.com;
    Database=redshiftdb;UID=dvohra;PWD=<password>;Port=5439
The connection string would be different for different users (or user groups) and is shown in the Create New Connection dialog in Figure 10. Click on the Connect button as shown in Figure 10.
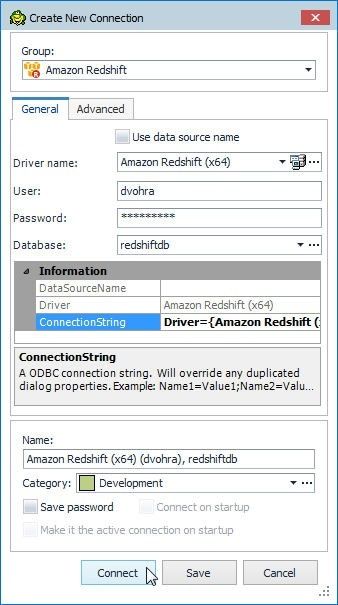
Figure 10. Connect
A new connection gets added to Toad Data Point Navigation Manager, as shown in Figure 11.
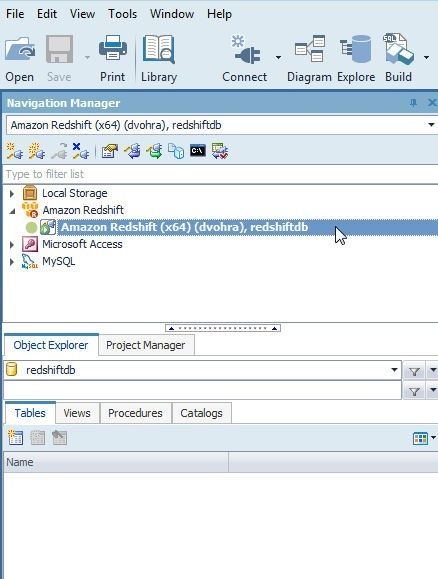
Figure 11. Redshift Connection in Toad Data Point
TheAutoCommit ON setting shown in Figure 12 indicates that AutoCommit is enabled. Right-click on the connection to display the various options.
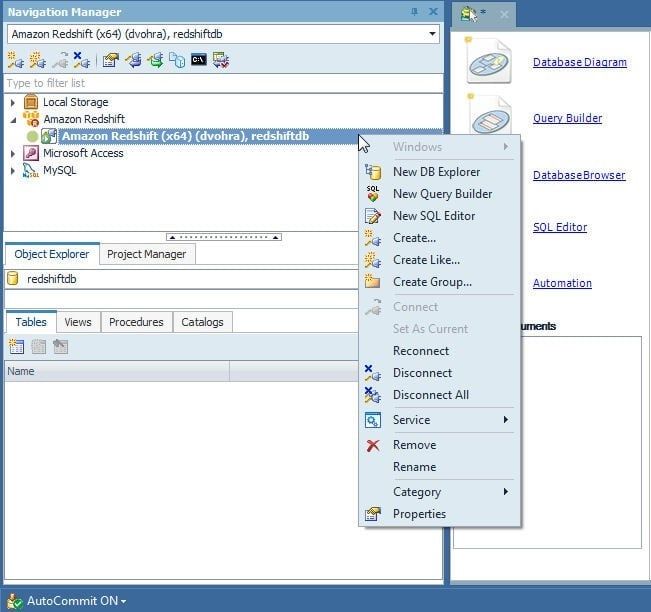
Figure 12. AutoCommit ON and Connection Options
Creating a Database Table
In this section we shall create a database table in the Redshift cluster using the following SQL script.
CREATE TABLE wlslog(id number default 0,category VARCHAR(255) default  ‘Notice’,
    type VARCHAR(255) default ‘WebLogicServer’,servername VARCHAR(255) default ‘AdminServer’,
    code VARCHAR(255) default ‘BEA-000365’,msg VARCHAR(255) default ‘’);

INSERT INTO wlslog VALUES(1,'Notice','WebLogicServer','AdminServer','BEA-000365','Server state changed to STANDBY');
INSERT INTO wlslog VALUES(2,'Notice','WebLogicServer','AdminServer','BEA-000365','Server state changed to STARTING');
INSERT INTO wlslog VALUES(3,'Notice','WebLogicServer','AdminServer','BEA-000365','Server state changed to ADMIN');
INSERT INTO wlslog VALUES(4,'Notice','WebLogicServer','AdminServer','BEA-000365','Server state changed to RESUMING');
INSERT INTO wlslog VALUES(5,'Notice','WebLogicServer','AdminServer','BEA-000361','Started WebLogic AdminServer');
INSERT INTO wlslog VALUES(6,'Notice','WebLogicServer','AdminServer','BEA-000365','Server state changed to RUNNING');
INSERT INTO wlslog VALUES(7,'Notice','WebLogicServer','AdminServer','BEA-000360','Server started in RUNNING mode');
Right-click on the connection in the Toad Data Point Navigation Manager and select New SQL Editor as shown in Figure 13.
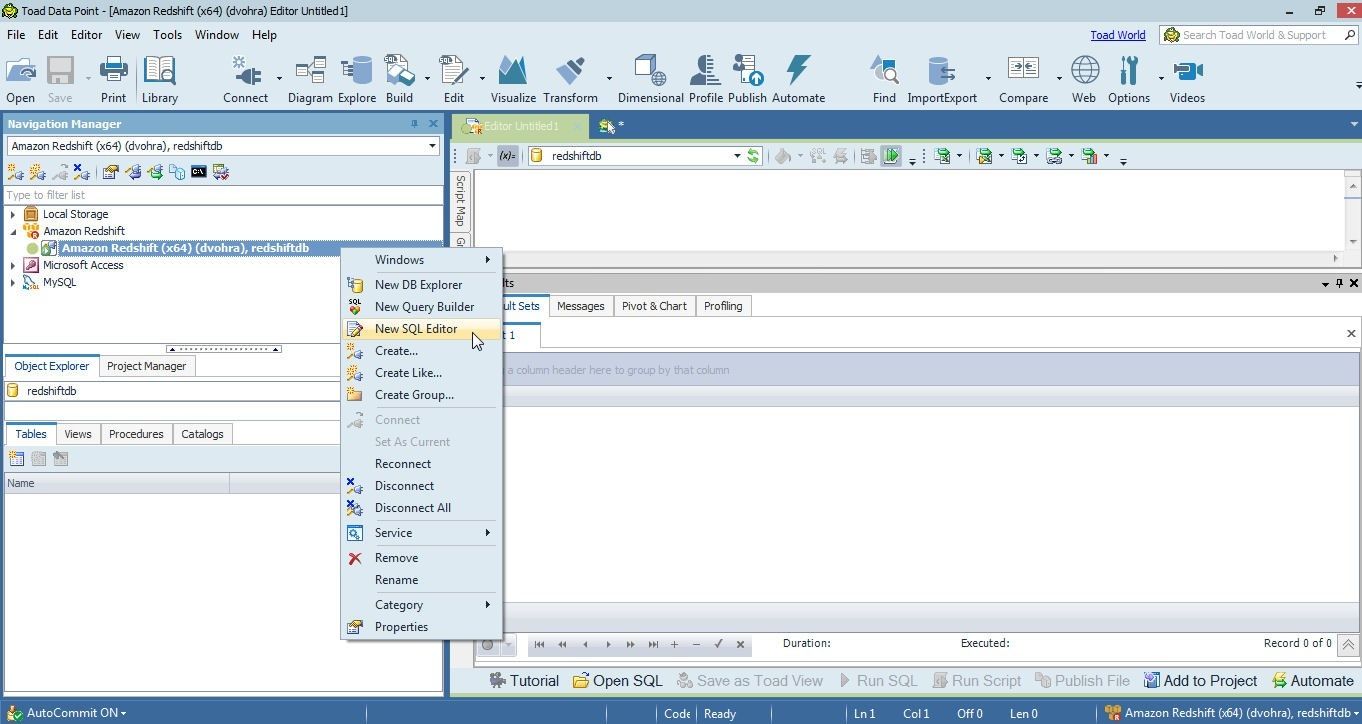
Figure 13. New SQL Editor
In the SQL Editor paste the CREATE TABLE DDL statement and click on Execute scripts as shown in Figure 14.

Figure 14. Running SQL Script to create a Table in Redshift Cluster
As the output in Figure 15 indicates, a table wslog gets created and added to the Object Explorer>Tables.

Figure 15. New Table wlslog in Object Explorer>Tables
Next paste the DML (INSERT) SQL statements in a SQL Editor and click on Execute scripts as shown in Figure 16.
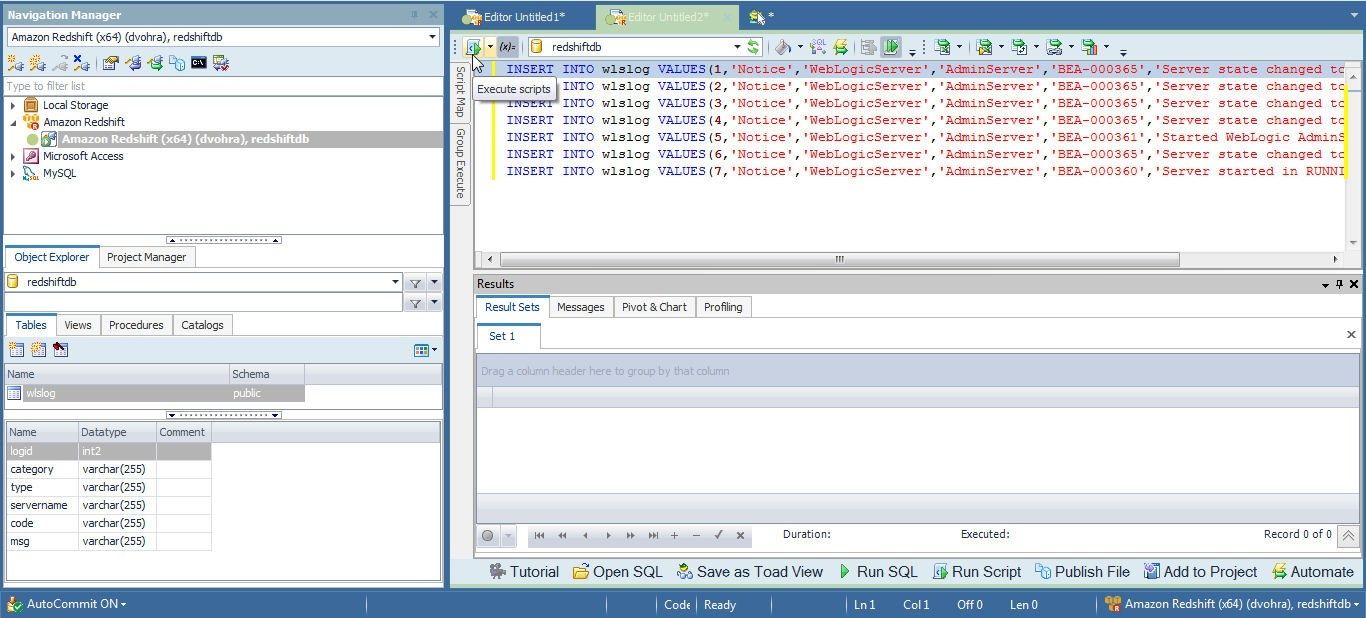
Figure 16. Execute scripts for DML SQL Statements
As the Messages output in Figure 17 indicates, the DML statements get run without error. An error, if generated, gets displayed in the Messages.
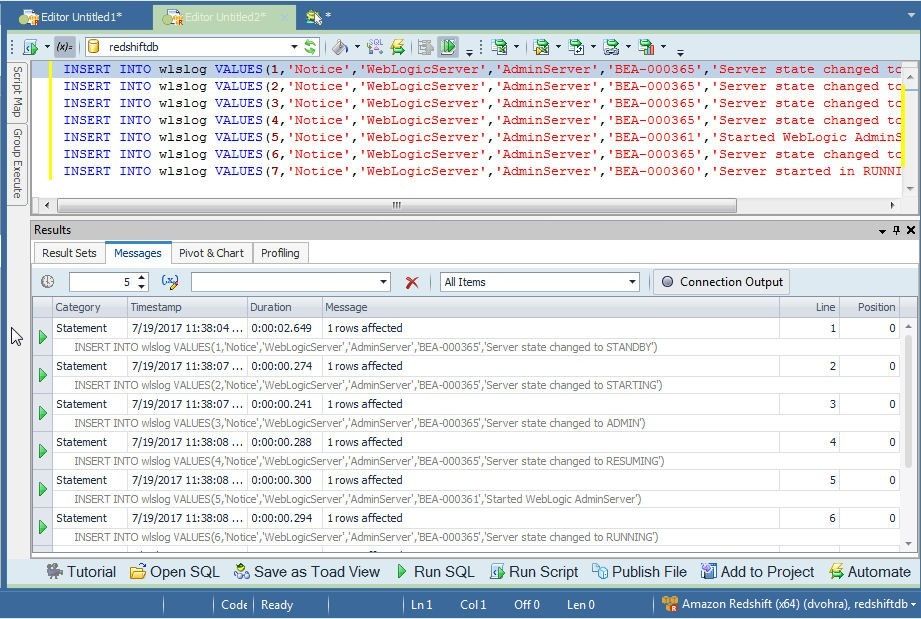
Figure 17. Messages Output for DML Statements
To query the Redshift table created run a SELECT statement as shown in Figure 18.
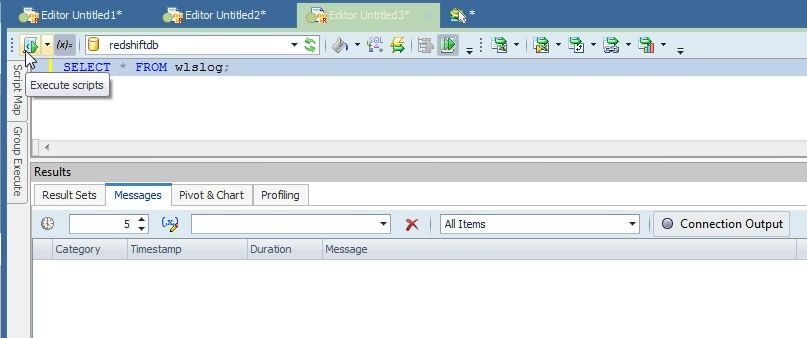
Figure 18. Running a SQL Query
A result set gets generated, as shown in Figure 19.
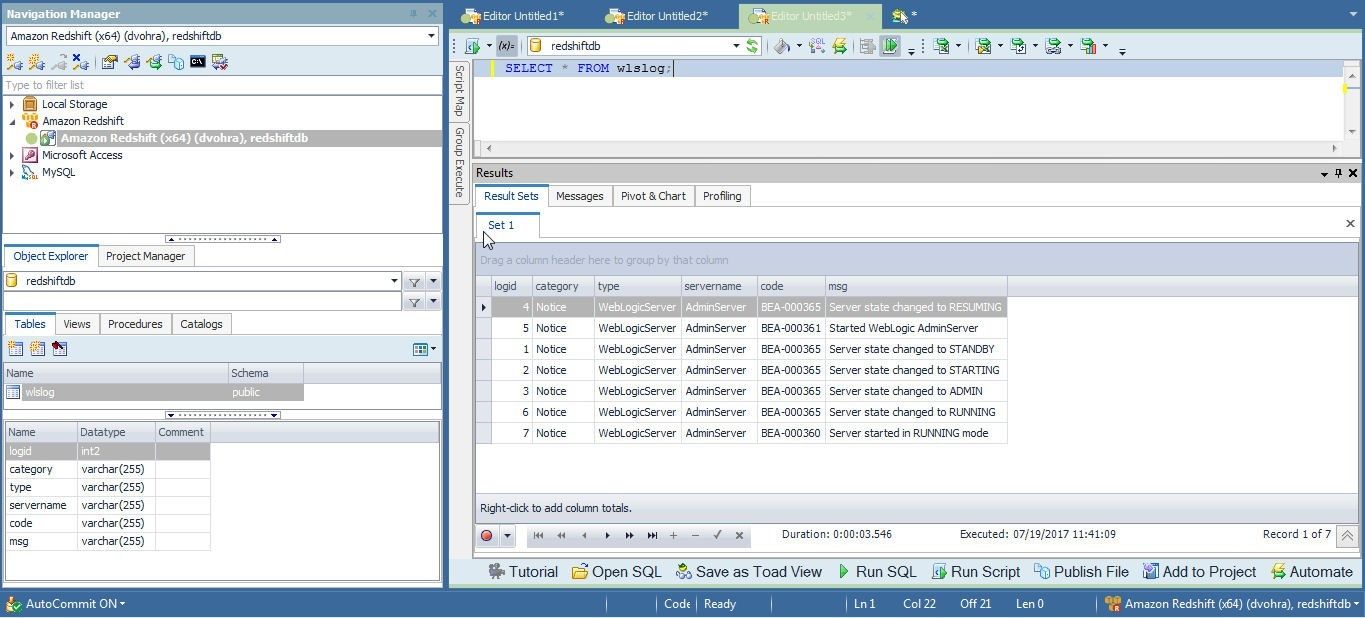
Figure 19. Result Set for SQL Query
Disconnecting and Connecting to Redshift Cluster
To disconnect a connection to Redshift cluster right-click on the connection in the Navigation Manager and select Disconnect as shown in Figure 20.
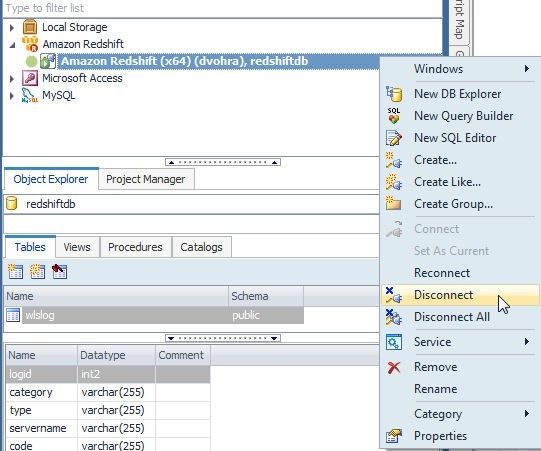
Figure 20. Disconnect
The connection gets disconnected, as shown in Figure 21. The icon for a disconnected connection is different than the icon for a connected connection, as indicated by the connection icons in Figure 21 and Figure 20 respectively.
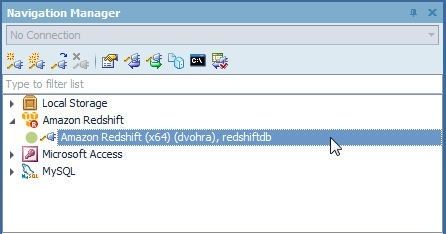
Figure 21. Disconnected Connection
To connect again right-click on the disconnected connection in the Navigation Manager and select Connect as shown in Figure 22.
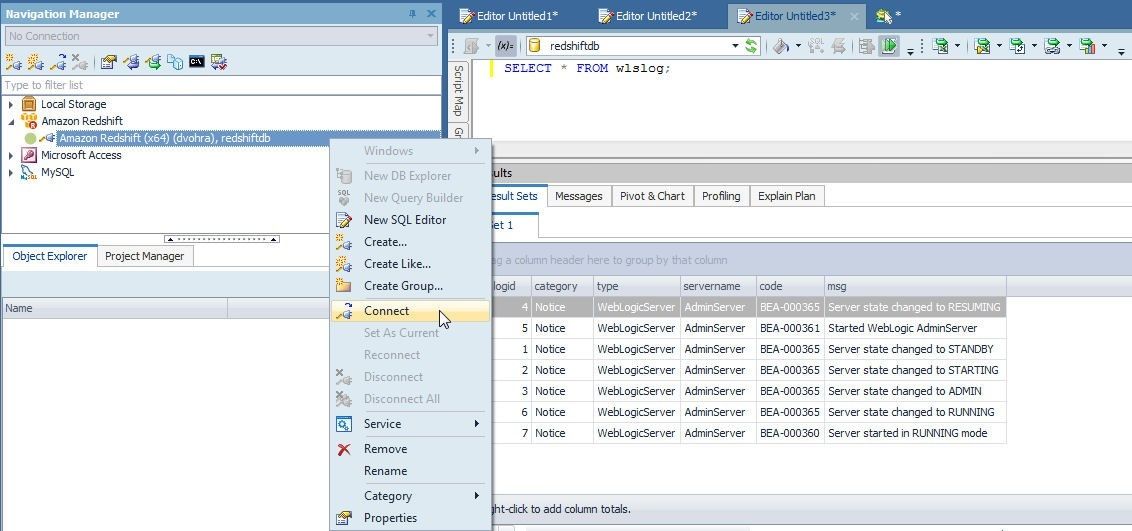
Figure 22. Connect
When a connection is connected after being disconnected the Need More Information to Connect dialog gets displayed, as shown in Figure 23. Specify the Password and click on Connect.
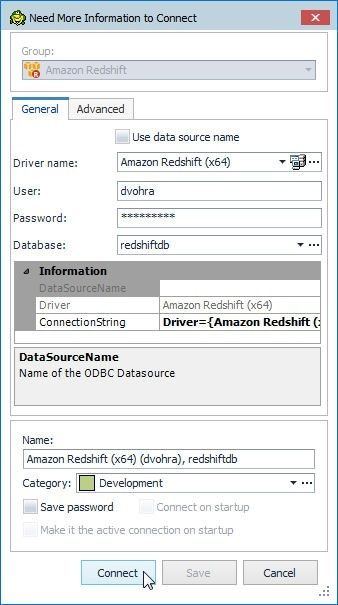
Figure 23. Need More Information to Connect dialog
The connection gets connected again, as shown in Figure 24.
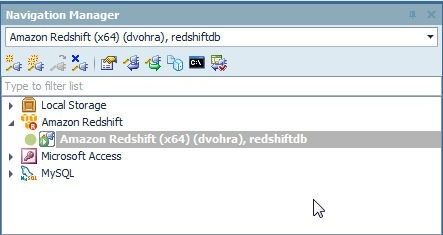
Figure 24. Connection Connected again
Setting the Current Connection
If only one connection exists, the connection is the current connection, but if multiple connections are created only one connection may be set as the current connection, as we shall discuss next.
First, create a second connection. Right-click on a connection in the Navigation Manager and select Create Like… as shown in Figure 25.
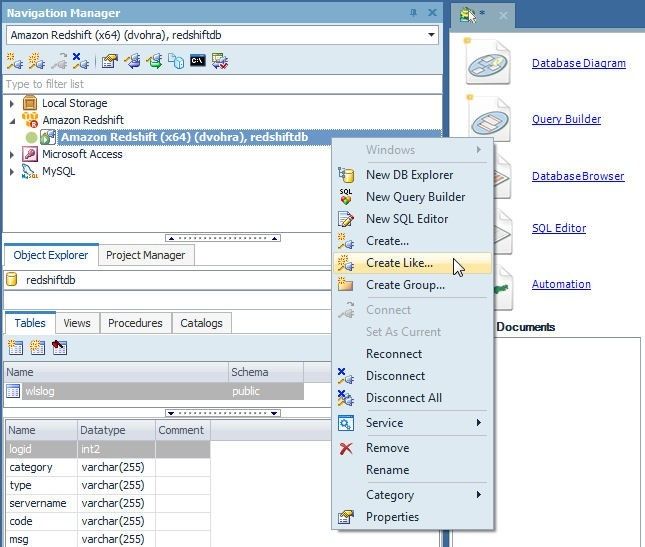
Figure 25. Create Like…
The Create New Connection dialog gets displayed; in which, specify the Password and click on Connect as shown in Figure 26.
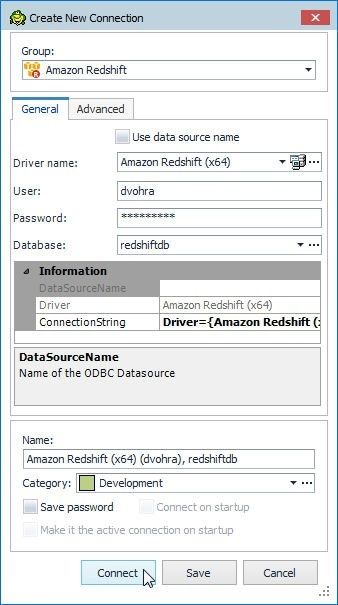
Figure 26. Create New Connection>Connect
A second connection gets added to Navigation Manger, as shown in Figure 27. The current connection has a different icon (a square box around the connection plug icon) from that indicating any other connected connection.

Figure 27. Second Connection in Navigation Manager
To make our other connection the current connection, right-click on the connection in the Navigation Manager and select Set As Current, as shown in Figure 28.
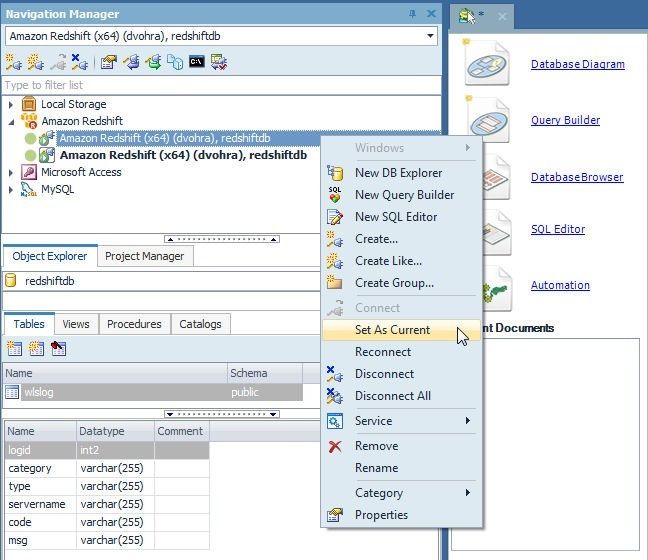
Figure 28. Set As Current
Our other connection becomes the current connection, as shown in Figure 29. The current connection is the connection in bold with a square box in the plug icon.

Figure 29. Current Connection
Deleting the Redshift Cluster
To delete a Redshift cluster select Cluster>Delete as shown in Figure 30.
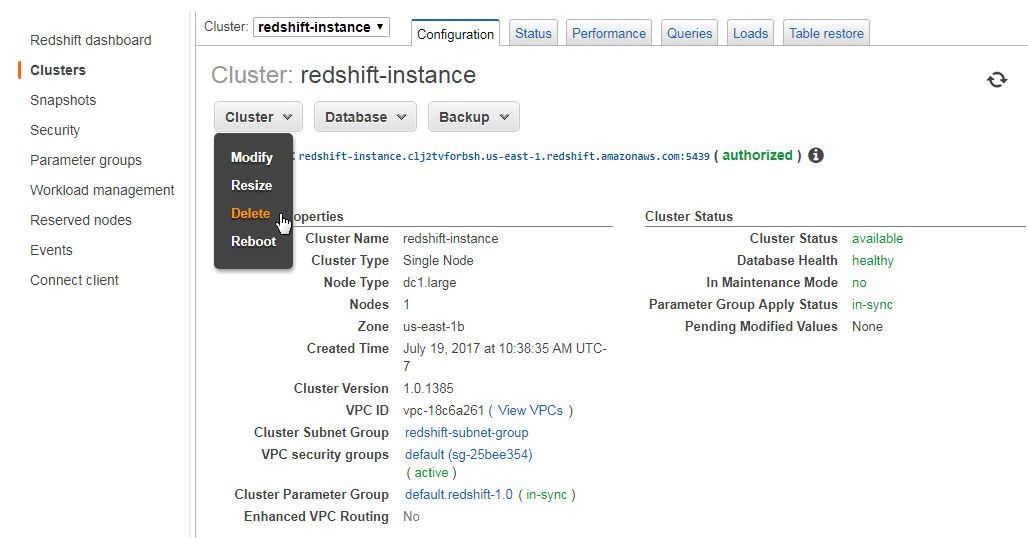
Figure 30. Cluster>Delete
In the Delete Cluster confirmation dialog click on Delete as shown in Figure 31.
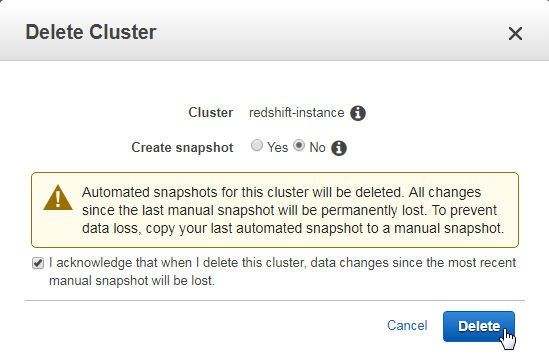
Figure 31. Delete Cluster
The cluster begins to get deleted, as indicated by the Cluster Status “deleting”, shown in Figure 32.
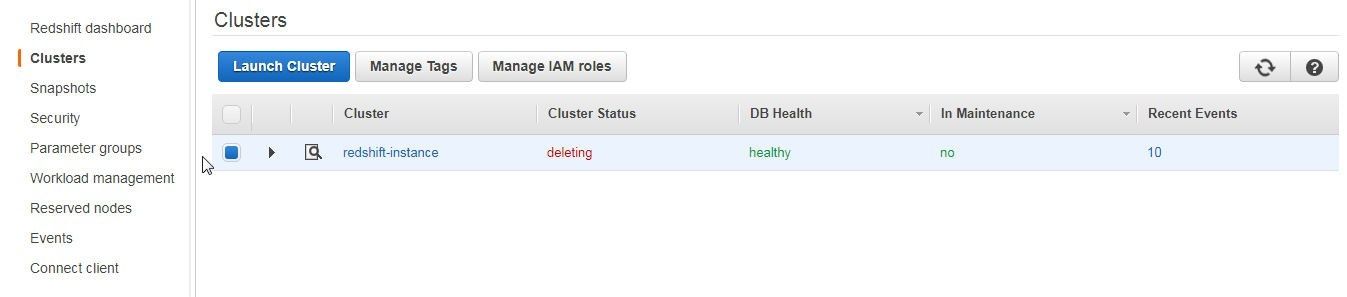
Figure 32. Cluster Deleting
Conclusion
In this two-part tutorial, we discussed using a Redshift cluster with Toad Data Point. Toad Data Point simplifies development and management of a Redshift cluster.
Start the discussion at forums.toadworld.com