Introduction
Amazon Redshift is a data warehouse and data analytics service that makes used of standard SQL for running complex analytical queries on structured data. Redshift contrasts with relational databases such as the AWS RDS databases in that it is a tool for running OLAP (Online Analytical Processing) queries instead of OLTP (Online Transactional Processing) queries. Redshift provides the features typically expected of a managed service, such as automated backups, fault tolerance, encryption, network isolation in a VPC (virtual private cloud), snapshots for restoring, scalability to a Petabyte, and integration with other AWS services such as CloudTrail, S3, IAM, and VPC. In two tutorial sessions we shall discuss using Redshift with Toad Data Point. In this first of the two tutorial sessions, we discuss the prerequisites for creating and accessing a Redshift cluster in the following sections:
- Setting the Environment
- Creating a VPC for Redshift
- Adding Subnets
- Adding an Internet Gateway
- Creating a Redshift Cluster Subnet Group for Redshift
- Creating a Redshift Cluster
- Modifying Route Table for VPC
- Modifying default Security Group Inbound/Outbound Rules
Setting the Environment
Redshift is a managed service hosted on AWS. An AWS account is required to be created, which may be created at https://aws.amazon.com/resources/create-account/. We have used Windows in this tutorial but any OS that supports the required software may be used. The following software is required to be installed for this tutorial:
Download the toaddatapoint_pro_4.2.1.303.x64.exe application for Toad Data Point. Double-click on the application to start the installation wizard and install Toad Data Point.
Download the Amazon Redshift ODBC Driver MSI installer (AmazonRedshiftODBC64-1.3.1.1000.msi or AmazonRedshiftODBC32-1.3.1.1000.msi or a later version) and double-click on the .msi file to install the driver. The Amazon Redshift ODBC Driver Setup wizard gets started, as shown in Figure 1. Click on Next.
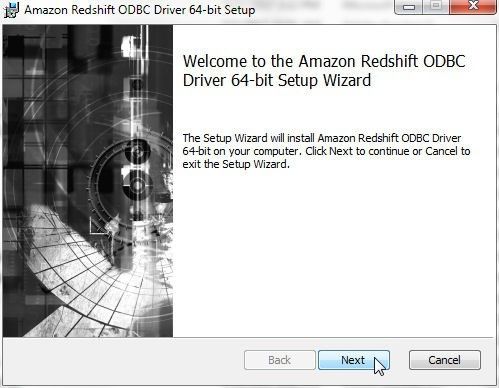
Figure 1. Amazon Redshift ODBC Driver Setup Wizard
Accept the Amazon Redshift ODBC Driver license agreement and click on Next. Select a Destination Folder to install the Amazon Redshift ODBC Driver as shown in Figure 2 and click on Next.
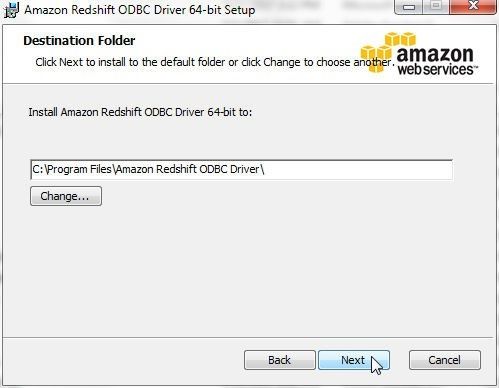
Figure 2. Selecting Destination Folder
Click on Install to install the Amazon Redshift ODBC Driver as shown in Figure 3.
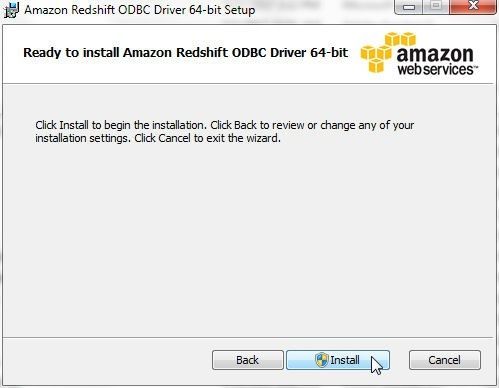
Figure 3. Install
The installation process starts, as shown in Figure 4.
Figure 4. Installing Amazon Redshift ODBC Driver
When the installation completes click on Finish as shown in Figure 5.
Figure 5. Installation Completed
Creating a Redshift cluster in a VPC involves the following procedure:
- Create a VPC
- Add subnet/s to the VPC
- Add an Internet gateway
- Create a cluster subnet group for Redshift cluster
- Create a Redshift cluster
- Add connectivity to the Redshift cluster by modifying the route table for the VPC and Security Group inbound/outbound rules
We shall discuss each of these next. Only after creating and configuring a Redshift cluster would we able to connect to the cluster and use the cluster from Toad Data Point.
Creating a VPC for Redshift
Navigate to the AWS VPC service in the management console. Click on Create VPC as shown in Figure 6 to create a VPC.
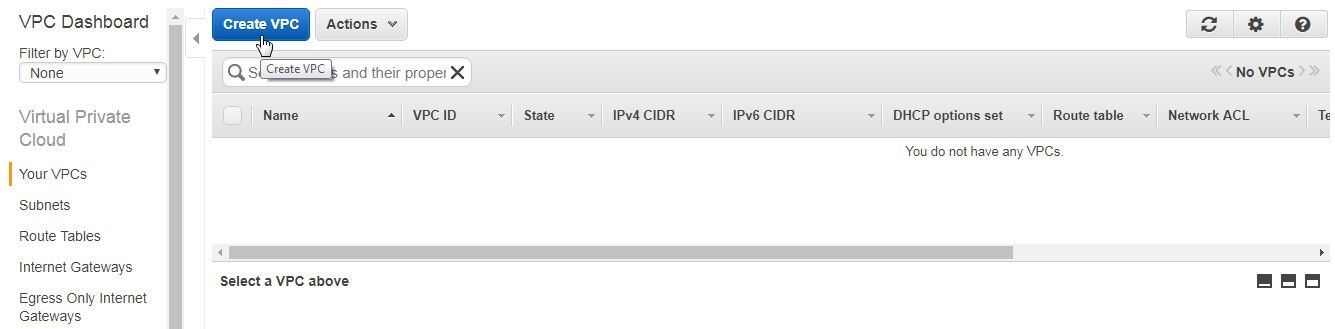
Figure 6. Create VPC
In the Create VPC dialog, specify a name (redshift-vpc) in the field Name tag, which creates a tag with a key=Name and a value set to the specified string in the field. Specify the range of IPv4 addresses for the VPC in CIDR (Classless Inter-Domain Routing) block format; for example, 10.0.0.0/24. A 10.0.0.0/24 CIDR supports 256 IP addresses. Block sizes must be between a /16 netmask and /28 netmask, which implies that the VPC may contain between 16 and 65,536 IP addresses. Select the option No IPv6 CIDR Block. The Amazon supplied IPv6 CIDR block provides a fixed size (/56) IPv6 CIDR block. A user cannot select the IPv6 addresses for the CIDR block. Select the Default Tenancy, which implies that the instances launched in this VPC use the tenancy attribute specified at launch. For dedicated hardware select the Tenancy option Dedicated. Click on Yes, Create as shown in Figure 7.
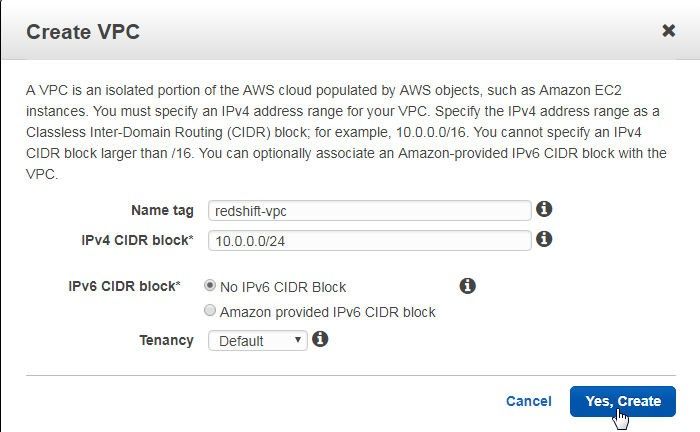
Figure 7. Create VPC Dialog
A VPC gets created, as shown in Figure 8.
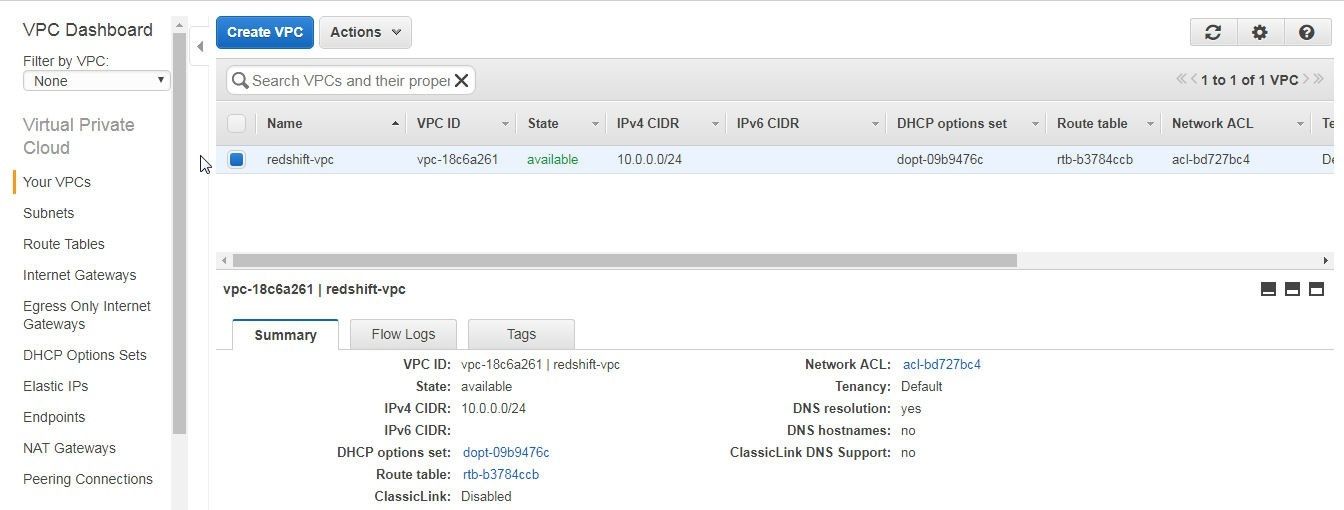
Figure 8. VPC Created
We need to enable at least one of the DNS Resolution or DNS Hostnames options. To enable, select the VPC and select Actions>Edit DNS Resolution as shown in Figure 9.
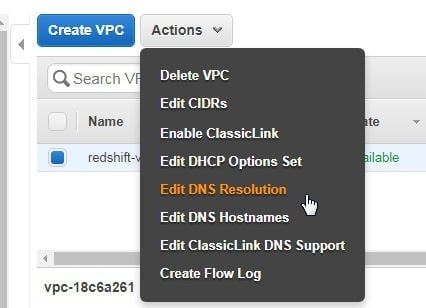
Figure 9. Actions>Edit DNS Resolution
In Edit DNS Resolution dialog select the Yes option and click on Save as shown in Figure 10.
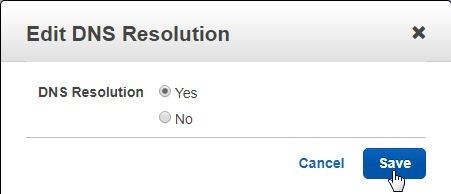
Figure 10. Edit DNS Resolution dialog
Similarly, select Actions>Edit DNS Hostnames as shown in Figure 11.
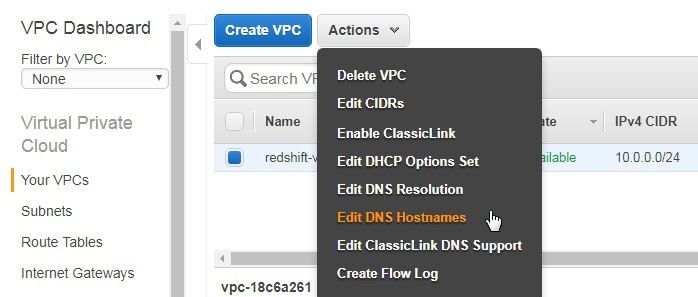
Figure 11. Actions>Edit NS Hostnames
In Edit DNS Hostnames click on Yes and Save as shown in Figure 12.
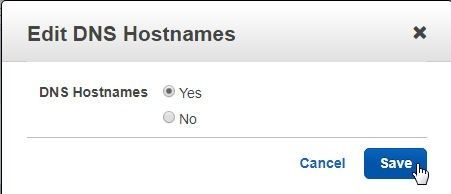
Figure 12. Edit DNS Hostnames
The DNS Resolution and DNS Hostnames settings get set to yes as shown in Figure 13.

Figure 13. VPC Settings for DNS
Adding Subnets
Next, add two subnets to the VPC. Only one subnet is required to create a Redshift cluster in a VPC, but create multiple subnets in different availability zones, as a new Redshift cluster subnet group may not support some availability zones. A cluster subnet group is required to for creating a Redshift cluster in a VPC. Click on Create Subnet in the VPC dashboard as shown in Figure 14 to add a subnet.
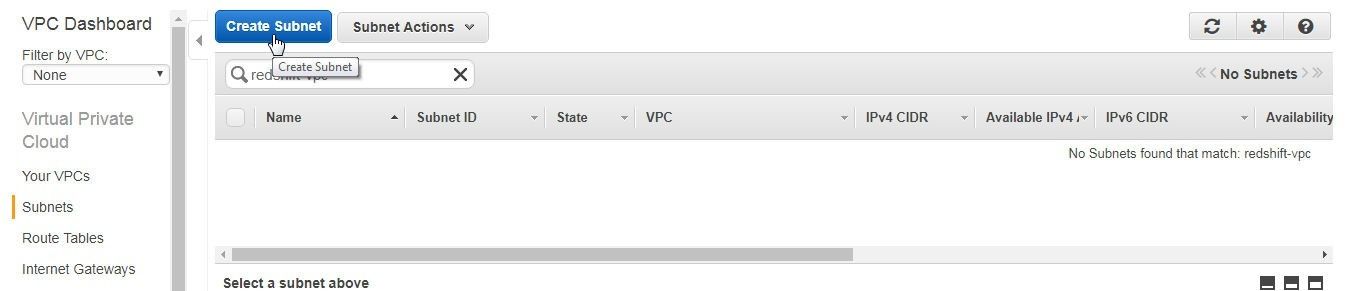
Figure 14. Create Subnet
In the Create Subnet dialog specify a Name tag (subnet-1) and select the VPC (redshift-vpc) created earlier, as shown in Figure 15. The VPC CIDRs lists the CIDRs associated with the VPC. Select Availability Zone (us-east-1a) and specify an IPv4 CIDR block (10.0.0.0/25). Click on Yes, Create.
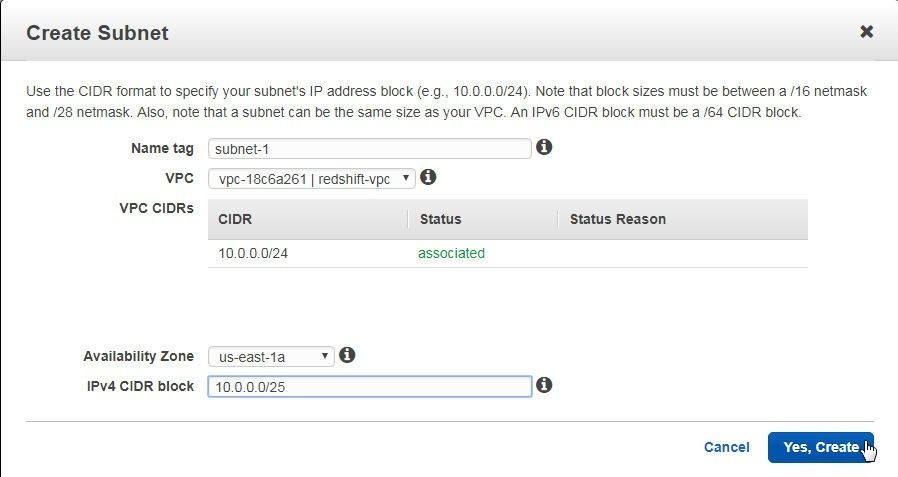
Figure 15. Create Subnet dialog
A subnet gets created as shown in Figure 16.
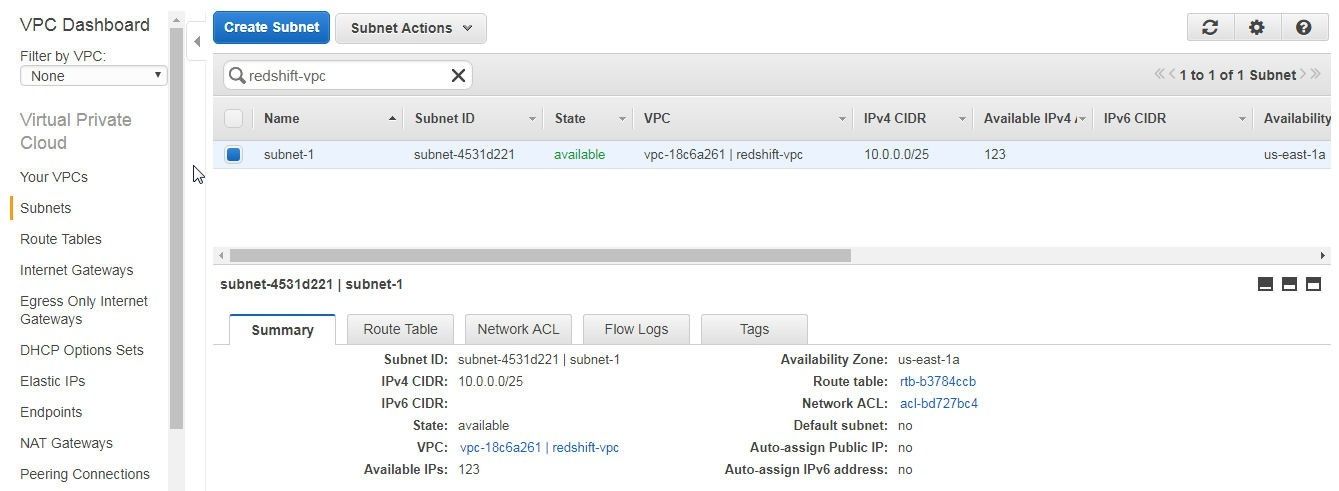
Figure 16. Subnet subnet-1 added
The Route Table for the subnet lists the route with Destination 10.0.0.0/24 and Target local, as shown in Figure 17.
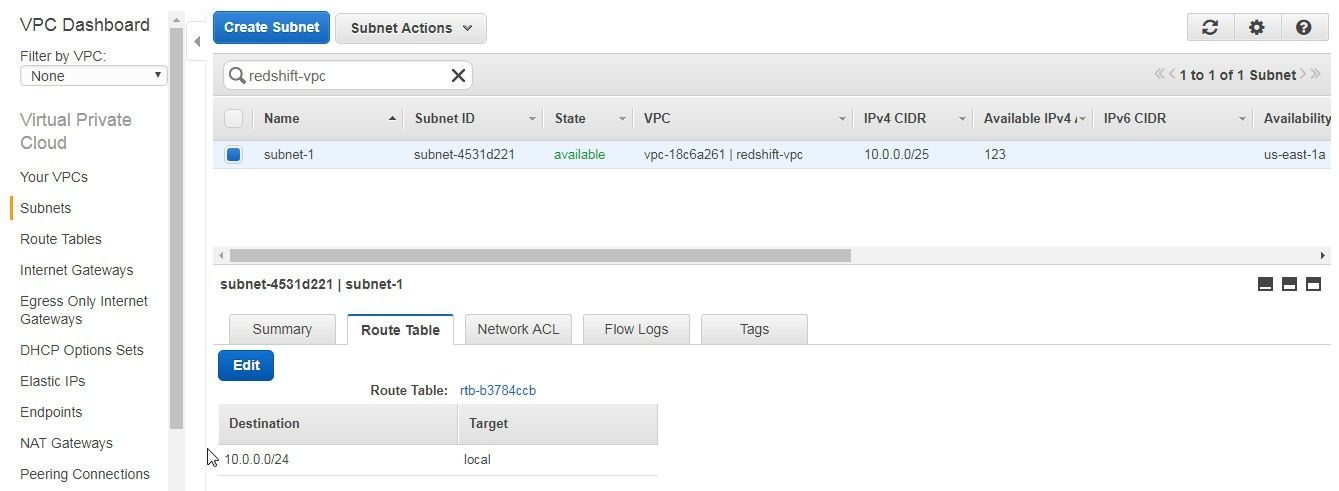
Figure 17. Route Table for Subnet
To add another subnet click on Create Subnet again as shown in Figure 18.

Figure 18. Create Subnet
In the Create Subnet dialog specify a Name tag (subnet-2) and select the VPC created for the Redshift cluster as shown in Figure 19. Select Availability Zone as us-east-1b and specify an IPv4 CIDR block (10.0.0.128/25) that does not overlap with the CIDR block of the first subnet. If the CIDRs overlap, an error message would indicate. Click on Yes, Create.
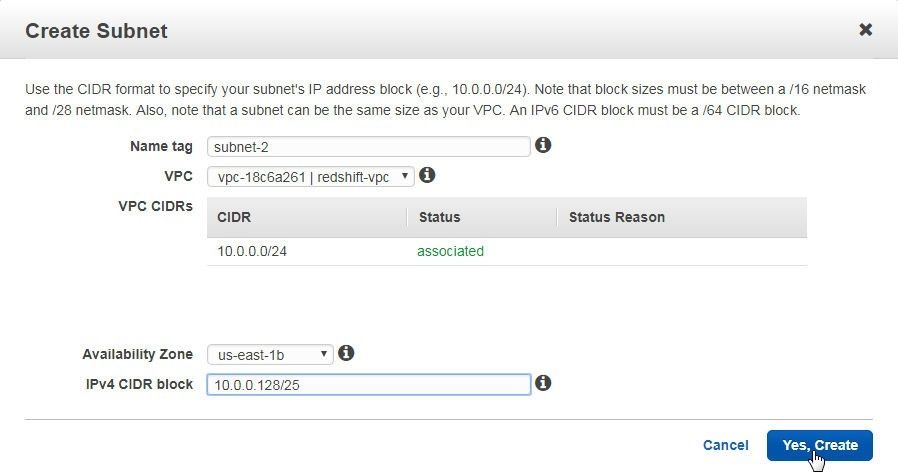
Figure 19. Creating another Subnet
The second subnet gets created, as shown in Figure 20.
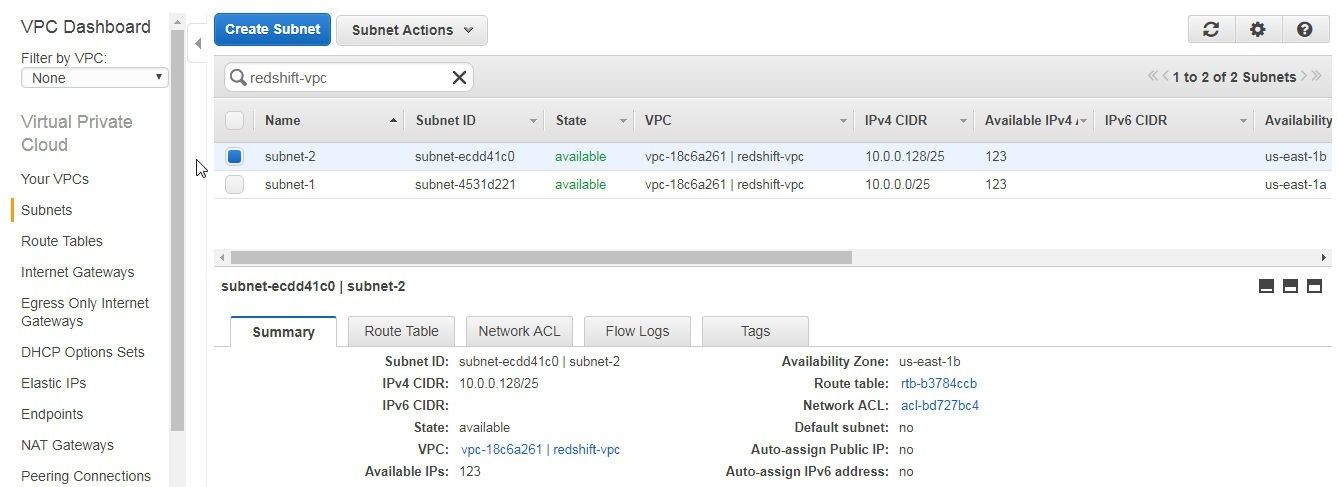
Figure 20. Subnet subnet-2 added
The Route Table of the second subnet also lists the route with Destination as 10.0.0.0/24 and Target as local as shown in Figure 21.
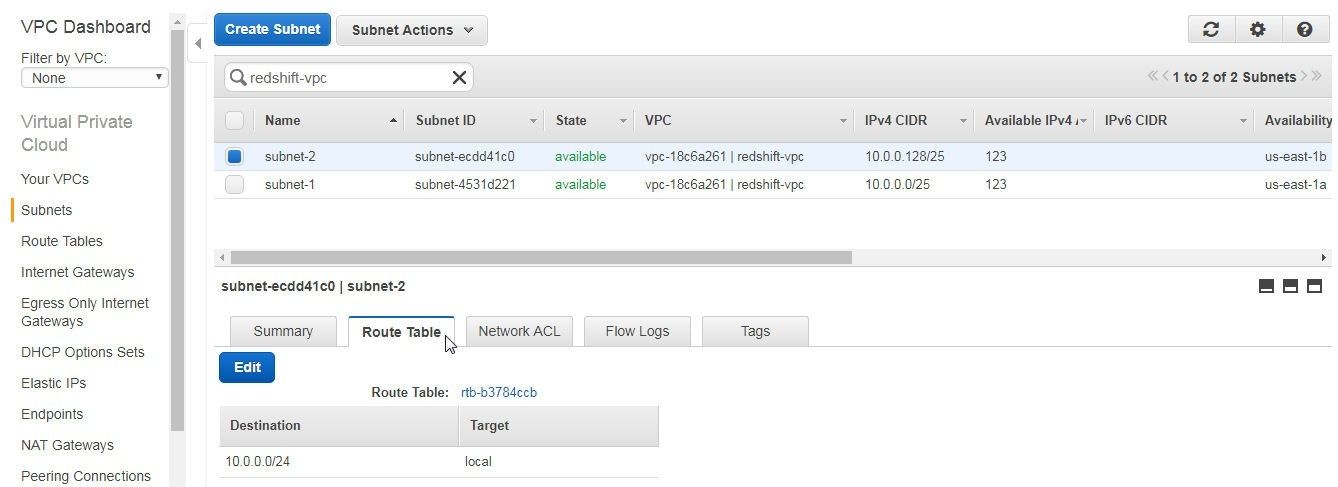
Figure 21. Route Table subnet-2
Adding an Internet Gateway
An Internet gateway allows communication between the instances in a VPC and the Internet. To add an Internet gateway click on Create Internet Gateway as shown in Figure 22.
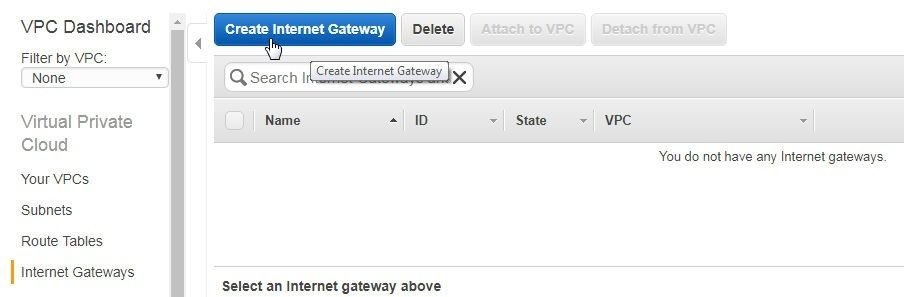
Figure 22. Create Internet Gateway
In the Create Internet Gateway dialog specify a name tag in the Name tag field which creates a tag with key=Name and value set to the specified string as shown in Figure 23.
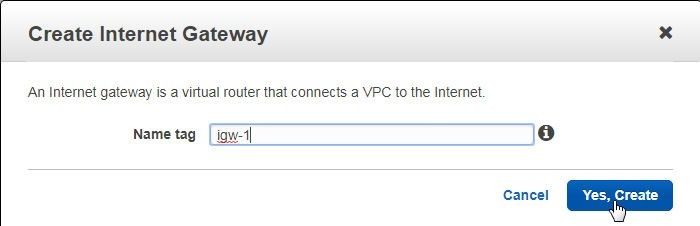
Figure 23. Create Internet Gateway
An Internet gateway gets created, as shown in Figure 24.
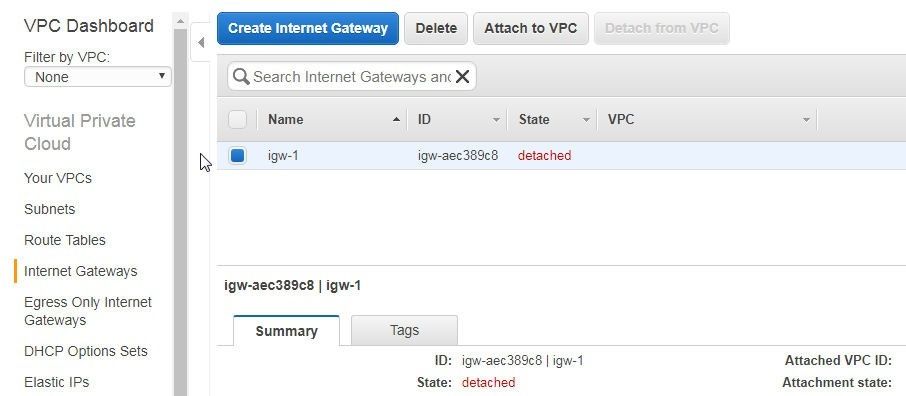
Figure 24. Internet Gateway igw-1
Initially, the Internet gateway is not associated with or attached to a VPC, as it needs to be. Click on Attach to VPC as shown in Figure 25.
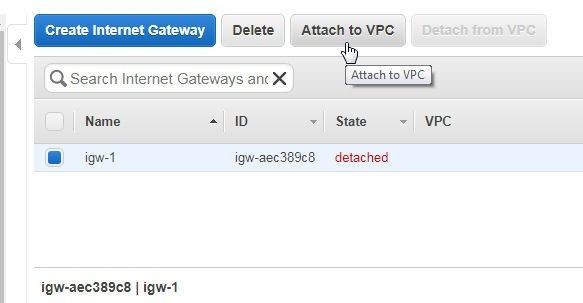
Figure 25. Attach to VPC
In the Attach to VPC dialog select the VPC redshift-vpc and click on Yes, Attach as shown in Figure 26.
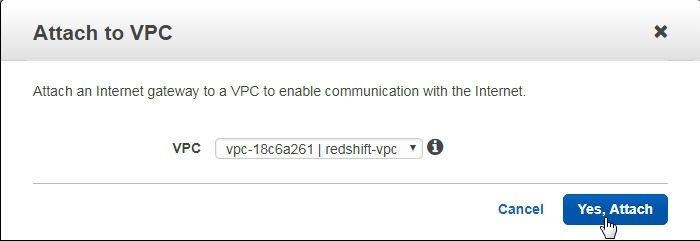
Figure 26. Attach to VPC
The Internet gateway gets associated with or attached to the VPC created for the Redshift cluster as shown in Figure 27.
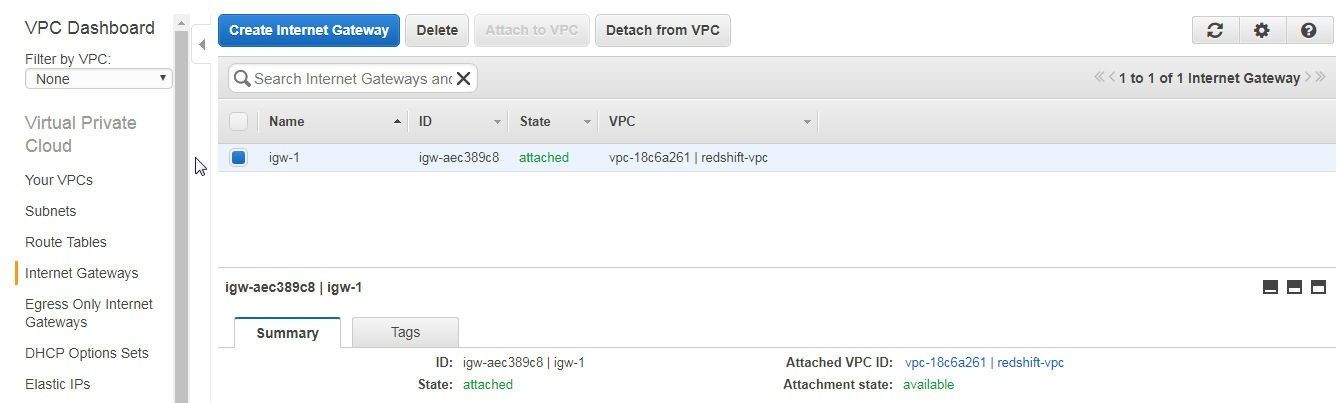
Figure 27. Internet Gateway attached to VPC
Creating a Redshift Cluster Subnet Group for Redshift
A Redshift cluster subnet group is a group of subnets provisioned to facilitate grouping of resources. A Redshift cluster subnet group is required for the creation of a Redshift cluster. Select Security in the left margin on the Redshift dashboard and click on Create Cluster Subnet Group as shown in Figure 28.
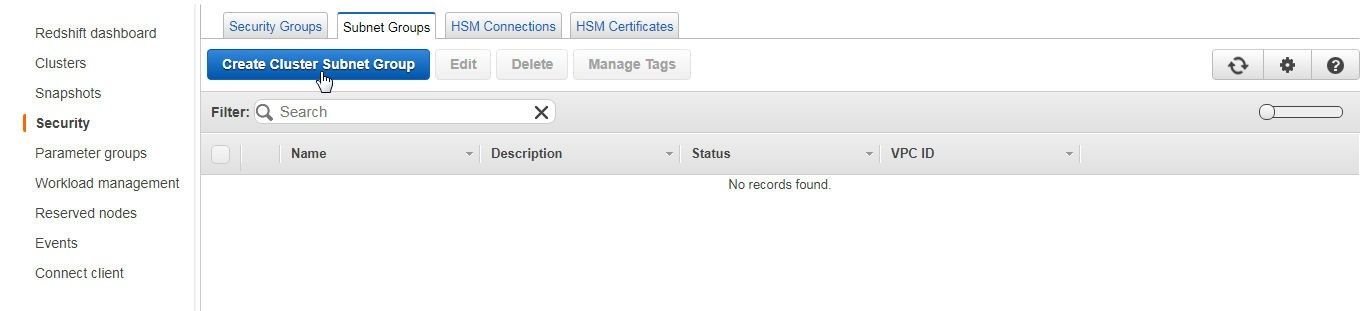
Figure 28 Create Cluster Subnet Group
In the Create Cluster Subnet Group dialog specify a Name (redshift-subnet-group), and description and select the VPC ID for the VPC to create the new Redshift cluster subnet group as shown in Figure 29.
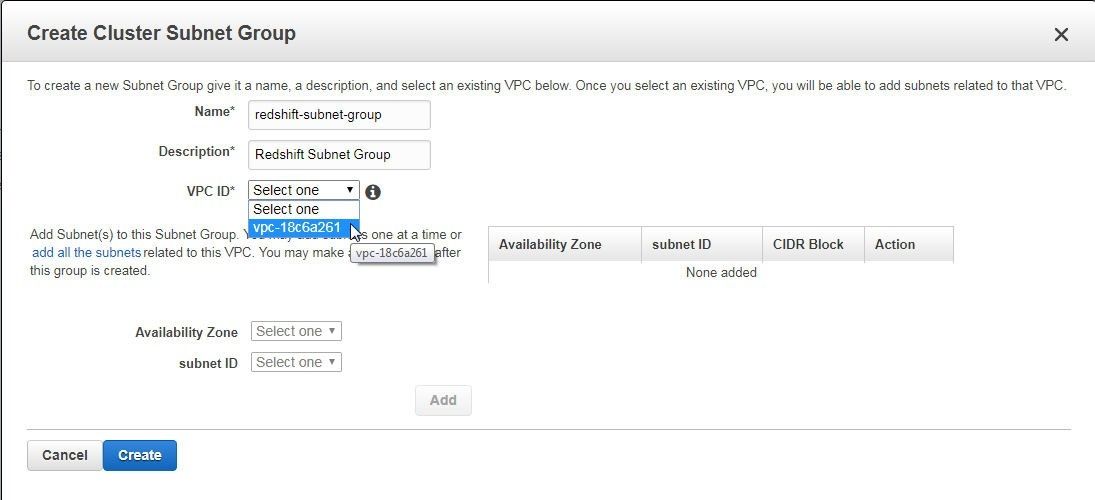
Figure 29. Create Cluster Subnet Group Dialog
Presently, Redshift supports subnets only in availability zones us-east-1b, us-east-1c, and us-east-1d; but the supported availability zones could change. Select Availability Zone us-east-1b and the subnet created in the availability zone and click on Add to add the subnet to the Subnet Group table as shown in Figure 30.

Figure 30. Adding a Cluster Subnet Group
Adding a subnet to the Subnet Group table does not create the cluster subnet group. Click on Create to create the cluster subnet group as shown in Figure 31.
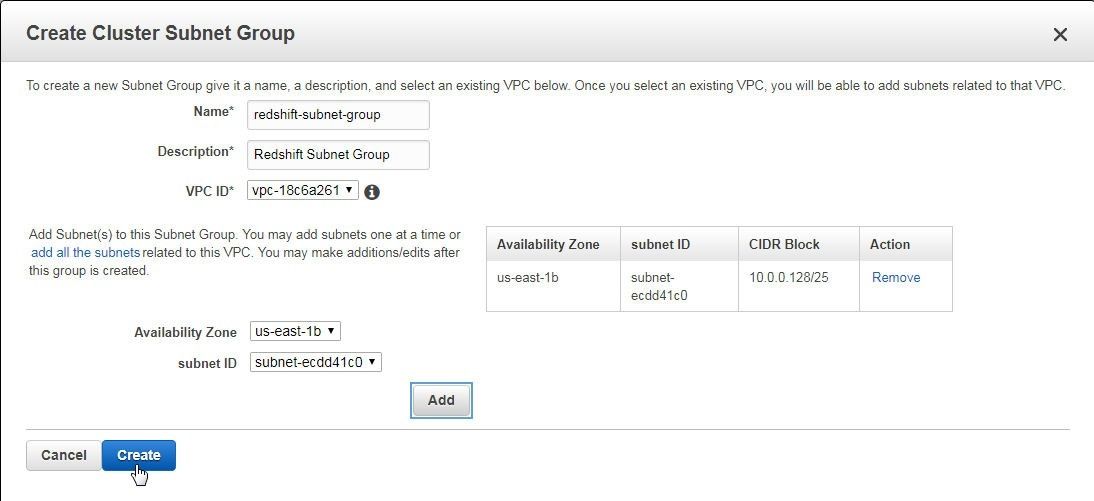
Figure 31. Creating a Cluster Subnet Group
A cluster subnet group gets created, as shown in Figure 32.

Figure 32. Cluster Redshift Group
Creating a Redshift Cluster
Having created the networking pre-requisites for creating a Redshift cluster next we shall create a Redshift cluster. To create a Redshift cluster click on Launch cluster in the Redshift dashboard as shown in Figure 33.
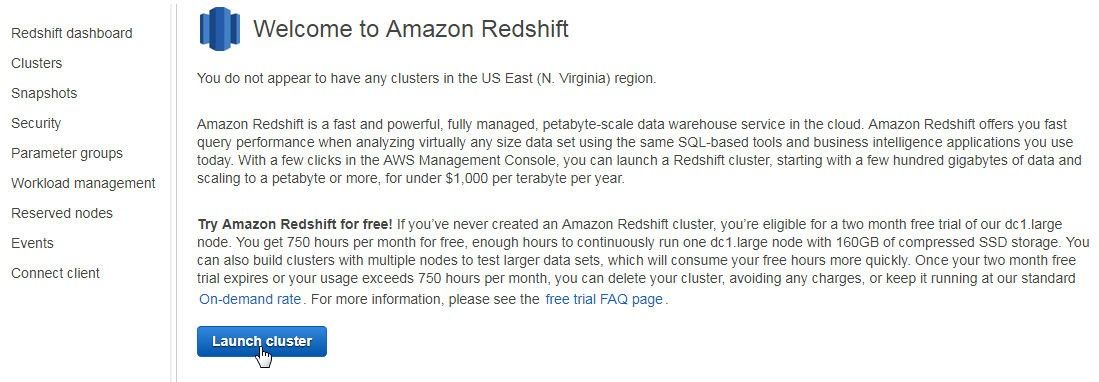
Figure 33. Launch cluster
In the Cluster Details page shown in Figure 34 only the Database port is pre-specified (5439) and the other field values need to be added. Specify a Cluster Identifier (redshift-instance), a Database name (redshiftdb), a Database port (default 5439), a Master user name and Master user password including Confirm password. Click on Continue.
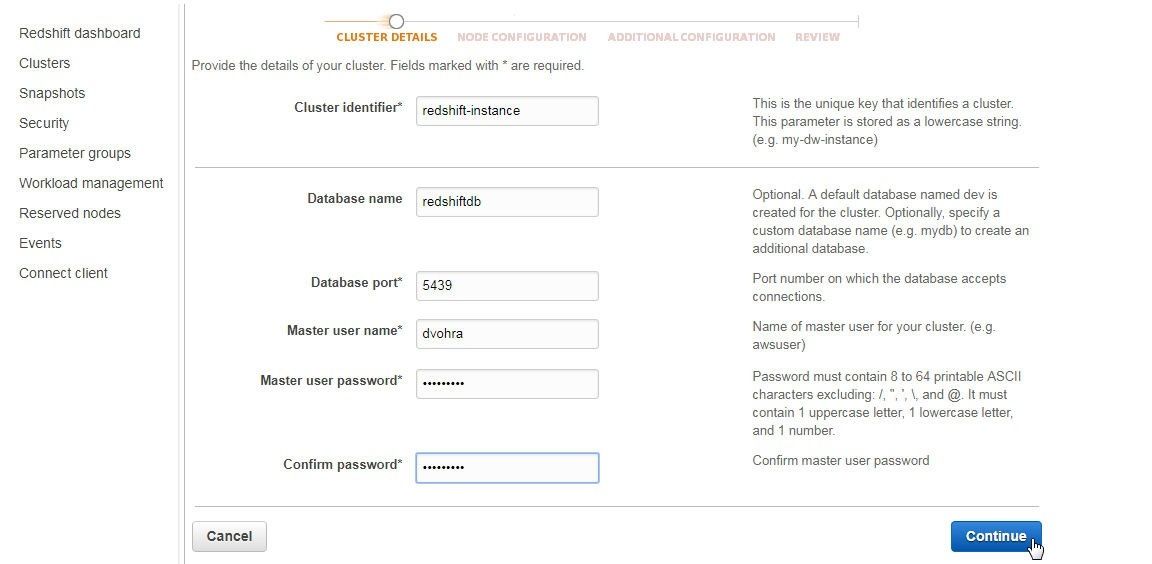
Figure 34. Cluster Details
In the Node Configuration select a Node type as shown in Figure 35. A node type specifies the compute, memory, storage and I/O capacity of the cluster’s nodes. The default setting of dc1.large is used.
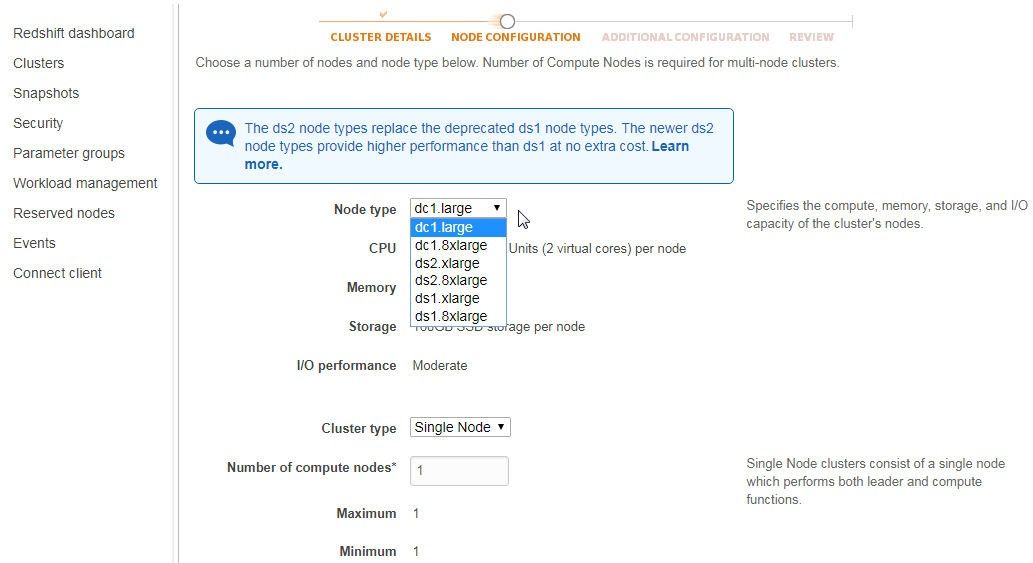
Figure 35. Selecting Node type
Select the Cluster type as Single Node, which sets the Number of compute nodes to 1 as shown in Figure 36. Click on Continue.
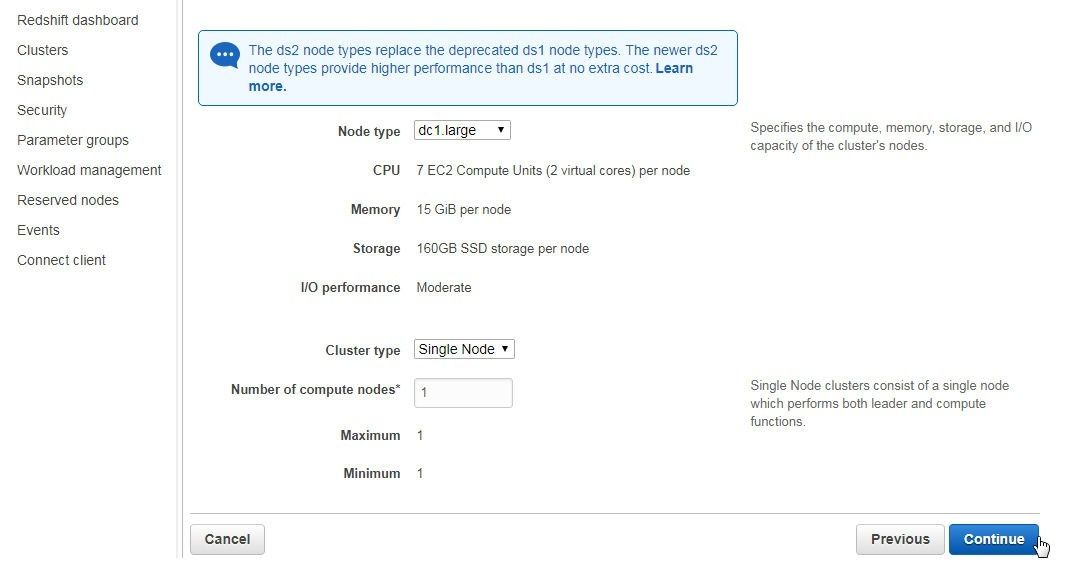
Figure 36. Node Configuration>Continue
In Additional Configuration the Cluster parameter group is pre-selected, as shown in Figure 37. Select the Encrypt database option as None. Choose the VPC which was created earlier.
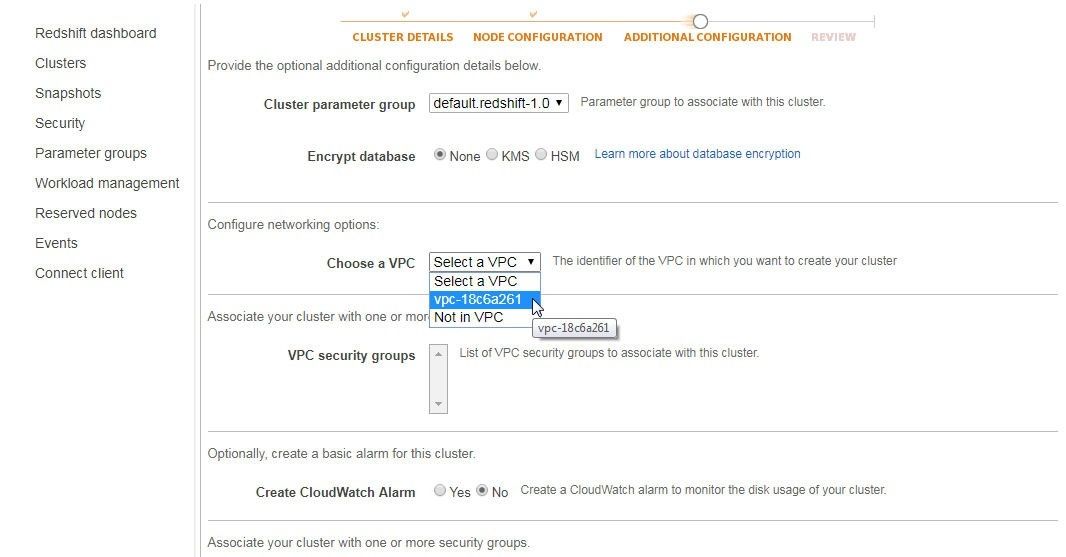
Figure 37. Choosing a VPC
Select the Cluster Subnet group created in the previous section as shown in Figure 38. Select the Publicly accessible option as Yes, Choose a public IP address as No, and Enhanced VPC Routing option as No.
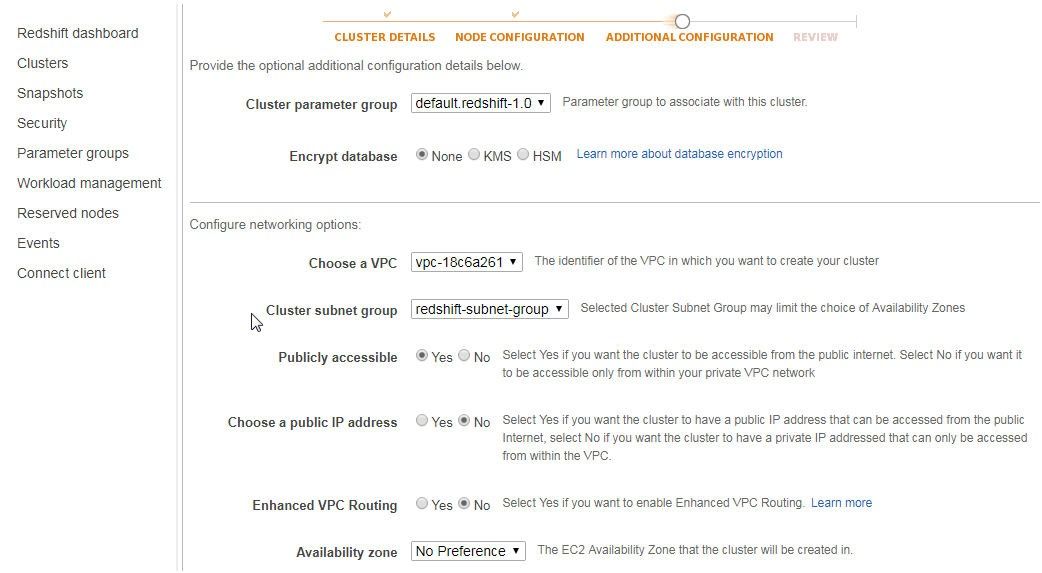
Figure 38. Selecting Subnet Group
Select the Availability zone as us-east-1b as shown in Figure 39.
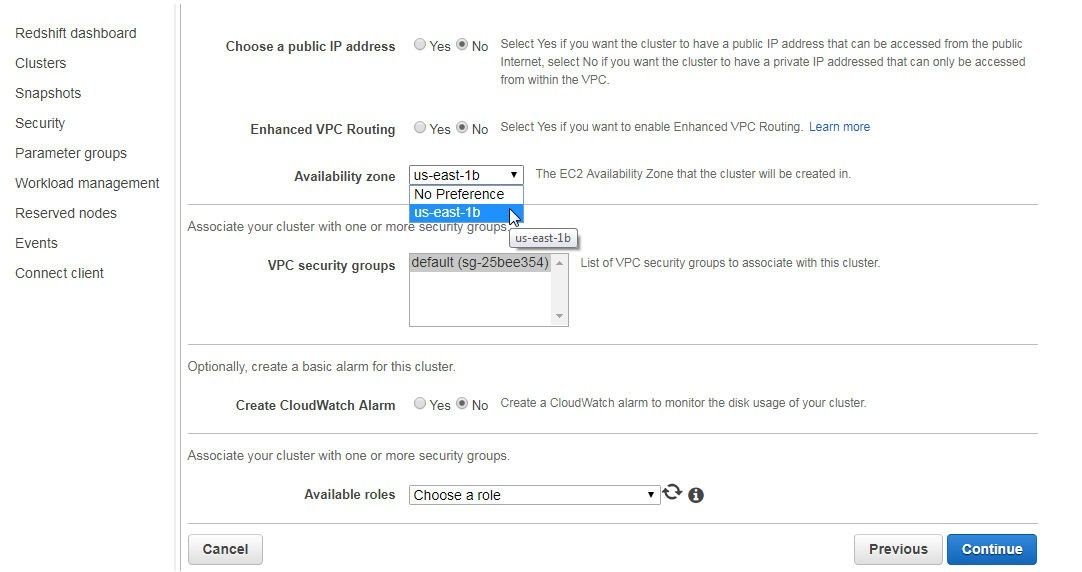
Figure 39. Selecting Availability zone
The VPC security groups list the default group. Click on Continue as shown in Figure 40.
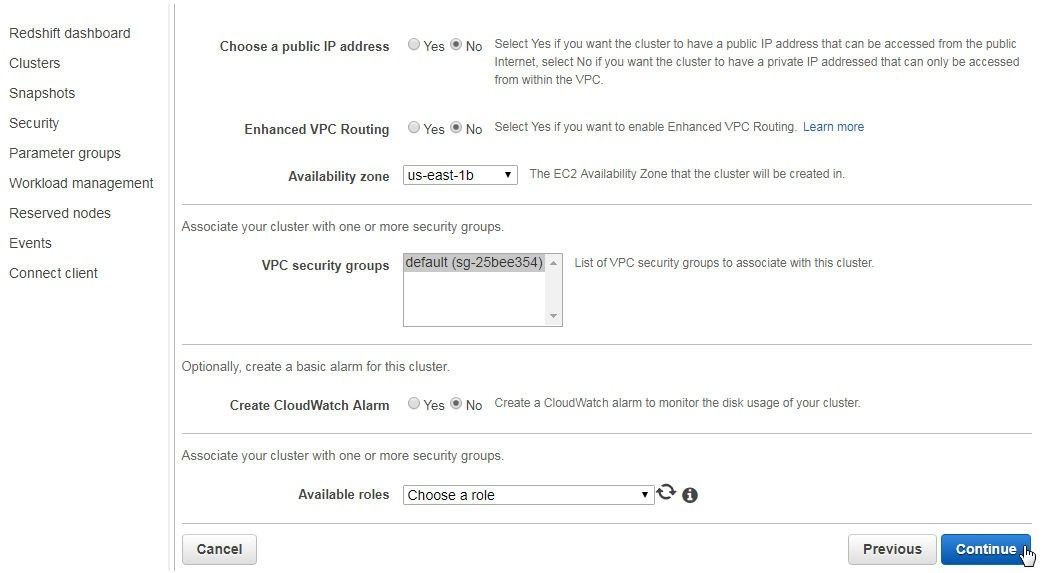
Figure 40. Additional Configuration>Continue
Click on Launch cluster as shown in Figure 41.
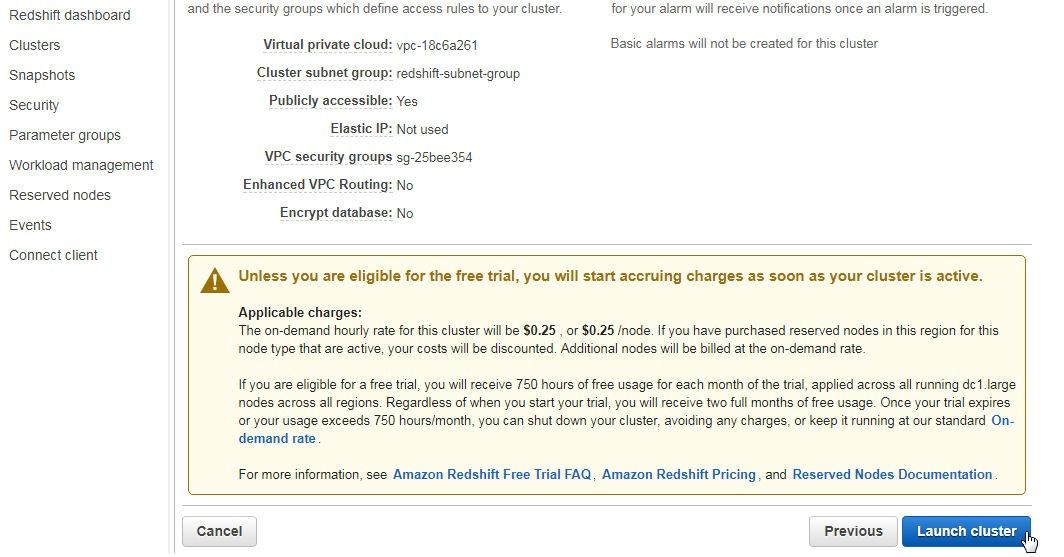
Figure 41. Launch cluster
The message “Cluster <cluster name> is being created” should get displayed, as shown in Figure 42. Click on the link View your cluster on the Clusters dashboard.
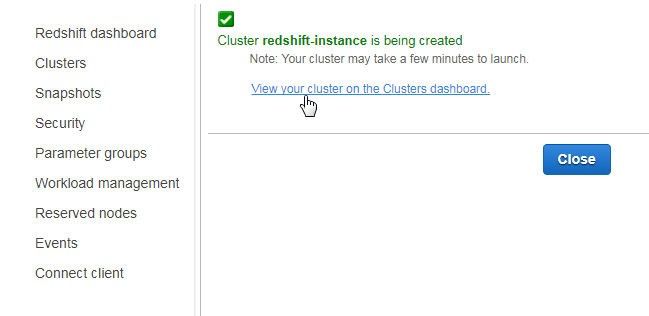
Figure 42. Redshift Cluster being created
When the Redshift cluster gets created it gets listed as being “available” in the Clusters table on the Redshift dashboard, as shown in Figure 43.
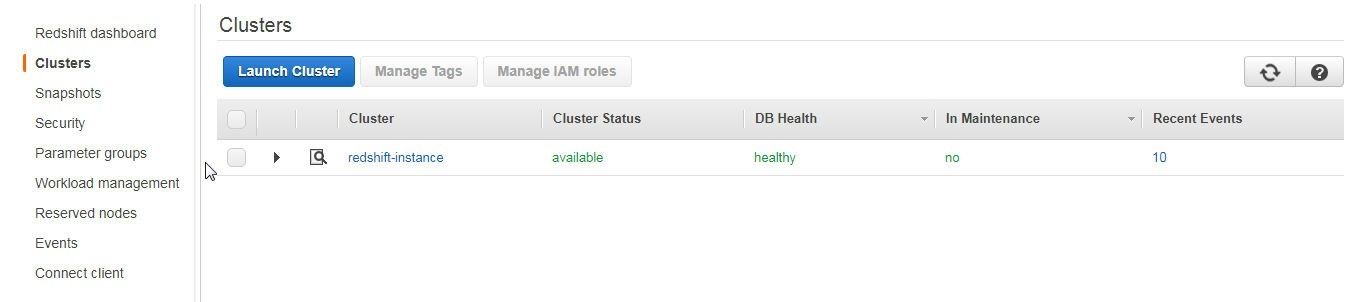
Figure 43. Redshift Clusters>redshift-instance
A cluster Endpoint gets created, as shown in Figure 44.
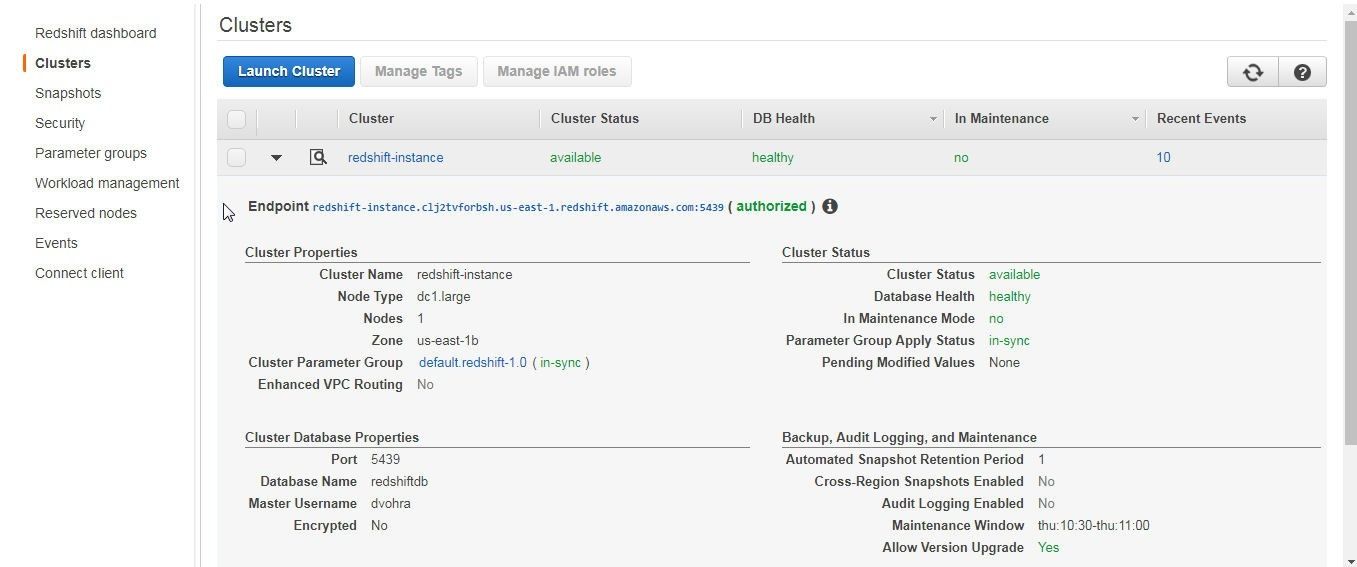
Figure 44. Redshift Cluster Endpoint
The Events table lists the events that precede in creating a Redshift cluster, as shown in Figure 45.
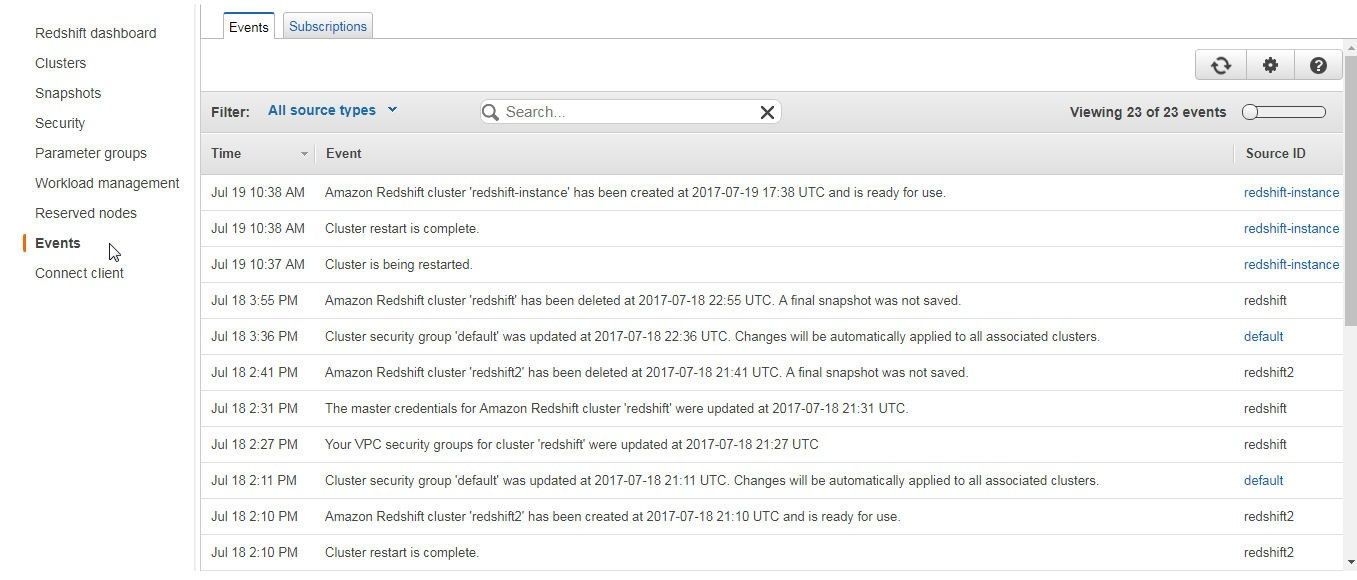
Figure 45. Redshift Cluster Events
Modifying Route Table for VPC
We need to add a route for the CIDR/IP for the Redshift cluster as a destination to the route table for the VPC in which the Redshift cluster is created. But first, we need to obtain the CIDR/IP of the Redshift cluster. Click on the Security tab in the Redshift dashboard and select the Security Groups tab. For the default security group copy the CIDR/IP, as shown in Figure 46.
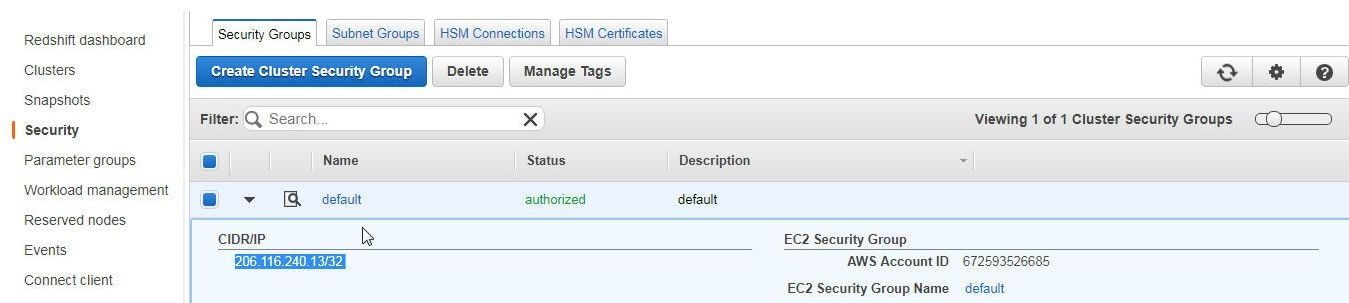
Figure 46. CIDR/IP of the Security Group for the Redshift Cluster
In the VPC dashboard select the VPC in which the Redshift cluster has been created and in Summary click on the Route table link, as shown in Figure 47.

Figure 47. Route table link for the VPC
In the Route Tables select the Routes tab and click on Edit, as shown in Figure 48, to add another route.
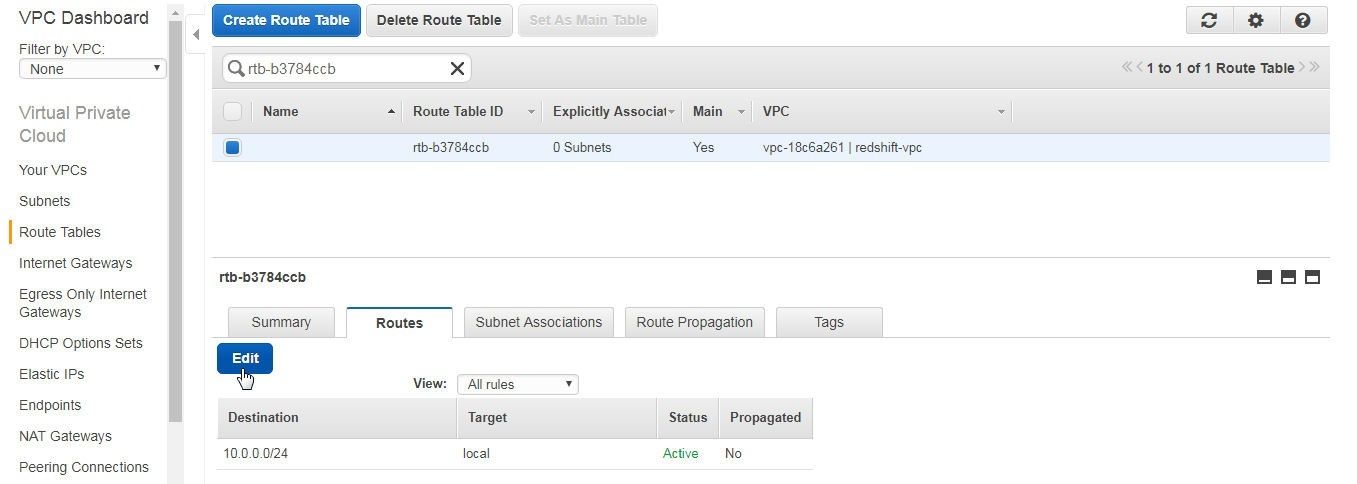
Figure 48. Route Table>Routes>Edit
Click on Add another route as shown in Figure 49.
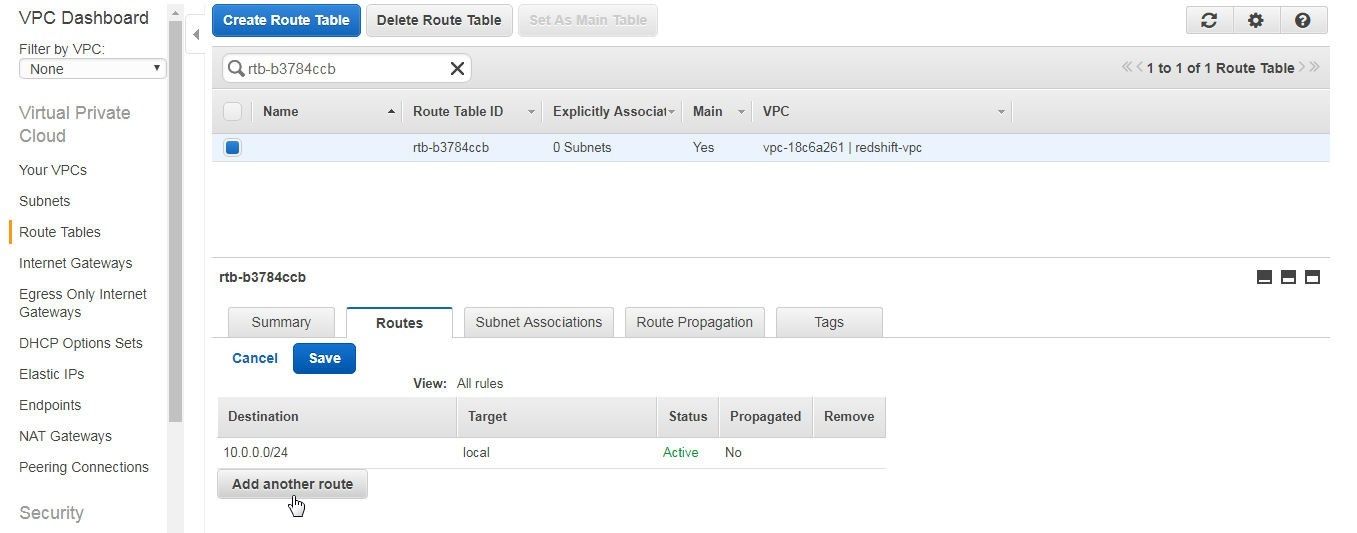
Figure 49. Add another route
Specify the CIDR/IP for the default security group for the Redshift cluster in the Destination and select the target as the Internet gateway igw-1 as shown in Figure 50.
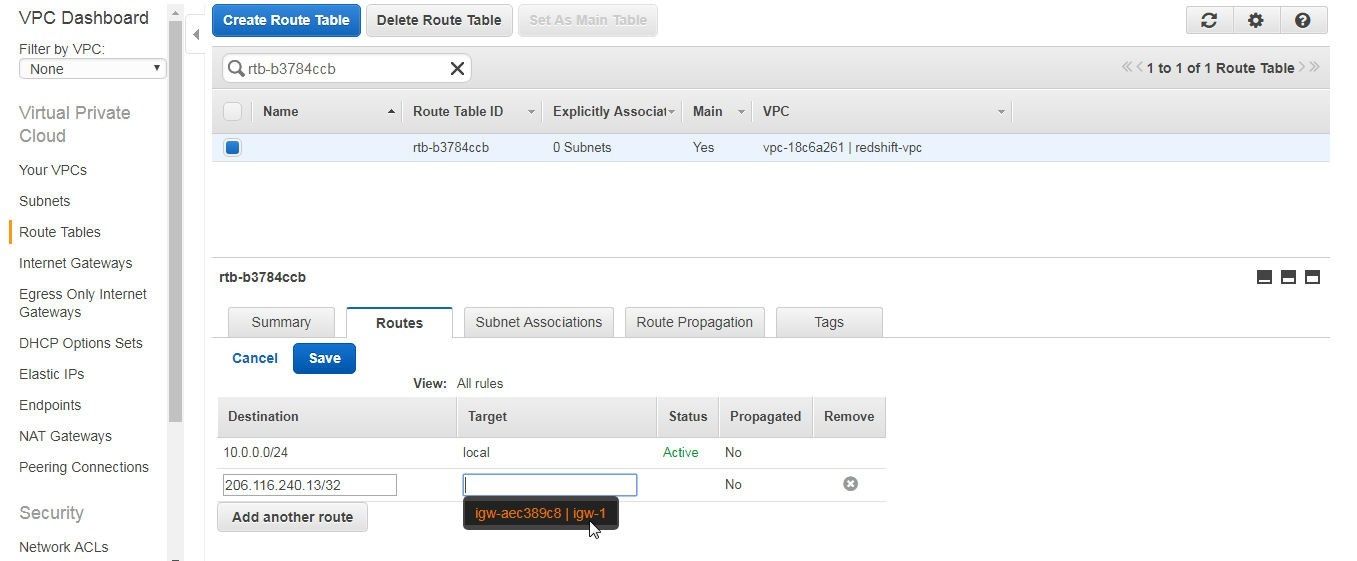
Figure 50. Adding a Route
Click on Save as shown in Figure 51.

Figure 51. Saving Route
A new route gets added, as shown in Figure 52.
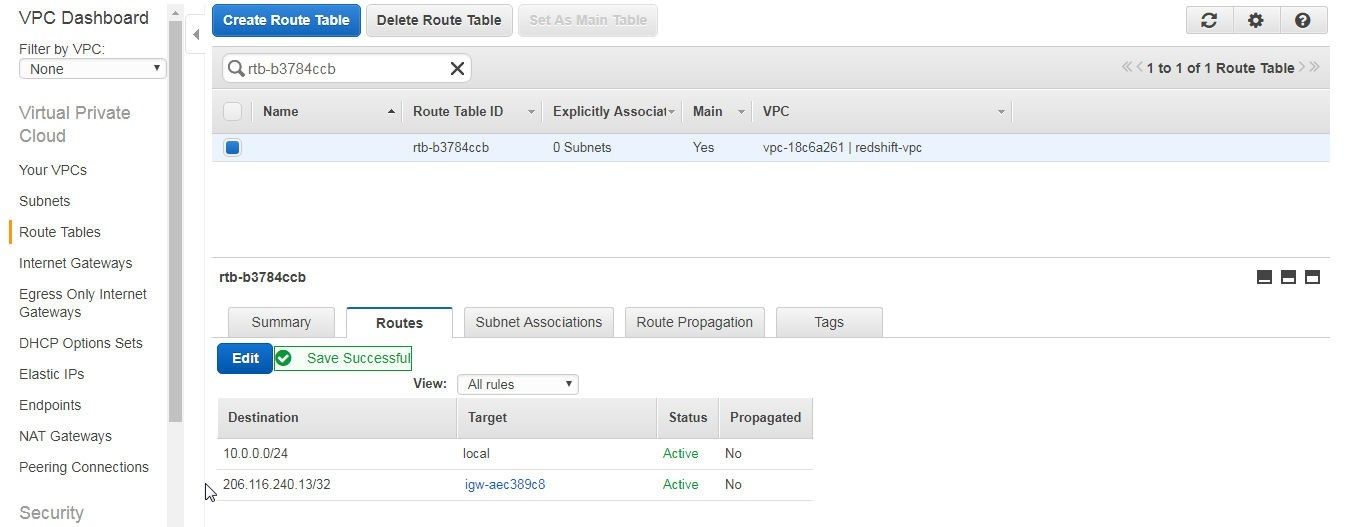
Figure 52. New Route for Redshift Cluster
The Subnet Associations tab lists the Subnets associated with the Route Table, as shown in Figure 53.
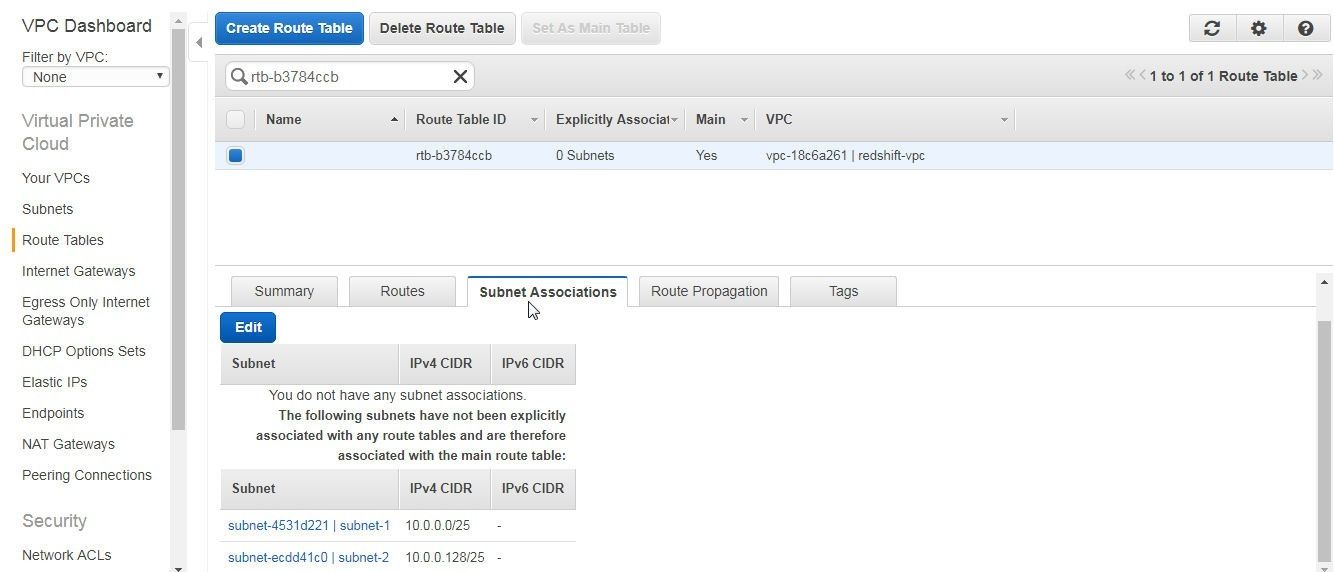
Figure 53. Subnet Associations for the Route Table
Modifying default Security Group Inbound/Outbound Rules
We also need to modify the Inbound/Outbound rules for the EC2 security group default associated with the VPC in which the Redshift cluster is created. Select the security group to be modified in the EC2 dashboard, select the Inbound tab, and click on Edit as shown in Figure 54.
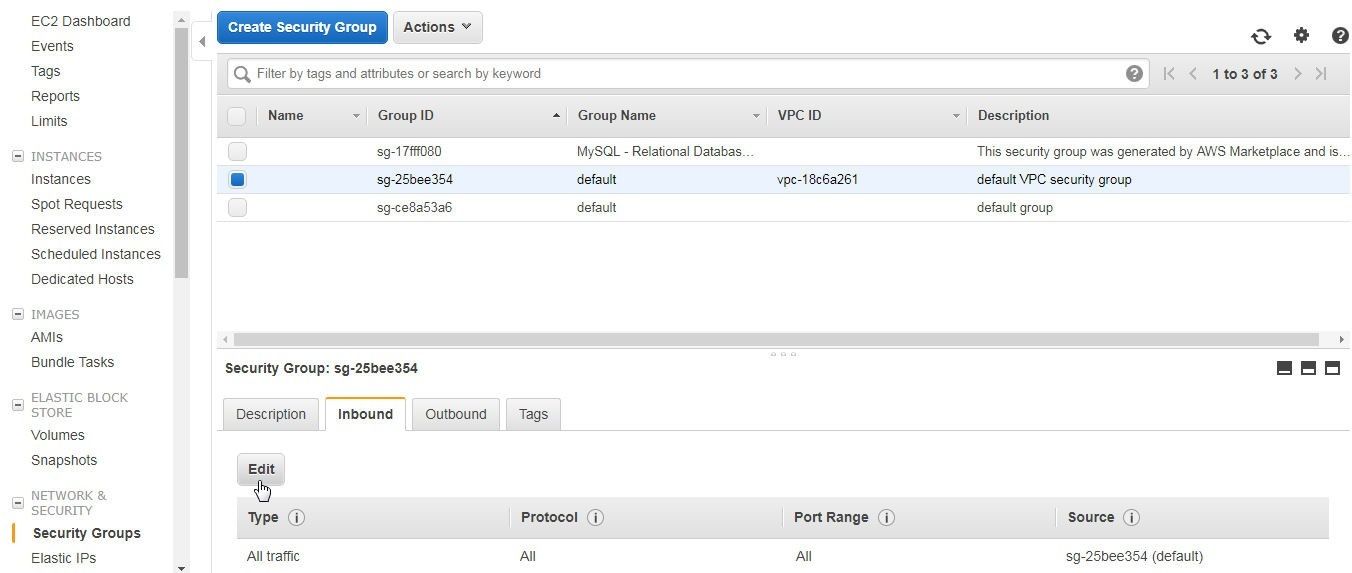
Figure 54. Security Groups>default>Inbound>Edit
In Edit inbound rules select Source as Anywhere and click on Save as shown in Figure 55.
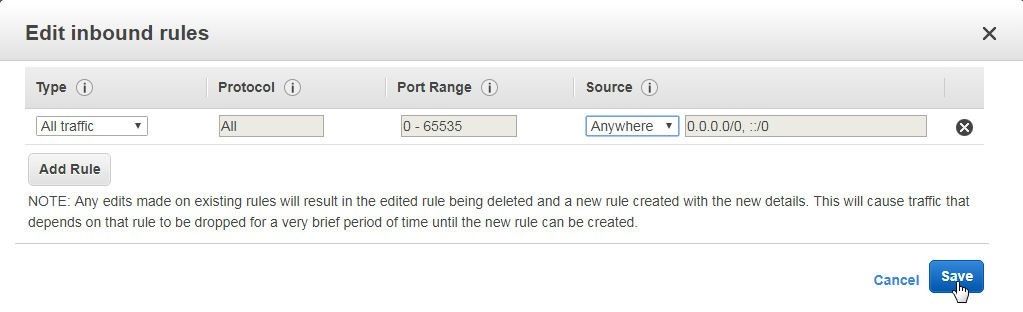
Figure 55. Edit inbound rules
The Inbound rule gets modified to allow All traffic, as shown in Figure 56.

Figure 56. Inbound Rule modified to allow All traffic
The Outbound rule also gets modified to allow All traffic, as shown in Figure 57.
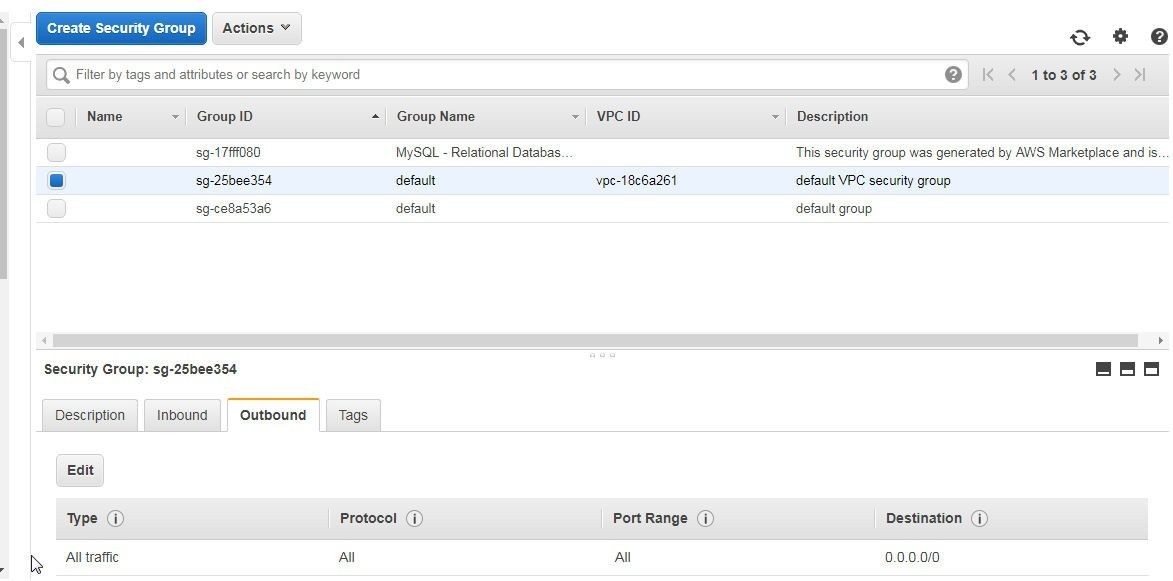
Figure 57. Outbound rule updated to allow All traffic
Conclusion to Part 1 of the Tutorial
In part one of this tutorial we have introduced using a Redshift cluster with Toad Data Point. So far, we have discussed only the prerequisites for using Redshift with Toad Data Point. In the second part of the tutorial we shall discuss connecting to Redshift using Toad Data Point, creating a table, and querying a table.
Start the discussion at forums.toadworld.com