In this post, we will go through the configuration of Db2 Data Server Driver v11.1 to communicate with the Db2 server via SSL. The pre-requirement for this post is to have a Db2 server configured for SSL. How to do it is described in my post Configure IBM Db2 LUW v11.1 for SSL Connections (self-signed certificate)
The current post also describes how to configure older clients (prior to version 10.5 FP 5). Not all the generated files are needed for all options. Read through the post and decide what to use according to your needs.
To generate a key database and certificates it is necessary to have a GSKit installed, but it is possible to generate all necessary files on the database server and move them to the client. We will do it this way.
In the certificate folder on the Db2 server there should be the following files:
- server.arm
- server.crl
- server.kdb
- server.rdb
- server.sth
Open the terminal and change the location to the folder where these files are located. Run the following command to create a client key store.
gsk8capicmd_64 -keydb -create -db "client.kdb" -pw "Passw0rd" –stash
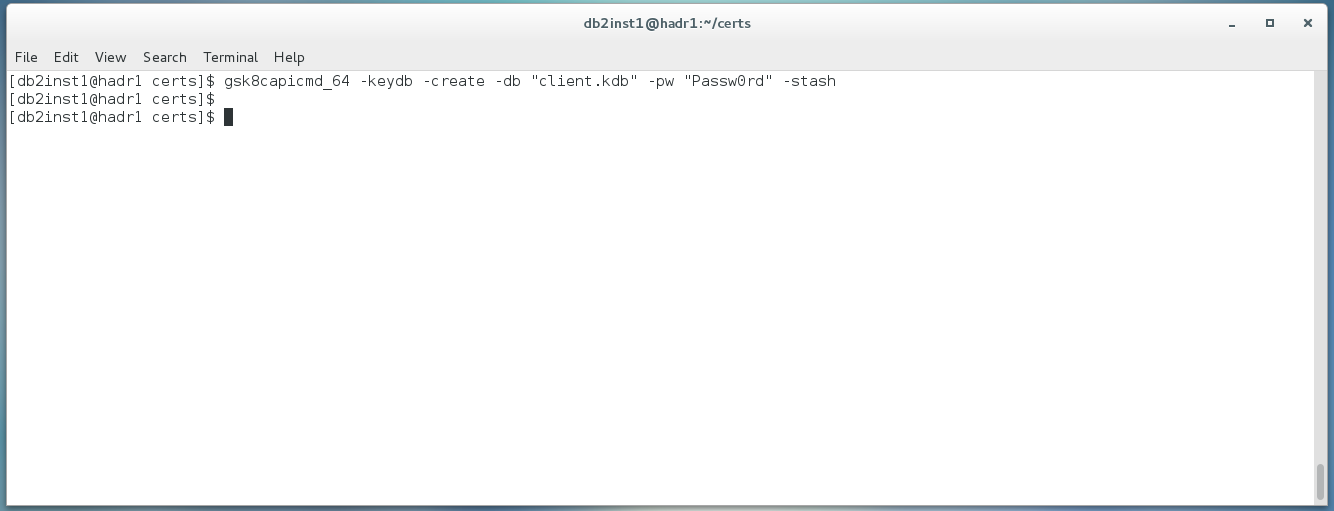
The explanation of the command parameters can be found in the post mentioned above.
To add a server certificate to the client key store run the following command:
gsk8capicmd_64 -cert -add -db "client.kdb" -pw "Passw0rd" -label "mylabel" -file "server.arm" -format ascii –fips
…where the path to the server certificate is defined in the –file parameter.
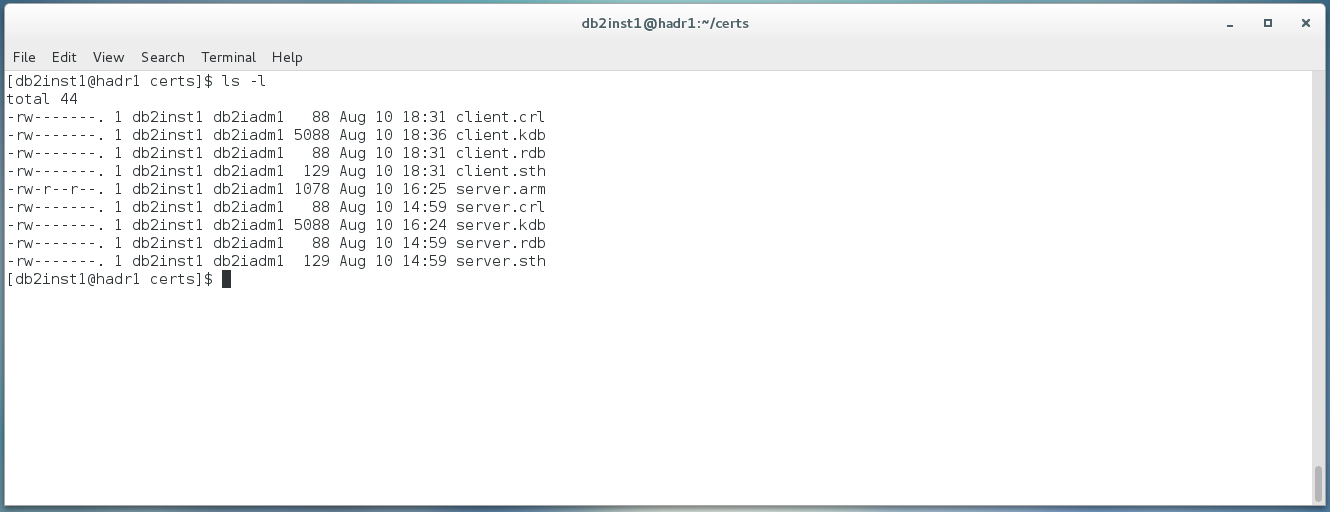
After you run this command there should be the following files in the folder:
- client.crl
- client.kdb
- client.rdb
- client.sth
- server.arm
- server.crl
- server.kdb
- server.rdb
- server.sth
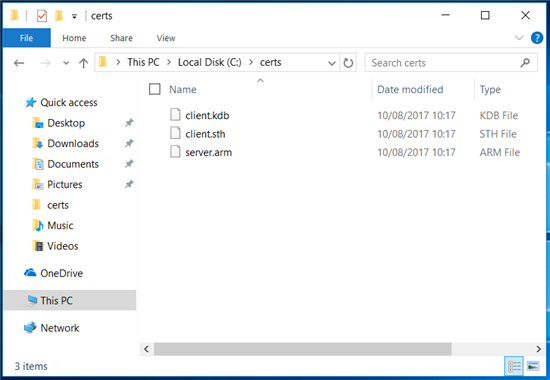
Move files client.sth, client.kdb (prior to v10.5 FP5) and server.arm to the client machine.
Versions prior the Db2 Client version 10.5 FP 5
If you have a client prior to the version 10.5 FP5 you need to install a GSKit to be able to establish an SSL connection to the database. The installation of a GSKit is not a part of Db2 Client installation.
How to install a GSKit on Windows can be found here:
http://www-01.ibm.com/support/docview.wss?uid=swg21631462
Don’t forget to make sure that the %GSKIT_HOME%/lib and %GSKIT_HOME%/bin directories are in the system PATH variable. The variable %GSKIT_HOME% points to the location where the GSKit is installed.
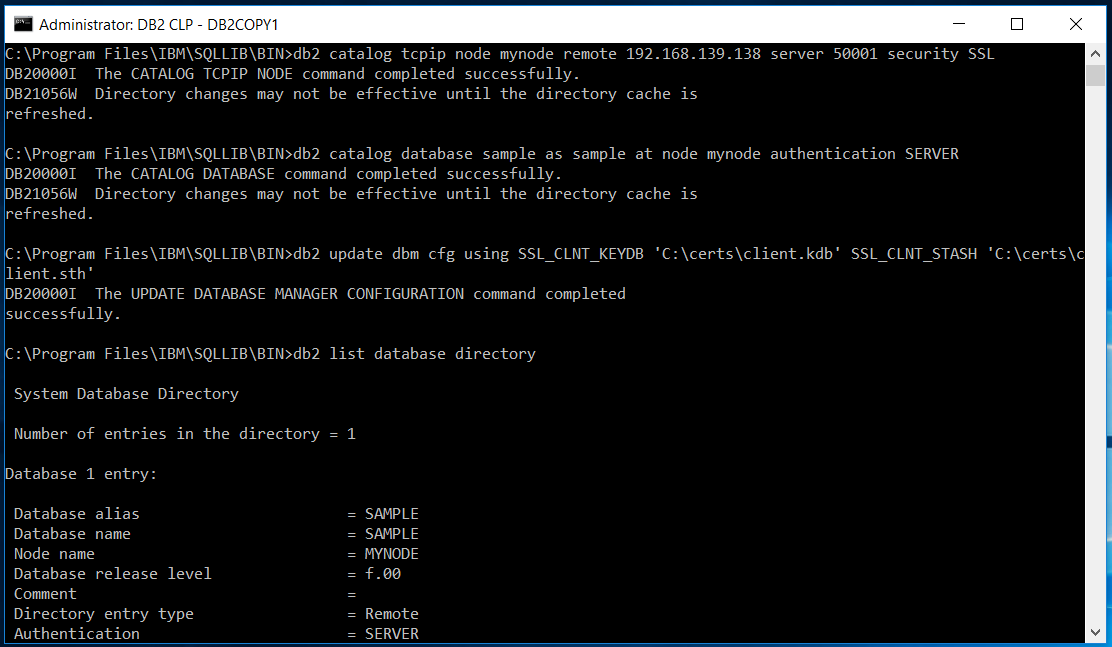
Configuration of the local DB2 client requires following commands:
db2 catalog tcpip node mynode remote 192.168.139.138 server 50001 security SSL
db2 catalog database sample as sample at node mynode authentication SERVER
db2 update dbm cfg using SSL_CLNT_KEYDB 'C:certsclient.kdb' SSL_CLNT_STASH 'C:certsclient.sth'
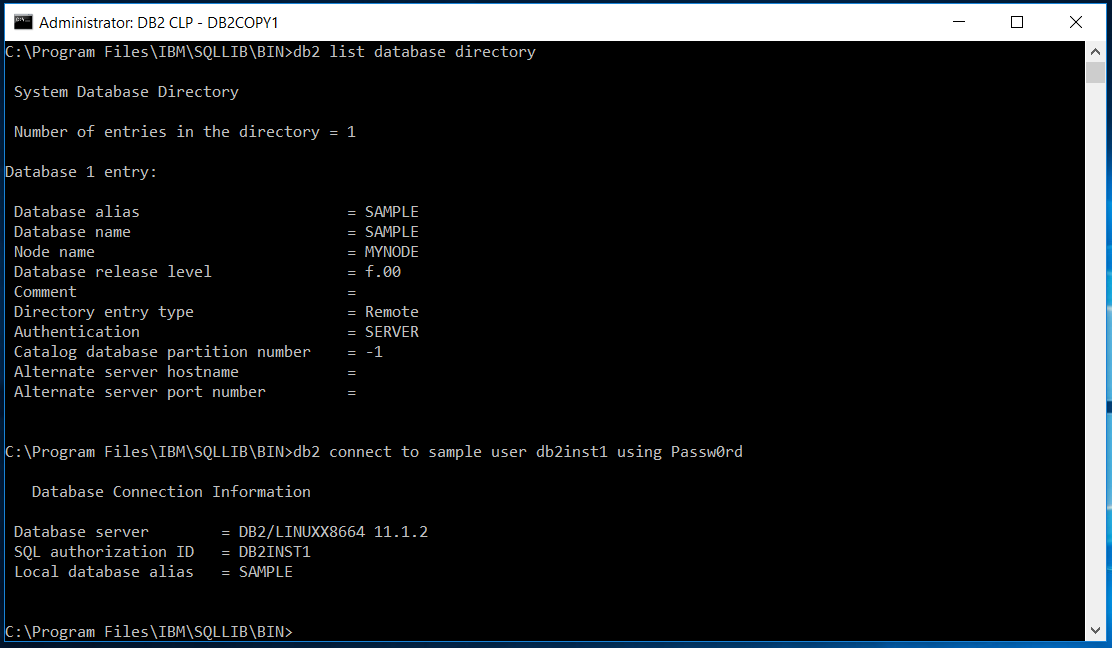
Next, list the catalogued databases.
db2 list database directory
You should see the SAMPLE database listed.
Try to connect to the database to see if is possible to establish the connection with the following command:
db2 connect to sample user <username> using <password>
The result should be like this:
IBM Db2 Client version 10.5 FP 5 and higher (Data Server Driver)
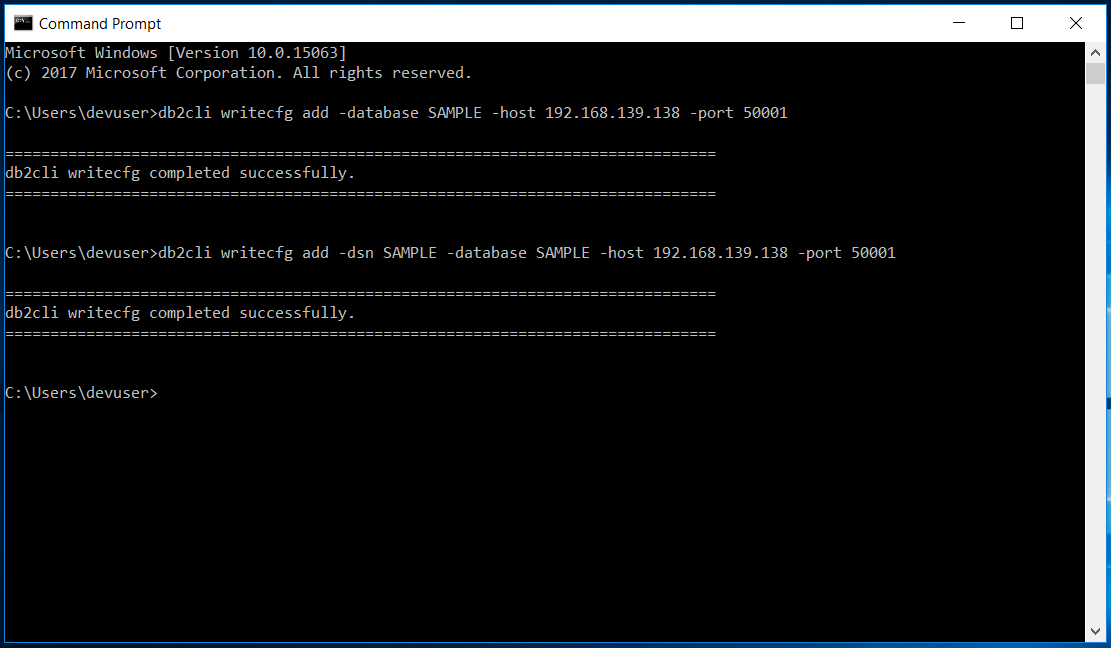
Open the CMD window and use commands to add the new connection to the Db2 driver. There is no need to install a GSKit. The client driver will create an internal key database and add the certificate to it.
To add a database ‘SAMPLE’ located on server 192.168.139.138 and port 50001, issue the following commands:
db2cli writecfg add -database SAMPLE -host 192.168.139.138 -port 50001
db2cli writecfg add -dsn SAMPLE -database SAMPLE -host 192.168.139.138 -port 50001
Now, because a self-signed certificate is used, we need to configure it with the client. In Db2 10.5 FP 5 we don’t need to use a stash file or key store file, only the server public key file.
In version 10.5 FP 5 and later we need only to add the server public key and activate SSL.
db2cli writecfg add -database SAMPLE -host 192.168.139.138 -port 50001 -parameter
    "SecurityTransportMode=SSL;SSLServerCertificate=C:certsserver.arm;"
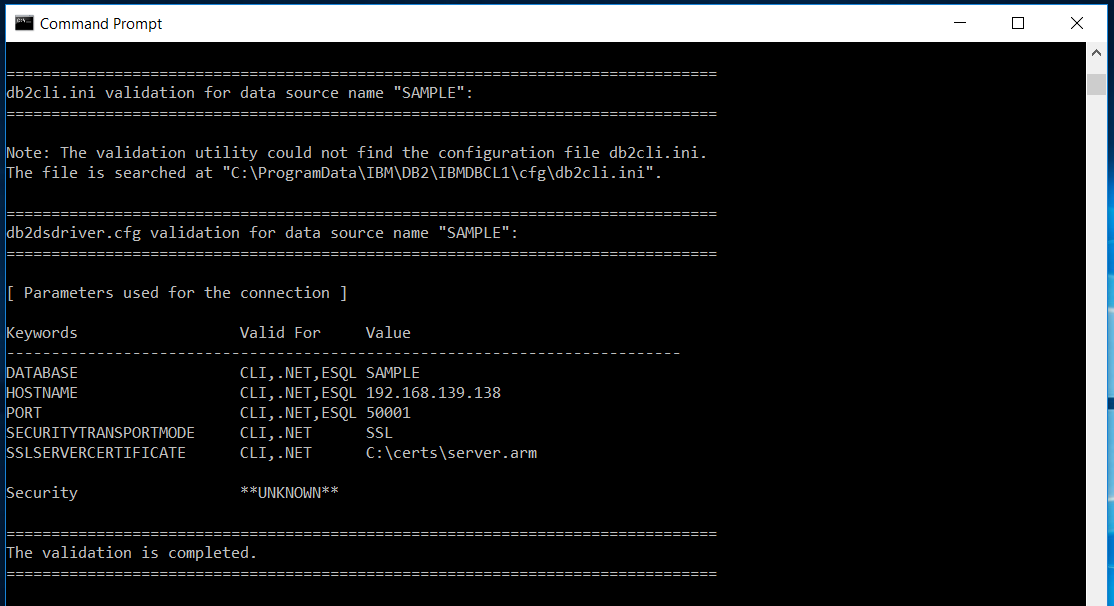
Check that the configuration is valid with the command:
db2cli validate –dsn SAMPLE
The last step is to test the connection:
testconn40 "DATABASE=alias;UID=userid;PWD=password;"
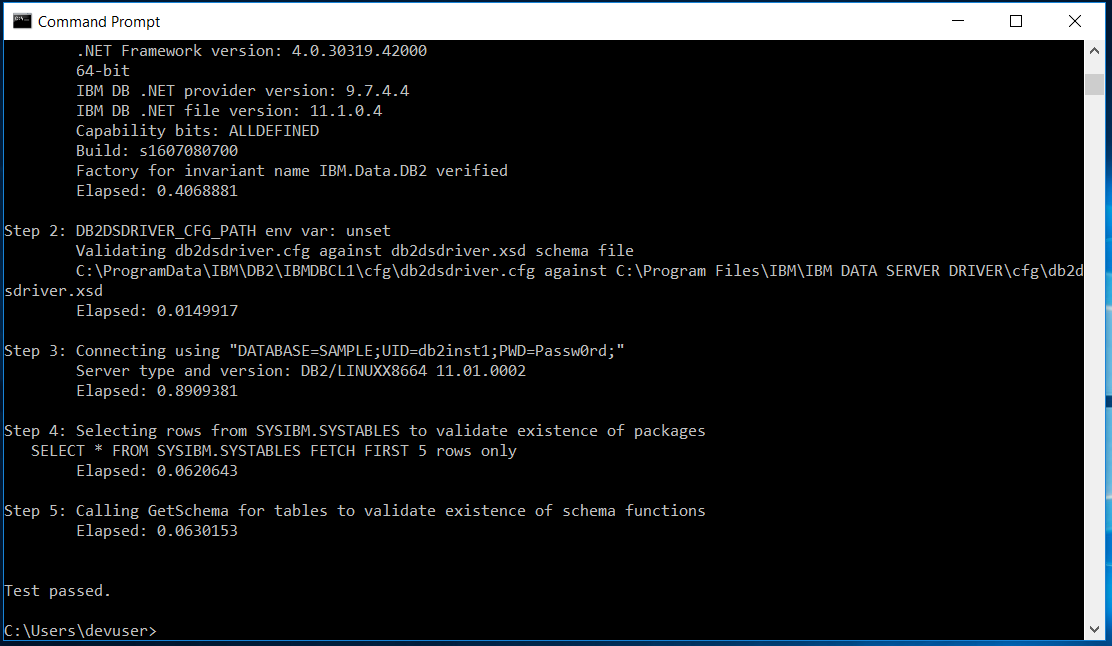
Perfect! We are able to connect.
Connection to the database using Toad for DB2.
Now open Toad for DB2 and try to connect to the database within the application.
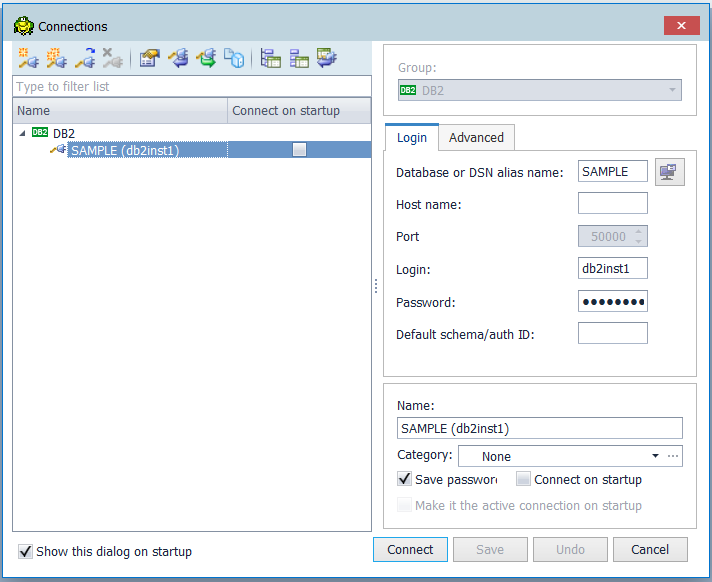

If you see database objects in the Database Explorer, you did the job.
In this post, we demonstrated configuring a Db2 Data Server client to use a self-signed SSL certificate. We discussed differences between the configuration for Db2 prior and after version 10.5 FP5 and for Db2 Client and Db2 Data Server Driver.
Source:
Try Toad for IBM DB2 for free
Are you in a trial now or just learning about Toad for IBM DB2? Find out which edition is right for you with our Toad for IBM DB2 functional matrix.
Like what you’ve learned so far about Toad for IBM DB2, why not try it for free for 30 days?

Already in a trial? Buy it now. Or request pricing.
Learn moreLearn more about Toad for IBM DB2 so you can spend less time managingDB2 and more time innovating. Data sheet: Toad for IBM DB2 ebook: Toad for IBM DB2 Tips and Tricks Questions?Start a discussion about this blog in the Toad World® forum, Toad for IBM DB2 . |
Help your colleagues
If you think your colleagues would benefit from this blog, share it now on social media with the buttons located at the top of this blog post. Thanks!
Start the discussion at forums.toadworld.com