In this tutorial we shall discuss creating a Kubernetes cluster on Amazon Elastic Kubernetes Service (EKS) running MySQL database and accessing the database with Toad Edge.
Docker is the de facto containerization platform and Kubernetes is the most commonly used production-grade orchestration platform for Docker. AWS is the #1 cloud platform used for Kubernetes. Without a managed service, installing Kubernetes on AWS is quite an involved process. Amazon Elastic Container Service for Kubernetes (Amazon EKS) is a managed service for Kubernetes on AWS. The benefits of EKS are as follows:
- The Kubernetes infrastructure is fully managed
- Highly available as nodes are spread across multiple availability zones and failure of a single zone does not make a Kubernetes containerized application unavailable
- Secure with integration with IAM
- Virtual Private Cloud (VPC) provides service isolation
- Kubernetes standards conformant. Any Kubernetes application may be migrated to EKS.
This tutorial consists of two articles, having the following sections.
Setting the Environment
Installing kubectl
Installing AWS IAM Authenticator for Kubernetes
Installing AWS CLI
Creating an IAM Role
Creating a VPC and Subnets
Creating EKS Cluster
Configuring kubeconfig for kubectl
Launching Worker Nodes
Joining Worker Nodes with Cluster
Creating a Kubernetes Replication Controller for MySQL
Creating a Kubernetes Service for MySQL
Creating a Connection
Creating a Table
Querying Table
Exporting Result Set
Setting the Environment
Create an AWS account. Download and install Toad Edge 2.0.2. Download the binaries for kubectl, a tool to manage a Kubernetes cluster. Download the kubectl.exe to a directory (C:\EKS) and add the directory to the PATH environment variable. The kubectl version may be output with the following command.
kubectl version –short –client
As the output in Figure 1 indicates, the kubectl version is 1.10.3.
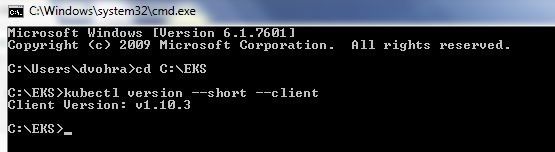
Figure 1. Outputting kubectl Version
Download the binaries for the AWS IAM Authenticator for Kubernetes, which is used to authenticate with the EKS, to the same directory as kubectl. Download and install AWS CLI. Add to PATH environment variable the C:\Program Files\Amazon\AWSCLI\bin directory, which has the aws application.
Create an Access Key to the AWS account by selecting Create New Access Key on the Security Credentials page for the account. An existing access key that is active may also be used if its Access Key ID and Secret Access Key are known. The Access Key ID of an active existing access key is listed on the Security Credentials page but the Secret Access Key is not. Add environment variables AWS_ACCESS_KEY_ID and AWS_SECRET_ACCESS_KEY and set their value to Access Key ID and Secret Access Key, respectively. Also configure AWS CLI with the following command-line command.
aws configure
Configuring the AWS CLI is essential if the EKS cluster is to be created on the command-line with the eks application. Specify the AWS Access Key ID and AWS Secret Access Key when prompted for. Also specify the Default region name and Default output format when prompted for, as shown in Figure 2.
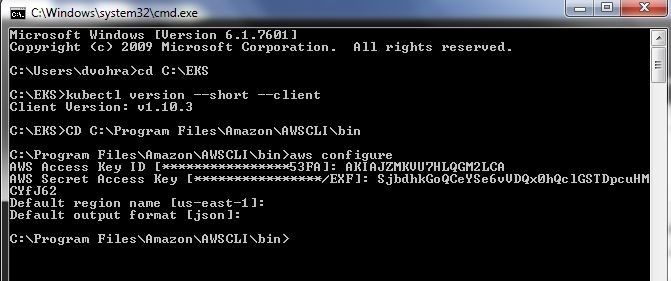
Figure 2. Configuring AWS CLI
We shall be using the EKS Console to create a cluster and not the eks on command-line.
Creating an IAM Role
AWS resources such as an elastic load balancer are created when an EKS cluster is created and Kubernetes assumes the role to create the new resources. We need to grant permissions to Kubernetes (EKS) to create the resources. In this section we shall create an IAM role that we shall use later to create an EKS cluster.
Navigate to the IAM Console at https://console.aws.amazon.com/iam/ and select Roles in the navigation margin. Click on Create Role, as shown in Figure 3, to create a new role.
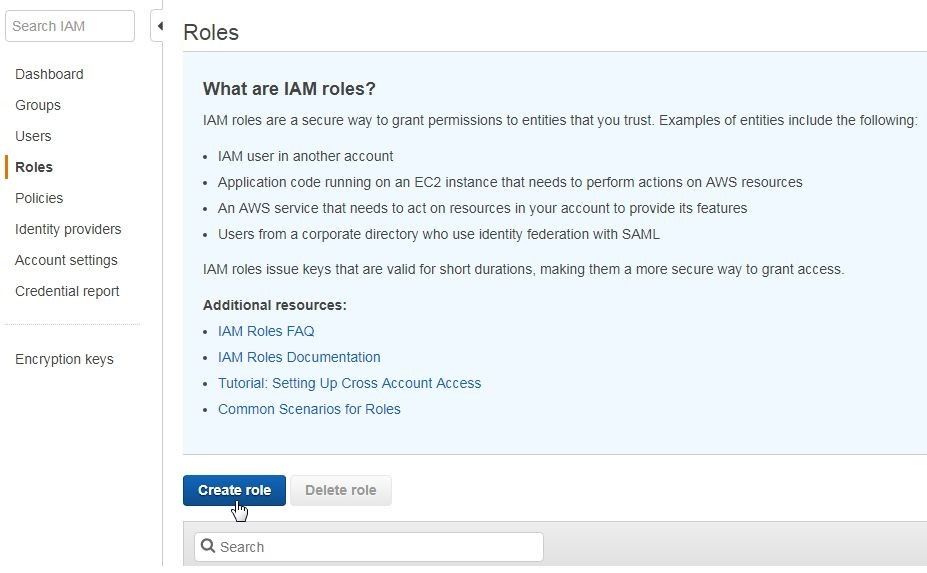
Figure 3. Roles>Create role
In Choose the service that will use this role, select EKS as shown in Figure 4.
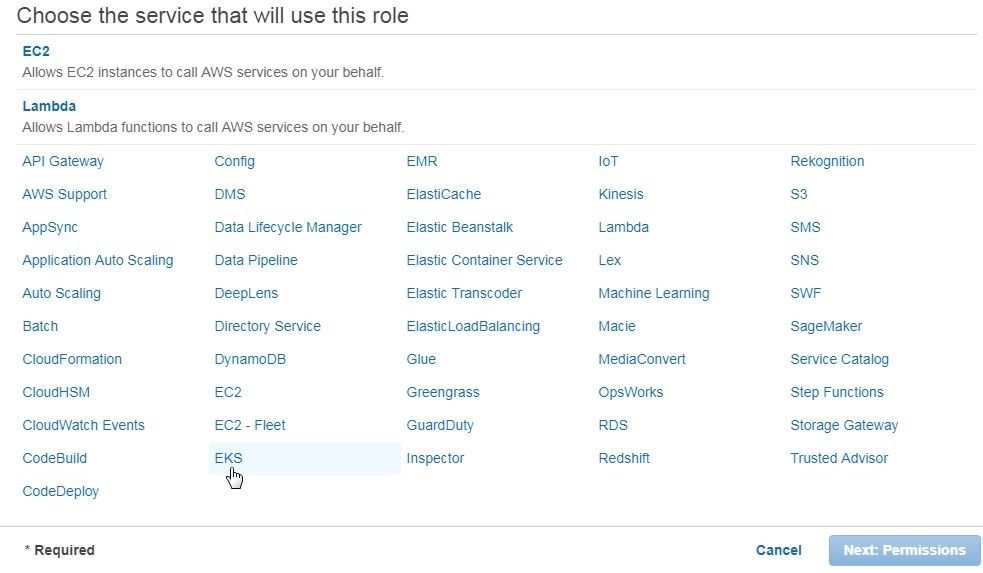
Figure 4. Choosing Service to Create Role for as EKS
Click on Next:Permissions as shown in Figure 5.
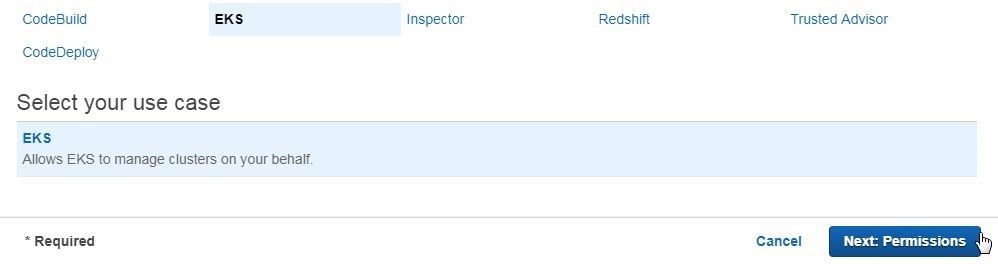
Figure 5. Next:Permissions
The two policies discussed in Table 1 are listed by default, as shown in Figure 6.
Table 1. Policies for EKS
| Policy | Description |
| AmazonEKSServicePolicy | This policy allows Amazon Elastic Container Service for Kubernetes to create and manage the necessary resources to operate EKS Clusters. |
| AmazonEKSClusterPolicy | This policy provides Kubernetes the permissions it requires to manage resources on your behalf. Kubernetes requires Ec2:CreateTags permissions to place identifying information on EC2 resources including but not limited to Instances, Security Groups, and Elastic Network Interfaces. |
Click on Next:Review as shown in Figure 6.

Figure 6. EKS Policies
In the Review page of the Create role dialog specify a Role name (eksServiceRole) and click on Create role as shown in Figure 7.
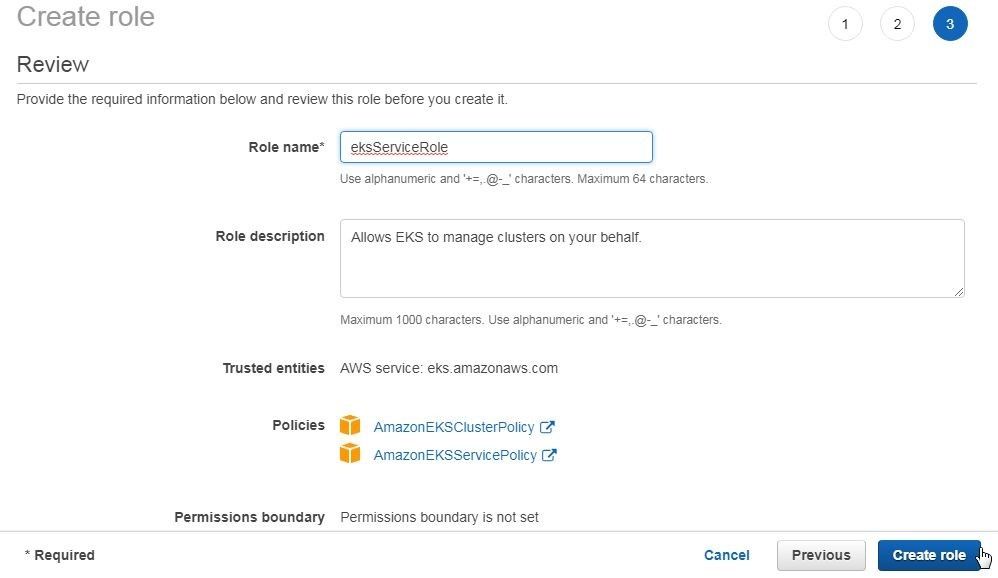
Figure 7. Create role>Review>Create role
A new role gets created, as shown in Figure 8.

Figure 8. New role created
The default policies added apply only to the EKS service and cluster. For worker nodes we need to add two more policies, discussed in Table 2.
Table 2. Policies for Worker Nodes
| Policy | Description |
| AmazonEKS_CNI_Policy | This policy provides the Amazon VPC CNI Plugin (amazon-vpc-cni-k8s) the permissions it requires to modify the IP address configuration on your EKS worker nodes. This permission set allows the CNI to list, describe, and modify Elastic Network Interfaces on your behalf. |
| AmazonEKSWorkerNodePolicy | This policy allows Amazon EKS worker nodes to connect to Amazon EKS Clusters. |
Click on the link for the eksServiceRole in Roles table shown in preceding Figure (Figure 8) and click on Attach policies as shown in Figure 9 to add these policies.

Figure 9. Roles>eksServiceRole>Attach policies
In the Attach Permissions search for “eks” using the Filter policies field and select the two policies listed as shown in Figure 10. Click on Attach policy.
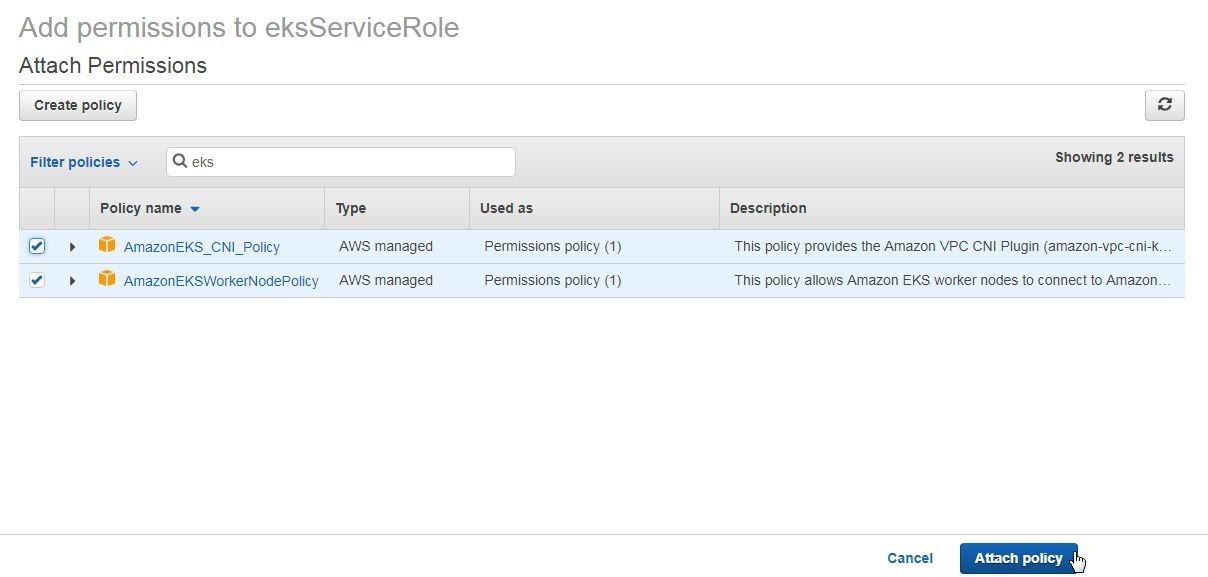
Figure 10. Adding policies for worker nodes
The two policies get added to theeksService Role. EKS provides several other API actions that are used to list EKS clusters, describe a cluster, and delete a cluster, to mention a few. If the role we have created is to be used by an IAM user that shall be used to administer EKS, these API actions may also be added to the role. Next, we shall add an inline policy that contains one or more of these EKS API actions. Click on Add inline policy as shown in Figure 11.
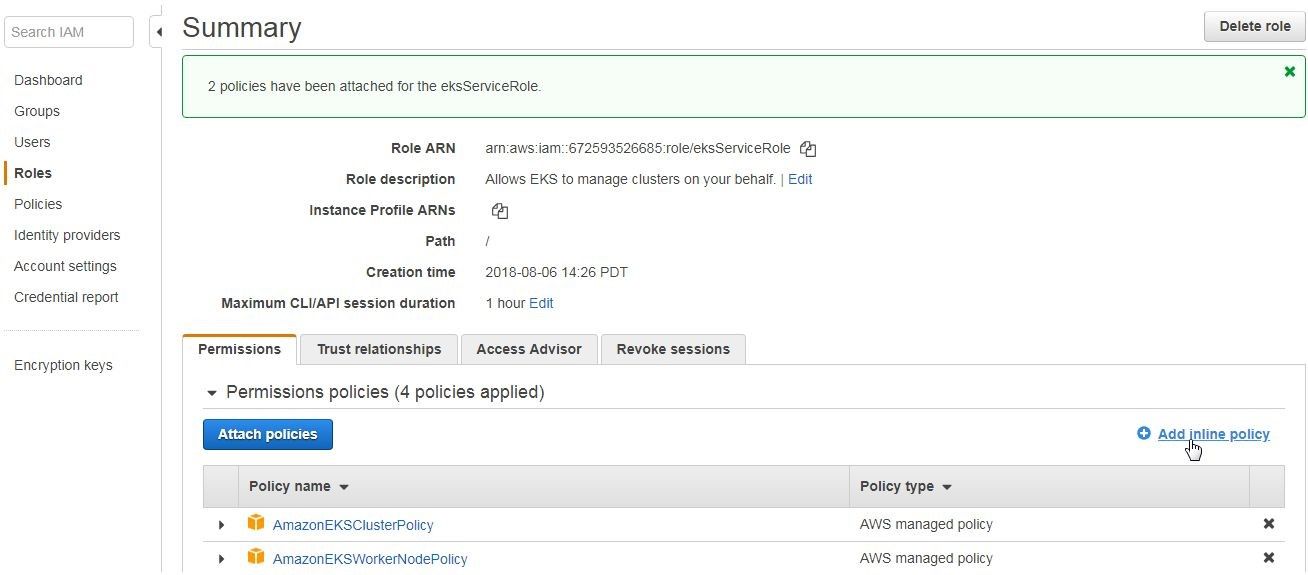
Figure 11. Add inline policy
In the Create policy page add the following inline policy in the field provided in the JSON tab, as shown in Figure 12. The inline policy listed allows all API actions on all resources, as indicated by the eks:* in the Action array, and may be modified to add only specific API actions on specific resources.
{
“Version”: “2012-10-17”,
“Statement”: [ {
“Effect”: “Allow”,
“Action”: [
“eks:*”
],
“Resource”: “*”
} ]
}
The inline policy listed allows all API actions on all resources as indicated by the eks:* in the Action array and may be modified to add only specific API actions on specific resources.
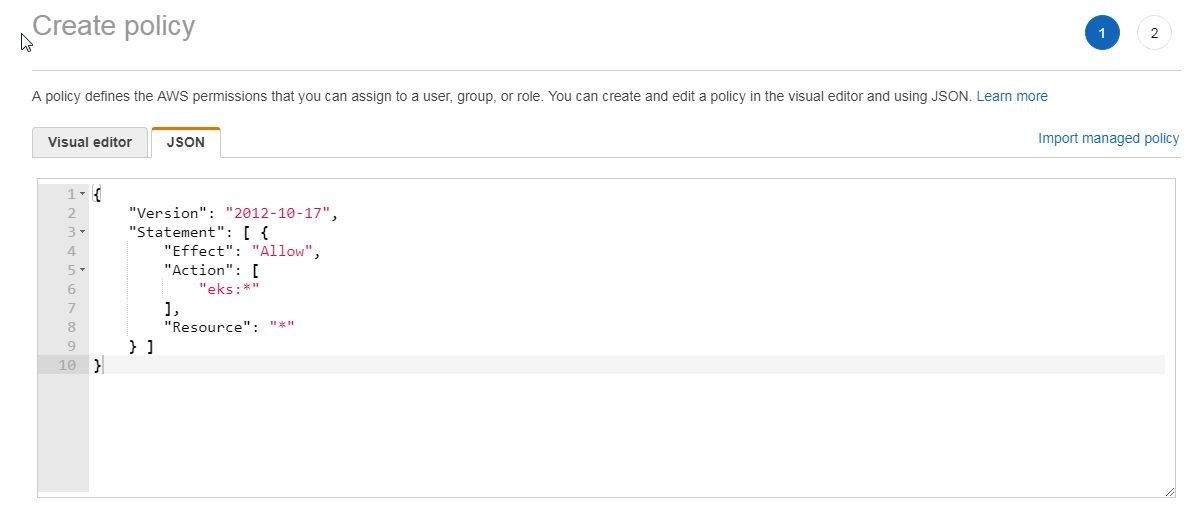
Figure 12. Create policy JSON
Click on Review policy as shown in Figure 13.
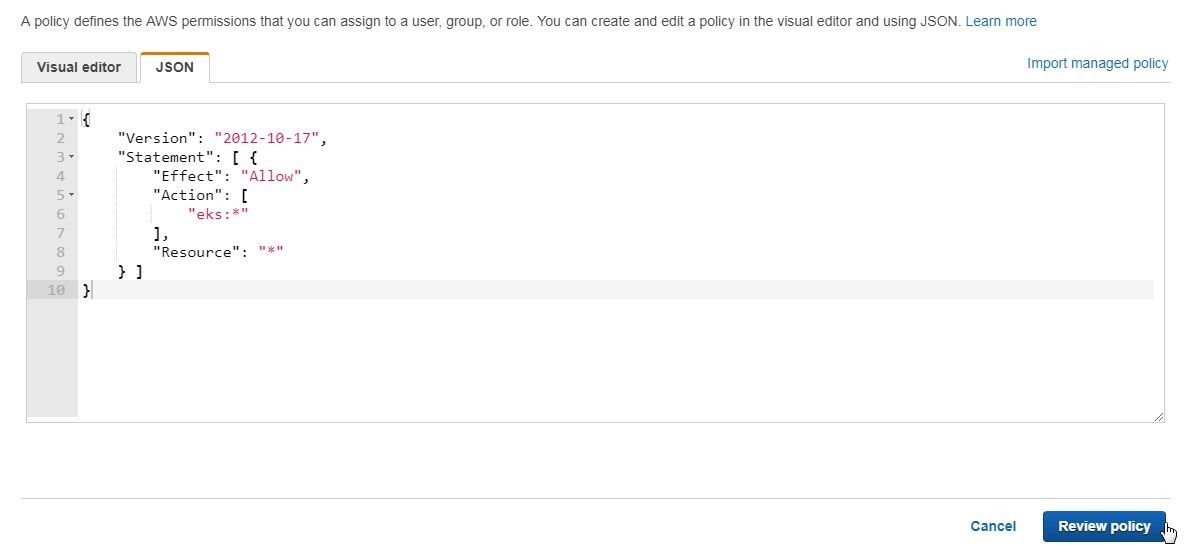
Figure 13. Review policy
In the Review policy page specify a policy name (eks) in the Name field and click on Create policy as shown in Figure 14.
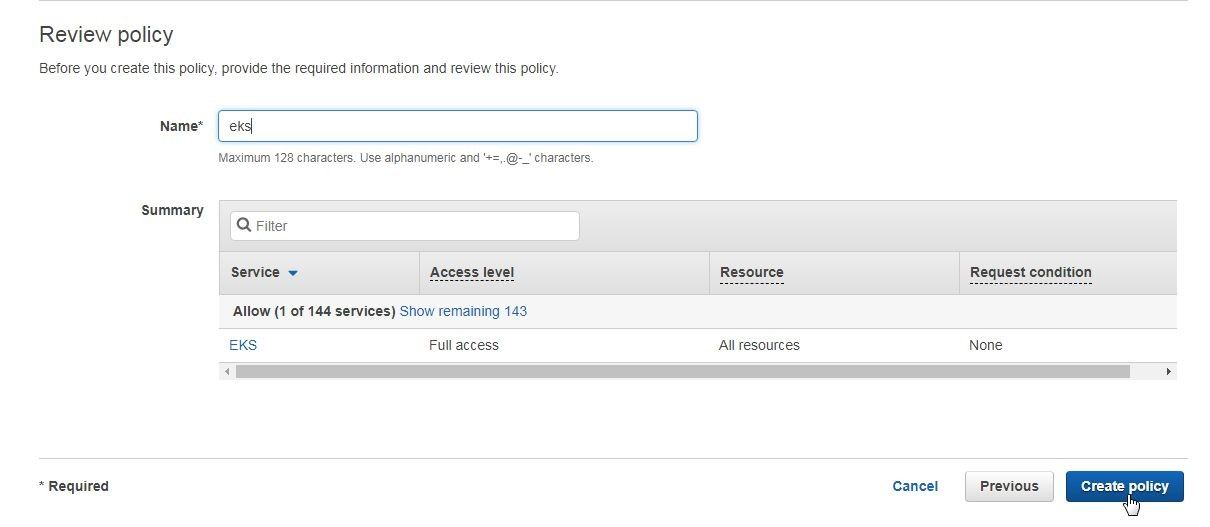
Figure 14. Review policy>Create policy
The policies in the eksServiceRole role are shown in Figure 15.
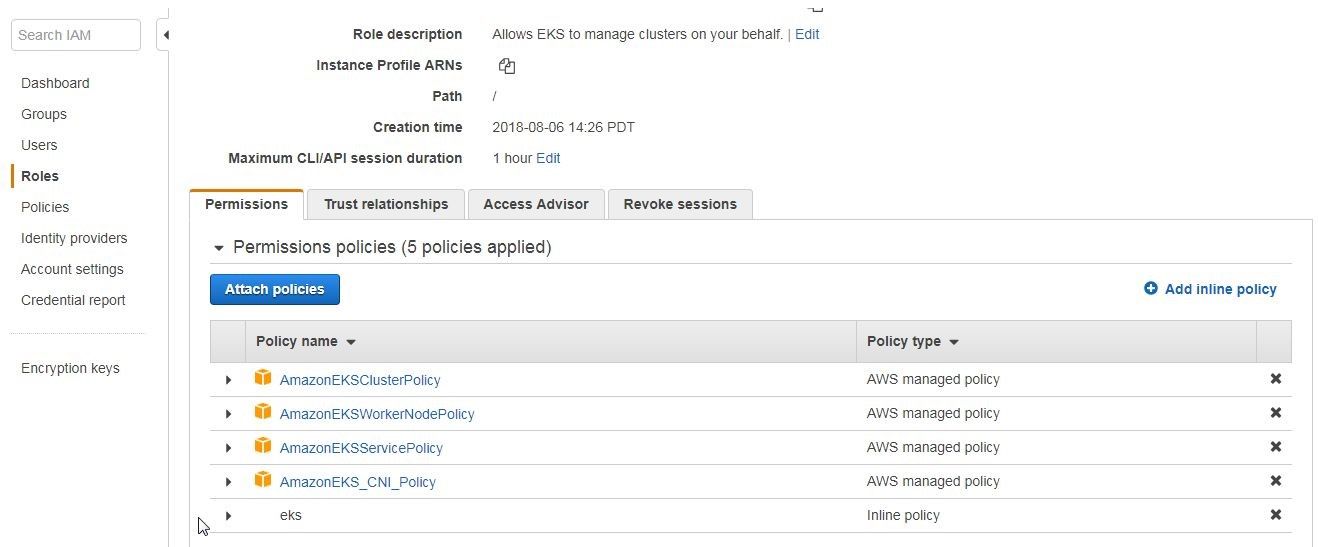
Figure 15. Policies in eksService Role
We shall need the role ARN (Amazon Resource Name) to select or specify the role when creating the EKS cluster. Click on Copy to clipboard as shown in Figure 16 to copy the Role ARN.
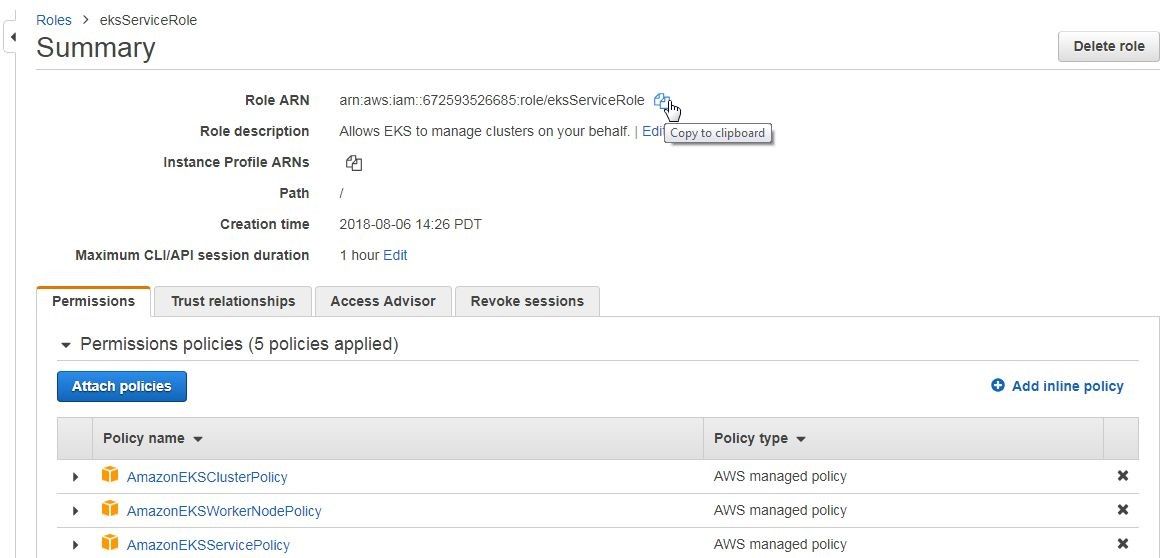
Figure 16. Copying Role ARN
Creating a VPC and Subnets
In this section we shall create a VPC including Subnets and SecurityGroups for the EKS cluster. We shall use the AWS CloudFormation service to create the resources for the VPC using a sample CloudFormation stack template. Select an AWS region that supports EKS, as not all regions support EKS. Navigate to the CloudFormation service with URL https://console.aws.amazon.com/cloudformation/ and click on Create new stack as shown in Figure 17.
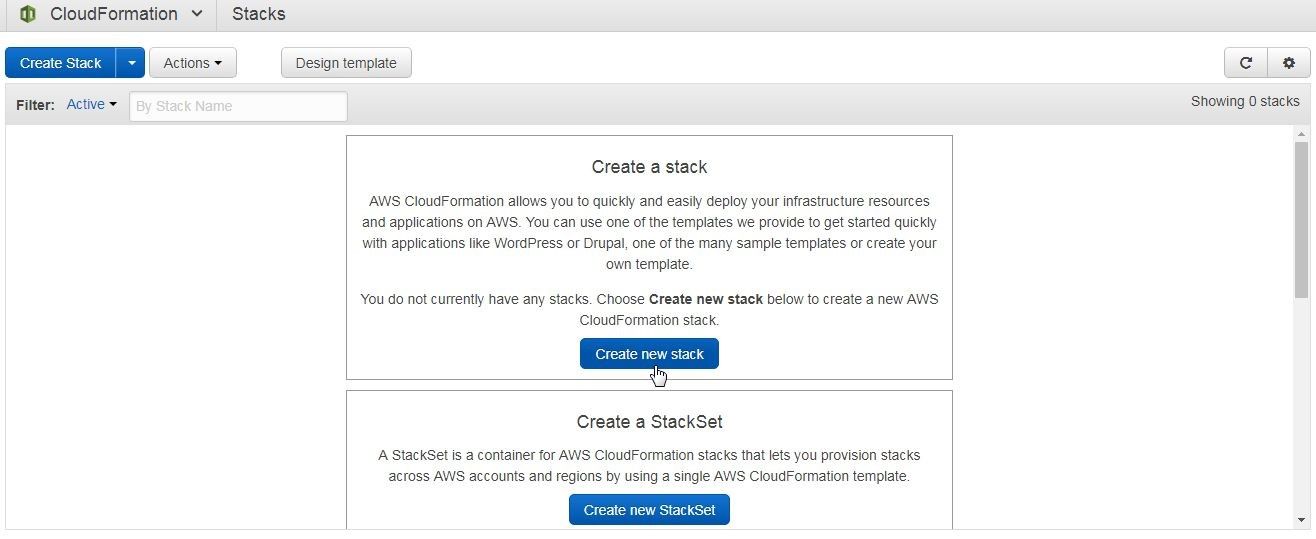
Figure 17. Create new stack
In the Create stack wizard, first a template needs to be created or selected. A stack is a JSON/YAML format file that describes the stack’s resources and associated properties. The Select template page has the option to design a template using the AWS CloudFormation Designer. Or, an existing sample template may be chosen. A template may be uploaded to S3 from a local machine. An S3 template URL may be specified. Specify the template URL https://amazon-eks.s3-us-west-2.amazonaws.com/1.10.3/2018-07-26/amazon-eks-vpc-sample.yaml, which is for an EKS VPC sample template on S3, as shown in Figure 18. Click on Next.
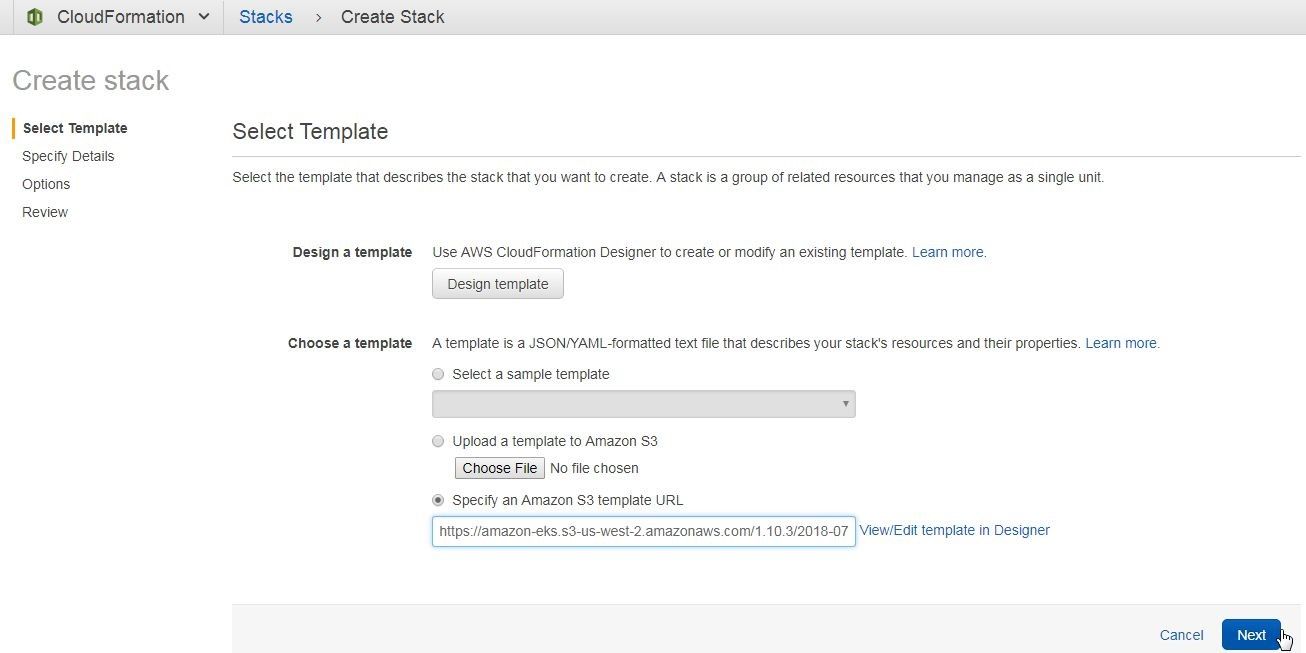
Figure 18. Selecting a Template
Next, specify the VPC details as shown in Figure 19. Specify a Stack name (eks-vpc). For the Worker Network Configuration specify CIDR range for each of parameters VPC Block, Subnet01 Block, Subnet02 Block and Subnet03 Block. Keep the default values provided and click on Next.
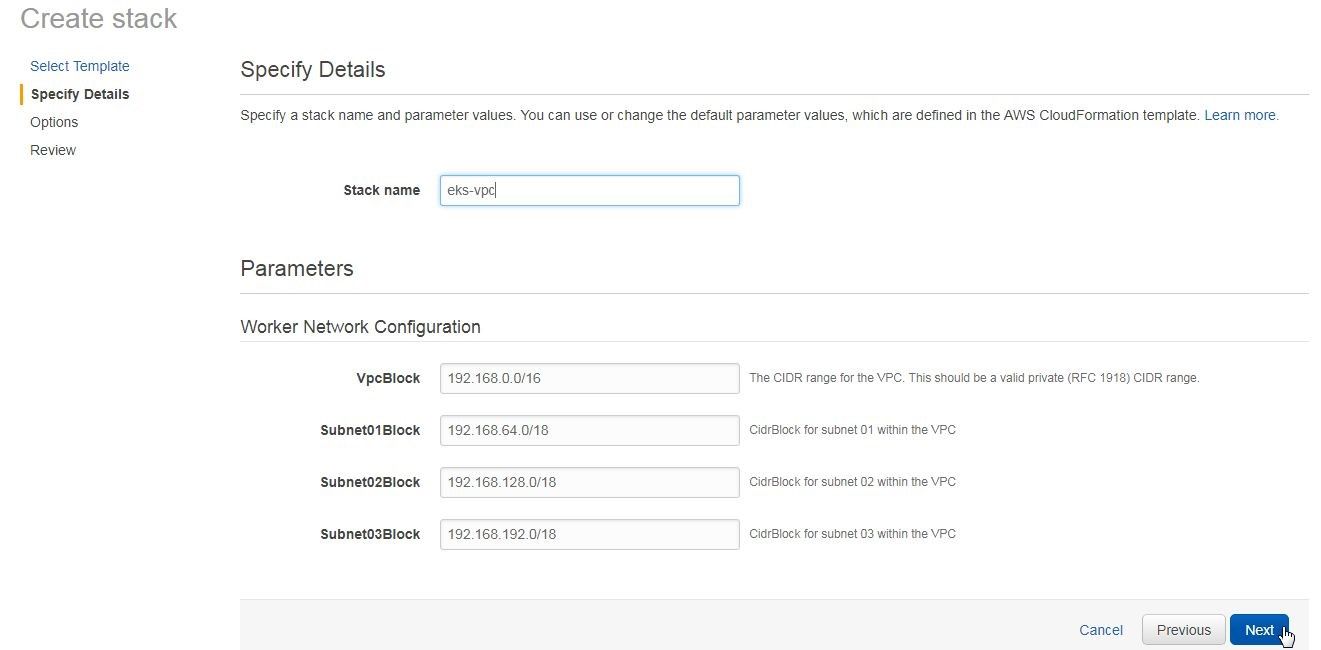
Figure 19. Specifying VPC Details
Next, specify optional settings, such as tags, in the Options page. We don’t need to specify any options. Click on Next. In Review the summary of the stack is displayed, as shown in Figure 20. Scroll down and click on Create.

Figure 20. Review Stack
A new CloudFormation stack gets created, as shown in Figure 21.
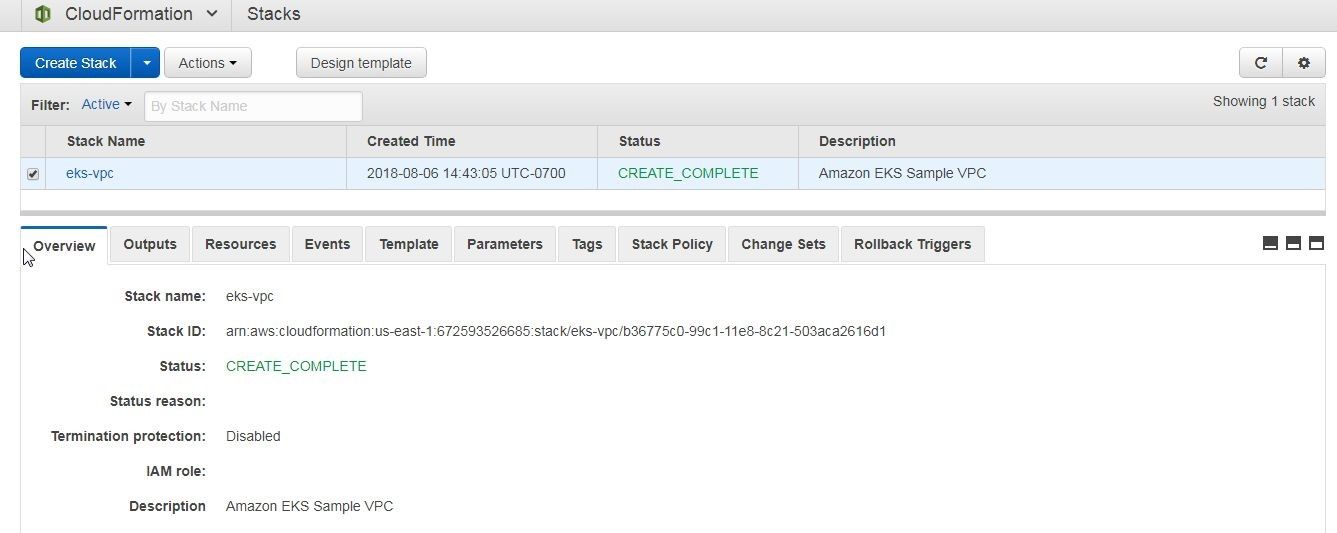
Figure 21. CloudFormation Stack
The Outputs tab lists the VPC, Subnets and Security Groups, as shown in Figure 22.
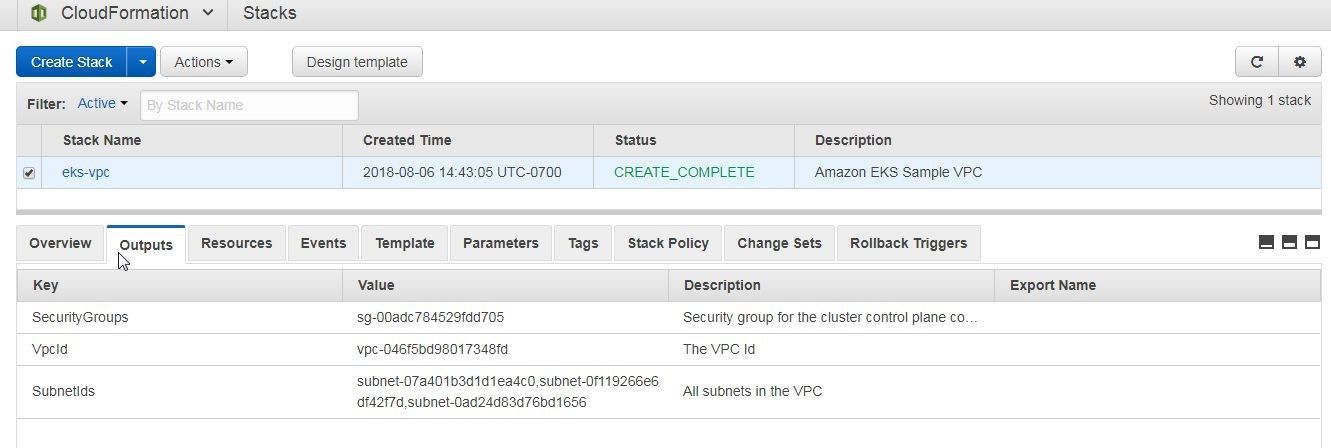
Figure 22. Outputs
We shall need their value when creating an EKS cluster. To copy an output value right-click on the value and select Copy as shown in Figure 23.
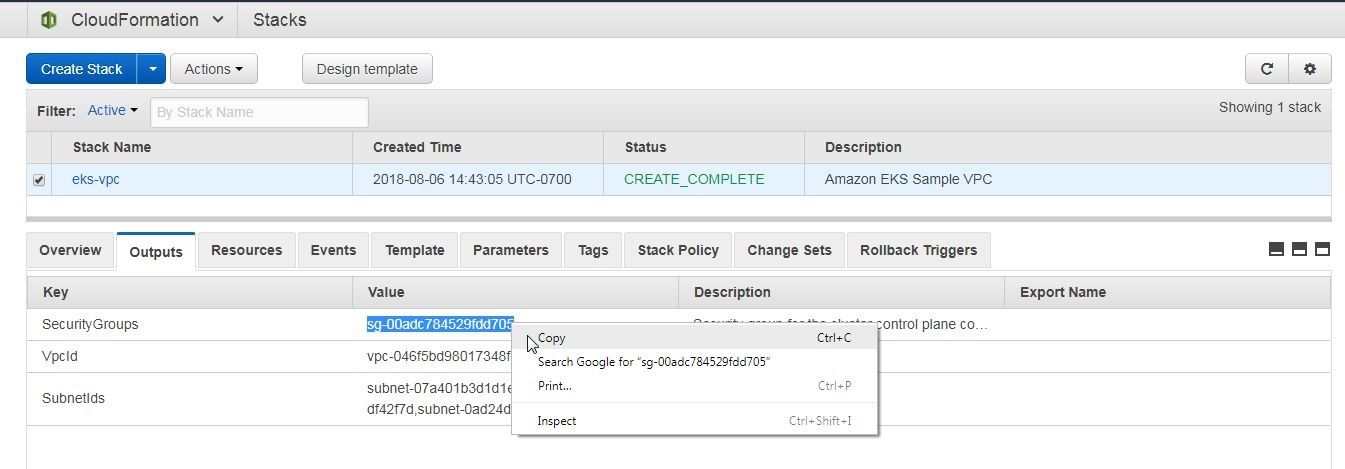
Figure 23. Copying an Output Value
Creating an EKS Cluster
In this section we shall create an EKS Cluster using the AWS EKS service. Navigate to the EKS Service page at URL https://aws.amazon.com/eks/. Click on Start Using Amazon EKS. In the Amazon EKS service page the Create EKS cluster wizard is displayed. Specify the Cluster name (mysql) and click on Next step as shown in Figure 24.
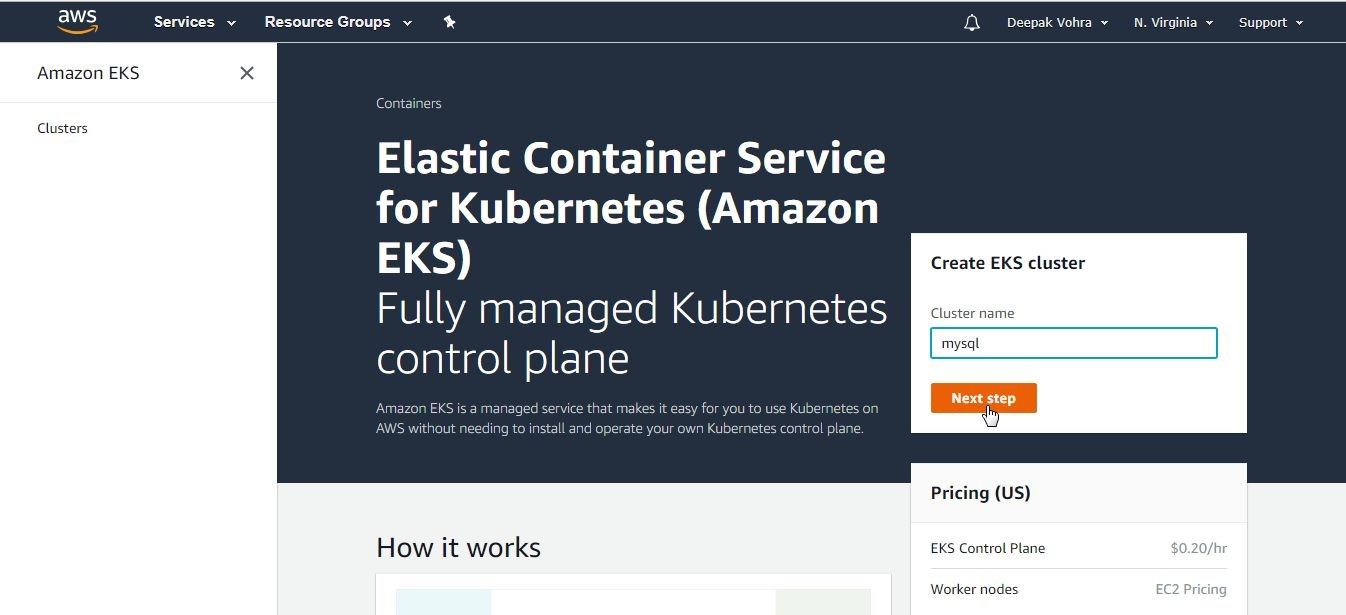
Figure 24. Create EKS Cluster
The Create cluster wizard displays the Cluster configuration page; in which, the Cluster name is already specified from the previous screen. The Kubernetes version is 1.10, as shown in Figure 25. Specify the Role ARN by selecting an IAM Role, the eksServiceRole, which we created earlier.
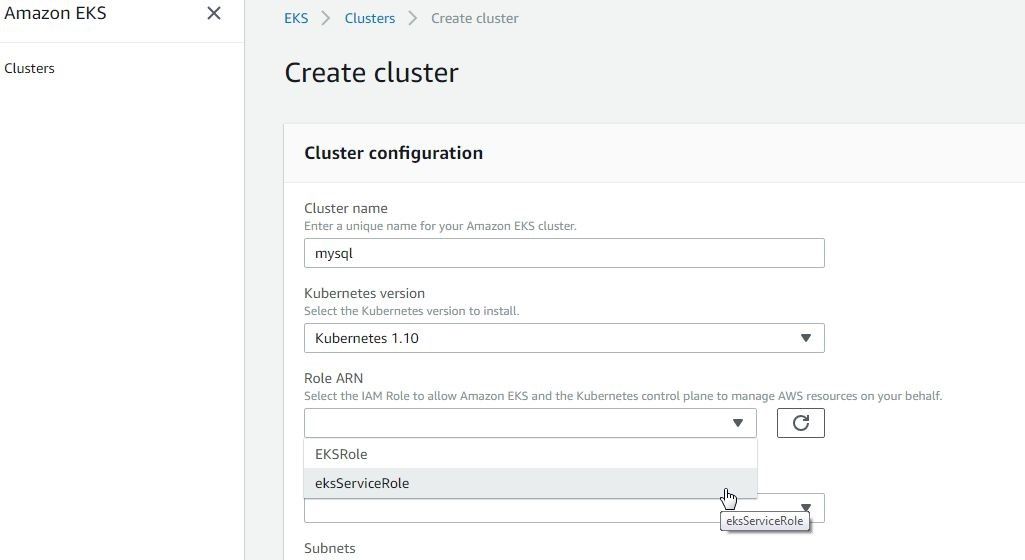
Figure 25. Cluster Configuration
Select the VPC, Subnets and Security Groups that we created earlier, as shown in Figure 26. Click on Create.
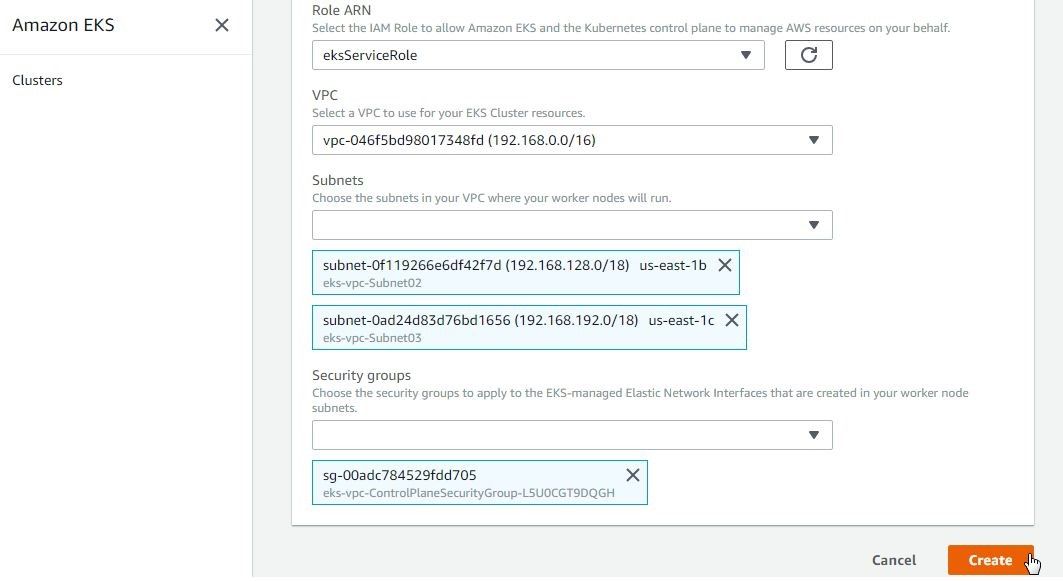
Figure 26. Selecting VPC, Subnets, and Security Groups
The following exception could get generated.
UnsupportedAvailabilityZoneException
Cannot create cluster ‘mysql’ because us-east-1a, the targeted availability zone, does not currently have sufficient capacity to support the cluster. Retry and choose from these availability zones: us-east-1b, us-east-1c, us-east-1d
If the exception gets generated select Subnets in the supported zones and click on Create. The EKS cluster starts to get created, as indicated by the Cluster creation initiated message and the CreatingStatus shown in Figure 27. Click on the button to refresh the status periodically, also shown in Figure 27.
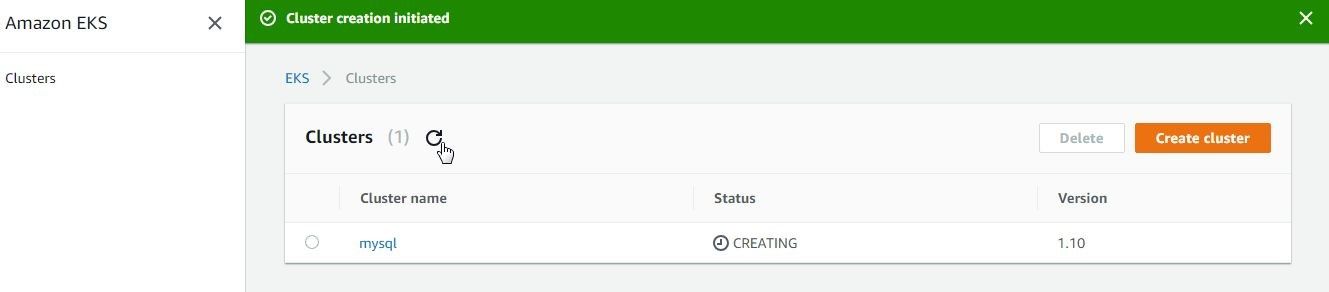
Figure 27. EKS Cluster Creating
When the cluster gets created its Status becomes ACTIVE, as shown in Figure 28. Click on the cluster link to display its detail.
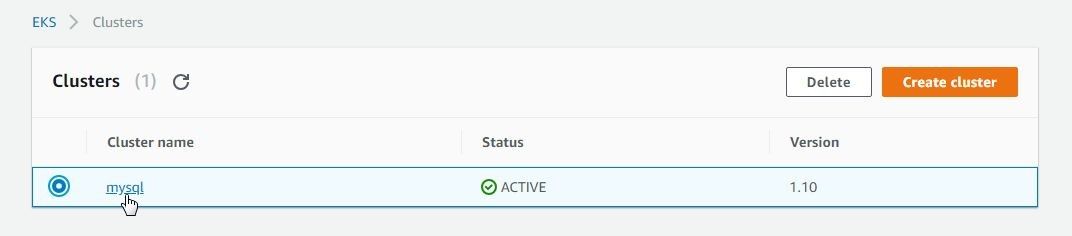
Figure 28. Cluster created and active
The cluster settings are displayed in Figure 29 and include the API server endpoint, Cluster ARN, Kubernetes Version, Status, Role ARN, Subnets, Security Groups and Certificate Authority.
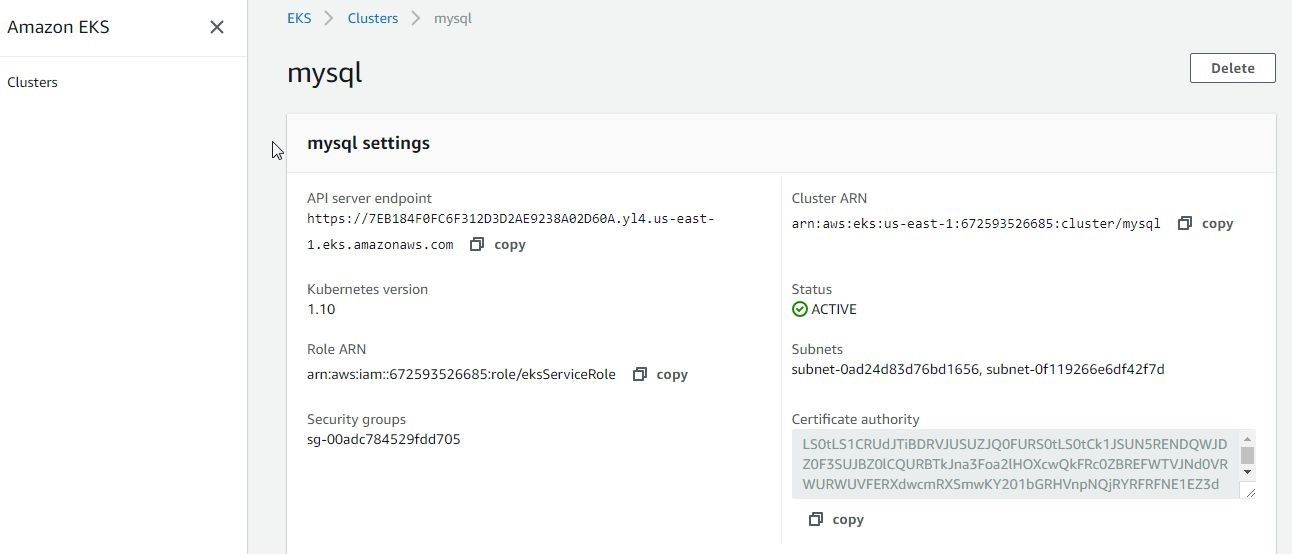
Figure 29. Cluster Settings
We need to copy the API server endpoint, as shown in Figure 30. Similarly, copy the Certificate authority.

Figure 30. Copying the API Server Endpoint
Configuring kubeconfig for kubectl
The kubectl is the Kubernetes cluster manager a client uses to access a cluster; and the configuration information, including cluster endpoint, cluster name, and certificate authority data for accessing a cluster, is stored in the kubeconfig file. The kubeconfig file name is arbitrary, but for a cluster named mysql the kubeconfig file is typically /.kube/config-mysql. The kubeconfig file template is as follows and includes variables as <>.
apiVersion: v1
clusters:
– cluster:
server: <endpoint-url>
certificate-authority-data: <base64-encoded-ca-cert>
name: kubernetes
contexts:
– context:
cluster: kubernetes
user: aws
name: aws
current-context: aws
kind: Config
preferences: {}
users:
– name: aws
user:
exec:
apiVersion: client.authentication.k8s.io/v1alpha1
command: aws-iam-authenticator
args:
– “token”
– “-i”
– “<cluster-name>”
# – “-r”
# – “<role-arn>”
# env:
# – name: AWS_PROFILE
# value: “<aws-profile>”
The kubeconfig file is without extension, and in Windows a file without extension is created with the notepad command as follows. The “.” After the config-mysql file name is needed to make the file without an extension.
>NOTEPAD C:\EKS\.kube\config-mysql.
For <endpoint-url> substitute the API Server endpoint displayed in cluster settings in Figure 30; for<base64-encoded-ca-cert>, the Certificate Authority Data also from Figure 30, and for <cluster-name>, the cluster name mysql. The config-mysql file with values substituted is listed:
apiVersion: v1
clusters:
– cluster:
server: “https://7EB184F0FC6F312D3D2AE9238A02D60A.yl4.us-east-1.eks.amazonaws.com”
certificate-authority-data: “LS0tLS1CRUdJTiBDRVJUSUZJQ0FURS0tLS0tCk1JSUN5RENDQWJDZ0F3SUJBZ0lCQURBTkJna3Foa2lHOXcwQkFRc0ZBREFWTVJNd0VRWURWUVFERXdwcmRXSmwKY201bGRHVnpNQjRYRFRFNE1EZ3dOakl6TXpVME1Wb1hEVEk0TURnd016SXpNelUwTVZvd0ZURVRNQkVHQTFVRQpBeE1LYTNWaVpYSnVaWFJsY3pDQ0FTSXdEUVlKS29aSWh2Y05BUUVCQlFBRGdnRVBBRENDQVFvQ2dnRUJBTDBPCmVWRERqMEJhbXZoM1d2cDlnSmk3SlAwckt4RU1rd1hyWndnWkcrN3JSQXJDdVlLQ0xlKy9TT3ZTNmFCendvWmQKY1hBOWl3d0JmK010WFk2VzJiTGpyM2Z2aVBCTGJ4RU5SYmVPY3Y4cFB6M2o2QkowNjZnLzJvT0xzb0pXenhObApXd28rVHh0dDlydUp0M09JU29jeTV0TDlKTGY1TjFQb01RaXAxdzlLTVRVclhycm5QSFA3aEdSeFpyNnVrS0JFCkp4cWh2bXhXMjJMZ0hMUWxHOG9XVDVFZG1xbkhJRDV6WG5GV2dZZStQMkZ4bmhvZGdqbSs5Ujd4WkJEYnMyWXcKbjZ0WEhmZUx3UGkvMHh4NFduTU5sNjJIK3RGYWFIajZ0RStQaHNkMDgxN3BORWY0WGF3emlLcS9vc2Rpa2xOWQp0SEt2WHEwSldObDVmeVlqSDRFQ0F3RUFBYU1qTUNFd0RnWURWUjBQQVFIL0JBUURBZ0trTUE4R0ExVWRFd0VCCi93UUZNQU1CQWY4d0RRWUpLb1pJaHZjTkFRRUxCUUFEZ2dFQkFIMzNNYjRGb2gycXdvTU1tRUxiVWJ6RUJkc0EKcFpQN2htd1FSQlcwRTVQbU5BTWFIa3dDSFhqZVJKWW5ZYlozT1NjMFM2OEdEY3lGejJ0eEpxYU1WVHYrdXlQUApwejhJSGhHRXVXTk53eTMxaXMyQ0gySXRoQUo2NXlJRGpSVzlxYWp4Z0hPcy9vOU1HV1RJbktnSHVraVFKdlFsCnJaWEdYeU1pV0VDT0pyTk5tdHNickhMRTFzVWdaMStybjQ5RldyczNCTzJ4bzAyWUpGVWYyUmNtZGIvb2h4V3cKNzJ1Tys1TzNCYnI4UVVDVktvMUNqSUllVFREUkRFNk15OVNtbHNOQzd4VXlVUkI4cysweUpoODBGRnVydktJYwpxZHFxUXZEY2w2VzBFekJYc1oyOUw2VXR5MWovblVGMHhPREhYOUloa2ZnZVJGODAvZEM1YUFhRXMzTT0KLS0tLS1FTkQgQ0VSVElGSUNBVEUtLS0tLQo=”
name: kubernetes
contexts:
– context:
cluster: kubernetes
user: aws
name: aws
current-context: aws
kind: Config
preferences: {}
users:
– name: aws
user:
exec:
apiVersion: client.authentication.k8s.io/v1alpha1
command: aws-iam-authenticator
args:
– “token”
– “-i”
– “mysql”
# – “-r”
# – “arn:aws:iam::672593526685:role/eksServiceRole”
The AWS IAM Authenticator for Kubernetes is used with kubectl for cluster authentication. It uses the same credentials as those configured in AWS CLI. To instead use an IAM role for cluster authentication, for example, theeksServiceRole, uncomment the following two lines in the kubeconfig file.
# – “-r”
# – “arn:aws:iam::672593526685:role/eksServiceRole”
A role may be assumed only by a non-root user. We won’t be using an IAM role and shall use the default AWS CLI credentials.
After the kubeconfig file has been created, add an environment variable called KUBECONFIG, which is not arbitrary, and set its value to the directory path of thekubeconfig file, which is ”C:\EKS\.kube\config-mysql”. Start a new Command-line window session and run the following command to list the Kubernetes services.
kubectl get svc
The kubernetes service gets listed.
c:\EKS>kubectl get svc
NAME TYPE CLUSTER-IP EXTERNAL-IP PORT(S) AGE
kubernetes ClusterIP 10.100.0.1 <none> 443/TCP 1h
The command output is also shown in Figure 31.

Figure 31. Listing Kubernetes Services
Launching Worker Nodes
In this section we shall launch worker nodes for the EKS Kubernetes cluster. Worker nodes are EC2 instances with the EC2 launch type. When Fargate support has been added to EKS the option to use the Fargate launch type for the worker nodes will become available. We used a CloudFormation stack to create an EKS Cluster VPC . We shall use a CloudFormation stack to launch the worker nodes. To create a CloudFormation stack, click on Create Stack in the CloudFormation console at https://console.aws.amazon.com/cloudformation/home as shown in Figure 32.

Figure 32. Create Stack
In the Create stack wizard select the option Specify an Amazon S3 template URL as shown in Figure 33.
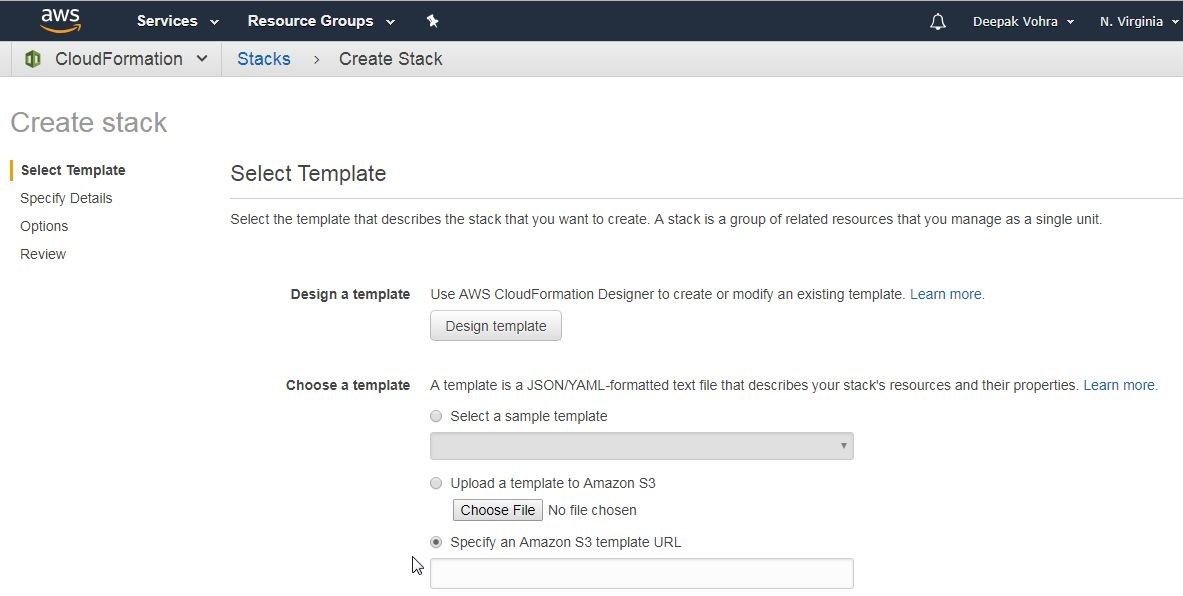
Figure 33. Specify an Amazon S3 template URL
Specify the URL https://amazon-eks.s3-us-west-2.amazonaws.com/cloudformation/2018-08-30/amazon-eks-nodegroup.yamlin the field provided, as shown in Figure 34. Click on Next.

Figure 34. Specifying URL for Worker Node Group
In Specify Details specify a Stack name (mysql-worker-nodes) and select the EKS Cluster parameters as shown in Figure 35. Specify Cluster Name (mysql) and select the ClusterControlPlaneSecurityGroup as the one created with the VPC using the CloudFormation template earlier in this article.
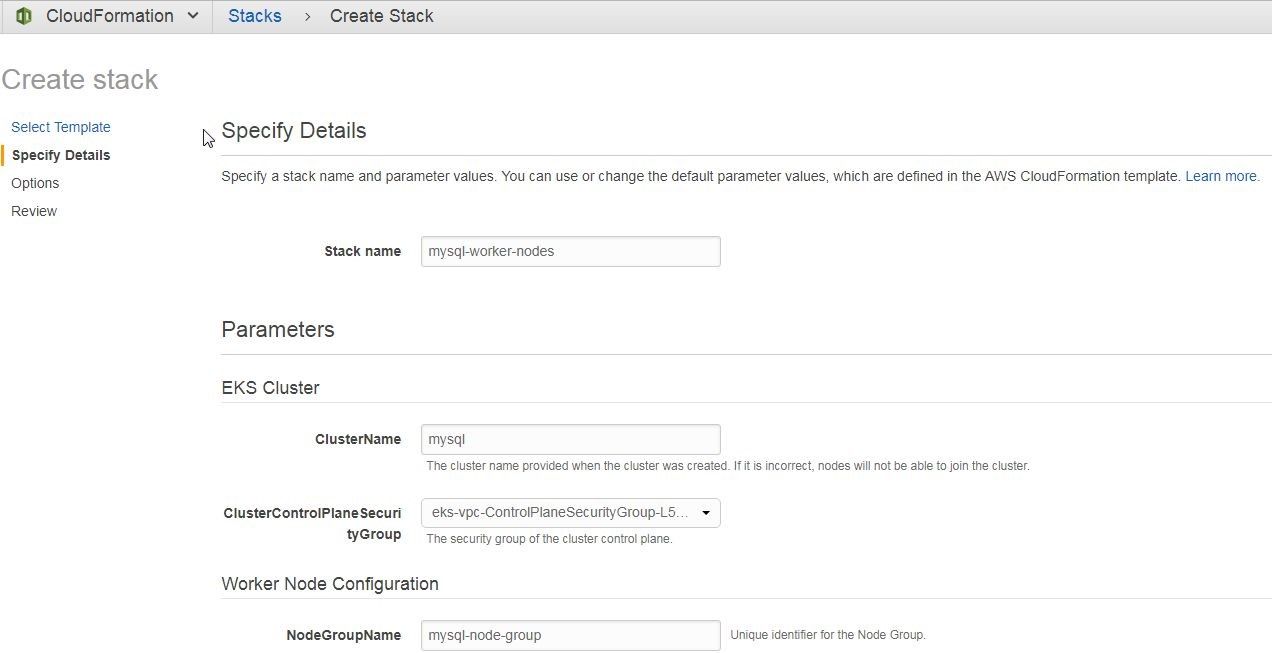
Figure 35. Specifying Stack Details
In Worker Node Configuration specify NodeGroupName (mysql-node-group) as shown in Figure 36. Specify the NodeAutoScalingGroupMinSize (1) and NodeAutoScalingGroupMaxSize (3) and select a NodeInstanceType; the default selection t2.medium is used. The default settings for most of the Worker Node Configuration should suffice for a small-scale cluster. Set the NodeImageId to ami-dea4d5a1 or ami-0440e4f6b9713faf6, which is Amazon EKS optimized AMI, and select a KeyName. If a Key Pair is not listed create a new key pair at https://console.aws.amazon.com/ec2/v2/home?region=us-east-1#KeyPairs.
Next, specify Worker Network Configuration, which consists of a VPC and Subnets, as shown in Figure 36.
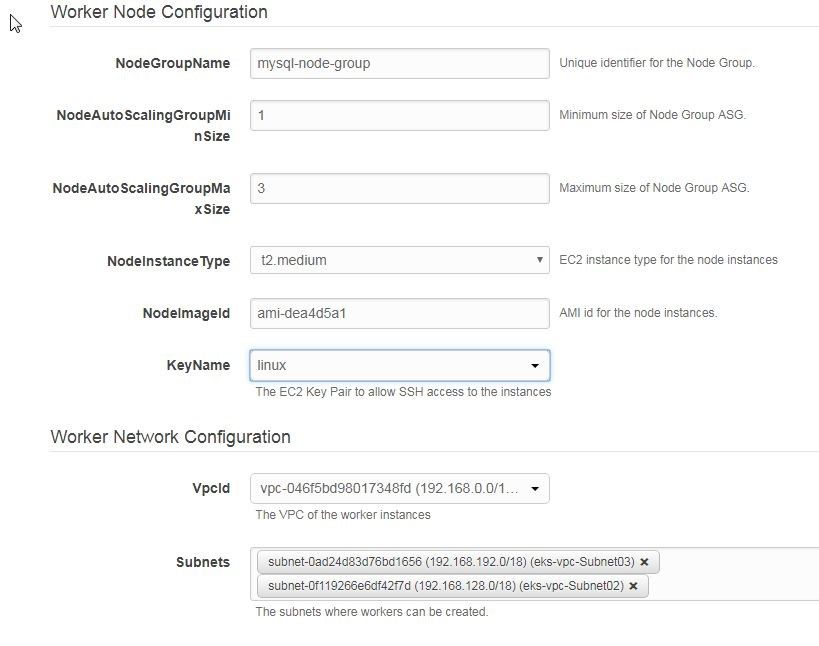
Figure 36. Worker Node and Network Configuration
Click on Next as shown in Figure 37.
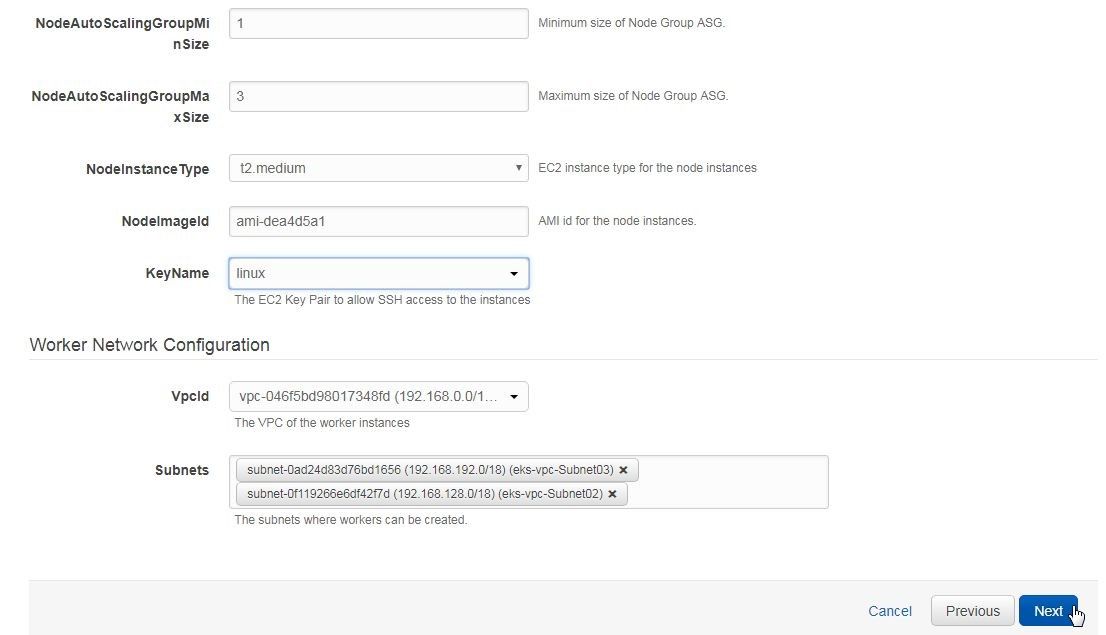
Figure 37. Specify Details>Next
In Options, tags and permissions may be set optionally. Click on Next in Options. On the Review page the Stack summary is listed, as shown in Figure 38.
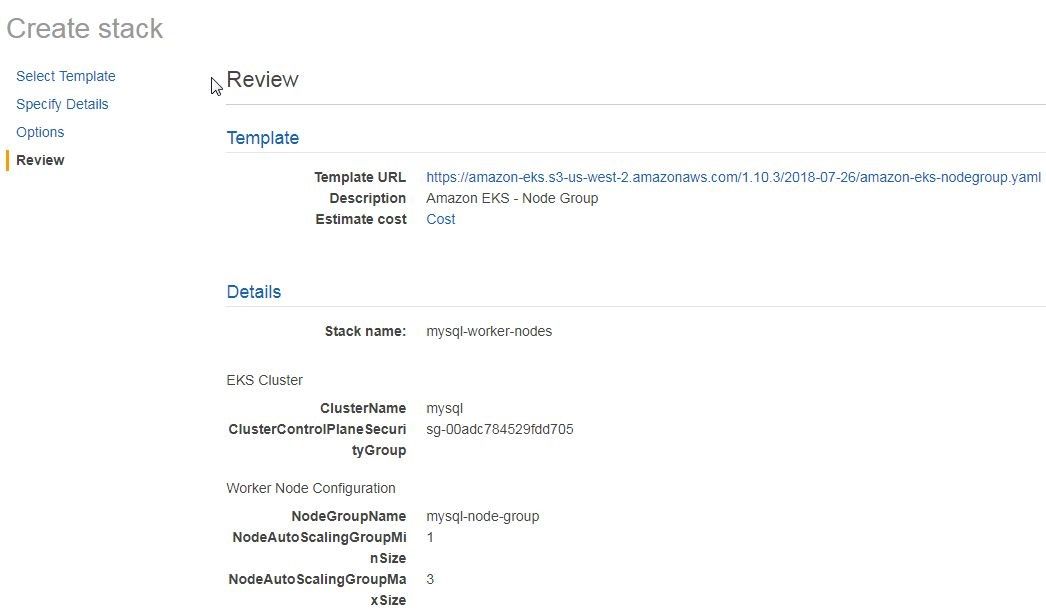
Figure 38. Review
Scroll down, select the checkbox in the Capabilities section, and click on Create as shown in Figure 39.

Figure 39. Review>Create
A new stack gets created for the worker node group, as shown in Figure 40. Select the Outputs tab and copy the NodeInstanceRole value, also listed in Figure 40.
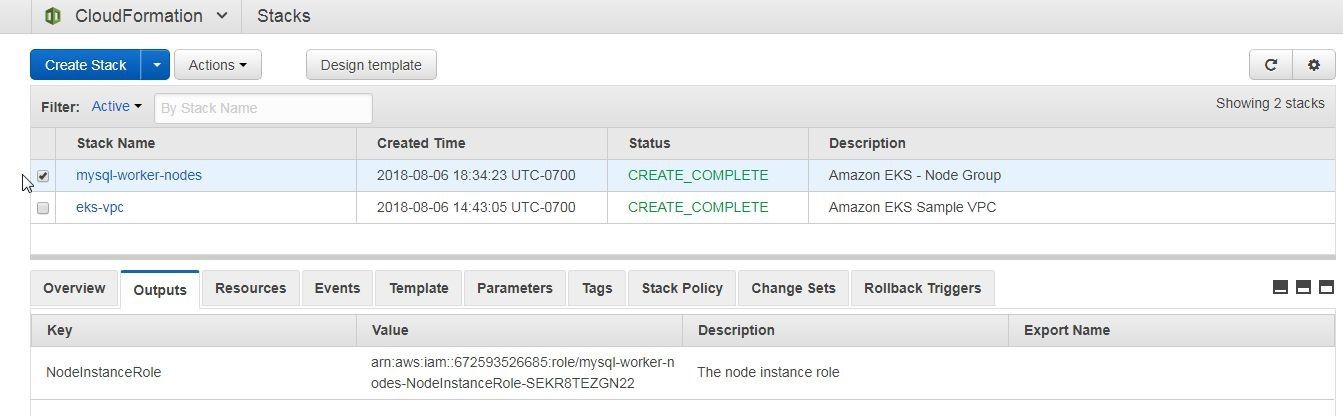
Figure 40. Stack for Worker Node Group
Joining Worker Nodes with Cluster
Worker nodes need authentication to join the cluster; for which, download the AWS authenticator configuration map from https://amazon-eks.s3-us-west-2.amazonaws.com/1.10.3/2018-07-26/aws-auth-cm.yaml. Replace the variable placeholder <ARN of instance role (not instance profile)> with the NodeInstanceRole copied from the Outputs tab in Figure 40. The aws-auth-cm.yaml is listed:
apiVersion: v1
kind: ConfigMap
metadata:
name: aws-auth
namespace: kube-system
data:
mapRoles: |
– rolearn: “arn:aws:iam::672593526685:role/mysql-worker-nodes-NodeInstanceRole-SEKR8TEZGN22”
username: system:node:
groups:
– system:bootstrappers
– system:nodes
To apply the configuration run the following command.
kubectl apply -f aws-auth-cm.yaml
The ConfigMap gets created.
c:\EKS>kubectl apply -f aws-auth-cm.yaml
configmap “aws-auth” created
Monitor the status of the nodes as they join the cluster.
kubectl get nodes –watch
As the nodes join the cluster their status becomes Ready.
c:\EKS>kubectl get nodes –watch
NAME STATUS ROLES AGE VERSION
ip-192-168-162-128.ec2.internal Ready <none> 47s v1.10.3
ip-192-168-166-168.ec2.internal Ready <none> 51s v1.10.3
ip-192-168-254-39.ec2.internal Ready <none> 45s v1.10.3
ip-192-168-162-128.ec2.internal Ready <none> 50s v1.10.3
ip-192-168-254-39.ec2.internal Ready <none> 50s v1.10.3
ip-192-168-166-168.ec2.internal Ready <none> 1m v1.10.3
ip-192-168-162-128.ec2.internal Ready <none> 1m v1.10.3
ip-192-168-254-39.ec2.internal Ready <none> 1m v1.10.3
ip-192-168-166-168.ec2.internal Ready <none> 1m v1.10.3
List the worker nodes, and three nodes get listed.
c:\EKS>kubectl get nodes
NAME STATUS ROLES AGE VERSION
ip-192-168-162-128.ec2.internal Ready <none> 1m v1.10.3
ip-192-168-166-168.ec2.internal Ready <none> 1m v1.10.3
ip-192-168-254-39.ec2.internal Ready <none> 1m v1.10.3
Summary
In this article we discussed creating an EKS cluster, launching worker nodes, and joining the worker nodes with the cluster. In a subsequent article we shall discuss creating a Kubernetes service for MySQL and use MySQL database with Toad Edge 2.0.2.
Start the discussion at forums.toadworld.com