In this article we shall discuss using Toad Edge with a containerized application for MySQL database running on Amazon ECS Fargate launch type. Amazon Elastic Container Service (ECS) is a managed container orchestration service for Docker containers with provision to launch containerized applications on virtual machines (EC2 instances/servers). With the EC2, launch type servers are provisioned and managed by a user. The Amazon Fargate launch type has introduced a serverless containerization platform with which no VMs (EC2 instances) are created and managed directly; instead, a user is provided a cluster of tasks on the Fargate platform. The Fargate platform manages the underlying VMs (EC2 instances). The Fargate launch type provisions an Elastic Network Interface (ENI) that includes a Public IP address for accessing the containerized application for each task. Fargate launch type has simplified the Amazon ECS service with its serverless platform and seamless scaling. An ECS service on Fargate launch type may be integrated with the other AWS services, such as VPC, CloudWatch, IAM, and CloudTrail, just like an ECS service on the EC2 launch type.
This article has the following sections.
Setting the Environment
Creating an Elastic Container Service
Configuring Container Definition for MySQL Database
Configuring Task Definition
Configuring ECS Service for MySQL Database
Creating ECS Cluster
Getting Networking Information to Connect to MySQL Database
Creating a Connection in Toad Edge
Creating a Database Table
Adding Table Data
Deleting a ECS Cluster
Setting the Environment
Download and install Toad Edge
Create an AWS account at https://aws.amazon.com/resources/create-account/.
Creating an Elastic Container Service
In this section we shall create an Amazon Elastic Container Service (ECS) with Fargate launch type for a containerized MySQL database application. Open URL https://aws.amazon.com/ecs/ in a browser and click on Get started with Amazon ECS as shown in Figure 1.
Figure 1. Get started with Amazon ECS
Click on Get Started in the ECS service wizard as shown in Figure 2.
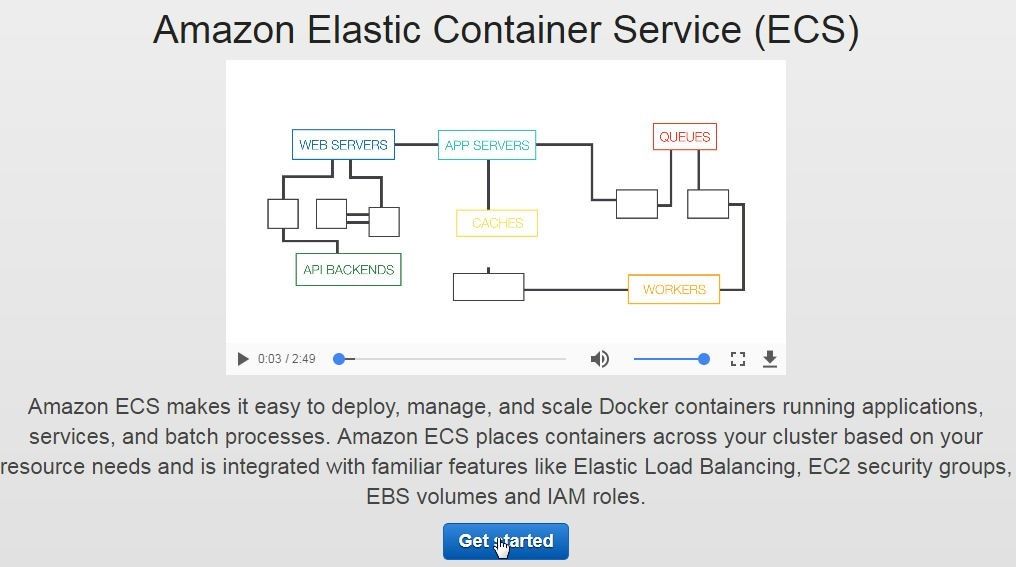
Figure 2. Get started
The Getting Started with Amazon ECS wizard gets launched, as shown in Figure 3. As the diagram for ECS objects indicates an ECS cluster comprises a service, which further comprises a task definition consisting of one or more container definitions. A task definition defines the task abstraction, which provisions an elastic network interface (ENI) and a Public IP. Multiple tasks may be defined in a single Elastic Container Service (ECS) cluster. The container abstraction defines the Docker image, including port mappings if any, environment variables if any, and networking, storage, and logging.
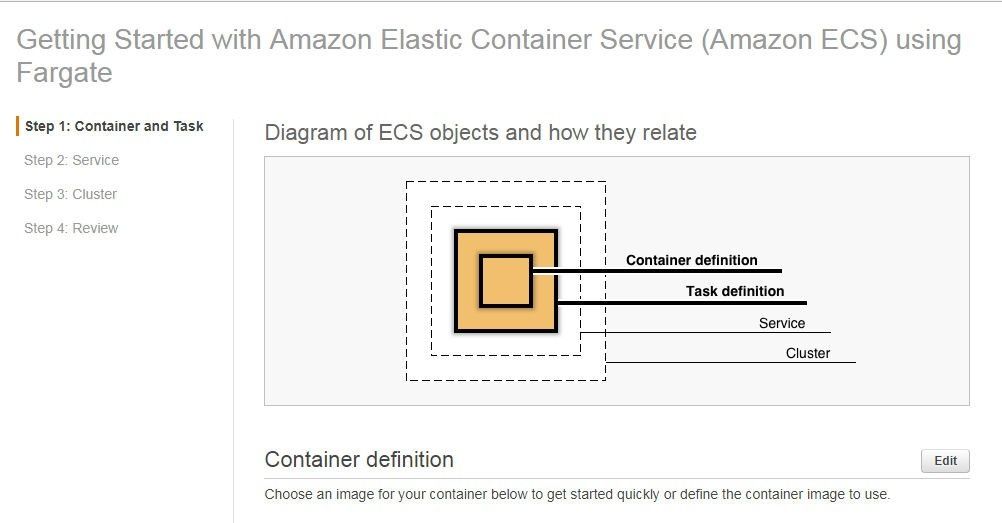
Figure 3. Diagram of ECS Objects
Configuring Container Definition for MySQL Database
First, the container definition is configured, and pre-configured container definitions for a sample-app and an nginx application are available. To create a custom container definition for MySQL database click on Configure for the custom container definition as shown in Figure 4.
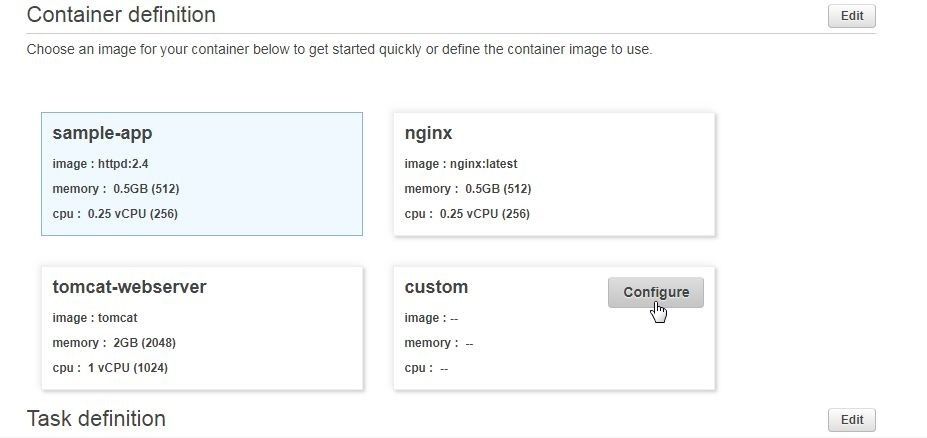
Figure 4. Selecting to configure custom container definition
In the Edit container wizard specify a Container name (mysqldb) and specify DockerImage as mysql as shown in Figure 5. Specify a Soft (512 MB) and Hard Limit (1024) for memory.
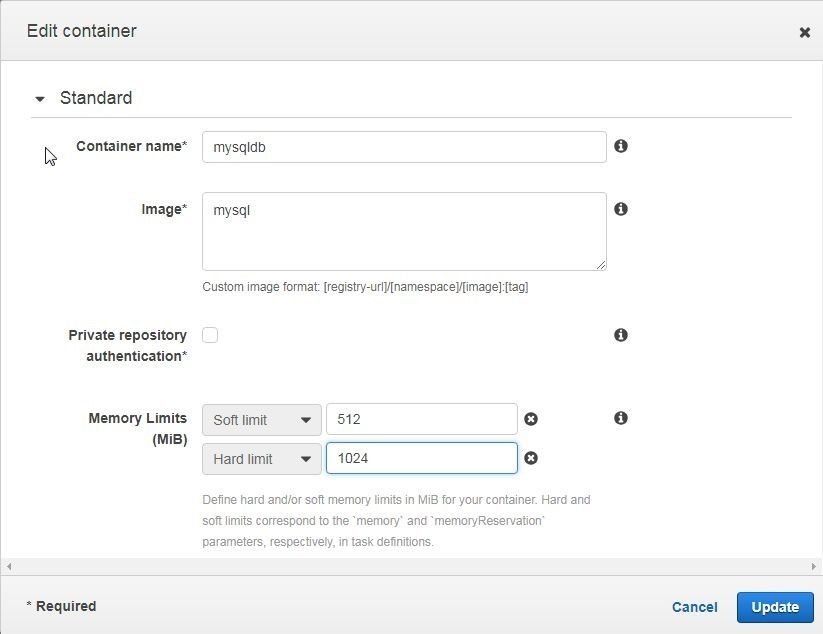
Figure 5. Configuring Container Definition
In Port mapping specify port 3306, as shown in Figure 6. For the Fargate launch the host port is the same as the container port. Click on Advanced container configuration to configure some of the other settings, including environment variables.

Figure 6. Specifying Port Mappings
First, the Environment configuration settings are displayed as shown in Figure 7. Every task definition, which includes one or more container definitions, must include at least one “essential” container definition. Select the Essential checkbox as shown in Figure 7. With only one container in a task definition, that container must be selected as “Essential”. The Environment section also includes a provision to specify environment variables. The Docker image mysql has one mandatory environment variable, MYSQL_ROOT_PASSWORD, which must be configured. Click on the Update button to complete the container definition.
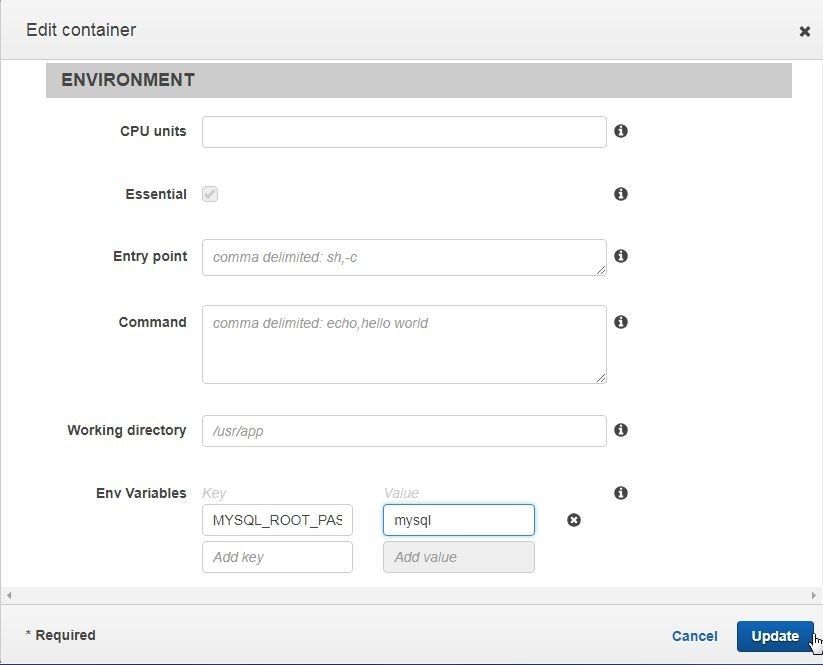
Figure 7. Advanced container configuration>Environment
A container definition gets added as shown in Figure 8.
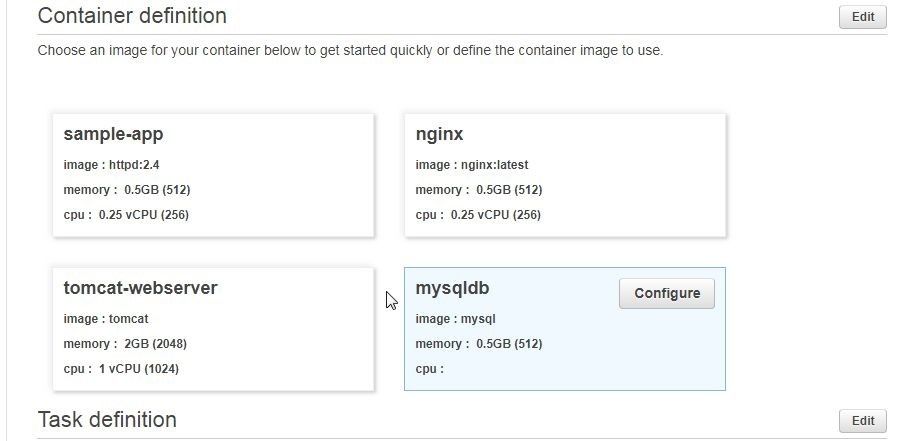
Figure 8. Container Definition mysqldb
Configuring Task Definition
Next, configure the task definition. As the Task definition section in Figure 9 indicates default values are provided for Task definition name, Network mode, Task execution role, Compatibilities (launch type compatibility), Task memory and Task CPU. Some of these task definition settings are modifiable while others are not. Click on Edit to modify task definition.
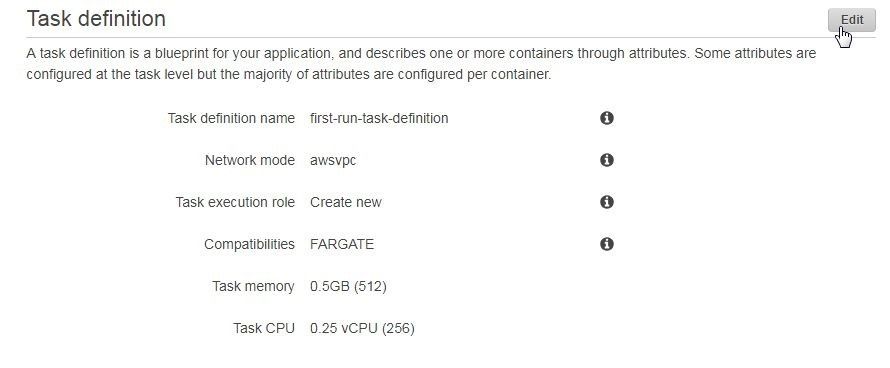
Figure 9. Task definition>Edit
In the Configure task definition set or modify the Task definition name (mysql-task-definition) as shown in Figure 10.
The Network mode for Fargate is not modifiable and must be awsvpc. The Task execution role may be set to ecsTaskExecutionRole. The ecsTaskExecutionRole allows accessing the Amazon ECR to download the container image, and allows access to CloudWatch to store container application logs.
Next, select the Task Size settings for Task memory and Task CPU as shown in Figure 10. Only specific combinations of Task memory and Task CPU may be used. For example, if Task CPU of 0.5 vCPU is selected for Task memory of 0.5GB an error message is displayed, “The bucket specified for memory and CPU is invalid. The valid memory range for 0.5 vCPU is: 1GB – 4GB.” Set Task memory to 1GB and Task CPU to 0.5 vCPU. Click on Save to save the task definition.
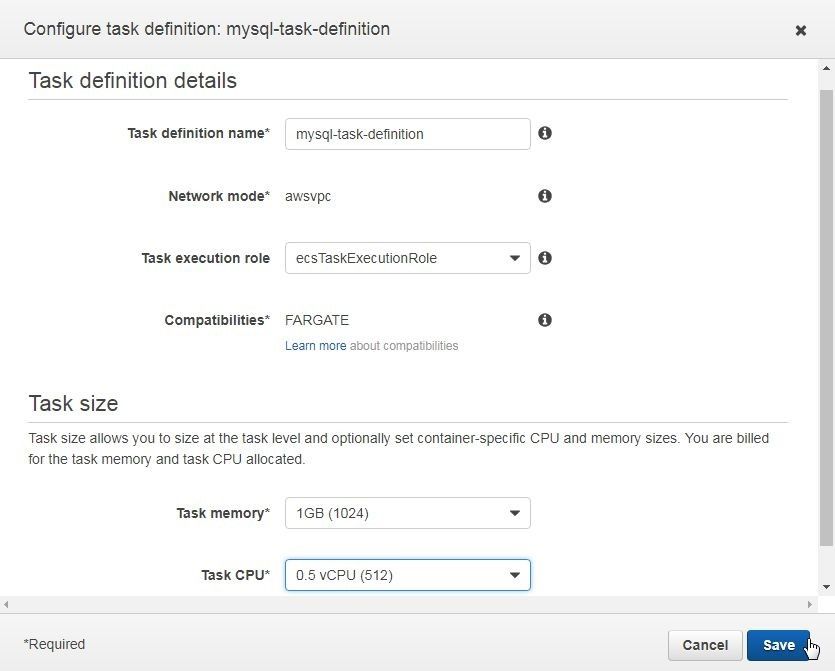
Figure 10. Task Size
Click on Next as shown in Figure 11 to complete the container and task definitions.
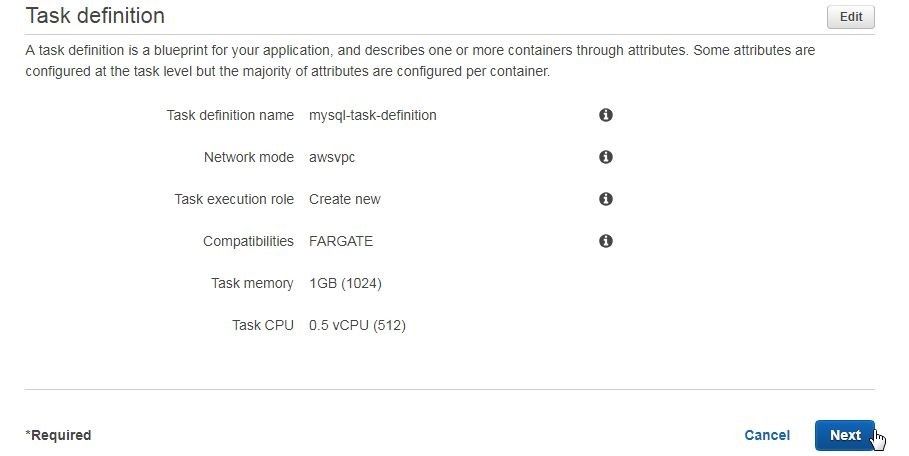
Figure 11. Completing Container and Task Definitions with Next
Configuring ECS Service for MySQL Database
The Define your service section lists the default settings for Service name, Number of desired tasks (1), Security group (Automatically create new) and Load balancer type (None), as shown in Figure 12. The Edit button is provided to modify the service. Keep the default service configuration and click on Next.
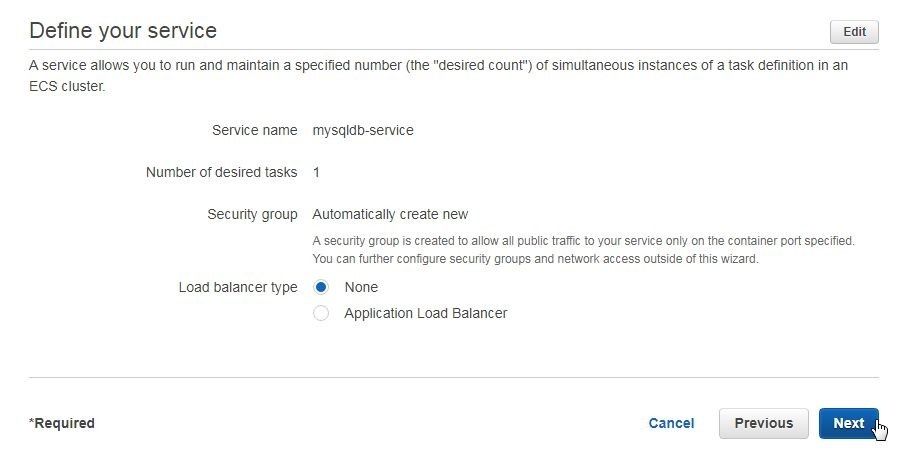
Figure 12. Define your service
Creating ECS Cluster
As the diagram for ECS objects in Figure 13 shows, the Cluster is the only object yet to be created.
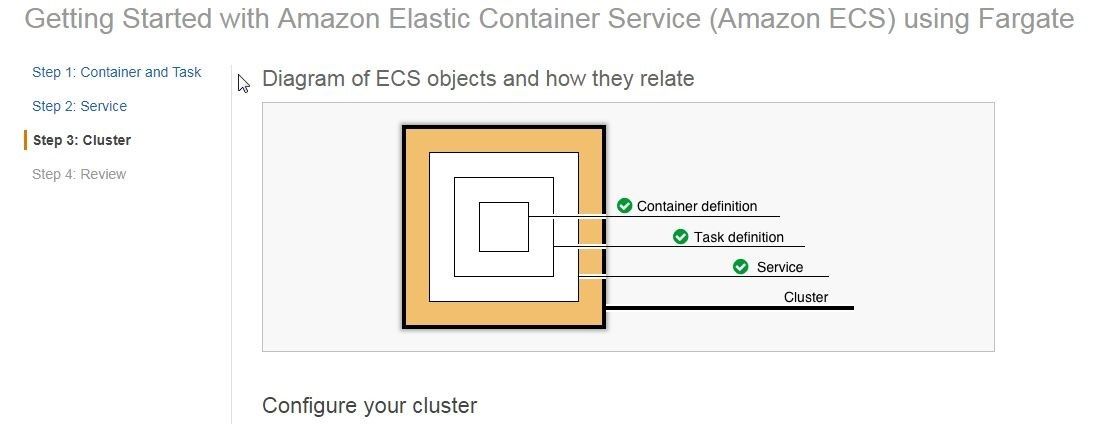
Figure 13. Diagram of ECS Objects
In Configure your cluster specify a Cluster name (mysql) as shown in Figure 14. The VPC ID is set to automatically create a new VPC and Subnets is set to automatically create new Subnets. To be able to automatically create a new VPC the account limit for the number of VPCs must not already have been reached, which may be verified at https://aws.amazon.com/vpc.
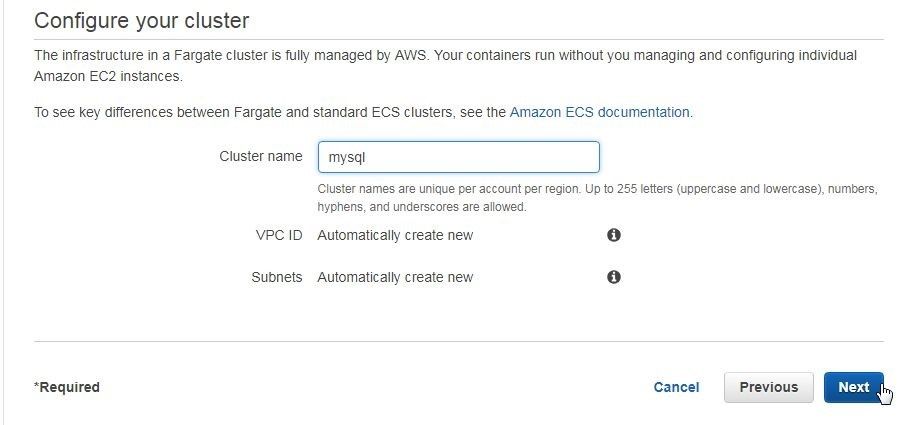
Figure 14. Configure your cluster
As the diagram in Figure 15 of ECS objects indicates, all the ECS objects have been configured.
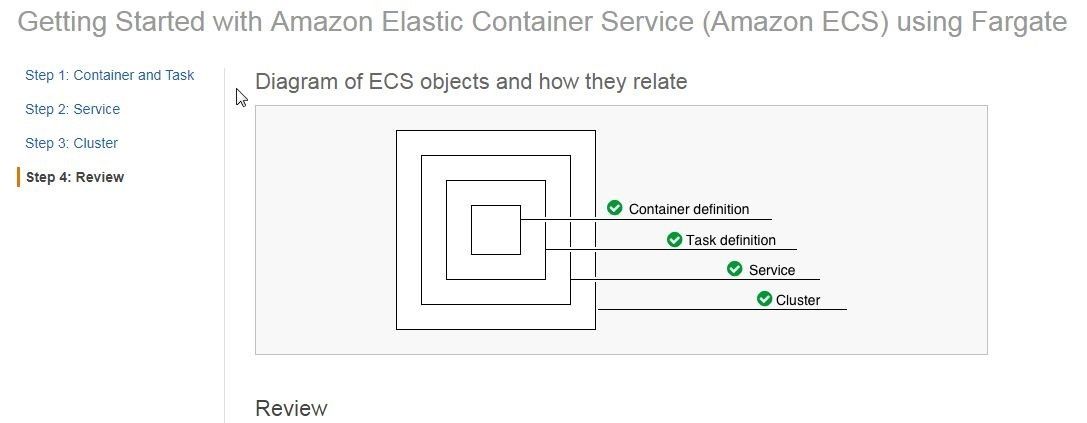
Figure 15. Diagram of ECS Objects
A Review of the Service, task definition, and container definitions gets listed, as shown in Figure 16. Click on Create to create the Elastic container service cluster.
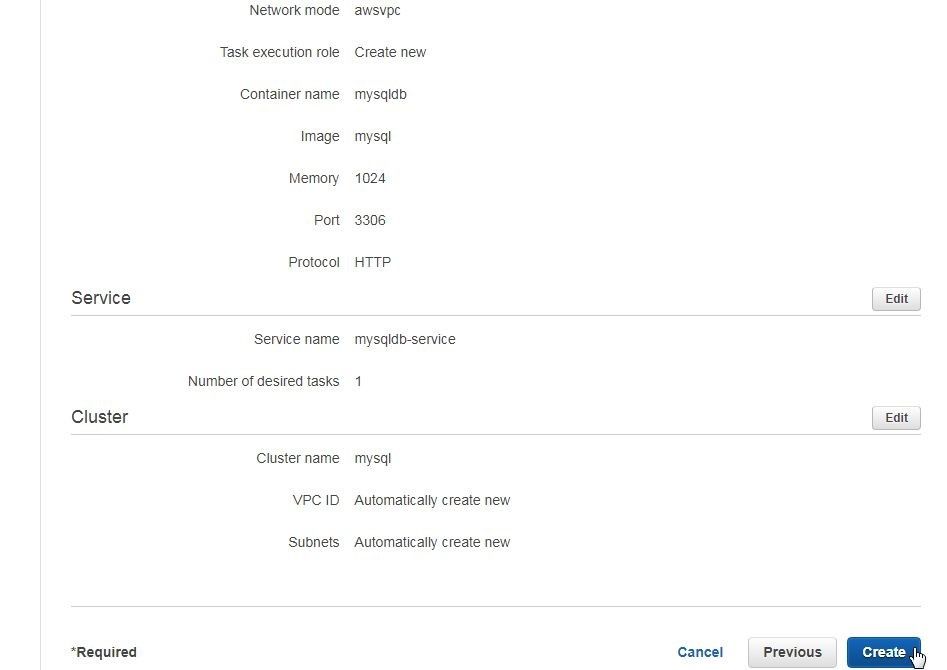
Figure 16. Review>Create
The ECS resources get provisioned, as shown by the Launch Status in Figure 17. Click on View service to display service detail.
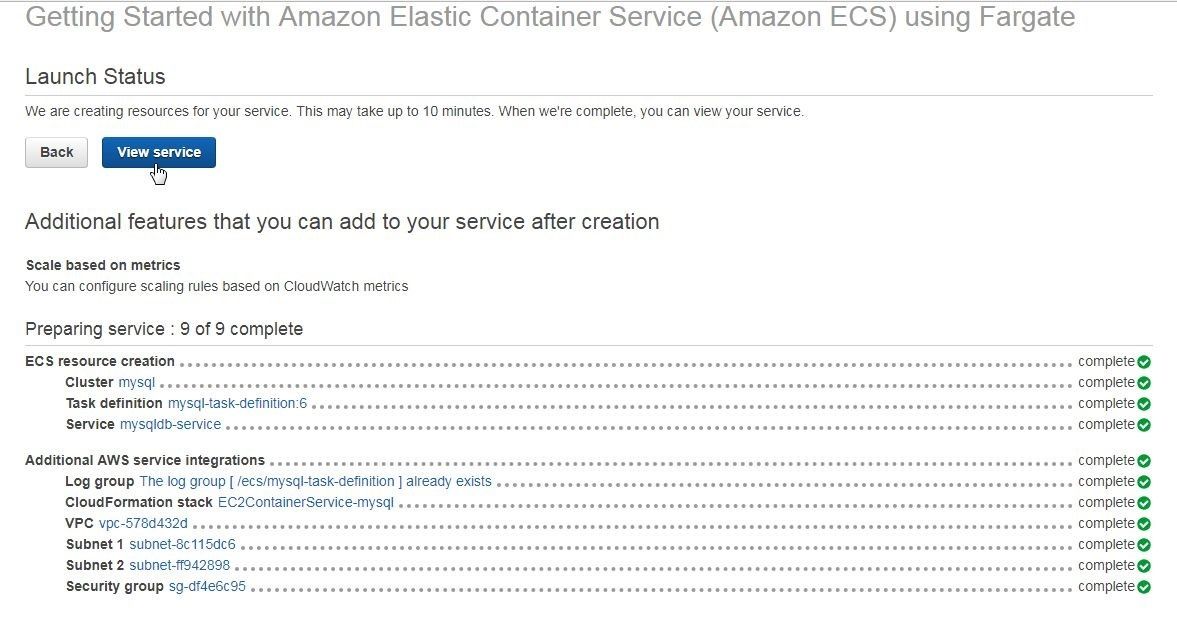
Figure 17. Launch Status of ECS Resources
The service detail for the mysqldb-service gets displayed, as shown in Figure 18. Tabs are provided for Details, Tasks, Events, Auto Scaling, Deployments, Metrics and Logs. Network Access lists the Allowed VPC, Allowed Subnets, and Security groups. The Auto-assign public IP must be ENABLED to allow access to the containerized application. Select the Tasks tab to list tasks.
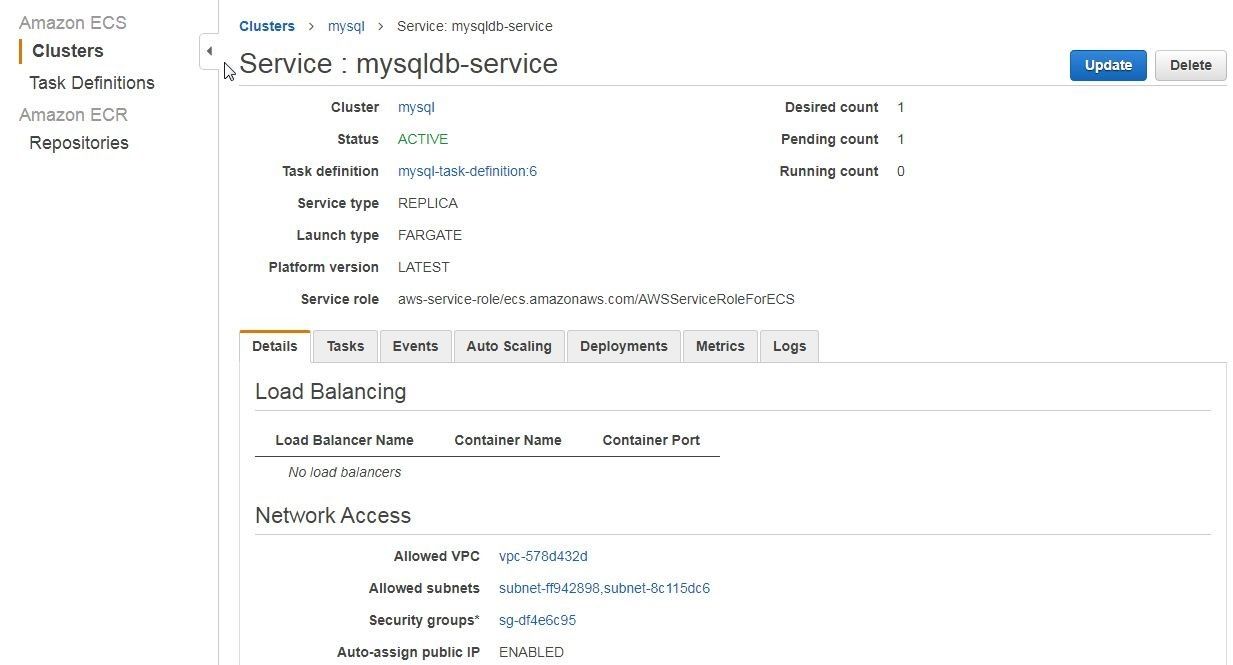
Figure 18. Service Details
The single service task gets listed, as shown in Figure 19. The LAST STATUS and Desired Status must be RUNNING before the task may be used.
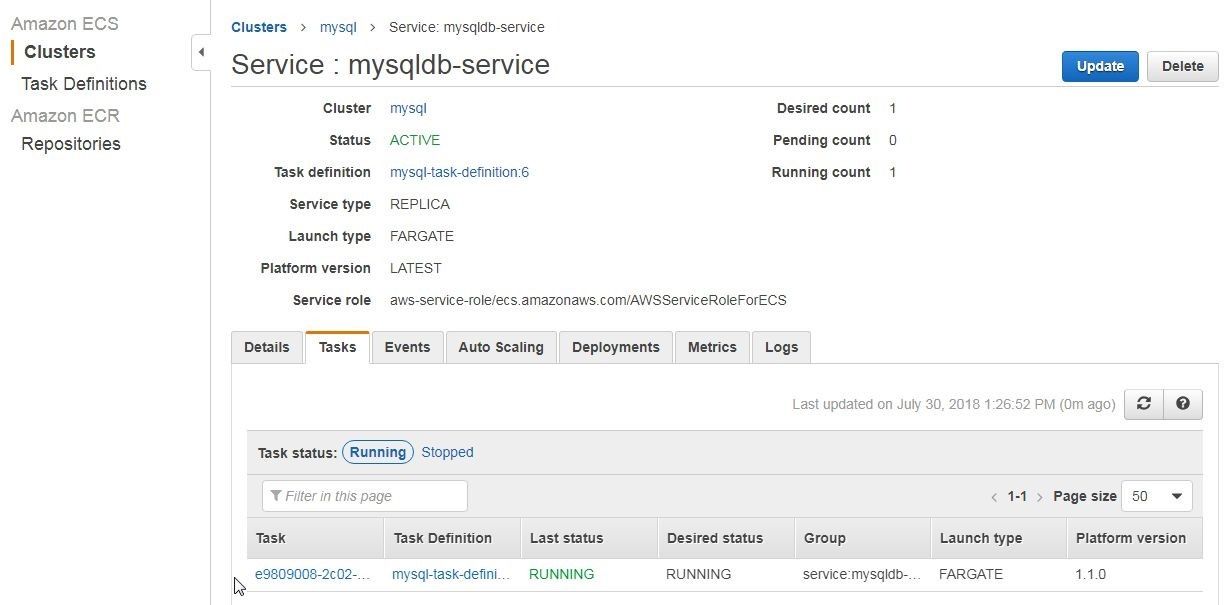
Figure 19. Listing Service Tasks
The Events tab (Figure 20) lists the events, which include the service starting task/s and reaching a steady state.
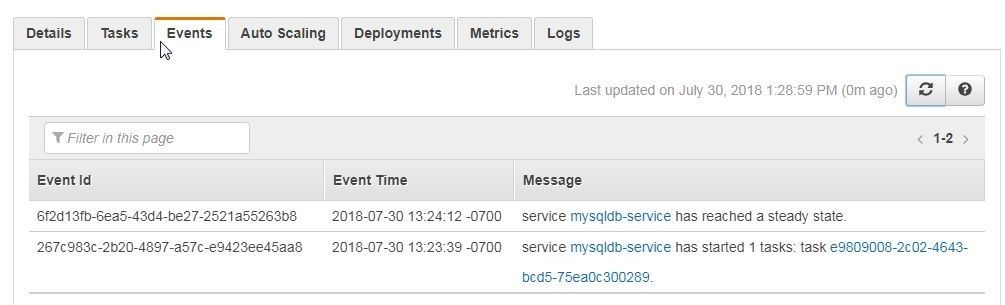
Figure 20. Events
The Clusters lists the mysql cluster, as shown in Figure 21.
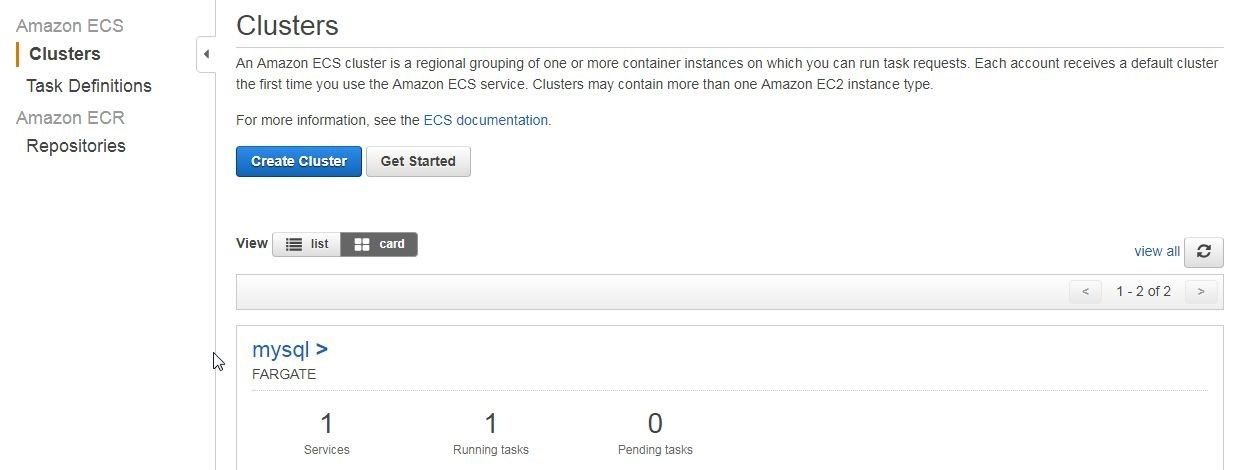
Figure 21. Clusters>mysql
Click on the cluster link mysql to display the services table with the mysqldb-service as shown in Figure 22.
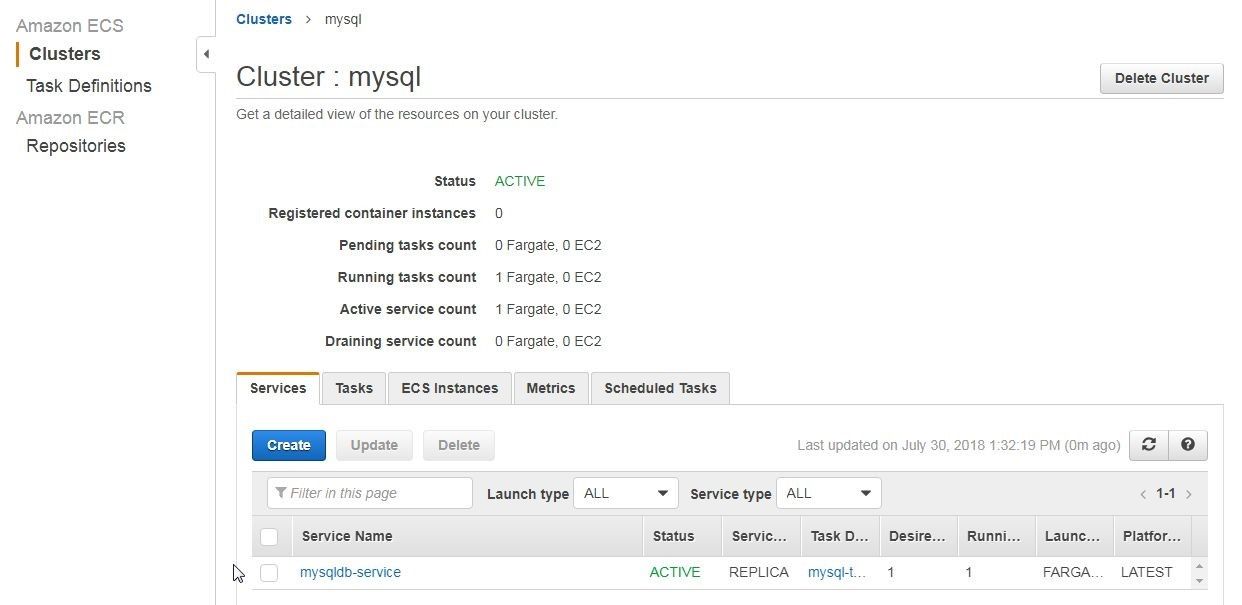
Figure 22. Service mysqldb-service
Getting Networking Information to Connect to MySQL Database
To be able to access the container application for MySQL database we need to get network information about the ECS task. Click on the task link shown in Figure 19. In the task detail copy the Public IP as shown in Figure 23. The Public IP may also be obtained from the ENI, which is listed in the ENI id field.
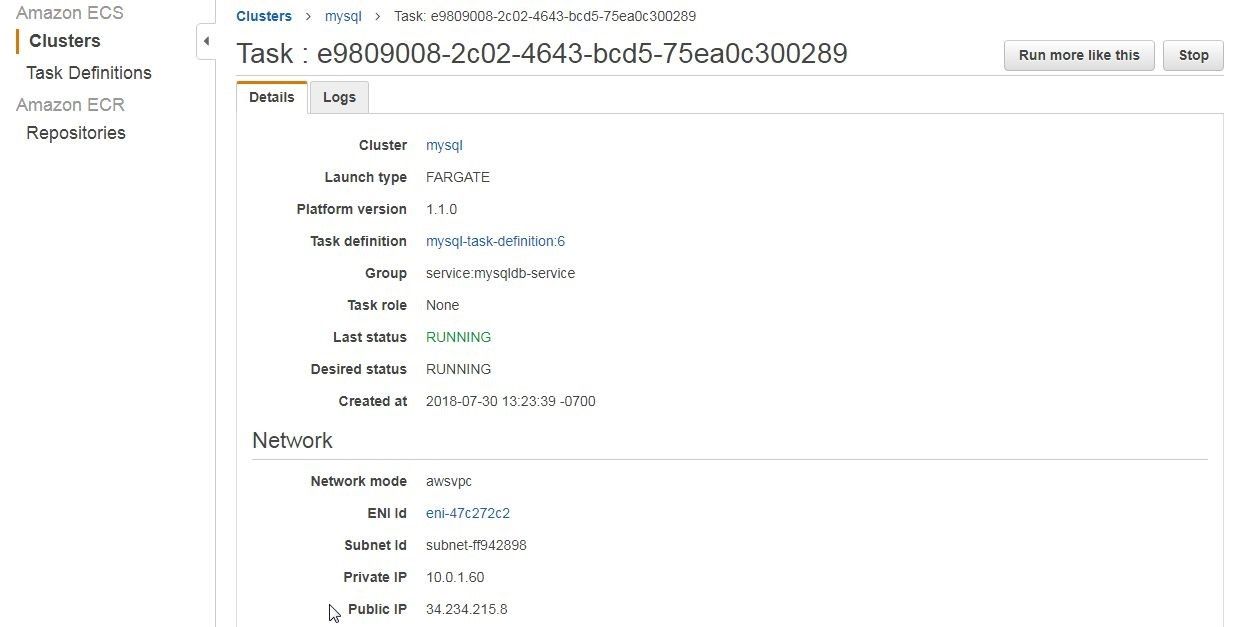
Figure 23. Public IP
Creating a Connection in Toad Edge
In this section we shall connect to the containerized application for MySQL database with Toad Edge. Select Connect>New Connection as shown in Figure 24.
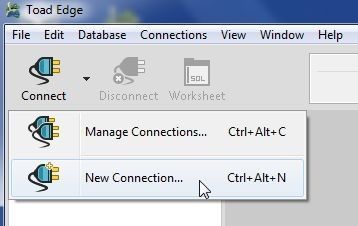
Figure 24. Connect>New Connection
In the New Connection wizard select Database Platform as MySQL and click on Next as shown in Figure 25.
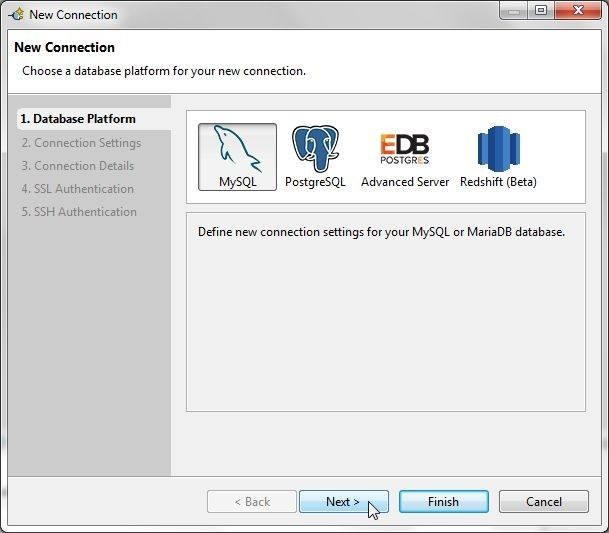
Figure 25. New Connection>Database Platform>MySQL>Next
Next, specify the Connection Settings as shown in Figure 26. Specify Host as the Public IP (obtained in Figure 24). Specify Database as mysql. Specify User as root and Password as the value of the MYSQL_ROOT_PASSWORD configured in Figure 7. Click on Test Connection to test the connection.
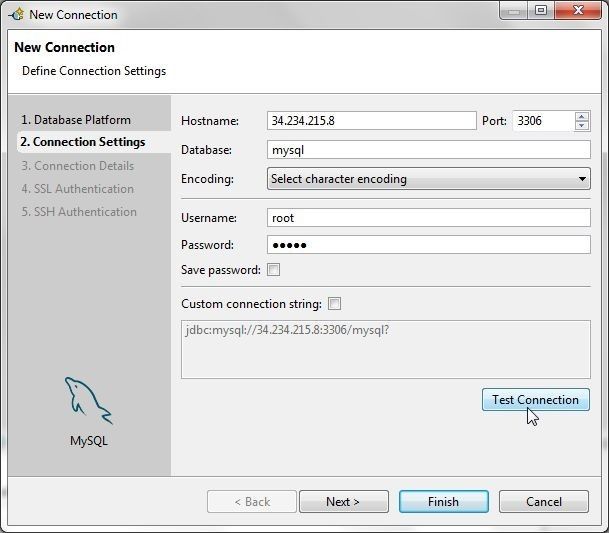
Figure 26. Configuring and Testing Connection
If a connection gets established the message Connection is OK gets displayed, as shown in Figure 27. Click on Next.
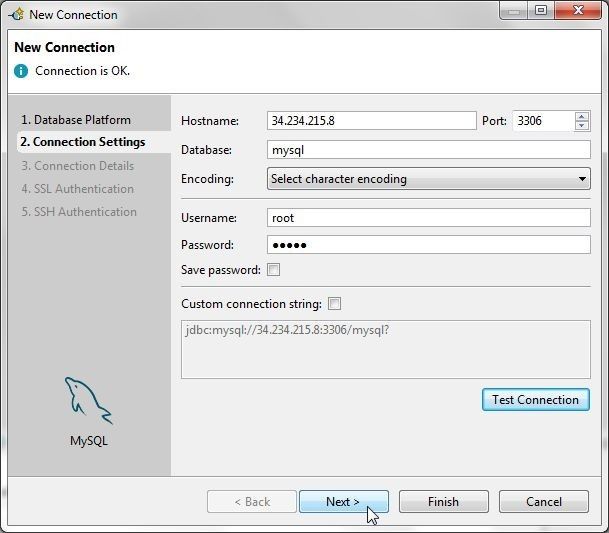
Figure 27. Testing Connection result is Connection is OK
In Connection Details select the checkbox for option Enable Autocommit as shown in Figure 28. Click on Finish.
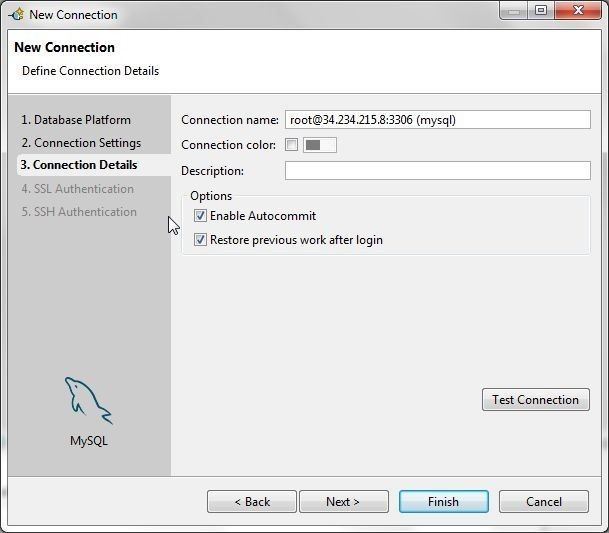
Figure 28. Connection Details
A new connection gets created and added to Connections view, as shown in Figure 29. A SQL Worksheet gets associated with the connection.
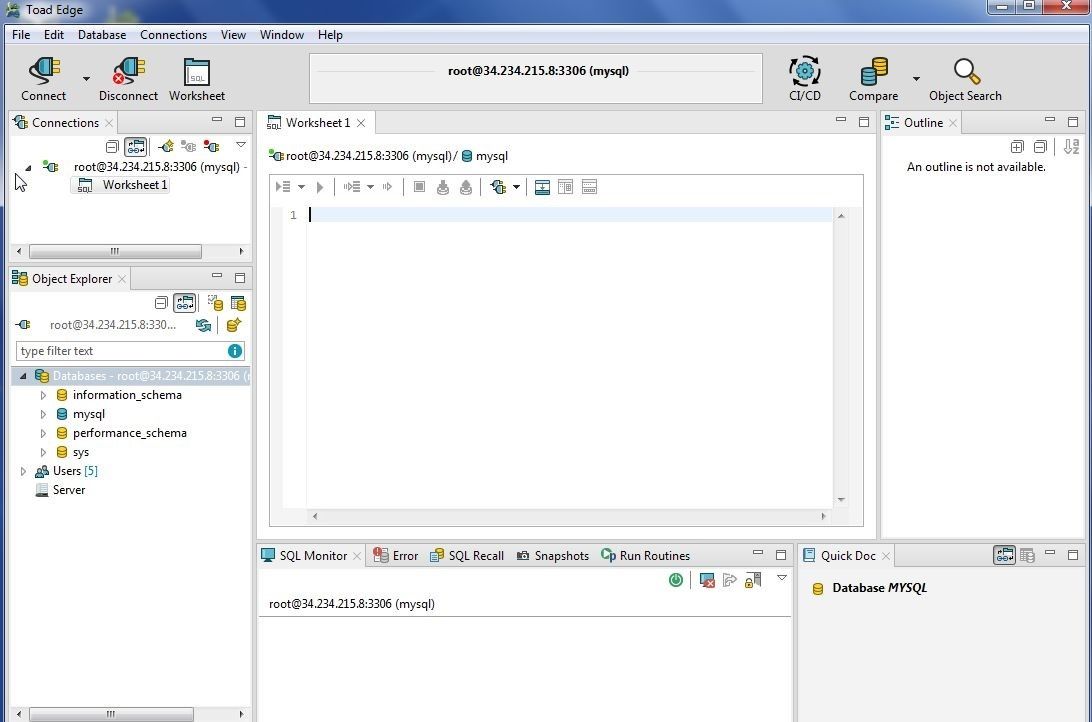
Figure 29. Connection added to Toad Edge
The Object Explorer lists the Databases, Users and Server, as shown in Figure 30. The mysql database is selected as the default (or active) database.
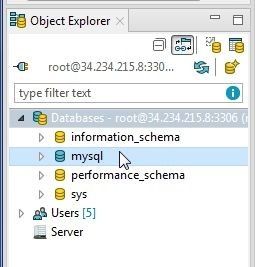
Figure 30. Connections and Object Explorer
Creating a Database Table
In this section we shall create a database table. We shall create a table called wlslog with columnslogid (primary key), category, type, servername, code and msg. All columns are of type VARCHAR except thelogid column, which is of type INT. Right-click on mysql>Tables and select New Table as shown in Figure 31.
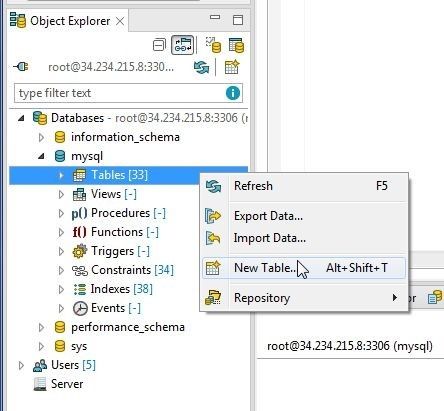
Figure 31. mysql>Tables>New Table
In the New Table wizard specify a table name (wlslog) with the Database selected as mysql. Keep other settings as the default and click on Next as shown in Figure 32.
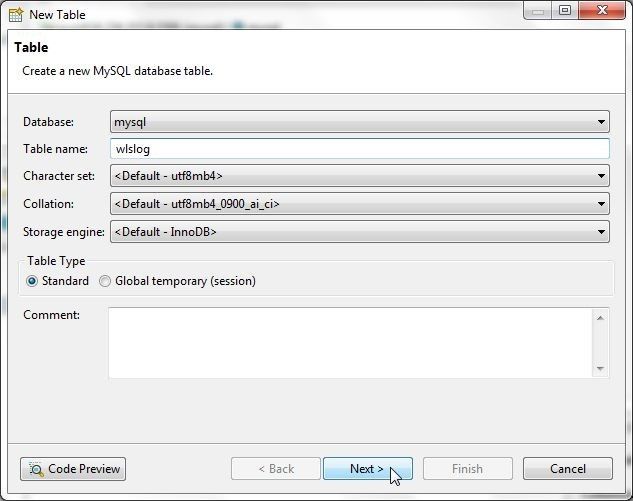
Figure 32. New Table>Next
In Table Columns click on New… to add column definitions as shown in Figure 33.
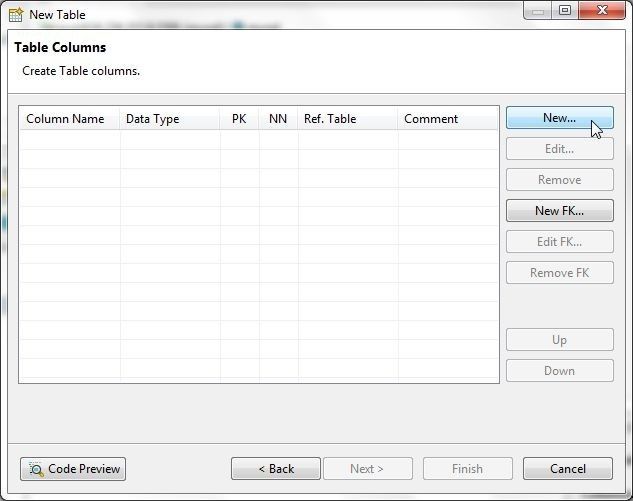
Figure 33. New Table>Table Columns>New
The New Column window gets started, as shown in Figure 34. Specify column name (logid for the primary key column) and select Data Type as INT. Specify the Column Precision (20 is default) and select the Primary Key checkbox as shown in Figure 34. The Not Null checkbox gets selected when a column is selected as a Primary Key column. Optionally select Autoincrement option. Click on OK to add the column. To add the column and start a new New Column window to add another column click on Ok+Add as shown in Figure 34.
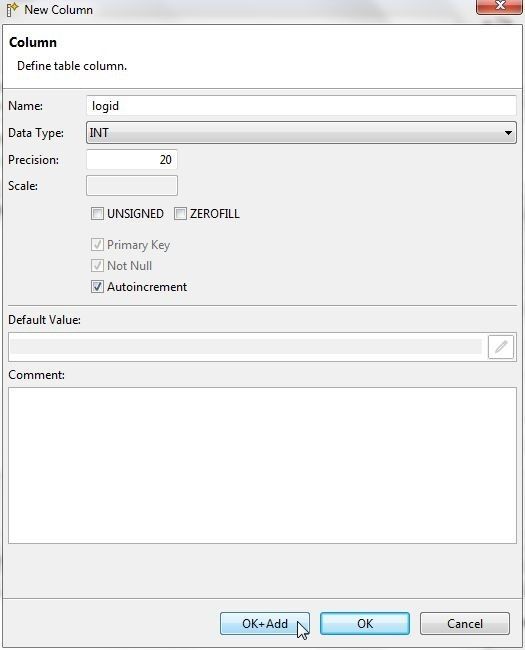
Figure 34. New Column>Ok+Add
The logid column gets added and a new New Column window gets launched to add another column. Add other columns (category, type, servername, code and msg). The New Column window is launched each time for a column when Ok+Add is clicked. After adding the last column msg click on OK as shown in Figure 35.
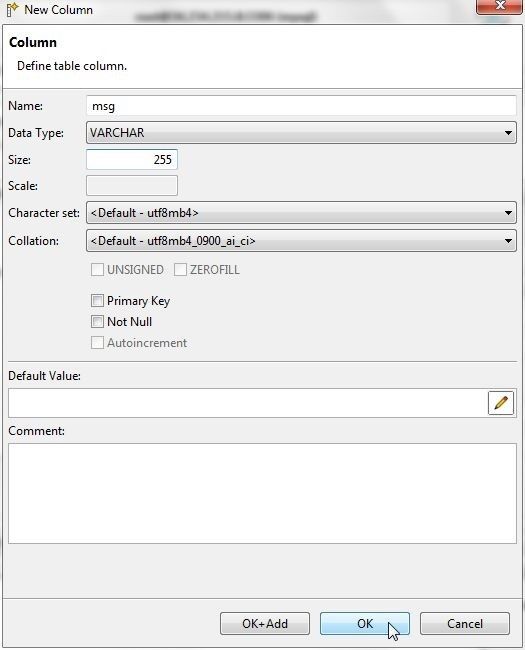
Figure 35. Adding msg column
After all columns have been added, as shown in Figure 36, click on Finish.
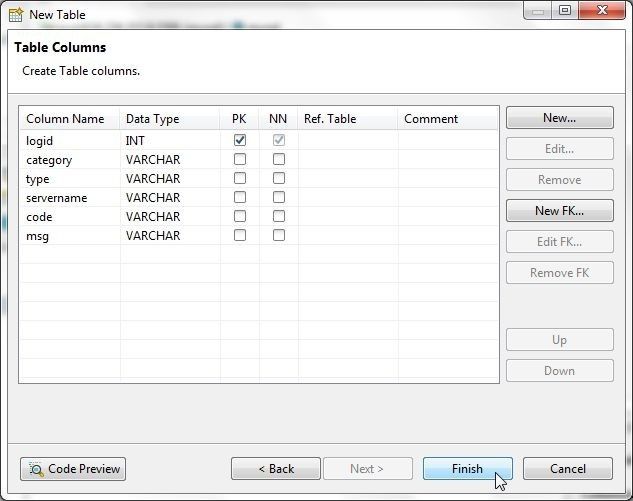
Figure 36. New Table>Table Columns>Finish
The wlslog table gets created and gets added to Object Explorer, as shown in Figure 37.
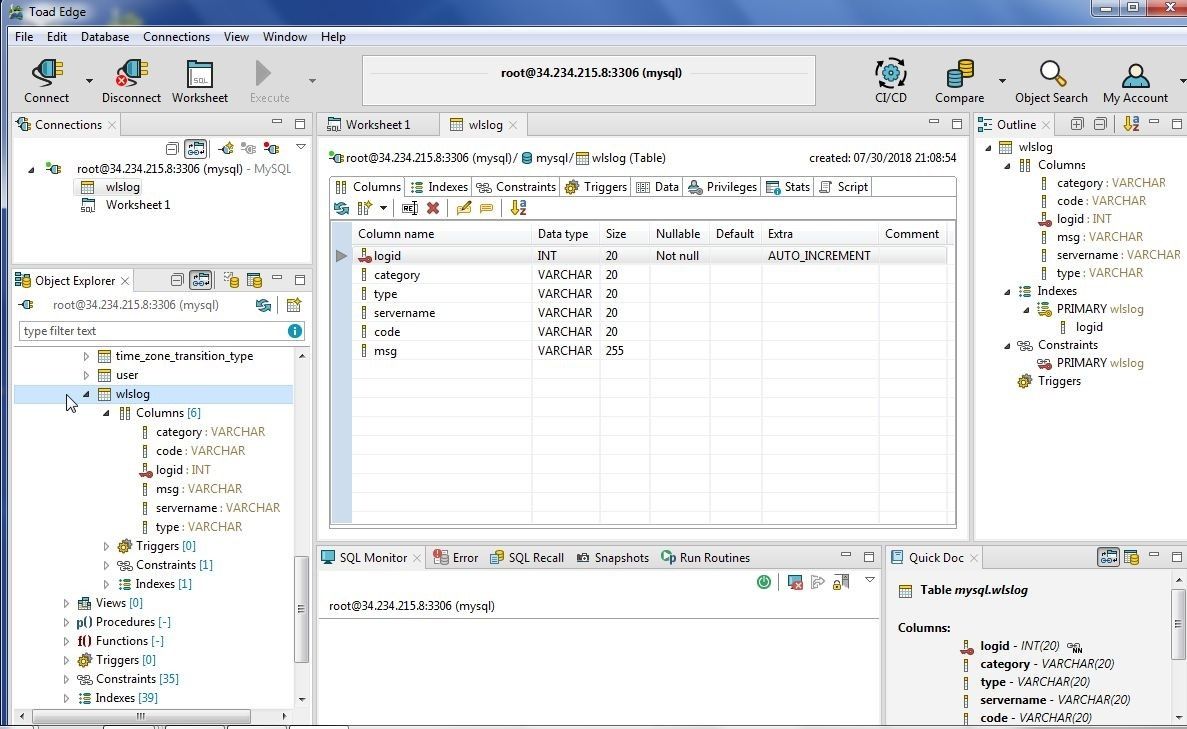
Figure 37. Table wlslog created
The table detail lists Columns and other table definition objects, as shown in Figure 38. Click on Data tab to display table data. Initially no data is displayed.
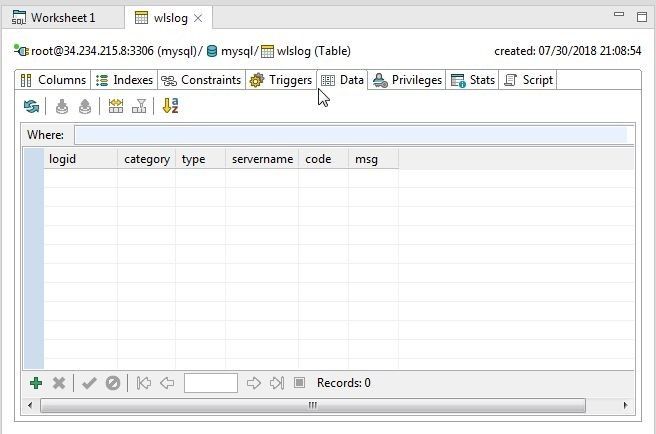
Figure 38. Table Columns and other table components
Adding Table Data
In this section we shall add data table. Create a CSV file (wlslog.csv) and save the following listing to the file.
LOGID,CATEGORY,TYPE,SERVERNAME,CODE,MSG
1,Notice,WebLogicServer,AdminServer,BEA-000365,Server state changed to STANDBY
2,Notice,WebLogicServer,AdminServer,BEA-000365,Server state changed to STARTING
3,Notice,WebLogicServer,AdminServer,BEA-000365,Server state changed to ADMIN
4,Notice,WebLogicServer,AdminServer,BEA-000365,Server state changed to RESUMING
5,Notice,WebLogicServer,AdminServer,BEA-000361,Started WebLogic AdminServer
6,Notice,WebLogicServer,AdminServer,BEA-000365,Server state changed to RUNNING
7,Notice,WebLogicServer,AdminServer,BEA-000360,Server started in RUNNING mode
The first row in the wlslog.csv file is for column headers. Next, import table data. Right-click on the wlslog table in Object Explorer and select Import Data… as shown in Figure 39.
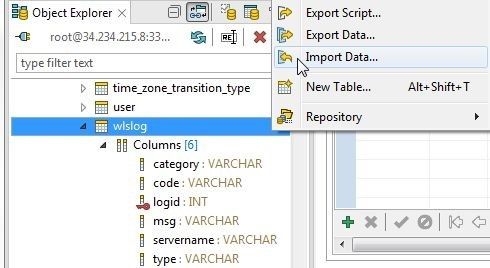
Figure 39. wlslog>Import Data…
The Import Data wizard gets started, as shown in Figure 40. For Import Format select CSV file or ZIP archive with CSV content. Click on the browse button (…) for the Source file and select the wlslog.csv file. Click on Next.
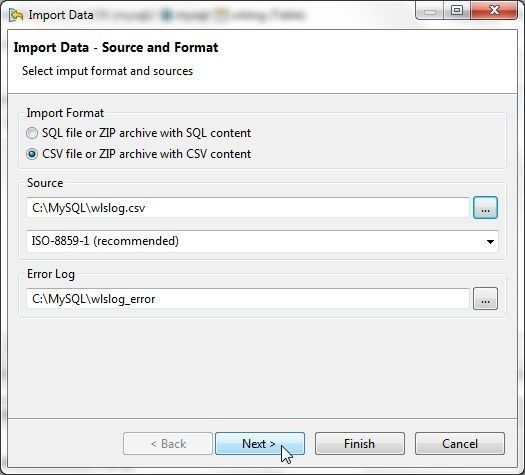
Figure 40. Import Data
Keep the default CSV Settings as shown in Figure 41. The Data Format Preview displays the data to be imported. Click on Finish.
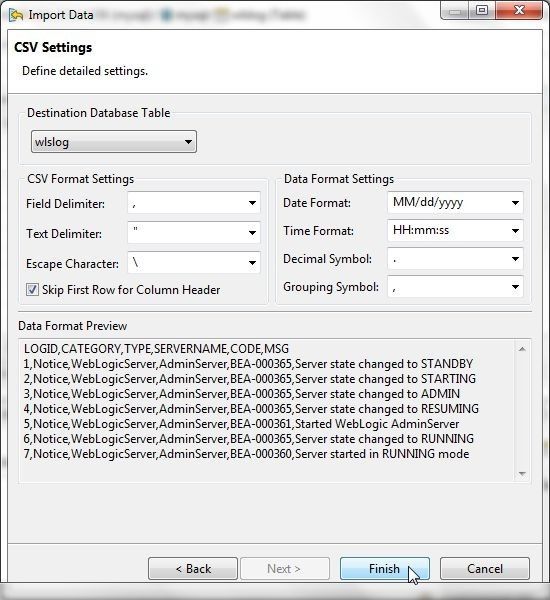
Figure 41. CSV Settings
The Data Import Result indicates that data has been imported successfully, as shown in Figure 42.
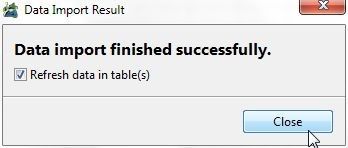
Figure 42. Data Import Result
Click on the Refresh button with the Data tab selected to display the data imported as shown in Figure 43.
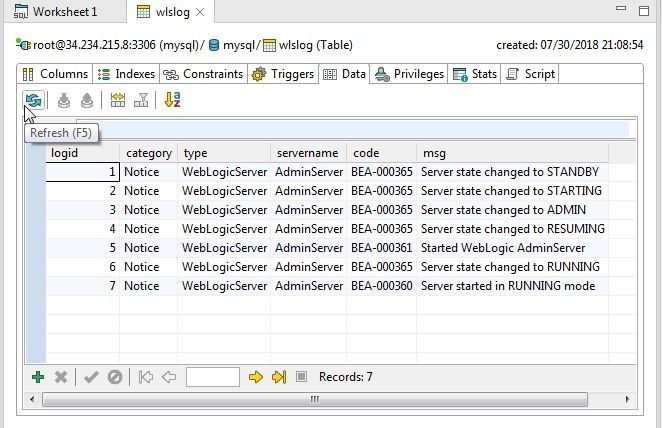
Figure 43. Data>Refresh
Data may be added one row at a time with Add Row as shown in Figure 44.
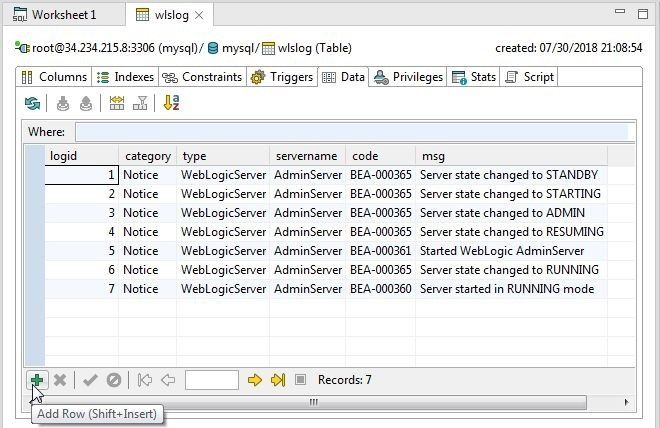
Figure 44. Add Row
One or more data rows may be deleted with Drop Selected Rows as shown in Figure 45.
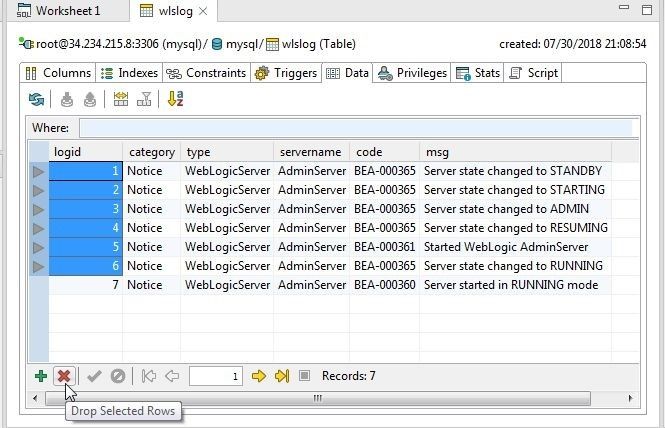
Figure 45. Drop Selected Rows
Deleting an ECS Cluster
To delete the ECS cluster all running tasks in the cluster must first be stopped. To stop a task or tasks select the task/s and click on Stop. To stop all tasks click on Stop All as shown in Figure 46.
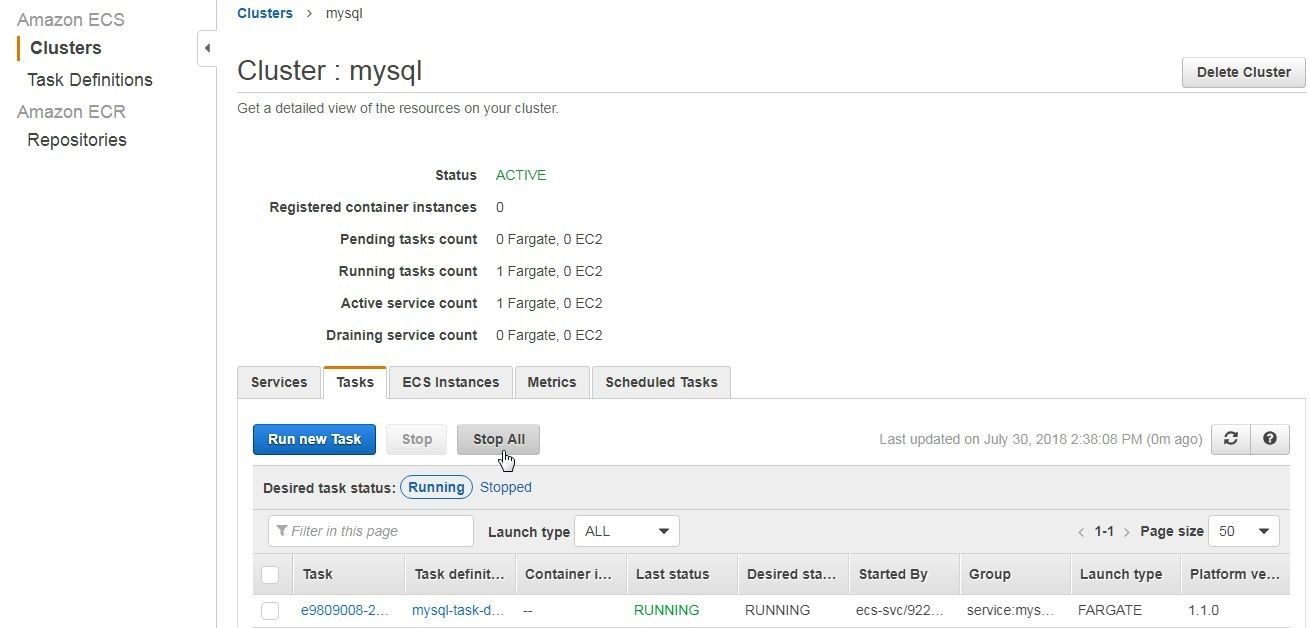
Figure 46. Stopping task/s
In the Stop all tasks dialog specify STOP ALL in the field provided and click on Stop all as shown in Figure 47.
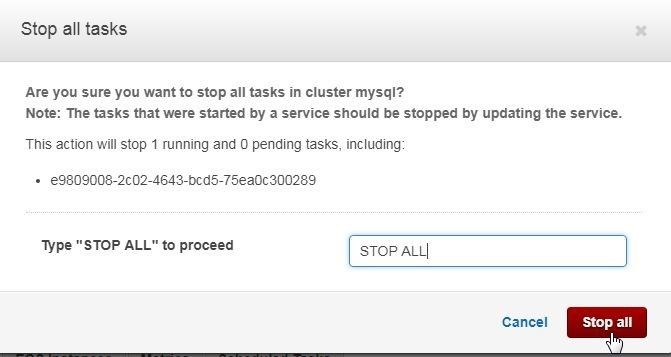
Figure 47. Stop all tasks
After stopping the task/s click on the Delete Cluster button, shown in Figure 48.
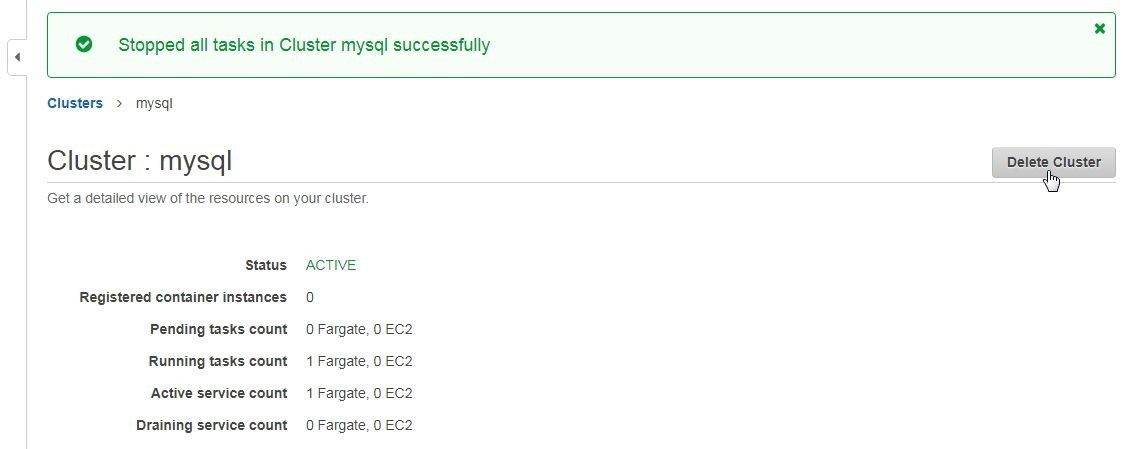
Figure 48. Delete Cluster
Click on Delete in the Delete Cluster dialog as shown in Figure 49.
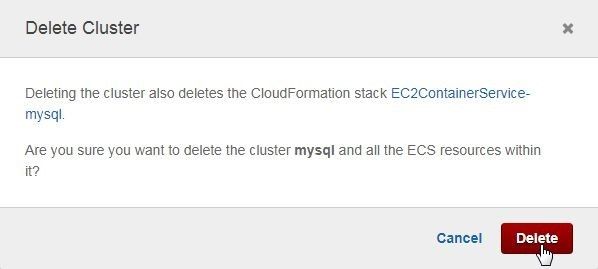
Figure 49. Delete Cluster
Cluster mysql gets deleted, as indicated by message and Clusters table in Figure 50.
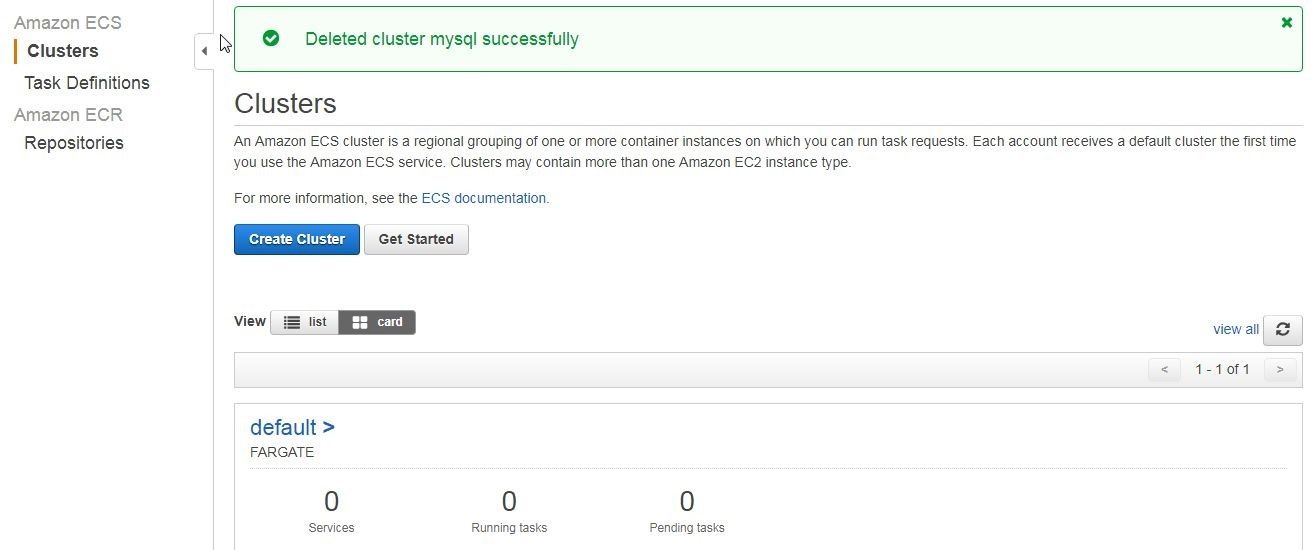
Figure 50. Cluster mysql deleted
Conclusion
In this article we discussed using Amazon ECS Fargate launch type to create a containerized application for MySQL database. Subsequently, we connected to the MySQL database with Toad Edge 2.0.2 and created a database table, and added table data. Toad Edge 2.0.2 is a one-stop integrated development environment not only for MySQL but also for PostgreSQL, EDB, and Redshift. We also discussed deleting the ECS cluster.
Want to learn more?User guide: Access the Toad Edge User Guide. Product page: Click the following link to watch a video on our product page and learn how Toad Edge can help you simplify development and management tasks for open source databases. Blog: 7 hacks to use Toad Edge like a boss Blog: 5 blogs that teach you to effectively work in Toad Edge®
Try Toad Edge free for 30 daysFree 30-day trial of Toad Edge Already in a trial? If Toad Edge has helped you ramp up on open source RDBMSs fast, buy it now or contact a sales representative. |
Start the discussion at forums.toadworld.com