Toad Data Modeler and Toad Edge are two tools that complement each other’s functionality very well. Toad Data Modeler provides all the features needed to model data and generate DDL from a model but does not provide support for DBA features such as connecting to a database to explore database objects, manage users, and run SQL DDL and DML statements. Toad Edge is the tool designed for a DBA; using which, database schemas, objects, and users may be managed and a SQL Worksheet used to run SQL statements. In two articles we shall discuss how Toad Data Modeler could be used with Toad Edge to model data and apply the model to MySQL database. The two articles have the following sections.
Setting the Environment
Creating a Model
Adding Entities
Saving Model
Generating DDL
Creating Connection in Toad Edge
Running DDL to Create Tables
Running DML to Add Table Data
Querying Table
Dropping Table
Setting the Environment
Download and install the following software on Windows OS.
Creating a Model
Toad Data Modeler is used to create logical and physical data models, using entities and database structures to model a database. In this section we shall create a top-level physical data model and use it to develop a logical data model for MySQL database table/s. To create a model, select File>New>Model in Toad Data Modeler as shown in Figure 1.
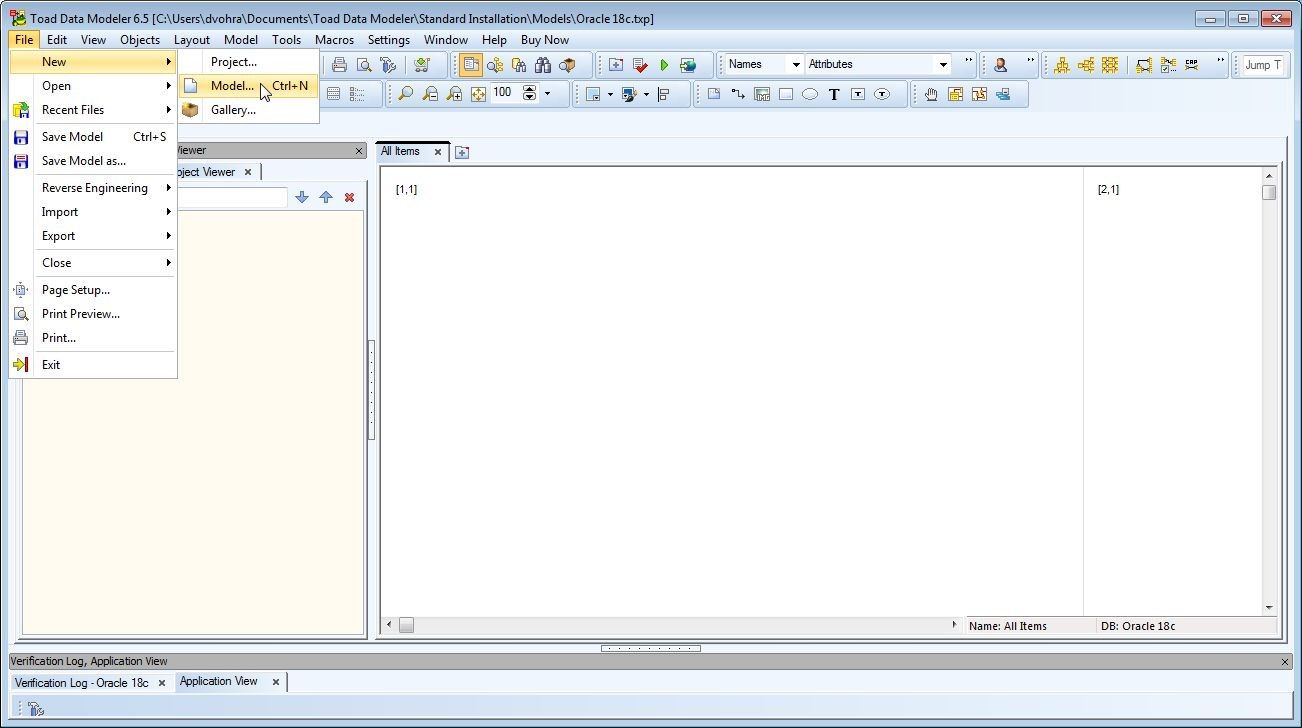
Figure 1. File>New>Model
In New Model window the Physical Data Model tab is selected by default; from which, select MySQL 5.7, which is the highest MySQL database version supported by Toad Edge, as shown in Figure 2. The Model Name gets set to the Data Model selected.

Figure 2. New Model>MySQL 5.7
Click on OK as shown in Figure 3 to create a model.
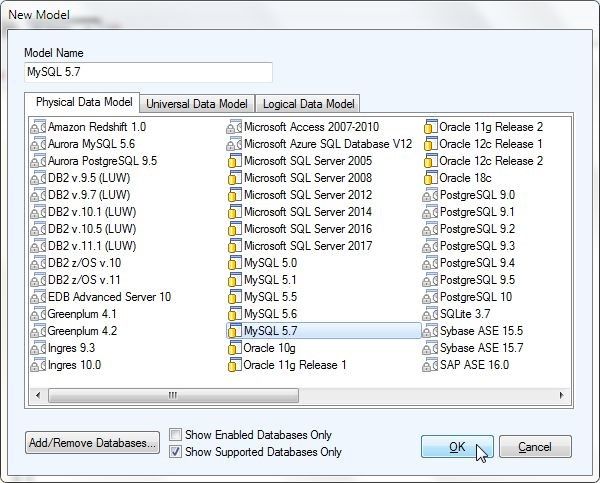
Figure 3. New Model>OK
A new Physical Data Model called MySQL 5.7 gets created and added to the Physical Model Explorer, as shown in Figure 4.
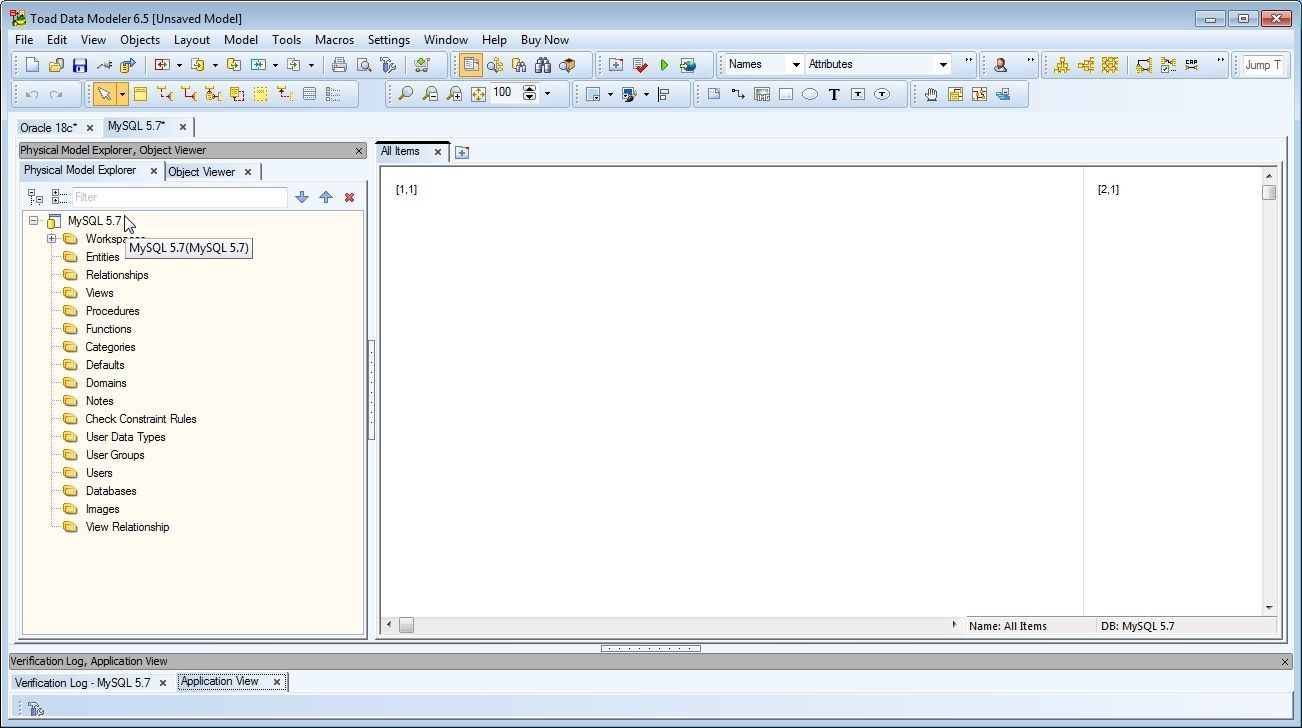
Figure 4. Physical Data Model MySQL 5.7 created
Adding Entities
In this section we shall create entities to model MySQL database tables. We shall be creating a logical data model for two MySQL database tables Log and LogEntry for WebLogic server log data. The Log table is to have columns logid (primary key), category, type and servername. TheLogEntry table is to have columns logid, timestamp, code and msg. Thelogid column in LogEntry is both the primary and foreign key.
Entities are logical data structures and define attributes and relationships that are used to model database tables and relationships between the tables. To add an entity right-click on the Entities in the MySQL 5.7 physical data model and select Add Entity as shown in Figure 5.
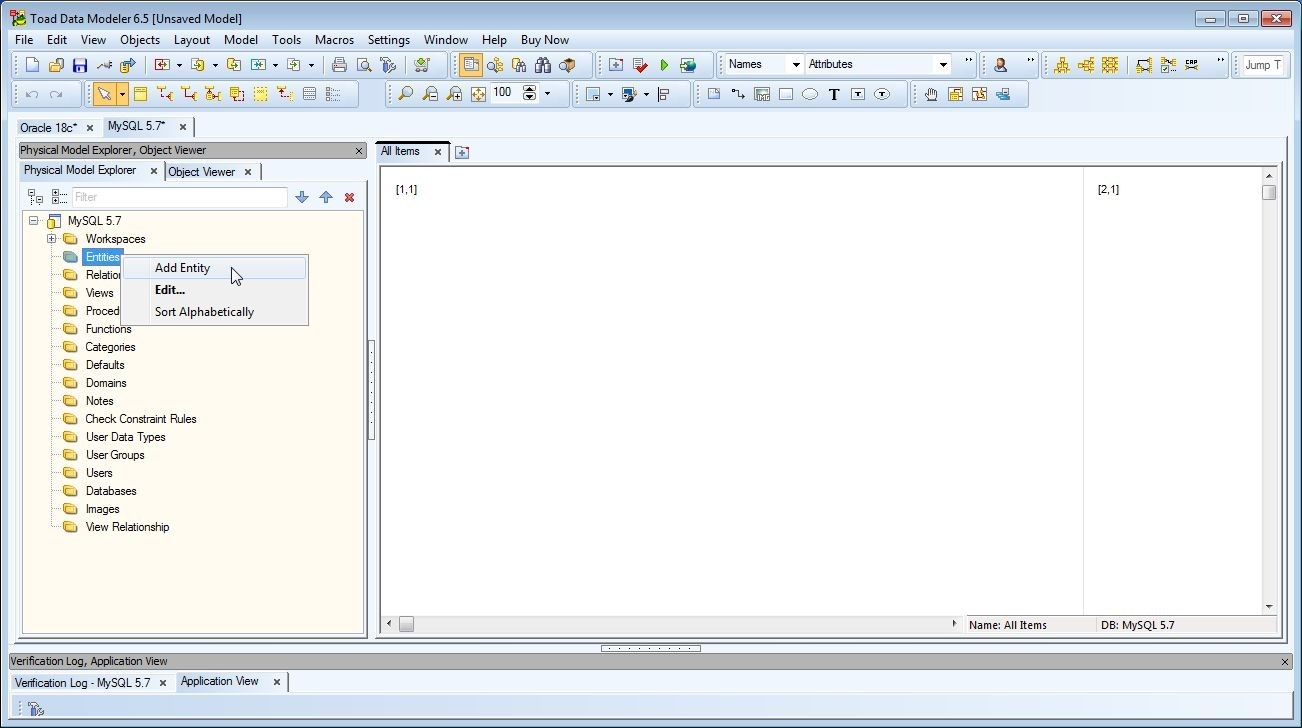
Figure 5. Entities>Add Entity
To add a new entity, alternatively select the MySQL 5.7 model and select Objects>Add New>Entity as shown in Figure 6.
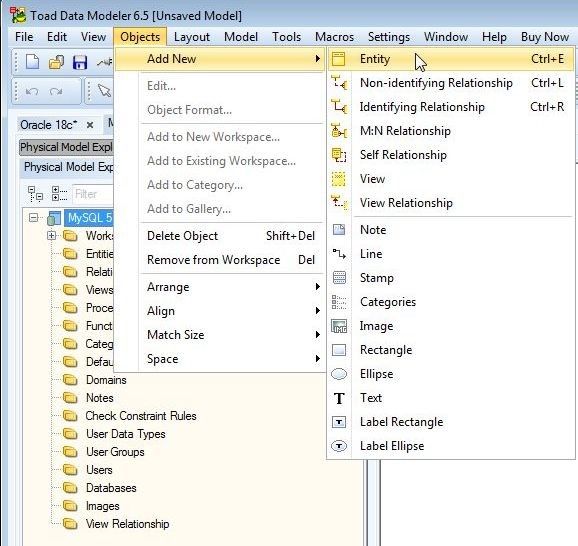
Figure 6. Objects>Add New>Entity
A new cursor gets generated when positioned over the All Items window pane, as shown in Figure 7.
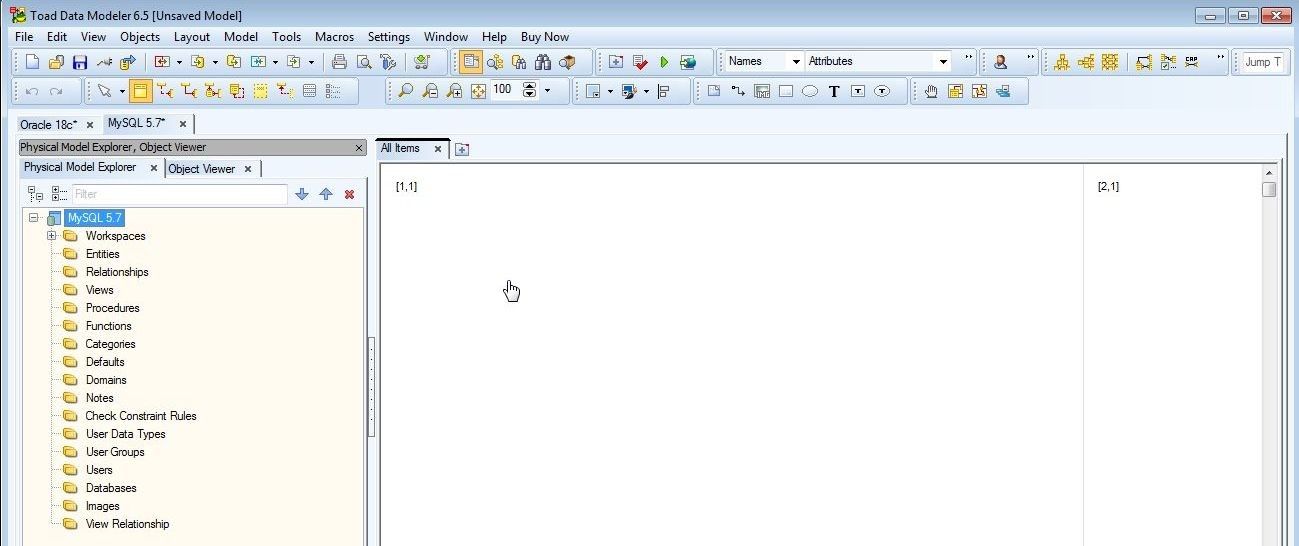
Figure 7. A new cursor in All Items
Click with cursor over the All Items and an Entity diagram gets created, as shown in Figure 8. A default Entity name is added starting with Entity1 for the first Entity added, and incrementing with name format Entityn with each subsequent Entity n added.
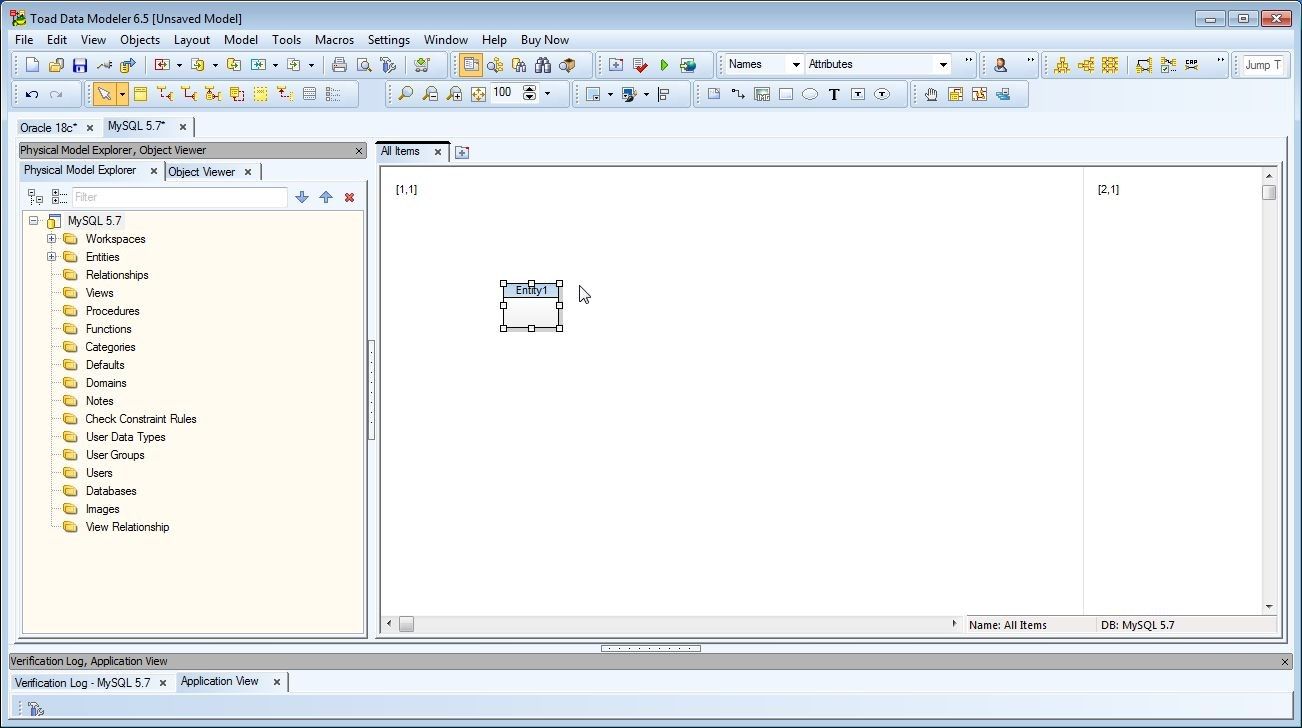
Figure 8. Entity1 Added
Next, we shall modify the entity to add attributes and relationships to develop a logical data model for database tables. Right-click in the Entity1 header and select Edit… as shown in Figure 9.
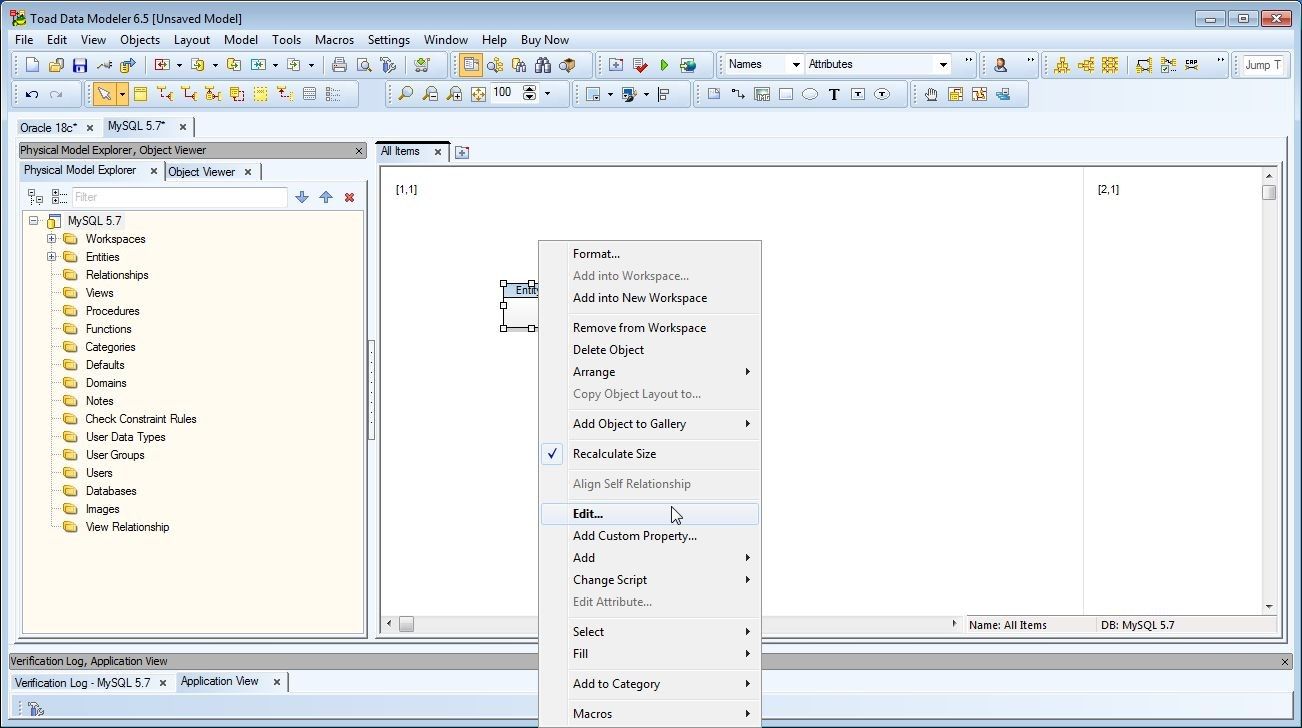
Figure 9. Entity1>Edit…
An Entity Properties window gets displayed. Add/modify Caption to set it to Log, which is the first entity that we shall model, as shown in Figure 10.
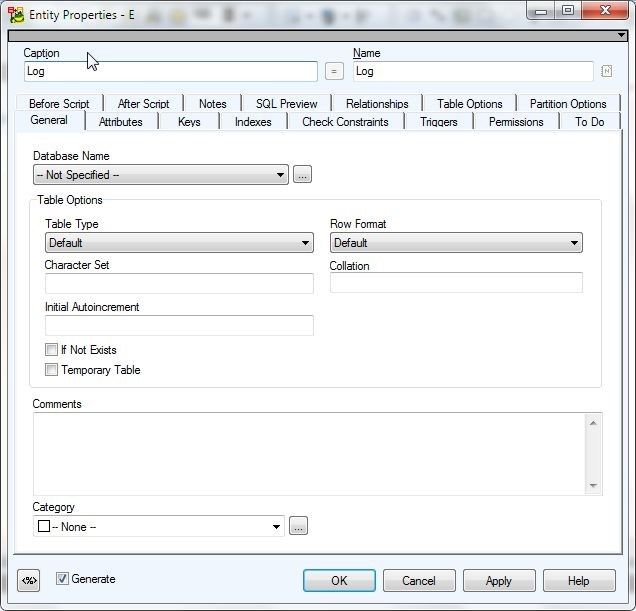
Figure 10. Entity Properties
To add attributes, select the Attributes tab as shown in Figure 11.
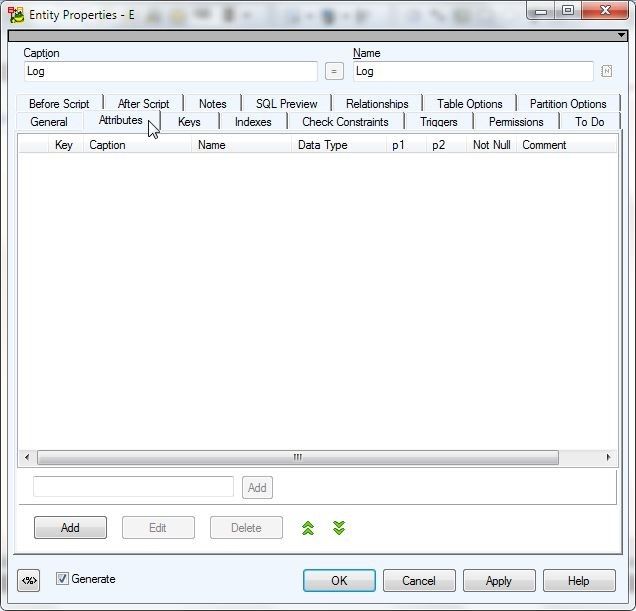
Figure 11. Attributes
To add an attribute click on Add as shown in Figure 12.
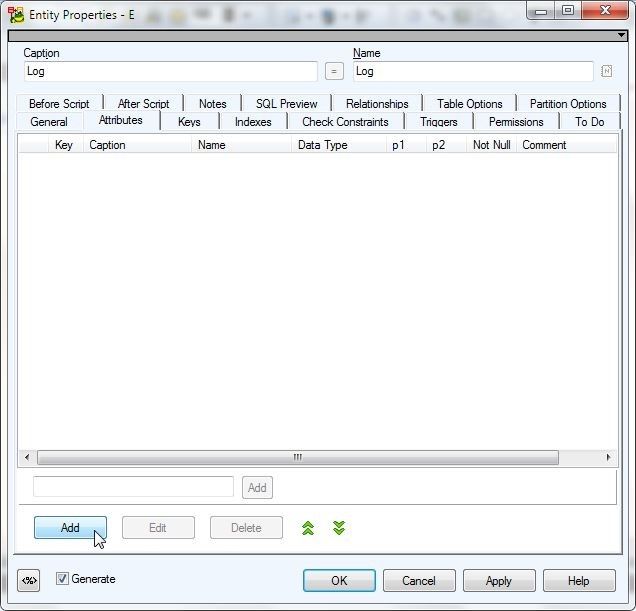
Figure 12. Attributes>Add
A dummy attribute gets added with default values, as shown in Figure 13.
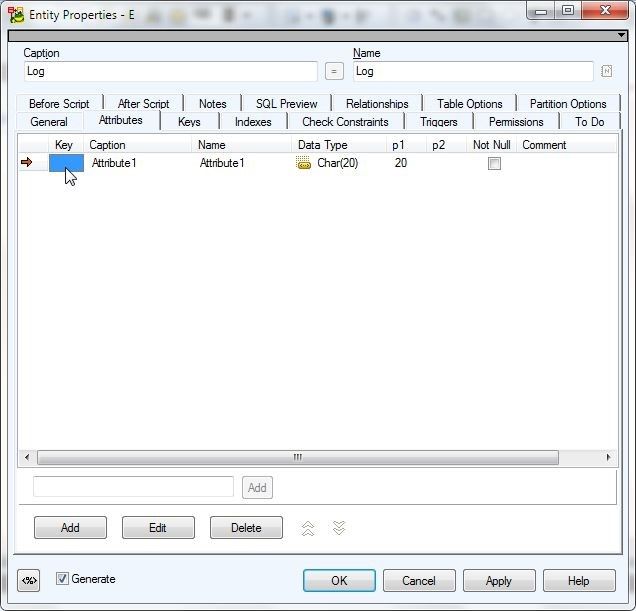
Figure 13. Dummy Attribute with Default Values
With the attribute selected click on Edit as shown in Figure 14.
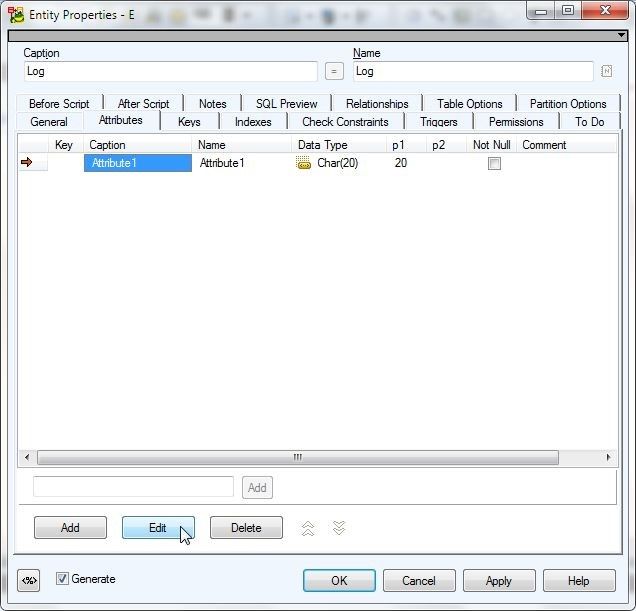
Figure 14. Edit
A Confirm dialog prompts that changes have not yet been confirmed, as shown in Figure 15. Click on Yes.
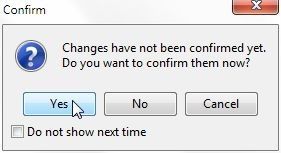
Figure 15. Confirm
An Attributes Properties – Log window gets displayed, as shown in Figure 16. Default Caption and Name field values are provided. Add a caption to the Caption field as logid. By default the Name field gets set to the same value as Caption when the Caption field value is modified from the default value. If the Name field is modified from the default value the Caption field value does not get modified as well. Caption and Name could be made different but we have used the same value. Select Data Type for the logid attribute as Integer as shown in Figure 16.
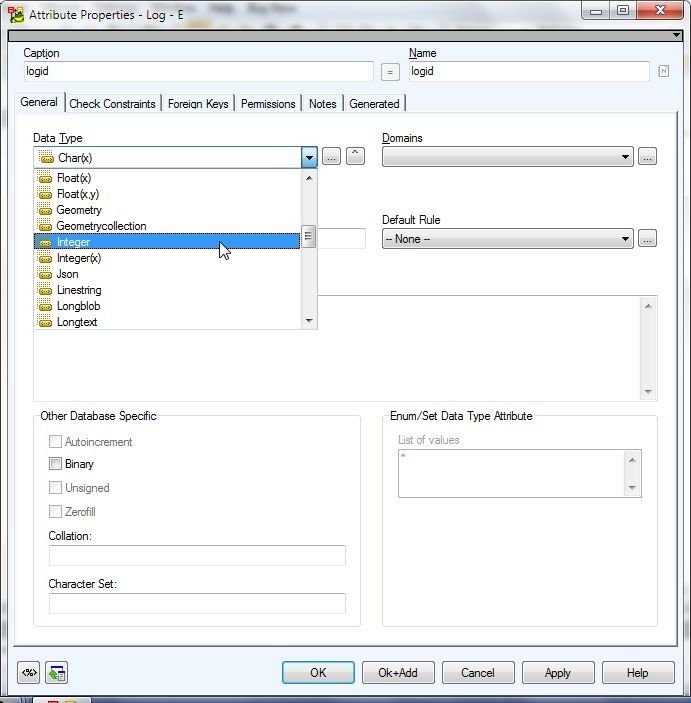
Figure 16. Setting Attribute Name and Data Type
The Primary Key checkbox must be checked for the logid attribute as it is the primary key for the Log table, as shown in Figure 17.
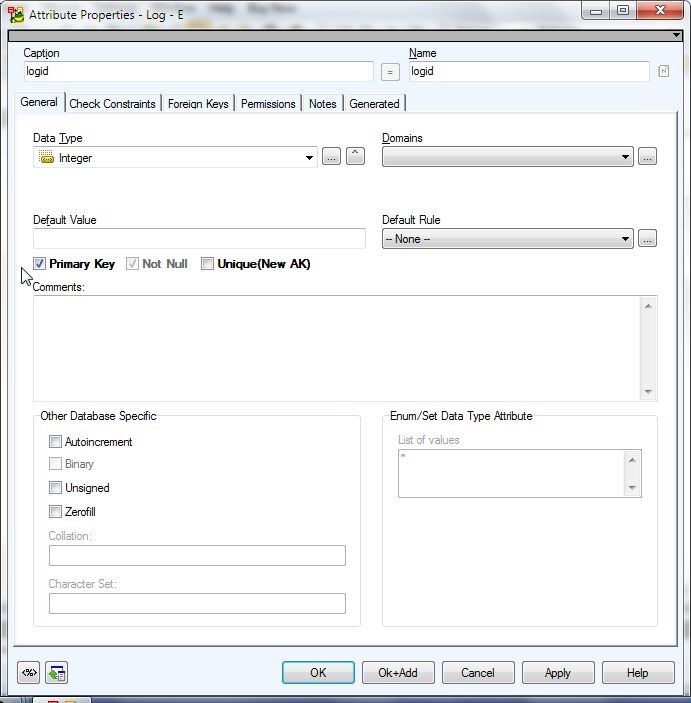
Figure 17. Setting Primary Key
Other database specific properties may also be set. MySQL supports auto-increment of primary key; therefore, select Autoincrement as shown in Figure 18.

Figure 18. Selecting Autoincrement
To add the logid attribute and add another attribute subsequently, click on OK+Add as shown in Figure 19.
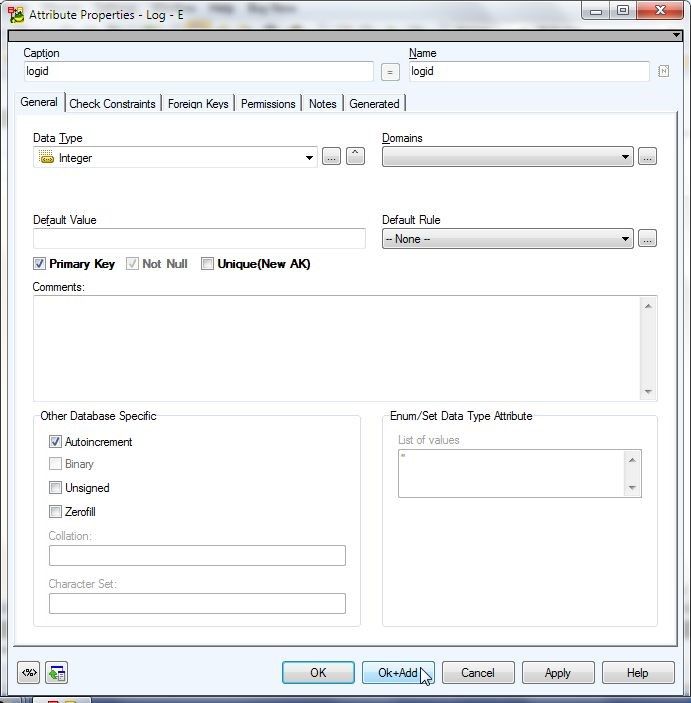
Figure 19. Ok+Add
A new Attribute Properties – Log window gets displayed; in which, add attribute name ascategory and select Data Type as Varchar(x) as shown in Figure 20.
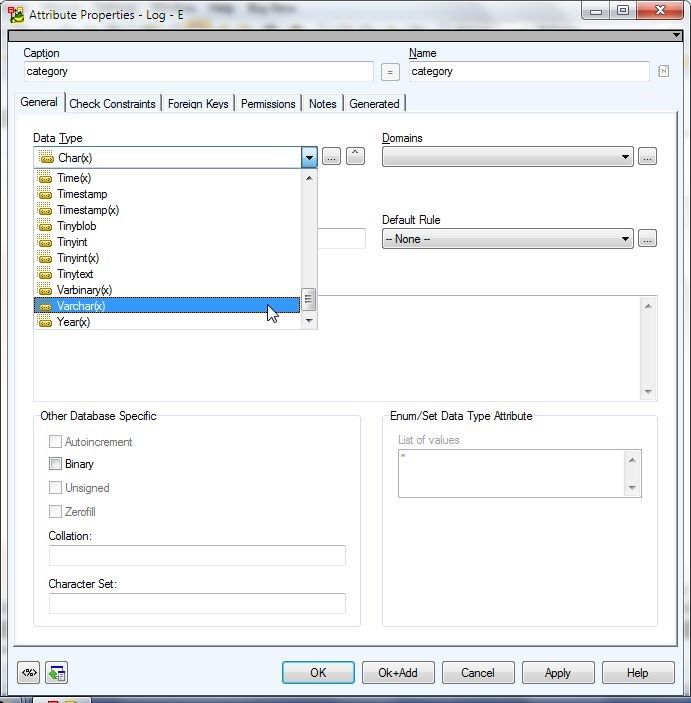
Figure 20. Adding another Attribute
As category is not a primary key attribute, the Primary Key and Not Null checkboxes must not be selected, as shown in Figure 21. And the Database Specific properties are listed based on other properties. Ascategory is not a primary key and Primary Key is not selected, the Autoincrement property is not available to be selected. Click on OK+Add.
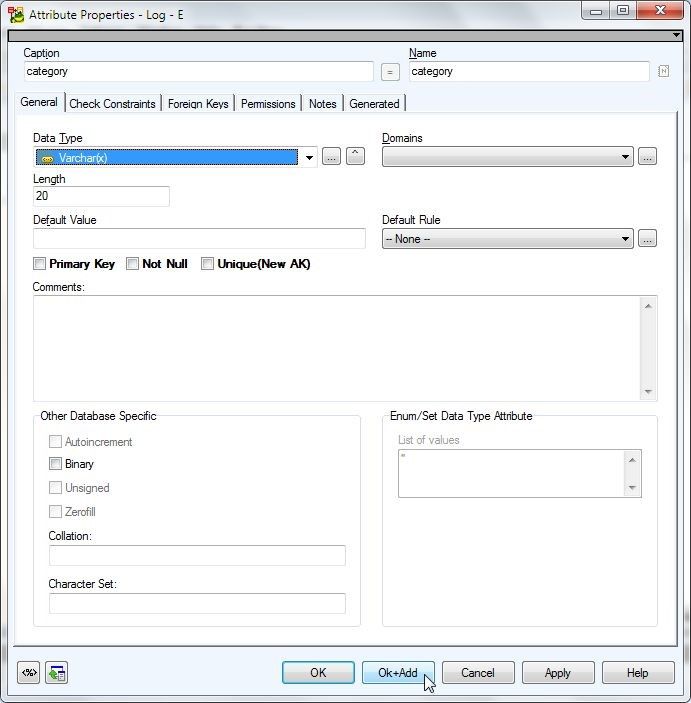
Figure 21 Adding a second attribute
Similarly, add the other entity attributes type and servername. After the last attribute is added click on OK instead of OK+Add, as shown in Figure 22.
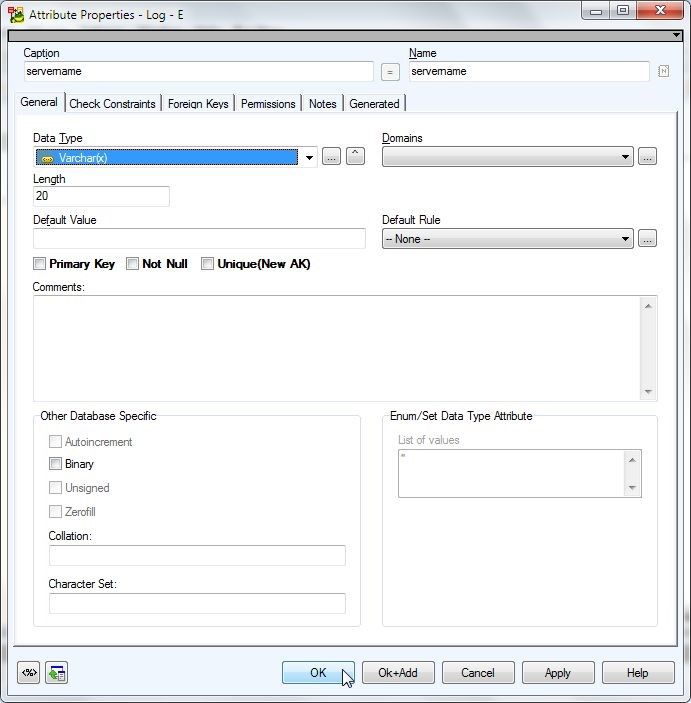
Figure 22. Adding last attribute servername
In the Entity Properties window all the attributes added are listed when Attributes tab is selected, as shown in Figure 23. Click on OK.
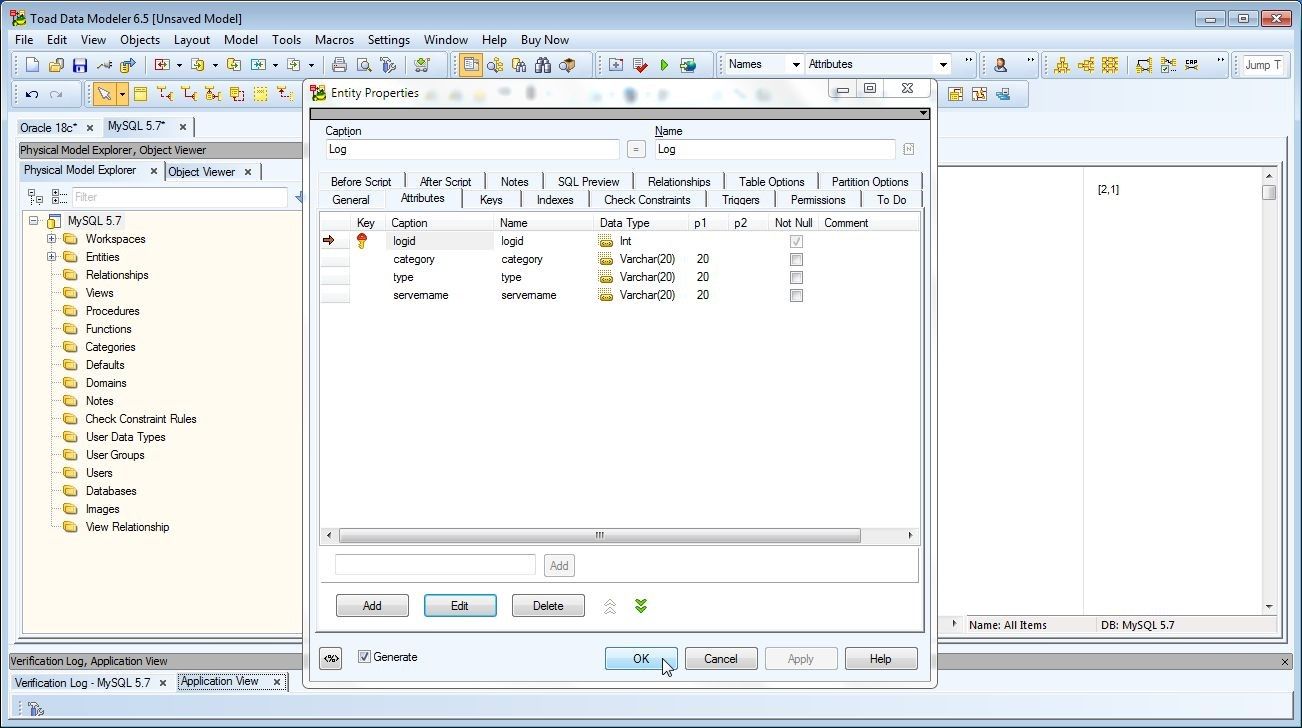
Figure 23. Entity Properties>OK
The Entity gets modified in the model, as shown in Figure 24. The entity diagram also gets modified.
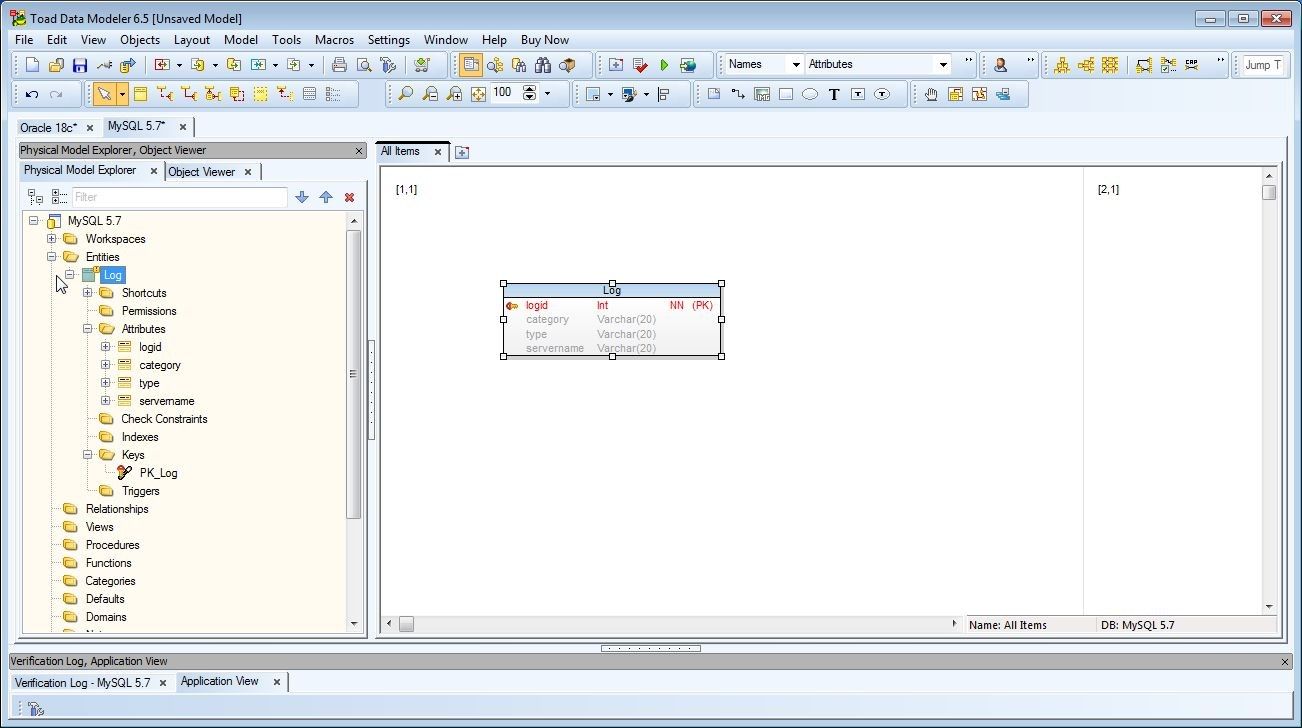
Figure 24. Entity Log
Next, we shall add another entity called LogEntry that has a foreign key mapped to the primary key of the Log entity. The Log entity has a 1:1 relationship with the LogEntry entity but the cardinality of the relationship could be different and is defined as M:N in general. To add the second entity select Objects>Add New>M:N Relationship as shown in Figure 25.
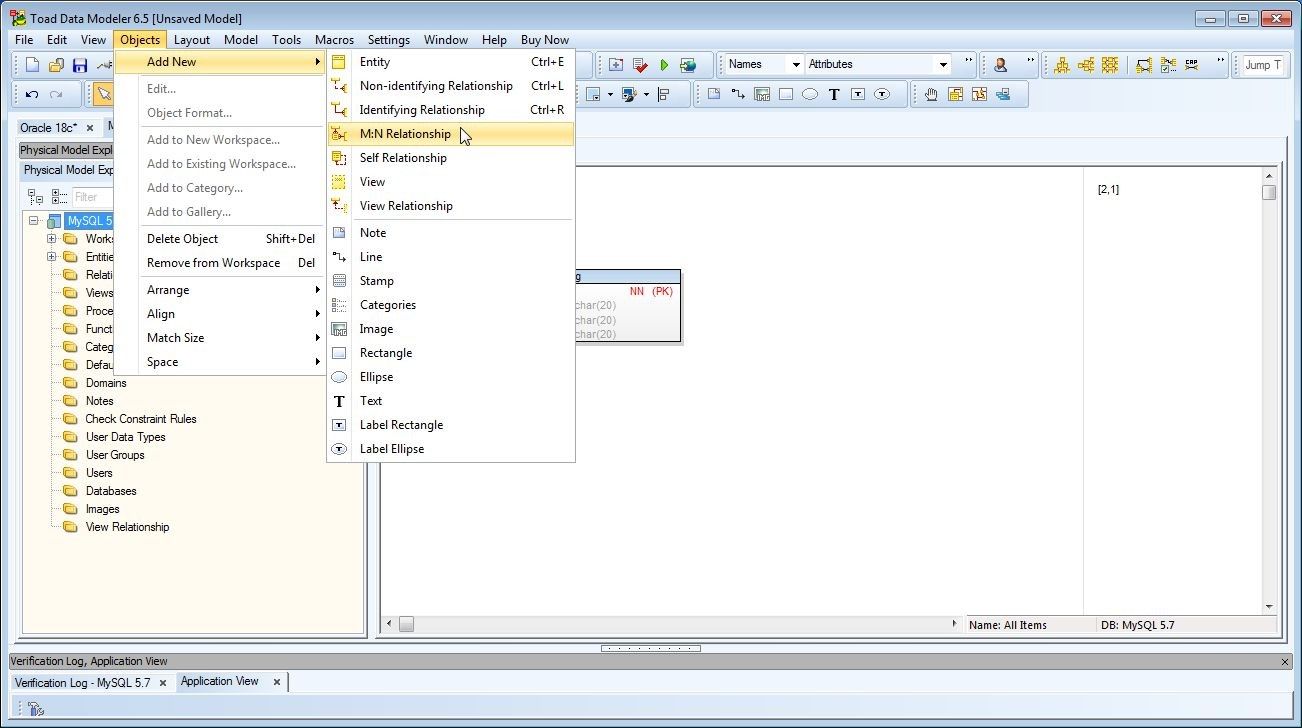
Figure 25. Objects>Add New>M:N Relationship
A ‘+’ shaped cursor gets generated, as shown in Figure 26. Position the cursor over the Log entity and double-click.

Figure 26. Adding M:N Relationship
A second entity gets generated with two PFK (Primary Foreign Key) keys, as shown in Figure 27.
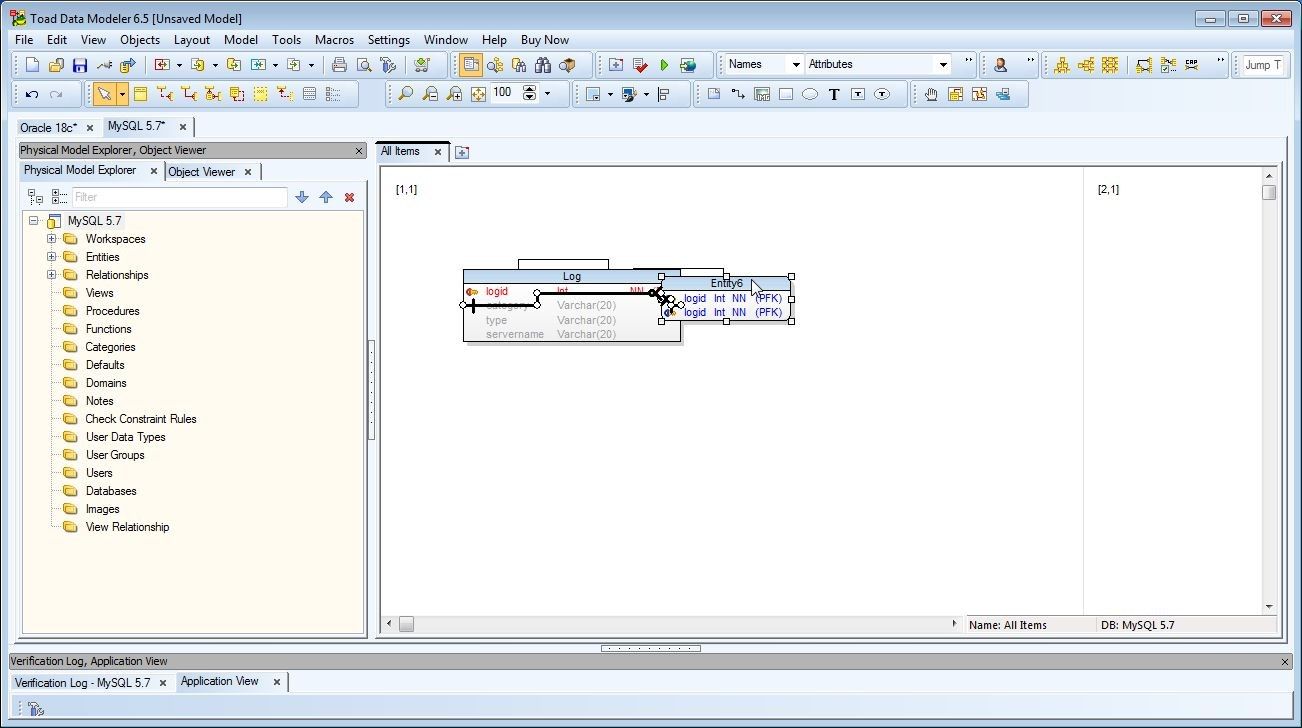
Figure 27. New Entity added
The new entity added may not be well laid out. To reposition the new entity, click in the entity header and drag the entity to a new position as shown in Figure 28.

Figure 28. Applying Entity Layout
We need to modify the default entity name and attributes. Double-click in the entity header as shown in Figure 29.

Figure 29. Double-clicking in Entity Header
The Entity Properties window gets displayed, as shown in Figure 30. The new entity has two PFK attributes calledlogid mapped to the primary key of the Log entity. As the entity relationship we need to define is1:1 we need to delete one of the PFK attributes. Select one of the logid attributes and click on Delete as shown in Figure 30.
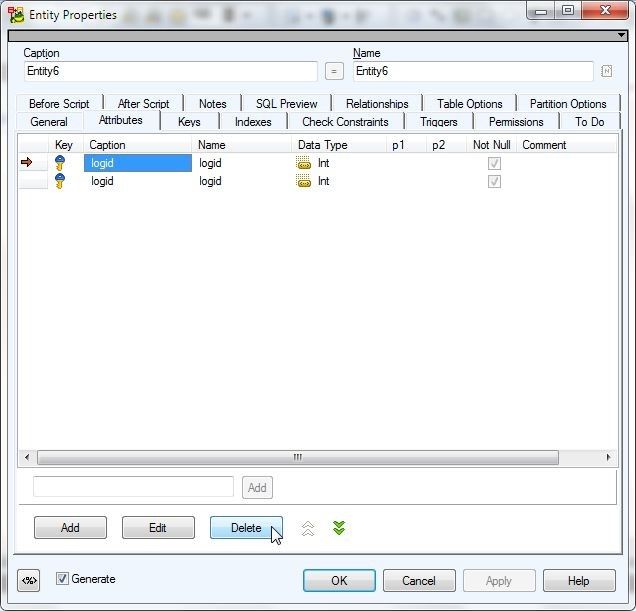
Figure 30. Entity Properties>Deleting a PFK Attribute
A Confirm dialog prompts whether the foreign key attribute should be deleted, as shown in Figure 31. Click on Yes.
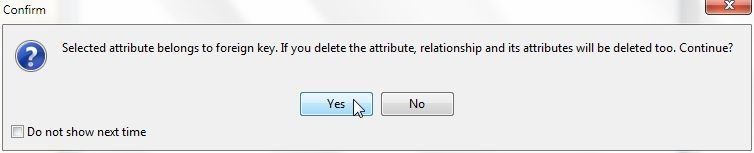
Figure 31. Confirm Dialog to delete an Attribute
One of the logid attribute gets deleted, as shown in Figure 32. Set the attribute name and caption to LogEntry. If the other logid attribute needs to be edited select the attribute and click on Edit.
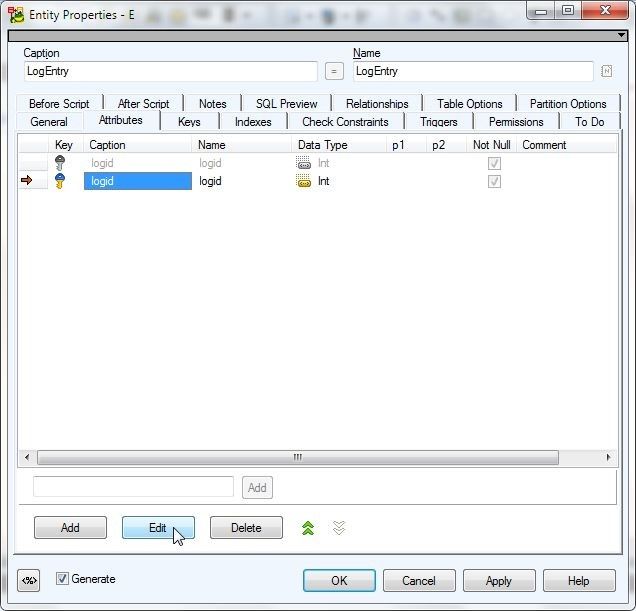
Figure 32. logid>Edit
In Attribute Properties the Foreign Keys tab lists the relationship to the logid attribute of theLog entity, as shown in Figure 33.
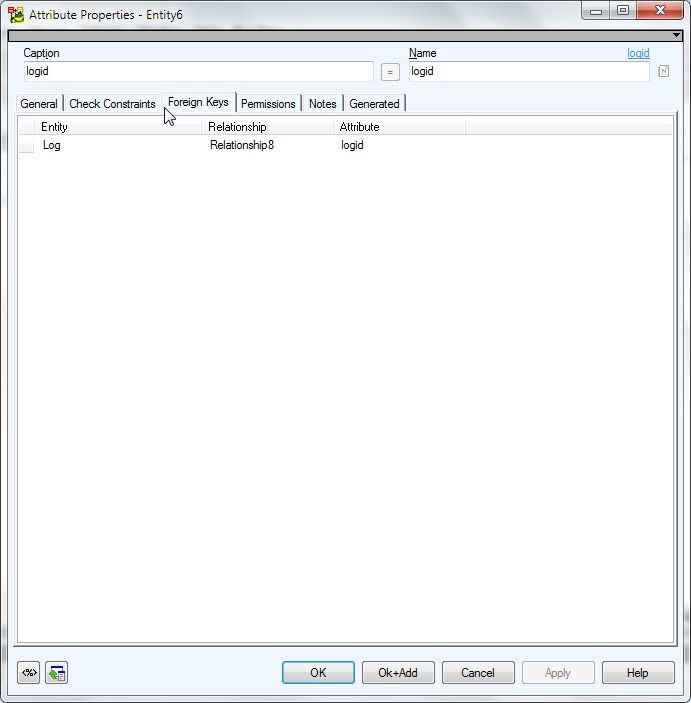
Figure 33. Foreign Keys
The General tab displays the general properties, as shown in Figure 34. We don’t need to modify any of the attribute properties for logid. Click on OK.

Figure 34. Attribute General Properties
We do need to add attributes timestamp, code and msg to the LogEntry entity. Click on Add in Entity Properties as shown in Figure 35.
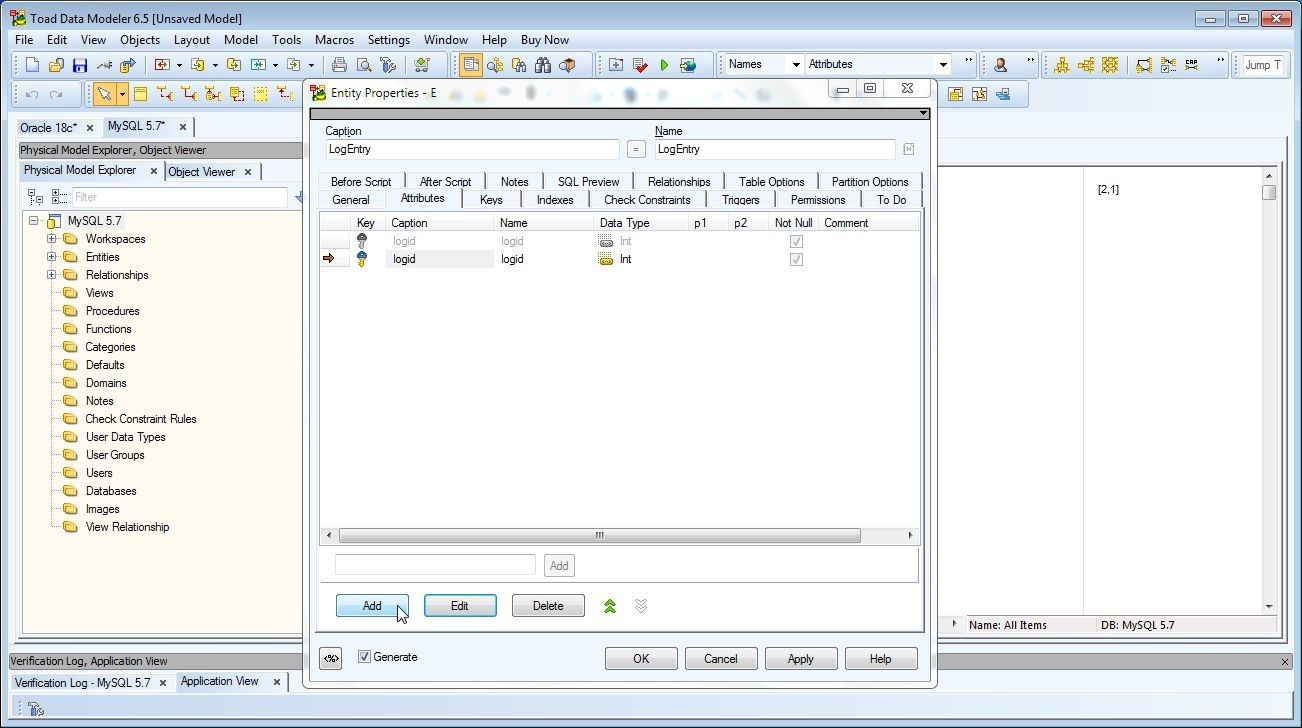
Figure 35. Entity Properties>Add
A new attribute gets added with default values, as shown in Figure 36. Using the same procedure as discussed for theLog entity add the timestamp, code and msg attributes. To edit the default new attribute you would need to click on Edit.
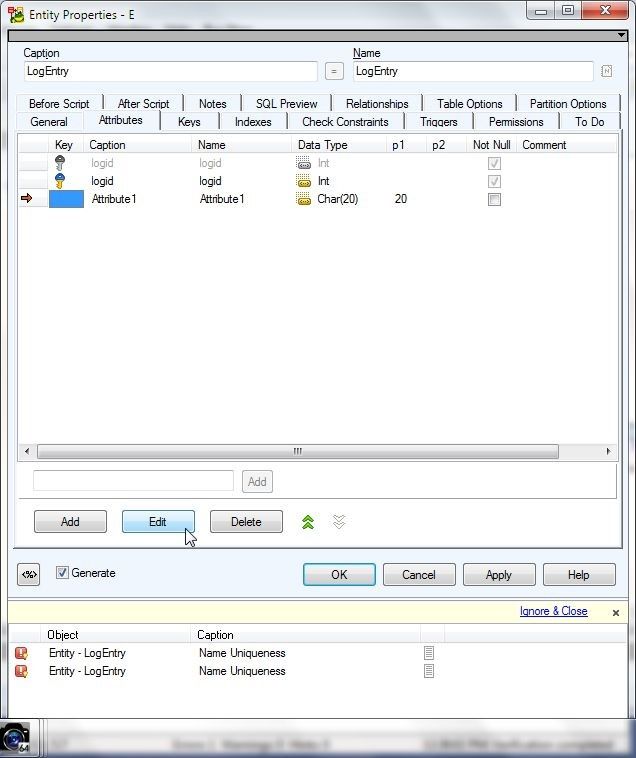
Figure 36. New Attribute with Default Values
Set attribute name to timestamp and select Data Type as Varchar(x) as shown in Figure 37. Modify the default length of “20” to “55” in the Length field.
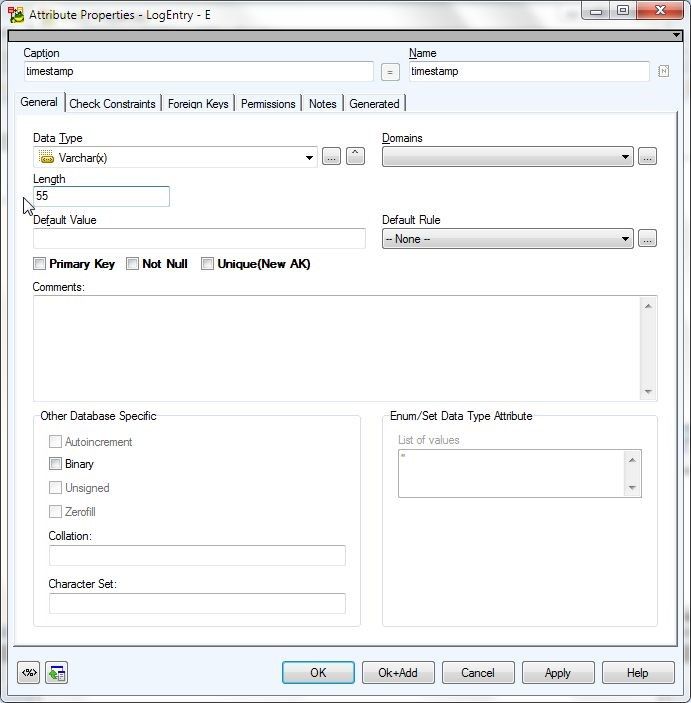
Figure 37. Adding Attribute timestamp
Click on OK+Add to add the other attributes code and msg. Set themsg attribute Length field to 255 to have provision for descriptive log messages. Click on OK after adding the last attribute msg as shown in Figure 38.
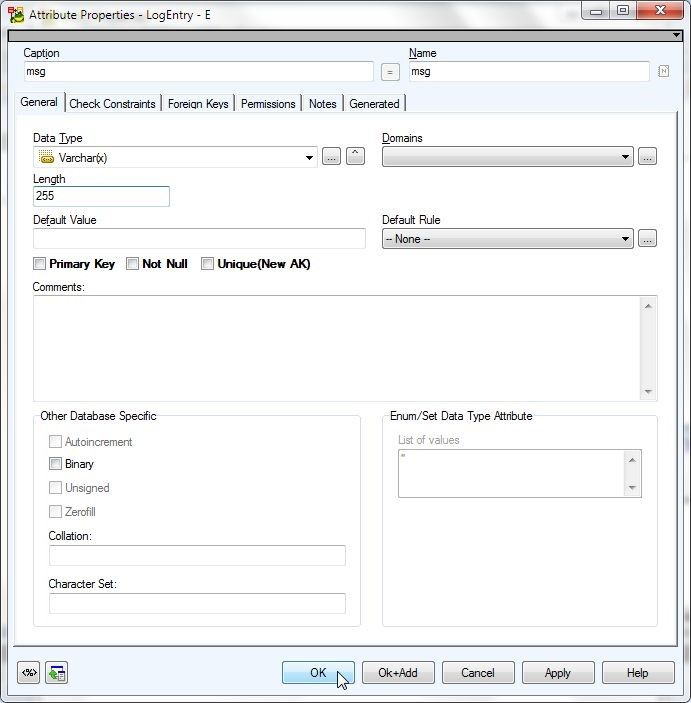
Figure 38. Adding Attribute msg
All the attributes for the LogEntry entity attribute are shown in Figure 39.
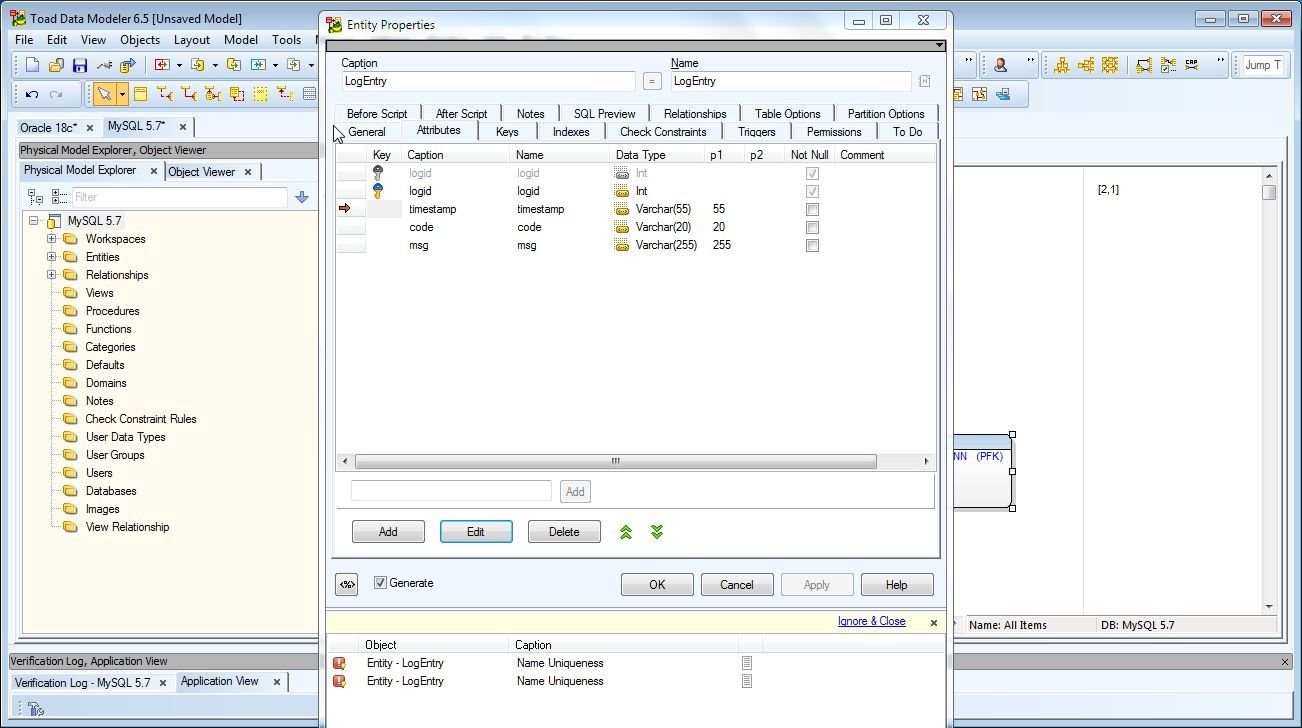
Figure 39. Entity LogEntry Attributes
The Name Uniqueness messages in the Entity Properties window (Figure 40) indicate that the Entity – LogEntry is not unique in the model and multiple entities called LogEntry may have been added during model development. We shall subsequently delete duplicate entities if any. Click on OK.
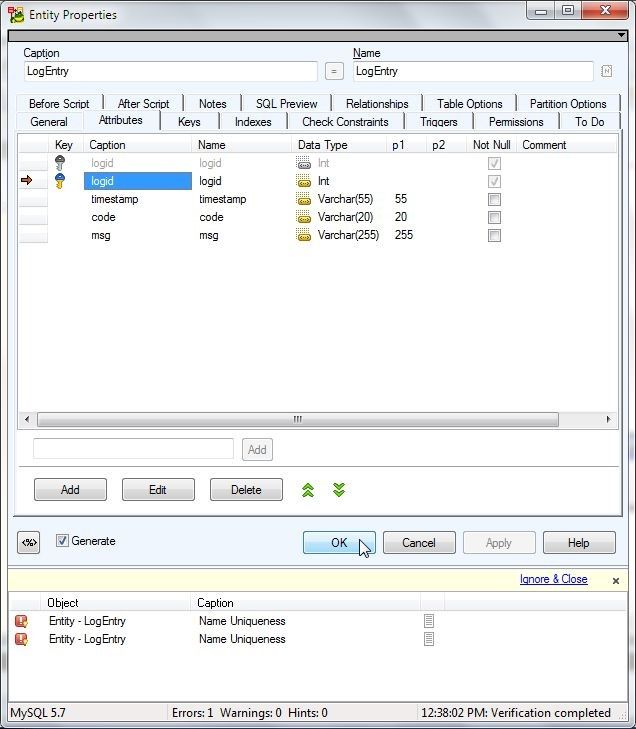
Figure 40. Entity Properties>OK
The second entity gets modified, as shown in Figure 41.
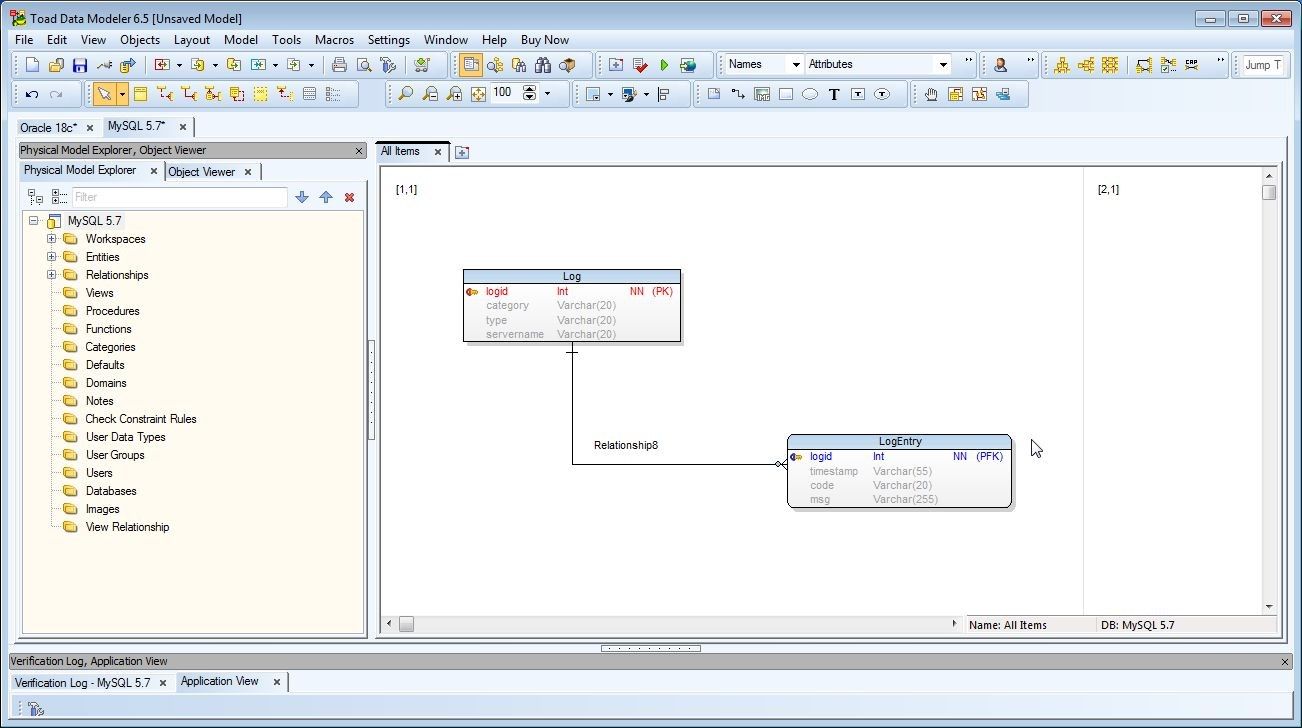
Figure 41. Entity LogEntry
To modify the default relationship name or any of its other properties double-click on the Relationship8 label as shown in Figure 42.
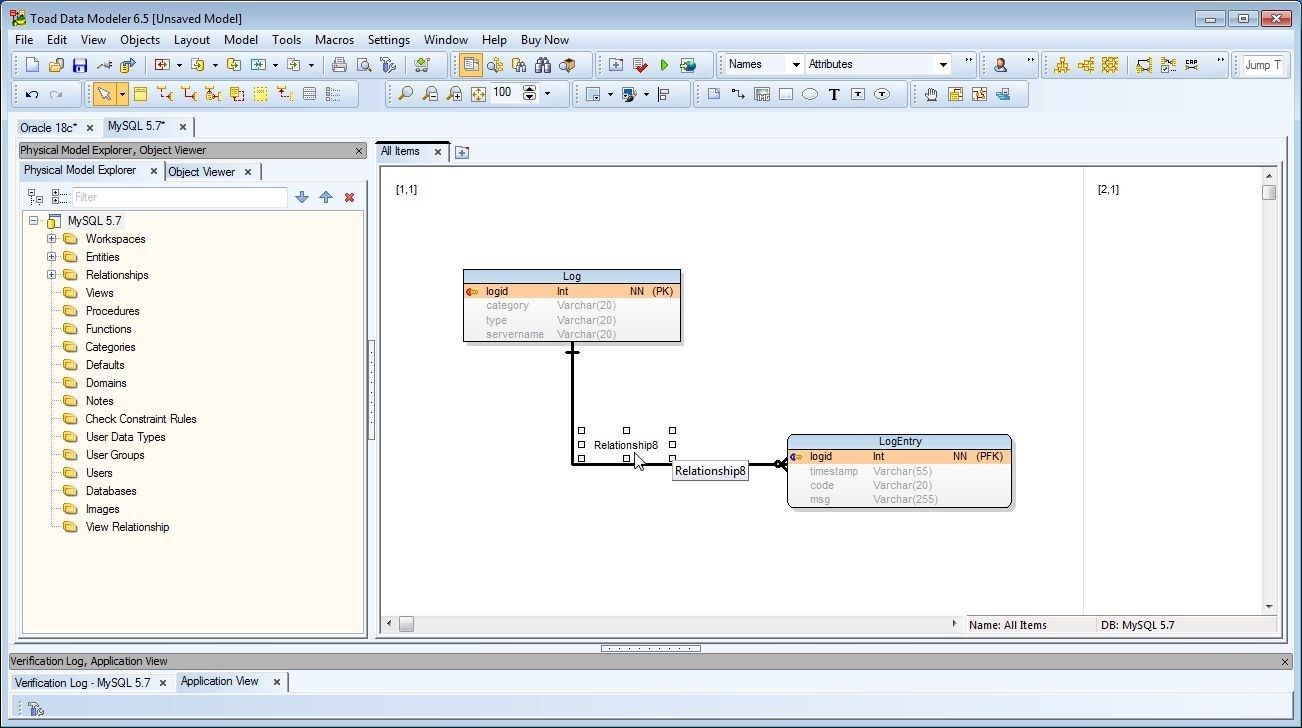
Figure 42. Relationship8>Double-click
The Relationship Properties window gets displayed, as shown in Figure 43. Modify the relationship name and caption and click on OK.
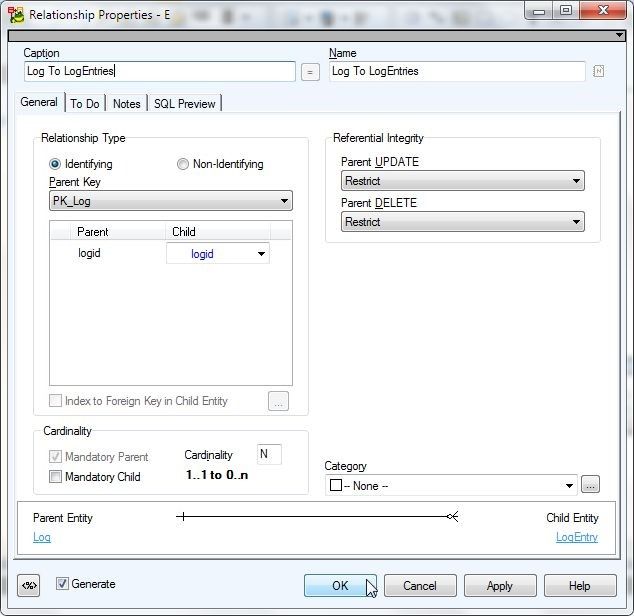
Figure 43. Relationship Properties
The relationship name gets applied, as shown in Figure 44.
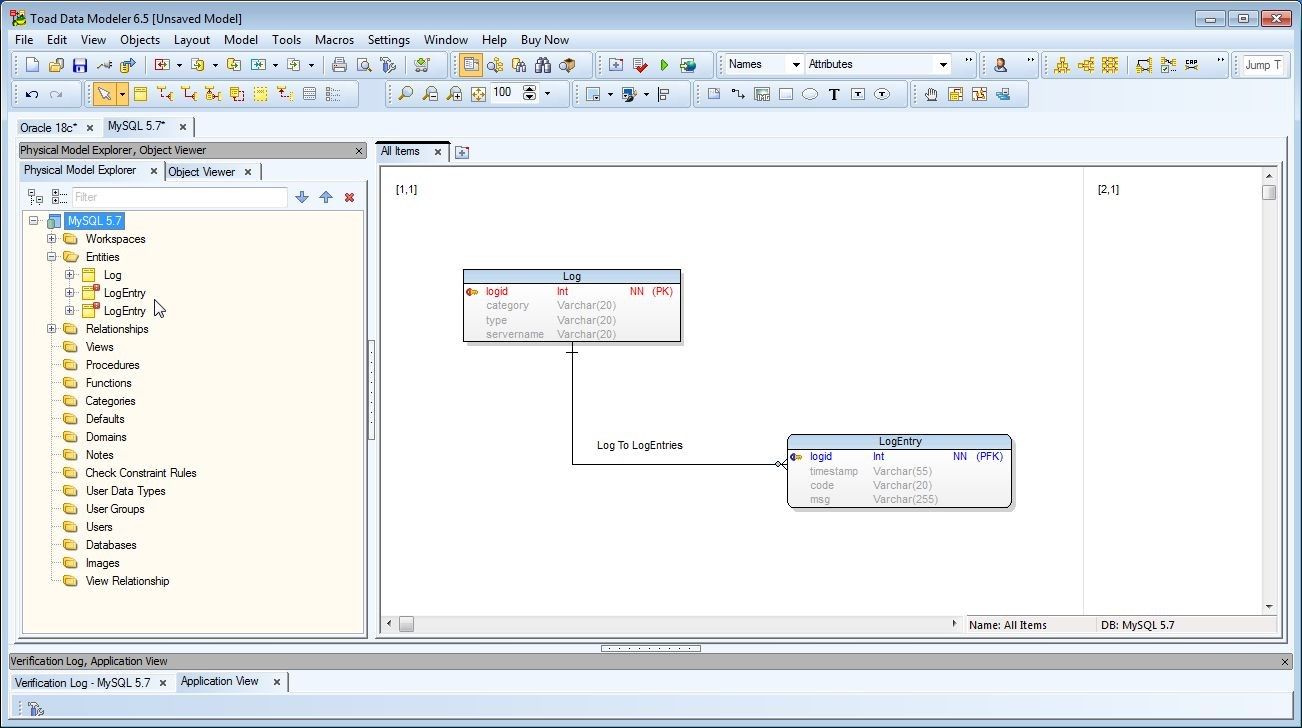
Figure 44. Relationship name modified
Next, we need to delete any extraneous entities that may have been added during model development. Two entities called LogEntry are listed, as shown in Figure 45, and Figure 44 also. One of the LogEntry entities has only one attribute, called Attribute1, and the entity may have been added during model development and testing. An extraneous entity may not always exist and if the procedure in this article is followed an extra entity or any other extra data structure should not get added, but it is a best practice to check for any extra data structures.
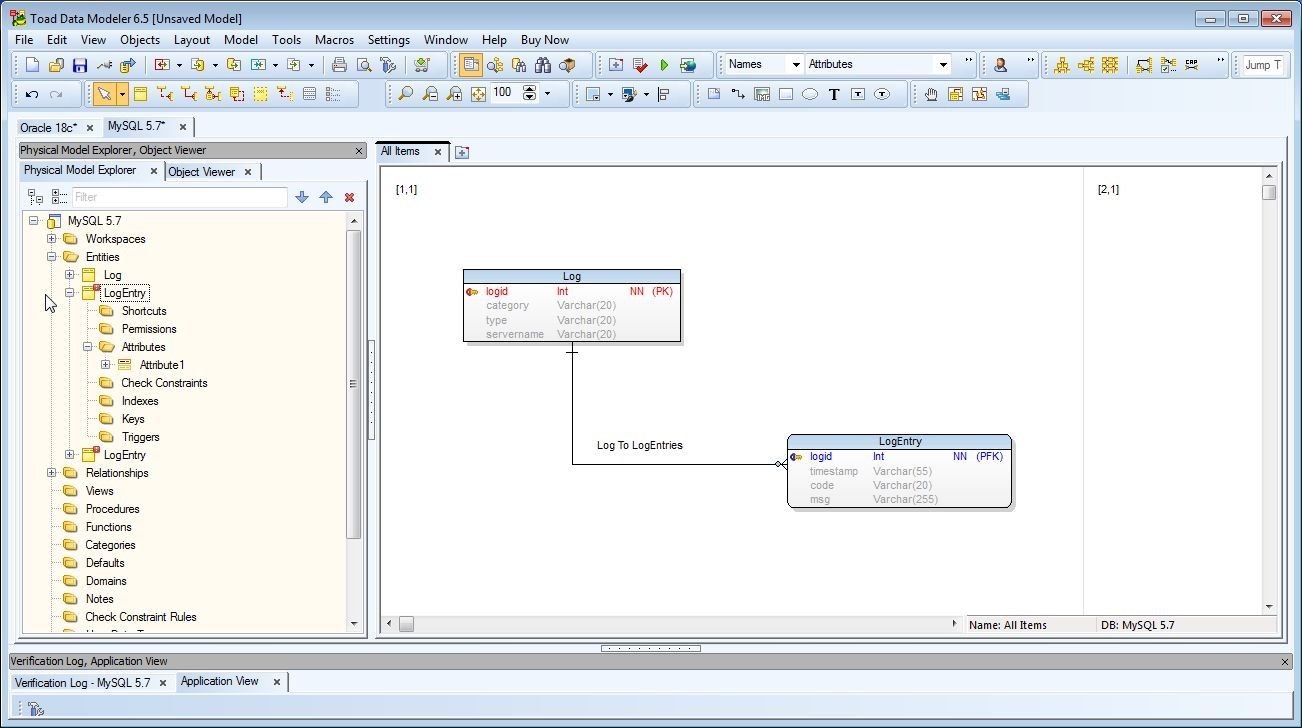
Figure 45. Extra LogEntry Entity
To delete the extra LogEntry entity, right-click on the entity and select Delete Item, as shown in Figure 46.
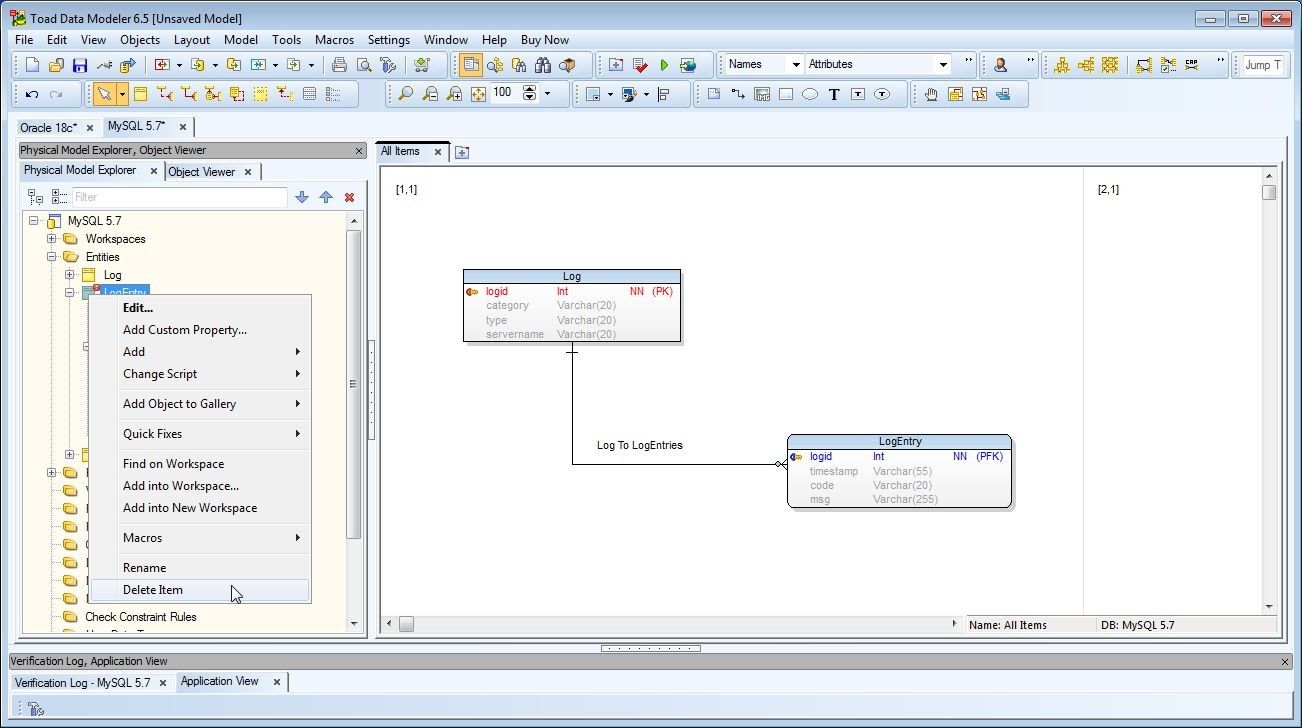
Figure 46. LogEntry>Delete Item
Click on Yes in Confirm as shown in Figure 47.
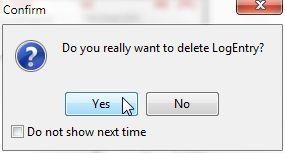
Figure 47. Confirm Dialog
The MySQL5.7 model should contain only entities and entity relationships that we added, as shown in Figure 48.
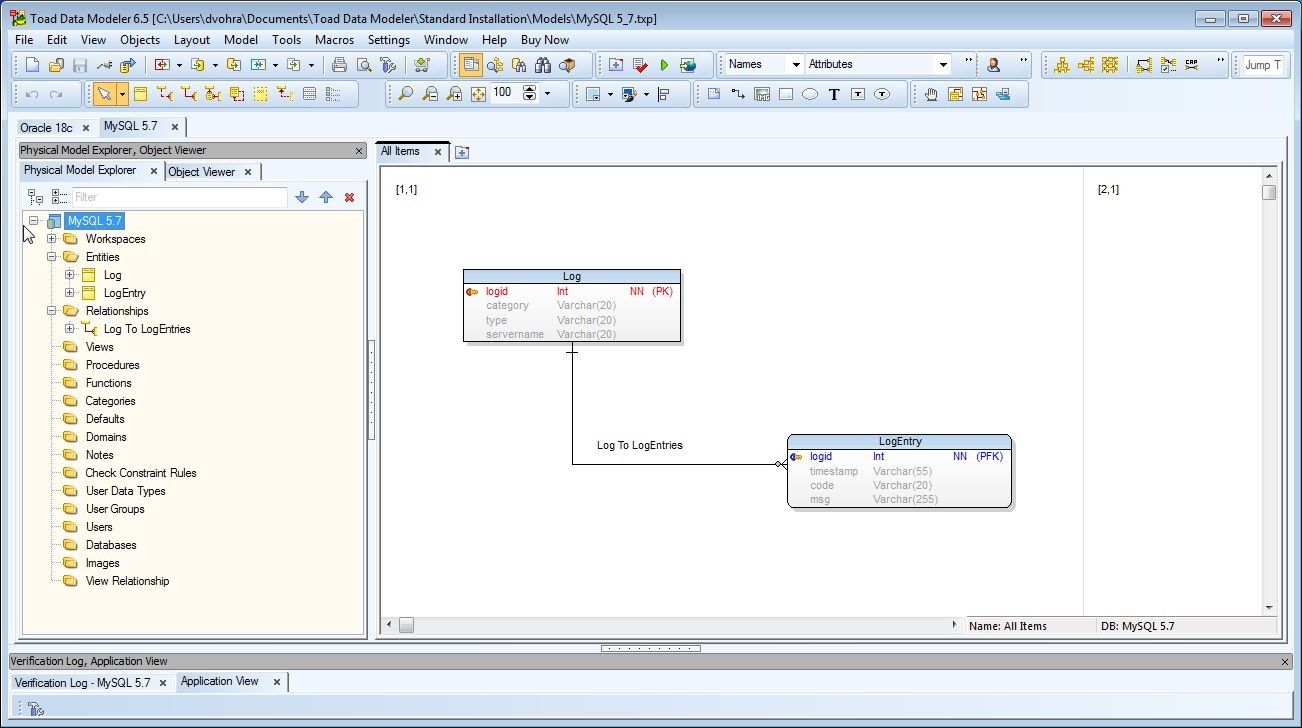
Figure 48. MySQL 5.7 Model
The entity diagram region provides several options that could be applied to the model and the diagram. Right-click on the diagram region to list these options. As an example, select Optimal Style to all lines as shown in Figure 49.
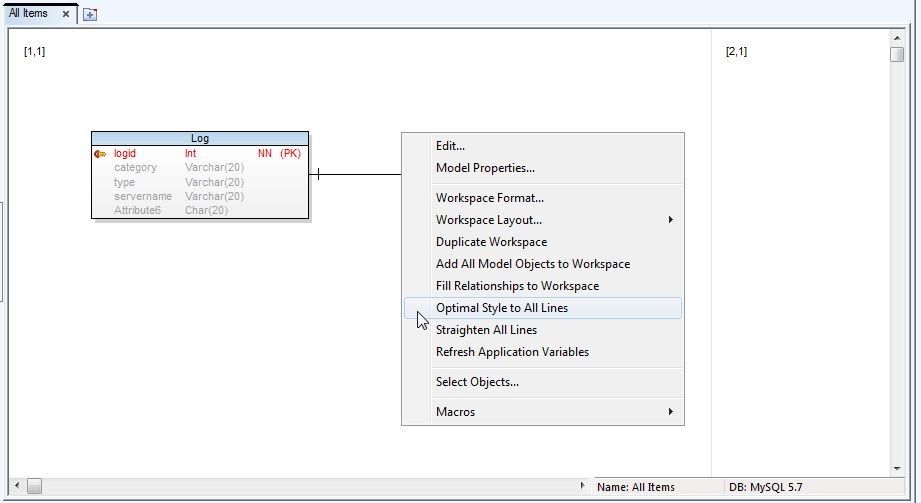
Figure 49. Optimal Style to All Lines
The diagram lines style gets updated, as shown in Figure 50.
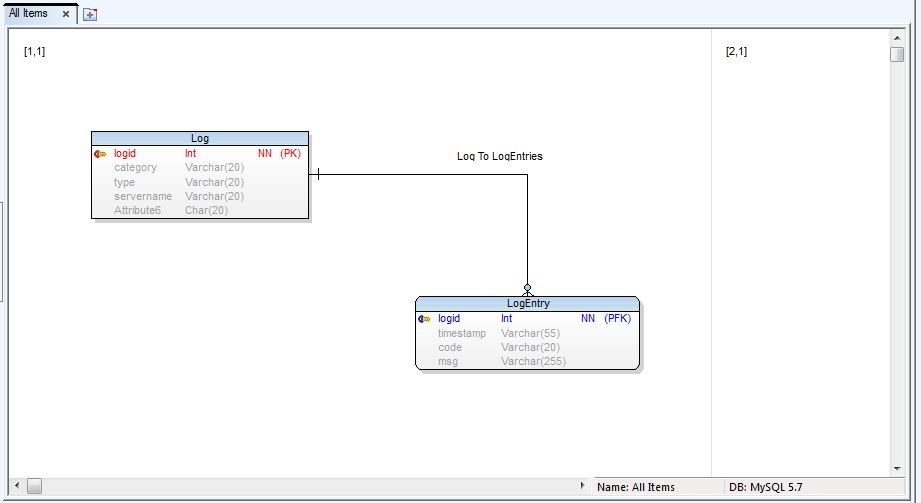
Figure 50. Diagram lines styled
Saving Model
To save the model select File>Save Model as shown in Figure 51.
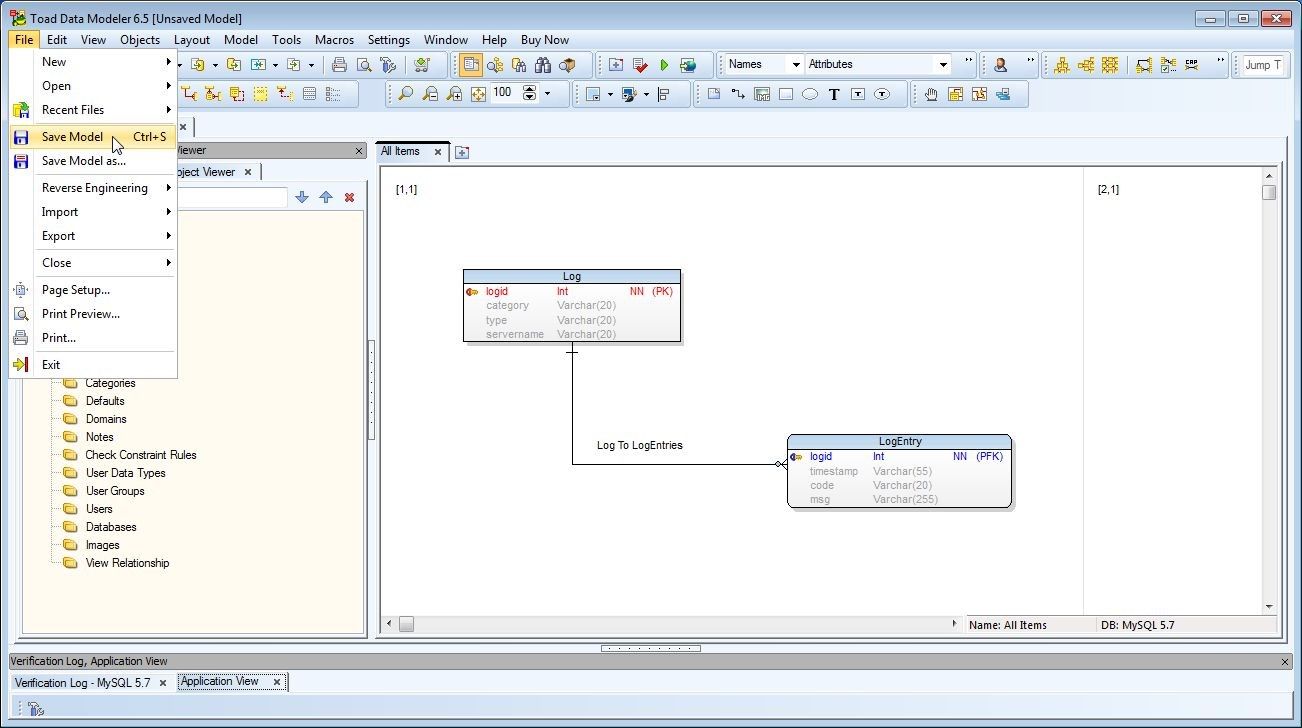
Figure 51. File>Save Model
In the Save Model as specify model file name and click on Save as shown in Figure 52.
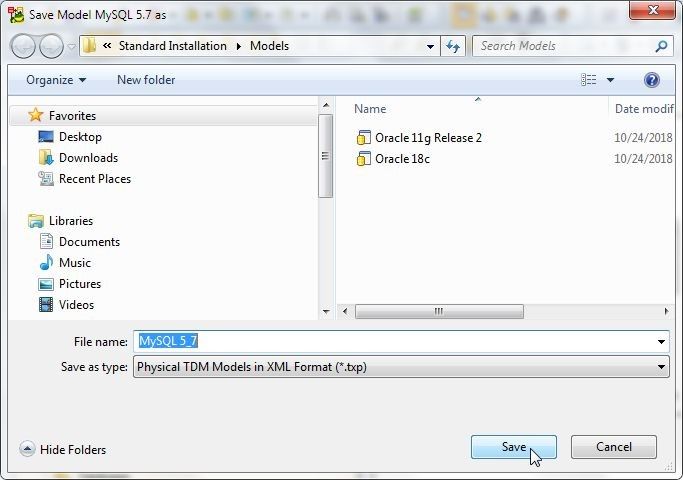
Figure 52. Save Model as>Save
Summary
In this first of two articles we developed a model for a MySQL database in Toad Data Modeler and added entities to model database tables. In a subsequent article we shall generate DDL from the model in Toad Data Modeler and run the DDL in Toad Edge to create database tables in a MySQL database.
Want to learn more?User guide: Access the Toad Edge User Guide. Product page: Click the following link to watch a video on our product page and learn how Toad Edge can help you simplify development and management tasks for open source databases. Blog: 7 hacks to use Toad Edge like a boss Blog: 5 blogs that teach you to effectively work in Toad Edge®
Try Toad Edge free for 30 daysFree 30-day trial of Toad Edge Already in a trial? If Toad Edge has helped you ramp up on open source RDBMSs fast, buy it now or contact a sales representative. |
Start the discussion at forums.toadworld.com