“Someday, we’ll find it, the Snowflake connection. The users, the analysts and me.”
– with Toad’s apologies to fellow amphibian, Kermit the Frog

If you haven’t seen the latest versions of Quest® Toad® Data Point, you’ve been missing some great new features. In particular:
- Toad Data Point v5.5 expands upon workbook functionality by allowing workbooks to be published to Toad Intelligence Central (TIC) and scheduled to execute from there.
- Toad Data Point v5.6 introduces a Snowflake connection as a data store option.
- Toad Data Point v5.7 enhances the published workbooks by allowing workbooks with variables to be published and executed.
Along with illustrating these features, this blog will share some useful tips and techniques in this refreshed Toad Data Point toolset.

Toad Data Point Workbook updates
The Workbook functionality offers a magnificent way to automate data intelligence tasks. Although traditional Toad Data Point has automation functionality that is easy to use, the workflows captured in Workbook are easy enough for a complete novice to automate manual steps of data retrieval and reporting outputs. Toad Data Point v5.5 and v5.7 introduce some useful enhancements to the Workbook — notably being able to publish it and manage variables.
Additionally, to help folks migrating from the Hyperion Brio tool set, Quest introduced the Workbook execution flow to offer a similar functionality. Quest has continually enhanced the Workbook technology to include useful features and to take advantage of Toad Intelligence Central sharing abilities.
Native Snowflake connection
Toad Data Point v5.6 enhances its vast database connectivity by adding Snowflake data stores to the mix, using Snowflake’s ODBC client. This allows Toad Data Point Professional users to navigate and query Snowflake data.
Try Toad Data Point for freeLearn how Toad Data Point can help you access and prepare data faster. Seamlessly access more than 50 data sources—both on premises and in the cloud—and switch between these data source with near zero transition times. Get started with our free 30-day trial. Already in a trial? If Toad Data Point is helping you connect, query and prepare data for faster business insights, buy it now or contact a sales representative. |
Toad Data Point v5.5 new features
Toad Data Point v5.5 enables users to publish and share Workbooks with the rest of the department and to schedule them to execute remotely with Toad Intelligence Central. Toad Intelligence Central is an excellent tool used to cleanse, transform, save and retrieve data, and can help you share your work with team members. Prior to this release, it was difficult to share saved Workbooks. Now, you can share your Workbooks and associated workflows with the same ease as sharing data and reports.
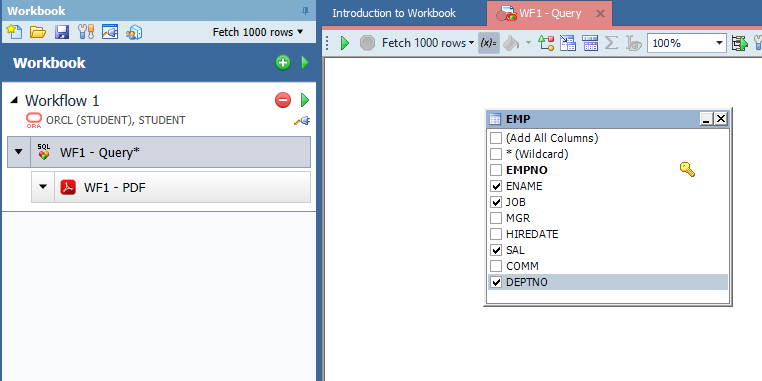
PDF report. This is just a simple workflow to show how easy it is now to share with others using Toad Intelligence Central.
The rightmost button on the tool bar in the upper left corner of the workbook is the publish button. Clicking it brings up the next panel allowing for the Workbook location, folder and other useful information to be saved to Toad Intelligence Central.
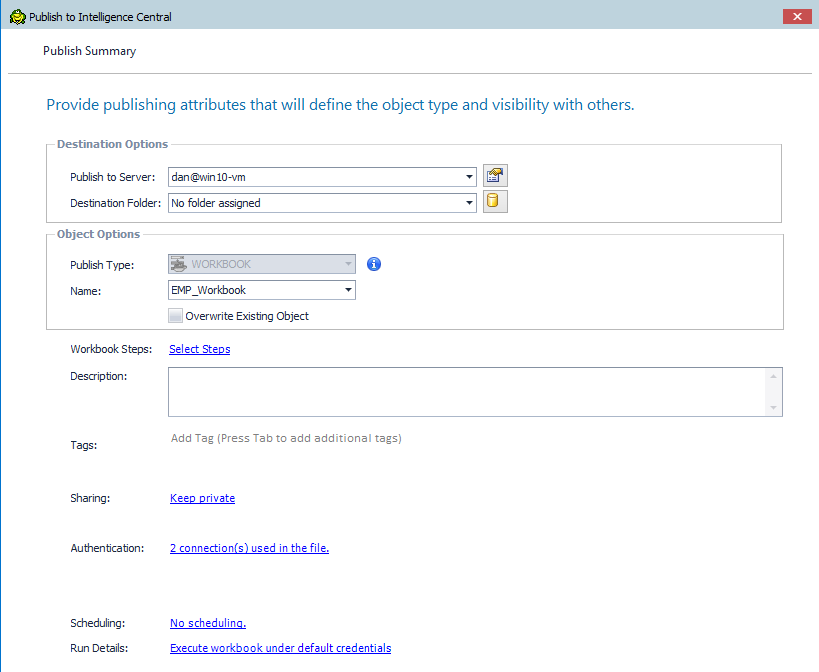
This panel allows you to identify the Toad Intelligence Central location for saving the Workbook. Notice you can create a new folder or choose an existing one. A good practice is to create these folders ahead of time as well as identify a useful naming convention for the Workbooks.
Notice you can publish a portion or all of the Workbook using the Workbook Steps selection. I’m choosing to publish the entire Workbook.
Use the description box to add notes about your Workbook so others know what it is doing, what it is accessing, etc. This can make the Workbook easier to find and understand.
The Tags option allows for additional search key words to be assigned to this Workbook.
Sharing allows for others to be able to use the Workbook.
Authentication is important especially if the Workbook is going to be scheduled and run from within Toad Intelligence Central. These are the login credentials for the data stores used by the Workbook. Scheduling can be set up and adjusted at any time via the Toad Intelligence Central web interface.
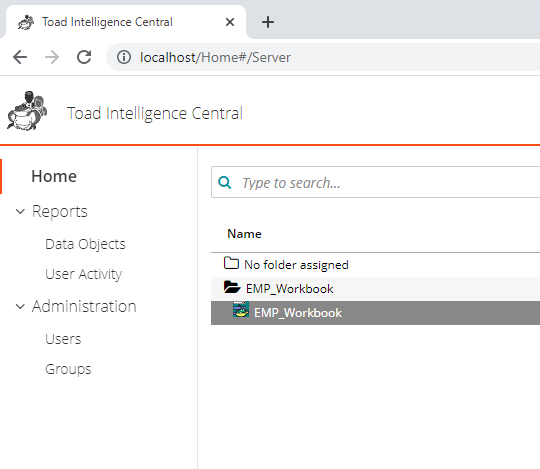
This is a screen shot of our EMP_Workbook after it was published. Since I didn’t give it a folder, Toad Intelligence Central created one for it.
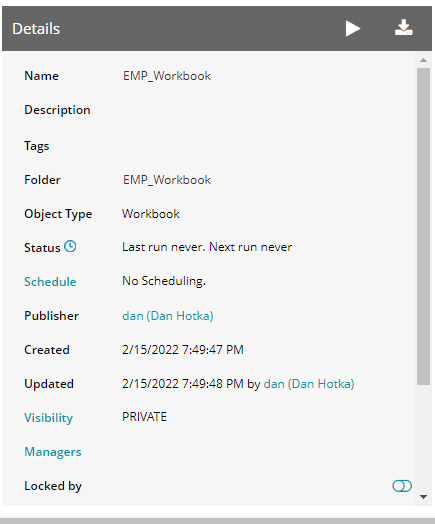
Slide to the right to see this information. You can change any of the items from the original publish panel here, including scheduling and sharing (visibility).
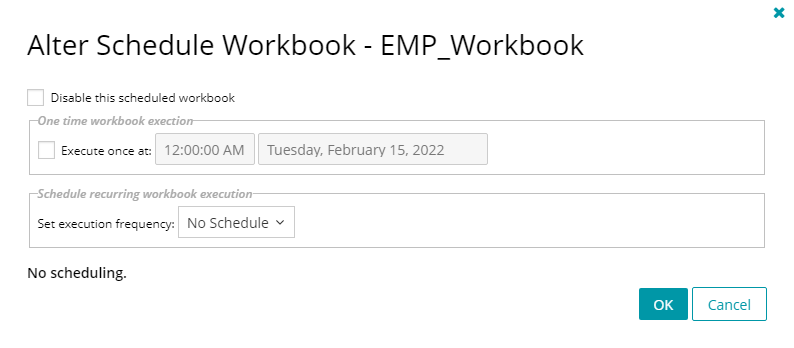
This shows the scheduling options available via the Toad Intelligence Central web interface. Anything you set up when you initially published the Workbook can be changed here.
For more information about this new feature, check out the Toad Data Point 5.5 release notes.
Toad Data Point v5.6 new features
Toad Data Point now provides a Snowflake connection, adding further to Toad Data Point’s 50+ data source options.
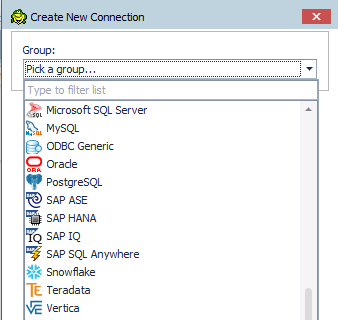
Note the Snowflake connection option now in the Connection Manager.
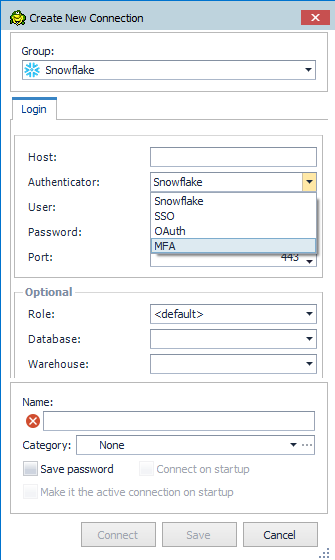
The Toad Data Point Snowflake connection has four options:
- User account
- SSO
- OAuth
- Multi-factor authentication
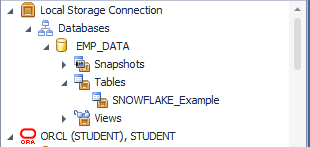
I don’t have access to a Snowflake data store so for this example, I have named an object in my Local Storage to illustrate an object that could be in a Snowflake connection data store. I will show how easy it is using Toad Data Point to pull data from multiple data stores with a single query.
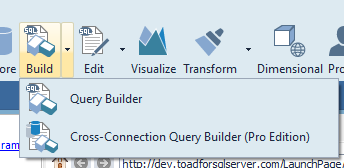
I find multi-database queries to be best developed using Query Builder and the Cross-Connection Query Builder option.
Again, I am simulating a Snowflake data object as I don’t have one available to connect to, but, it would work this way and with this ease.
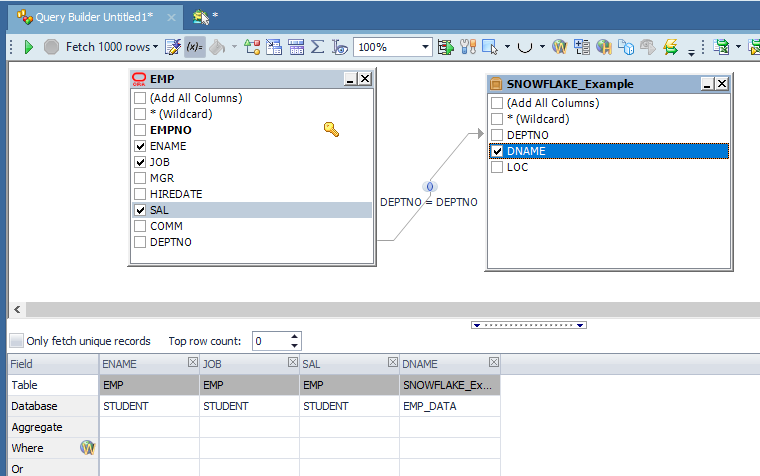
Simply drag and drop your data stores onto the canvas and relate the common data together. In this example, the DEPTNO column contains the common data between these two data stores. Using the mouse, you would click and hold the EMP DEPTNO column and drop this onto the SNOWFLAKE_Example DEPTNO column. Select the columns of data to display by clicking in the box next to the column. In this example, we have three columns from the EMP table and one column from the SNOWFLAKE_Example data store.
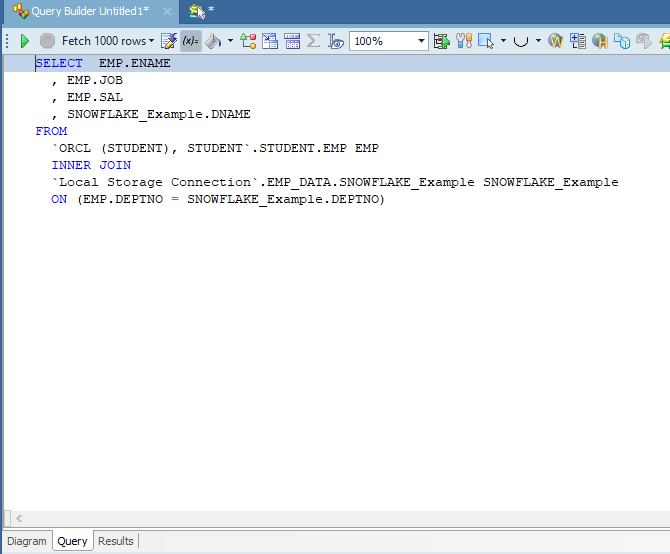
Notice the SQL that we quickly assembled with two drag and drop mouse operations, and by selecting the columns and identifying the relationship. Note, the Cross-Connection Query Builder will always use ANSI SQL.
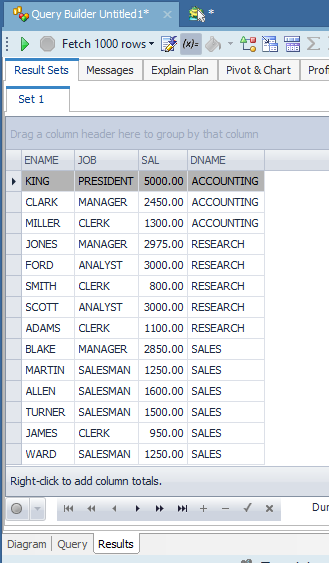
This data result set is from the above-built query. You can adjust the output using the Diagram tab (query builder) or you can adjust the SQL in the Query tab.
Accessing data from multiple databases is a snap with Toad Data Point. With this updated release, Toad Data Point now supports a native Snowflake connection.
This updated functionality allows you to query Snowflake data by using Object Explorer, Query Builder and SQL Editor. Take a look at the full release notes for more details.
Toad Data Point v5.7 new features
Toad Data Point Workbooks have supported variables in the SQL for quite a few releases. Now, with the 5.7 release, Toad Data Point supports variables in Workbooks that are being published to Toad Intelligence Central. This allows for default values to be used for Toad Intelligence Central scheduling and execution of Workbooks.
Substitution variables are a nice way to reuse existing code but with different data. The selection criteria can be submitted at execution time instead of hard coding it within the Workbook. As an example, this allows for the same Workbook/workflow to report on data from different departments.
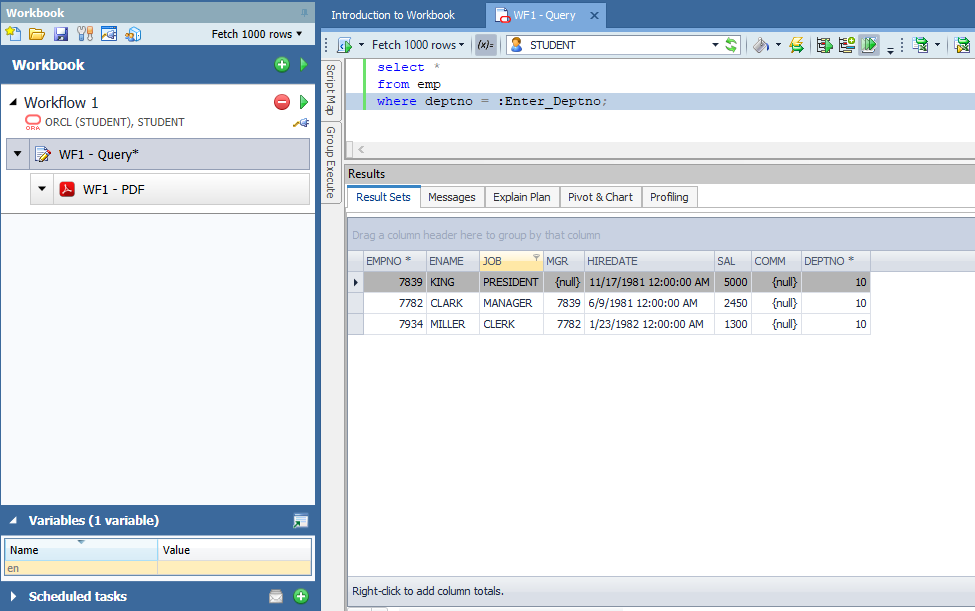
Notice the :Enter_Deptno variable in the Where clause of the SQL in the editor window. This shows up in the Variables tab in the Workbook/workflow area on the lower left.
I like to use a meaningful description for the variable name. When executed, this variable name will pop up in a panel asking for the data to be substituted into the SQL at runtime.
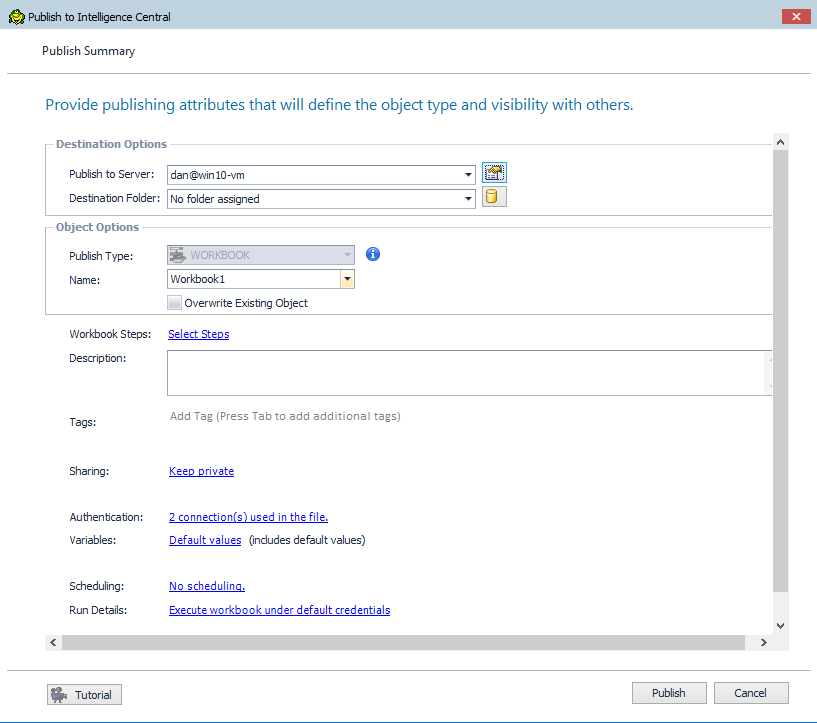
Note the Variables option near the bottom in the above publishing panel. It will want the default runtime value for any variables in the workbook.
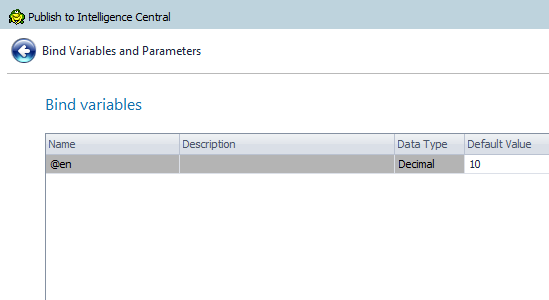
When clicking on the ‘default values’ in the Variables section, you can fill in the default values to be used if this Workbook is scheduled and executed from Toad Intelligence Central. Of course, you can manage these substitution variables from the Toad Intelligence Central web interface as well.
Related Links
Webinar: Self-service reporting and collaboration – access 50+ data sources, including Snowflake
Datasheet: Toad Data Point Functional Matrix
Web Datasheet: Quest Toad Data Point Web
Start the discussion at forums.toadworld.com