Hybrid Cloud management is an interestingly hot topic for today’s cloud world, since not all companies want to move everything to the cloud. In this article series, we have been looking at the detailed steps for setting up the Oracle hybrid cloud via the latest version – Oracle Enterprise Manager Cloud Control 13c installed on premises. Our main intention is to install an Enterprise Manager hybrid cloud agent on our database cloud servers (on the Oracle public cloud) via the hybrid gateway, in the scenario where our company has databases running on premises as well as on the Oracle public cloud, and then to look at hybrid cloud management using Enterprise Manager.
In the previous parts of the article series, we completed the pre-setup steps for the hybrid cloud – such as setting up one of our on-premises Enterprise Manager Oracle Management Service (OMS) agents as the hybrid gateway agent, creating SSH keys for the OMS server, and creating a named credential with SSH key credentials for the hybrid cloud. At the same time, we also created an Oracle Database service (a server with an Oracle database) on the Oracle public cloud.
Next, we completed the installation of the hybrid cloud agent via Oracle Enterprise Manager, which performed a background transfer of the agent software to the destination host. We logged into the on-premises Enterprise Manager console as SYSMAN or a super administrator and drilled down to the Cloud Host home page. On this page, we could see the Enterprise Manager Configuration and performance metrics for the host; these metrics had been uploaded by the hybrid cloud agent. And after the database discovery process was completed, the cloud database appeared in the list of Enterprise Manager database targets, and it can now be monitored and managed just like a normal on-premises database.
We compared Oracle database configurations by selecting Enterprise | Configuration | Comparison and Drift Management from the Enterprise Manager console, and creating a comparison. We selected the on-premises 12c database “ahuprod.sainath.com” and the cloud database AHUTEST. Effectively, we compared the configuration of a local on-premises database with that of a cloud database. This comparison can be done at the server level as well. Oracle Enterprise Manager is also able to enforce the same compliance standards on the Oracle public cloud as well as on premises, which is perfect for a hybrid database setup.
Next, we looked into the cloning of PDBs from on premises to cloud, one of the main features of the hybrid cloud. To proceed with the actual PDB cloning, we made sure the source and destination CDBs were at the latest PSU. We then went through the steps to preserve the Enterprise Manager agent home when patching the cloud database. Next, we started the Clone to Oracle cloud process. This was done via right-clicking on the on-premises PDB “SALES” which is in the ahuprod CDB, and selecting Oracle Database | Cloning | Clone to Oracle Cloud.
The name of the destination PDB on the cloud side was entered as “SALESTST”, since this will be a test pluggable database. We also selected a user name and password for the PDB administrator of the new PDB. Then, we could have clicked on “Clone” to quickly start the procedure, but instead we clicked on the “Advanced” button at the top of the page. This switched to advanced mode, and a multiple page workflow appeared on the same screen.
We clicked on Next. The “Clone to Oracle Cloud: Configuration” page appeared. As per cloud database standards, which are based on Oracle Flexible Architecture (OFA) standards, the PDB data files will reside on /u02, in the /u02/app/oracle/oradata/<PDB name> directory. You can also enter storage limits if you wish, such as the maximum PDB size or the maximum shared TEMP tablespace size. The default logging attribute for tablespaces creating with the PDB can also be specified – Logging, No Logging or Filesystem Like Logging.
After this, the Post Processing page appeared. Here we noted the importance of the Advanced mode, since it is possible on this page to select a data masking definition if it has been created for the source database. Masking is seamlessly integrated with Enterprise Manager. This makes sure that confidential data is masked when being cloned from an on-premises production database to a cloud development database.
A simple masking definition had already been created. This definition was named “LatestDataMaskDefinitionHR” (no spaces should be included in the definition name) and was selected at this point. This will mask some of the confidential columns in the Employees table, in the destination cloud PDB that will be created.
In the Schedule screen that appeared next, we scheduled the job, then reviewed and clicked on Clone. The procedure started to execute. Among the steps in the procedure, we also observed a Secure Copy files step. Note that the “rsync” unix command was used by the procedure to fast-copy files to the cloud.
The clone to cloud completed successfully in under 16 minutes (depending on the PDB size and the internet connectivity). When we moved to Targets | Databases, we saw the new SALES Test PDB under the cloud CDB AHUTEST, and then drilled down to the Sales Test PDB Home page.
If we had selected the masking definition as a part of the cloning workflow, we would have needed to verify that the employees table data has been masked. We connected to the on-premises ahuprod cdb as sysdba, and selected from the hr.employees table to examine the original unmasked data. Then we checked the same rows in the cloud PDB. We observed that the employee data had been masked successfully, as per the masking definition that was selected during the clone to cloud procedure.
Another point to note is that if the APEX versions on the two databases (on-premises and cloud) do not tally, the plug-in of the PDB to the cloud database during the cloning process may not complete successfully. The PDB on the cloud database may be left open in restricted mode. The solution for this issue was to download the APEX 5.0 version (not the 5.0.1 version) from http://www.oracle.com/technetwork/developer-tools/apex/downloads/index.html and then to apply this APEX version on the on-premises database, before starting the cloning. After this was complete, the on-premises had the correct APEX version.
The cloning from the on-premises PDB to the cloud CDB then proceeded without any issues. However, if the cloud database had reported a new version of APEX higher than 5.0, then we would have needed to follow the procedure as outlined above while using the higher version of APEX and installing it on the ahuprod database.
Cloning from Oracle Cloud
It is also possible to clone PDBs from the dloud back to on premises. For example, we complete our development on the cloud PDB, and then bring back the PDB to an on-premises CDB for testing purposes.
To do this, we selected the Cloud PDB, right-clicked, and selected Oracle Database | Cloning | Clone from Oracle Cloud. This procedure bought the PDB back to the on-premises CDB. This brings up the Clone details page, where we can select the source PDB, and the destination CDB, which is on premises. Credentials were specified on either side.
This should complete successfully in the majority of cases, but at times, when a special cloud patch has been applied at the cloud database level by the Oracle Cloud team, that patch is not available to be rolled back by the Datapatch utility at the on-premise PDB level. This will result in the clone procedure failing at the “Apply Datapatch” stage.
In such a case, ignore the step and continue the procedure. The PDB will be cloned but opened in restricted mode. You will then have to resolve the patching issue manually.
Using the RESTful API
The self-service user could use the Enterprise Manager self-service console for creating databases, and this would also work for schemas or PDBs on demand. But what if a company does not want to use the Enterprise Manager self-service console? There may be various reasons for this, one example being that the company has created and customized its own orchestration engine outside Enterprise Manager, in a sense its own “private cloud portal” which is able to provision multiple technologies in their private cloud, not just Oracle databases or middleware. Such a portal/orchestration engine can of course be built using Oracle technology – for example, one could use Oracle WebCenter, Oracle SOA Suite and Oracle BPM to build a powerful cloud portal/orchestrator with approvals and business rules included.
The self-service user could request a production database and it would require approval from management, Oracle BPM would route it to the appropriate manager and once approved the database would be provisioned. Or, approvals could be required based on the cost of the database service going beyond a certain limit. Non Oracle technology, such as databases from other vendors, could be provisioned as well with this orchestrator. Manual services such as performance tuning or data migration could also be included (thus increasing the value of the IT department), and a business catalog created, all outside Enterprise Manager.
From Cloud Management Plug-in 12.1.0.2 onwards, RESTful Web Services-based API support for Database as a Service (DBaaS) has been provided in Enterprise Manager. This support has been steadily enhanced in later versions of the plug-in – such as support for RESTful APIs for Schema as a Service, snap clone, and RMAN based cloning in Cloud Management Plug-in 12.1.0.6, next for Pluggable Database as a Service in the 12.1.0.7 version of the Plug-in, then for CloneDB in DBaaS in 12.1.0.8, and so on. The RESTful API of Enterprise Manager continues to be enhanced by Oracle.
This RESTful API support is of great importance when orchestration engines are being used. The orchestrator is able to call the RESTful API of Enterprise Manager to do the actual provisioning.
We will now use the RESTful API to query the available cloud services as an example. The API can also be used to request the self-service provisioning of a database, schema and PDB service – just like you can using the Enterprise Manager self-service console. The progress of the creation of each of these services can also be monitored using the RESTful API, and after creation is complete the RESTful API can be used to destroy each of the created services.
Installing the REST Client
First of all, install a REST Client in your browser. For example, if using Google’s Chrome browser, you can use the “Postman – Rest Client”. Search for this extension in Chrome and add it. Alternatively, if using the Mozilla Firefox browser, you can use “RESTClient” as the appropriate add-on.
In our case we will be using the “Postman – Rest Client” in Chrome. This appears as follows (Figure 38) when installed and started up.
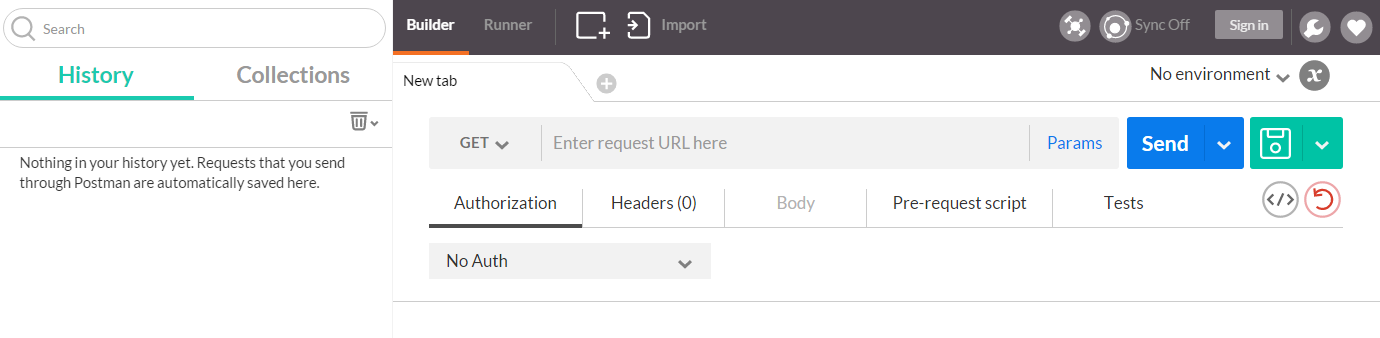
Figure 38: Postman – Rest Client in Chrome
For the full Database-as-a-Service RESTful API syntax, refer to the extensive official Oracle documentation – Chapter 44, “Database as a Service SSA User REST APIs” in the Enterprise Manager Cloud Administration Guide (Release 13.1). We will use some of the examples listed in the Oracle documentation so as to demonstrate the working of the RESTful API with Enterprise Manager. And it is always good to refer to the documentation.
Pre-steps
Before attempting any requests via the RESTful API, some pre-steps need to be completed. Your Enterprise Manager needs to be up and running in the background, since it will be doing the actual provisioning. If using an Enterprise Manager VBOX, make sure the VBOX is up and running and you have started the Enterprise Manager OMS and agents.
Next, make sure your browser can connect to “https://em12c.sainath.com:7802/em” (assuming that this is the name of the installation) and accept the security certificate so that it proceeds to the login screen of Enterprise Manager. Do this in the following way.
Enter “https://em12c.sainath.com:7802/em” in your browser; in this case we are using Chrome. A message may appear: “Your connection is not Private”. Click on “Advanced” and then click on the “Proceed to” link as seen in Figure 39.

Figure 39: Allowing the Connection
The Enterprise Manager login screen will be displayed. Do not log in to Enterprise Manager at this point, but proceed to the Postman steps in the next section.
This step of allowing the connection and accepting the security certificate is necessary, otherwise Postman will return an error when you issue the request in Step 1 below. The error will look like:
“Could not get any response: This seems to be like an error connecting to https://em12c.sainath.com:7802/em/cloud.”
We will now briefly demonstrate how to use the RESTful API to view details of the cloud resources. The API can also be used to issue creation requests for new databases, schemas, and PDBs; to monitor the progress of their creation, and then to issue deletion requests for the services you have created.
Viewing Details
You can view the details of all the cloud resources accessible to a particular SSA user, like SAI_DAS. The top level /em/cloud is used. This is a GET Request and the request configuration should include:
|
URL |
/em/cloud |
|
Request headers |
Authorization: basic ZGVtb3VzZXI6ZGVtb3VzZXI= X-specification-Version: 10001 |
|
Body |
None |
|
Request method |
GET |
Start the REST client. For the Request URL, prefix with “https://em12c.sainath.com:7802” to give a full Request URL of “https://em12c.sainath.com:7802/em/cloud” for this particular action of viewing the cloud resources.
Select “Basic Auth” in the Authorization tab, and put in the Basic Authentication details as SAI_DAS, password “welcome1” – this is a Self Service Application (SSA) user that has been created previously by the cloud administrator.
After entering the Basic Authentication details, click on “Update Request” as seen in Figure 40.

Figure 40: Basic Authentication details – Get Cloud Resource Details request
This generates the authorization header. Move to the Headers tab (Figure 41)
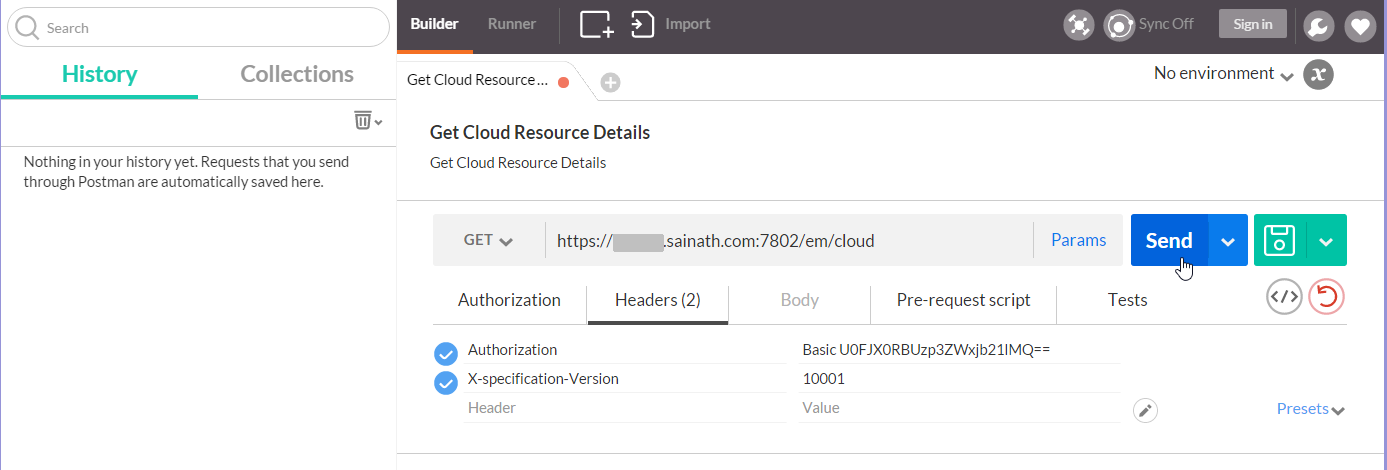
Figure 41: Headers – Get Cloud Resource Details request
Enter the second header as follows: “X-specification-Version: 10001”. Make sure the Request Method is GET. Now, you can click on the Send button. The response comes back after a few seconds.
As the response, you have now received the details of all the cloud resources available to the SSA user. This is seen in Figure 42.
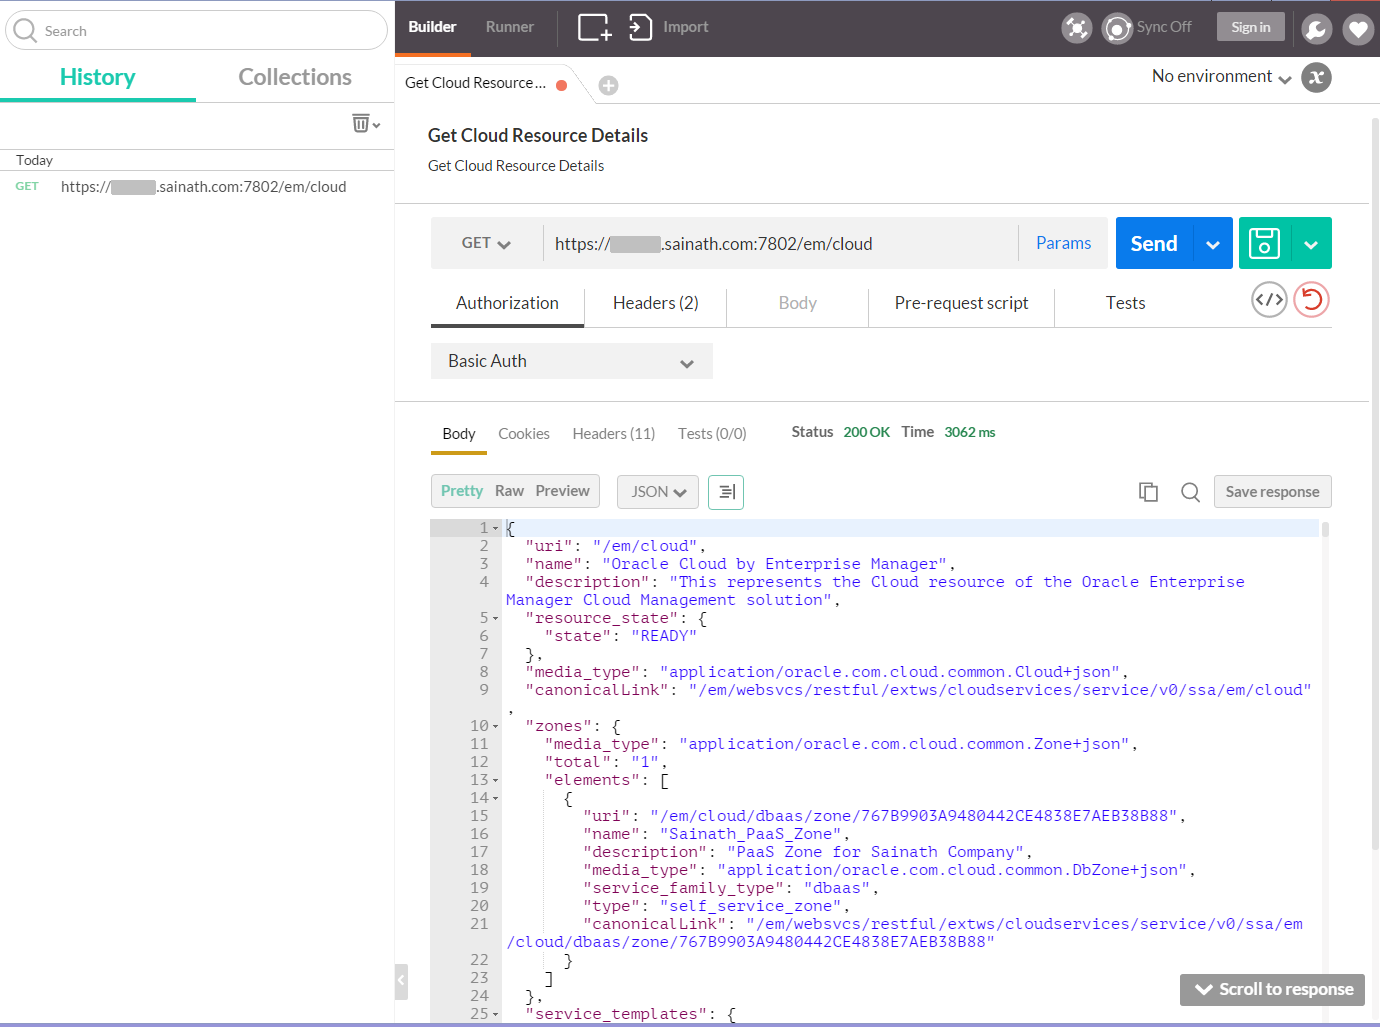
Figure 42: Response – Get Cloud Resource Details request
For your reference, the output of the cloud resources Details is reproduced below. This contains important information such as the zone details, and the service template details that are available to the SAI_DAS user.
The output shows that there are different service templates for creating databases, schemas and PDBs via self-service. These service templates are all available to the SAI_DAS user. These have been set up previously by the Cloud administrator.
This information about the zone and various service templates that are available can be used by you to create the various services. Have a quick look at the bold parts and the parts marked with a “Author’s Note:”, then skip to the end of the output.
Cloud Resources Details Output
{
"uri": "/em/cloud",
"name": "Oracle Cloud by Enterprise Manager",
“description”: “This represents the Cloud resource of the Oracle Enterprise Manager Cloud Management solution”,
“resource_state”: {
"state": "READY"
},
"media_type": "application/oracle.com.cloud.common.Cloud+json",
"canonicalLink": "/em/websvcs/restful/extws/cloudservices/service/v0/ssa/em/cloud",
"zones": {
"media_type": "application/oracle.com.cloud.common.Zone+json",
"total": "1",
"elements": [
{ (Author’s Note: This is the main PaaS zone set up in the image)
"uri": "/em/cloud/dbaas/zone/767B9903A9480442CE4838E7AEB38B88",
“name”: “Sainath_PaaS_Zone”,
“description”: “PaaS Zone for Sainath Company”,
“media_type”: “application/oracle.com.cloud.common.DbZone+json”,
"service_family_type": "dbaas",
"type": "self_service_zone",
"canonicalLink": "/em/websvcs/restful/extws/cloudservices/service/v0/ssa/em/cloud/dbaas/zone/767B9903A9480442CE4838E7AEB38B88"
}
]
},
"service_templates": { (Author’s Note: This is the List of Service Templates)
“media_type”: “application/oracle.com.cloud.common.ServiceTemplate+json”,
"total": "6",
"elements": [
{ (Author’s Note: This is the Service template for a single 11g database)
“uri”: “/em/cloud/dbaas/dbplatformtemplate/0C21CF0F90EA6AEAE055000000000001”,
“name”: “Sainath 11204 Single Instance Database”,
“description”: “Service Template to create a single instance database of version 11.2.0.4 for Sainath company”,
“media_type”: “application/oracle.com.cloud.common.DbPlatformTemplate+json”,
"service_family_type": "dbaas",
"type": "dbaas",
"canonicalLink": "/em/websvcs/restful/extws/cloudservices/service/v0/ssa/em/cloud/dbaas/dbplatformtemplate/0C21CF0F90EA6AEAE055000000000001"
},
{ (Author’s Note: This is the Service Template for a CloneDB 11g database)
“uri”: “/em/cloud/dbaas/dbplatformtemplate/0C226670F4C70ECDE055000000000001”,
“name”: “Sainath Snap Clone 11204 Database using CloneDB”,
“description”: “Service Template for creating Snap Clone 11204 Database using CloneDB for Sainath company”,
“media_type”: “application/oracle.com.cloud.common.DbPlatformTemplate+json”,
"service_family_type": "dbaas",
"type": "dbaas",
"canonicalLink": "/em/websvcs/restful/extws/cloudservices/service/v0/ssa/em/cloud/dbaas/dbplatformtemplate/0C226670F4C70ECDE055000000000001"
},
{ (Author’s Note: This is the Service Template for a 12c SALES PDB)
“uri”: “/em/cloud/dbaas/pluggabledbplatformtemplate/0C5B81D424A60E39E055000000000001”,
“name”: “Sainath 12102 PDB from Profile of SALES PDB”,
“description”: “Service Template for 12102 PDB creation from Profile of Sales PDB”,
“media_type”: “application/oracle.com.cloud.common.PluggableDbPlatformTemplate+json”,
"service_family_type": "dbaas",
"type": "dbaas",
"canonicalLink": "/em/websvcs/restful/extws/cloudservices/service/v0/ssa/em/cloud/dbaas/pluggabledbplatformtemplate/0C5B81D424A60E39E055000000000001"
},
{(Author’s Note: This is the Service Template for an empty 12c PDB)
“uri”: “/em/cloud/dbaas/pluggabledbplatformtemplate/0C5B81D424AE0E39E055000000000001”,
“name”: “Sainath 12102 Empty PDB”,
“description”: “Service Template for Empty 12102 PDB for Sainath company.”,
“media_type”: “application/oracle.com.cloud.common.PluggableDbPlatformTemplate+json”,
"service_family_type": "dbaas",
"type": "dbaas",
"canonicalLink": "/em/websvcs/restful/extws/cloudservices/service/v0/ssa/em/cloud/dbaas/pluggabledbplatformtemplate/0C5B81D424AE0E39E055000000000001"
},
{(Author’s Note: This is the Service Template for HR Schema)
“uri”: “/em/cloud/dbaas/schemaplatformtemplate/0C308CF48B1616C2E055000000000001”,
“name”: “Sainath HR Schema”,
“description”: “Template to create HR schema for Sainath company”,
“media_type”: “application/oracle.com.cloud.common.SchemaPlatformTemplate+json”,
"service_family_type": "dbaas",
"type": "dbaas",
"canonicalLink": "/em/websvcs/restful/extws/cloudservices/service/v0/ssa/em/cloud/dbaas/schemaplatformtemplate/0C308CF48B1616C2E055000000000001"
},
{ (Author’s Note: This is the Service Template for User Defined Schemas)
“uri”: “/em/cloud/dbaas/schemaplatformtemplate/0C308CF48B1D16C2E055000000000001”,
“name”: “Sainath User Defined Schema”,
“description”: “User Defined Schema for Sainath company”,
“media_type”: “application/oracle.com.cloud.common.SchemaPlatformTemplate+json”,
"service_family_type": "dbaas",
"type": "dbaas",
"canonicalLink": "/em/websvcs/restful/extws/cloudservices/service/v0/ssa/em/cloud/dbaas/schemaplatformtemplate/0C308CF48B1D16C2E055000000000001"
}
]
},
"service_family_types": {
"media_type":
<truncated>
All the cloud resource information, such as the service templates that have been previously created, is seen in the output above, as available to the SAI_DAS user. This list of the cloud resource information demonstrates how the Restful API can be used. You can carry this further to perform more actions on the cloud resources, such as creation and deletion of database services.
This concludes the article series. We hope you have enjoyed learning about Oracle Enterprise Manager and the Hybrid Database Cloud. Thanks for your readership.
Start the discussion at forums.toadworld.com