Toad Edge is the newest edition to the Toad family of products. You can greatly reduce your development and DBA efforts when managing MySQL and Postgres by using Toad Edge (it can run on Windows and MacOS). See the product documentation for a detailed support matrix: https://support.quest.com/toad-edge/2.0.6/technical-documents.
In addition, Toad Edge can support your DevOps initiatives by allowing you to integrate into your Continuous Integration platforms. An excellent video discussing how this works can be found here.
What if your goals are much simpler and you just want to automate specific tasks within Toad Edge, similar to what you can do in other Toad products?
You most definitely can and that’s what I want to show you …
Currently, Toad Edge allows you create a batch or shell script to do the following actions:
- Empty Schema – Drop all objects from a selected schema to prepare it for a clean script deployment
- Create Snapshot – Save your database schema structure to a file for point-in-time recovery
- Create Baseline – Set the current state of your schema structure as the baseline in order to detect the most recent changes that have been made
- Generate create SQL Script – Generate a create SQL script from your repository, saved snapshot or database
- Generate change SQL Script – Generate an alter SQL script based upon a previous Schema Compare operation
- Compare schemas – Compare two different schemas (from database, repository or snapshot) in preparation for running a report or alter script
- Compare schema with baseline – Compare your current schema with the baseline as one of the steps to assure that a deployment script is successful
- Deploy SQL Script – Execute any arbitrary SQL on a selected database
- Generate HTML comparison report – Generate an HTML report based upon a previous schema compare operation
Note: More detail on each action can be found in the product documentation referred to in the hyperlink above.
These batch or shell scripts can then be composed to do more complex operations. Once finished, you can put these scripts into Jenkins or Bamboo or whatever CI server you may be using.
You can also put these scripts into CRON or the Windows Task Scheduler (depending on where you want these scripts to reside and run). Make sure these scripts execute in their respective environments and meet specific criteria outlined in the product documentation.
Let me show you how this works through a simple example.
In my example, I’m going to show you how to schedule a nightly snapshot of a specific Postgres schema (Public). Again, a snapshot is a point-in-time backup of the schema structure (metadata only, no actual data). This is useful should you need to recover the structure back to a point in time or just create a report of what changes were done during the day.
This example assumes you have a working knowledge of Toad Edge. In case you do not or would like a refresher, please refer to this video series to get started.
Let’s begin!
Once you launch Toad Edge and make a connection to your database, notice the CI/CD icon in the upper right hand corner of your desktop.
Figure 1. CI/CD icon
Select this icon and a pop-up window will appear with all the different actions available (described above):
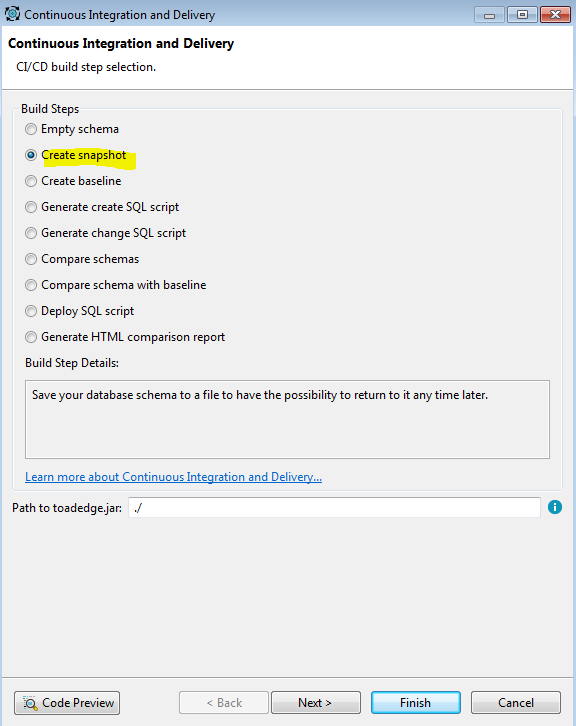
Figure 2. CI/CD actions available
You’ll also notice that I have already selected the “Create Snapshot” action. Note that the “Path to toadedge.jar” file needs to be filled in also. You can download this from our website (https://support.quest.com/toad-edge/2.0.6). Once you navigate to this page, you’ll see the following:
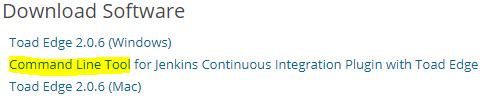
Figure 3. Download Software links
Click on the “Command Line Tool” to download and place this file in a directory that you will specify in the “Path to toadedge.jar” file. I created a directory and placed mine as follows:
Figure 4. Specify the path to toadedge.jar
Once done, you can click Next> to see the following:
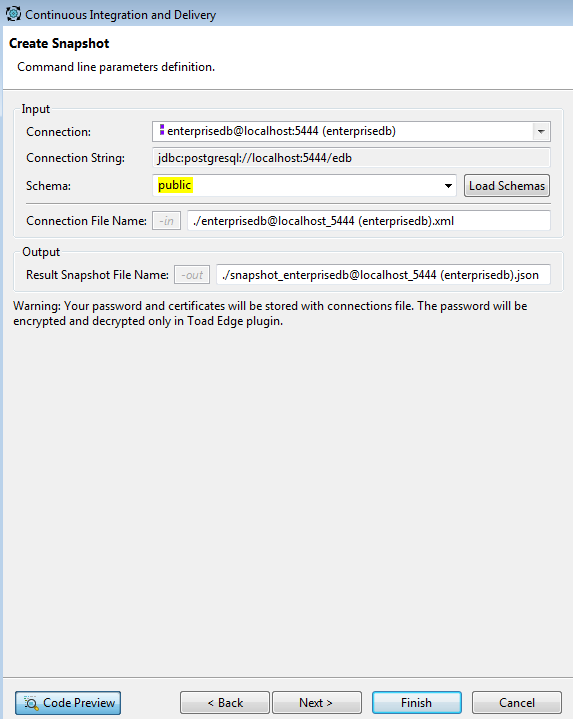
Figure 5. Define the Create Snapshot command line parameters
You’ll also notice that I selected the Public schema as the schema I want to take a snapshot of. Once the correct schema is selected, select the correct connection string and location of the JSON file (snapshot output). Then select Next> to see the following:
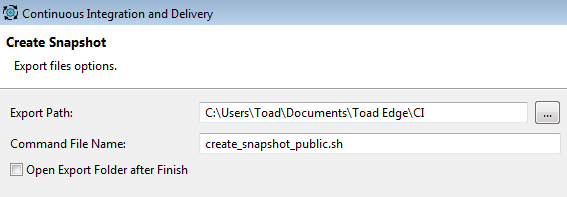
Figure 6. Create Snapshot export file options
The default Command File Name is a *.sh file to execute on Linux. By simply changing the name to have a *.bat extension, you will be able to produce a batch file that can be executed on a Windows Server. After doing this, you select Finish and you’ll see two scripts placed in the directory specified by “Export Path” in the dialog window.
Before selecting Finish>, you can check the box to “Open Export Folder after finish”, the window will pop up automatically as follows:

Figure 7. Two scripts have been placed in your specified directory
The first item is the actual batch script with the following contents:
java -jar "C:\Program Files\Quest Software\ToadEdgeJenkinsPlugintoadedge.jar" -snapshot -in "./enterprisedb@localhost_5444 (enterprisedb).xml” -out “./snapshot_enterprisedb@localhost_5444 (enterprisedb).json”
This batch script will create a snapshot using the enterprisedb@localhost_5444(enterprisedb).xml file and output the snapshot in JSON format.
The XML file specifies the connection, schema(s), and object(s). The specific XML file for my example can be seen below:
<?xml version="1.0" encoding="UTF-8"?><Connections>
<Connection SubType="EDB" autoCommit="" type="Jdbc">
<Path>EDB</Path>
<Name>enterprisedb@localhost:5444 (enterprisedb)</Name>
<Host>localhost</Host>
<Port>5444</Port>
<User>enterprisedb</User>
<SavePassword>true</SavePassword>
<Password>1ybsDyeisRARCaWAsPLdiw==</Password>
<RestoreWork>true</RestoreWork>
<LastConnectionDate>2018-12-20T06:43:50</LastConnectionDate>
<Color>#8000FF</Color>
<Database>edb</Database>
<Schema>public</Schema>
<Options>
<UUID>dbb28330-0029-4a31-883b-695dd0c227c1</UUID>
<Origin>toadedge</Origin>
<AutoLogon>false</AutoLogon>
<RestoreState>true</RestoreState>
<Performance>1</Performance>
<DriverPath>C:\Program Files\Quest Software\Toad Edge\lib\drivers\edb-jdbc.jar</DriverPath>
<PerformanceOptions>
<PerformanceOption>
<Key>TYPES</Key>
<Value>false</Value>
</PerformanceOption>
<PerformanceOption>
<Key>TRIGGERS</Key>
<Value>false</Value>
</PerformanceOption>
<PerformanceOption>
<Key>FOREIGN_TABLES</Key>
<Value>false</Value>
</PerformanceOption>
<PerformanceOption>
<Key>TABLE_COLUMNS</Key>
<Value>false</Value>
</PerformanceOption>
<PerformanceOption>
<Key>PACKAGES</Key>
<Value>false</Value>
</PerformanceOption>
<PerformanceOption>
<Key>PROCEDURES</Key>
<Value>false</Value>
</PerformanceOption>
<PerformanceOption>
<Key>INDEXES</Key>
<Value>false</Value>
</PerformanceOption>
<PerformanceOption>
<Key>MATERIALIZED_VIEW_RULES</Key>
<Value>false</Value>
</PerformanceOption>
<PerformanceOption>
<Key>AGGREGATES</Key>
<Value>false</Value>
</PerformanceOption>
<PerformanceOption>
<Key>VIEW_COLUMNS</Key>
<Value>false</Value>
</PerformanceOption>
<PerformanceOption>
<Key>TABLE_CONSTRAINTS</Key>
<Value>false</Value>
</PerformanceOption>
<PerformanceOption>
<Key>TABLE_INDEXES</Key>
<Value>false</Value>
</PerformanceOption>
<PerformanceOption>
<Key>CONSTRAINTS</Key>
<Value>false</Value>
</PerformanceOption>
<PerformanceOption>
<Key>DOMAINS</Key>
<Value>false</Value>
</PerformanceOption>
<PerformanceOption>
<Key>MATERIALIZED_VIEW_COLUMNS</Key>
<Value>false</Value>
</PerformanceOption>
<PerformanceOption>
<Key>SYNONYMS</Key>
<Value>false</Value>
</PerformanceOption>
<PerformanceOption>
<Key>TABLE_TRIGGERS</Key>
<Value>false</Value>
</PerformanceOption>
<PerformanceOption>
<Key>TRIGGER_FUNCTIONS</Key>
<Value>false</Value>
</PerformanceOption>
<PerformanceOption>
<Key>VIEW_RULES</Key>
<Value>false</Value>
</PerformanceOption>
<PerformanceOption>
<Key>FUNCTIONS</Key>
<Value>false</Value>
</PerformanceOption>
<PerformanceOption>
<Key>TABLE_RULES</Key>
<Value>false</Value>
</PerformanceOption>
<PerformanceOption>
<Key>MATERIALIZED_VIEWS</Key>
<Value>false</Value>
</PerformanceOption>
<PerformanceOption>
<Key>MATERIALIZED_VIEW_INDEXES</Key>
<Value>false</Value>
</PerformanceOption>
<PerformanceOption>
<Key>TABLES</Key>
<Value>false</Value>
</PerformanceOption>
<PerformanceOption>
<Key>COLLATIONS</Key>
<Value>false</Value>
</PerformanceOption>
<PerformanceOption>
<Key>SEQUENCES</Key>
<Value>false</Value>
</PerformanceOption>
<PerformanceOption>
<Key>VIEWS</Key>
<Value>false</Value>
</PerformanceOption>
<PerformanceOption>
<Key>VIEW_TRIGGERS</Key>
<Value>false</Value>
</PerformanceOption>
</PerformanceOptions>
<SSH>
<Enable>false</Enable>
</SSH>
<SSL>
<Enable>false</Enable>
</SSL>
</Options>
</Connection>
</Connections>
You can now use your Windows Task Scheduler to execute your newly created batch file. Remember that the Windows client needs connectivity to the database in question when the script is scheduled to fire off. Here is a great link on how to use the Windows Task Scheduler: https://www.e-education.psu.edu/geog485/node/143.
The output will be a snapshot in JSON format and look like the following (note that only a portion of the JSON file is shown since it is quite large):
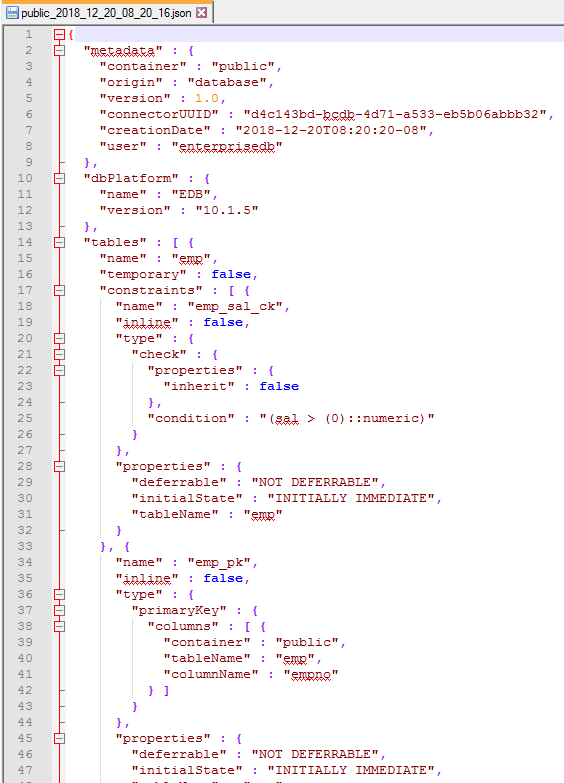
Figure 8. The snapshot output in JSON format
While this operation is very useful, it is quite simple to set up. Once you have success with this, you may want to extrapolate upon this example to schedule more complex operations.
I hope you found this helpful. Happy automation!
Start the discussion at forums.toadworld.com