Why should you version your models?
By versioning your models that you have created with Toad® Data Modeler you can keep track of model changes just like you do with your application code. If you need to rollback a change to a database model, you can easily pull the model out of your GIT repository. If you are using GitHub, Toad Data Modeler can connect to it as well.
Get started with Toad Data Modeler on how to save your Data Models into your GIT repository
To get started you need to make sure Toad Data Modeler has the proper path to your Git environment. Here’s how:
- Simply go to the Settings Menu on the top tool bar
- Choose Options.
- Under Options choose Version Control System. This will open the screen you see below.
Simply fill out the Local Settings fields to use your local Git repository. If you want to push your models to GitHub simply fill out the appropriate fields and click OK.
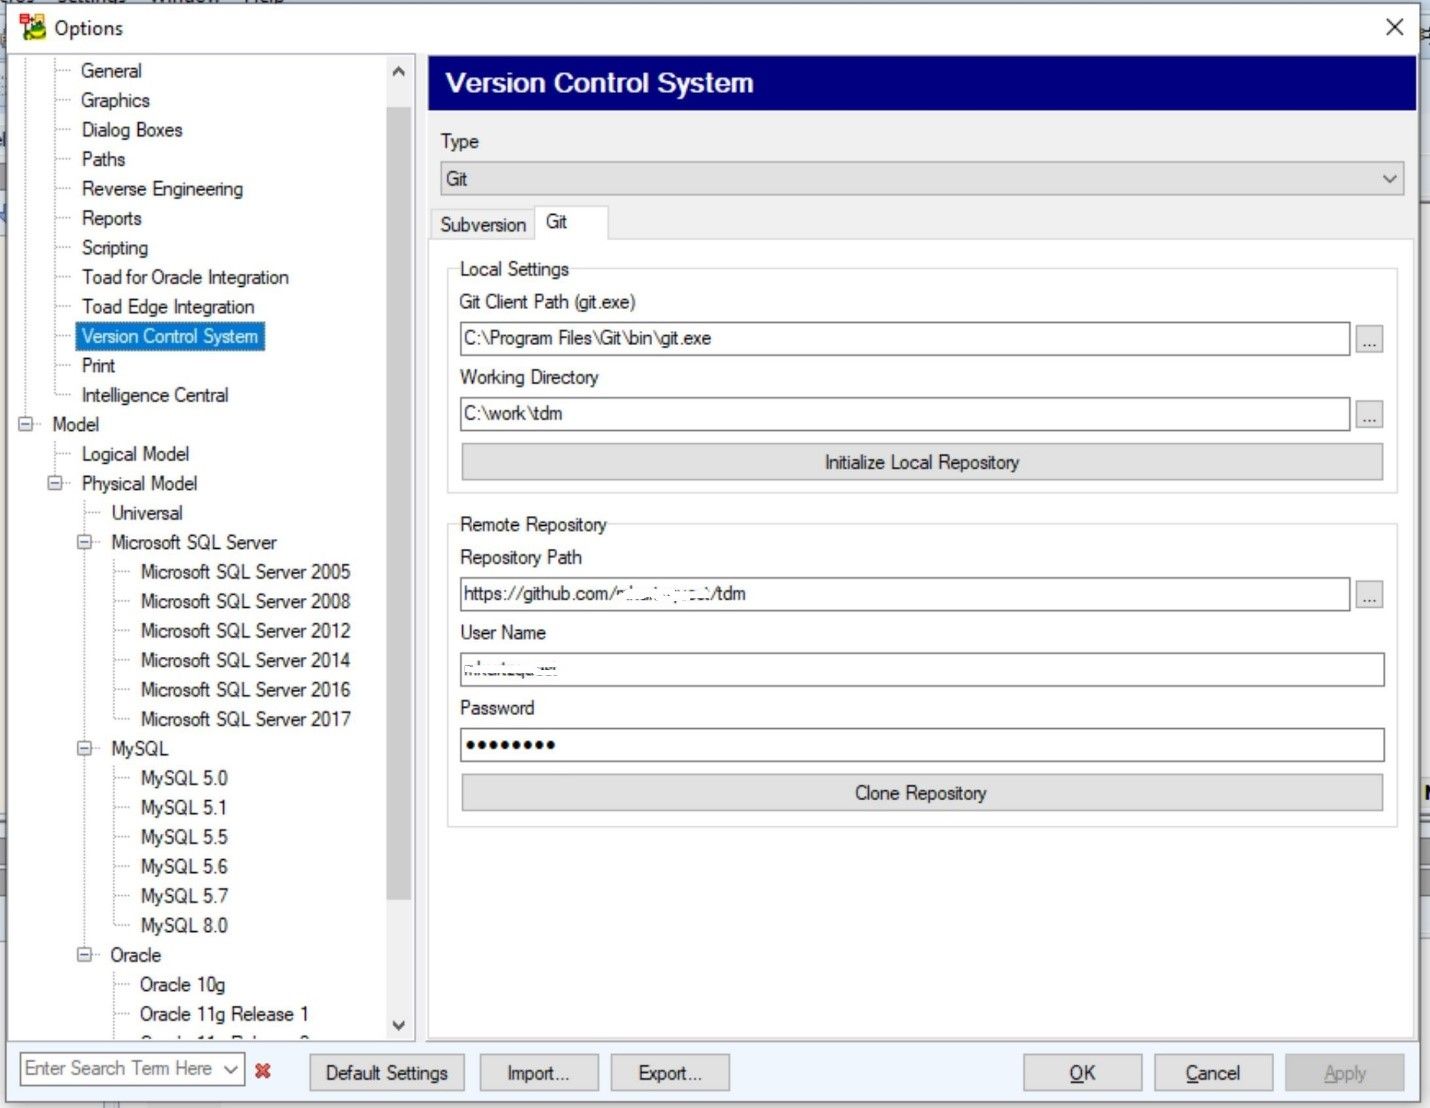
The Toad Data Modeler options page, where you configure your VCS options.
Start working with your model(s) by reverse engineering
Now you can start working with your model(s).
I am going to create a new model by reverse engineering a database that I have. Here’s how:
- Go to the File menu item.
- Choose Reverse Engineering from the dropdown
- Choose Reverse Engineering Wizard.
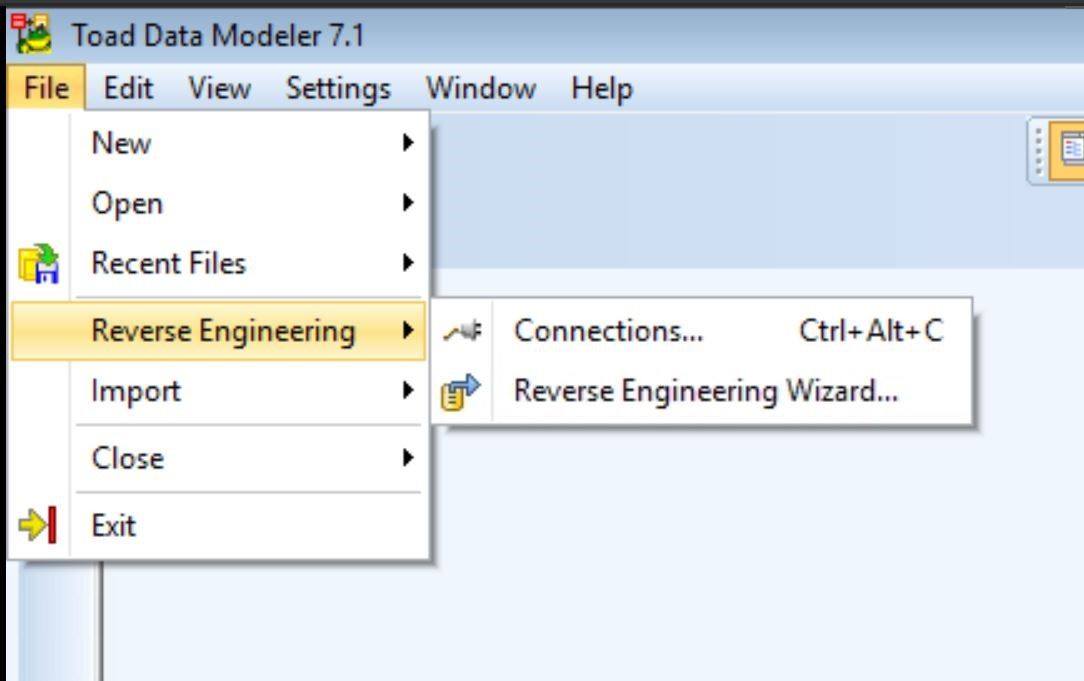
How to create a reverse engineering model in Toad Data Modeler.
This will open a dialog box where you can choose the database you want to work with. You can use a ‘stored connection’ if you have used Toad Data Modeler previously or you can create a new connection. Below you can see that I have an Oracle connection and a SQL Server connection. For this blog I will use the Oracle connection quest_dev.
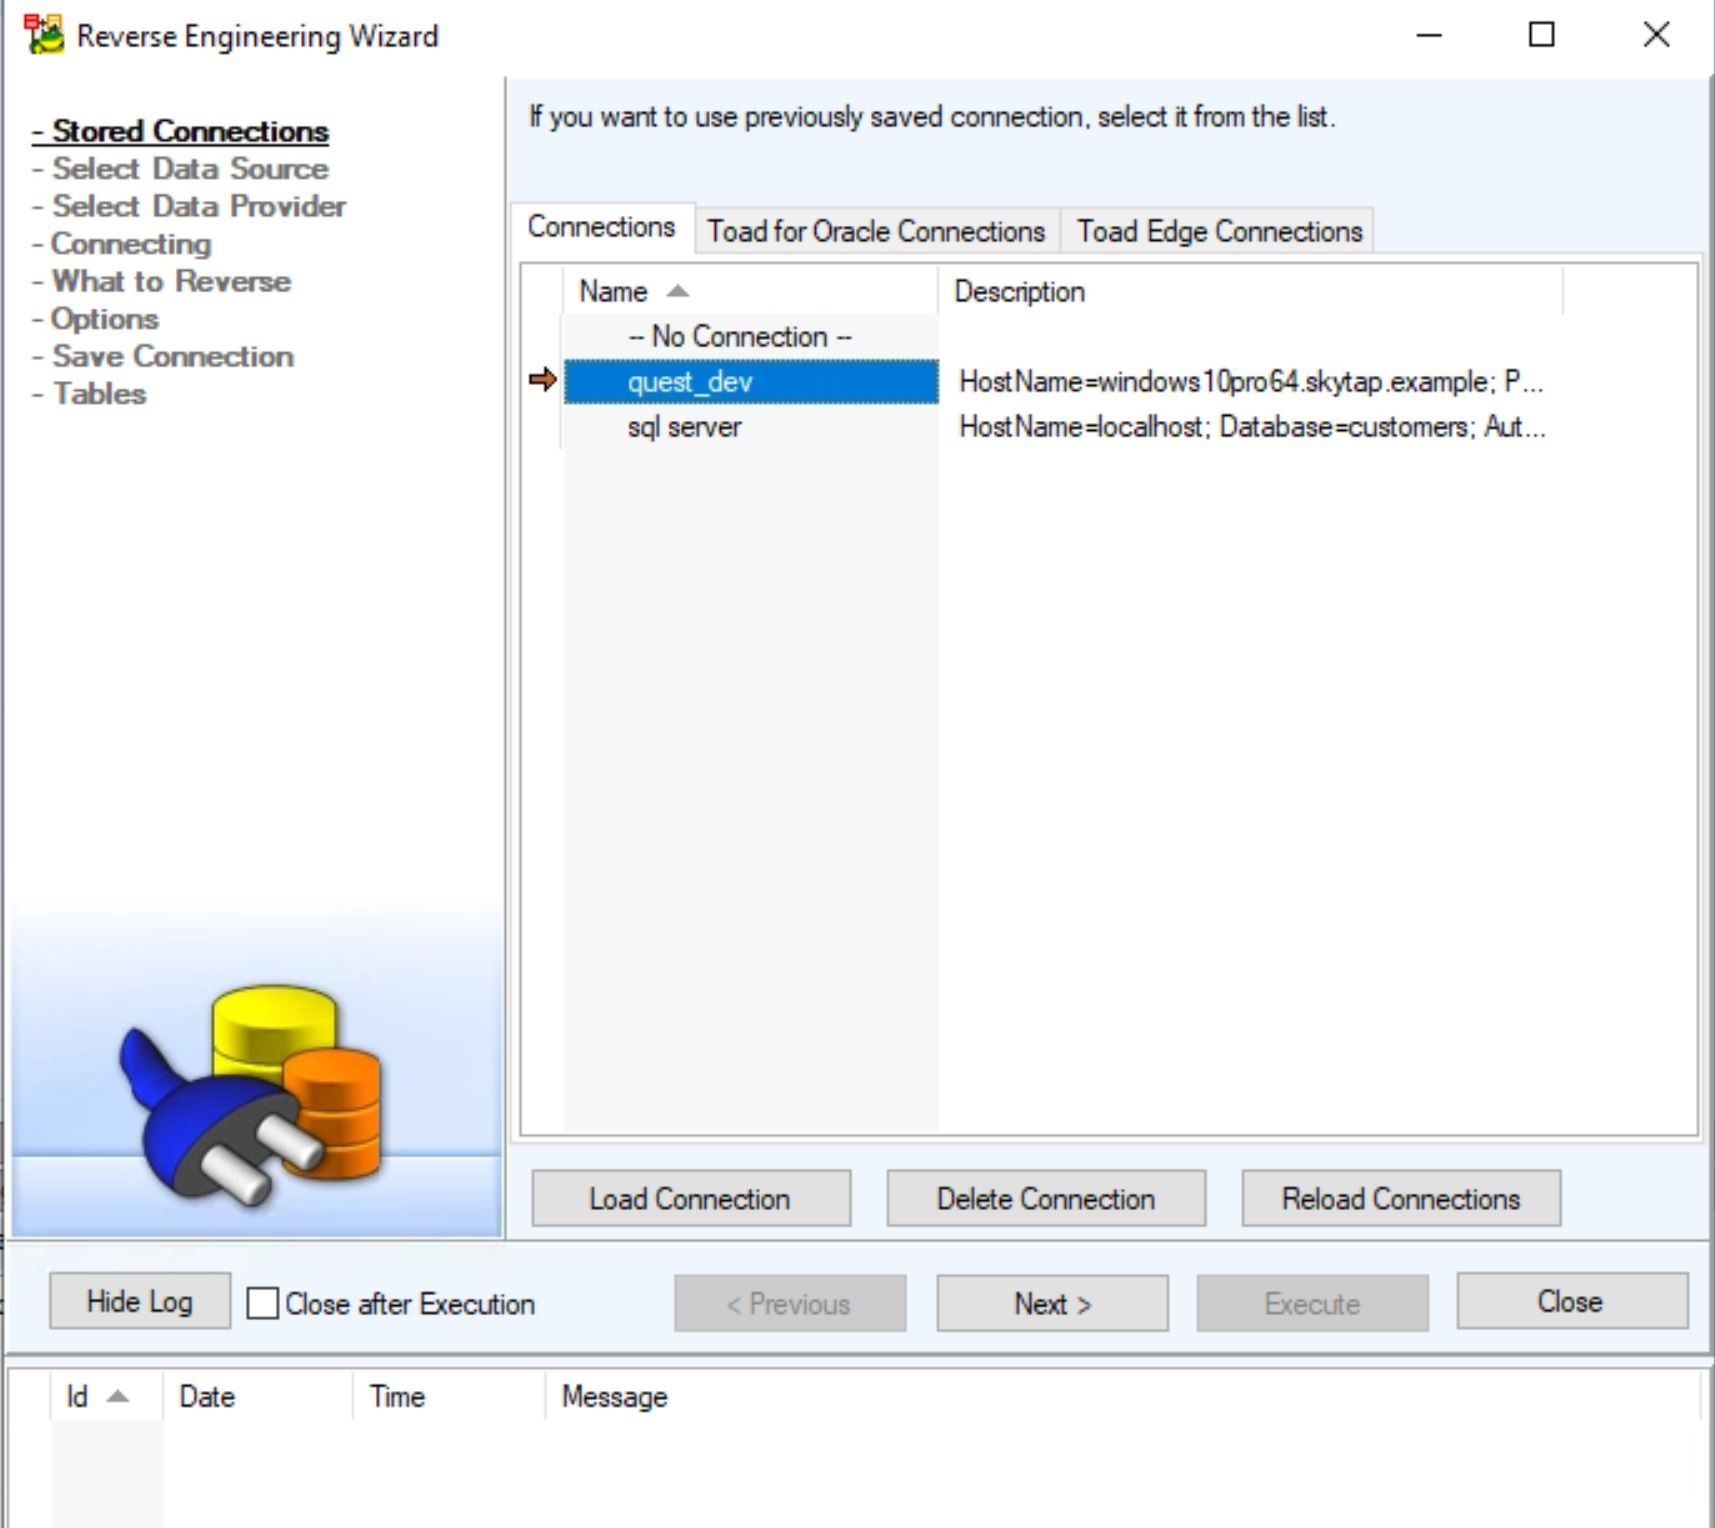
Toad Data Modeler showing how to use a predefined connection or create a new connection.
When you click on the Next button you will see the screen below. (this is a subset of all of the data sources Toad Data Modeler can work with. You will need to scroll down to find your database).
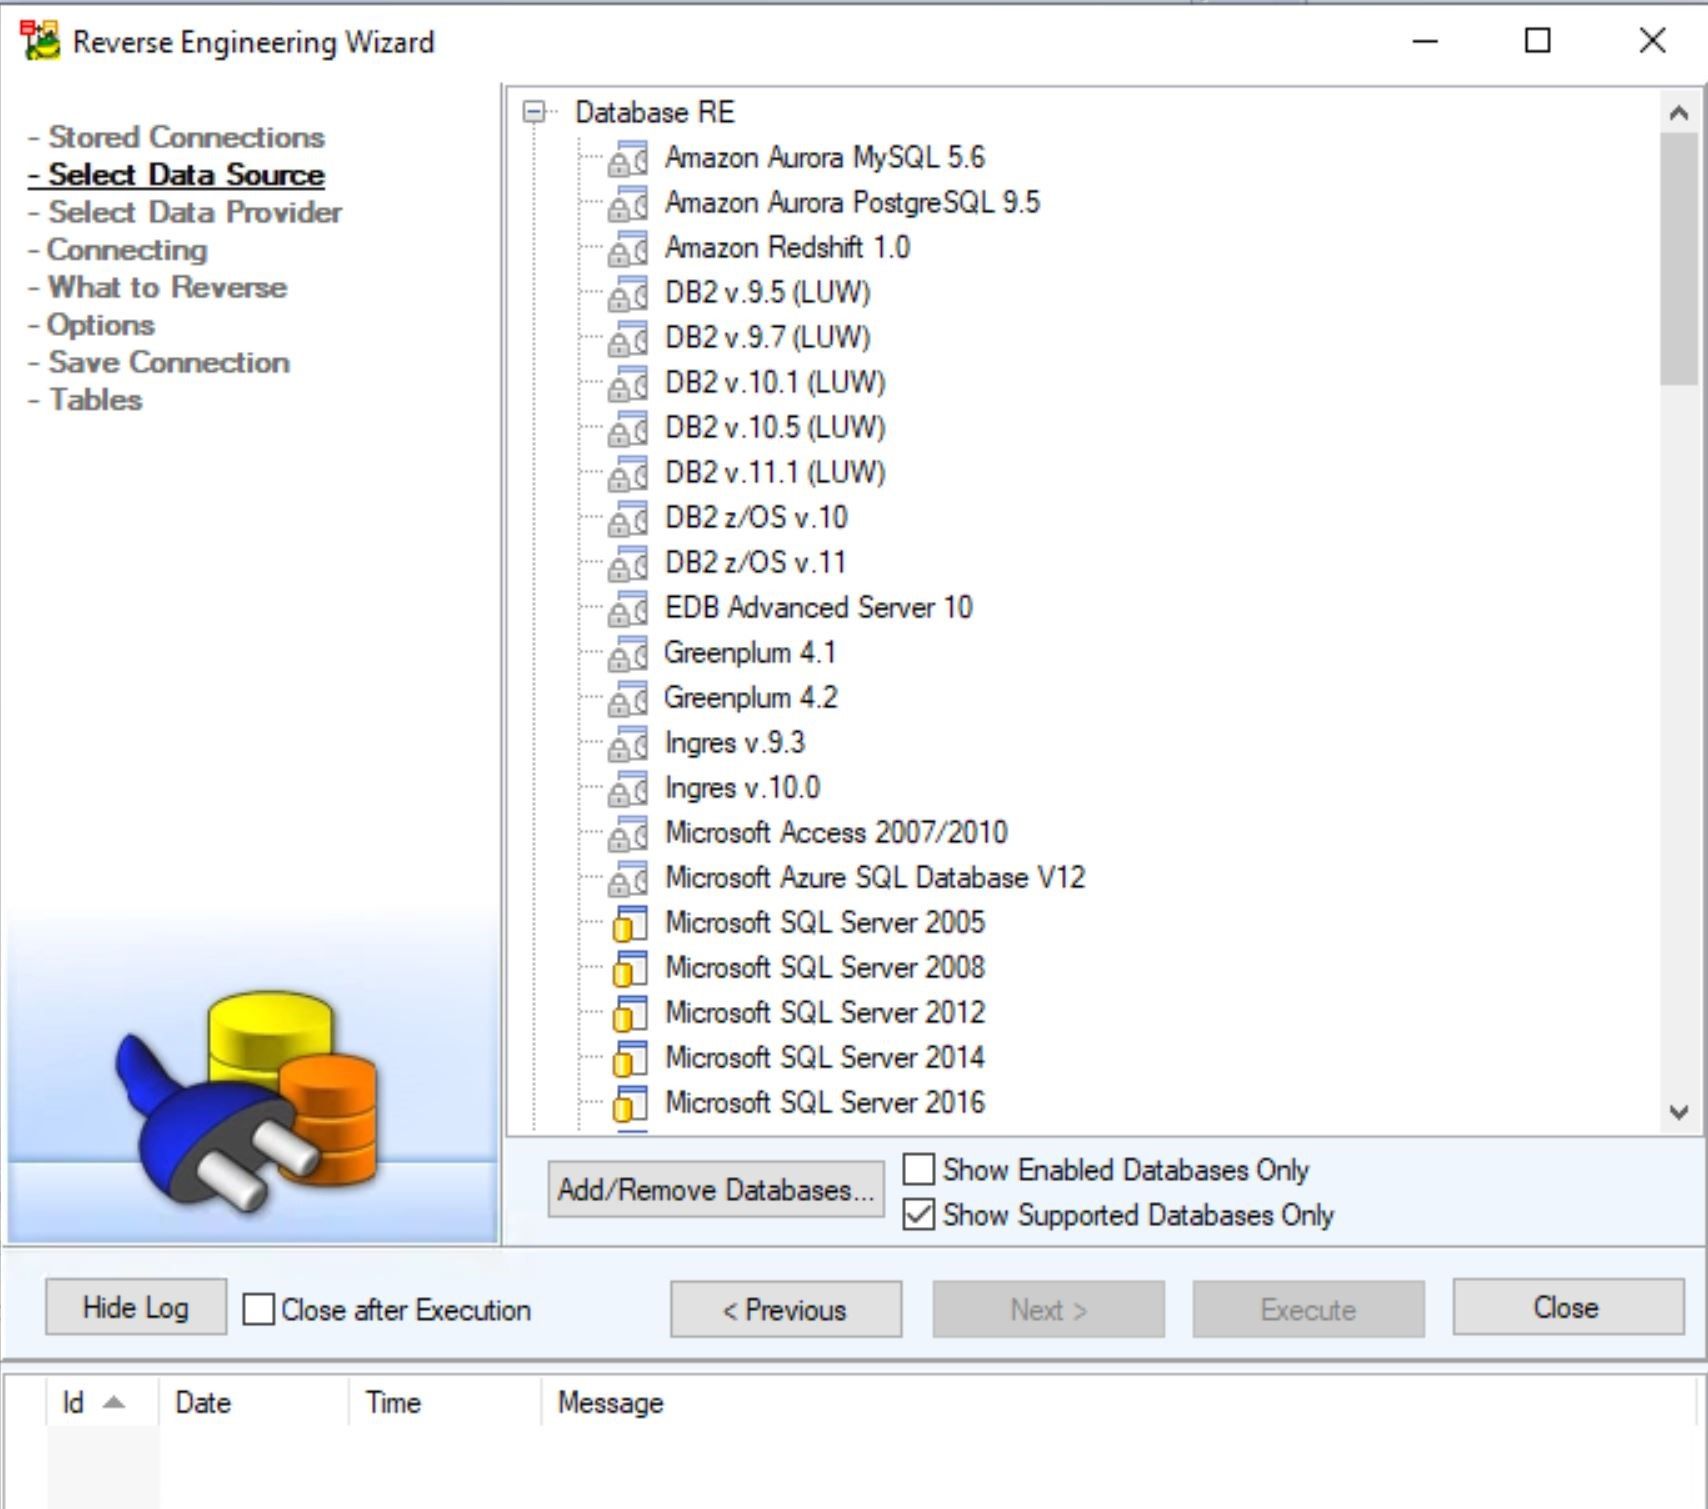
Toad Data Modeler showing the subset of all the data sources available to work with.
Once you have chosen your source database, click on the Next button option to get to the “What To Reverse” dialog. This is where you can choose the tables you want to model.
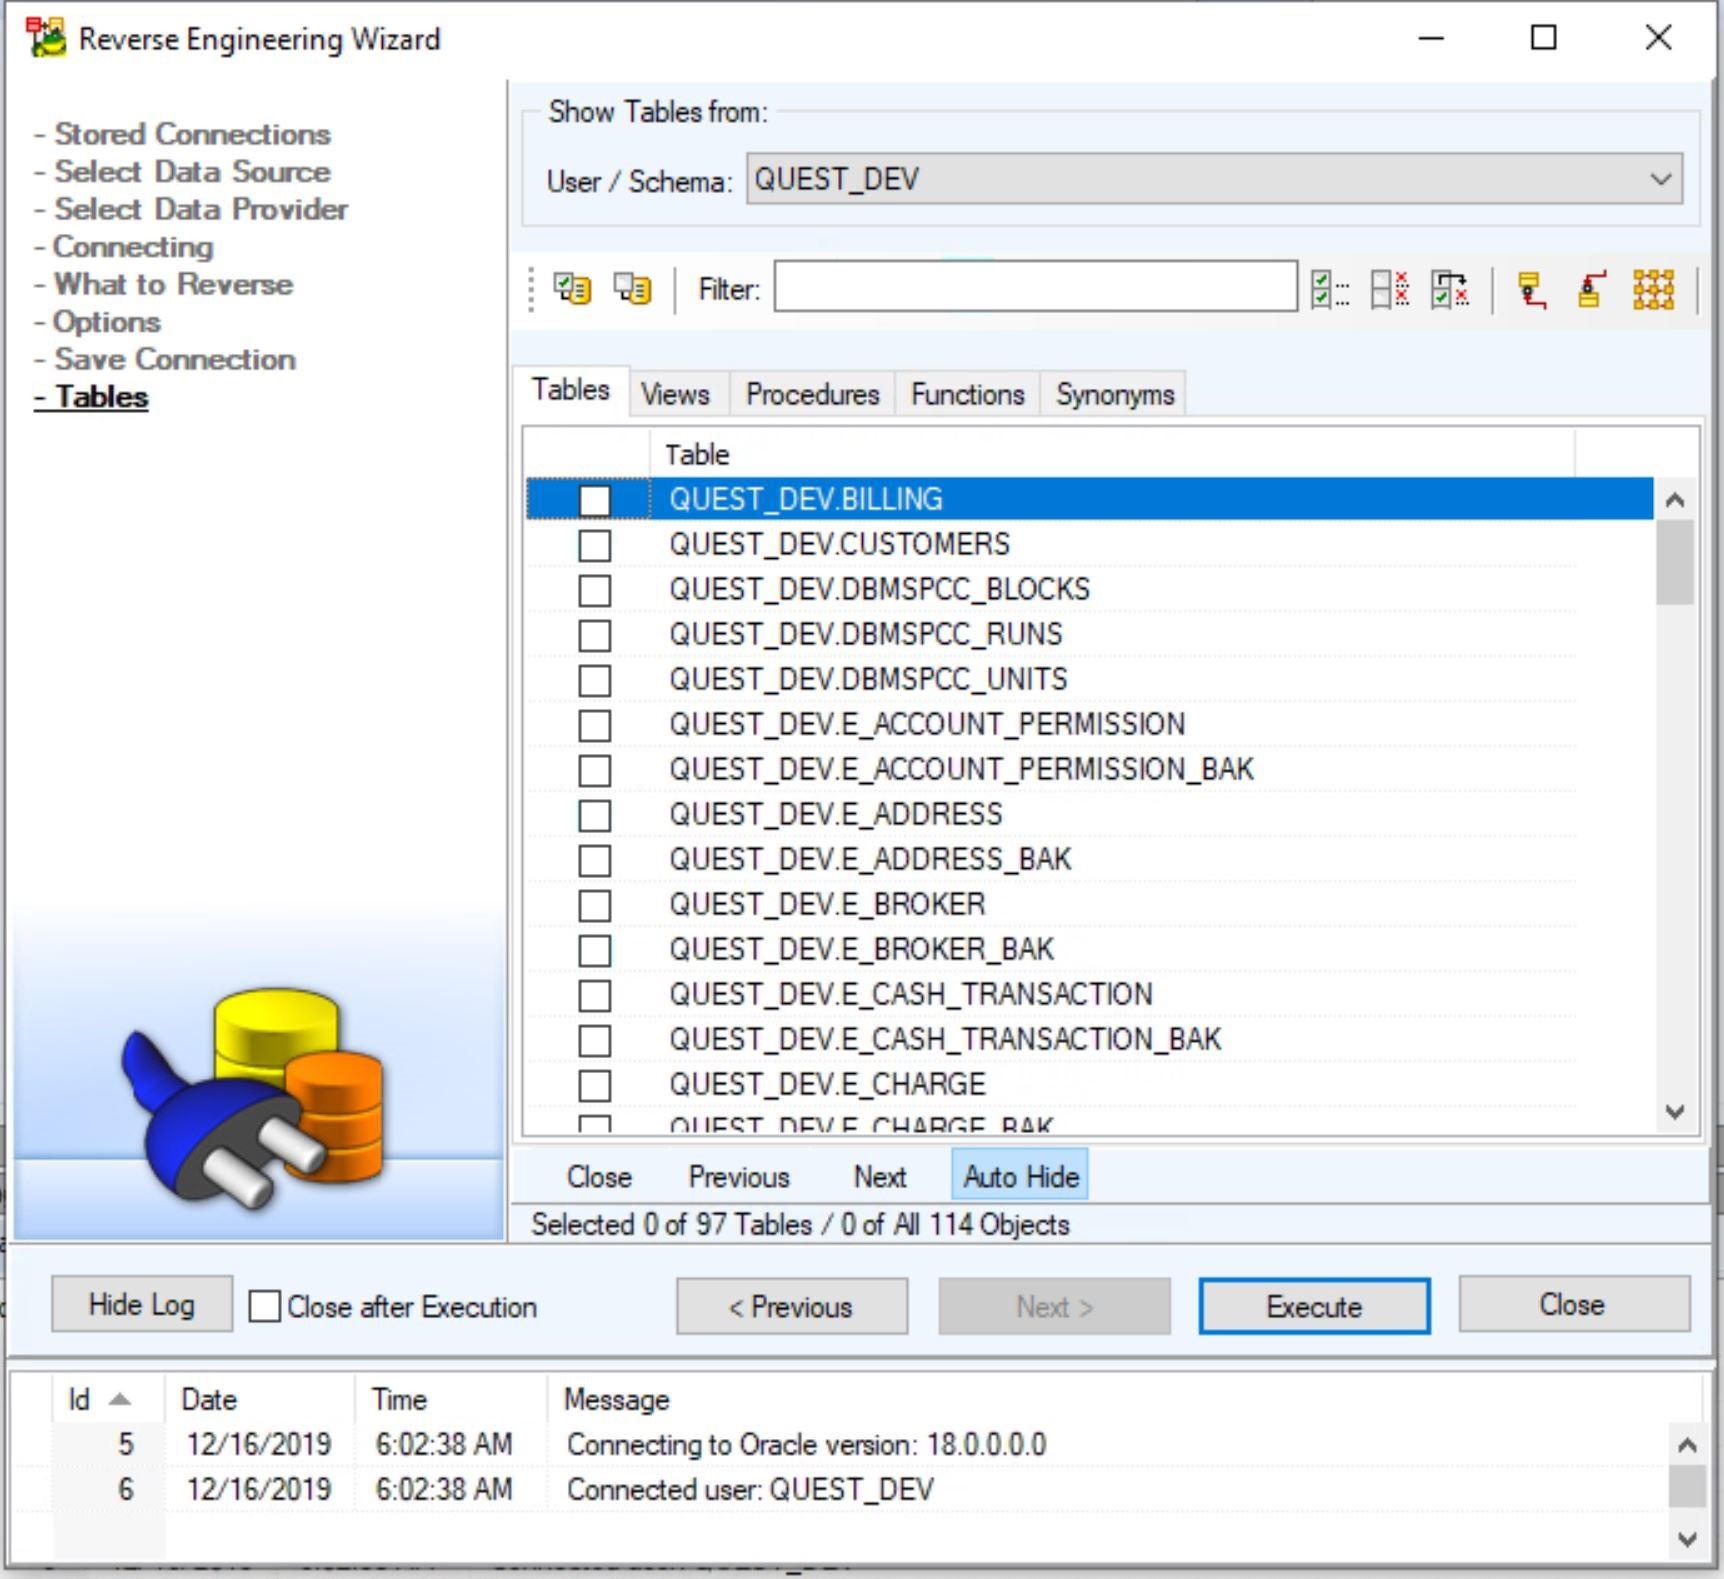 Toad Data Modeler shows a list of tables that you can reverse engineer.
From the list shown, simply click on the checkbox for the objects you want to reverse engineer. Once you have made your choice click on the Execute button to launch the process.
When the process completes you will see the dialog box below. Click on the OK button.
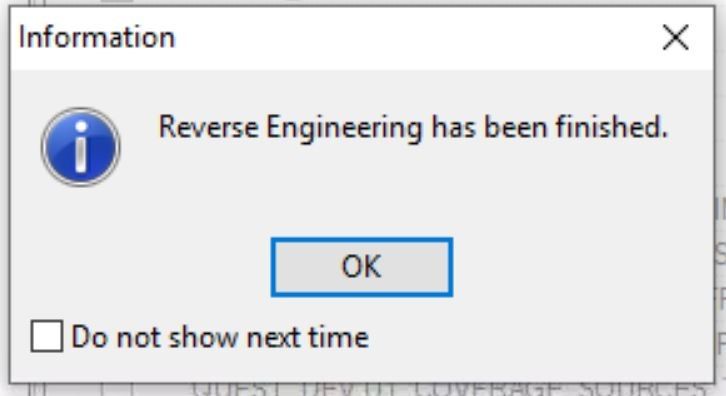
Toad Data Modeler message: Reverse Engineering is complete.
This window will open and you will see the objects that you have just reverse engineered.
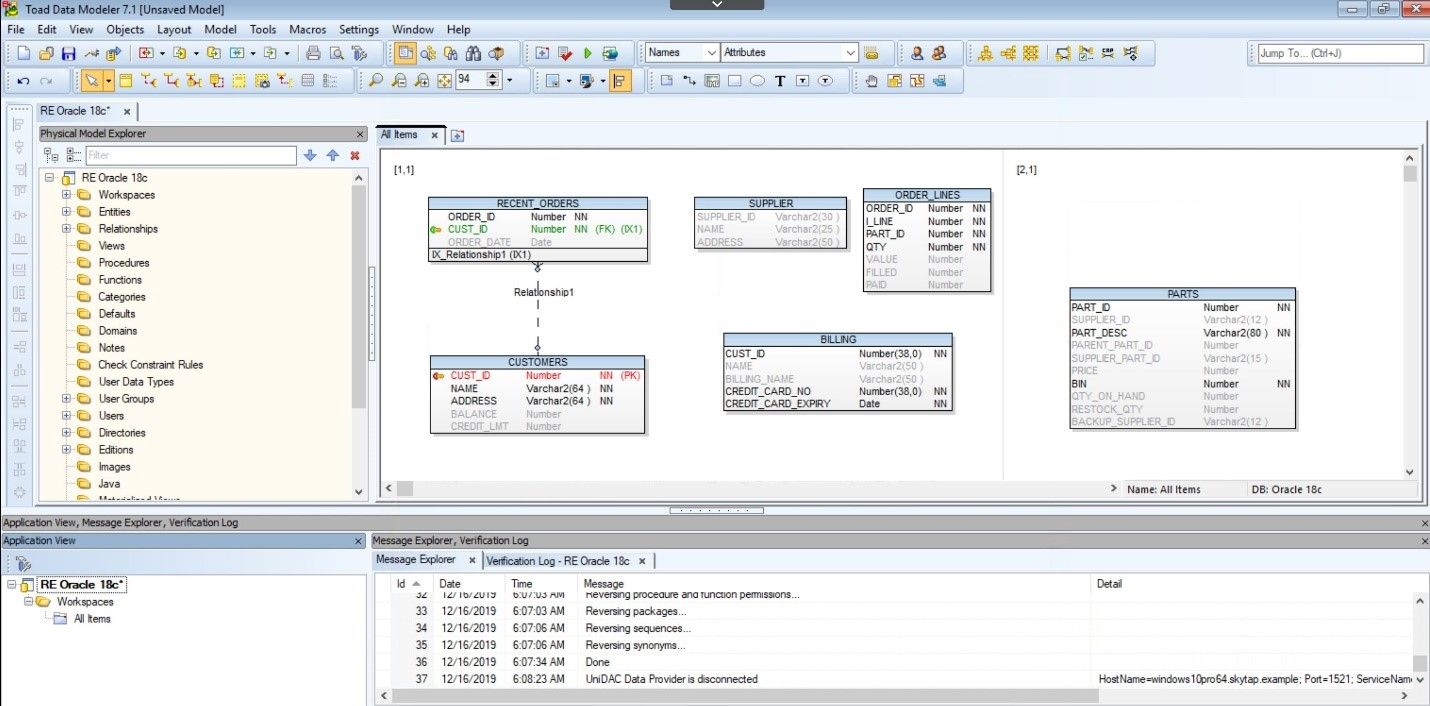
Diagram of reverse engineered model.
Add to Git repository
Now we can take this model and add it to our Git repository. To do this you need to create a project. Right-click on the model you just created and choose ‘New Project’ from the ‘Add to Project’ list.
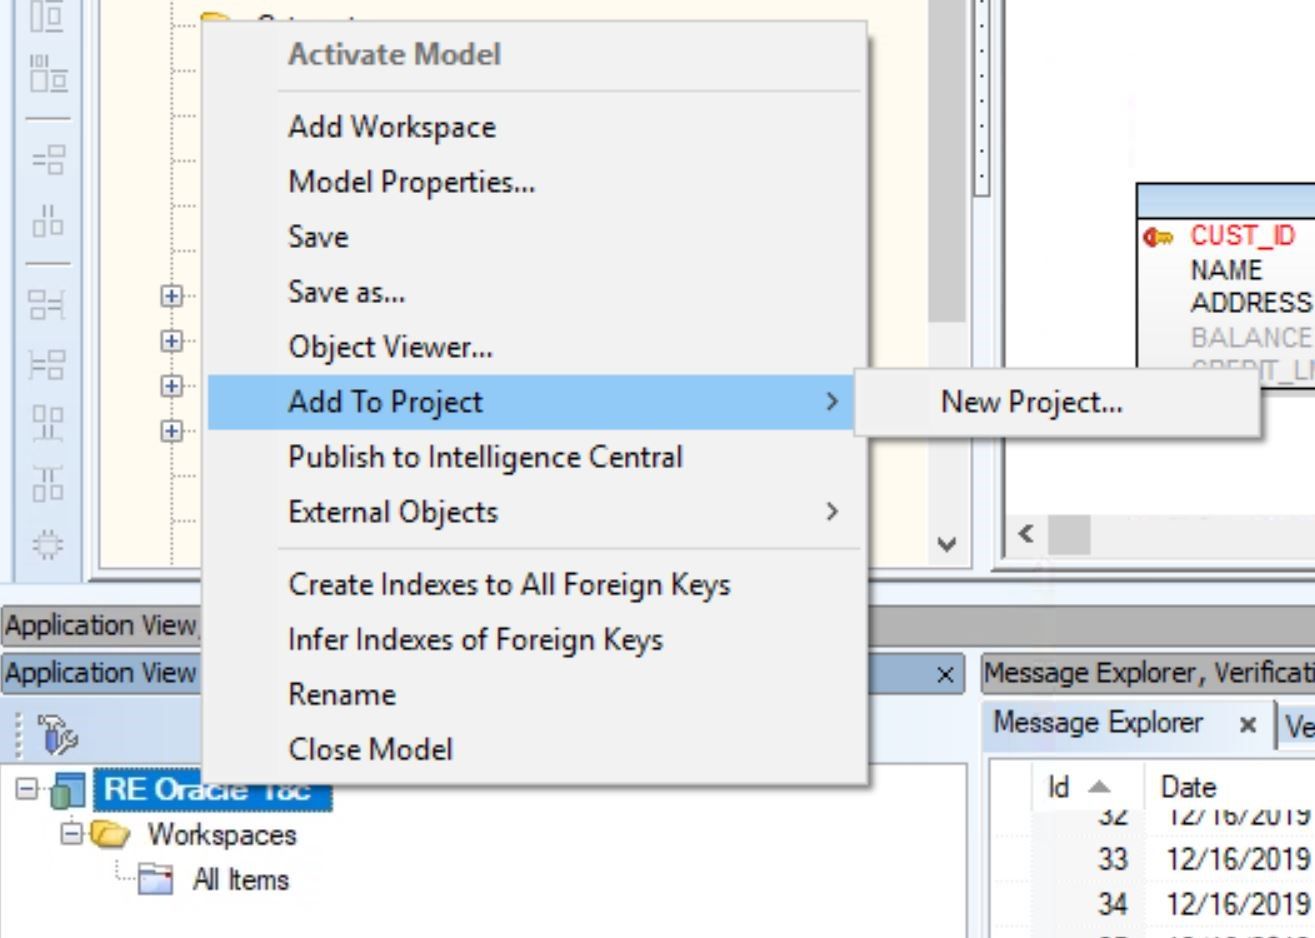
Toad Data Modeler to create a new project. Choose add to project from the menu.
This dialog box is where you start defining your project.
- Give your project a name. I chose TDM Blog for mine.
- Put in a description. Although this is optional it will help you in the long run if you enter a description now.
- Define the project path. This is where the project will be stored. This path can be local or on a network location.
- Choose the ‘Use Version Control System’ checkbox. That’s why we’re here, right?
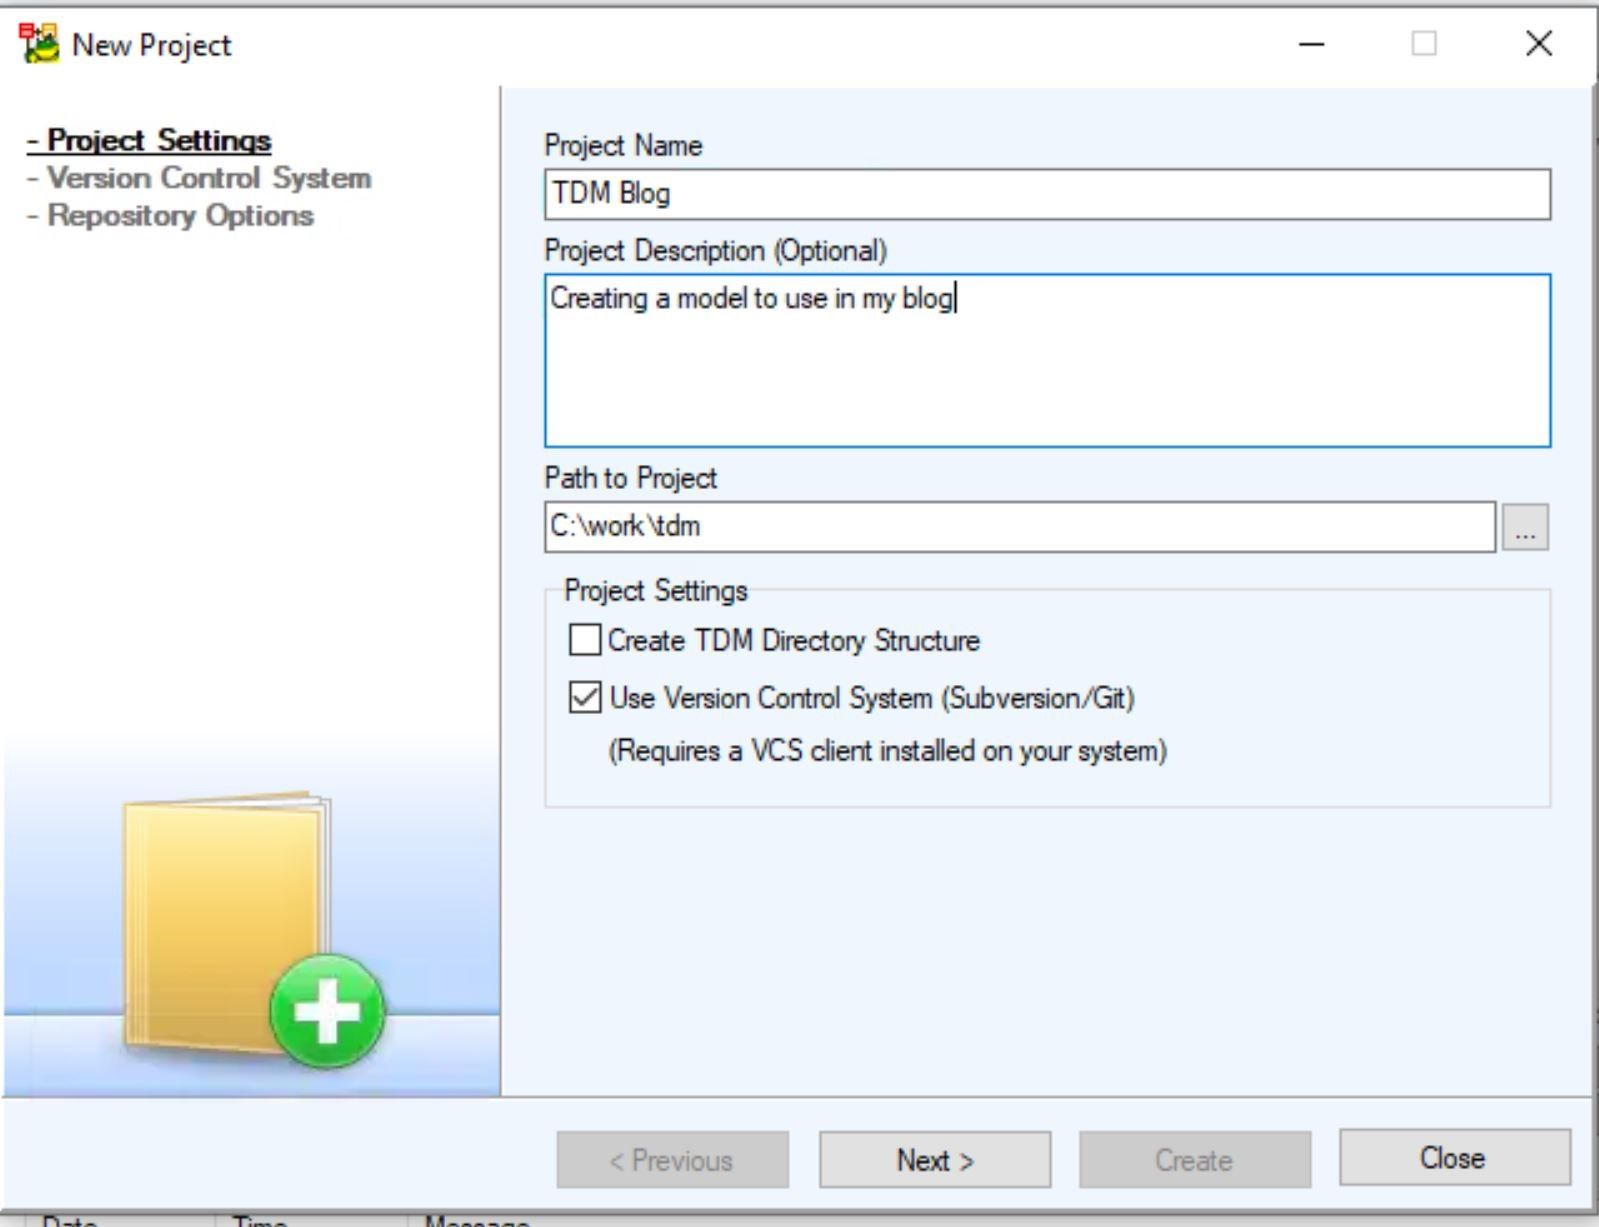
Toad Data Modeler showing how to set the parameters for your project.
Now you need to setup Git. This is pretty straight forward. Simply enter the path to the git executable.
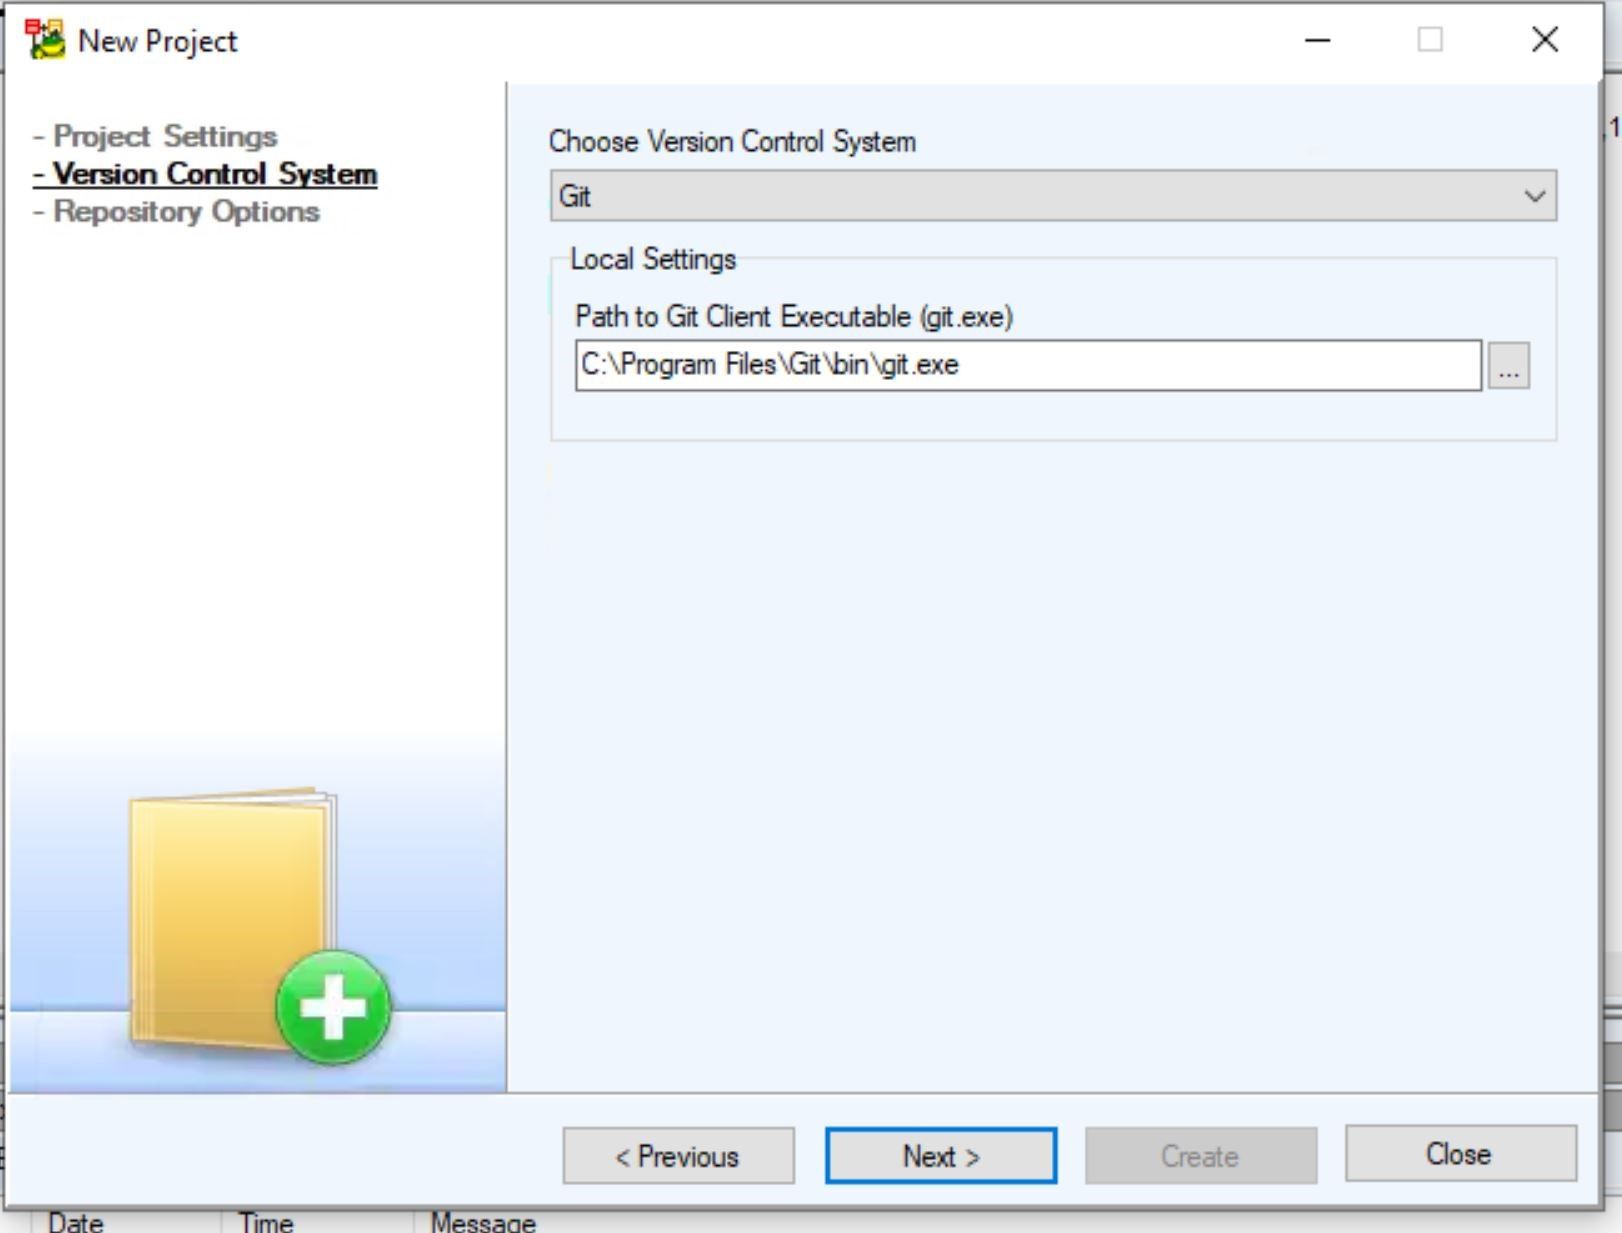 Toad Data Modeler, Path to Git.
Configure how you want to use your Git repository
Now you can configure how you want to use your Git repository. You can Initialize a Local Repository and Configure your Remote Repository. Configuring the remote repository allows you to use GitHub.
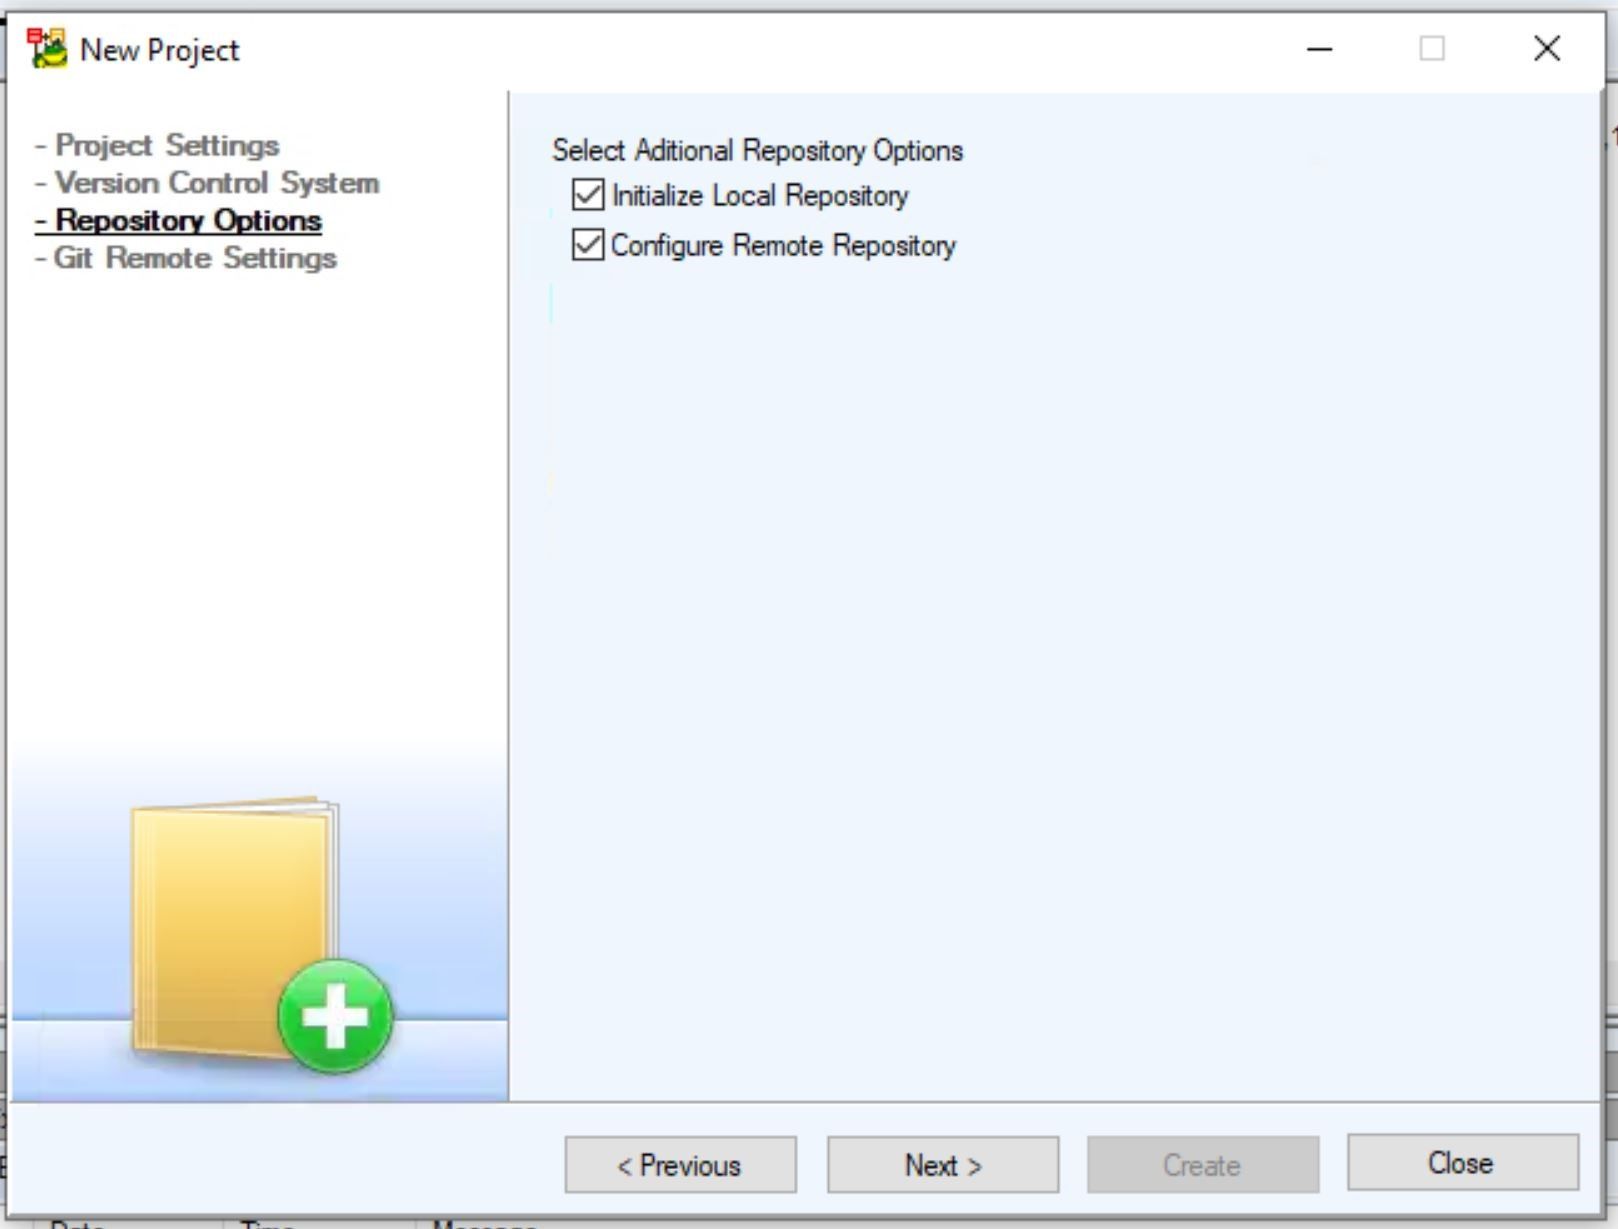 Toad Data Modeler showing how to configure your git repository options.
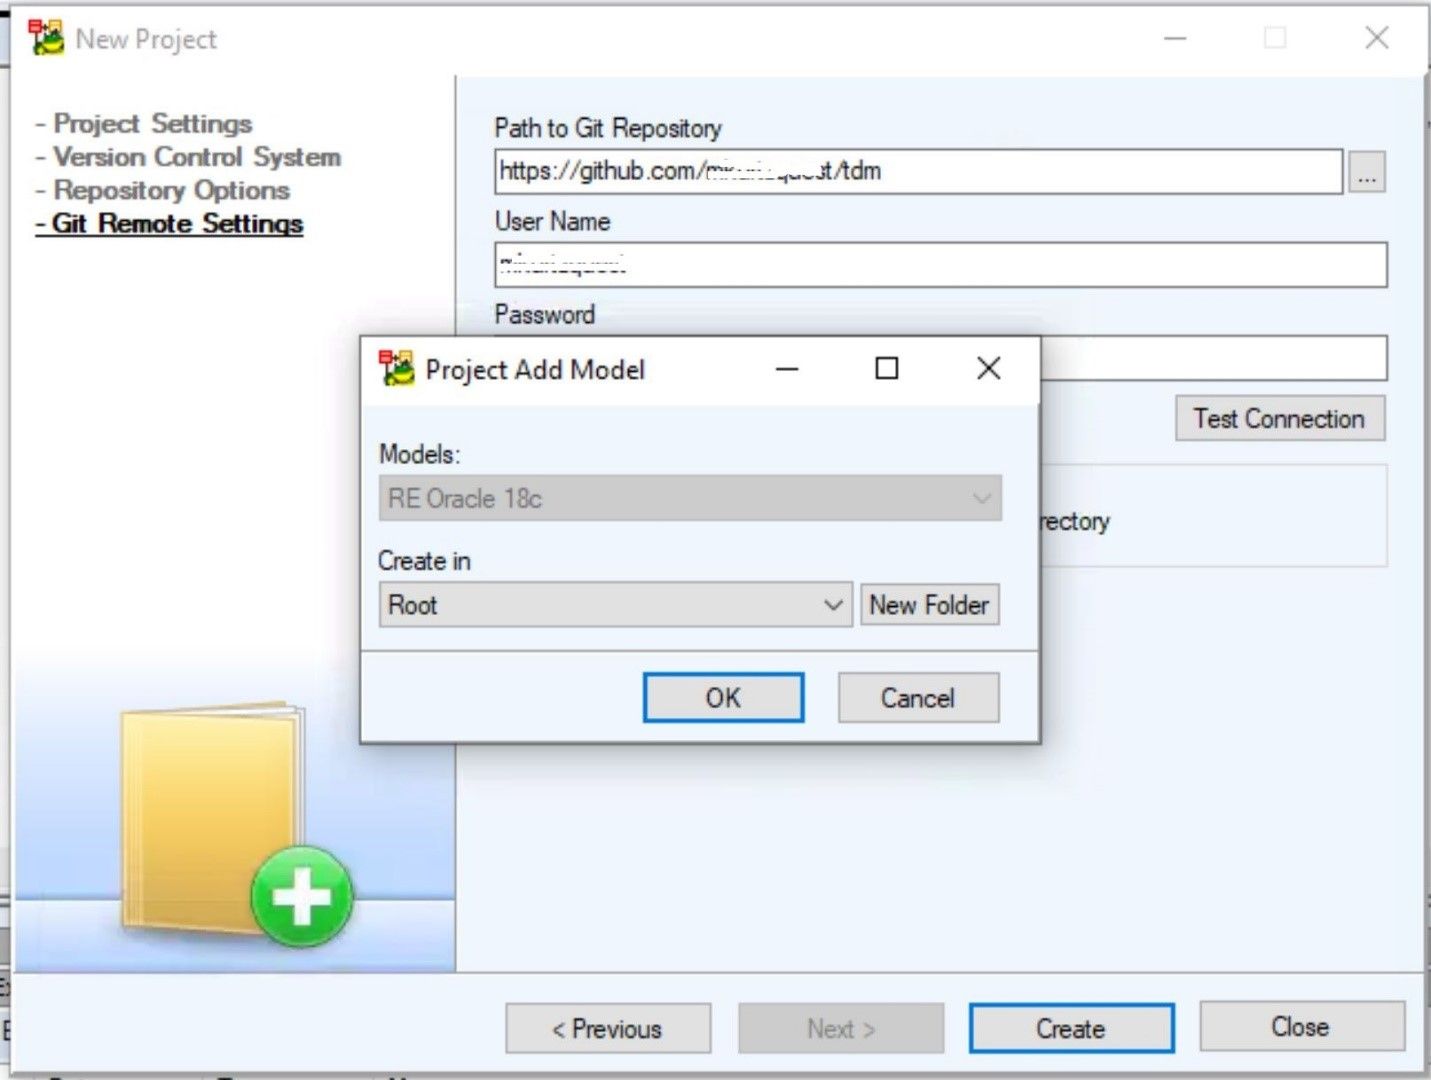
When you choose the ‘Configure Remote Repository’ the dialog window below will open, and this is where you define the path to your remote repository. Make sure you test your connection to ensure you have it right.
If you want, you can clone an existing repository to an existing directory and use the existing directory environment.
Click on the Create button.
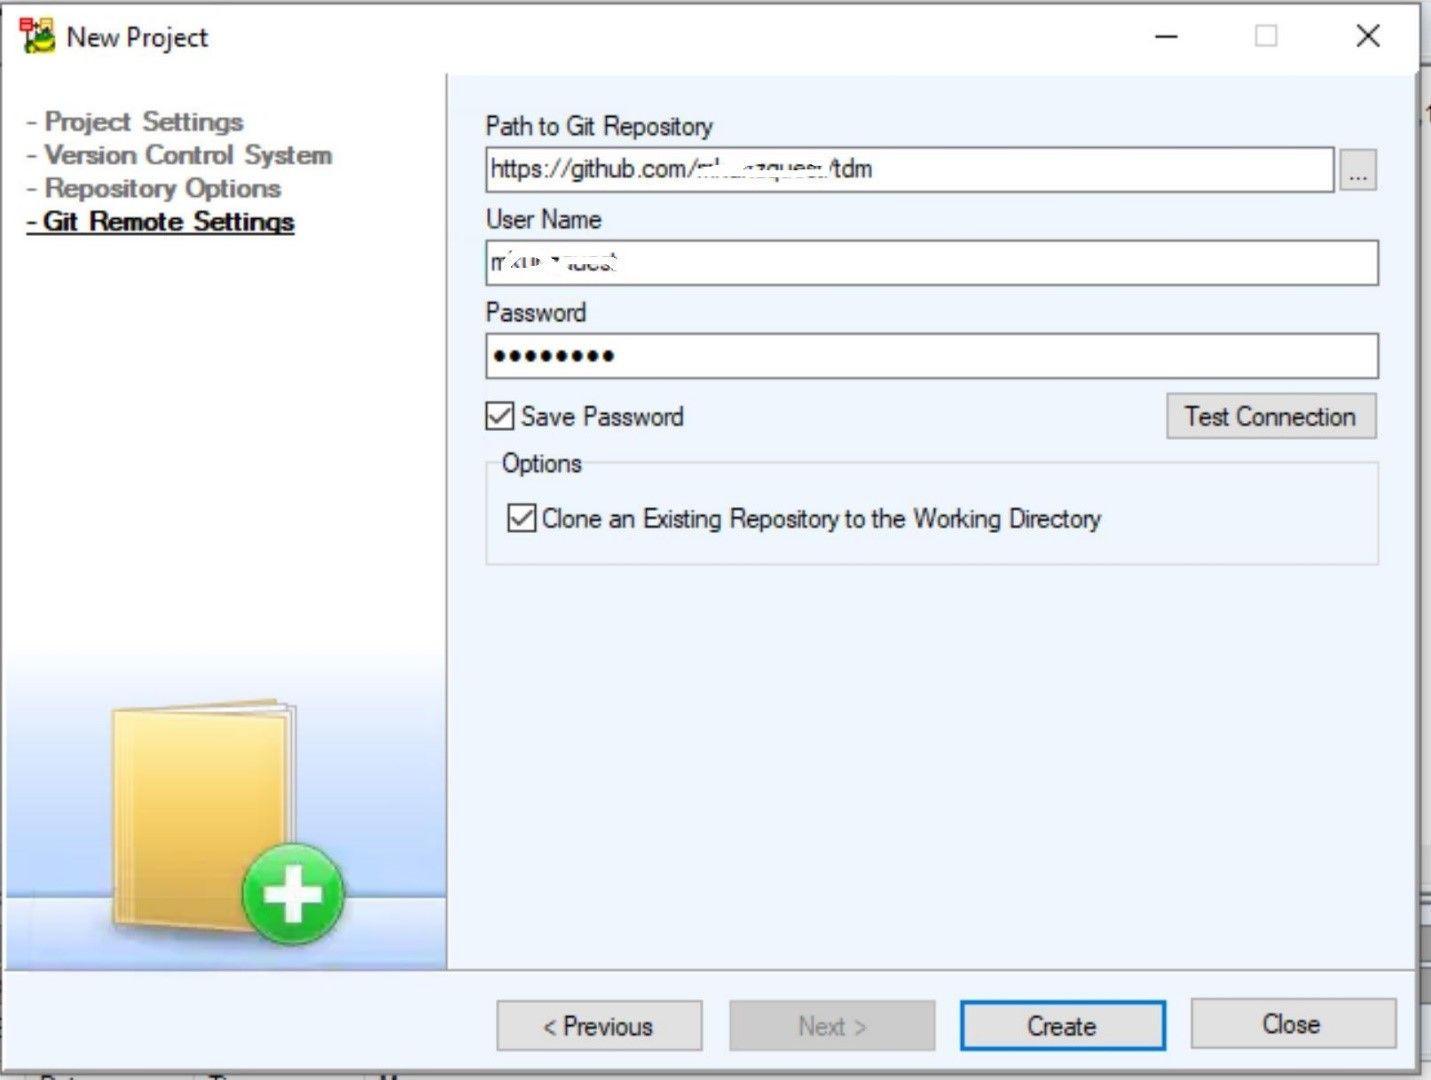
Toad Data Modeler, showing how to define the path to your remote git repository.
You will be prompted for the Git Branch you want to use. I am going to use the default Root path, but you should define your environment appropriately inside of Git. Click on the OK button to continue.
Toad Data Modeler, showing how to choose your Git branch to use.
Save your project into Git
So far, so good. In the screen shot below you can see that you have just created a project in Toad Data Modeler but what’s up with the question marks? They mean that while you have created a project and defined your Git repository you have not saved this project into Git. We will do that next.
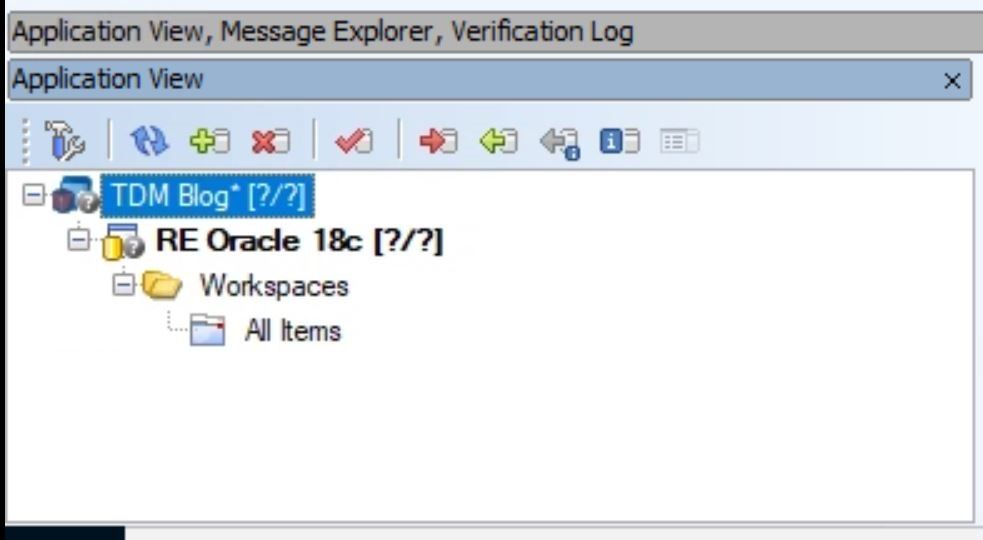
Toad Data Modeler showing the Application view, showing new project that was just created.
The next step is to ‘commit’ this project to the Git repository. Right-click on the project TDM Blog and choose Git from the drop down menu. This will open another menu tree that shows all of the actions you can perform for Git within Toad Data Modeler.
We are interested in committing this project to the Git repository.
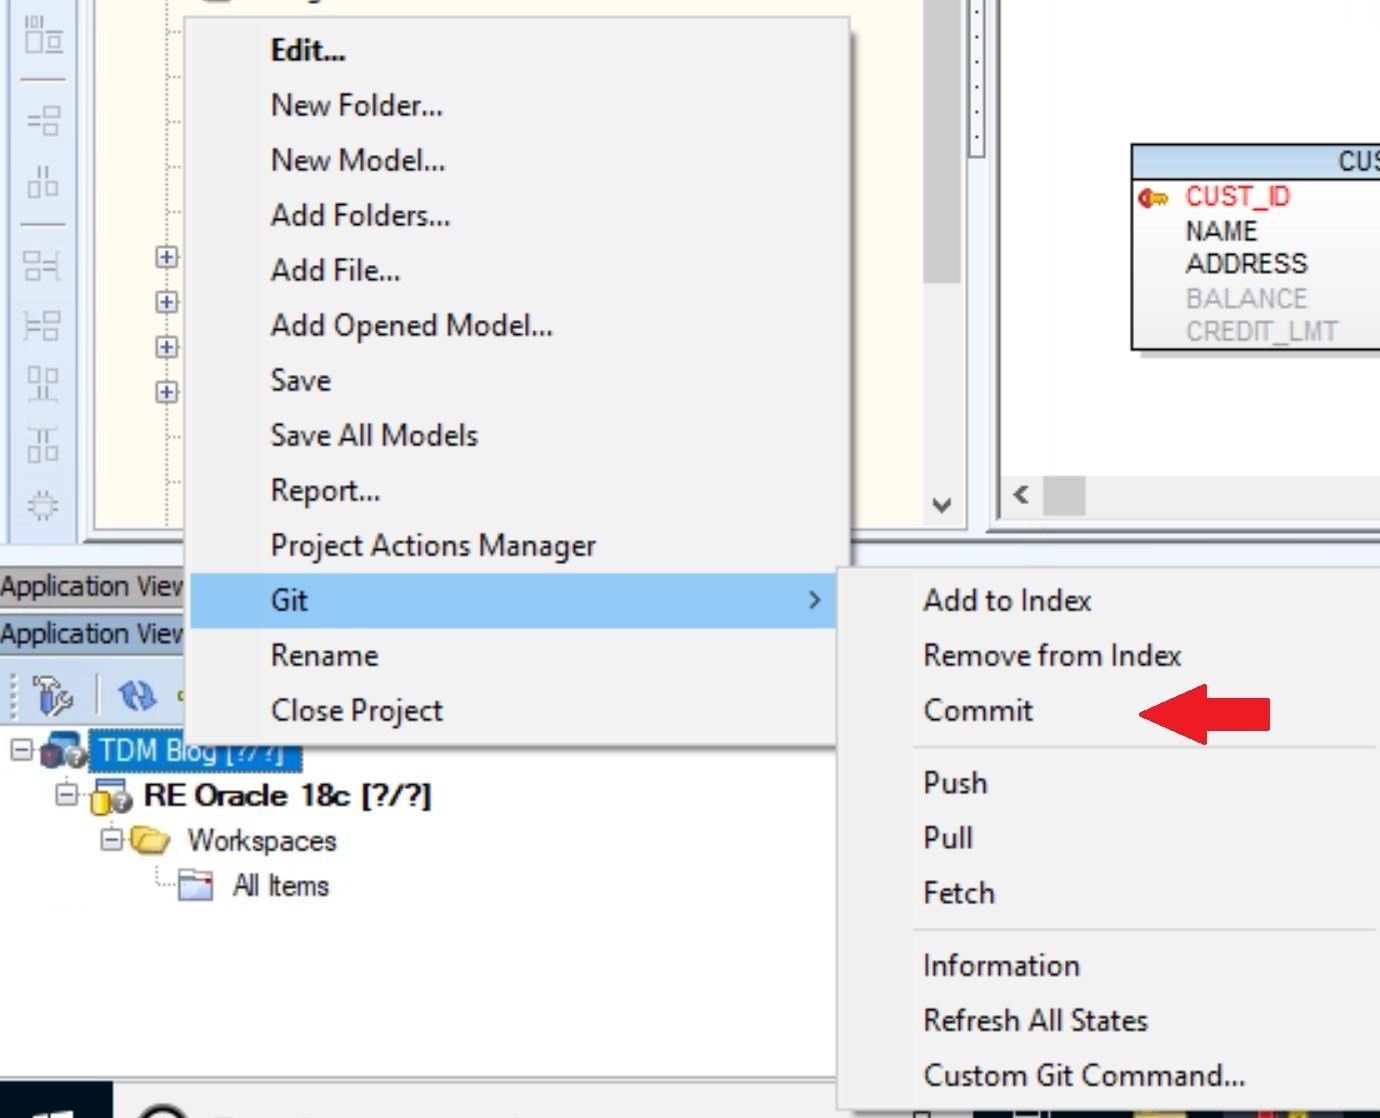 Toad Data Modeler, showing how to chose Commit from the menu to add this project to Git.
The Commit dialog box will open showing the model file (RE Oracle 18c.tcp) that will be added to the repository. (If you do not see a .txp file in this dialog that means you haven’t successfully committed your project and you need to check for errors in the Message Explorer dialog box in Toad Data Modeler.)
Add a comment in the message field then click on the Commit button.
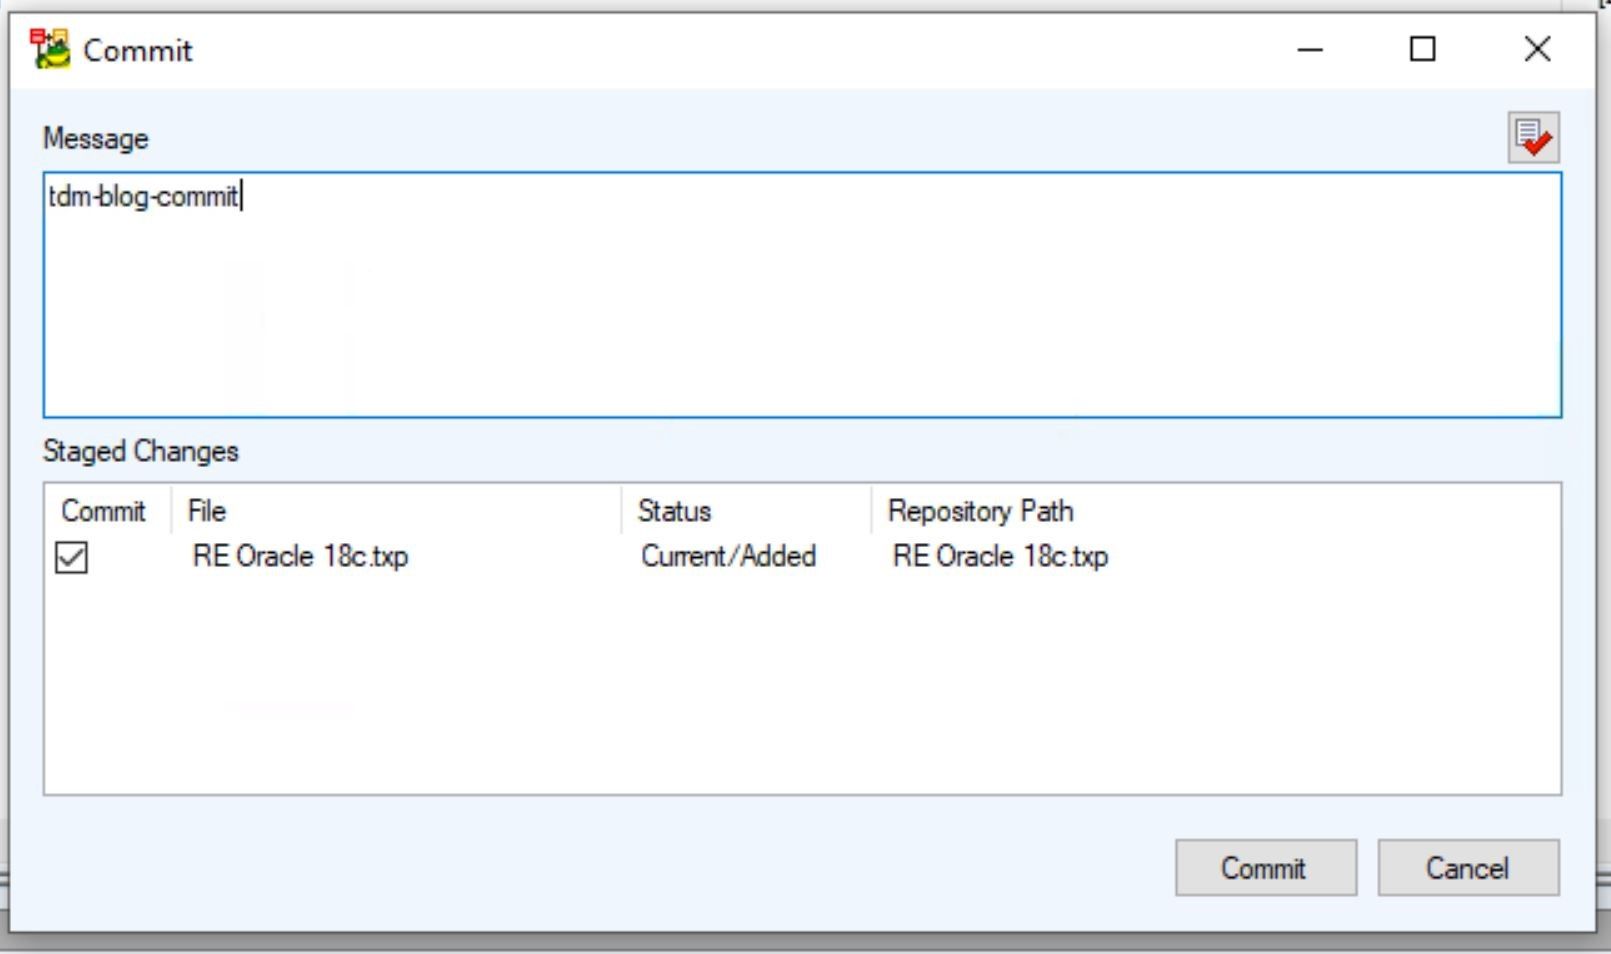
Git commit message dialog box.
If successful you will see a message stating that in the Message Explorer dialog box. This is the same dialog box I mention in the previous step.
In message line 40 you can see that the .txp file has been successfully added to my Git repository
 Confirmation dialog box.
Push this model to GitHub repository
The final thing I am going to do, and this is optional to you, is Push this model to my GitHub repository.
In the screen show below you can see that I am using the same process as above when I committed the model to my local Git but now I am going to Push this to GitHub.
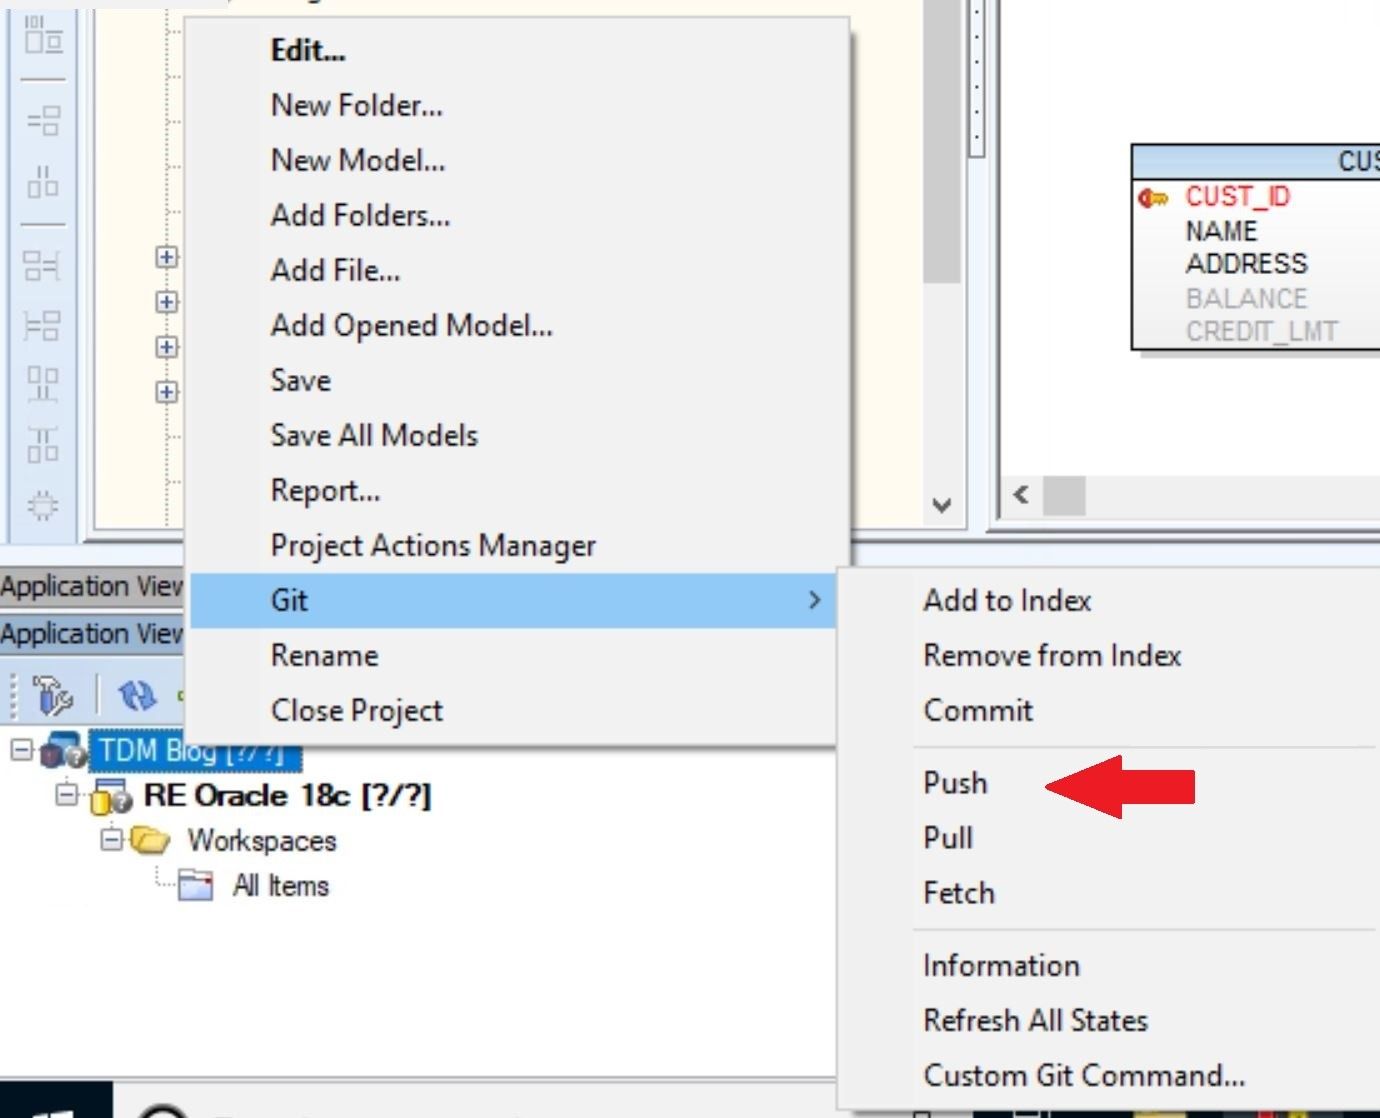
Toad Data Modeler, showing how to Push the model to GitHub.
When you choose the Push option you will be prompted for your GitHub credentials.
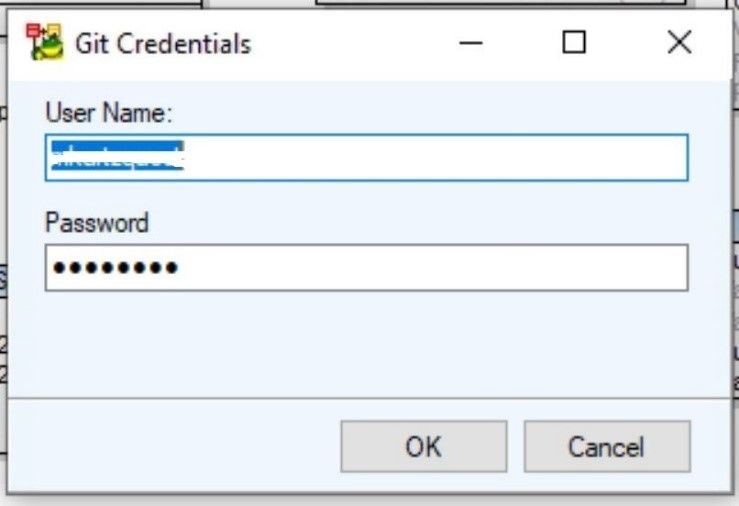
How to Enter your github credentials to continue.
Once you are done with the push you can use the GitHub tool of your choice to verify that the model file was successfully pushed.
Screen shot showing GitHub verification of push.
And that is pretty much it. You have now successfully added a model from Toad Data Modeler to Git and GitHub. Now you can treat this model as any other source controlled file that you may have in your environment.
Hopefully you find this blog useful and if you have any question just leave a comment on the blog page.
-Mark Kurtz
More blogs about Toad Data Modeler
5 essential Toad® Data Modeler videos
Learn moreToad Data Modeler enables business analysts to rapidly connect to and view data structures across more than 20 different database platforms including Oracle, SQL Server, MySQL, PostgreSQL and IBM DB2. It allows you to reverse engineer both databases and data warehouse systems as well as re-engineer from one database type to another. Toad Data Modeler is an extremely cost effective, simple-to-use data modeling tool, ideally suited to someone new to data modeling. Whether you are currently a Toad Data Modeler customer or just getting started with our free 30-day trial, learn more and access the Toad Data Modeler User Guide. If you're in a trial and Toad Data Modeler is helping you access and prepare data for faster business insights, buy it now or contact a sales representative. |
Got questions?
If you have any questions, please post questions to the Toad Data Modeler forum on Toad World®.
Share on social media
If you think your colleagues would benefit this blog, share it now on social media with the buttons located at the top of this blog post. Thanks!
Start the discussion at forums.toadworld.com