Toad Data Modeler and its behavior can be easily customized in several ways. One of the ways to customize Toad Data Modeler is by creating a macro.
Why would you create a macro?
Macros help you automate tasks. It’s an action (or several actions) that you can run repeatedly. Read more about macros in the Toad Data Modeler User Guide, page 534.
In this blog tutorial, you will learn how to create a macro and how to assign attributes with data type char(50) domain "DomainCity" for the Oracle models.
In order to do this it is required that you enable Expert Mode, from Settings-Options-General.
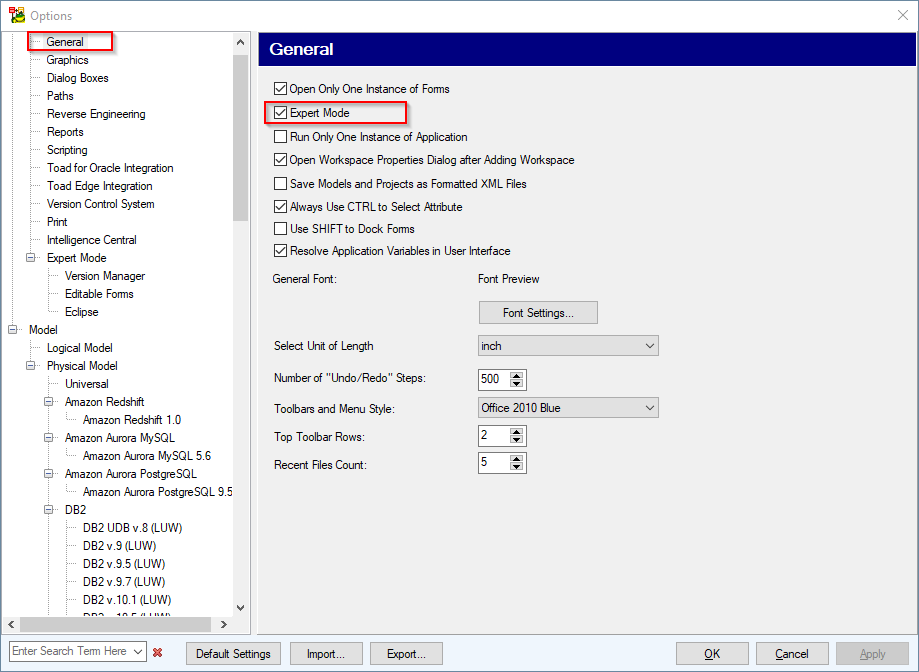
Screen shot showing how to enable Expert Mode.
Save all your customization to a package
Toad Data Modeler allows you to save all customization to packages. There are three types of packages:
- System packages
- User packages
- My package
System packages are packages that are made by a Toad Data Modeler developer team and it is not recommended to make any change to these packages. Packages are stored under an install folder, by default in a program files folder.
User packages are all packages that have been created by user. It is the right place to store our customization.
My Package is a very specific package that is visible from all database packages. It can be used for macros that are valid for all Toad Data Modeler models or some simple changes.
How to create a user package
In our example we will create a user package.
Go to Main Menu – Expert Mode – Customization – New Custom Package.
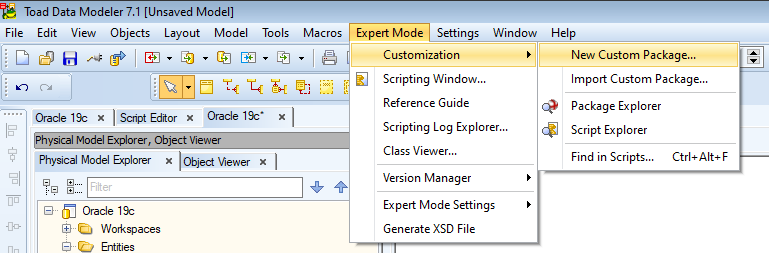
Screen shot showing how to create a new custom package.
When you select a new package it’s very important to select the right extension. For the purpose of this exercise, we will select package "Database Oracle" as extension of package "DomainAssign."
| Extension is very important. When you want to extend the functionality of Oracle, you need select “Database Oracle” package. When you want to do modification for Oracle 19c only you will set package “Database Oracle 19c.” When you want to do a modification for all physical models you need to select “Physical Entity Relationship Model” etc. |
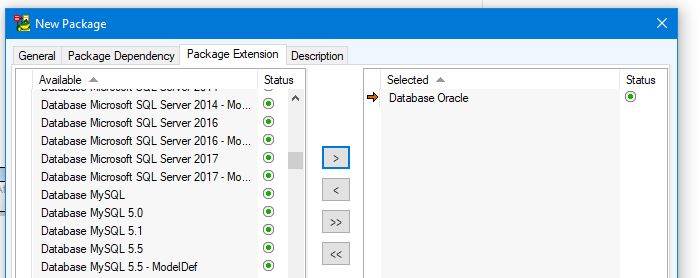
Screen shot showing how to select the right package extension.
After you commit this dialog, go to "Main Menu – Expert Mode – Customization – Package Explorer" to open a package explorer. Open the package explorer, and confirm that your new package is listed. Because there are a lot of packages I recommend to filter out system packages by Icon from a toolbar.
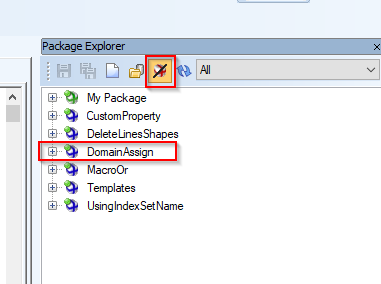
Screen shot showing how to confirm your new package is listed.
Now, select the DomainAssign package in the Package Explorer and right click to open a "Package Properties" dialog. Go to a "Visibility" tab and set Visibility to Oracle.
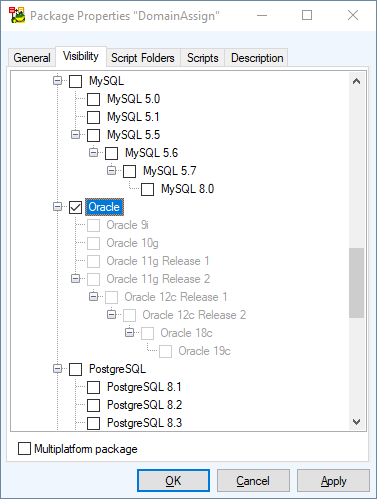
Screen shot showing package properties “Domain Assign” Visibility tab.
Press the OK button and package is ready.
If you want to locate this package in your HDD, then you can open the "Package Properties" window and on the general tab you’ll see a field that shows the full path to the file.
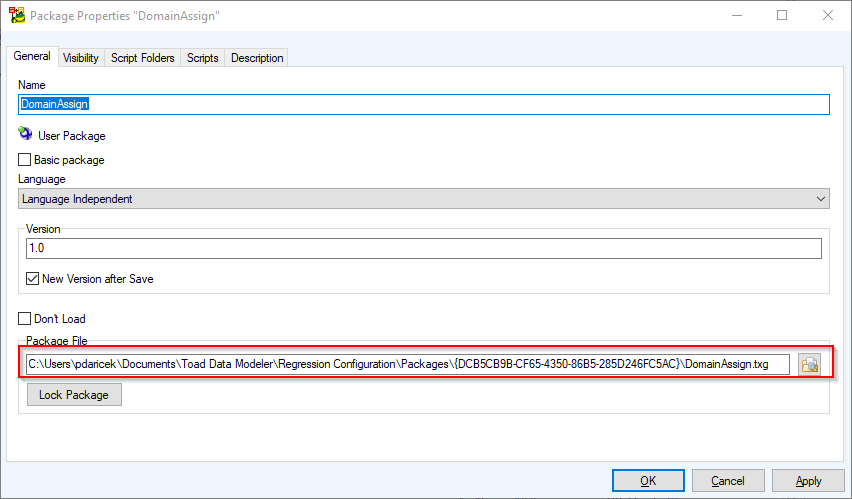
Screen shot showing package properties “Domain Assign” General tab.
Now you’re ready to create the Macro
Go to the Package Explorer to the DomainAssign package and expand it.
Go to the folder "Macros" and right click. From context menu choose "Add Macro.”
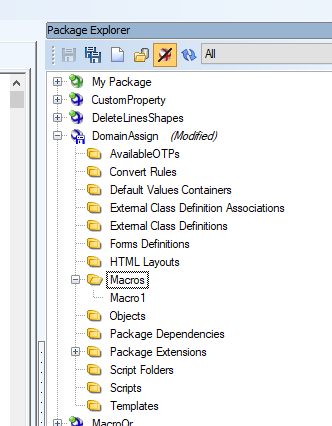
Screen shot showing how to go to Package Explorer and Domain Assign and add Macro.
It will be called "Macro1" by default. Right click on the macro and from a context menu choose "Properties." Next, I’ll show you how to create the proper macro settings.
How to create the proper macro settings
General tab
Set a Name and a Caption of macro.
The caption is used for display in menu and the name for identification.
The Name cannot contain any spaces.
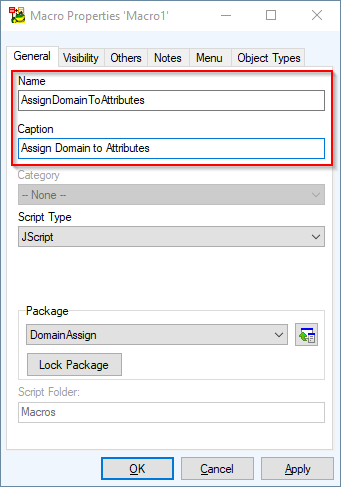
Screen shot showing Macro Properties ‘Macro1’ Name and Caption.
Visibility tab
Go to the Visibility tab. Set the visibility the same as you did for the Oracle package.
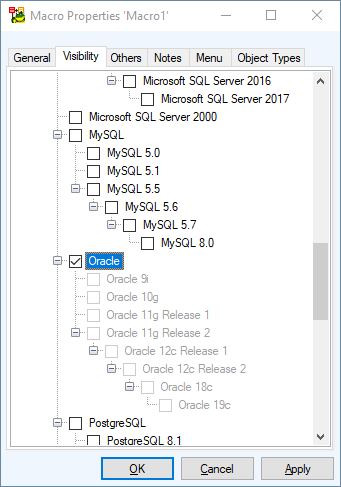
Screen shot showing Macro Properties ‘Macro1’ Visibility tab, Oracle.
Menu tab
Go to the Menu tab. Each macro can be accessible from the Macros Properties ‘Macro 1’ Main menu tab. Add to Main Menu is selected by default. In this demonstration we will also select Add To Popup Menu.
Select "Add to Popup Menu" (Additionally, you could specify in Path fields in the submenu to sort our macro.)
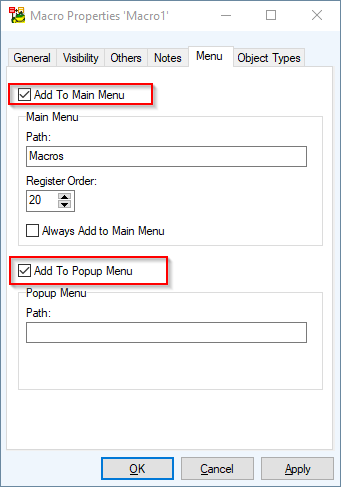
Screen shot showing Macro Properties ‘Macro1’ accessibility options.
Object Types
Go to the Object Types tab. On this tab you can specify objects in a which context menu will be the macro accessible. Select "Model" and "Workspace" on a "Physical Model" tab. Because we set workspace, it will be accessible from the context menu of a designer. Because we set "Model" it will be accessible from a model node of a Model Explorer and a View Explorer.
Click OK to confirm all modifications.
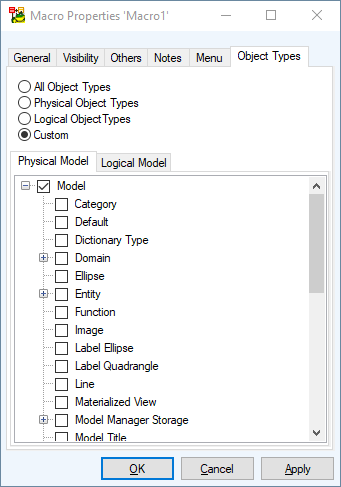
Screen shot showing Macro Properties ‘Macro1’ Object Types tab.
Control Macro Settings: Create a new Oracle 19c model
Create a new Oracle 19c model. At the Toad Data Modeler main menu bar, go to the Macros tab and you should see a new item "Assign Domain to Attribute."
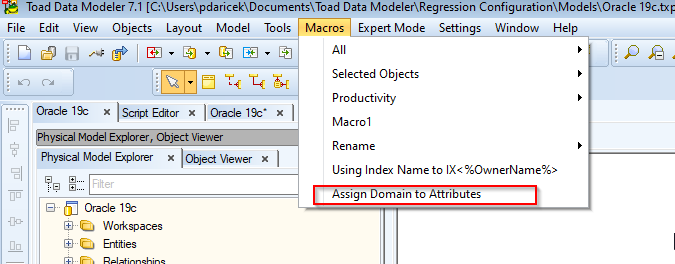
Screen shot showing Toad Data Modeler, Macros Tab, Assign Domain to Attributes.
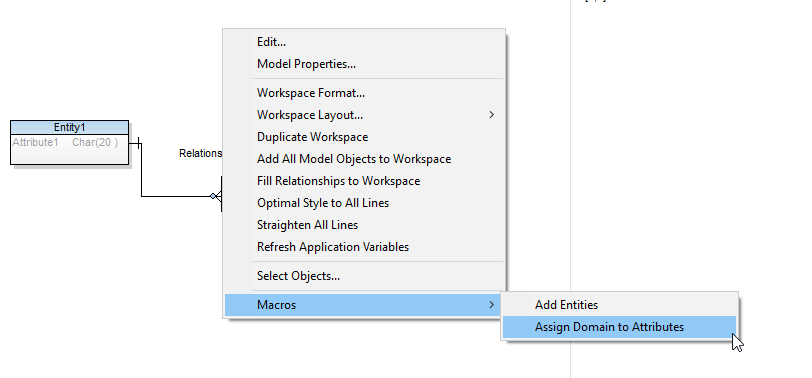
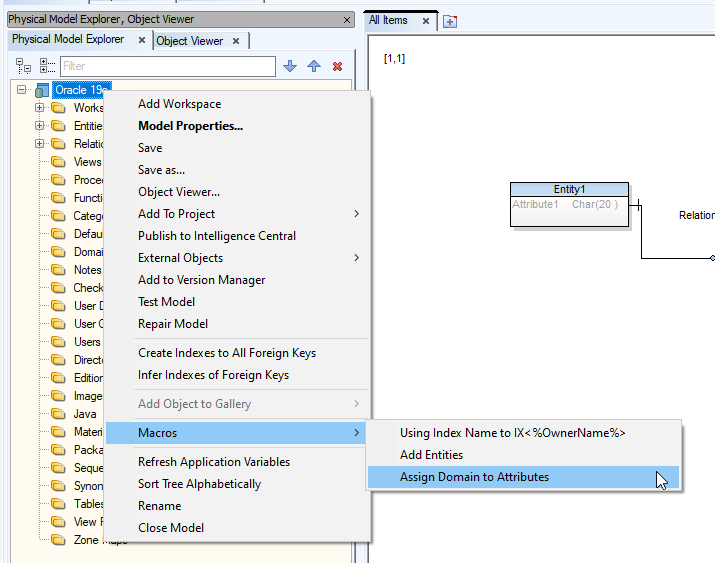
Similarly, when you right click on a designer or on a model node in a model explorer, you can see in the context menu a new item, “Assign Domain to Attribute.”
Screen shots showing designer and model node, Macros, Assign Domain to Attributes.
Implement Source Code for Macro
Now we have a macro, but it doesn’t do anything … yet.
Lets go to the "Package Explorer", and double click on the macro "AssignDomainToAttribute." It opens a "Script Editor" with this macro.
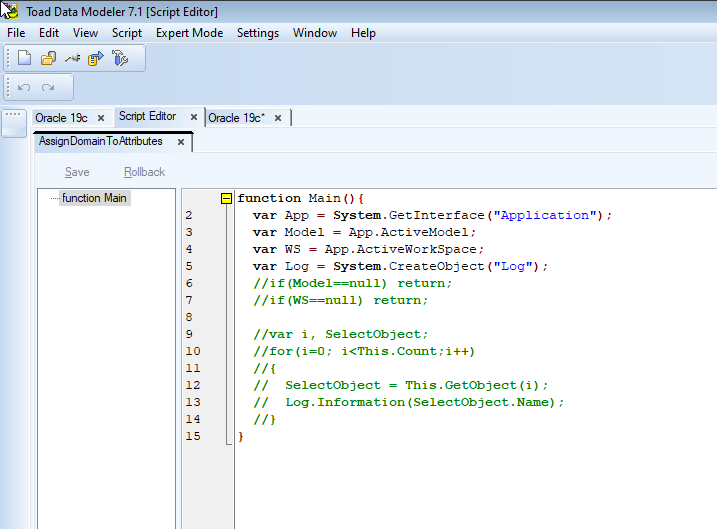
Screen shot script editor AssignDomainToAttributes.
You can see that there are some a default code that you can choose to use or not use.
But first we need to create a dialog for selection of a domain.
It will be a simple dialog, with one combo box. In this combo box will be all domains from a model. We will modify source code of the main function.
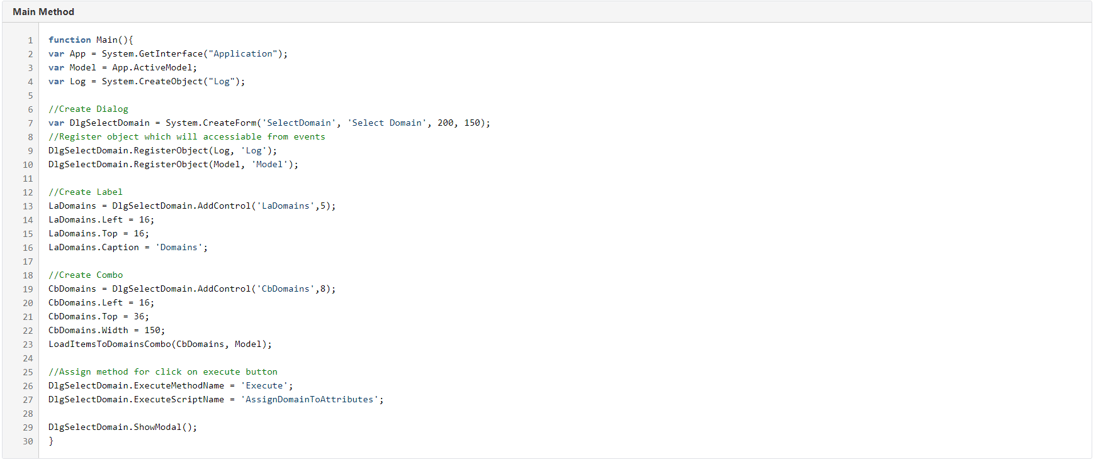
Screen shot showing Main Method source code.
At the begin of method some global objects to variables are stored. It is a model and a log for some messages.
Next, create a dialog with one label and one combo.
We will register our variables Model and Log via method "RegisterObject" to be accessible in dialog events.
On the end of method is defined Execute method, which will be in the same script and command for show dialog.
On Line 23 is used method LoadItemsToDomainsCombo. Below is the code.

Screen shot showing LoadItemToDomainsCombo source code.
LoadItemsToDomainsCombo
Now we need a code to assign domain to attributes.
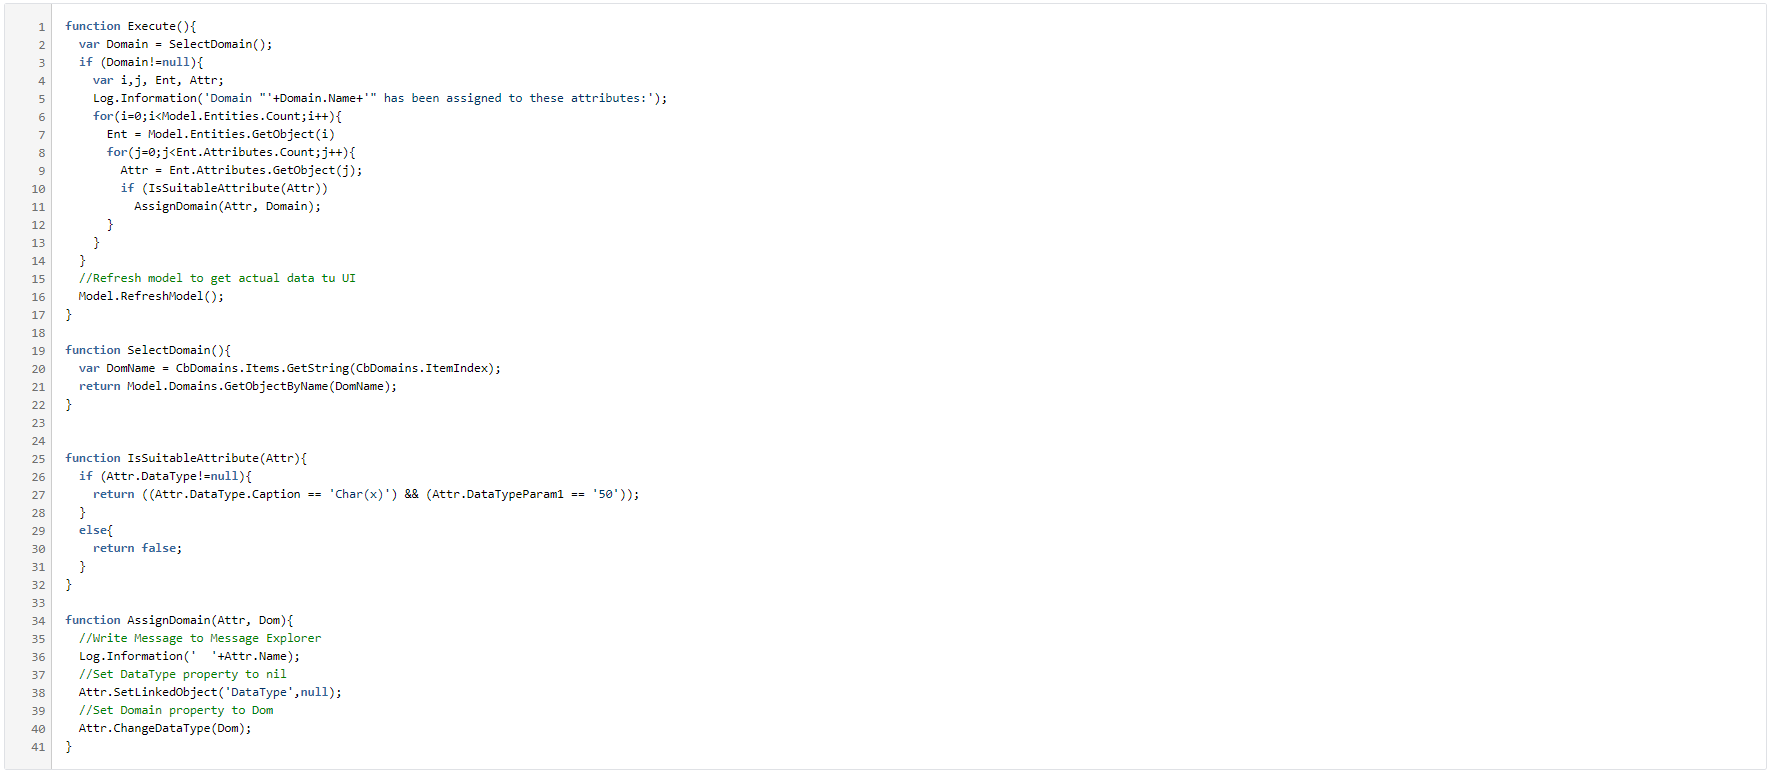
Screen shot showing code to assign domain to attributes.
You can see in the method. As we Execute, we go through all the attributes in the model and if the attribute is of data type char(50), then it has an assigned domain.
Run Macro
Now we can try the macro. When you run it, you should get this dialog:

Screen shot dialog Domain1.
In the combo are all domains from the model.
When you press the execute button, you will see in message explorer a list of attributes which has been changed.
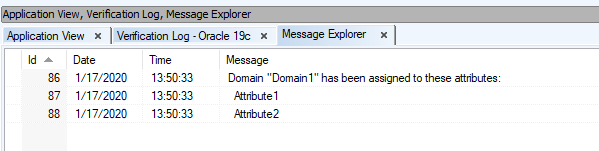
Screen shot showing Message Explorer and attributes.
Download a package with this example
Click the link to download a package with this example implemented for Toad Data Modeler 7.1. Domain Assign Package for TDM 7.1.
Learn moreToad Data Modeler enables business analysts to rapidly connect to and view data structures across more than 20 different database platforms including Oracle, SQL Server, MySQL, PostgreSQL and IBM DB2. It allows you to reverse engineer both databases and data warehouse systems as well as re-engineer from one database type to another. Toad Data Modeler is an extremely cost effective, simple-to-use data modeling tool, ideally suited to someone new to data modeling. Try Toad Data Modeler for freeWhether you are currently a Toad Data Modeler customer or just getting started with our free 30-day trial, learn more and access the Toad Data Modeler User Guide. If you're in a trial and Toad Data Modeler is helping you access and prepare data for faster business insights, buy it now or contact a sales representative. |
Got questions?
If you have any questions, please post questions to the Toad Data Modeler forum on Toad World.
Share on social media
If you think your colleagues would benefit this blog, share it now on social media with the buttons located at the top of this blog post. Thanks!
Start the discussion at forums.toadworld.com