Introduction
MySQL database may be run on several cloud platforms that provide managed services for MySQL. AWS Relational Database Service (RDS) is one such managed service for relational databases, including MySQL. Google Cloud Platform provides the Cloud SQL managed service for MySQL and PostgreSQL databases. Oracle Cloud Platform hosts a managed service for MySQL in addition to Oracle Database. IBM Bluemix provides ClearDB database as a service for MySQL Database.
AWS EC2 provides several AMIs that run MySQL database on an instance. An AWS EC2 instance running MySQL database is not a managed service but has the database running preconfigured, with no additional installation or configuration required to use the database. In this two article series we shall create an EC2 instance with an AMI that provides MySQL database preconfigured. Subsequently we shall connect to the MySQL database on the EC2 instance using Toad Edge 1.1. This first article has the following sections.
- Setting the Environment
- Creating an EC2 Instance with a MySQL based AMI
- Connecting to EC2 Instance
- Getting MySQL root Password
- Starting MySQL CLI
Setting the Environment
Download and install Toad Edge 1.1 from https://www.toadworld.com/products/toad-edge. The Toad Edge console is shown in Figure 1.
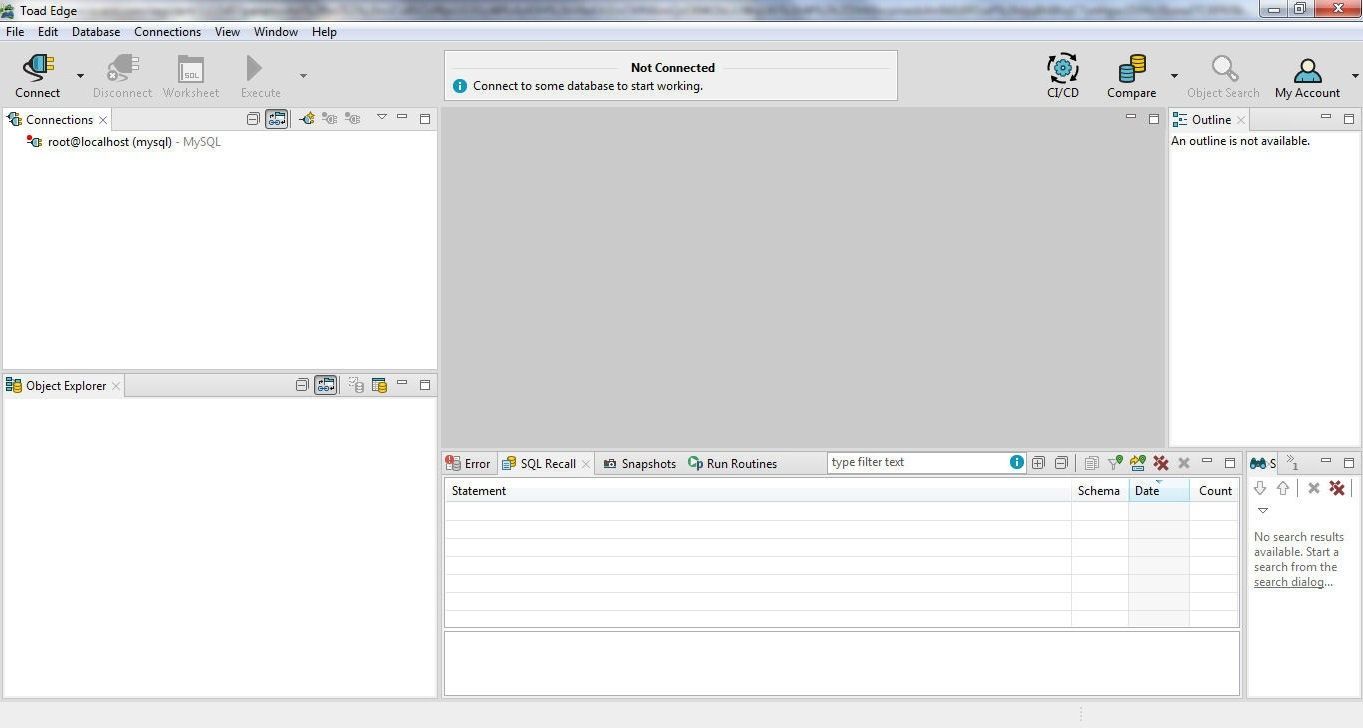
Figure 1. Toad Edge GUI Console
Create an AWS account at https://aws.amazon.com/resources/create-account/.
Creating an EC2 Instance with a MySQL based AMI
In this section we shall create an EC2 instance using an AMI that has MySQL database preconfigured. Several AMIs are available on the AWS Marketplace that run MySQL database. These AMIs are provided by different vendors and include LAMP with PHP 5.6 Certified by Bitnami, MySQL 5.7, MySQL on Windows Server 2012 Powered by GlobalSolutions, WordPress with MySql on Windows Server 2012 R2, and ScaleArc for MySQL. We shall use the MySQL powered by Bitnami AMI, which runs MySQL 5.6.37, as shown in Figure 2.

Figure 2. Choosing an AMI to create an EC2 Instance
In Choose an Instance Type select the free tier eligible t2.micro instance and click on Next.
In Configure Instance Details select a VPC in the Network, and select Enable for the Auto-assign Public IP as shown in Figure 3. The option to enable CloudWatch detailed monitoring is available. Click on Next.
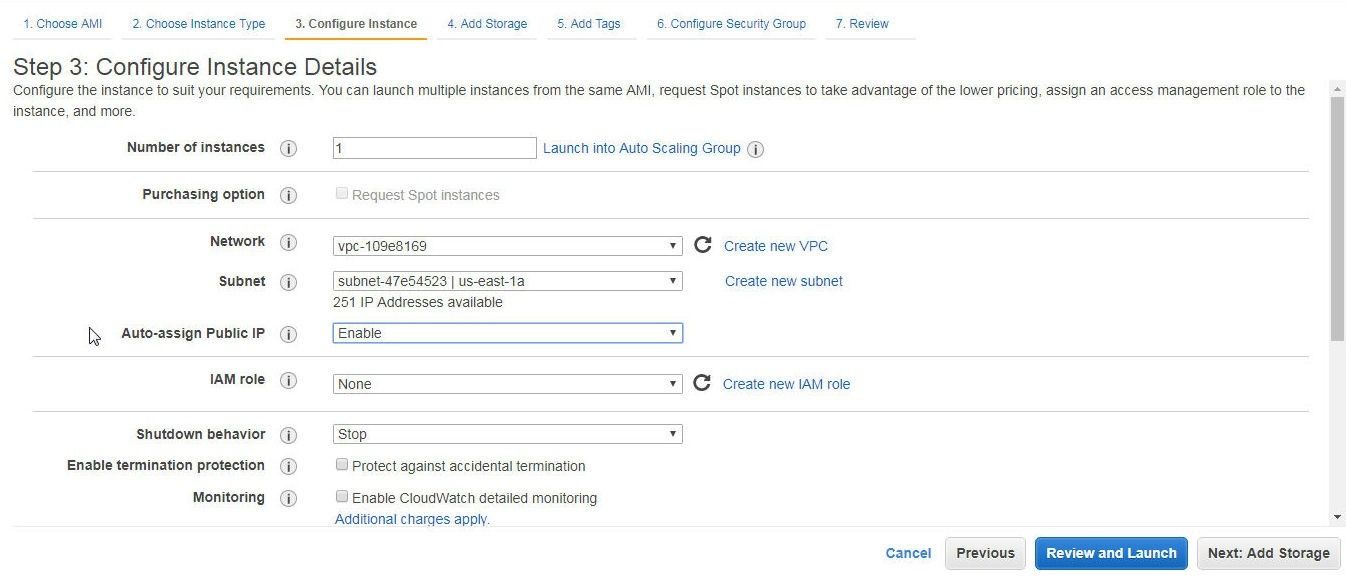
Figure 3. Selecting “Enable” for Auto-assign IP
In Add Storage the Root volume type size may be increased as shown by the setting of 100 GiB in Figure 4. Increasing the Storage size could be required if other software is also to be installed on the EC2 instance. Click on Next.
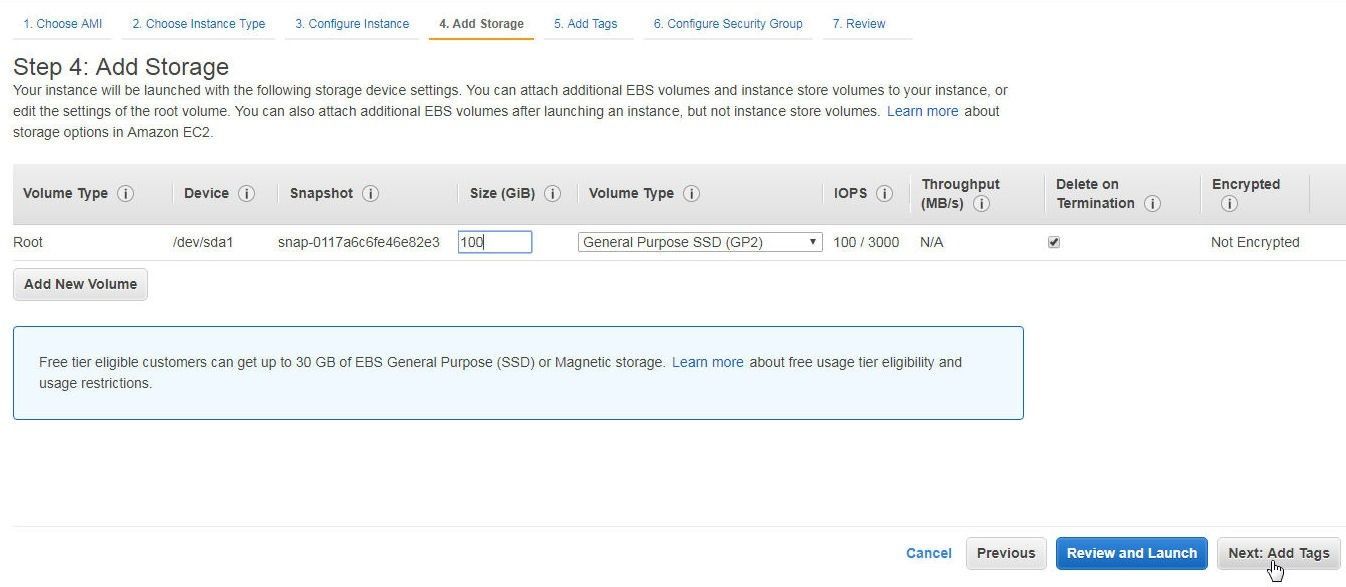
Figure 4. Setting Storage
In Add Tags click on Next. In Configure Security Group click on Add Rule to add a rule to allow all traffic as shown in Figure 5; or at least traffic from the IP Address of the machine on which Toad Edge is running. Click on Review and Launch.
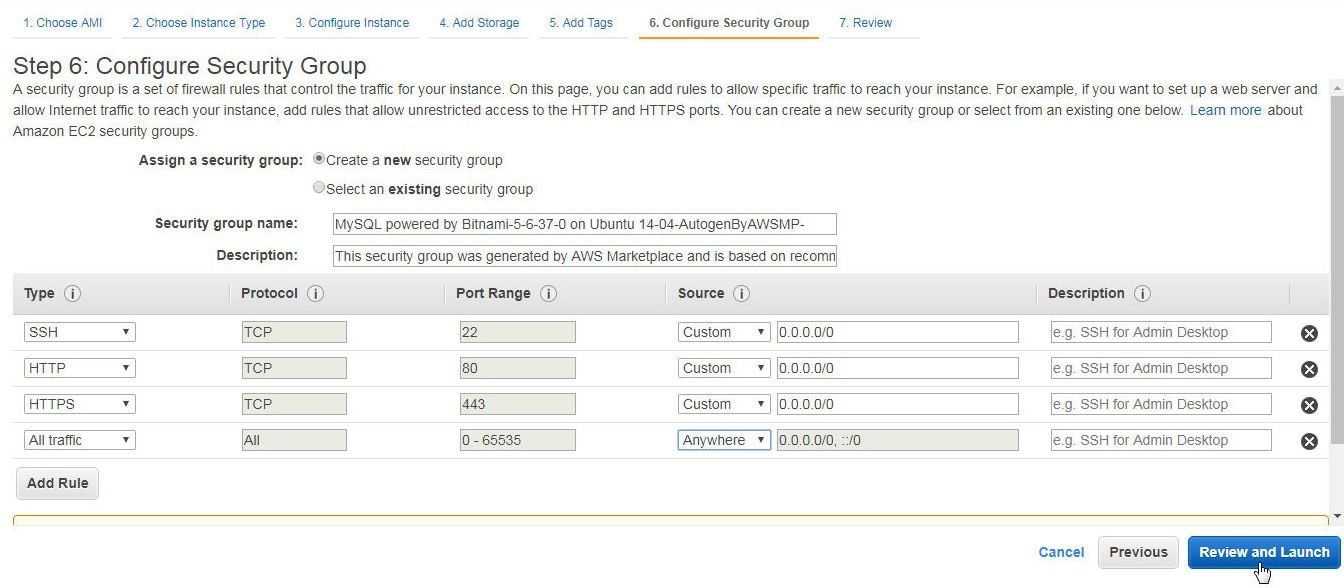
Figure 5. Adding Rule to Allow All Traffic
In Review Instance Launch click on Launch.
In Select an existing key pair or create a new key pair click on Create a new key pair as shown in Figure 6. A key pair consists of a public key that AWS stores and a private key file that a user stores. The private key file is used to access the EC2 instance from a local Linux machine.
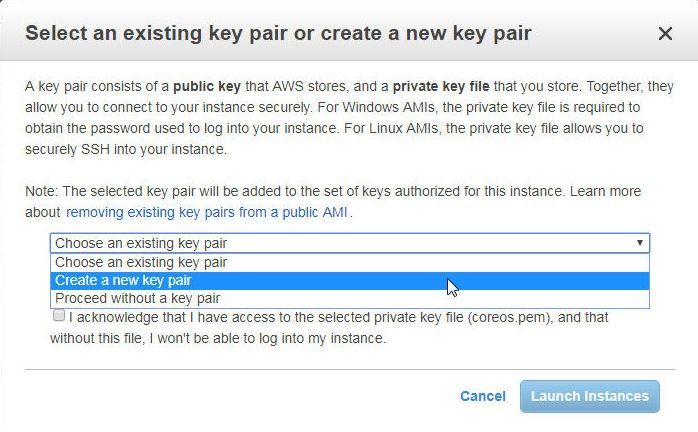
Figure 6. Create a new key pair
Specify a Key pair name (mysql) and click on Download Key Pair to download the private key file mysql.pem as shown in Figure 7. The mysql.pem file gets downloaded to the local machine.
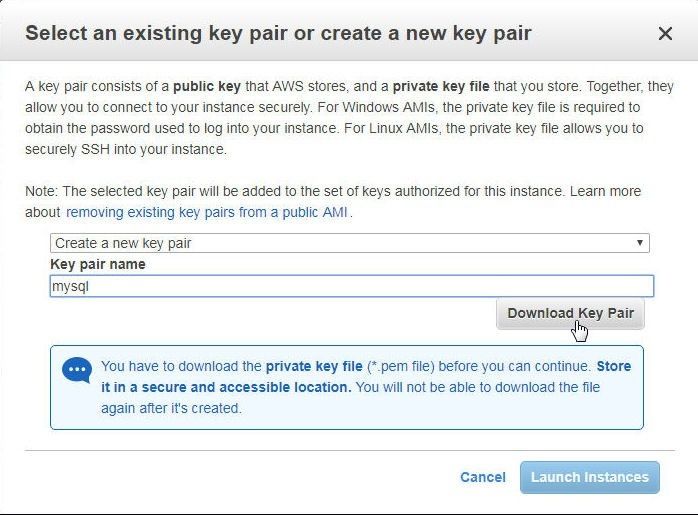
Figure 7. Creating and downloading a Key Pair
Click on Launch Instances as shown in Figure 8.
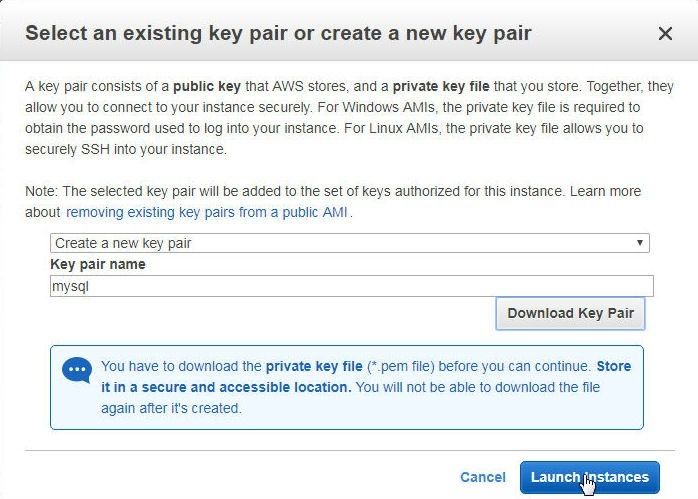
Figure 8. Launch Instances
An EC2 instance gets launched as shown in the EC2 console in Figure 9.

Figure 9. EC2 instance for MySQL database
Connecting to EC2 Instance
To connect to the EC2 instance obtain the Public IP address of the instance from the EC2 console as shown in Figure 10.
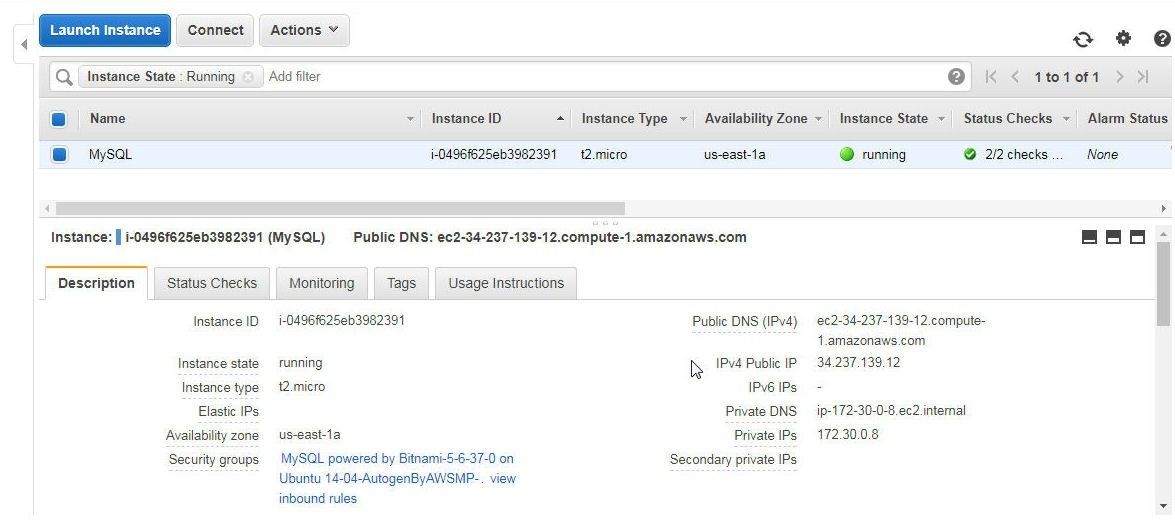
Figure 10. Public IP Address
Copy the mysql.pem to a local Linux machine from which a connection to the EC2 instance is to be made. Set the permissions on the mysql.pem to 400 (read-only by owner) as shown in Figure 11.

Figure 11. Setting Permissions on Private Key File
SSH Login to the EC2 instance using the Public IP address and the private key file. The SSH user for the AMI MySQL powered by Bitnami is “bitnami”. The SSH user for different AMIs is different and may be obtained on the product detail page for most AMIs, such ashttps://aws.amazon.com/marketplace/pp/B01M0RA8RN?ref=cns_srchrow.
[root@localhost ~]# ssh -i "mysql.pem" bitnami@34.237.139.12
A connection gets established to the EC2 instance and the bitnami command prompt gets displayed, as shown in Figure 12.
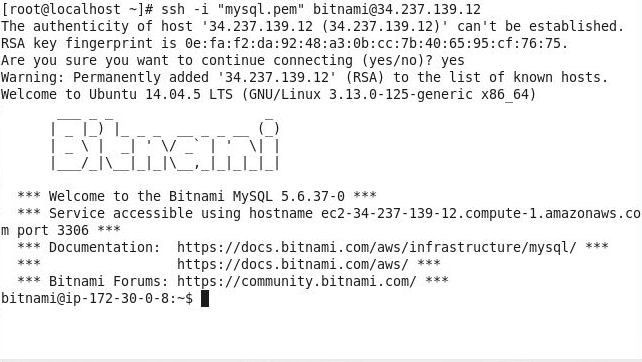
Figure 12. Bitnami MySQL Command prompt
Getting MySQL root Password
The password for the root user for MySQL database is required to connect to the database with the MySQL command line interface (CLI) and to connect to the database with Toad Edge. The root user password is not fixed and is generated automatically when the EC2 instance is launched. Select Actions>Instance Settings>Get System Log in the EC2 dashboard as shown in Figure 13.
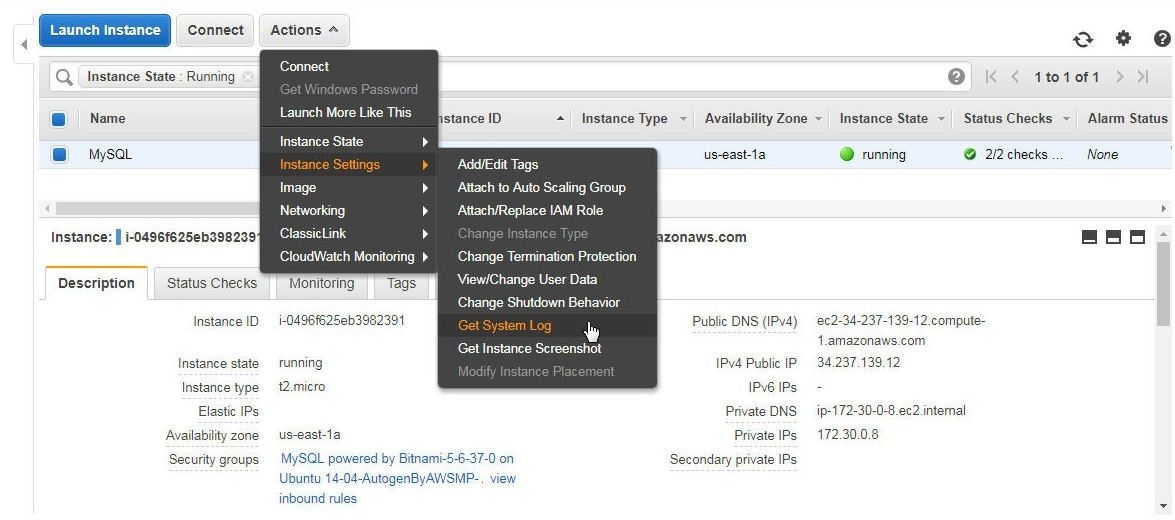
Figure 13. Actions>Instance Settings>Get System Log
Theroot user password is displayed in the system log in a statement Setting Bitnami application password to '' as shown in Figure 14.
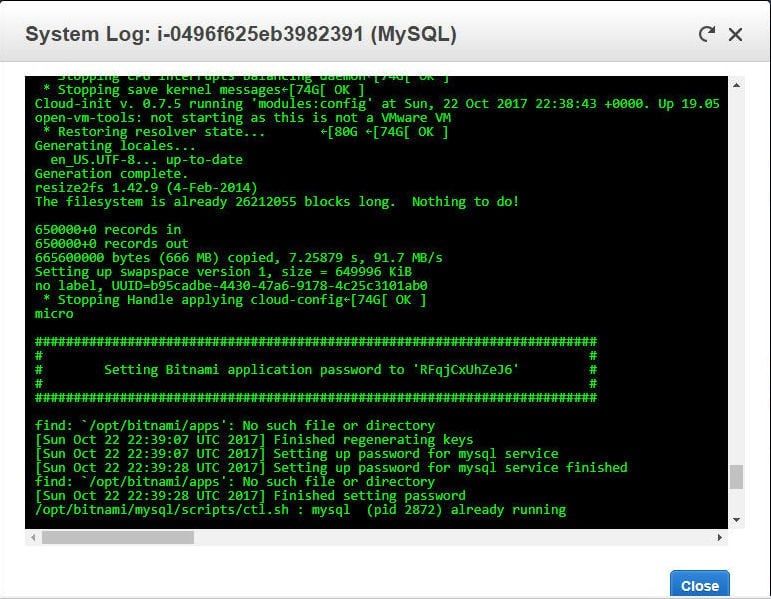
Figure 14. Obtaining Password from System Log
Starting MySQL CLI
To connect to the MySQL database with the MySQL command line interface (CLI) run the following command.
bitnami@ip-172-30-0-8:~$ mysql -u root –p
At the following password prompt specify the password copied from the system log.
Enter password:
The MySQL CLI gets started, as shown in Figure 15.
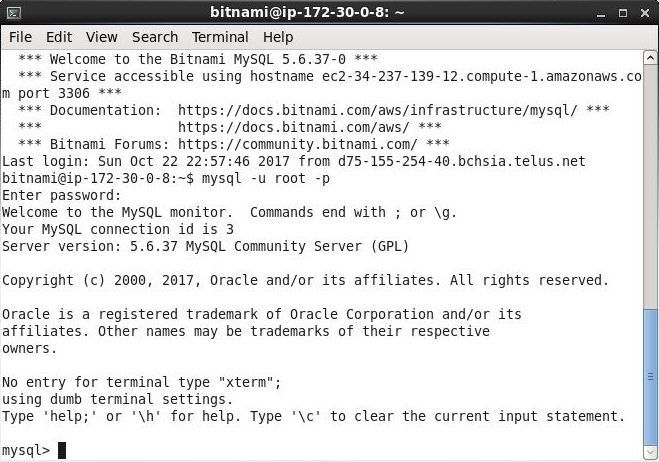
Figure 15. MySQL CLI
List the databases with the following command.
mysql> show databases;
The databases listed include the user schemas test and mysql and the system schemas, as shown in Figure 16.
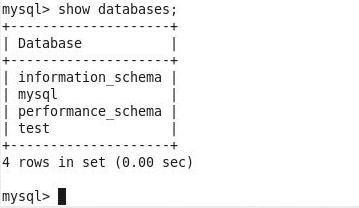
Figure 16. Listing Databases
Conclusion to Part I
In this first of two articles we have discussed creating an EC2 instance with a MySQL based AMI, connecting to the EC2 instance, getting the password for the MySQL root user, and starting a MySQL command line interface (CLI). In the second article we shall discuss connecting to the MySQL database on EC2 with Toad Edge 1.1, creating a new database, and creating a database table.
Start the discussion at forums.toadworld.com