MySQL and PostgreSQL are the #1 and #2 open source databases, respectively, providing complementary features to meet the requirements of any open source database developer. The latest Toad Edge (2.02) is an all-in-one, integrated development environment (IDE) for MySQL and PostgreSQL databases, including support for the MySQL- and PostgreSQL-compatible Aurora, and the MySQL-compatible MariaDB. Additionally, Toad Edge 2.02 supports the enterprise class EnterpriseDB (EDB) Postgres. Toad Edge features include database object management, content assist in SQL Worksheet, schema compare, import of data from various formats including SQL & CSV, export of result set records, and database snapshots; to mention a few. Toad Edge 2.02 is a one-stop solution for any open source database developer. Toad Edge also supports Amazon Redshift in Beta.
In this article we shall discuss using Toad Edge with MySQL, PostgreSQL, Aurora, and MariaDB on AWS RDS. We shall also discuss using EDB Postgres. This article has the following sections.
Setting the Environment
Using with MySQL Database
Creating an AWS RDS Instance for MySQL Database
Connecting with MySQL on RDS
Using with PostgreSQL Database
Creating an AWS RDS Instance for PostgreSQL Database
Connecting with PostgreSQL on RDS
Using with EDB
Configuring the EDB JDBC Driver
Connecting with EDB
Using with Amazon Aurora
Creating an Aurora Instance
Connecting with Aurora
Using with MariaDB Database
Creating an AWS RDS Instance for MariaDB Database
Connecting with MariaDB on RDS
Setting the Environment
Download the Toad Edge 2.0.2 trial edition, which isa full-featured, fully functioning version. Double-click on the toadedge_2.0.2_x64_en.exe application to launch the Toad Edge Setup wizard, which is shown in Figure 1. Click on Next.
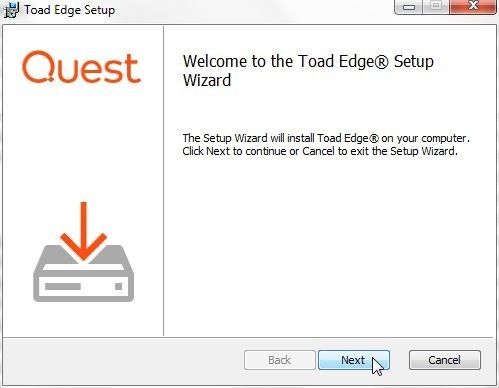
Figure 1. Toad Edge Setup Wizard
Accept the End-User Agreement and click on Next. Keep the default destination folder and click on Next as shown in Figure 2.
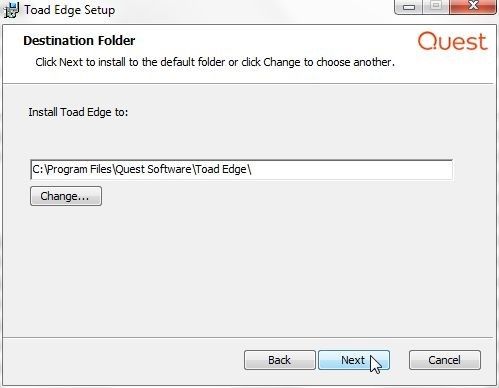
Figure 2. Selecting a Destination Folder
Click on Install in Ready to Install Toad Edge 2.0.2. Toad Edge gets installed and registered. When installation completes click on Finish as shown in Figure 3.
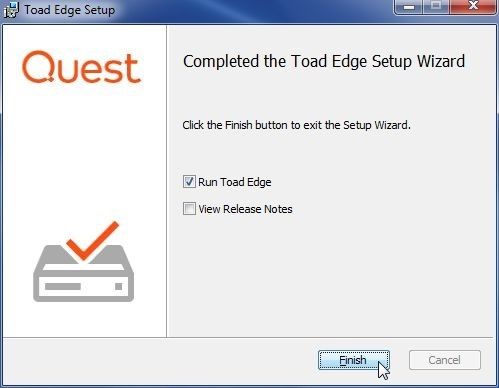
Figure 3. Installation Completed
If the Toad Edge for MySQL and Toad Edge Preview for PostgreSQL were previously installed, the license gets updated, as indicated in Figure 4.
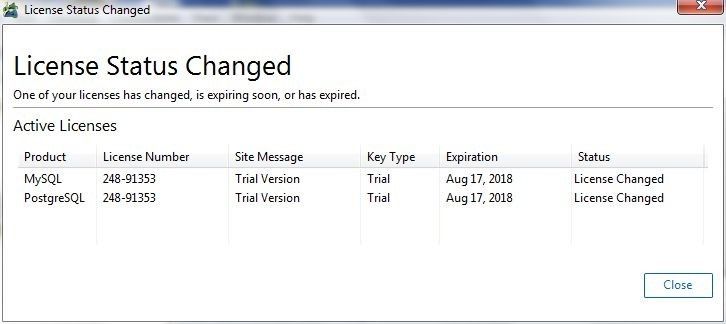
Figure 4. License Status Changed
The only other requirement is an AWS account, which may be created at https://aws.amazon.com/resources/create-account/ .
Using with MySQL Database
Toad Edge 2.0.2 supports MySQL 5.5, 5.6, 5.7. The MySQL database could be on a local machine or on a cloud service. We shall be using the AWS Relational Database Service (RDS).
Creating an AWS RDS Instance for MySQL Database
Log-in to AWS and select the RDS service. Click on Get started now in the RDS introduction screen. Select database engine as MySQL as shown in Figure 5.
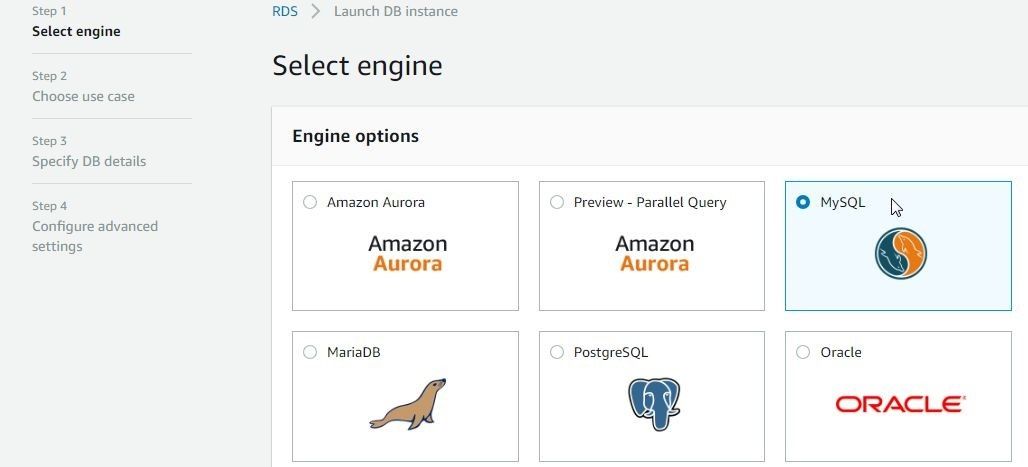
Figure 5. Selecting Database Engine as MySQL
RDS supports a MySQL database size up to 16 TB. Instances offer up to 32 vCPUs and 244 GiB memory. RDS supports automatic backup and point-in-time recovery. Cross-region read replicas are supported. Click on Next. Choose the use case as Dev/Test – MySQL and click on Next as shown in Figure 6.
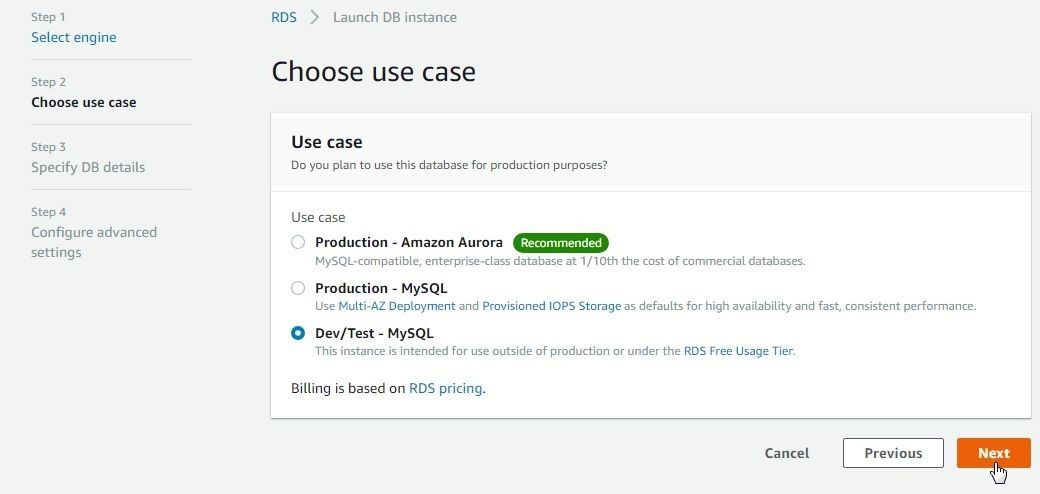
Figure 6. Choose use case as Dev/Test-MySQL
Specify DB details, which include instance specification and settings. The DB engine is pre-selected as MySQL Community Edition. Select License as general-public-license. Select DB engine version as mysql 5.7.21 as shown in Figure 7.
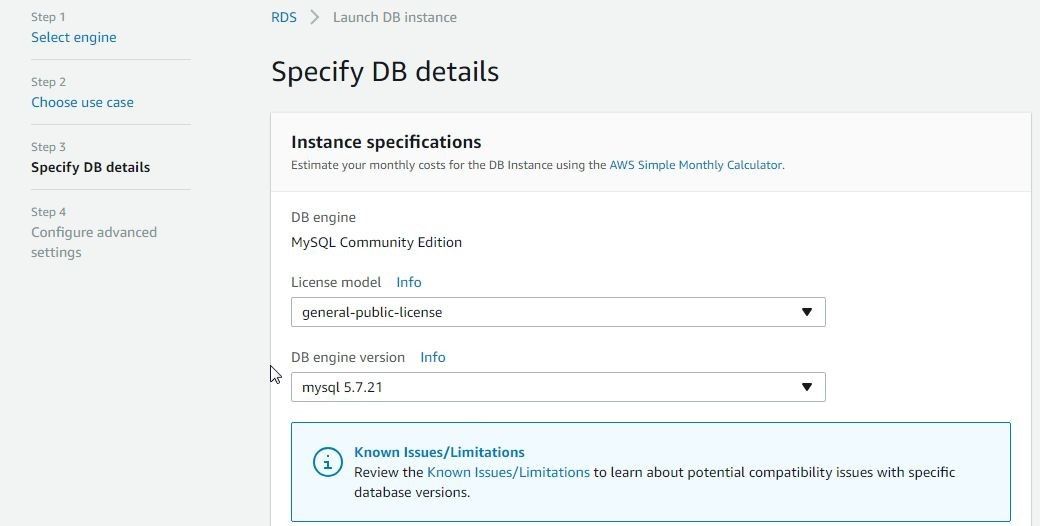
Figure 7. Instance Specification
Select the option to enable only Free tier eligible options as shown in Figure 8.
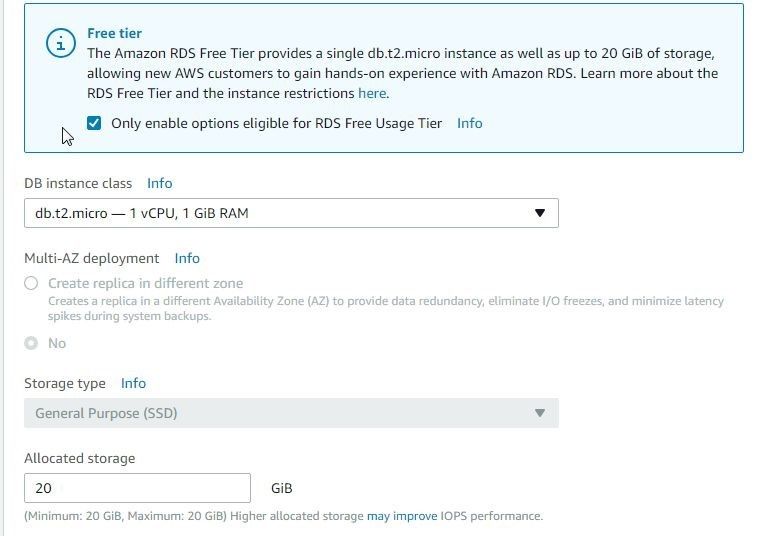
Figure 8. Selecting Free tier option
In Settings specify a DB instance identifier (mysqldb) as shown in Figure 9. Specify Master username and Master password. Click on Next.
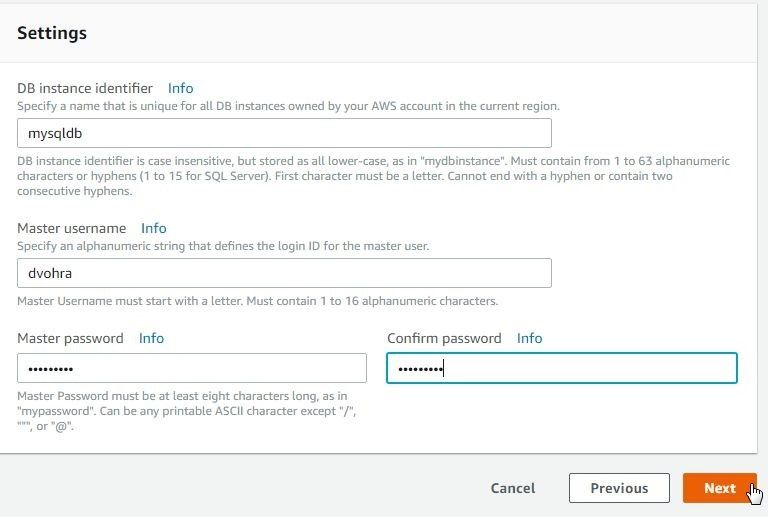
Figure 9. Settings
In Configure advanced settings select Publicly accessible as Yes. In Database options specify a Database name (mysqldb) as shown in Figure 10. Specify Database port as 3306. Keep other settings as the default.
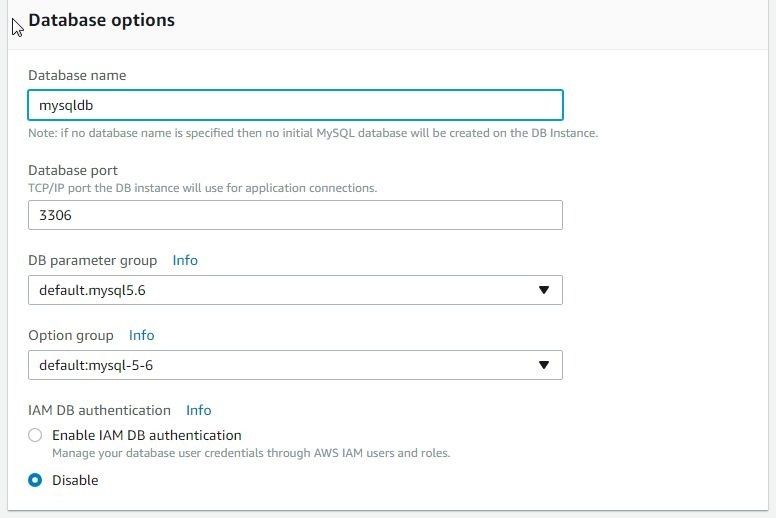
Figure 10. Database Options
Scroll down and keep the default settings for Encryption, Backup, and Monitoring. For Log exports to CloudWatch Logs select the Audit log, Error log, General log, and Slow query log as shown in Figure 11.
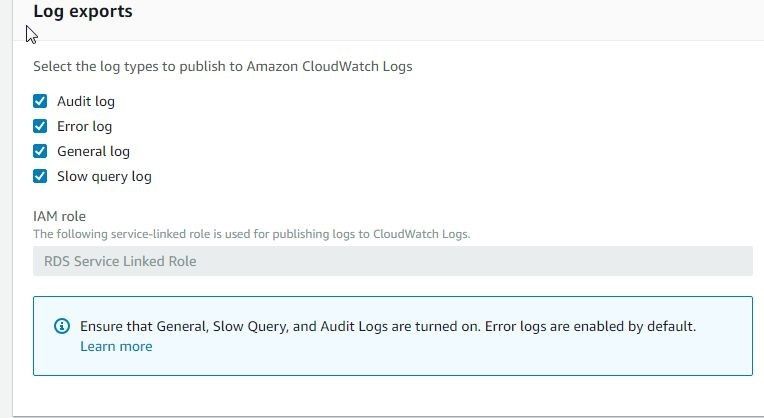
Figure 11. Log exports
Keeping the default configuration for Maintenance, click on Launch DB instance. The DB instance starts to get created. Click on View DB Instance details, which should display a Summary of the new MySQL instance being created. The Instances lists the new MySQL RDS instance with Status as available after a few minutes, as shown in Figure 12. Click on the mysqldb link to get instance details.
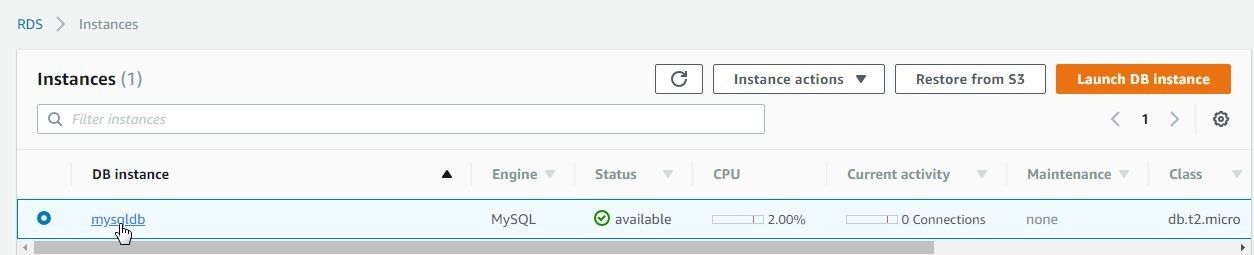
Figure 12. Instance available
The mysqldb summary screen includes a Connect section, which includes Endpoint and Port, as shown in Figure 13. Copy the Endpoint value as it is the host name for the database.
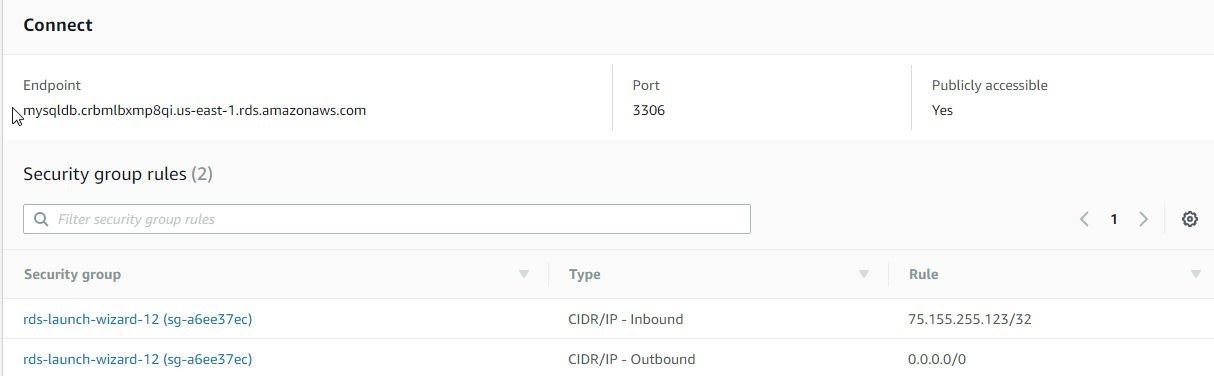
Figure 13. Database Endpoint
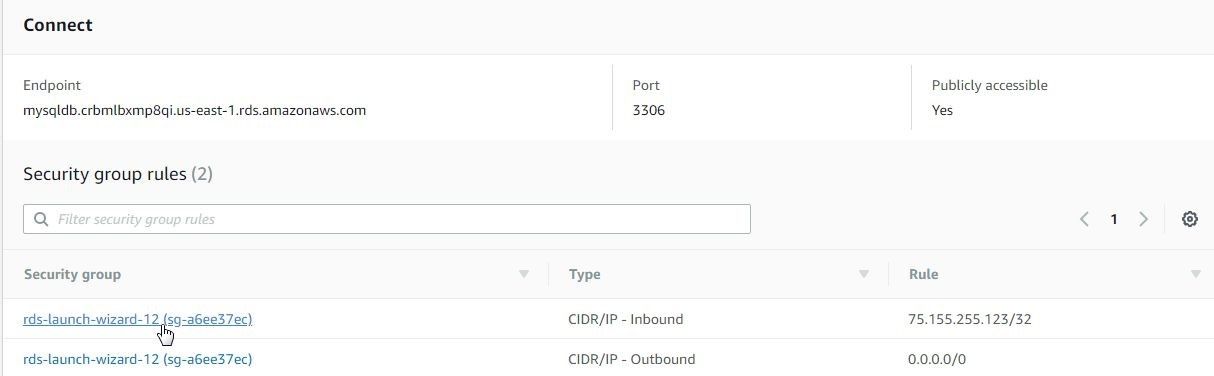
Figure 14. Selecting Security group link
In the Security group page select the Inbound tab and click on Edit as shown in Figure 15.
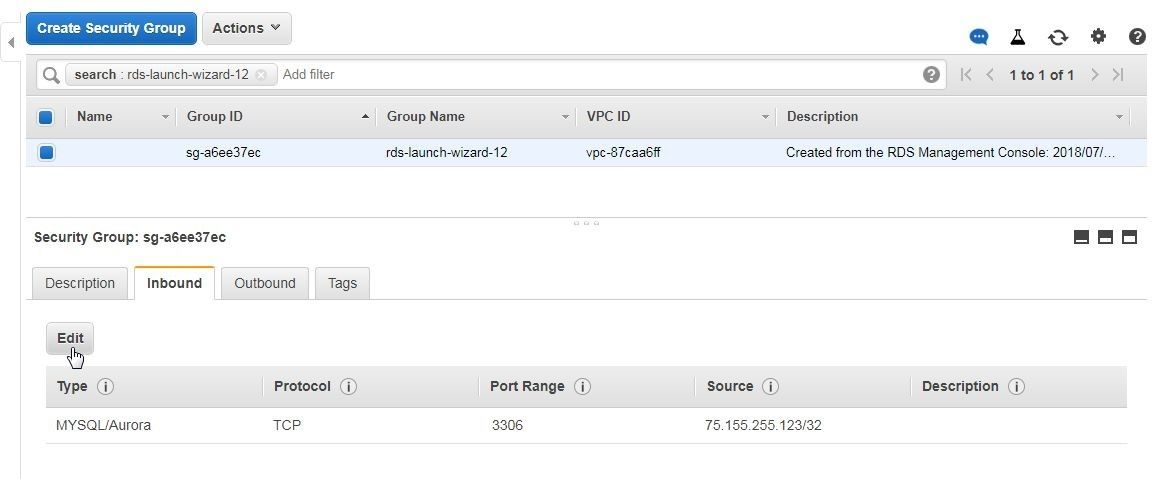
Figure 15. Inbound>Edit
In Edit inbound rules modify Type to All Traffic, and Source to Anywhere to allow all TCP traffc as shown in Figure 16. Click on Save.
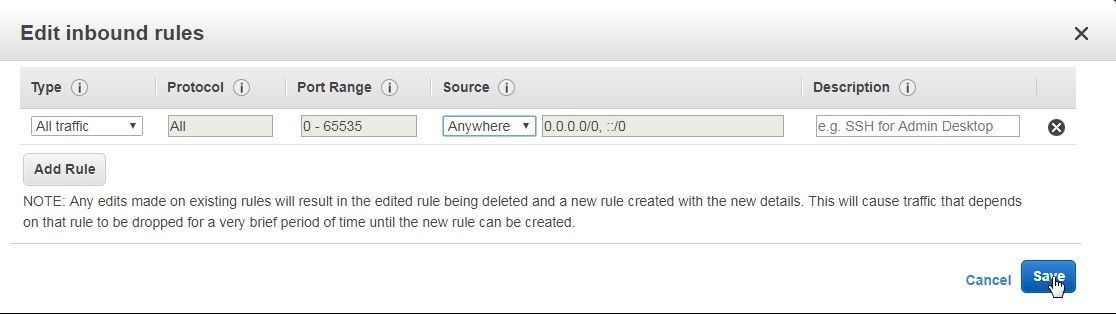
Figure 16. Edit inbound rules
The Inbound rules get modified, as shown in Figure 17.
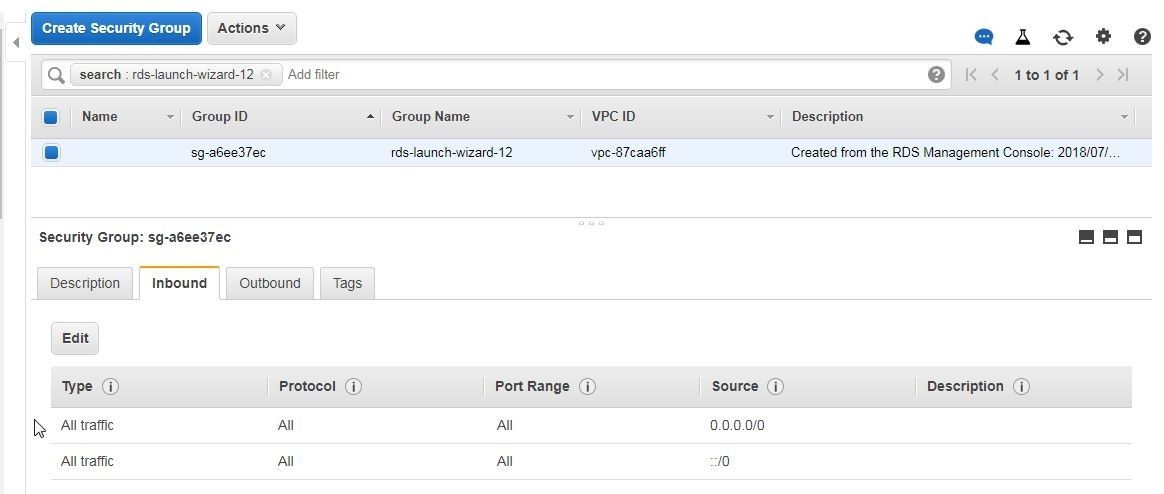
Figure 17. Inbound rules
The Inbound rules also get modified on the Summary page, as shown in Figure 18.
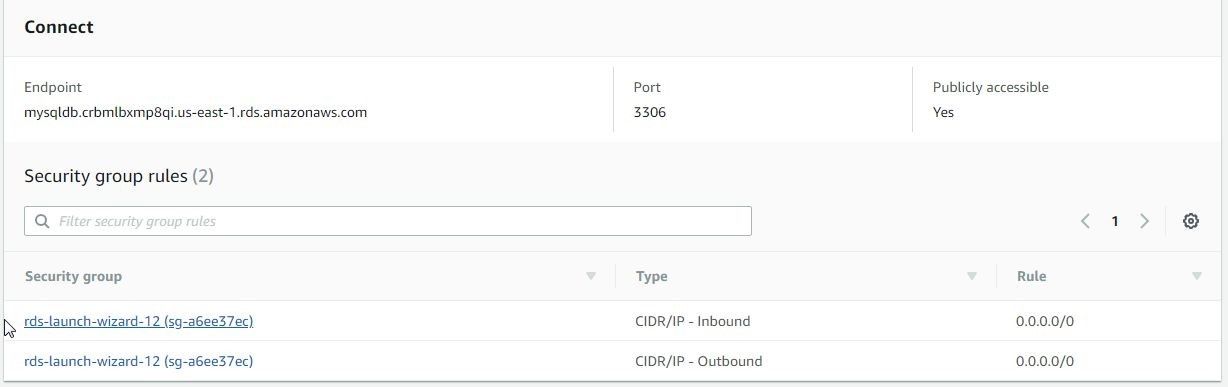
Figure 18. Security group rules to allow all inbound traffic
If the DB name and username are not kept note of when being configured, these may be obtained from the Details>Configuration section, as shown in Figure 19.
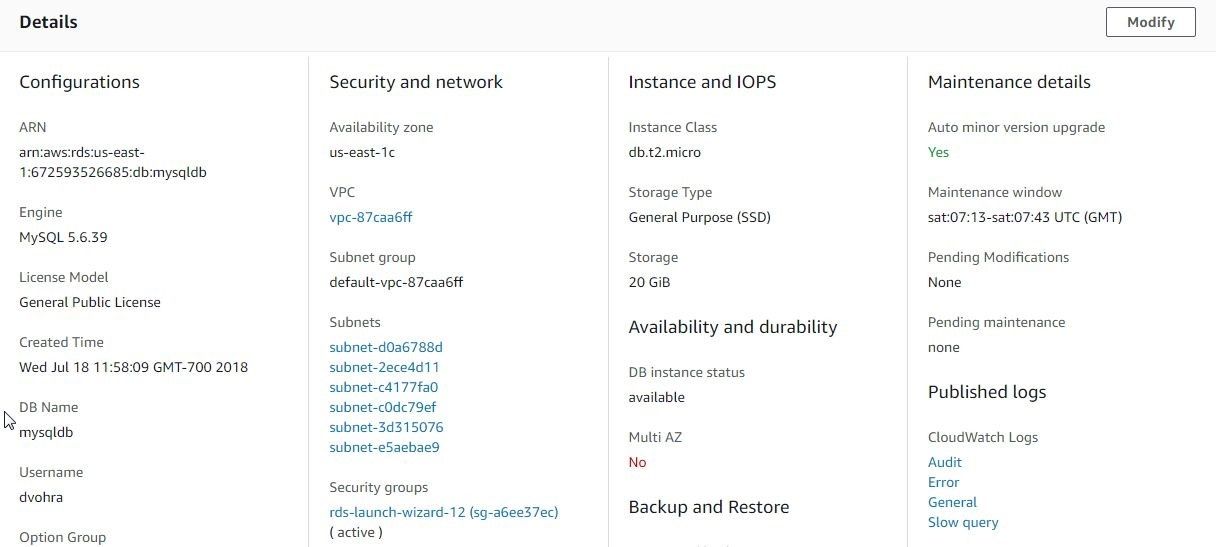
Figure 19. Details>Configuration
Connecting with MySQL on RDS
Next, we shall connect with a MySQL based RDS instance in Toad Edge. Select Connect>New Connection as shown in Figure 20.
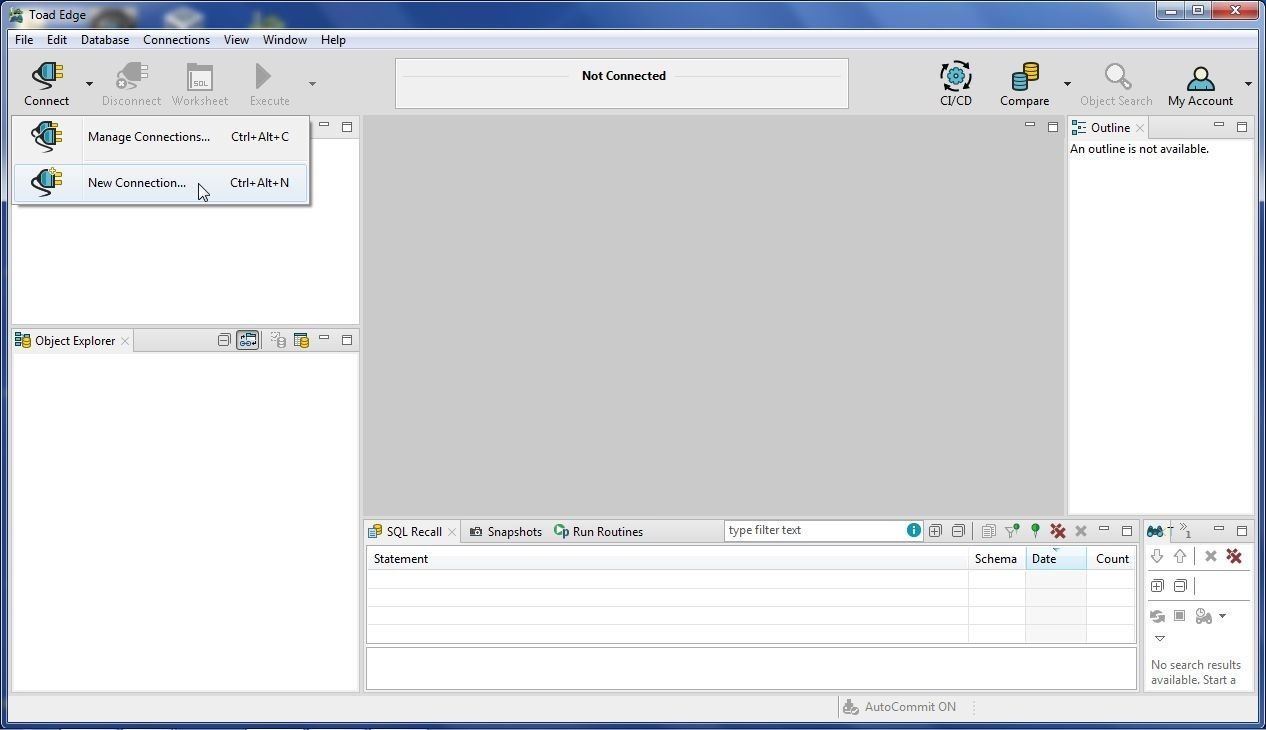
Figure 20. Connect>New Connection
In the New Connection wizard select Database Platform as MySQL as shown in Figure 21 and click on Next.
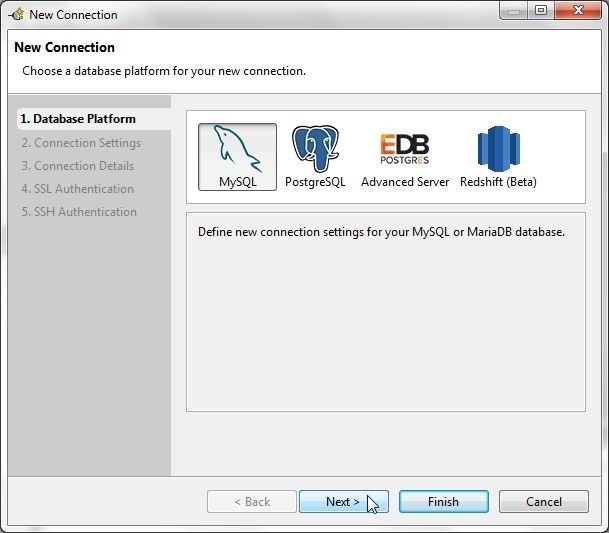
Figure 21. Selecting Database Platform as MySQL
In Connection Settings specify Hostname as the Endpoint for the RDS instance copied earlier. Specify Database as mysqldb. Specify Username and Password and click on Test Connection as shown in Figure 22.
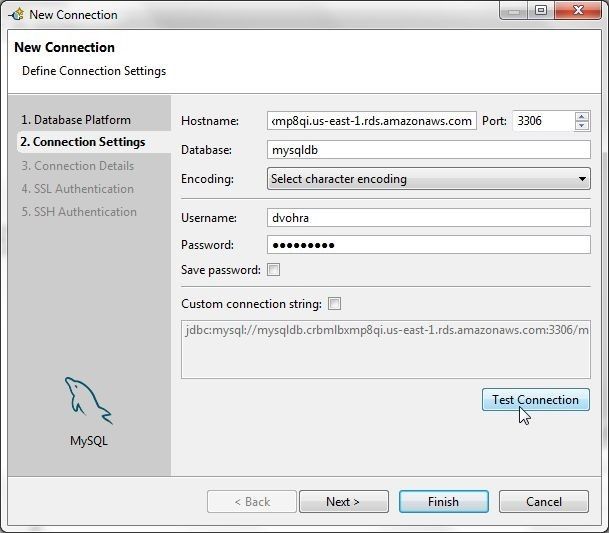
Figure 22. Connection Settings>Test Connection
If the message Connection is OK gets displayed click on Next as shown in Figure 23.
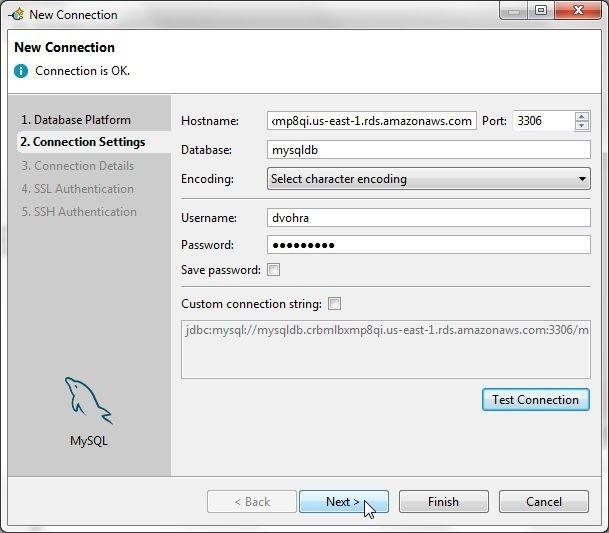
Figure 23. Connection is OK>Next
In Connection Details select the option to Enable Autocommit as shown in Figure 24.

Figure 24. Connection Details
Modify the default Connection name, which includes the host name, to a shorter name (mysql) as shown in Figure 25. The option to use SSL/SSH Authentication is also provided. Click on Finish.
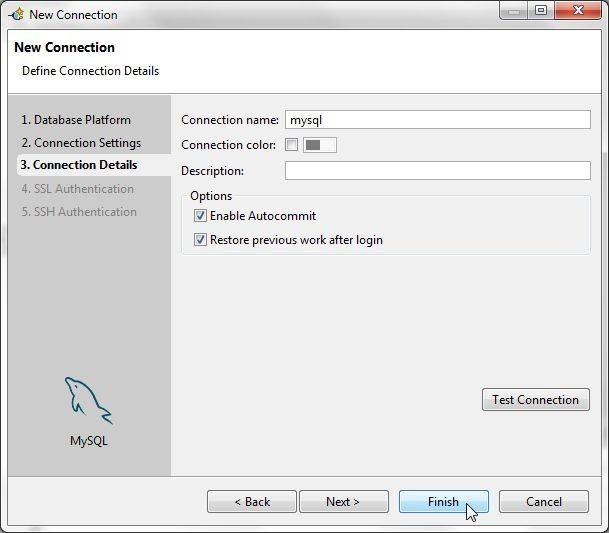
Figure 25. Connection Details>Finish
A new connection gets added in Connections view, as shown in Figure 26. The default (active) database is indicated in Object Explorer with a bluish-green color. AutoCommit ON label indicates that the auto-commit is on.
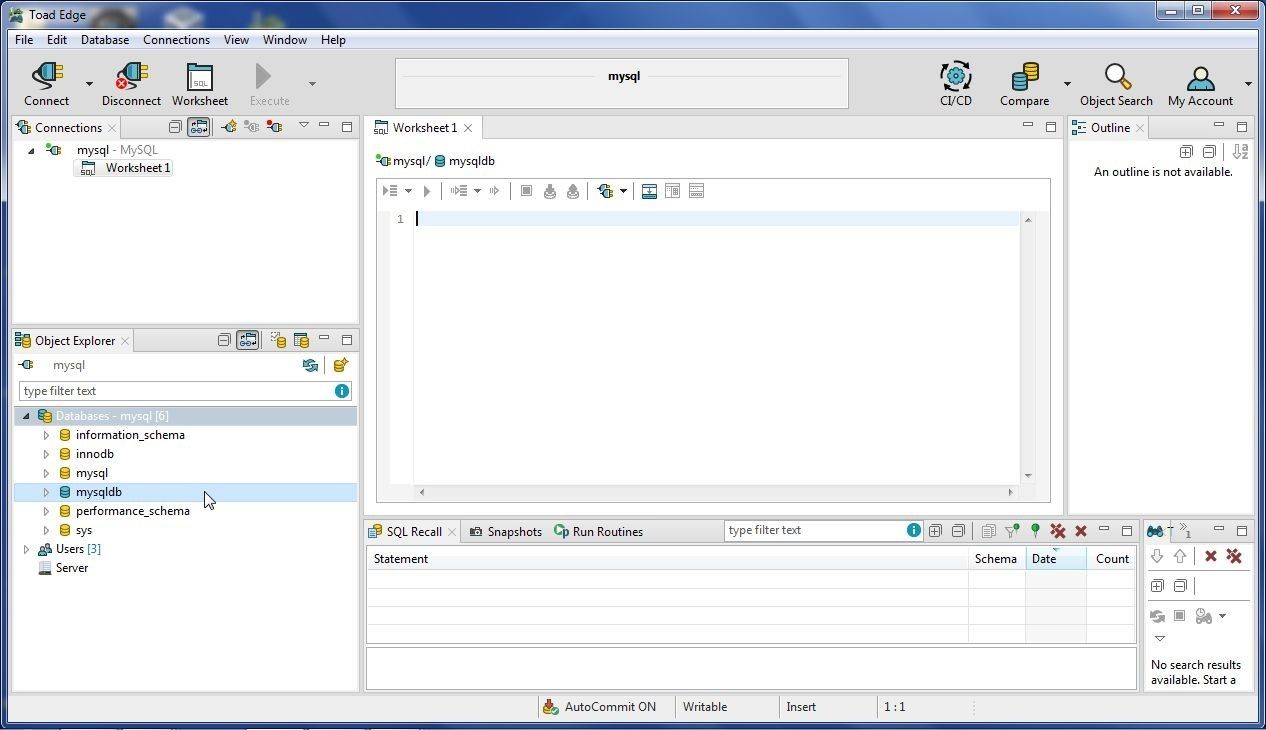
Figure 26. New Connection for MySQL
Using with PostgreSQL Database
Toad Edge 2.0.2 supports PostgreSQL 9.5, 9.6, 10. We shall be using version 9.6 on AWS RDS.
Creating an AWS RDS Instance for PostgreSQL Database
To create an RDS instance for PostgreSQL click on Launch DB Instance in RDS Console as shown in Figure 27.
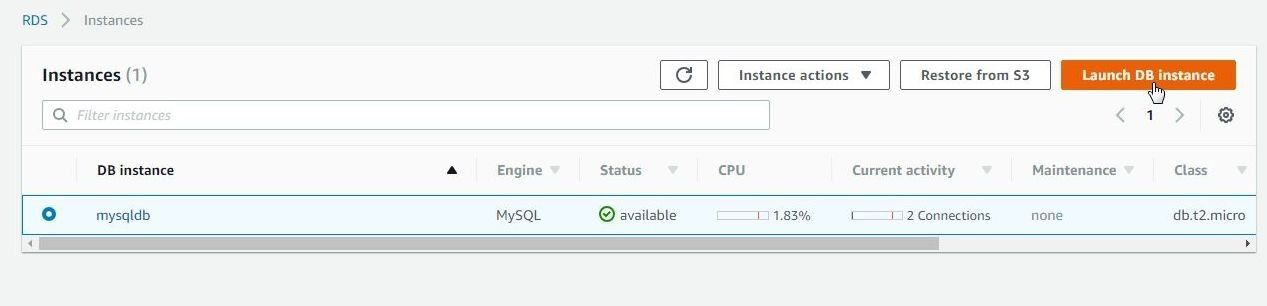
Figure 27. Launch DB Instance
In the Launch DB Instance wizard, first select engine as PostgreSQL, as shown in Figure 28.
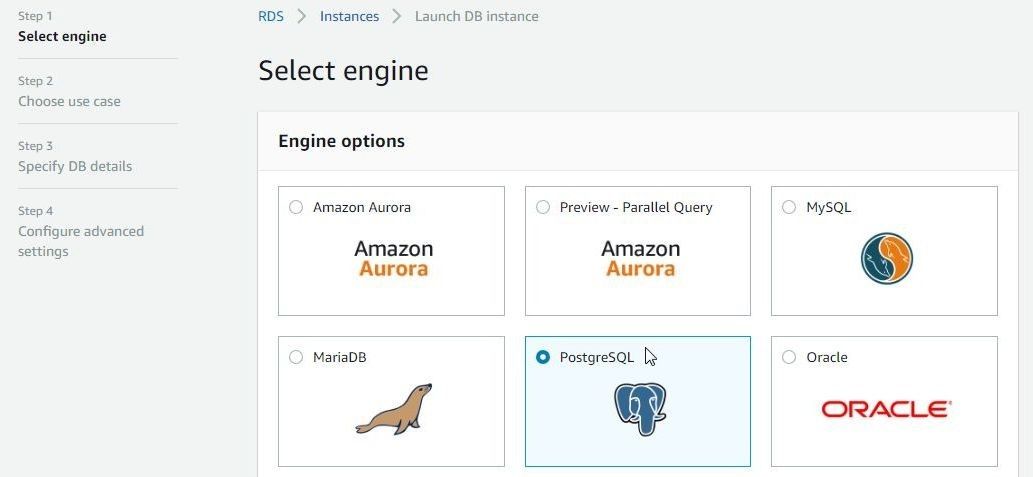
Figure 28. Selecting Database Engine as PostgreSQL
Click on Next. Specify DB details, which include selecting a License model, DB engine version, DB instance class, Multi-AZ deployment, Storage Type, and Allocated Storage. In Settings specify a DB instance identifier (postgresdb), and specify a Master username and password. Click on Next. In Configure advanced settings select a VPC and Subnet group. Select Yes for Publicly accessibility. Click on Launch DB Instance to launch the RDS instance for PostgreSQL. The RDS instance postgresdb gets created, as shown in Figure 29.
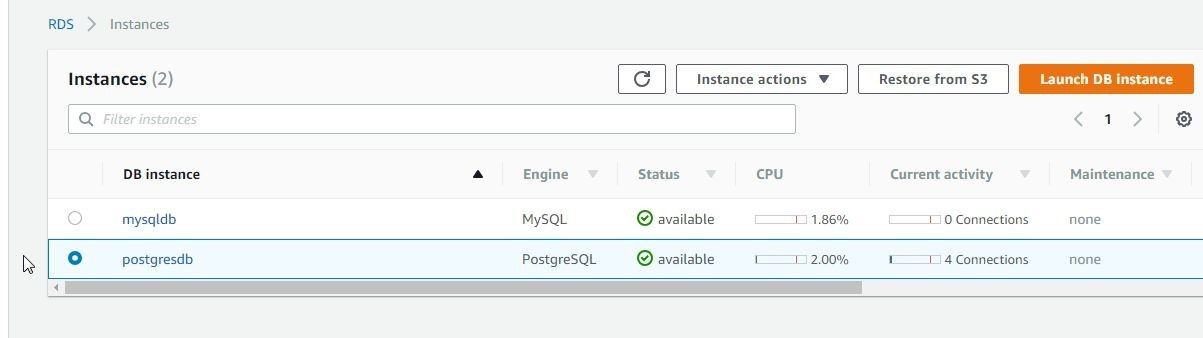
Figure 29. RDS Instance postgresdb
Click on the postgresdb link to display Summary. From the Connect section copy the Endpoint as shown in Figure 30. The Port is 5432. Modify the Security group for Inbound rules to allow all traffic, as explained for the MySQ based RDS instance.
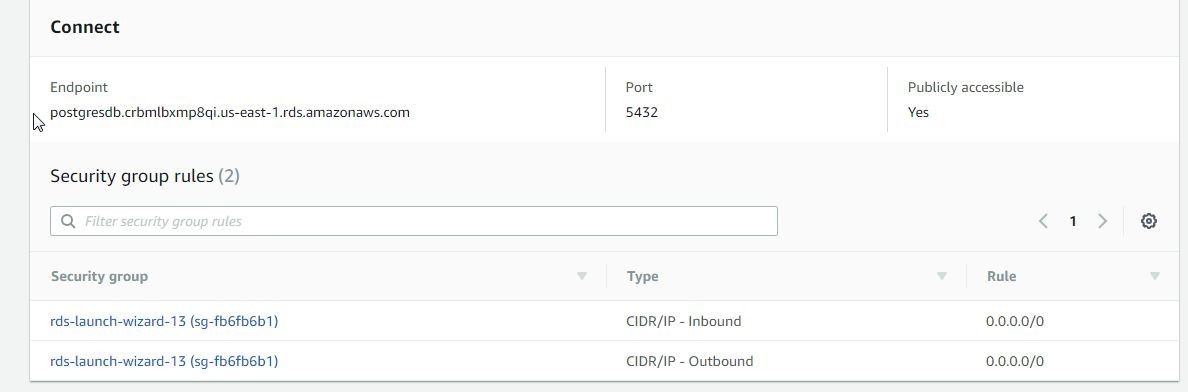
Figure 30. Obtaining Endpoint
The DB Name and Username may be obtained from the Details>Configuration section, as shown in Figure 31. The password is not displayed and must be made note of when creating the RDS instance.
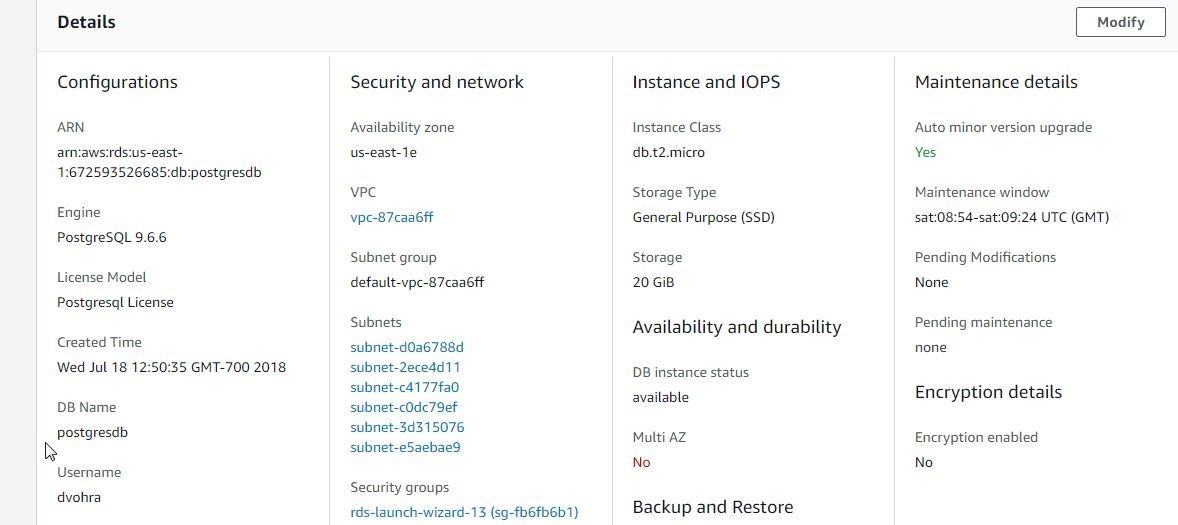
Figure 31. Obtaining DB Name and Username
Connecting with PostgreSQL on RDS
To connect with the PostgreSQL based RDS instance, select Connect>New Connection as shown above in Figure 20. Alternatively, select New Connection in Connections view as shown in Figure 32.
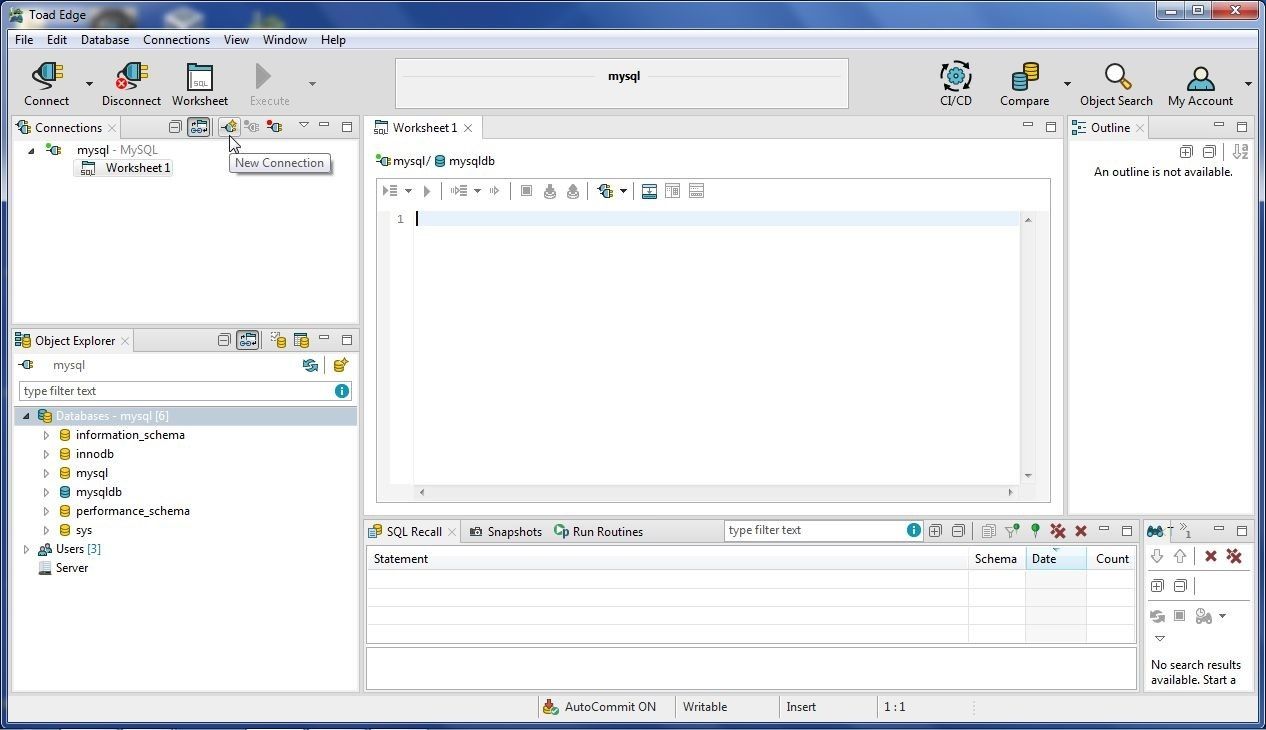
Figure 32. Selecting New Connection in Connections View
In the New Connection wizard select database engine as PostgreSQL, as shown in Figure 33, and click on Next.
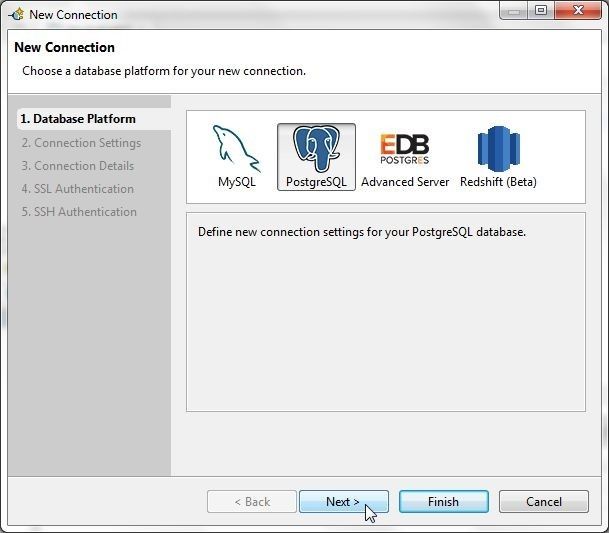
Figure 33. Selecting Database Engine as PostgreSQL
In the Connection Settings specify Hostname as the Endpoint for the RDS instance as shown in Figure 34. Specify the Database as the DB Name postgresdb. Specify Username as the Master Username and Password as the Master Password. Click on Test Connection.
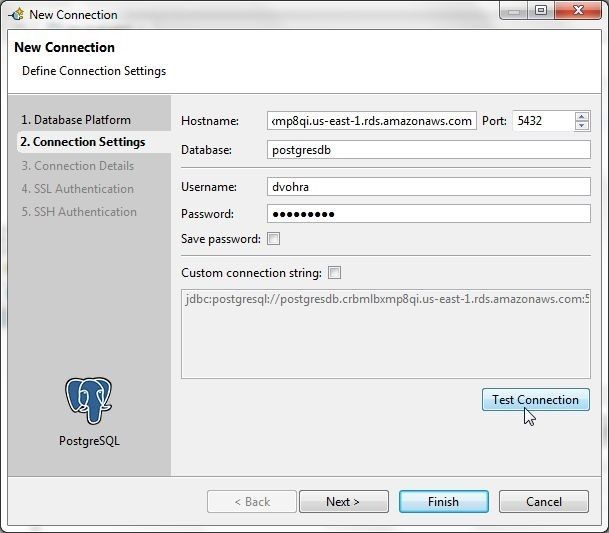
Figure 34. Specifying Connection Settings
If the message Connection is OK is displayed, as shown in Figure 35, click on Next.
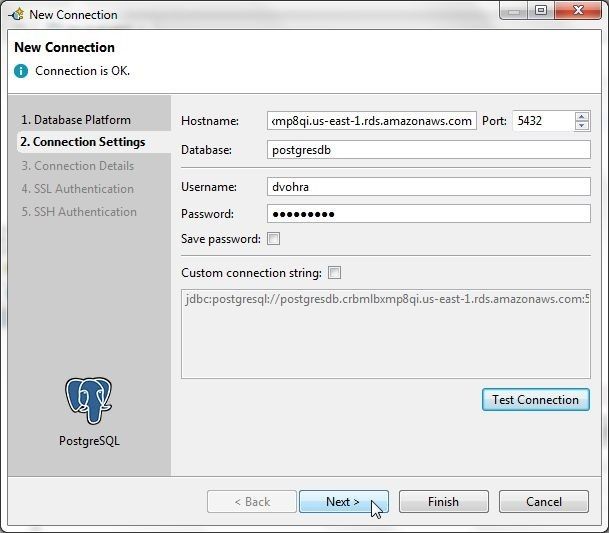
Figure 35. New Connection>Next
In Connection Details select the option to Enable Autocommit and shorten the Connection name (postgres), as shown in Figure 36, and click on Finish.
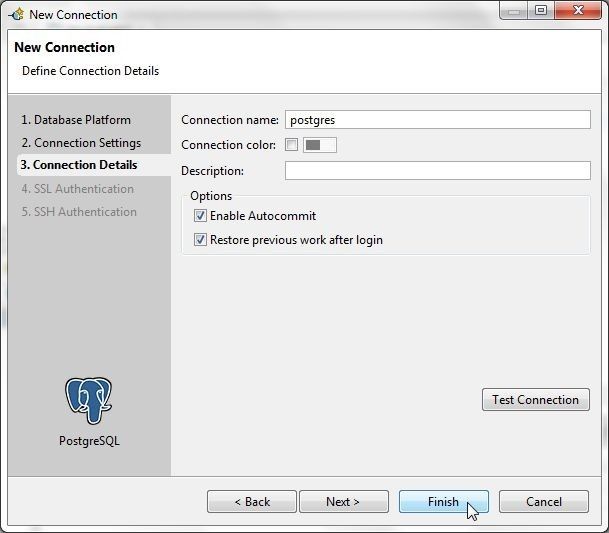
Figure 36. New Connection>Finish
A new connection gets added for PostgreSQL, as shown in Figure 37.
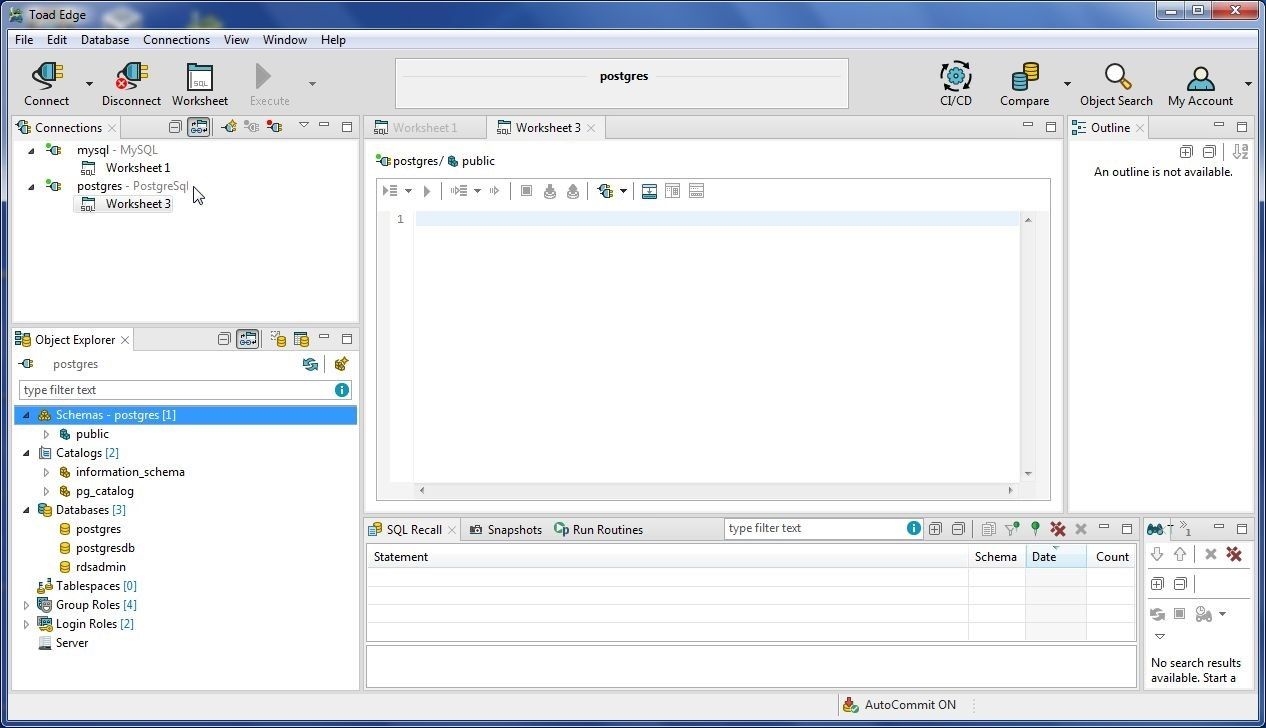
Figure 37. New Connection postgres
Using with EDB
Toad Edge 2.0.2 supports EDB Postgres Advanced Server 9.6, and 10 and we shall be using EDB Postgres Advanced Server 9.6,10. An account registration with Enterprisedb.com is required.
Installing EnterpriseDB (EDB) Postgres 10
Download EDB Postgres Advanced Server v10.0 for Windows x86-64 Interactive Installer (edb-as10-server-10.1.5-2-windows-x64.zip file). Extract the edb-as10-server-10.1.5-2-windows-x64.zip file to a directory. Right-click on the edb-as10-server-10.1.5-2-windows-x64.exe application and select Run as administrator.
The EDB Postgres Advanced Server Setup wizard gets started. Click on Next. Accept the license agreement and click on Next.
Provide the user credentials as registered in an account with EnterpriseDB. Click on Next.
Select the default Installation Directory and click on Next.
Select the default components to install and click on Next. Select the default Additional Directories, which include the Data directory and the WAL directory and click on Next.
Select the Advanced Server Dialect from two choices of Compatible with Oracle and Compatible with PostgreSQL and click on Next. By selecting a compatible database, Advanced Server configures data type conversions, time and date formats, and dictionary views such that it is easier to migrate or develop new applications that are compatible with the database selected.
Specify a password for the superuser enterprisedb and click on Next. Select the default port setting of 5444 and default locale.
Select server type as Development and click on Next. Select workload type as Transaction processing and click on Next.
In Update Notification Service select the default option to install updates when available and click on Next. The Pre-Installation Summary lists the settings for the installation. Click on Next.
In Ready to Install click on Next to start the installation. The database server startup gets configured and started. When the installation has completed click on Finish.
Configuring the EDB Connectors
While the JDBC drivers for MySQL and PostgreSQL databases are packaged with Toad Edge, the JDBC drivers for EDB are not. Download EDB Connectors 10.0.1 (JDBC, ODBC, OCI, .NET) for Windows x86-64 (edb-connectors-10.0.1-1-windows-x64.exe application) from ADD-ON COMPONENTS & BUNDLES. Right-click on the edb-connectors-10.0.1-1-windows-x64.exe application and select Run as administrator. Select installation language as English. Follow through with the Setup wizard using default settings to install the EDB connectors.
Next, configure the EDB Connectors in Toad Edge. Select View>Preferences as shown in Figure 38.
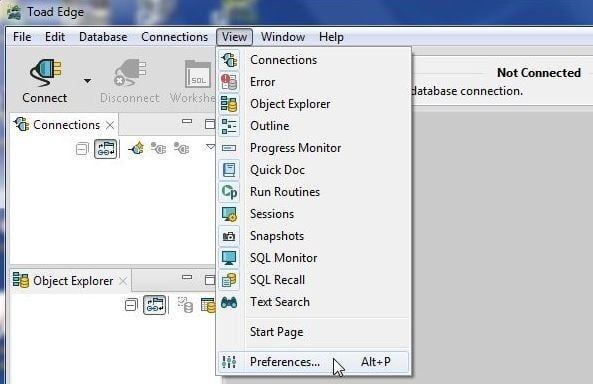
Figure 38. View Preferences
In Preferences select Database and select the EnterpriseDB tab as shown in Figure 39. Click on Add… to add a JDBC driver.
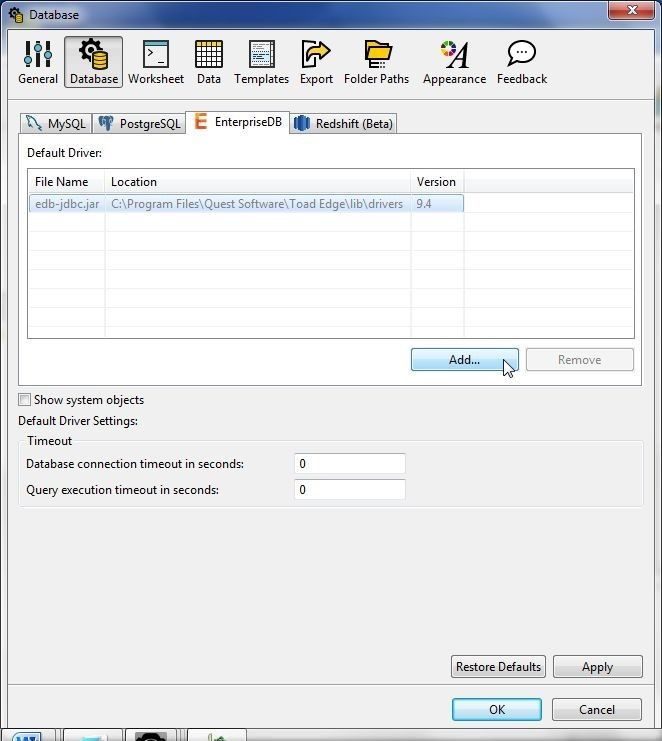
Figure 39. Database>EnterpriseDB>Add
Add the edb-jdbc18.jar as shown in Figure 40. Click on Apply. Click on OK.
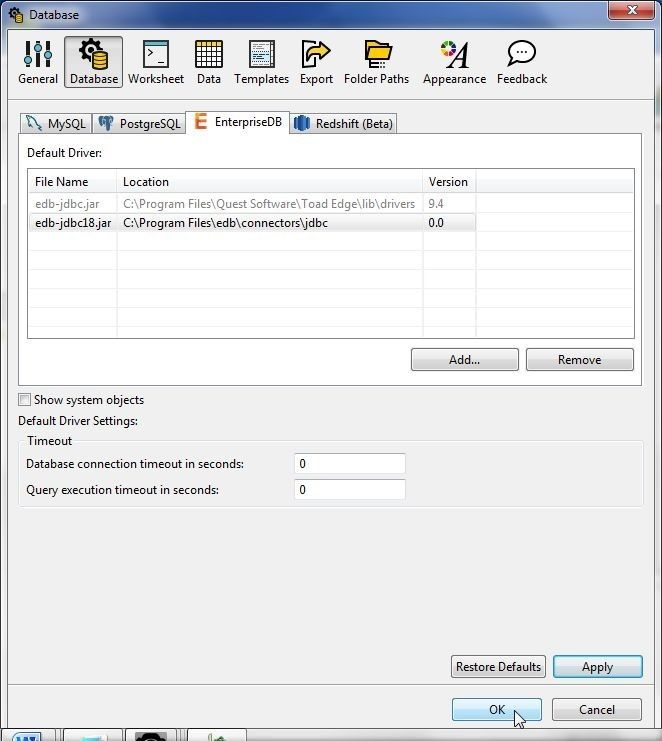
Figure 40. Adding EDB Driver JAR
Connecting with EDB
To connect with EDB in Toad Edge select Connect>New Connection. In the New Connection wizard select database as EDB Postgres Advanced Server and click on Next as shown in Figure 41.
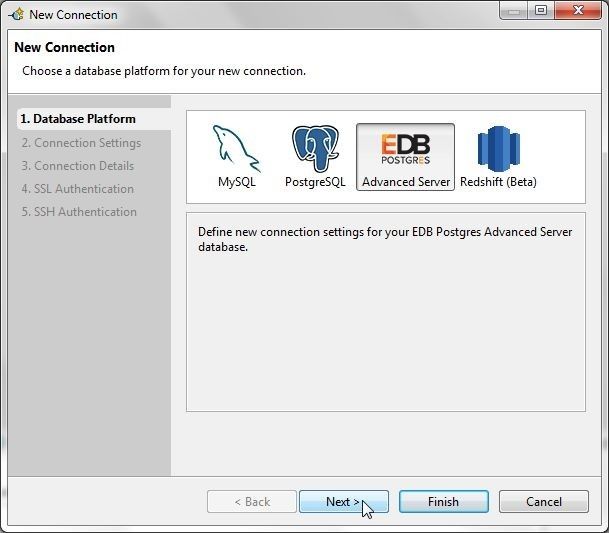
Figure 41. Selecting Database Platform
In Connection Settings specify Hostname as localhost, Database as edb, Username as enterprisedb and the Password as configured when installing EDB. Click on Test Connection and if the message Connection is OK is output, as shown in Figure 42, click on Next.
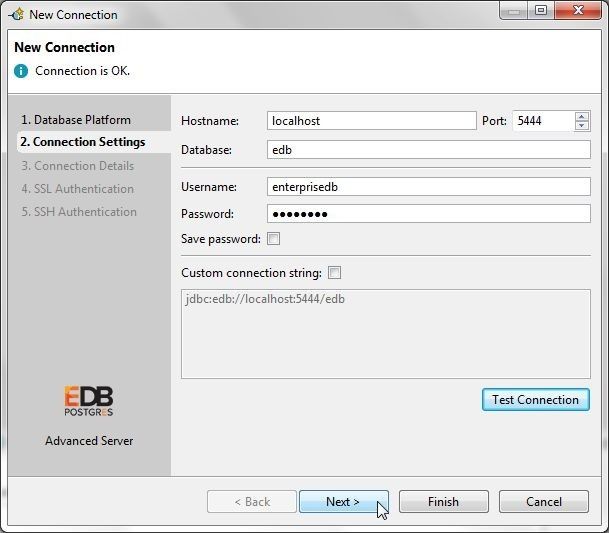
Figure 42. Specifying Connection Settings
In Connection Details shorten the Connection name (edb) and select the option to Enable Autocommit as shown in Figure 43. Click on Finish.

Figure 43. Connection Details
A connection to EDB gets added, as shown in Figure 44. The enterprisedb is listed as the default (active) schema in Object Explorer.
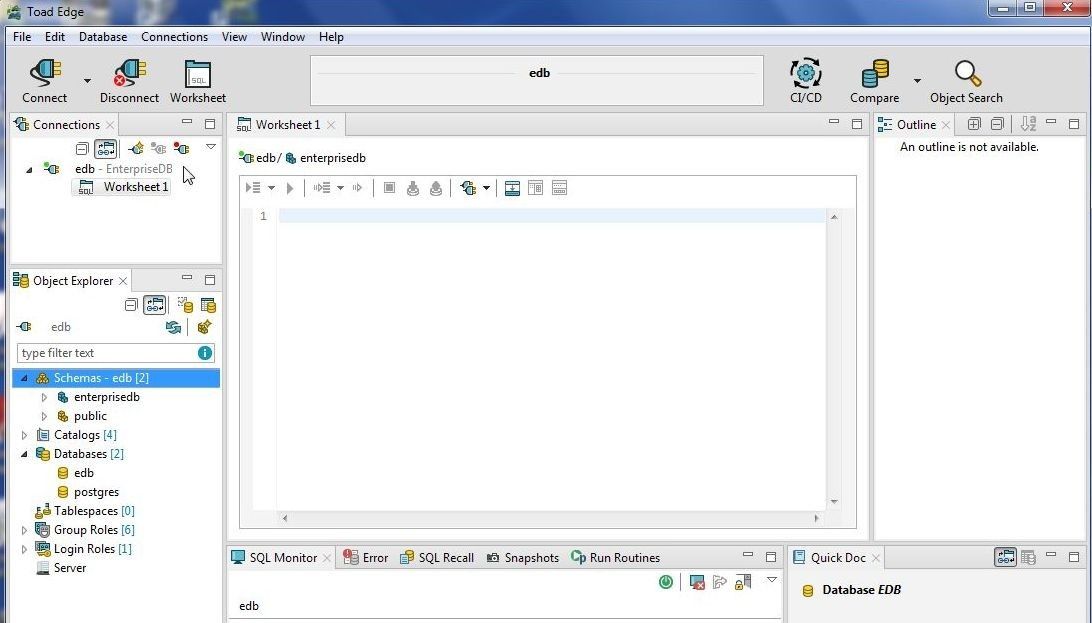
Figure 44. Connection to EDB added
Using with Amazon Aurora
Amazon Aurora is a MySQL- and PostgreSQL-compatible database available only on AWS RDS.
Creating an Aurora Instance
To create an Aurora instance click on Launch DB Instance in RDS Console. Select database engine as Amazon Aurora as shown in Figure 45.
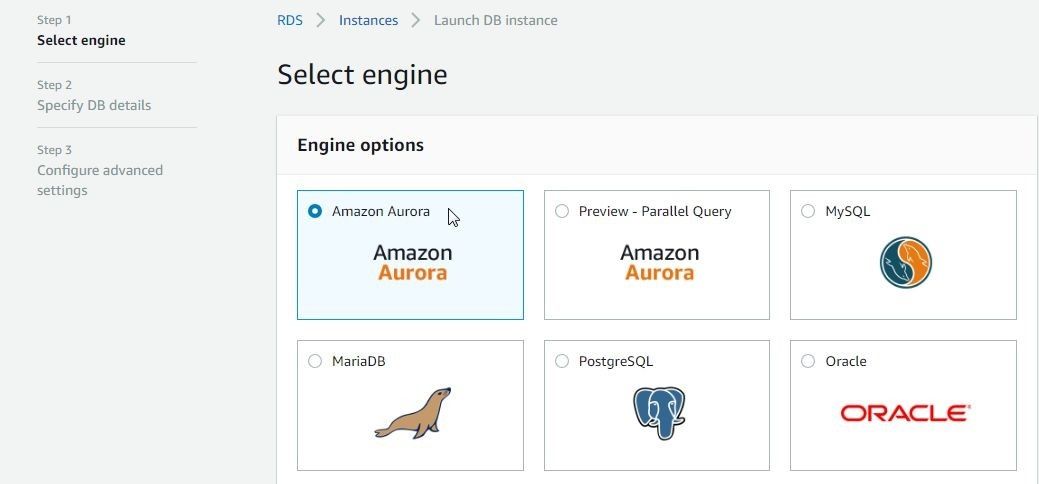
Figure 45. Selecting Database Engine as Amazon Aurora
Select Edition as MySQL 5.7-compatible and click on Next as shown in Figure 46.
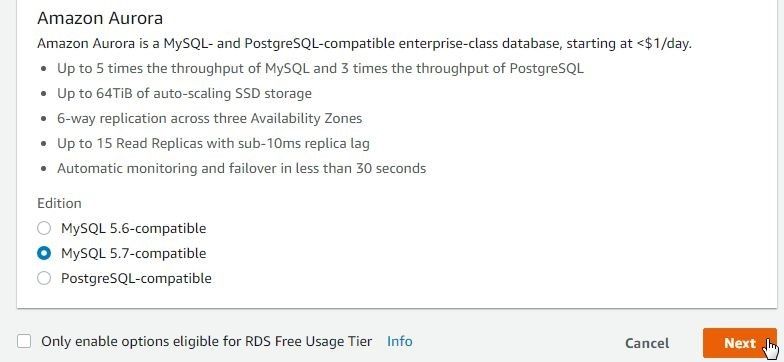
Figure 46. Selecting Edition
Next, specify DB details including DB instance class. For Multi-AZ deployment select Create Replica in Different Zone. In Settings specify DB instance identifier (auroradb), Master username and Master password. Click on Next. In Configure advanced settings select a VPC and a Subnet group. Public accessibility must be set to Yes. For Availability zone select No preference. Select the option to Create new VPC security group. In Database options specify a Database name (auroradb) as shown in Figure 47. The DB cluster identifier field may be kept blank as a default cluster identifier derived from instance identifier gets generated. Database port is 3306 by default.

Figure 47. Database options
Keep Encryption, Failover, Backup, Monitoring and Maintenance settings as default. Select the log types to export to CloudWatch Logs and click on Launch DB Instance. Two DB instances get created, one for the Aurora database and another for the Aurora DB Cluster, as shown in Figure 48.
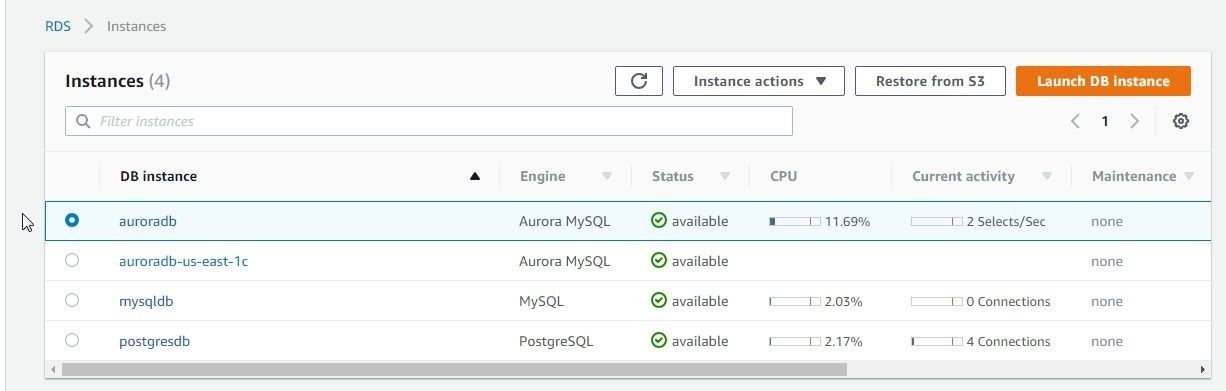
Figure 48. Aurora DB Instances
Click on the link for auroradb get instance details including the Endpoint and Port as shown in Figure 49.
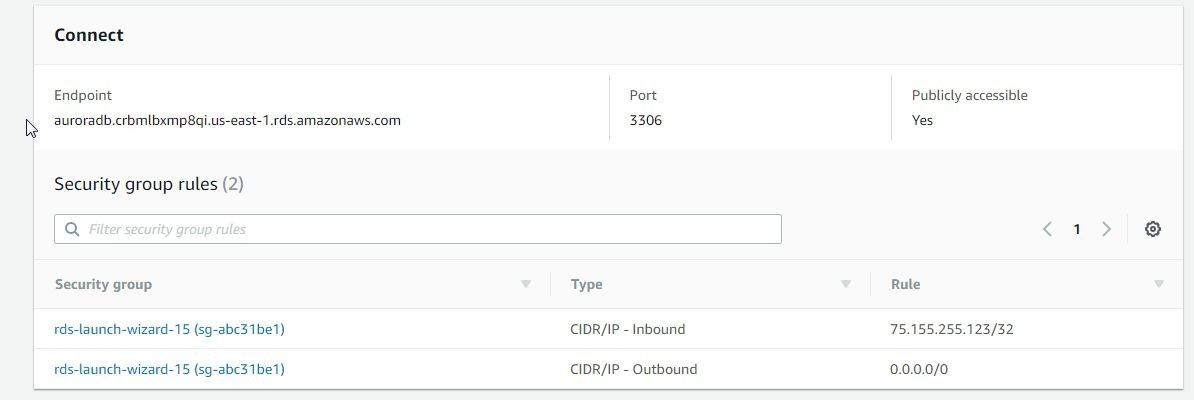
Figure 49. Endpoint and Port for Aurora
Modify the Inbound access rules to allow all traffic on all ports from all sources as explained for MySQL and PostgreSQL and shown in Figure 50.
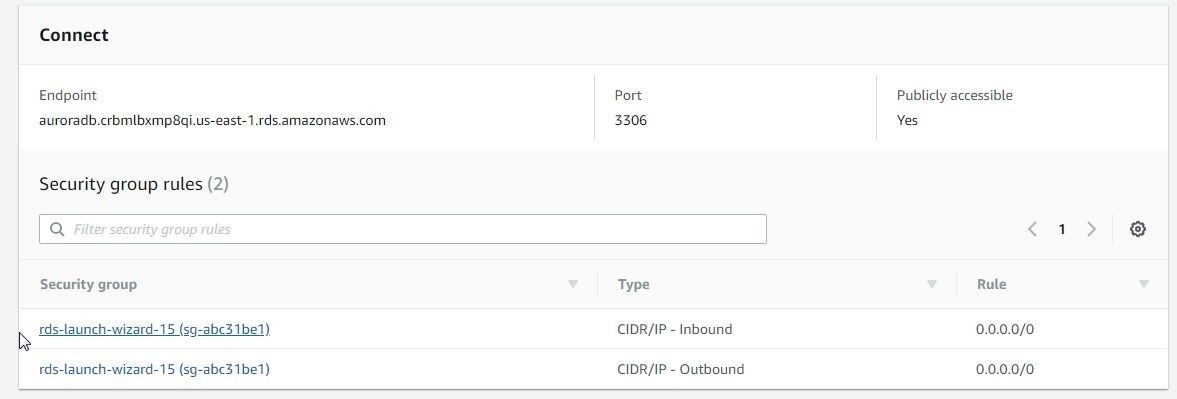
Figure 50. Modified Inbound rules to allow all traffic
The DB Name and Username may be obtained from Details>Configuration, as shown in Figure 51.
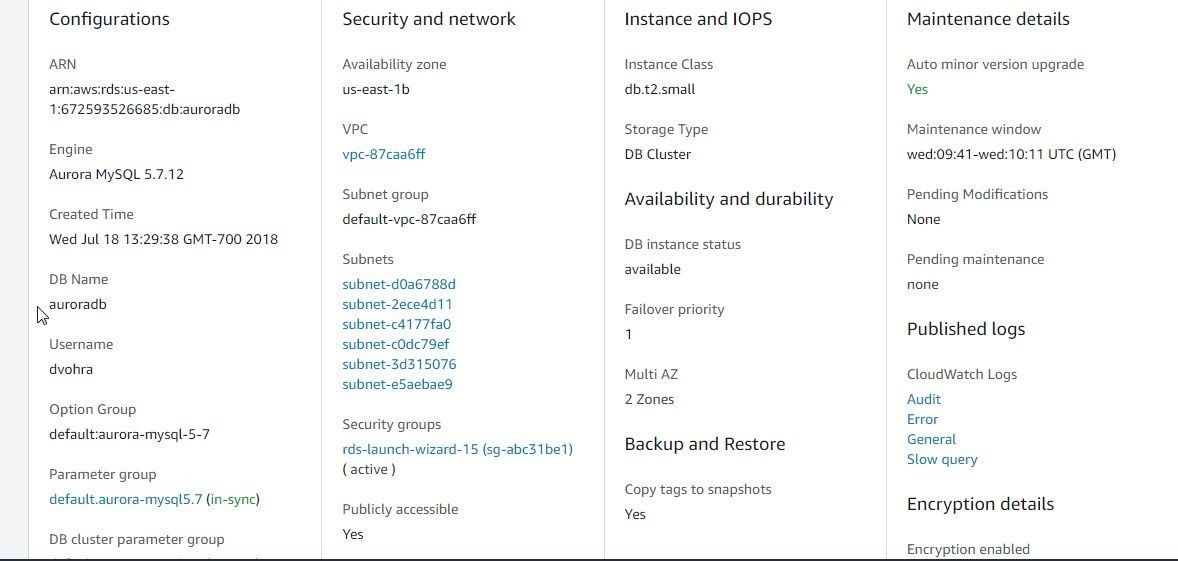
Figure 51. DB Name and Username
Connecting with Aurora
To create a connection with Aurora select Connect>New Connection. Alternatively, right-click on a connection in Connections view and select New Connection as shown in Figure 52.
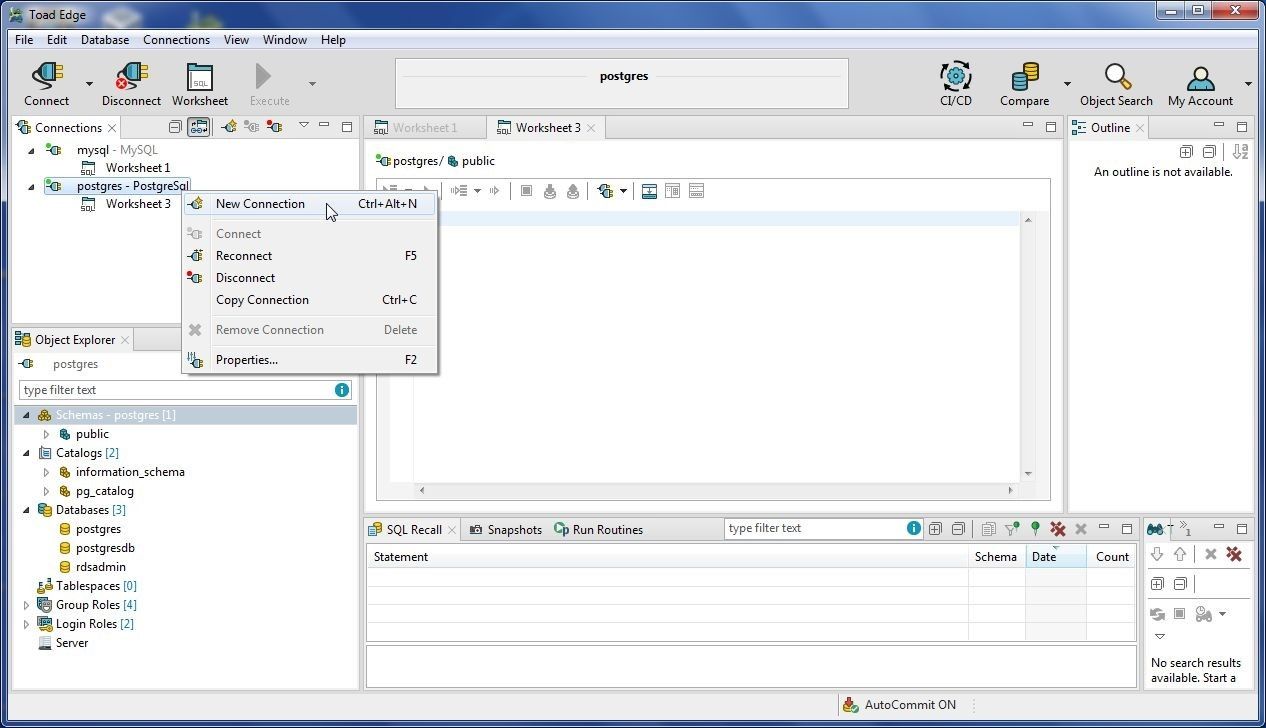
Figure 52. New Connection
In New Connection select MySQL database platform and click on Next as shown in Figure 53.

Figure 53. Selecting Database Platform as MySQL
In New Connection wizard, first specify Hostname as the Endpoint for Aurora DB instance. Specify Port as 3306 and Database as auroradb. Specify Username and Password and click on Test Connection. If the message :Connection is OK” is displayed, as shown in Figure 54, click on Next.
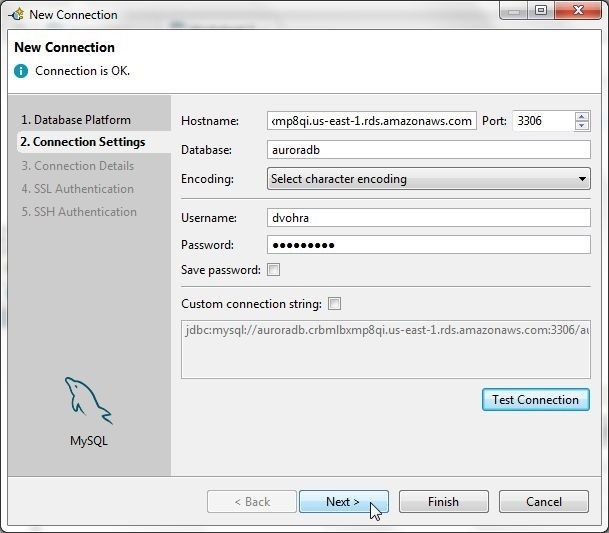
Figure 54. Connection Settings>Test Connection
In Connection Details optionally specify a shorter name (aurora) for the connection and select the option to Enable Autocommit as shown in Figure 55.

Figure 55. Connection Details
A new connection for Aurora gets added, as shown in Figure 56. The Object Explorer lists the user-created database auroradb as the default (active) database.
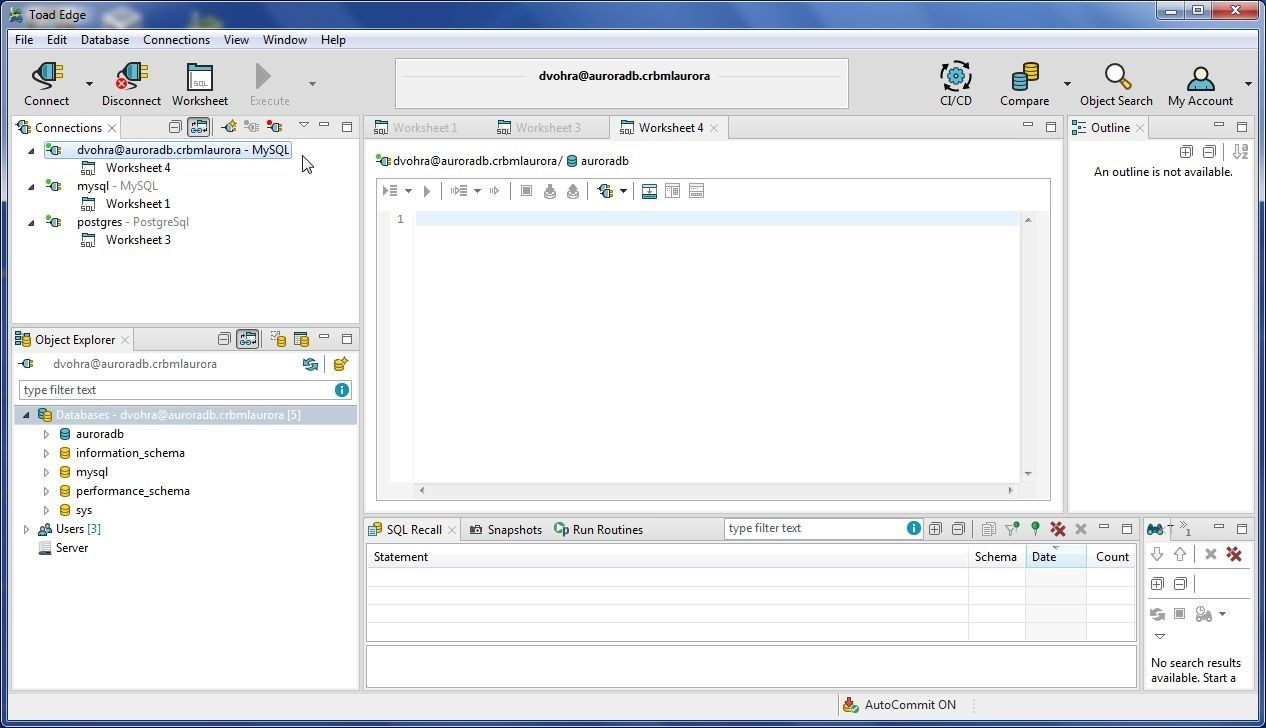
Figure 56. Aurora Connection
Using with MariaDB Database
MariaDB is a MySQL-compatible database developed by the original developers of the MariaDB 10.1, 10.2 database. Toad Edge 2.0.2 supports MariaDB 10.1, 10.2.
Creating an AWS RDS Instance for MariaDB Database
To create a MariaDB instance click on Launch DB Instance in RDS Console. Select database engine as MariaDB as shown in Figure 57.
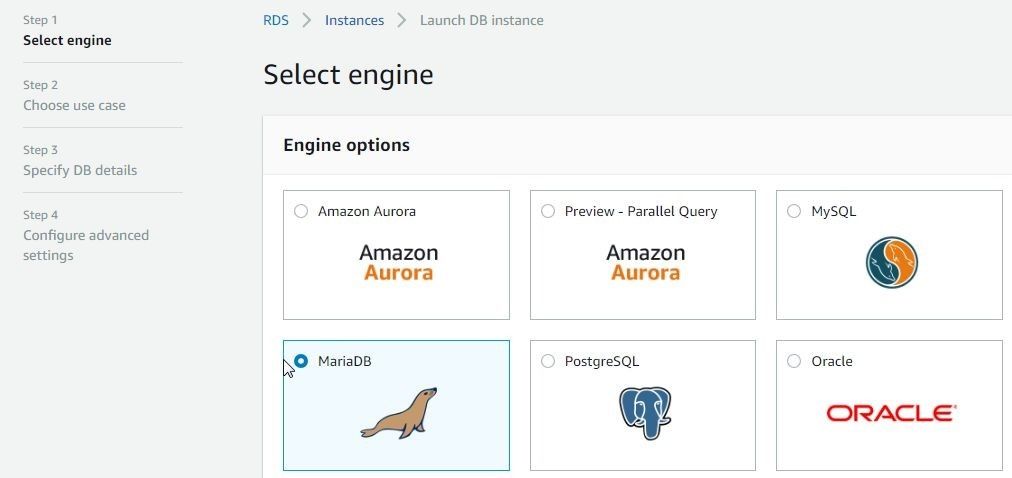
Figure 57. Selecting Database Engine as MariaDB
Click on Next. In Choose use case select Dev/Test – MariaDB and click on Next. Specify DB Details including the License model, DB engine version and the option to Only enable options eligible for RDS Free Usage Tier. Select a DB instance class, Storage type and Allocated storage.
In Settings specify a DB instance identifier (mariadb), Master username, and Master password and click on Next. In Configure advanced settings select a VPC, Subnet group, and set Public accessibility to Yes.
Set Availability zone to No preference and select the option to Create new VPC security group. In Database options specify a Database name (mariadb) and keep the default setting for Port as 3306.
Configure Monitoring and select the log types to export to CloudWatch Logs. Keeping the default settings for Maintenance click on Launch DB Instance. An RDS instance for MariaDB gets created, as shown in Figure 58.
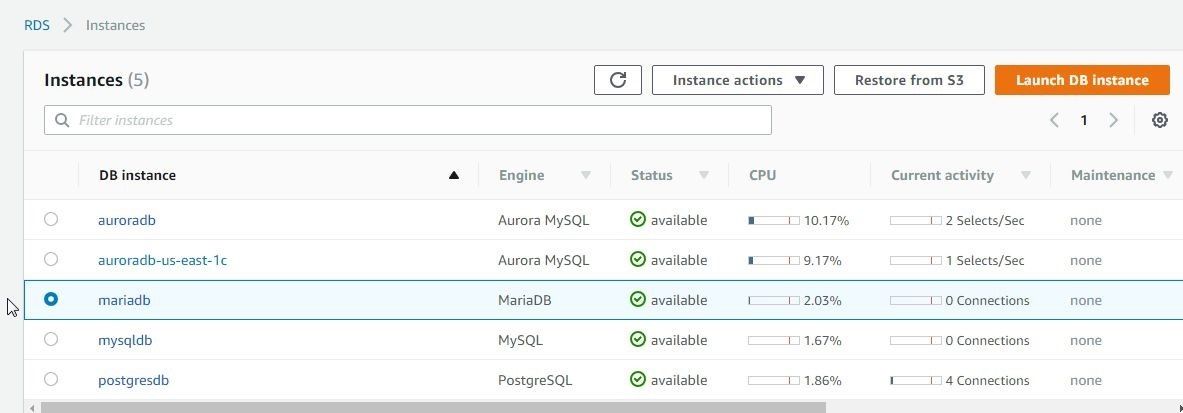
Figure 58. MariaDB Instance
Click on the mariadb link to display Summary. From the Connect section obtain the Endpoint as shown in Figure 59.

Figure 59. Endpoint for MariaDB
Modify the Security group Inbound rules to allow all traffic on all ports from all sources as shown in Figure 60.
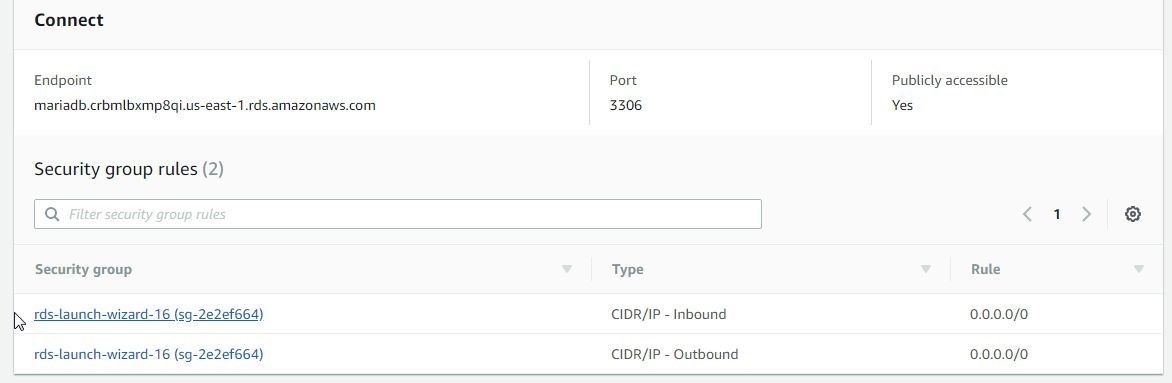
Figure 60. Security group Inbound rules to allow all traffic
The DB Name and Username may be obtained from Details>Configuration.
Connecting with MariaDB
We have discussed the different options to launch the New Connection wizard. One other option is to select Connections>Manage Connections as shown in Figure 61.
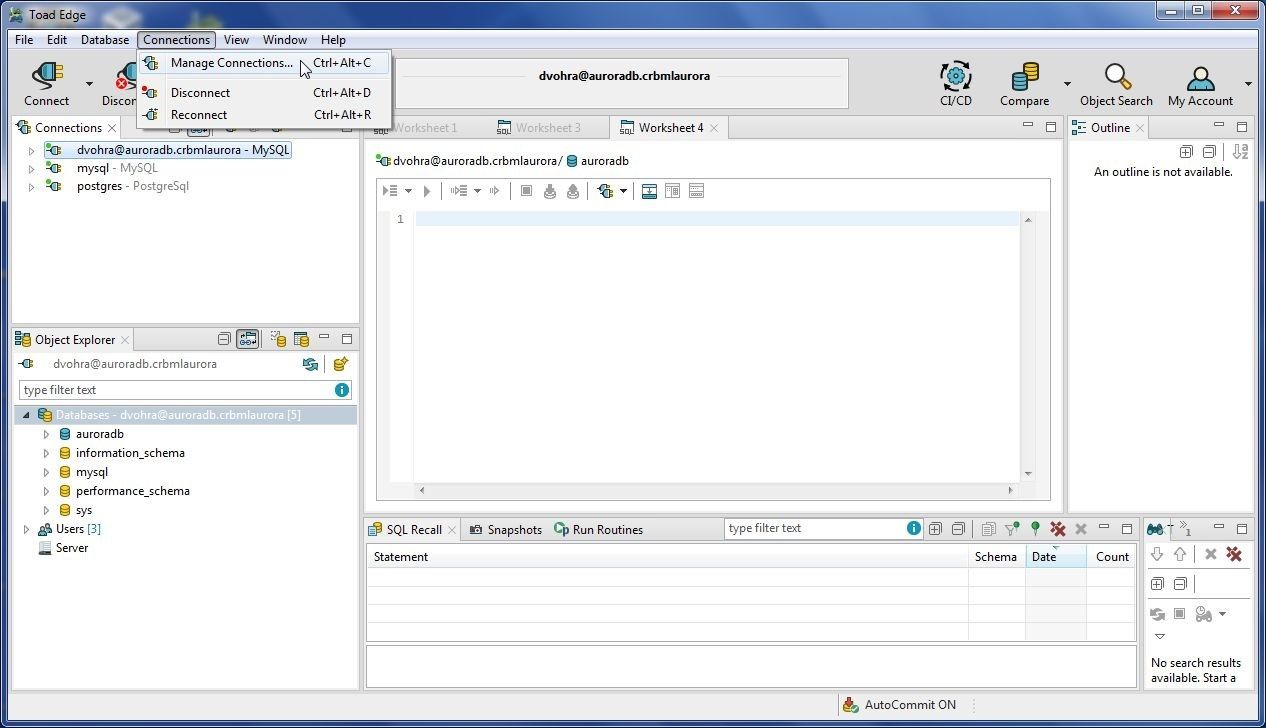
Figure 61. Connections>Manage Connections
In Database Connections click on Add… to add a new connection as shown in Figure 62.
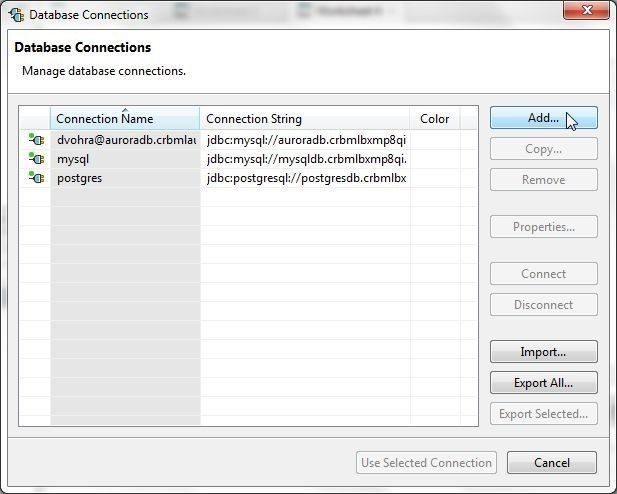
Figure 62. Database Connections>Add…
The New Connection wizard gets launched; in which, select MySQL as the Database Platform and click on Next as shown in Figure 63.
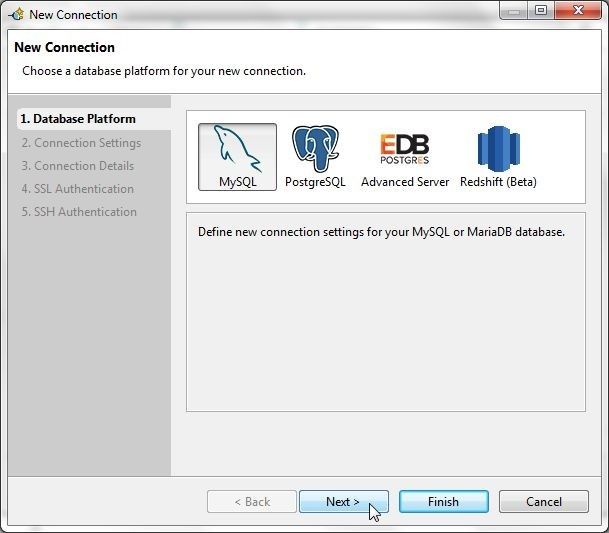
Figure 63. Selecting Database Platform
In the Connection Settings specify Hostname as the Endpoint for the mariadb instance on RDS. Specify Port as 3306. Specify Username and Password and click on Test Connection. If the message Connection is OK is output, as shown in Figure 64, click on Next.
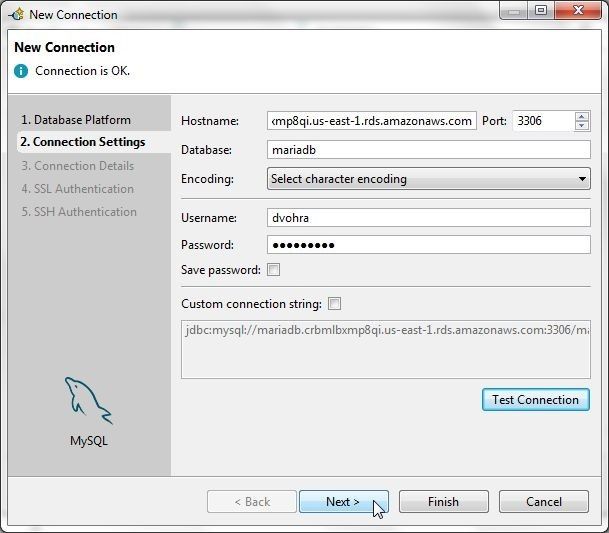
Figure 64. Testing Connection Settings
In Connection Details optionally specify a shorter Connection name (mariadb) than the default and select the option Enable Autocommit as shown in Figure 65. Click on Finish.
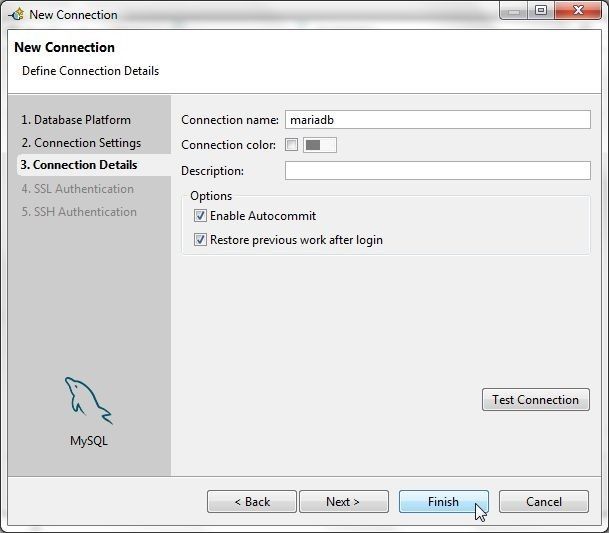
Figure 65. Connection Details
A new connection gets added to Database Connections, as shown in Figure 66.
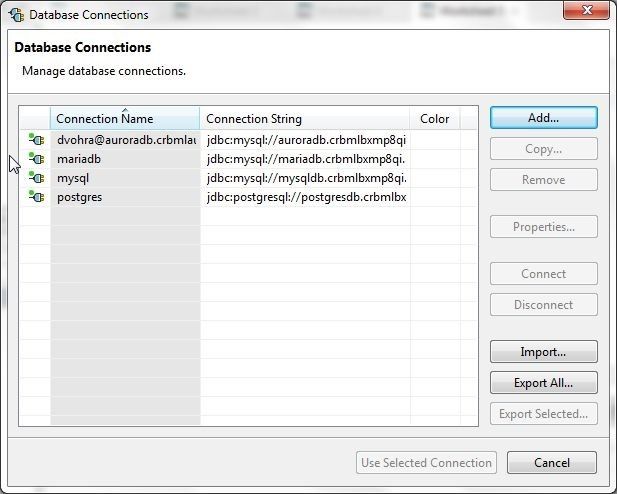
Figure 66. New Connection in Database Connections
A new connection also gets added to Connections view, as shown in Figure 67. The default (active) database in Object Explorer is set to mariadb, the user created database.
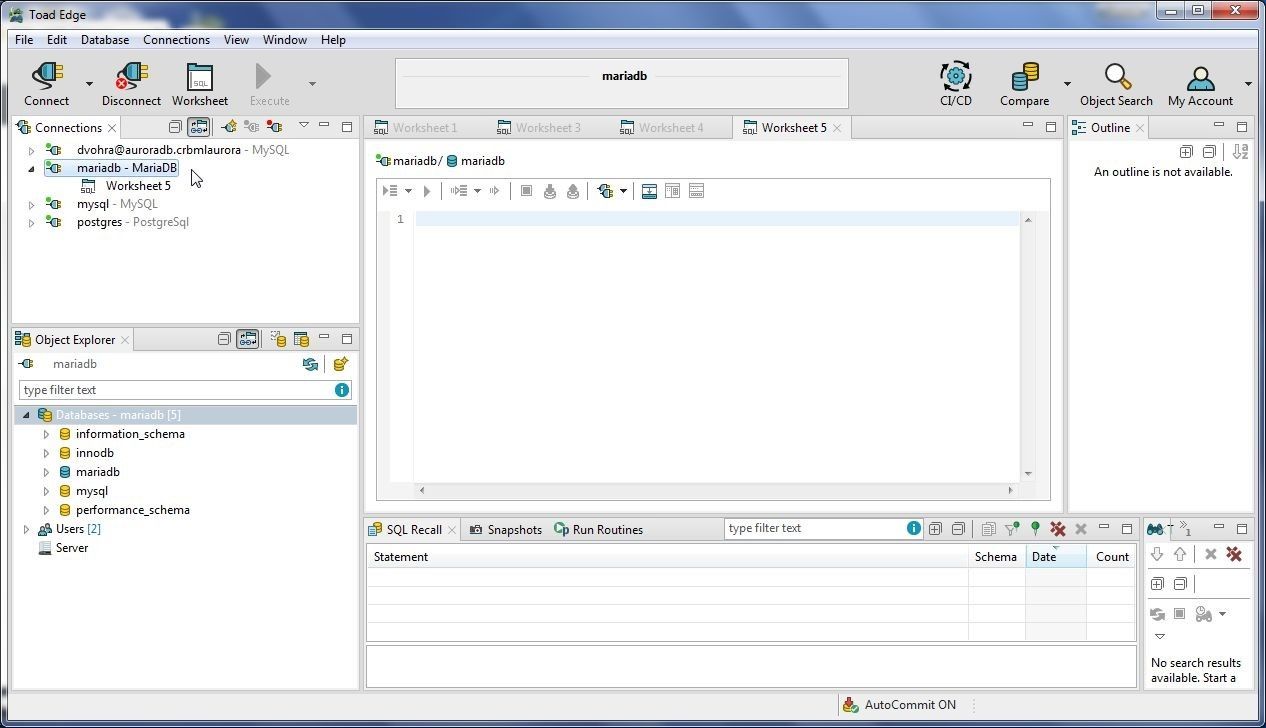
Figure 67. New Connection mariadb
Conclusion
In this article we discussed the new Toad Edge 2.0.2 as an all-in-one IDE for open source database development with MySQL, PostgreSQL, EDB, Aurora, and MariaDB.
Want to learn more?User guide: Access the Toad Edge User Guide. Product page: Click the following link to watch a video on our product page and learn how Toad Edge can help you simplify development and management tasks for open source databases. Blog: 7 hacks to use Toad Edge like a boss Blog: 5 blogs that teach you to effectively work in Toad Edge®
Try Toad Edge free for 30 daysFree 30-day trial of Toad Edge Already in a trial? If Toad Edge has helped you ramp up on open source RDBMSs fast, buy it now or contact a sales representative. |
Start the discussion at forums.toadworld.com