Amazon Aurora is a fully managed proprietary relational database available only on AWS RDS. Aurora is MySQL and PostgreSQL compatible, which implies that the same code, client tools and applications that are used with MySQL and PostgreSQL databases may be used with Aurora. An Aurora instance consists of the following components:
– One or more DB instances. A DB instance could either a Primary instance or an Aurora replica. The difference between a Primary instance and an Aurora replica is that the Primary instance supports read and write operations while an Aurora replica only supports read operations. Multiple replicas (up to 15) may be created to distribute the read load, which may be distributed even across multiple availability zones.
– A cluster volume to store data. The cluster volume is SSD (Solid State Disk) drives based virtual volume. A cluster volume grows with the data storage requirements up to 64 TB. The Primary instance performs all the data modifications to a cluster volume.
The benefits of using Aurora DB is that it is a high performance, high throughput, and reliable managed service. Managed service implies that most of the tasks including backup and recovery, provisioning, patching, failure detection and repair are handled automatically.
In this article we shall use Toad Data Point with a PostgreSQL-compatible Aurora DB instance. Aurora DB supports PostgreSQL version 9.6.3. The article has the following sections.
Setting the Environment
Creating a PostgreSQL-compatible Aurora DB Instance
Getting Aurora DB Configuration Information
Configuring Connectivity to the Aurora DB
Configuring ODBC Data Source for PostgreSQL-compatible Aurora
Creating a Connection to PostgreSQL-compatible Aurora DB
Creating a Database Table with Create Table wizard
Exploring Database Objects
Importing Table Data from an .XLS Spreadsheet
Querying Table with Query Builder
Exporting Table Data to HTML
Setting the Current Connection
Disconnecting Connections
Deleting the Aurora DB
Setting the Environment
Download and install:
– PostgreSQL ODBC Driver (as discussed in Using PostgreSQL Database on Localhost with Toad Data Point)
Create an AWS account at https://aws.amazon.com/resources/create-account/.
Creating a PostgreSQL-Compatible Aurora DB Instance
Access the AWS RDS service at https://console.aws.amazon.com/rds and click on Get Started Now to launch the RDS Console. Select the Amazon Aurora engine as shown in Figure 1.
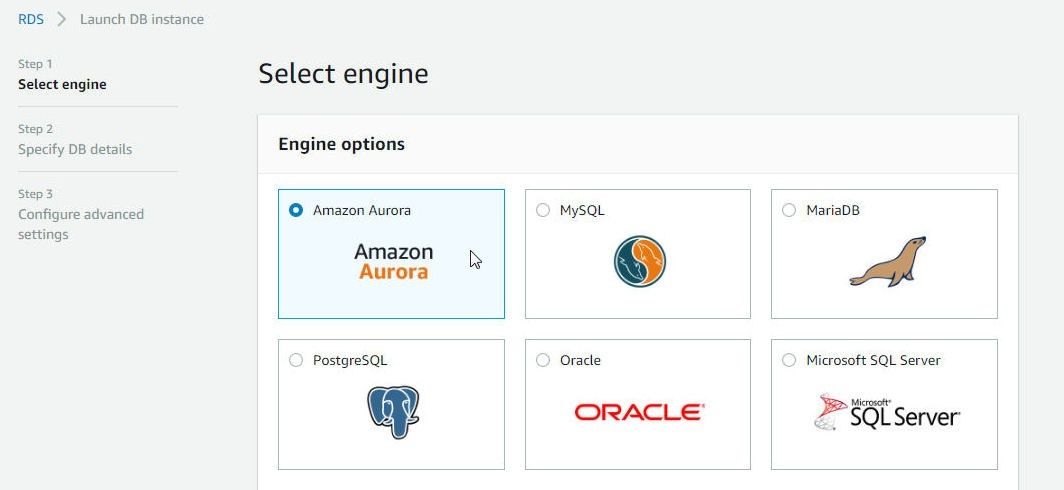
Figure 1. Selecting the Amazon Aurora Engine
Scroll down and select Edition as PostgreSQL-compatible as shown in Figure 2. Click on Next.
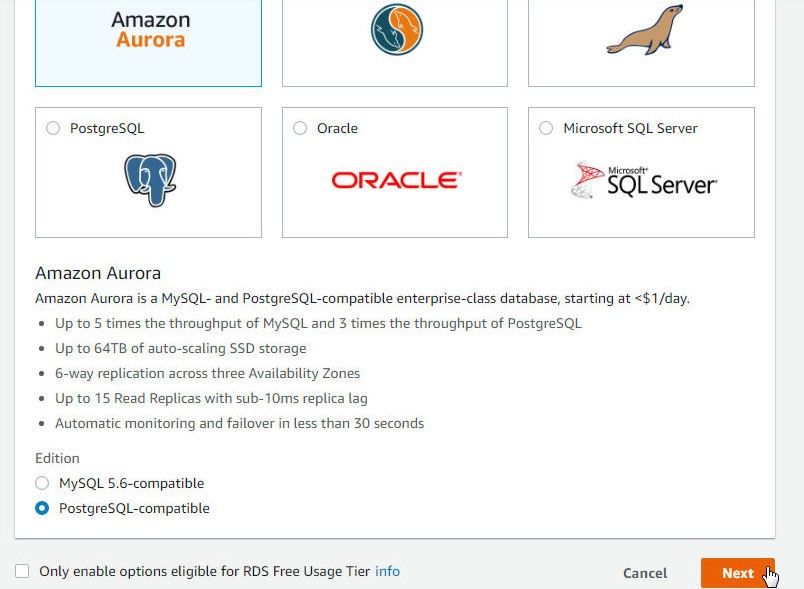
Figure 2. Selecting Edition as PostgreSQL- Compatible
In Specify DB details select a DB Instance class as shown in Figure 3.
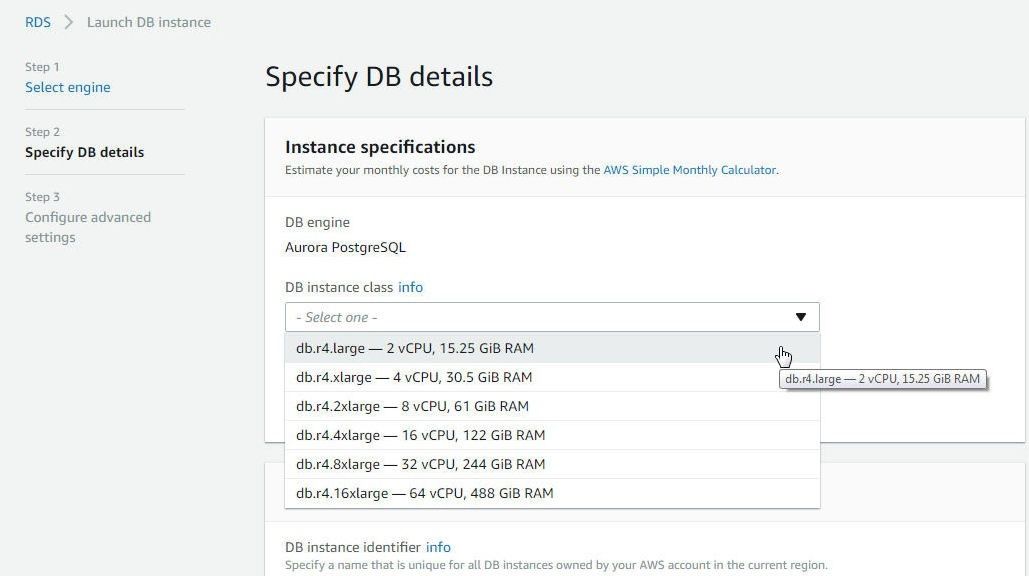
Figure 3. Selecting a DB Instance Class
In Multi-AZ deployment select the option to Create Replica in Different Zone as shown in Figure 4. Creating replica in a different availability zone provides high availability.
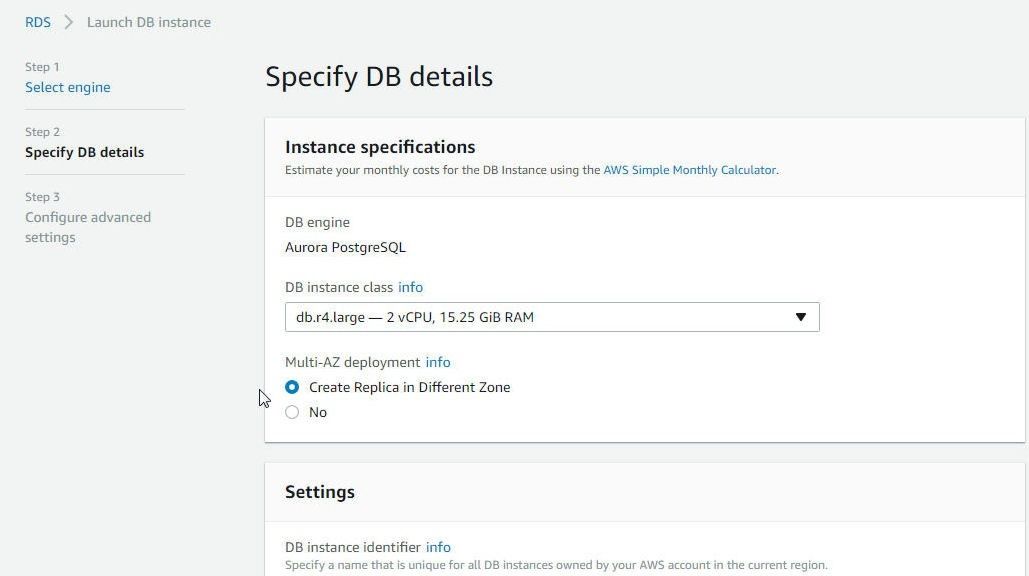
Figure 4. Selecting to Create Replica in a Different Zone
In Settings specify a DB instance identifier (postgres-aurora), a Master username and a Master password as shown in Figure 5. Click on Next.
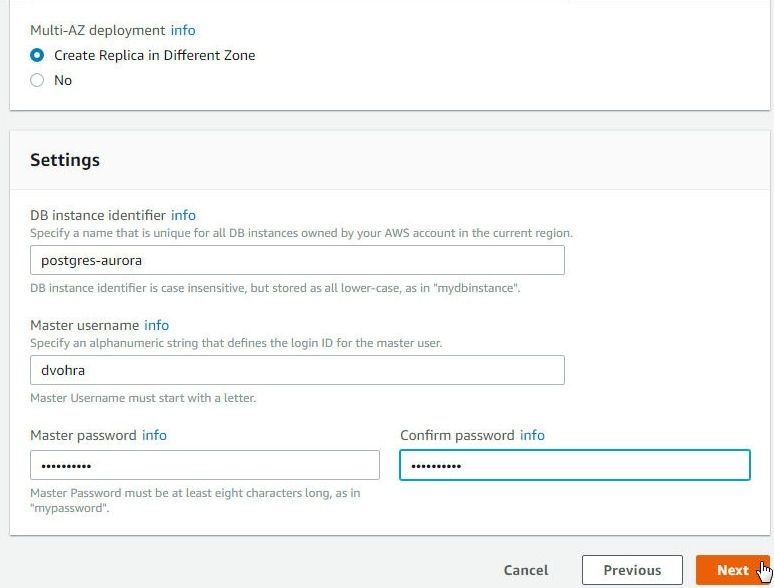
Figure 5. Specifying DB Instance Identifier, Master username, and Master password
In Configure advanced settings select Create new VPC as shown in Figure 6. Alternatively, select a pre-existing VPC.
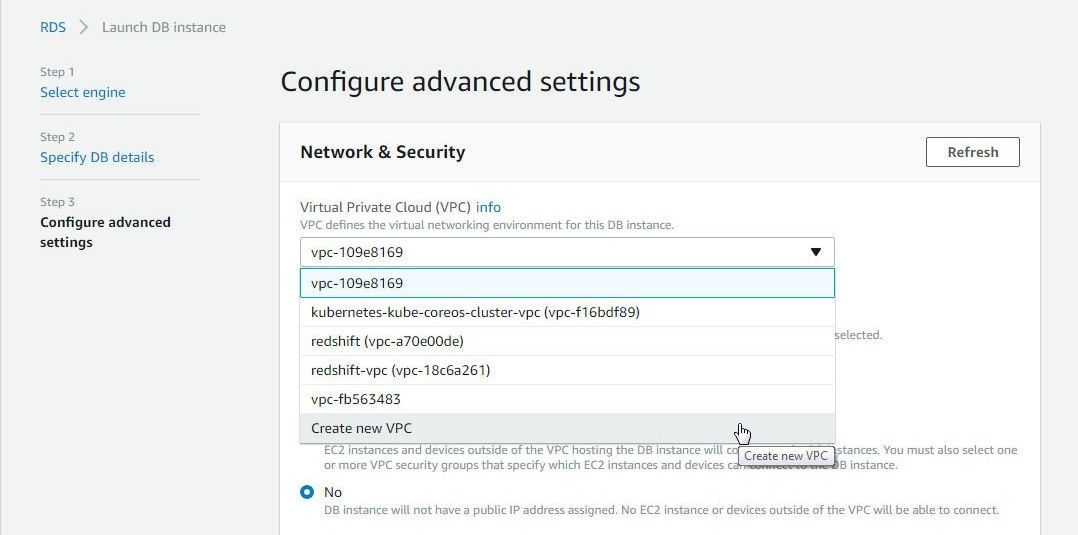
Figure 6. VPC>Create new VPC
To be able to access the Aurora DB instance outside the VPC select Public accessibility as Yes as shown in Figure 7. Select Availability zone as No preference and select the option to Create new VPC Security group.
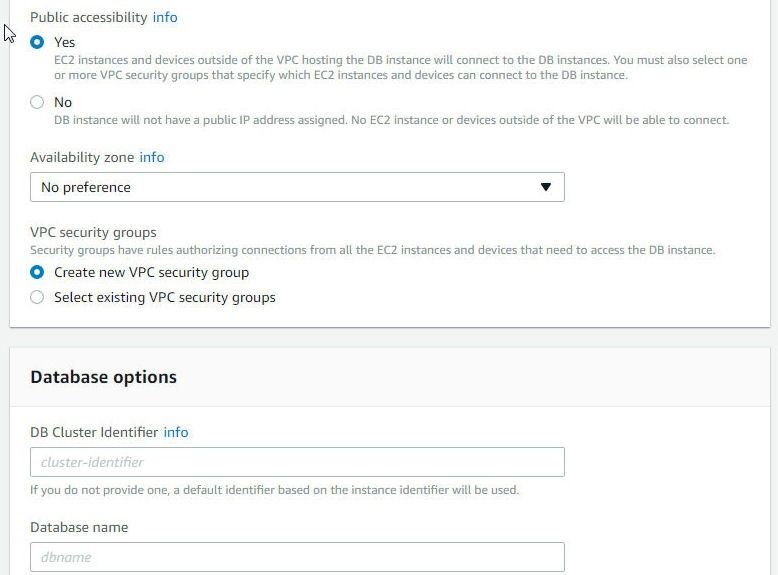
Figure 7. Selecting Public Accessibility as Yes
Next, specify the Database Options, which include a DB Cluster Identifier (postgres), Database Name (postgres), and Database Port (5432), as shown in Figure 8.
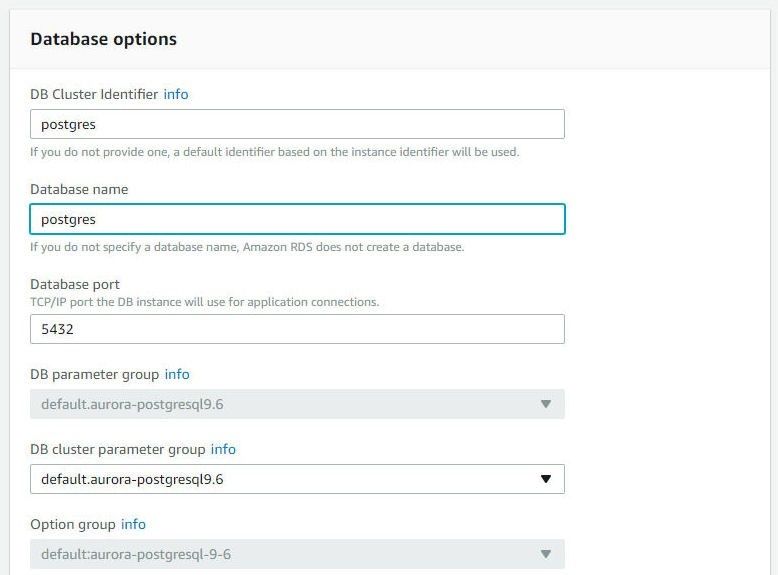
Figure 8. Specifying Database Options
In Encryption section select Enable Encryption and select a Master key as shown in Figure 9.
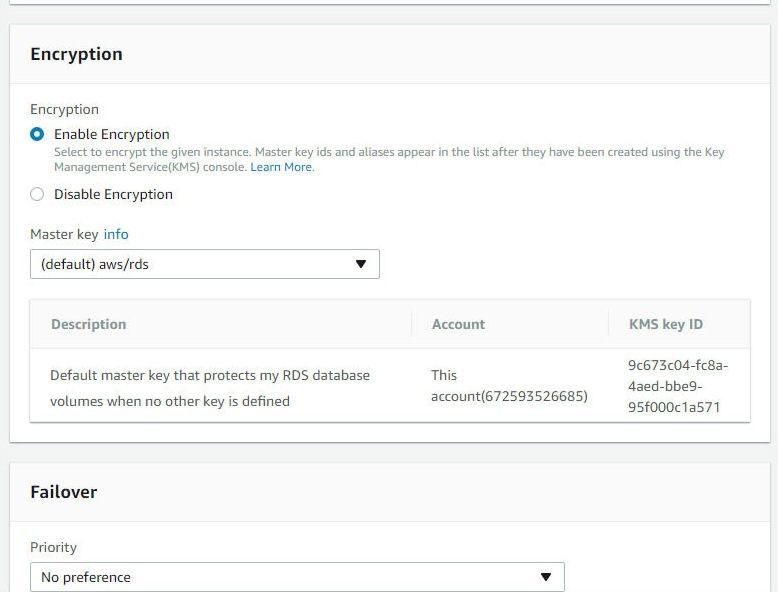
Figure 9. Configuring Encryption
Select a Failover Priority, the default being No preference as shown in Figure 10. In Backup keep the default setting for Retention period. Select to Disable Enhanced Monitoring.
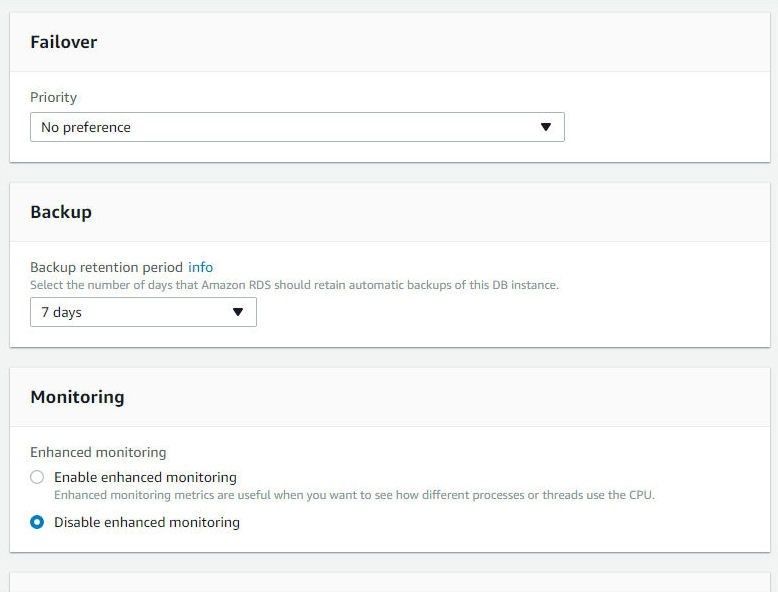
Figure 10. Configuring Failover, Backup and Monitoring
The other settings that may be configured are Performance Insights and Maintenance. Click on Launch DB Instance as shown in Figure 11.
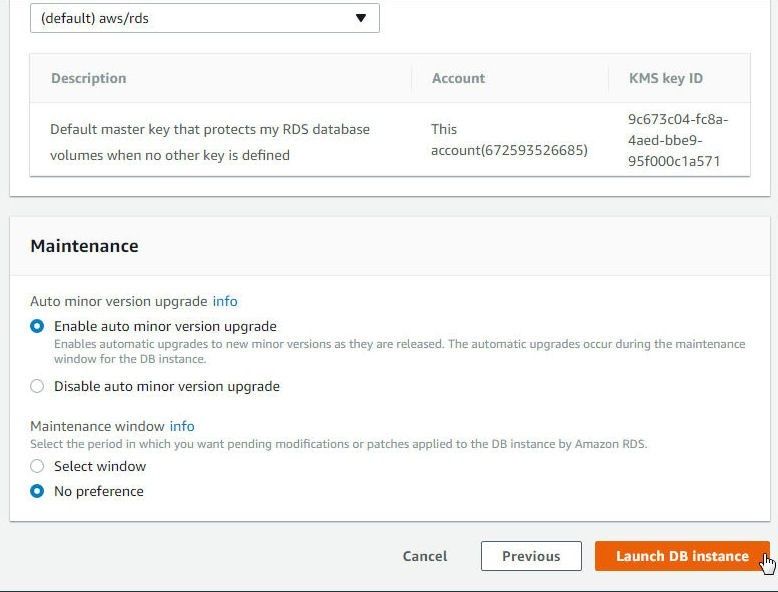
Figure 11. Launch DB Instance
A new VPC and Subnet Group get created. Click on View DB Instance Details. An Aurora DB cluster gets created, as shown in Figure 12.
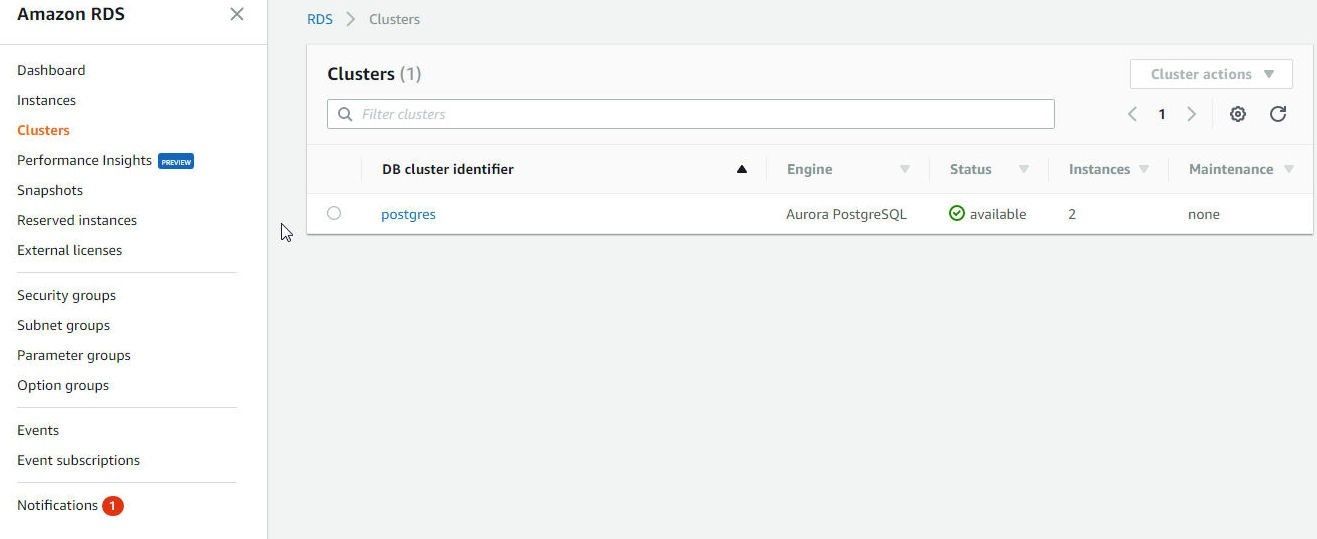
Figure 12. Aurora DB Cluster Created
Click on RDS>Instances in the RDS Console to display the Primary instance and replica as shown in Figure 13.
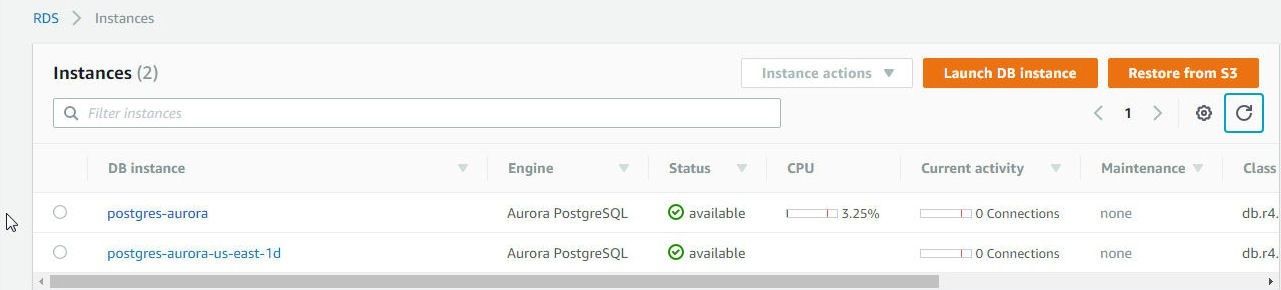
Figure 13. RDS Instances
Getting Aurora DB Configuration Information
To get configuration information detail including the endpoint to connect to, click on the Primary instance link as shown in figure 14.
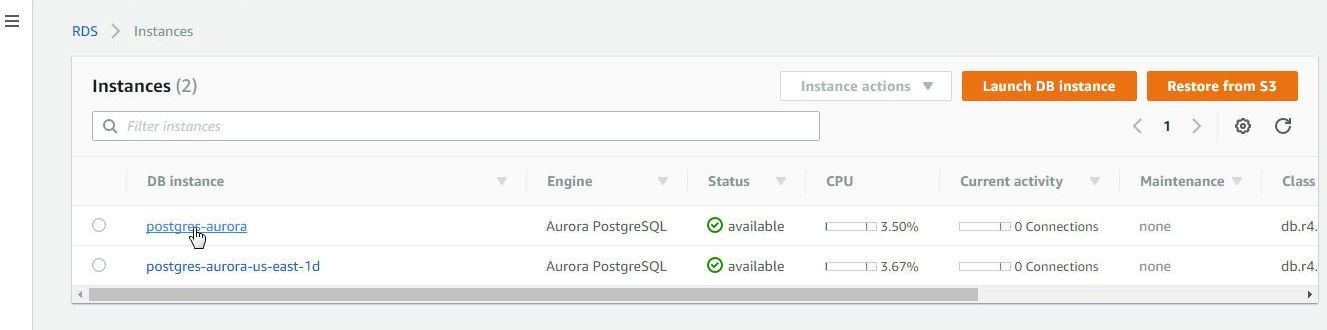
Figure 14. Primary Instance link
In the RDS>Instances>postgres-aurora Summary and Details page the cluster endpoint at which the RDS DB instance may be connected to is displayed in the Connect section, as shown in Figure 15.
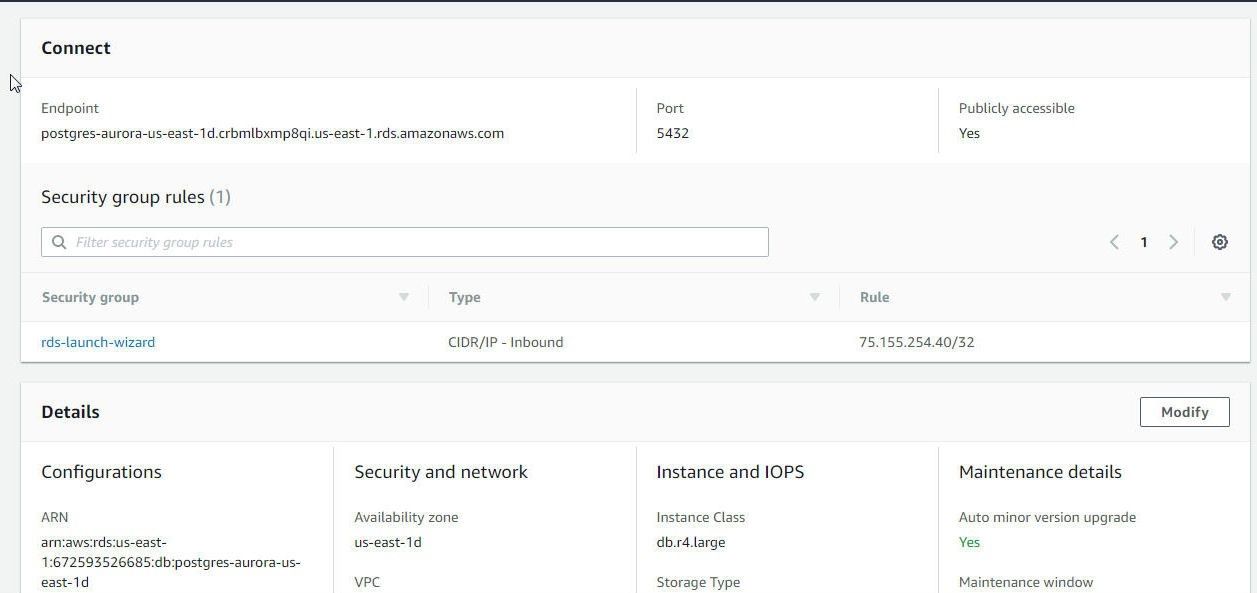
Figure 15. Connect>Endpoint
The Details section lists the DB Name and Username among other settings, as shown in Figure 16.
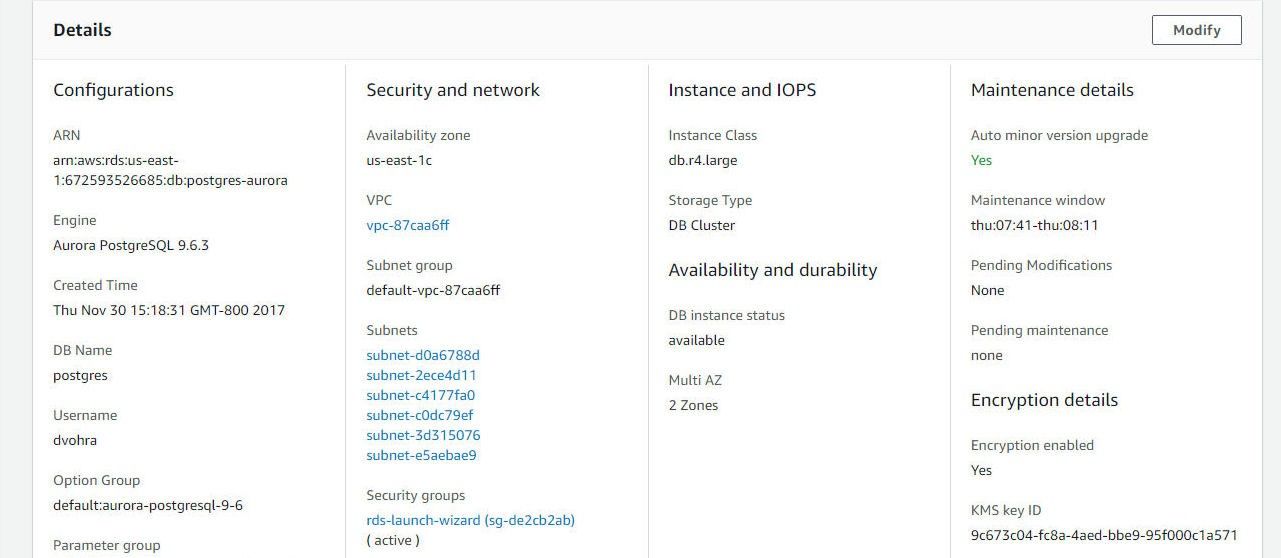
Figure 16. Details
Configuring Connectivity to the Aurora DB
The default Security group for a RDS DB instance in a VPC has only one Inbound rule configured of type CIDR/IP which allows access from a specific IP address in a VPC. To allow access from the machine on which Toad Data Point is installed the Security group needs to be modified. Click on the Security group link in the Details section as shown in Figure 17.
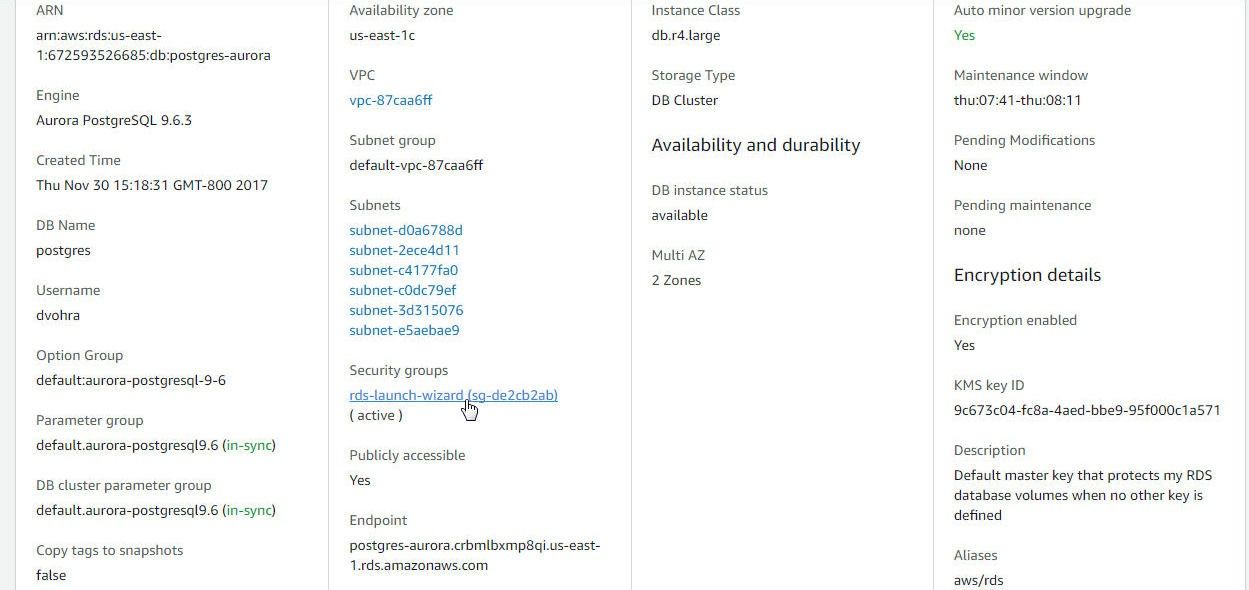
Figure 17. Security group link
Select the Inbound tab and click on Edit for the inbound rule as shown in Figure 18.
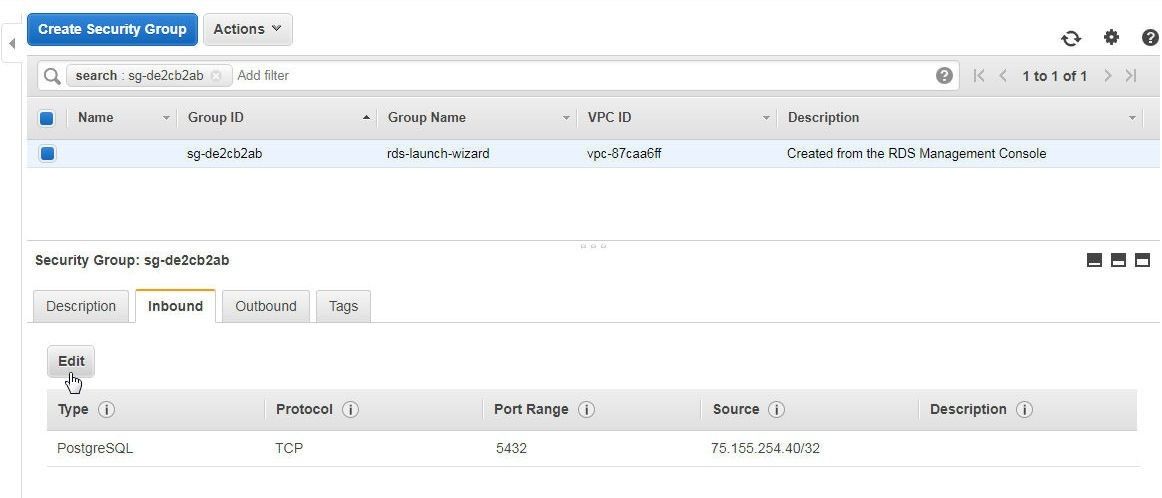
Figure 18. Security group>Inbound>Edit
In Edit Inbound rules add the IP address of the machine on which the Toad Data Point is installed. If the IP address is not known, cannot be ascertained, or if access from multiple IP addresses is required, select Type as All traffic, Protocol as All, Port Range as 0-65535, Source as Anywhere, as shown in Figure 19. Click on Save.
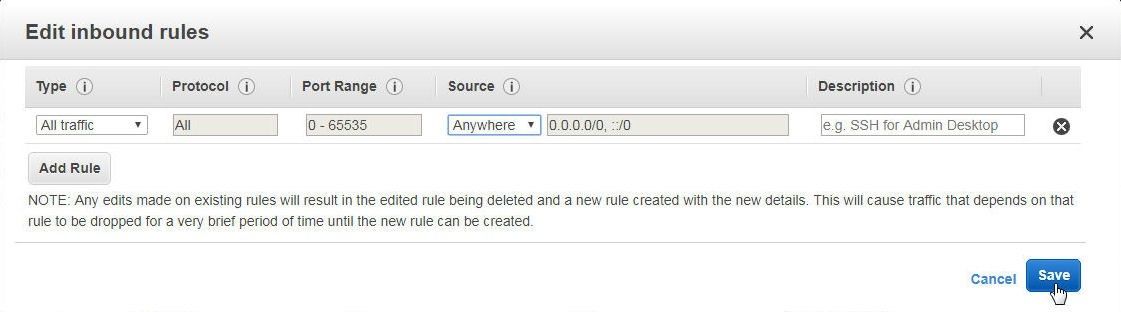
Figure 19. Edit inbound rules
The modified Inbound rules are shown in Figure 20.
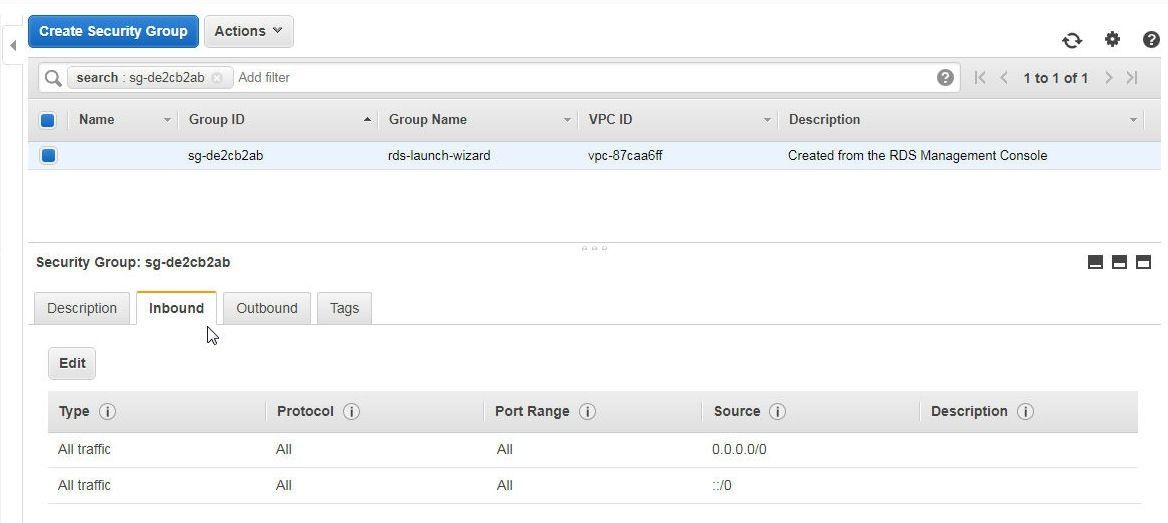
Figure 20. Modified Inbound Rules
Configuring ODBC Data Source for PostgreSQL-Compatible Aurora
In this section we shall configure an ODBC Data Source for PostgreSQL database. Select Data Sources (ODBC) in Administrative Tools as shown in Figure 21.

Figure 21. Administrative Tools>ODBC Data Sources
Select System DSN (not User DSN) and select PostgreSQL35W data source as shown in Figure 22. Click on Configure. If the PostgreSQL35W data source is not listed click on Add… to add a data source for the PostgreSQL Unicode (64x) driver.
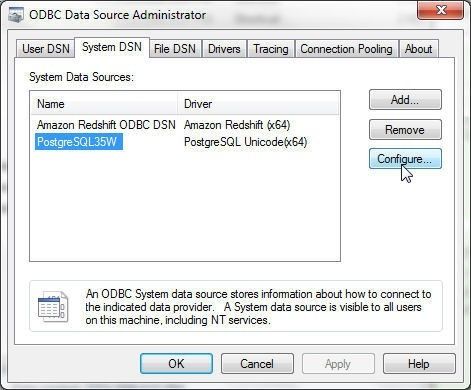
Figure 22. PostgreSQL35W Data Source>Configure
In the PostgreSQL Unicode ODBC Driver Setup specify Database as postgres, and Server as the Endpoint copied from the Connect section in Figure 15. Specify Port as 5432 and user Name and Password as the Master Username and Master Password, respectively. Click on Test as shown in Figure 23.

Figure 23. Testing a PostgreSQL Unicode ODBC Driver Setup
A Connection Successful message in a Connection Test window gets displayed if a connection gets established, as shown in Figure 24.
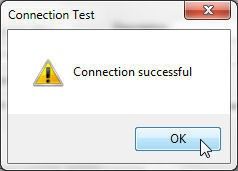
Figure 24. Connection Test
Click on Save to save the PostgreSQL Unicode ODBC Driver Setup as shown in Figure 25.
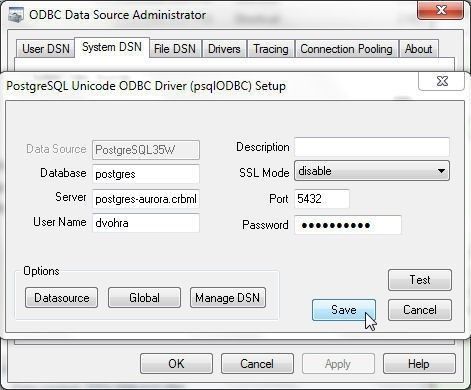
Figure 25. Save PostgreSQL Unicode ODBC Driver Setup
Click on OK in the ODBC Data Source Administrator as shown in Figure 26.
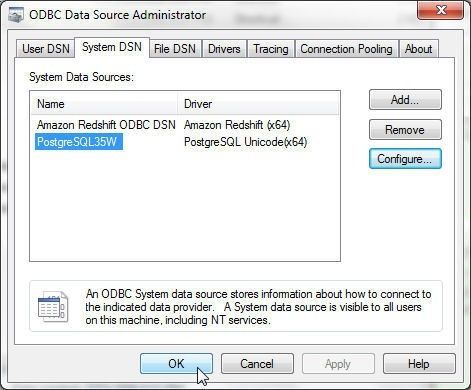
Figure 26. ODBC Data Source Administrator>OK
Creating a Connection to PostgreSQL-compatible Aurora DB
To create a connection to PostgreSQL-compatible Aurora DB click on Connect>New Connection in Toad Data Point as shown in Figure 27.
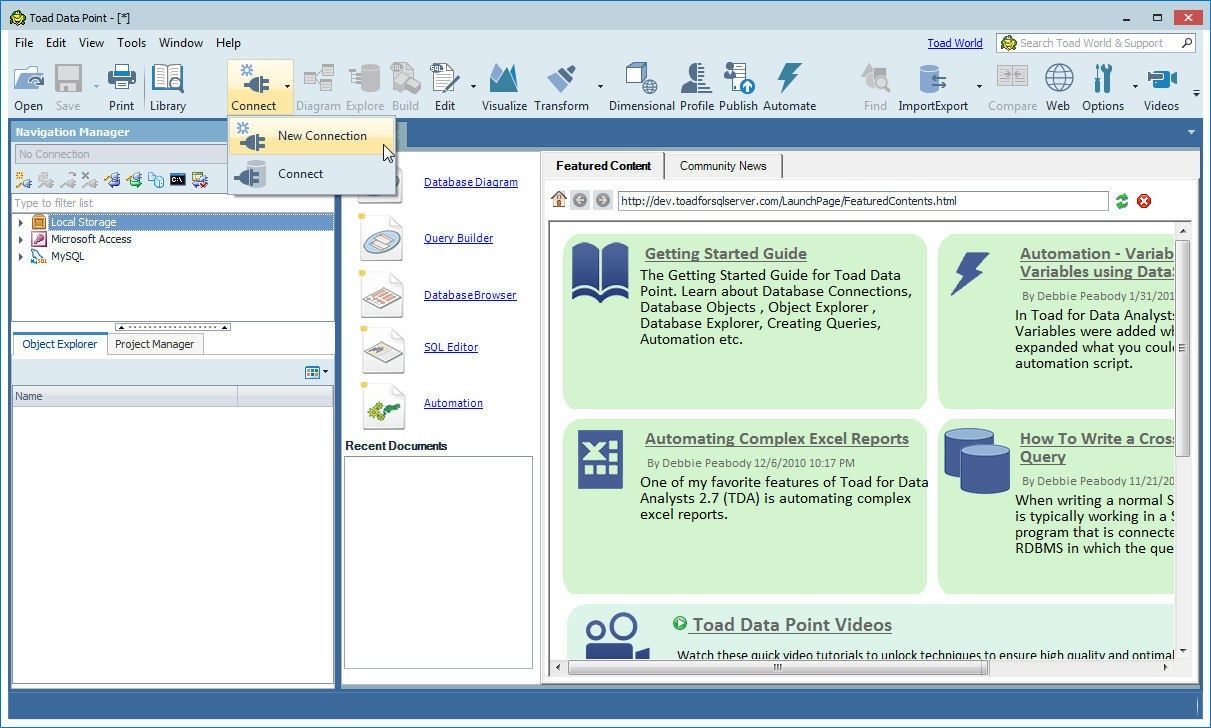
Figure 27. Connect>New Connection
In the list of data sources select PostgreSQL from the list of Relational Data Sources as shown in Figure 28.
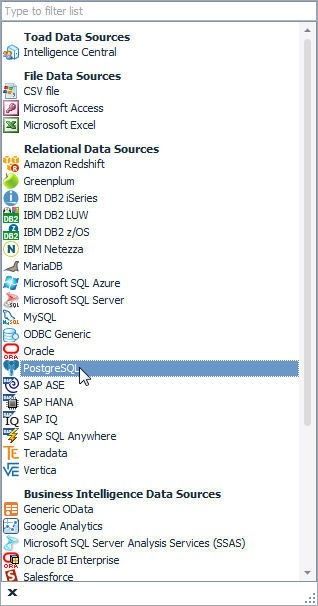
Figure 28. Selecting Relational Data Sources>PostgreSQL
In Create New Connection wizard, click in the Use data source name checkbox and click on the selector button (…) for the Data source name field as shown in Figure 29.

Figure 29. Create New Connection wizard
Select the PostgreSQL35W data source as shown in Figure 30.
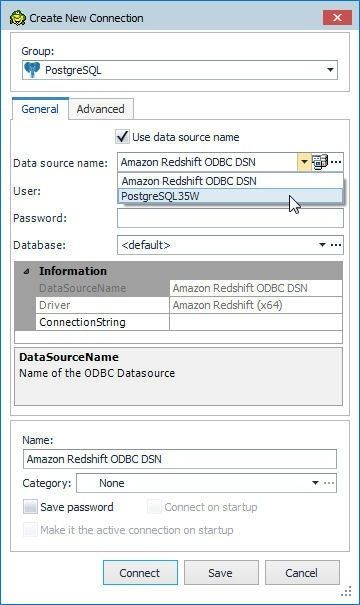
Figure 30. Selecting the PostgreSQL35W Data Source
Specify User and Password as the Master Username and Master Password as shown in Figure 31. Click on the selector button (…) for the Database field.
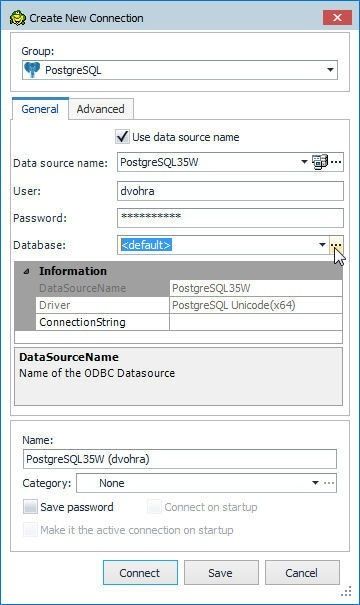
Figure 31. Selecting Database
A confirmation dialog gets displayed prompting the user whether to Continue, as shown in Figure 32. Click on Yes.
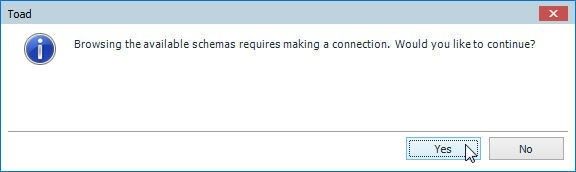
Figure 32. Confirmation Dialog
Select the Database public as shown in Figure 33.
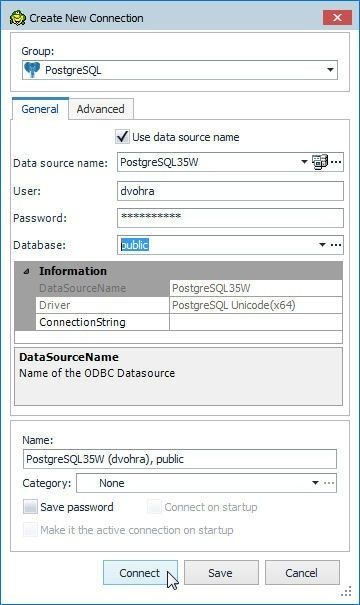
Figure 33. Selecting the public Schema
A connection to Aurora DB instance gets created, as shown in the Navigation Manager in Figure 34.
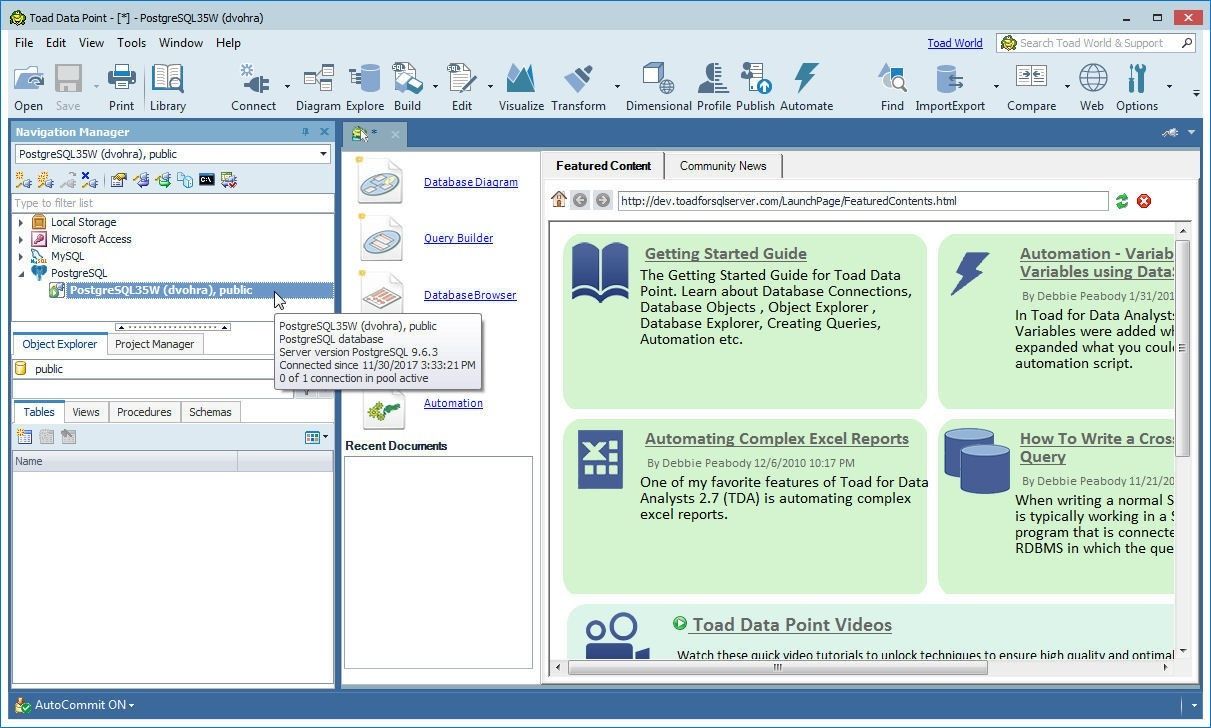
Figure 34. Connection added
Creating a Database Table with Create Table Wizard
To create a new database table select the public schema in the Object Explorer and, with the Tables tab selected, click on Create a table as shown in Figure 35.
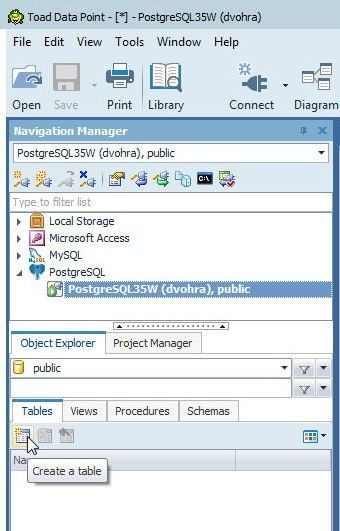
Figure 35. Object Explorer>Tables>Create a table
The Create Table wizard gets launched, as shown in Figure 36.

Figure 36. Create Table wizard
We shall create a table definition for a table called wlslog with fieldslogid (int) as primary key, and fields category, type, servername, code, msg of type string. Specify the table name (wlslog) in the Name field with the Schema field value preselected as public as shown in Figure 37. Modify the default column name from Column_1 to logid. Select the Not Null checkbox and click on Set Primary Key as shown in Figure 37.
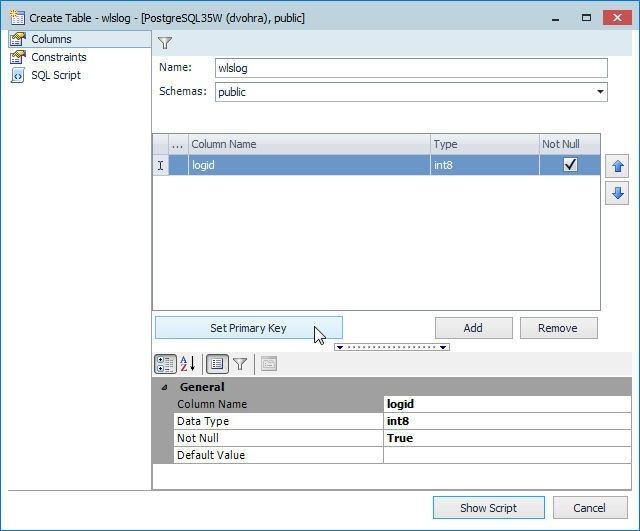
Figure 37. Adding the Primary Key Field logid
Click on Add to add each of the other fields as shown in Figure 38.
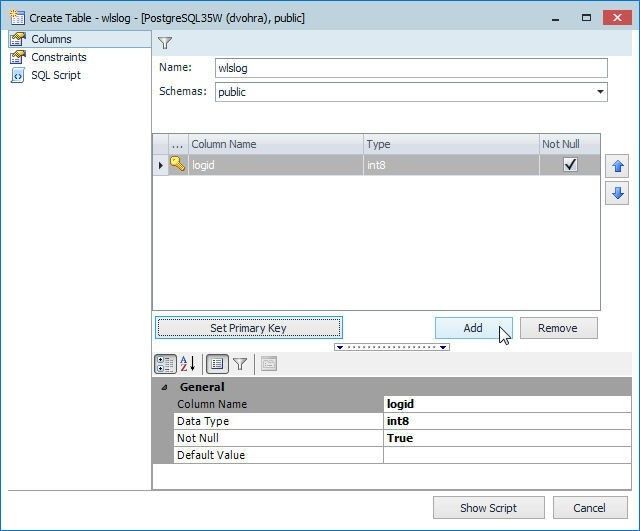
Figure 38. Adding a field with Add
Specify field name in the Column Name column and select field type in the Type column, as shown for the category field of type varchar in Figure 39.
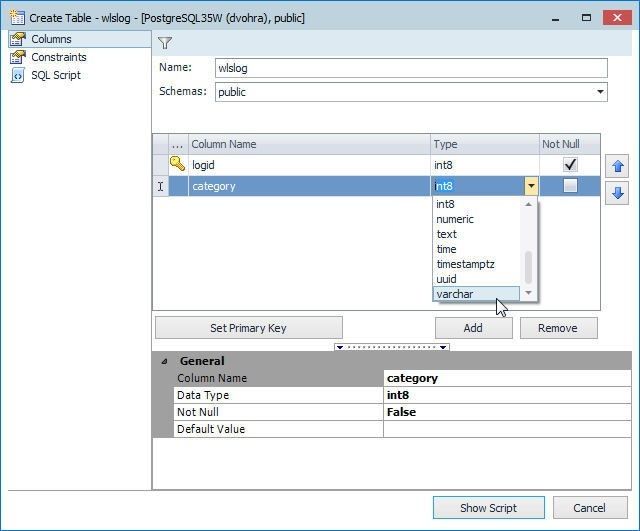
Figure 39. Adding a Field
Similarly, add the other fields as shown in Figure 6. The default length of a field of type varchar is 40.
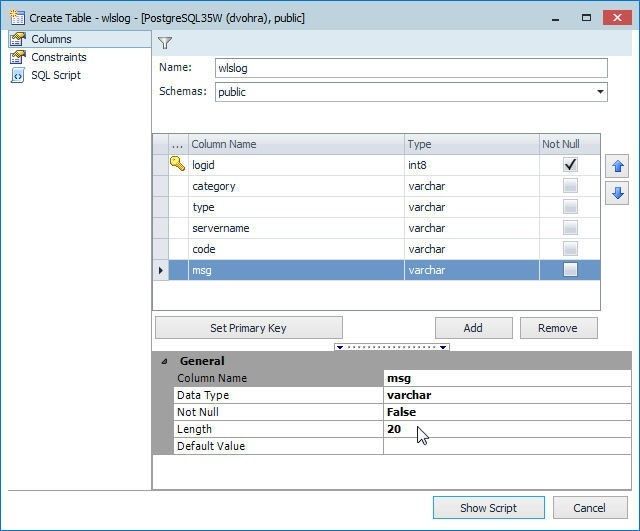
Figure 40. Adding table fields
Modify the Length of the msg field to 255 as shown in Figure 41 and click on Show Script.

Figure 41. Modifying Field Length and Show Script
The DDL SQL script for the table gets displayed, as shown in Figure 42. Click on Execute to run the SQL script.
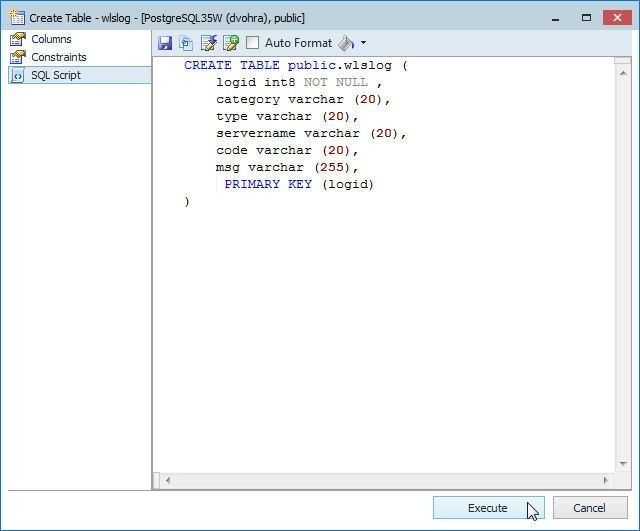
Figure 42. Running the SQL Script to create a table
If the table gets created a Table successfully created dialog gets displayed, as shown in Figure 43.
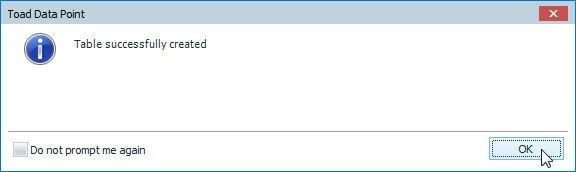
Figure 43. Table successfully created
The new table does not get listed in Object Explorer automatically. Click on View>Refresh All as shown in Figure 44 to list the table.
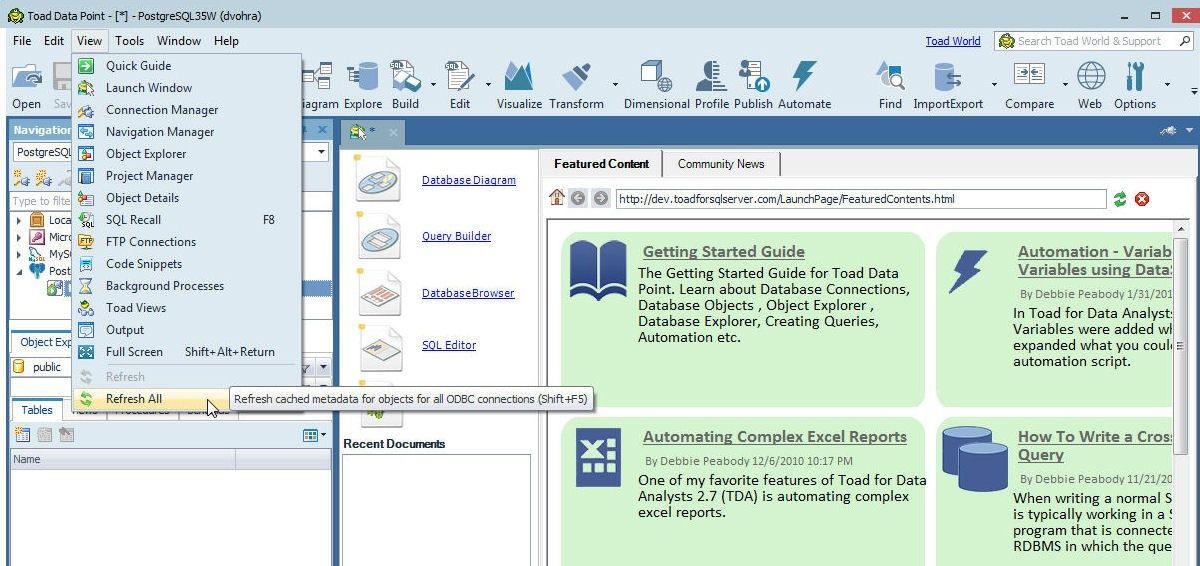
Figure 44. View>Refresh All
Thewlslog table gets listed in Tables tab in Object Explorer as shown in Figure 45.
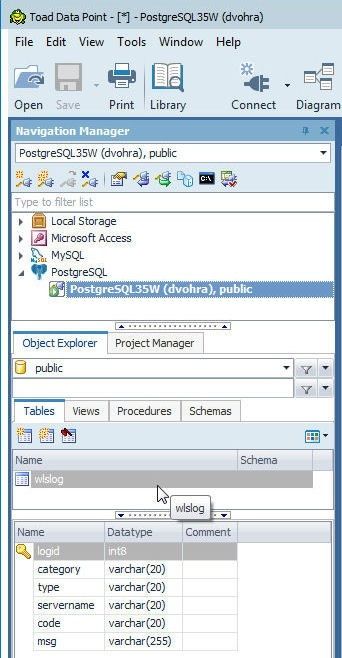
Figure 45. Table wlslog in Object Explorer
Exploring Database Objects
To explore the database objects click on Explore in the toolbar as shown in Figure 46.
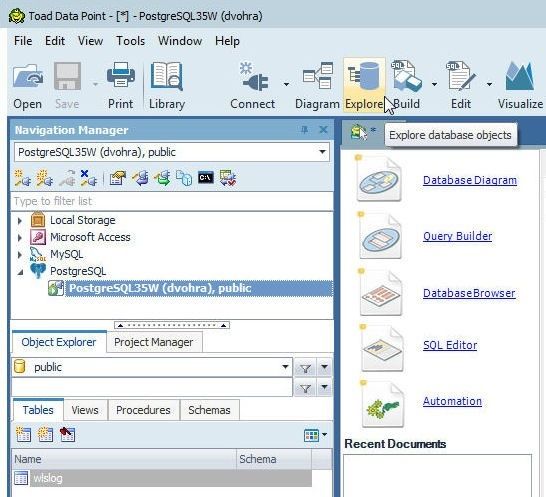
Figure 46. Explore database objects
The Viewer Table wlslog gets displayed as shown in Figure 47. The Columns tab is selected by default.
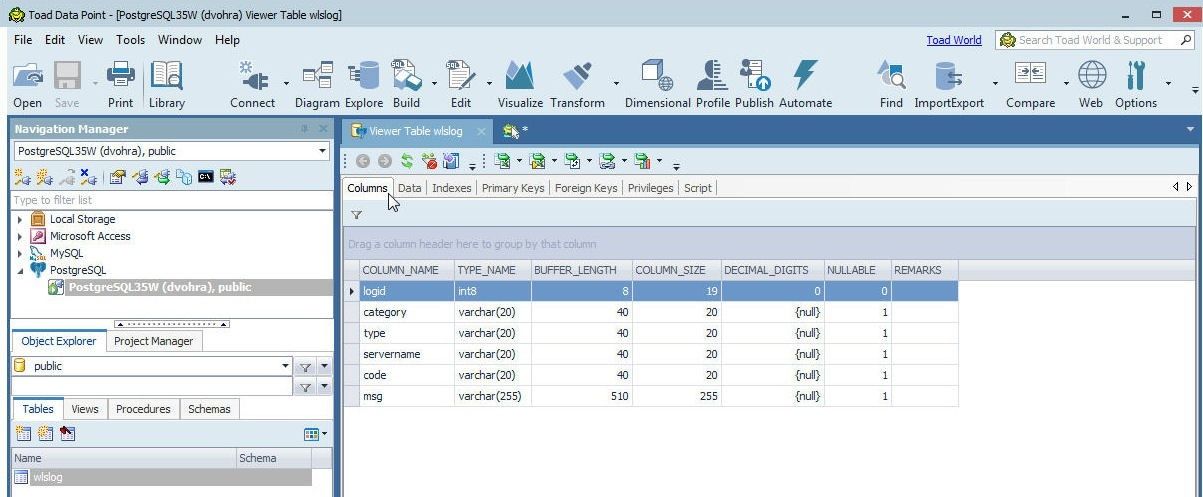
Figure 47. Viewer Table wlslog
Click on the Data tab and no data is selected for the new table, as shown in Figure 48.
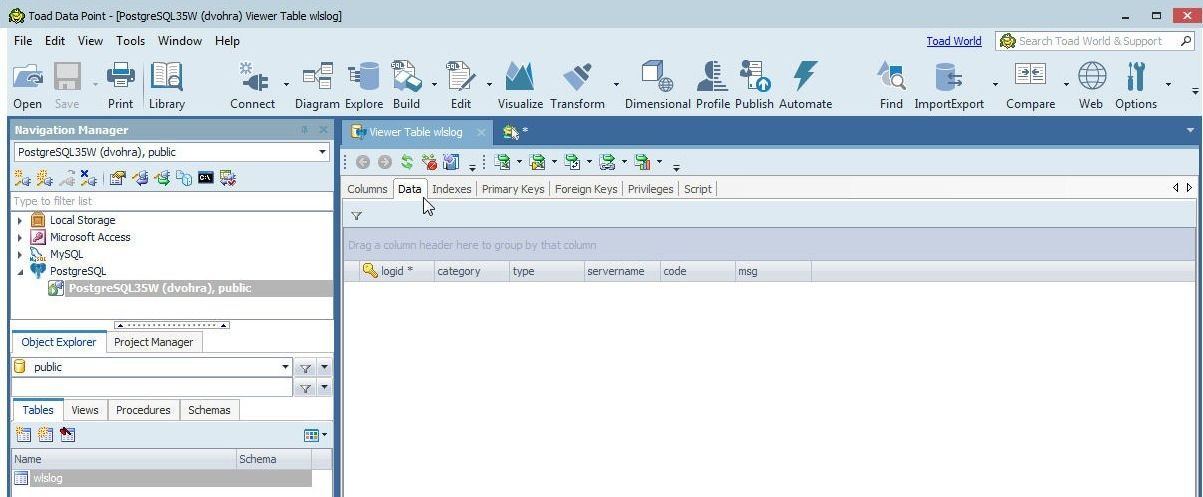
Figure 48. Selecting Data Tab which is empty initially
Importing Table Data from an .XLS Spreadsheet
In this section we shall import table data from an Excel spreadsheet, which is shown in Figure 49. The Excel spreadsheet must have the same column header names as the database table into which data is to be imported.

Figure 49. Excel Spreadsheet from which table data is to be imported
To import data right-click on the wlslogtable in Object Explorer and select Import Wizard as shown in Figure 50.
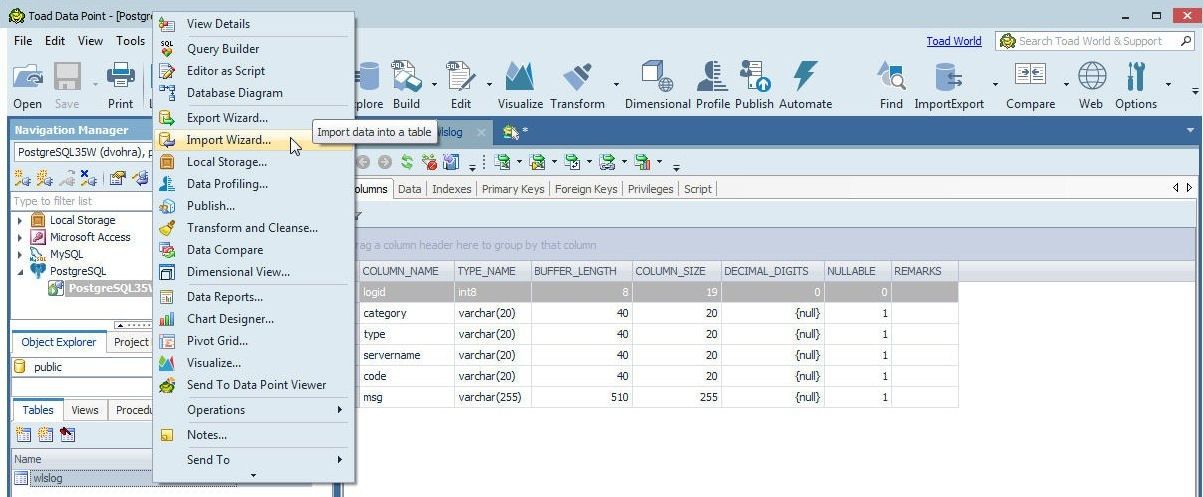
Figure 50. wlslog>Import Wizard
The Import Wizard gets launched, as shown in Figure 51. Click on Add File… to add a field from which data is to be imported.
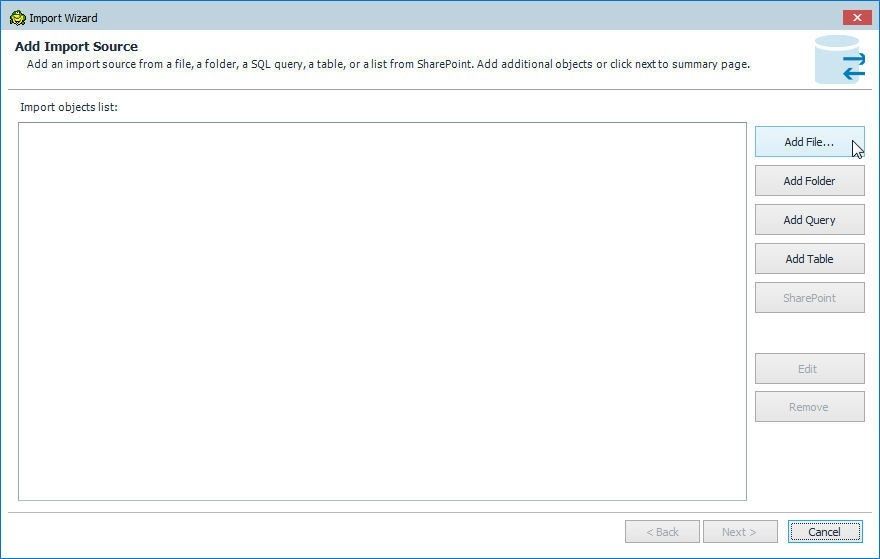
Figure 51. Import Wizard>Add File…
Supported import files formats include .csv, .xls, .xlsx, and .xml. Select the Excel CSV file from which data is to be imported and click on Open as shown in Figure 52.
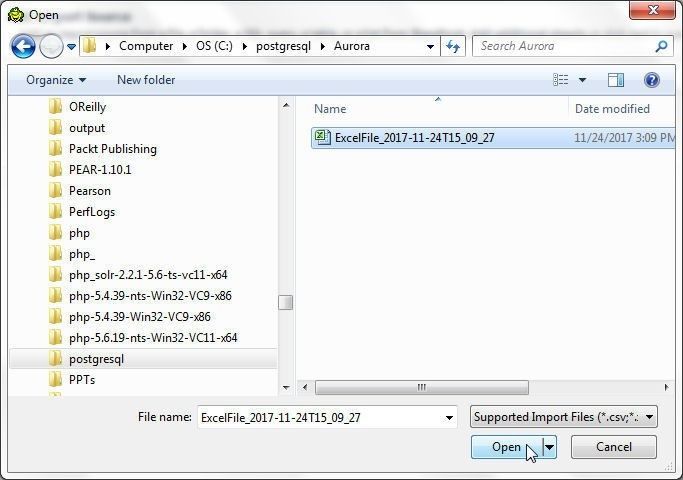
Figure 52. Selecting Excel CSV File to import data from
The File Preview lists the data that is to be imported, as shown in Figure 53. Different checkboxes and drop-down selectors displayed for the data to import are Column name as header, Empty fields are null, Start column, Start row, Transpose all, Normalize column, End column, and End row. The default setting of Auto is kept for the drop-down selectors. The checkboxes Column name as header and Empty fields are null are selected. Click on Next.
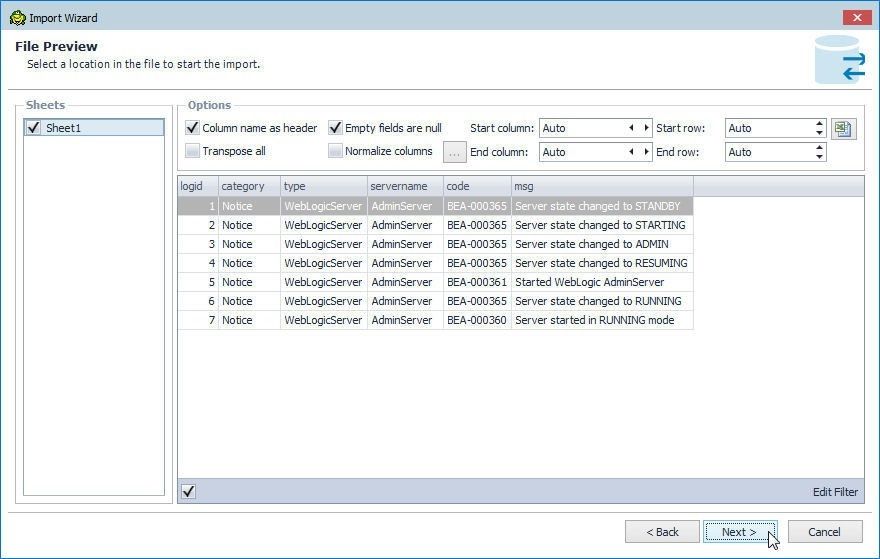
Figure 53. File Preview
In Define columns the columns to include in the import may be selected, as shown in Figure 54. By default data from all columns are imported. Click on Next.
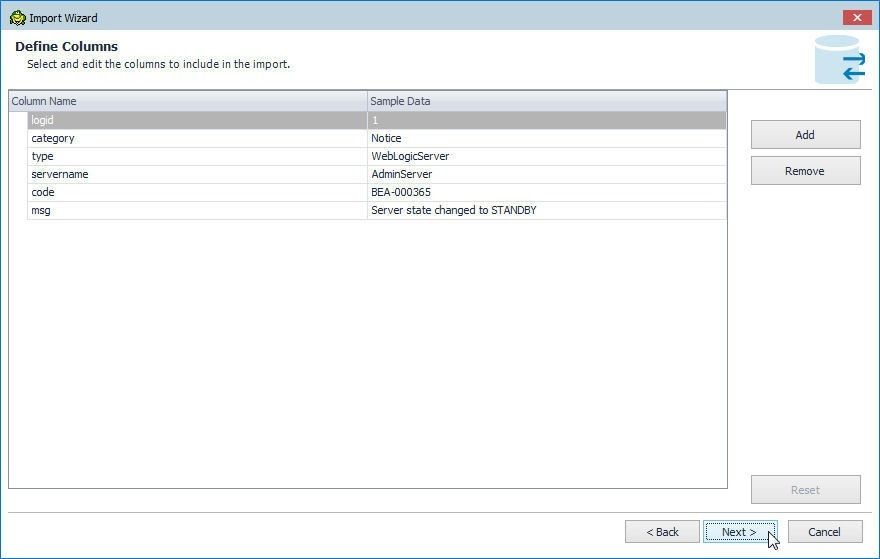
Figure 54. Define Columns
Next, select the target table to import data into in the Select Target window as shown in Figure 55. Select the option Select A Single existing table. The other option is A Single new table. The Target Connection is pre-selected. So are the Database (public) and Tables (wlslog). The Optimize block size is preselected by default to optimize the block size during import. Click on Next.
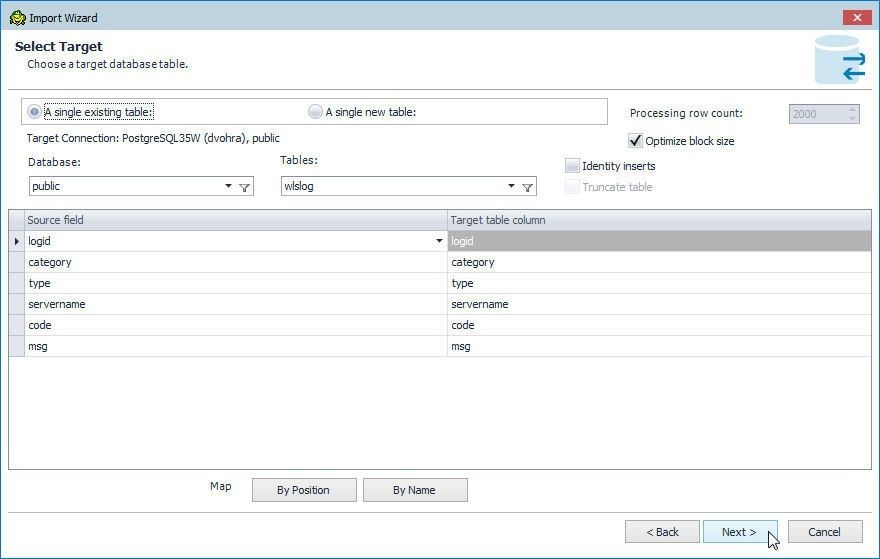
Figure 55. Select Target
Next select the source file, folder, SQL query, table, or a list from SharePoint in Add Import Source as shown in Figure 56.
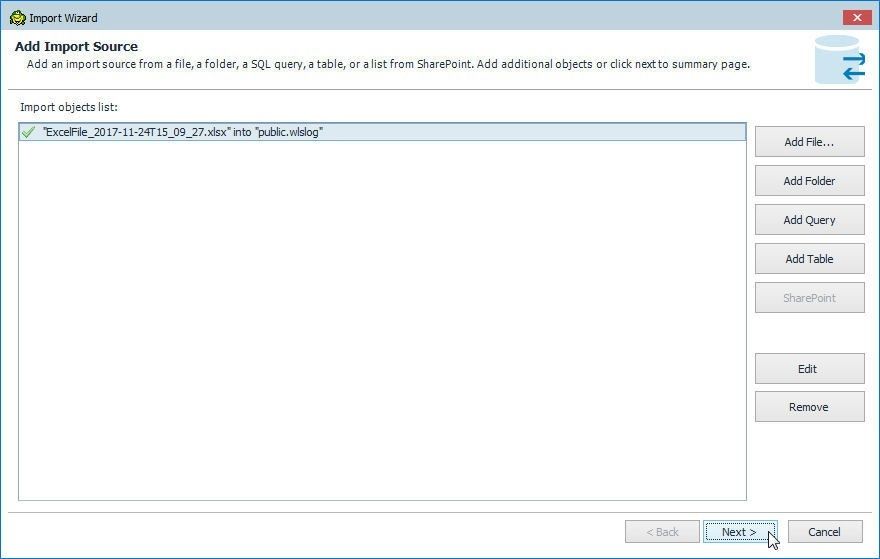
Figure 56. Add Import Source
In Save Settings as Template the options to Import Data Now, Import Data Later, or send to Automation are provided, as shown in Figure 57. Select the default setting of Import Data Now and click on Finish.
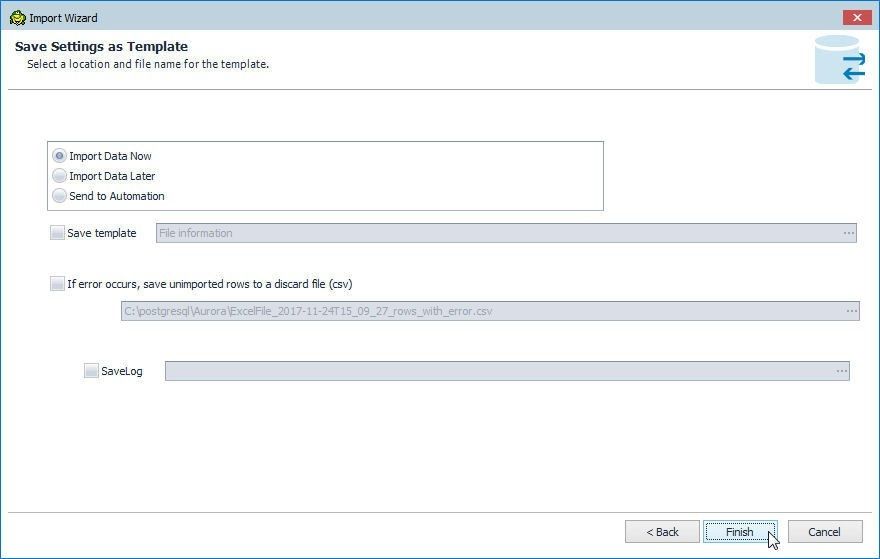
Figure 57. Save Settings as Template
When the import gets completed the Import Finished dialog gets displayed, as shown in Figure 58. The Read Rows column lists the number of rows read, the Imported Rows column lists the number of rows imported, the Status column lists the status of the import, and the File Name column lists the file used to import data from.
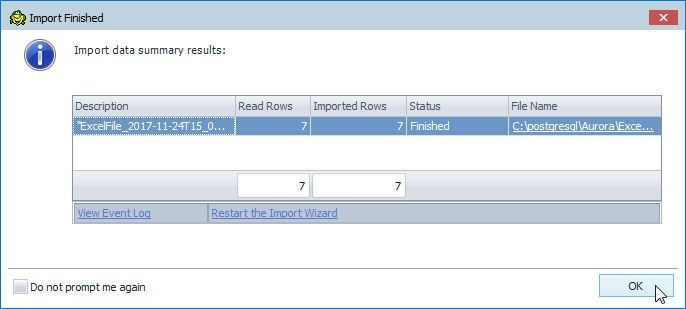
Figure 58. Import Finished
In the Viewer Table wlslog launched by selecting Explore in the toolbar, the Data tab still does not list any data, as shown in Figure 59, even though the import has completed, because the Viewer Table needs to be refreshed.
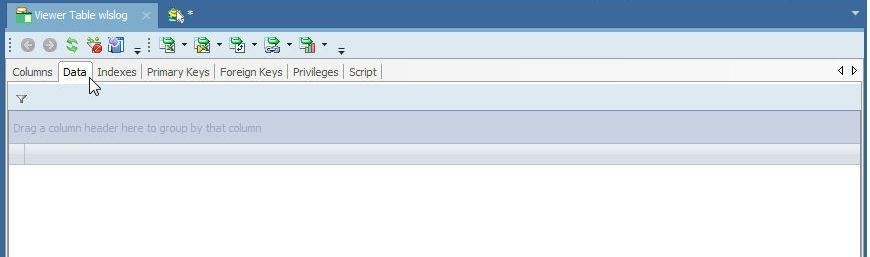
Figure 59. Data tab is still empty
Click on Refresh as shown in Figure 60 to refresh the Viewer Table wlslog.
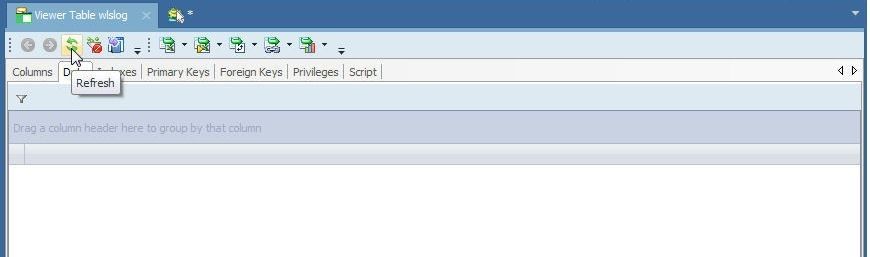
Figure 60. Viewer Table>Refresh
The data imported gets listed, as shown in Figure 61.

Figure 61. Data Imported
If while importing the connection gets disconnected, or the connection is disconnected to start with, right-click on the connection in the Navigation Manager and select Connect as shown in Figure 62.
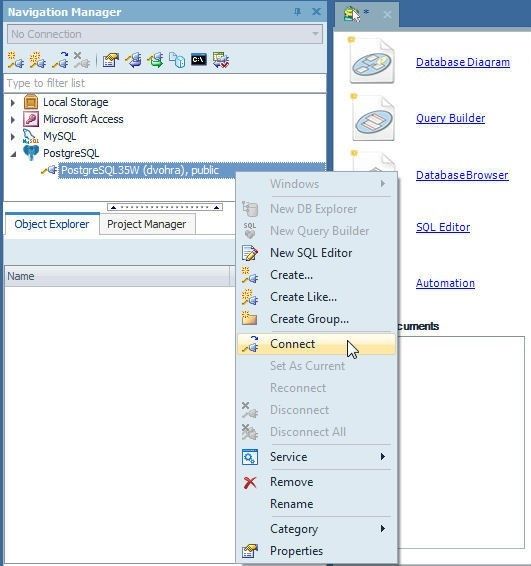
Figure 62. Connect
The Need More Information dialog gets displayed; in which, specify the Password and click on Connect as shown in Figure 63.
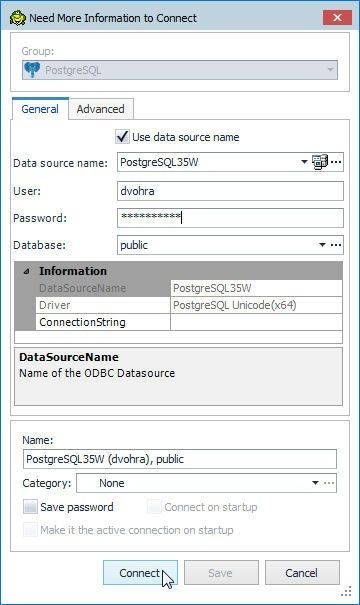
Figure 63. Need More Information
A connected connection is shown in Figure 64.
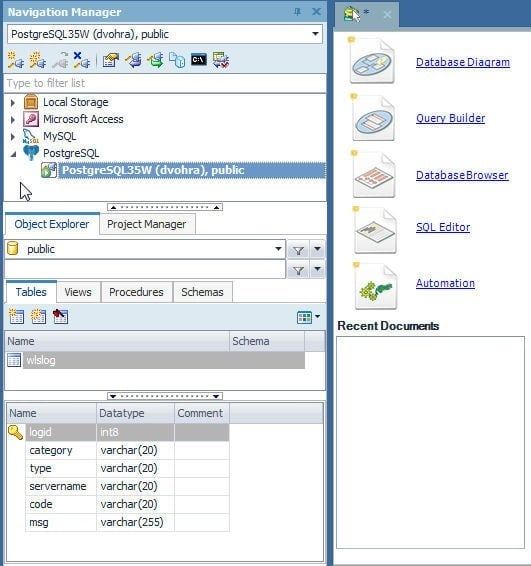
Figure 64. A Connected Connection
Querying Table with Query Builder
The Query Builder is used to query a database table. Click on Build>Query Builder as shown in Figure 65 to start the Query Builder.

Figure 65. Build>Query Builder
Select the wlslogtable from the Object Explorer and drag to the Query Builder as shown in Figure 66.
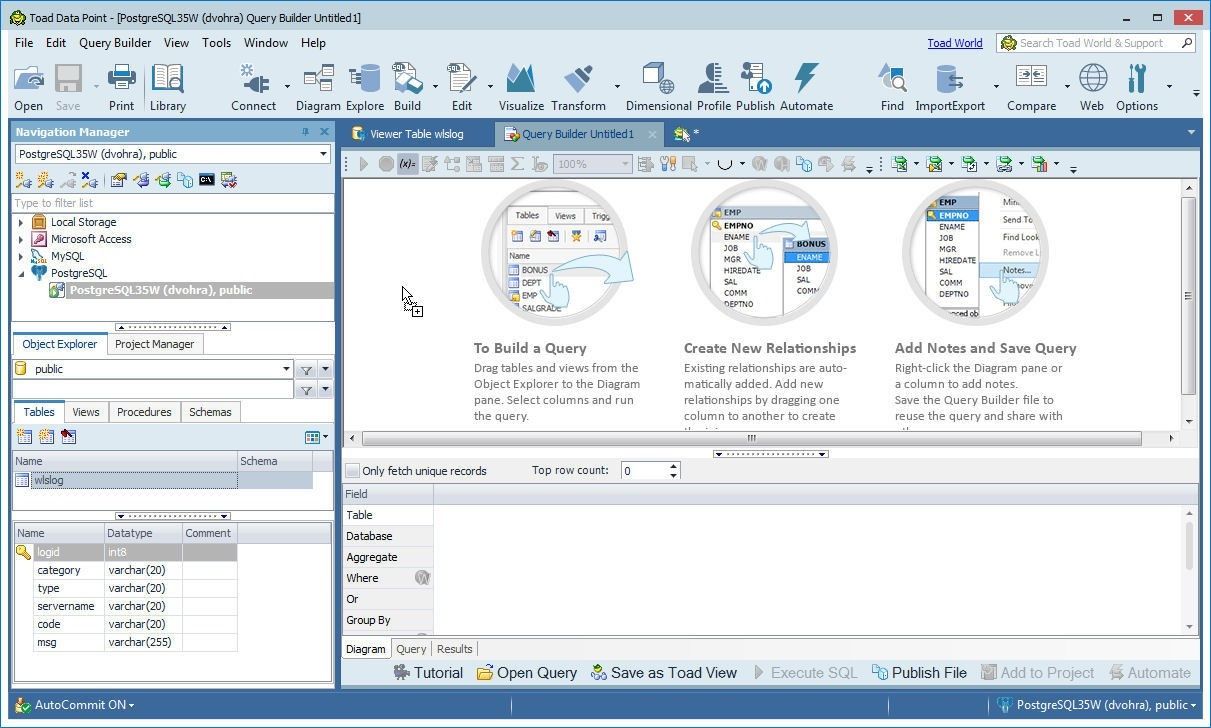
Figure 66. Adding table to Query Builder
A class diagram for the table gets added, as shown in Figure 67. The columns to add to the query that is automatically generated may be selected from the diagram.
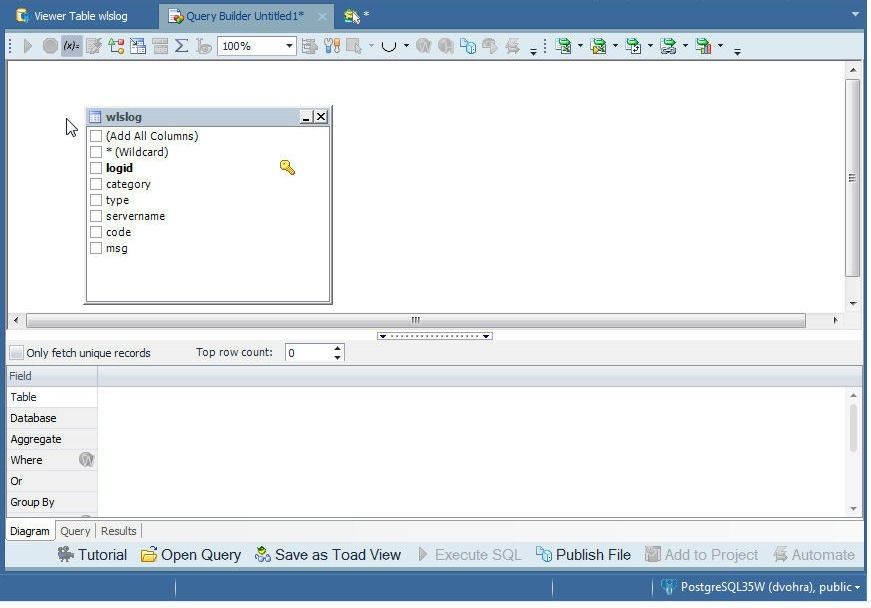
Figure 67. Class Diagram
Select the option Add All Columns as shown in Figure 68 to select all columns to add to the query.
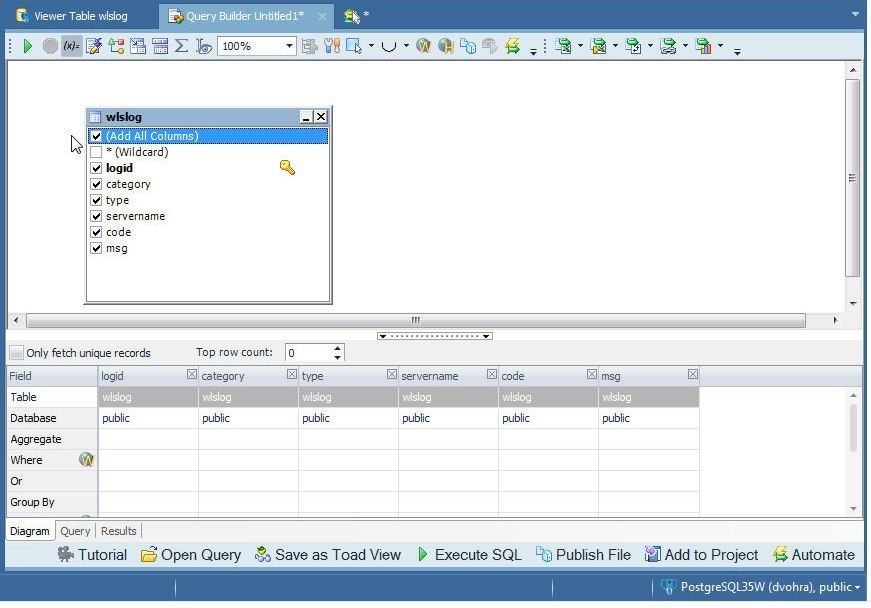
Figure 68. Selecting Add All Columns
Click on Execute the SQL statement as shown in Figure 69 to run the SQL statement.
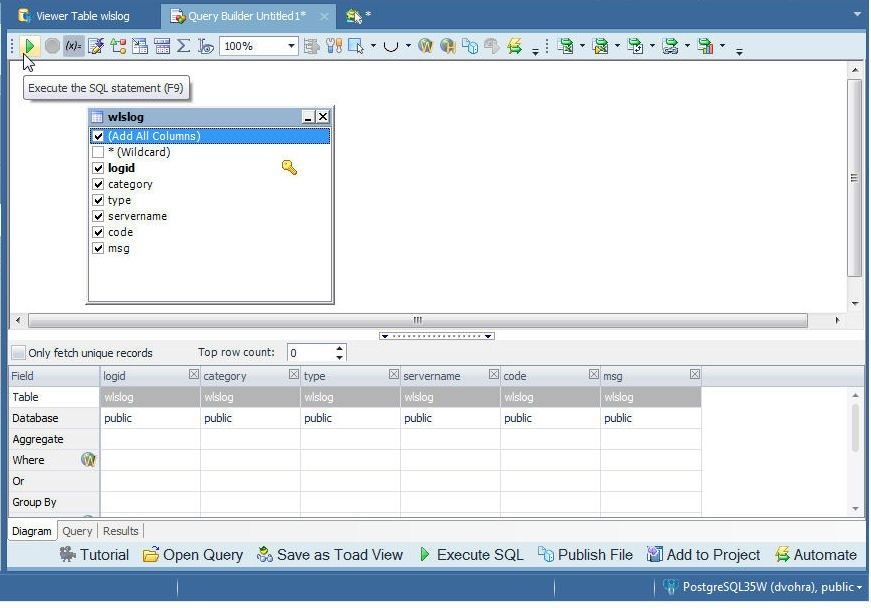
Figure 69. Execute SQL Statement
A result set for the query gets generated, as shown in Figure 70.
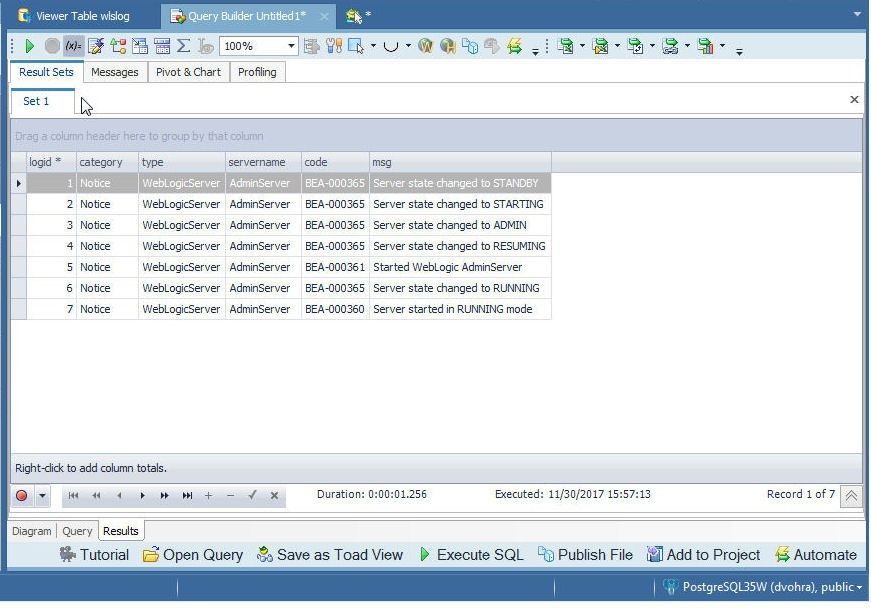
Figure 70. Result Set
Exporting Table Data to HTML
A result set data may be exported to an Excel report, CSV report or HTML report. Select HTML File from the drop-down as shown in Figure 71.
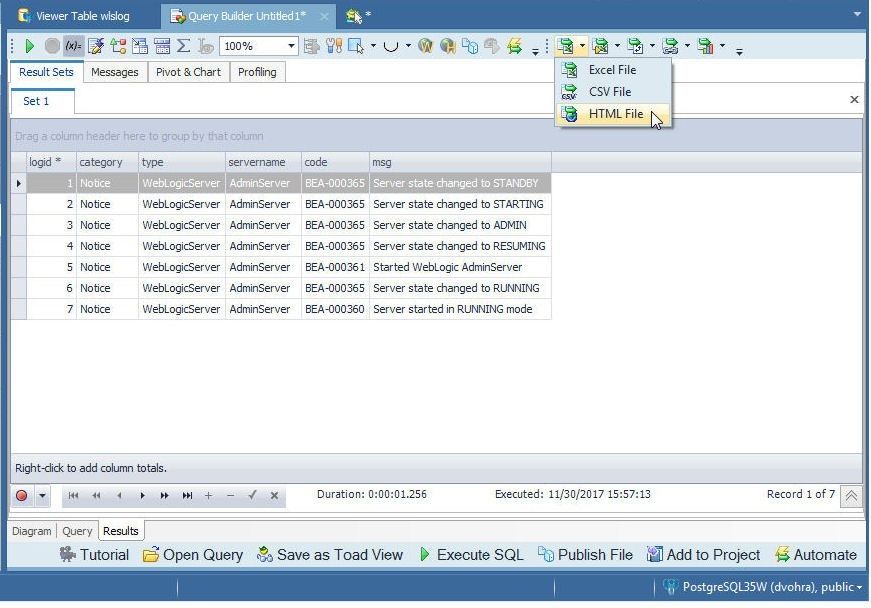
Figure 71. Exporting to an HTML File
When the export gets completed an Export Finished dialog gets displayed, as shown in Figure 72. Click on the File Name link to open the HTML file.
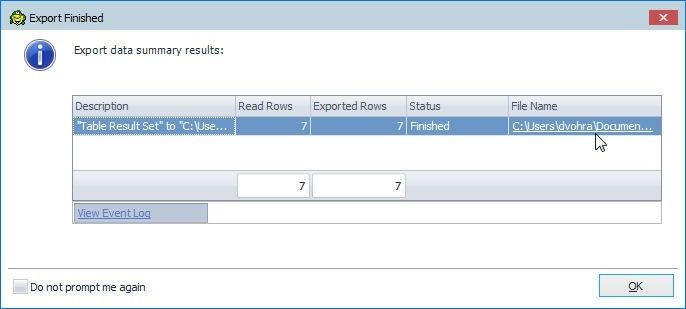
Figure 72. Export to HTML Completed
The HTML File displays the data exported, as shown in Figure 73.
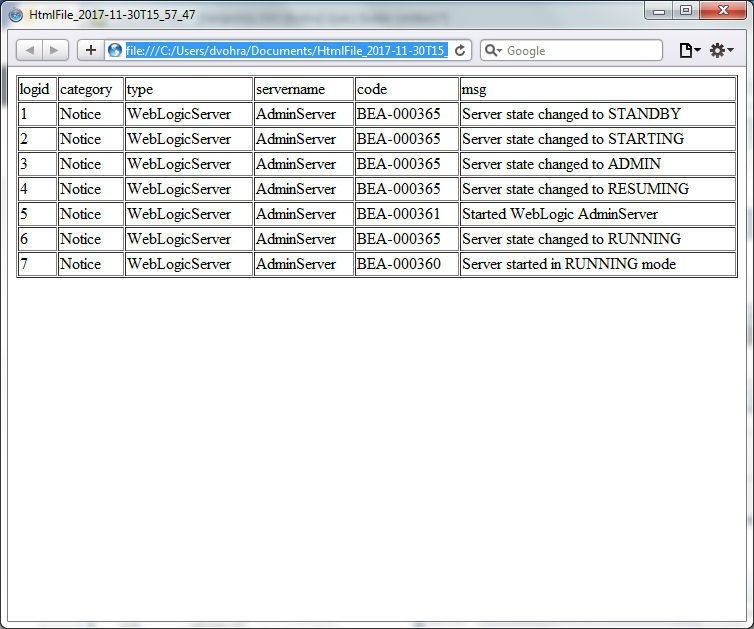
Figure 73. HTML File
Setting the Current Connection
If a single connected exists to a database the connection is the current connection, but if multiple connections exist only one of the connections is the current connection even though all connections could be connected. To demonstrate setting the current connection right-click on a connection and select Create Like… to create another connection, as shown in Figure 74.
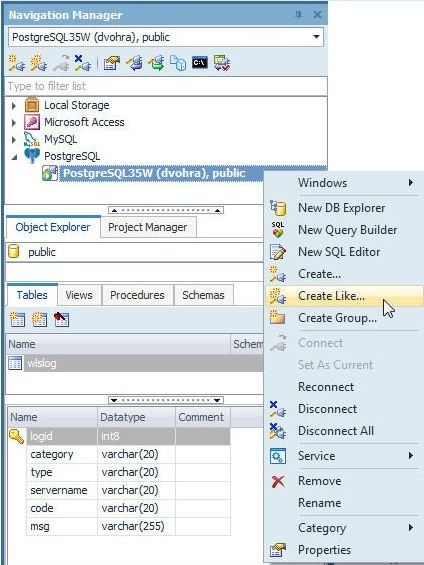
Figure 74. Create Connection Like
The Create New Connection wizard gets launched; in which, specify the Password and click on Connect as shown in Figure 75.
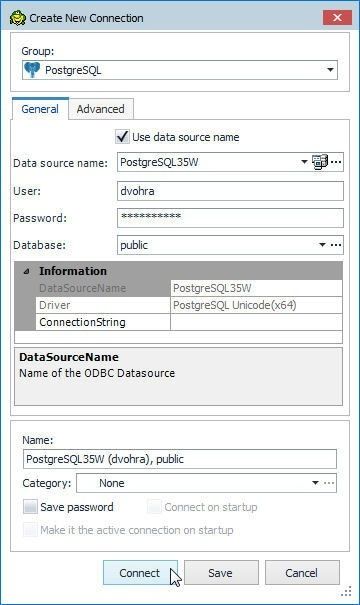
Figure 75. Create New Connection>Connect
A new connection gets created and gets set as the current connection, as shown in Figure 76.
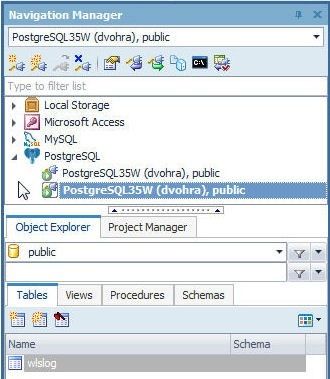
Figure 76. Two Connections with one as the Current Connection
To make the connection that is not current as current, right-click on the connection and select Set As Current as shown in Figure 77.
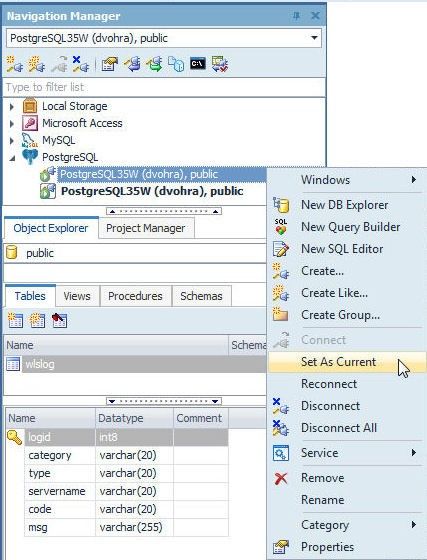
Figure 77. Set As Current…
The connection becomes the current connection as shown in Figure 78.
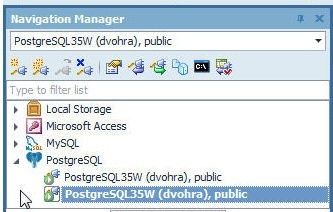
Figure 78. Connection set as current
Disconnecting Connections
To disconnect a particular connection right-click on the connection and select Disconnect. To disconnect all connections select Disconnect All as shown in Figure 79.
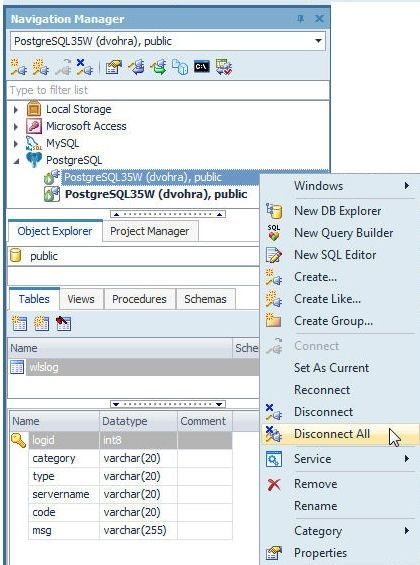
Figure 79. Disconnect All
If any file that has been modified but not saved needs to be saved, a Modified File dialog gets opened with the option to save changes to the file. Click on Yes to save and No not to save, as shown in Figure 80.
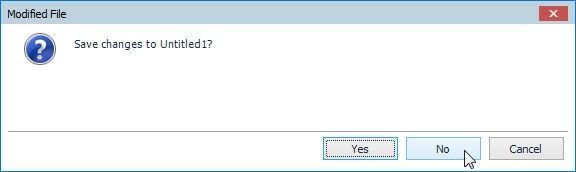
Figure 80. Modified File
The file gets saved if Yes is selected and does not get saved if No is selected and the connection/s get disconnected, as shown in Figure 81.
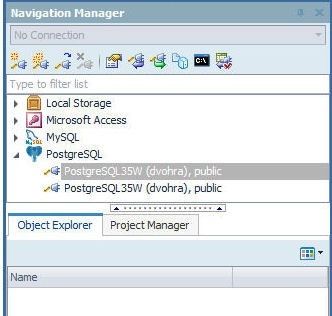
Figure 81. Disconnected Connections
Deleting the Aurora DB
To delete the Aurora DB instances for PostgreSQL-compatible database select the instance to delete and select Instance actions>Delete as shown in Figure 82 for the Primary instance postgres-aurora.
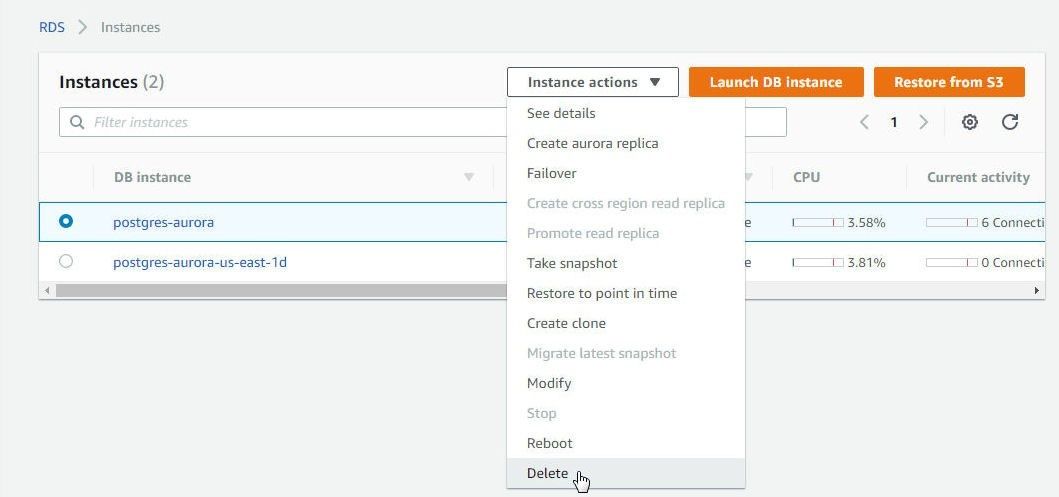
Figure 82. postgres-aurora>Instance actions>Delete
In Delete DB Instance click on Delete as shown in Figure 83.
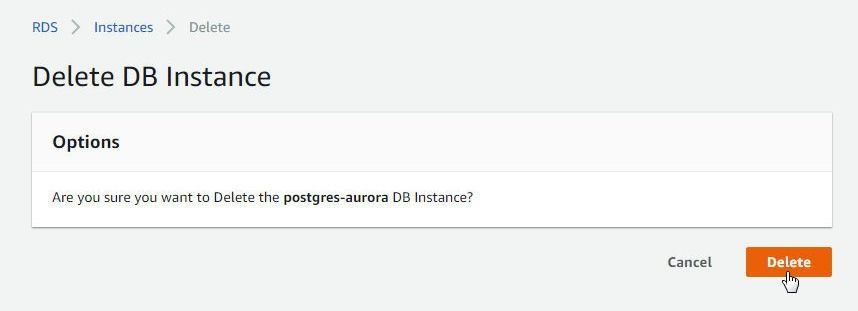
Figure 83. Delete Instance
Similarly, select Instance actions>Delete for the replica instance as shown in Figure 84.
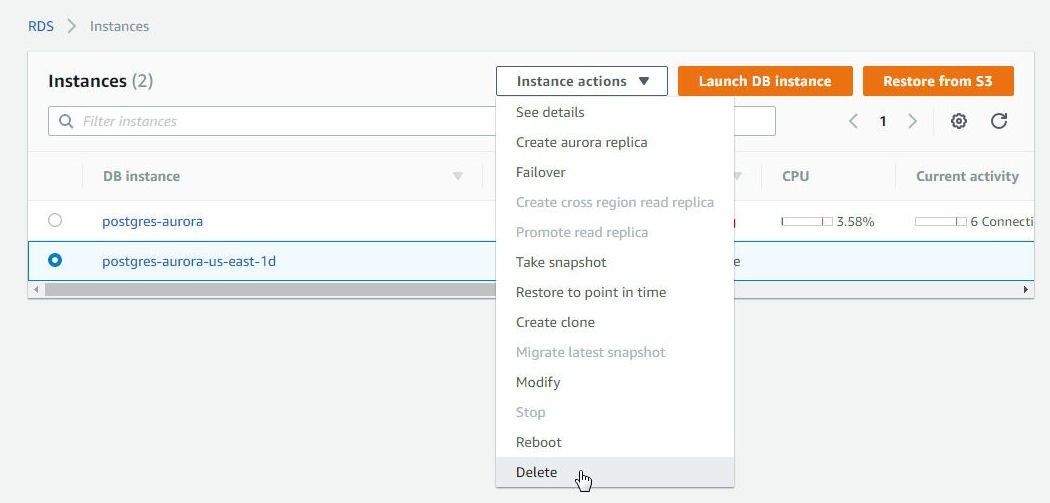
Figure 84. Replica instance>Instance actions>Delete
For the read-only replica/s an option is provided to Create a final replica, as shown in Figure 85.
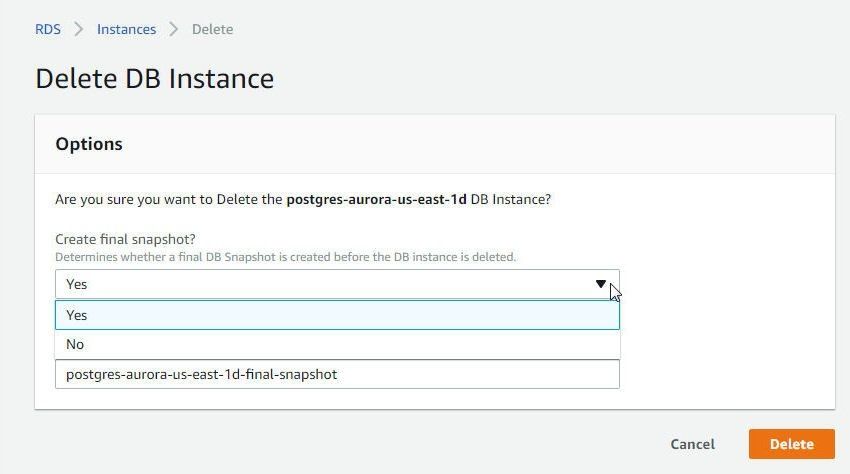
Figure 85. Delete DB Instance Confirmation with an option to create a final snapshot
Select No if a replica is not to be created and click on Delete as shown in Figure 86.
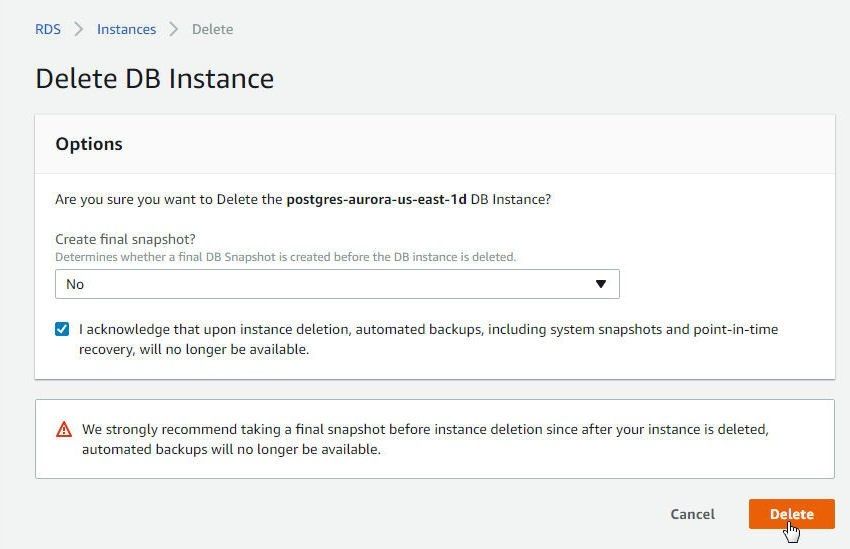
Figure 86. Delete DB Instance>Delete
The Primary Instance and the replica are shown to be deleting in Figure 87.
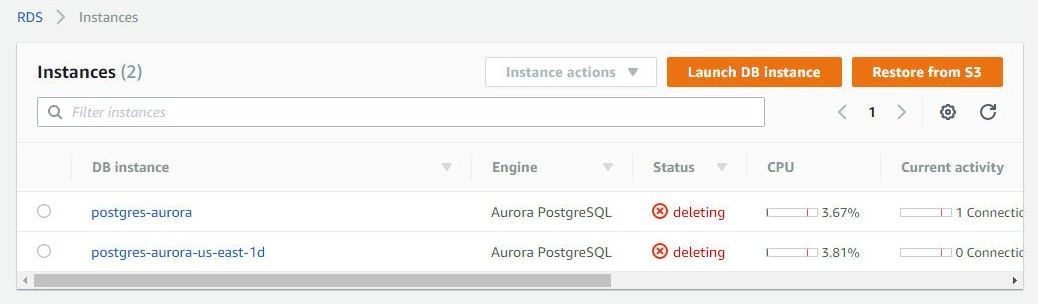
Figure 87. Primary Instance and Replica Deleting
Conclusion
In this article we discussed using a PostgreSQL-compatible Aurora DB instance with Toad Data Point. We introduced Amazon Aurora and Toad Data Point as a client to PostgreSQL-compatible Aurora. We got started by creating a PostgreSQL-compatible Aurora instance. Subsequently we created a connection in Toad Data Point to the Aurora instance. Then we created a database table and explored some of the other features of Toad Data Point as used with Aurora.
When trying to connect the AWS Aurora PostgreSQL DB instance using Toad Data Point, below error message is seen.
Can somebody guide on how to resolve this issue.