In our first article on using Toad Edge 2.0.0 with PostgreSQL on Amazon ECS Fargate we created an ECS service. In this continuation article we shall connect to the ECS service with Toad Edge Preview 2.0.0. But first we need to obtain the connection parameters for the ECS service.
Obtaining Connection Parameters
The connection parameters for the ECS service consist of the Public IP address and the Port. The port is configured as 5432. The Public IP is provisioned automatically and has to be found from the ECS Console. An elastic network interface (ENI) is created for each service. To access the ENI, either launch the ENI console directly in the EC2 Console or click on a task link in the ECS Service console as shown in Figure 1.
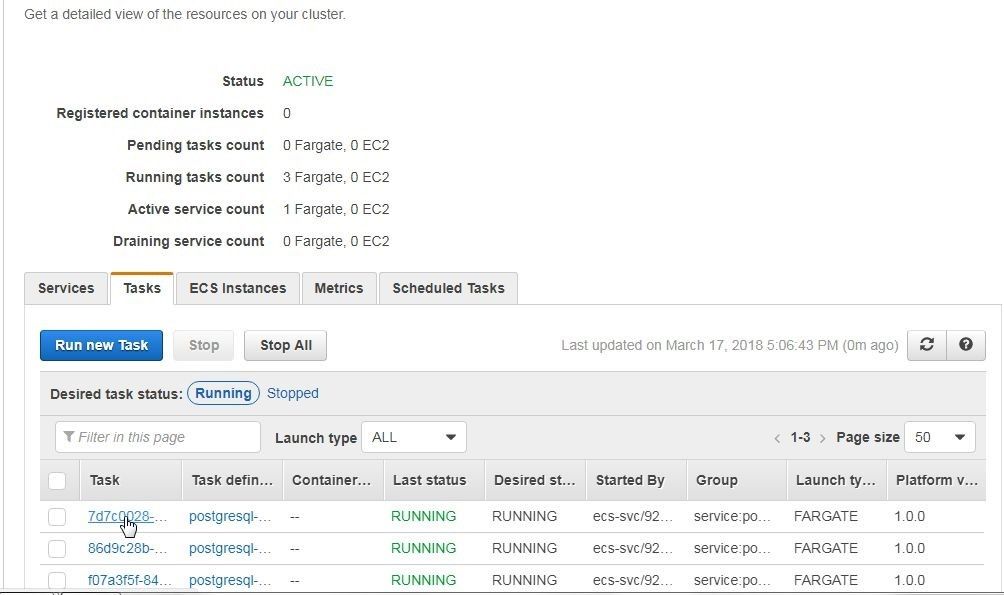
Figure 1. Task Link in ECS Service
The task detail gets displayed. Click on the ENI Id link as shown in Figure 2.
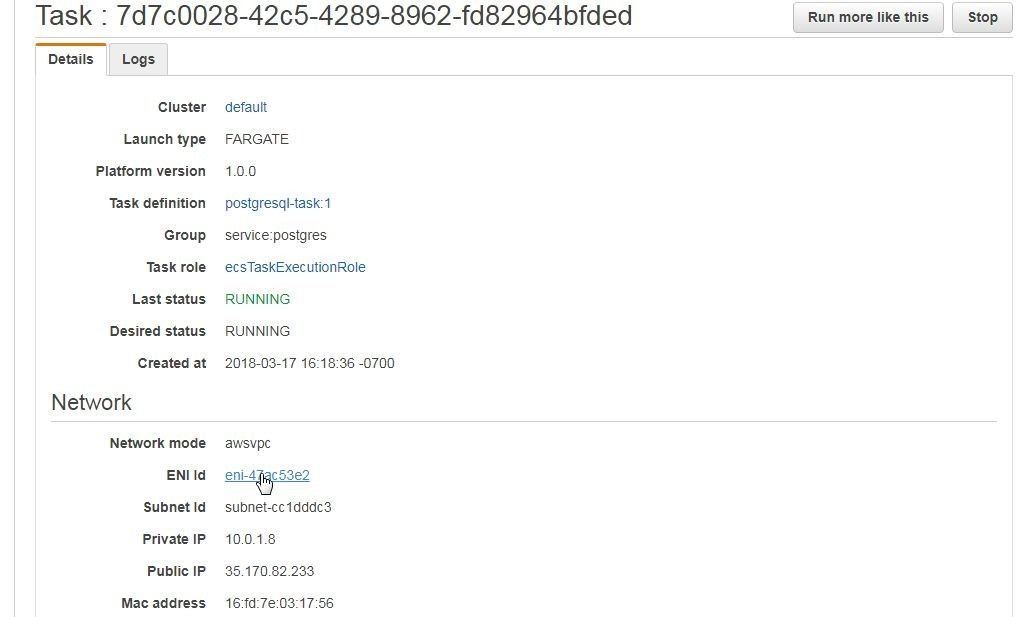
Figure 2. ENI Id Link
The ENI Console displays the IPv4 Public IP, as shown in Figure 3.
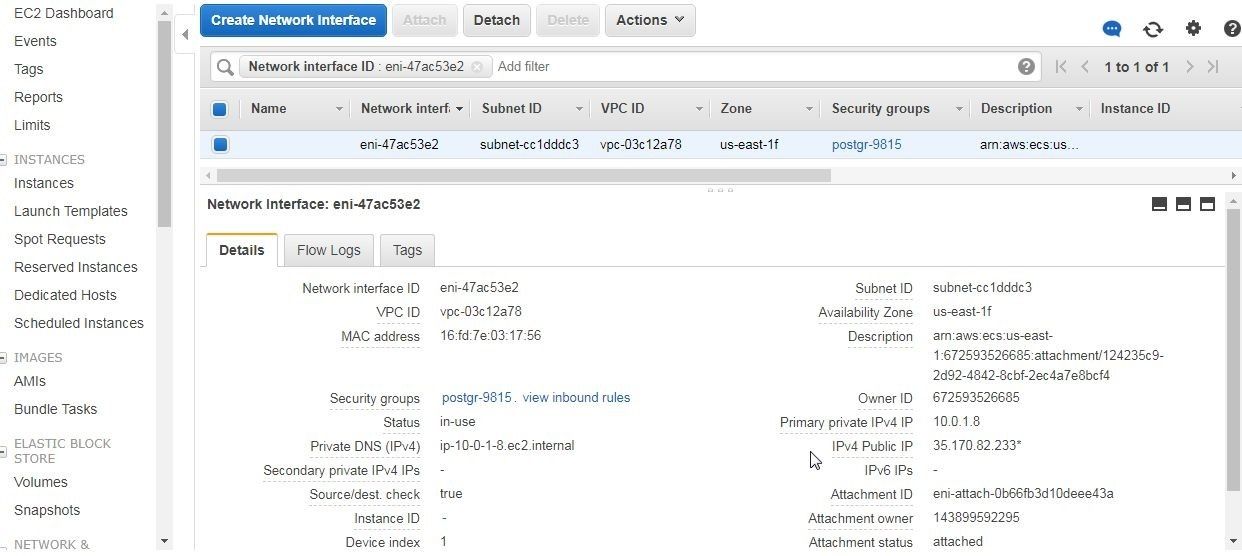
Figure 3. IPv4 Public IP
Before being able to use the Public IP to access the task we need to modify the Security group to allow traffic on the port that PostgreSQL listens on. Click on the Security groups link as shown in Figure 4.
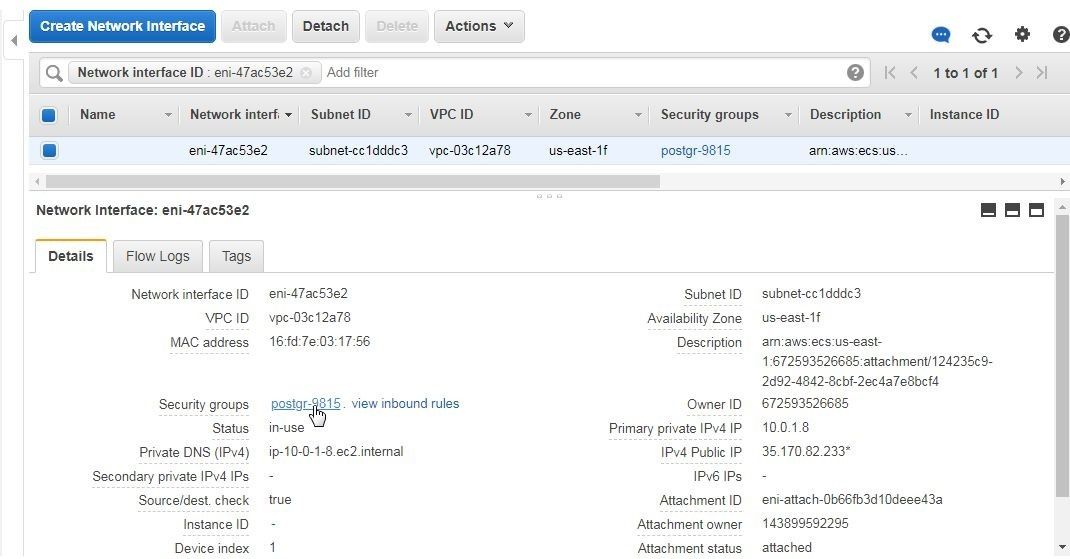
Figure 4. Securitys group link
In the Security group console select the Inbound tab and click on Edit as shown in Figure 5.
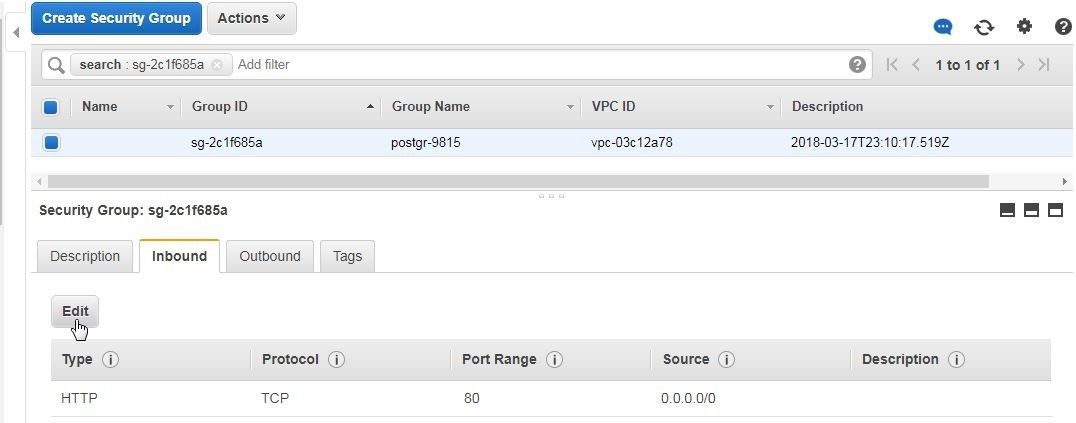
Figure 5. Security group>Inbound>Edit
In Edit Inbound rules, click on Add Rule to add a rule as shown in Figure 6.
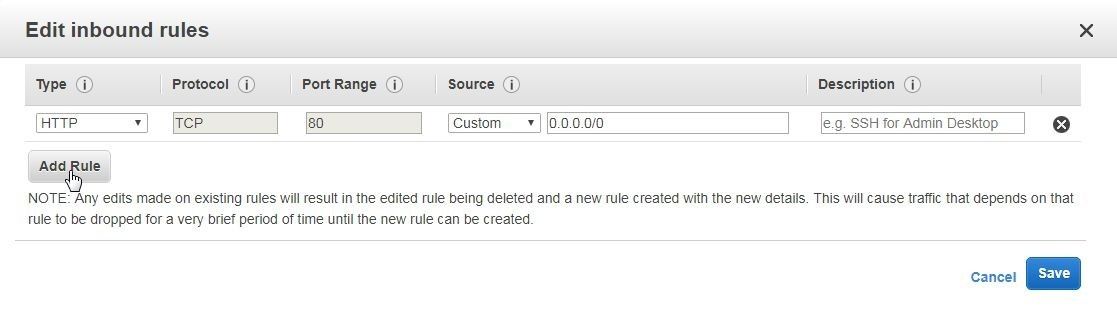
Figure 6. Edit Inbound rules>Edit
Add a rule to allow all traffic on all ports, as shown in Figure 7, and click on Save.
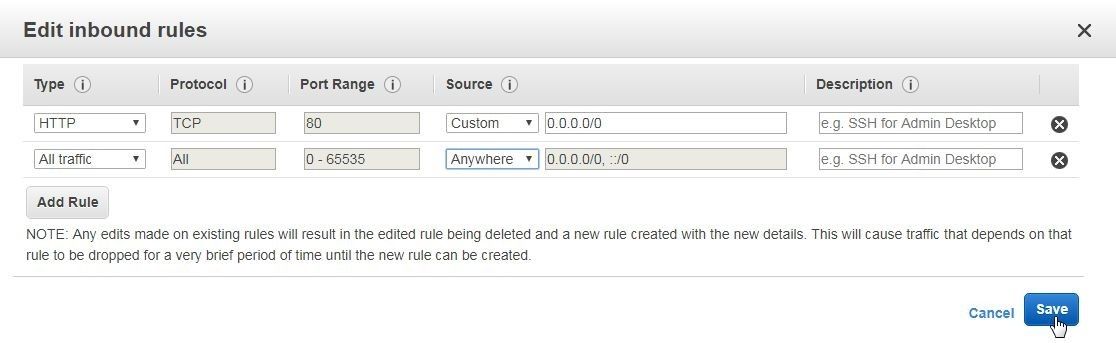
Figure 7. Adding an inbound rule to allow all traffic
A new inbound rule to allow all traffic on all ports, including the PostgreSQL port of 5432, gets added, as shown in Figure 8.
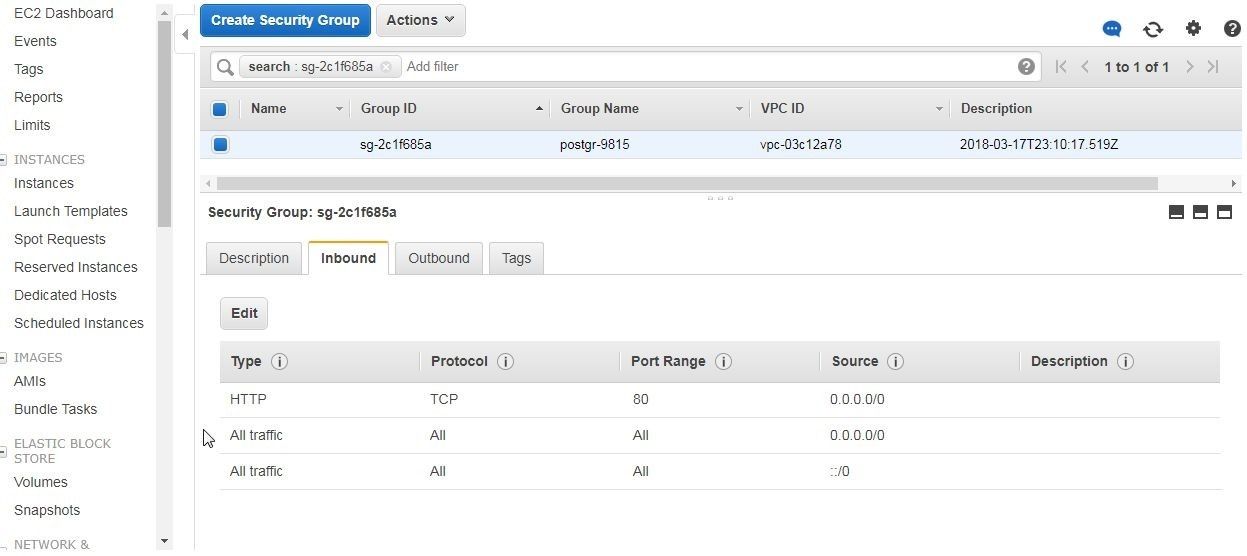
Figure 8. Inbound rule added
Having obtained the Public IP and enabled connectivity to port 5432, next we shall connect to the ECS service in Toad Edge 2.0.0.
Creating a Connection in Toad Edge 2.0.0
To create a connection, select Connect>New Connection as shown in Figure 9.
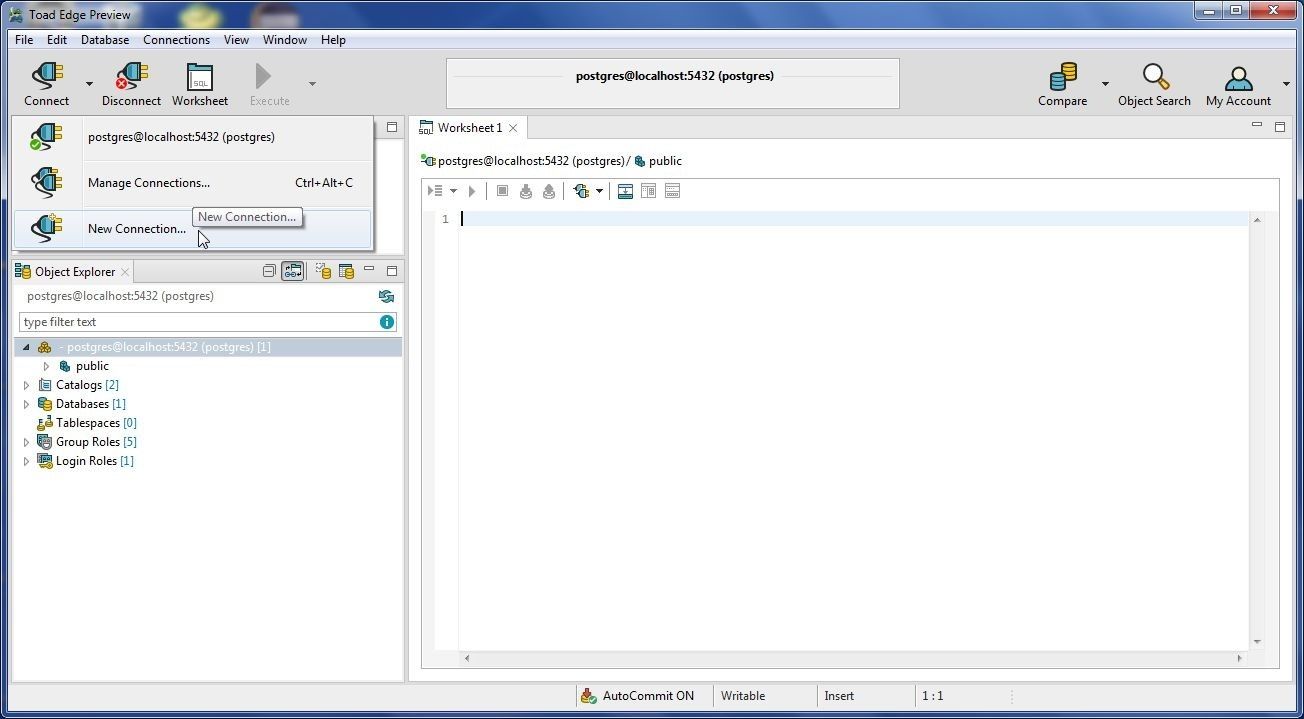
Figure 9. Connect>New Connection
The New Connection wizard gets started, as shown in Figure 10. Click on Next. Select Database Platform as PostgreSQL. The other option is EnterpriseDB, which is presently not available as a Docker image.
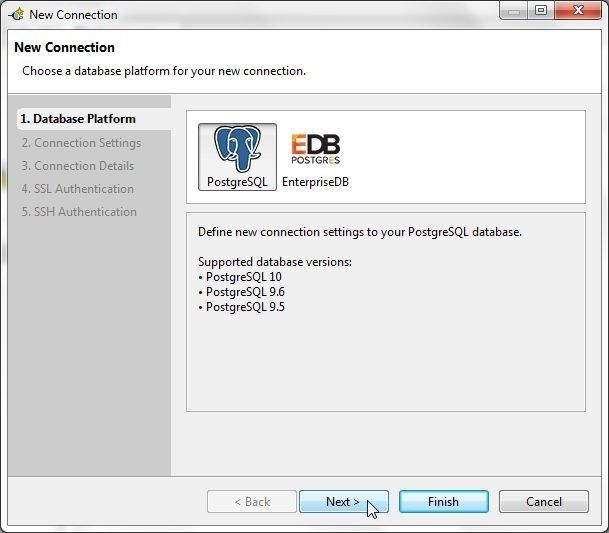
Figure 10. Selecting Database Platform as PostgreSQL
In Connection Settings specify Hostname as the Public IP of elastic network interface for a task. Specify Port as 5432. Specify Database as postgres, Username as postgres and Password as postgres also. Click on Test Connection as shown in Figure 11 to test the connection settings.
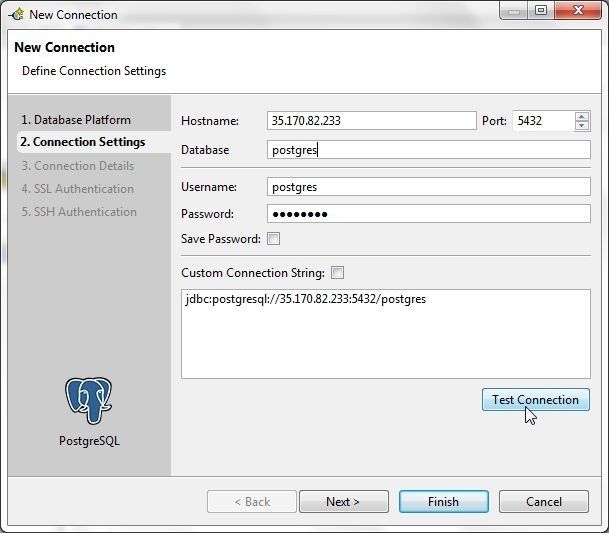
Figure 11. Test Connection
As the Connection is OK message in Figure 12 indicates, a connection gets established. Click on Next.
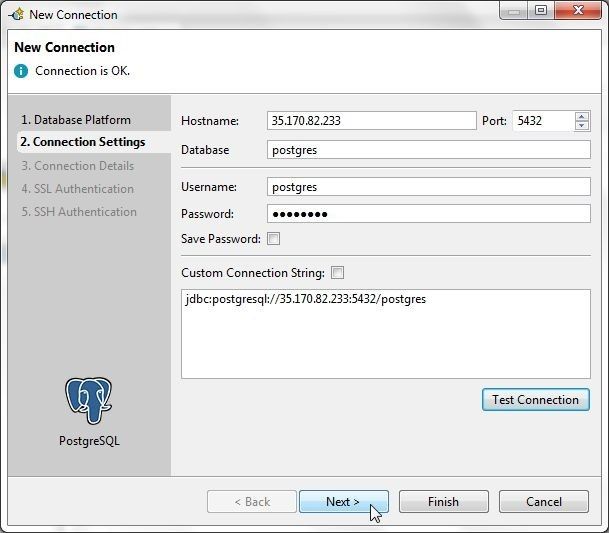
Figure 12. Connection is OK
In Connection Details select the option Enable Autocommit as shown in Figure 13. Click on Finish.
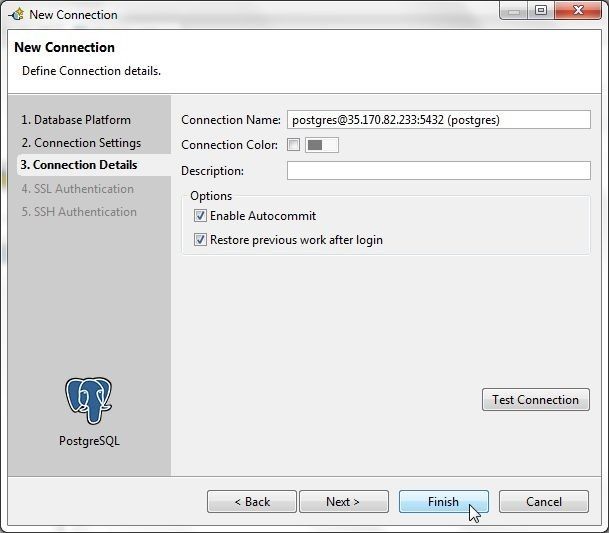
Figure 13. Selection Autocommit Option and completing connection
A new connection gets added and gets listed in Connections view, as shown in Figure 14. The default schema public is listed in Object Explorer.
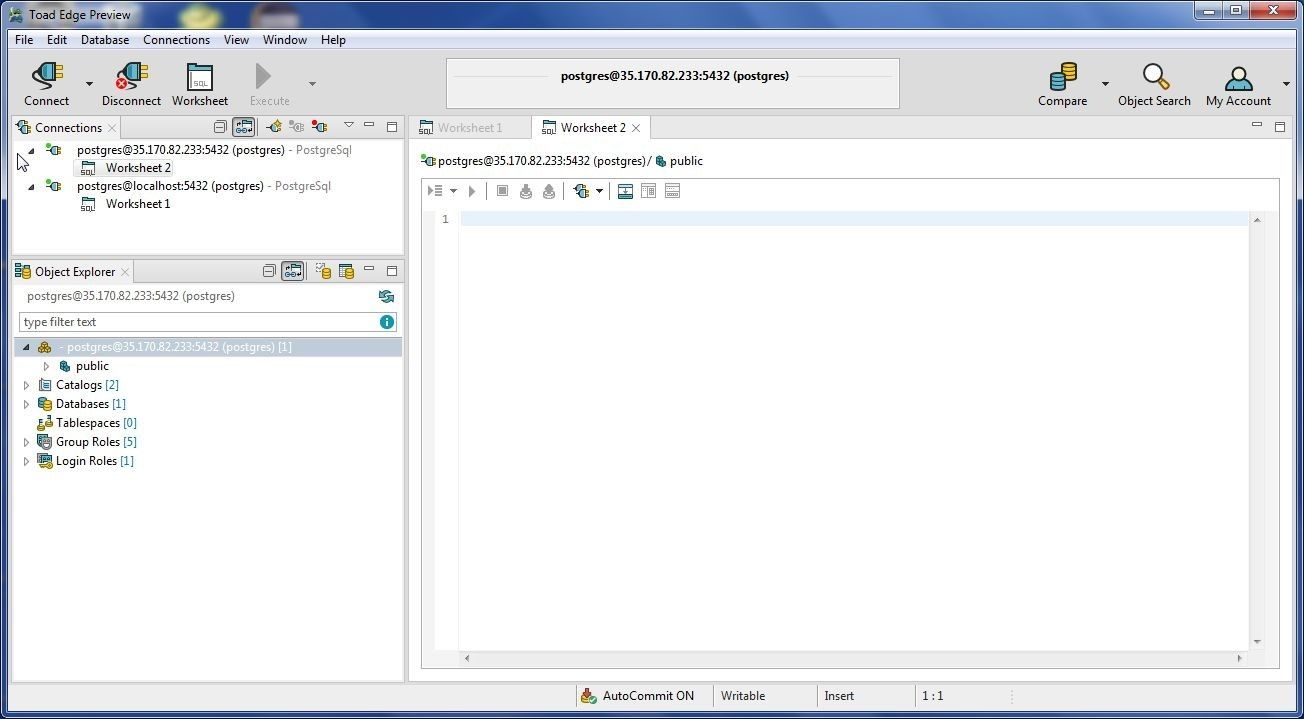
Figure 14. Connection added
Creating a Table
To create a database table two options are available:
- Use the New Table wizard
- Run DDL and DML in a SQL Worksheet
We shall use the DDL and DML listed to create a table called wlslog.
CREATE TABLE wlslog(timestamp VARCHAR(255) PRIMARY KEY,category VARCHAR(255),type VARCHAR(255),
servername VARCHAR(255), code VARCHAR(255),msg VARCHAR(255));

INSERT INTO wlslog(timestamp,category,type,servername,code,msg) VALUES('Apr-8-2014-7:06:16-PM-PDT',
'Notice','WebLogicServer','AdminServer','BEA-000365','Server state changed to STANDBY');

INSERT INTO wlslog(timestamp,category,type,servername,code,msg) VALUES('Apr-8-2014-7:06:17-PM-PDT',
'Notice','WebLogicServer','AdminServer','BEA-000365','Server state changed to STARTING');

INSERT INTO wlslog(timestamp,category,type,servername,code,msg) VALUES('Apr-8-2014-7:06:18-PM-PDT',
'Notice','WebLogicServer','AdminServer','BEA-000365','Server state changed to ADMIN');

INSERT INTO wlslog(timestamp,category,type,servername,code,msg) VALUES('Apr-8-2014-7:06:19-PM-PDT',
'Notice','WebLogicServer','AdminServer','BEA-000365','Server state changed to RESUMING');

INSERT INTO wlslog(timestamp,category,type,servername,code,msg) VALUES('Apr-8-2014-7:06:20-PM-PDT',
'Notice','WebLogicServer','AdminServer','BEA-000361','Started WebLogic AdminServer');

INSERT INTO wlslog(timestamp,category,type,servername,code,msg) VALUES('Apr-8-2014-7:06:21-PM-PDT',
'Notice','WebLogicServer','AdminServer','BEA-000365','Server state changed to RUNNING');

INSERT INTO wlslog(timestamp,category,type,servername,code,msg) VALUES('Apr-8-2014-7:06:22-PM-PDT',
'Notice','WebLogicServer','AdminServer','BEA-000360','Server started in RUNNING mode');
Copy the SQL script to a SQL Worksheet and click on Execute All Statements as shown in Figure 15.
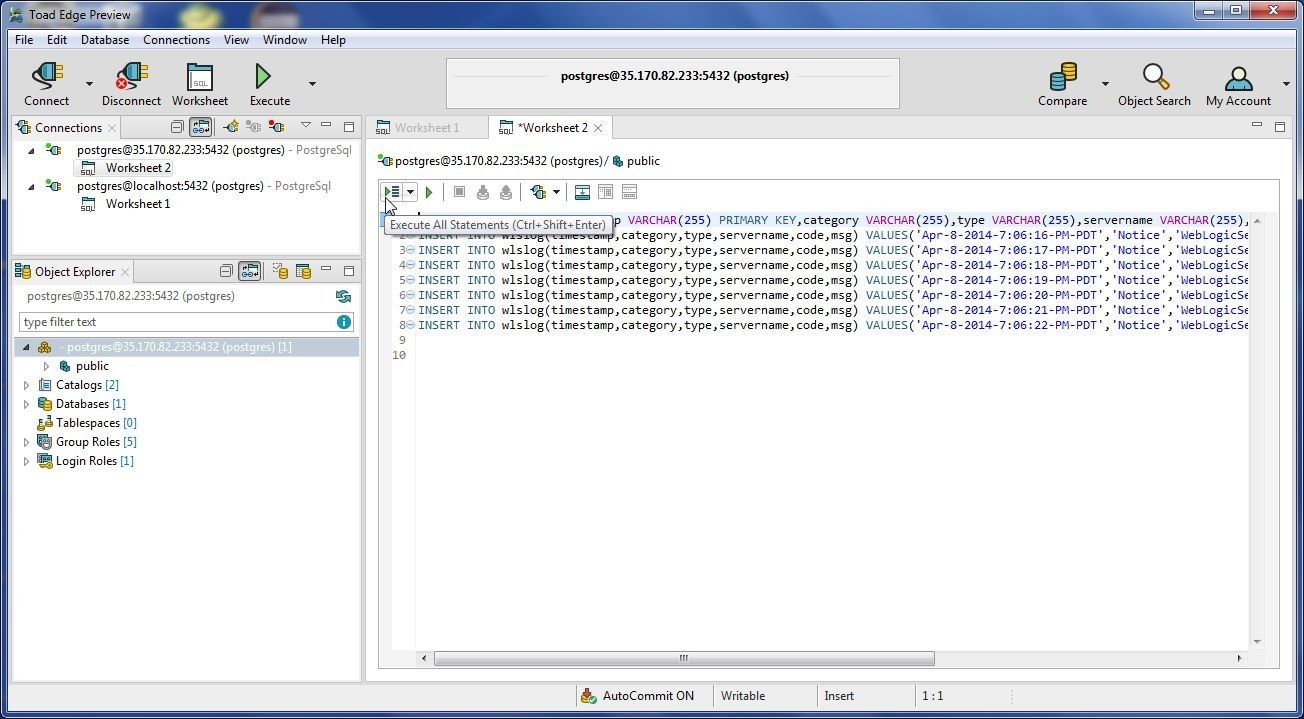
Figure 15. Execute All Statements
As the message in Figure 16 indicates, eight Statements are processed.
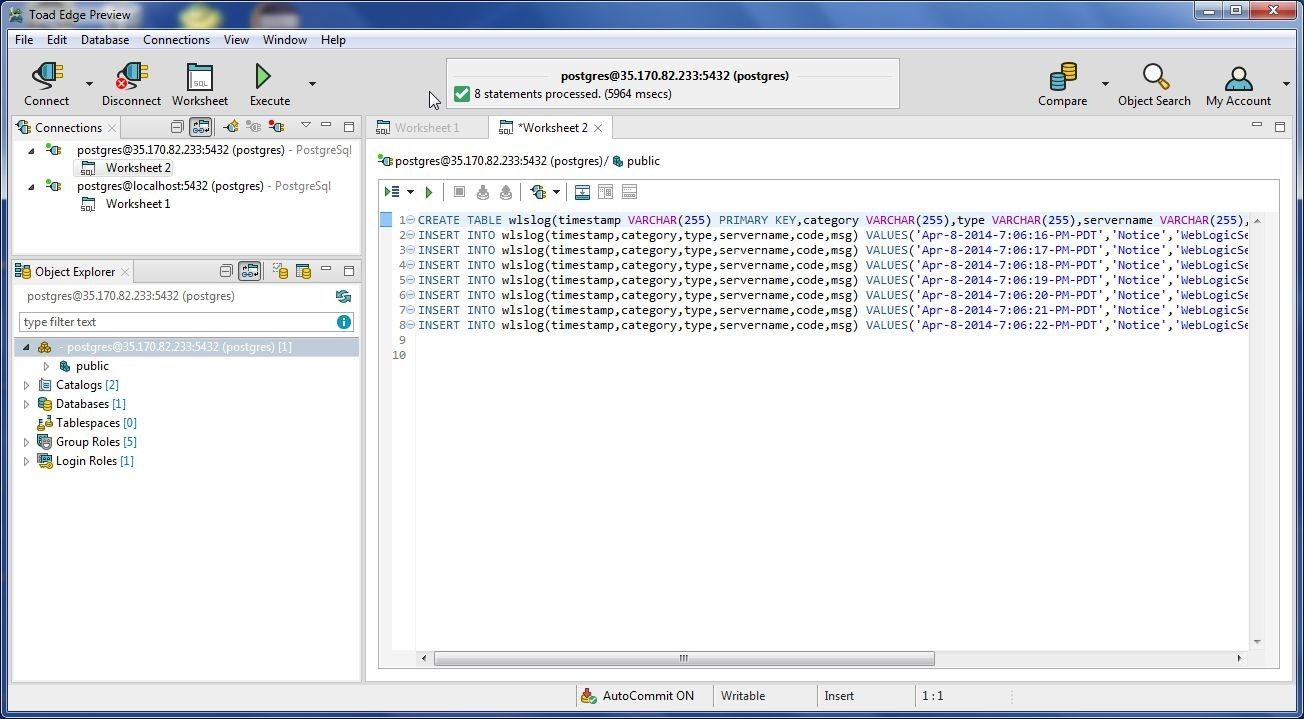
Figure 16. 8 SQL Statements Processed to create a table and add data
The wlslog table gets listed in the Object Explorer, as shown in Figure 17.
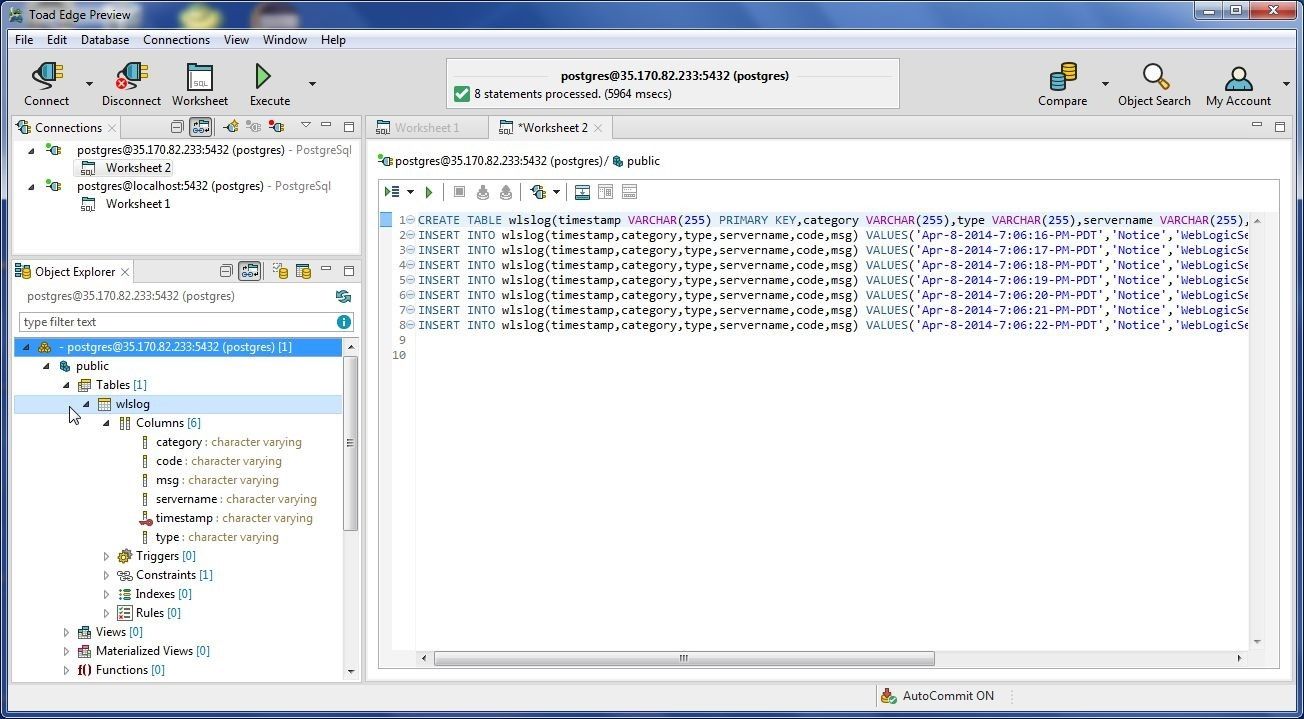
Figure 17. Table wlslog listed in Object Explorer
Open the table in a Data Editor by selecting wlslog>Open in Object Explorer as shown in Figure 18.
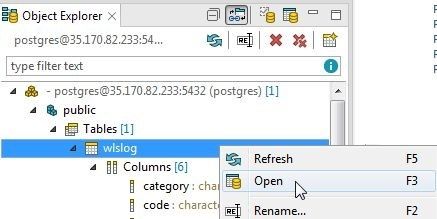
Figure 18. Object Explorer>wlslog>Open
The Data Editor displays table information with the Columns tab selected by default, as shown in Figure 19.
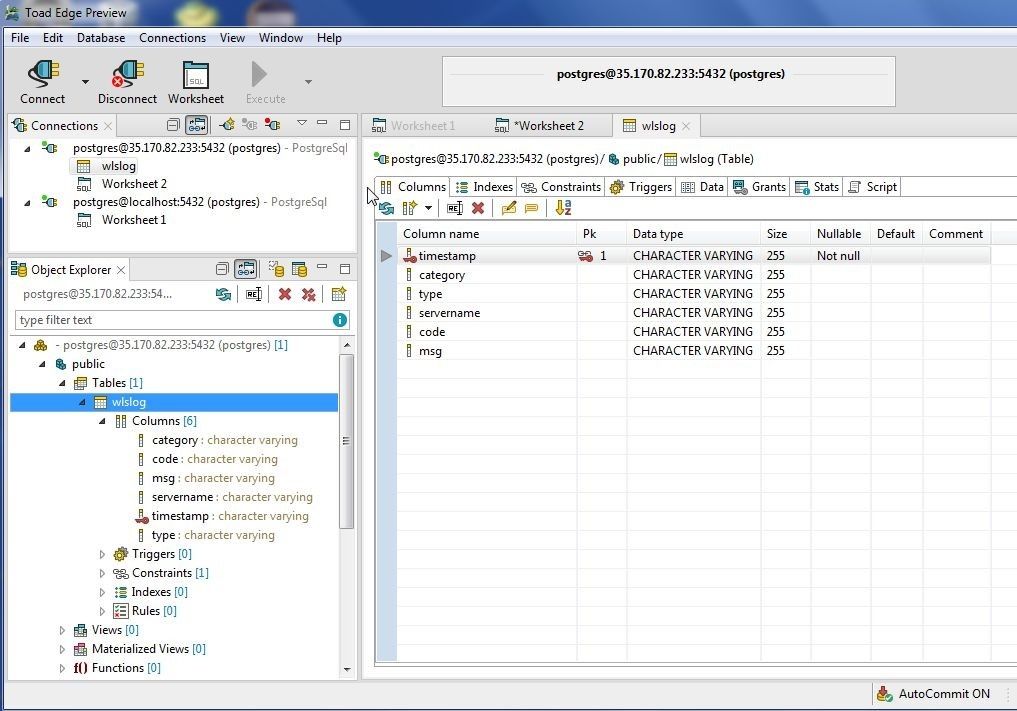
Figure 19. Data Editor
Select the Data tab to display the table data as shown in Figure 20.
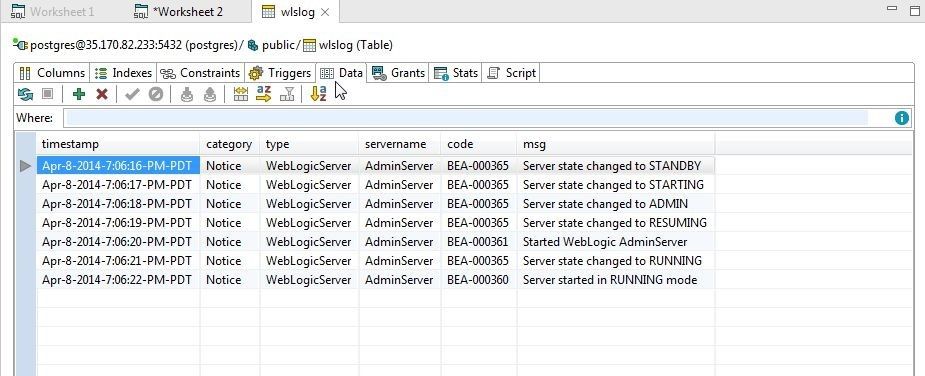
Figure 20. Table Data
Comparing Schemas
Toad Edge 2.0.0 provides the schema compare feature that may be used to compare any combinations of schemas including the following:
- Two schemas in different connections and database instances
- Two schemas in the same connection and database instance
- A schema with a schema snapshot
In this section we shall compare a schema in the connection to PostgreSQL database on ECS with a schema in a connection to PostgreSQL on a local machine. Using a local PostgreSQL with Toad Edge 2.0.0 is discussed in an earlier article. To start a new comparison select Compare>New as shown in Figure 21.
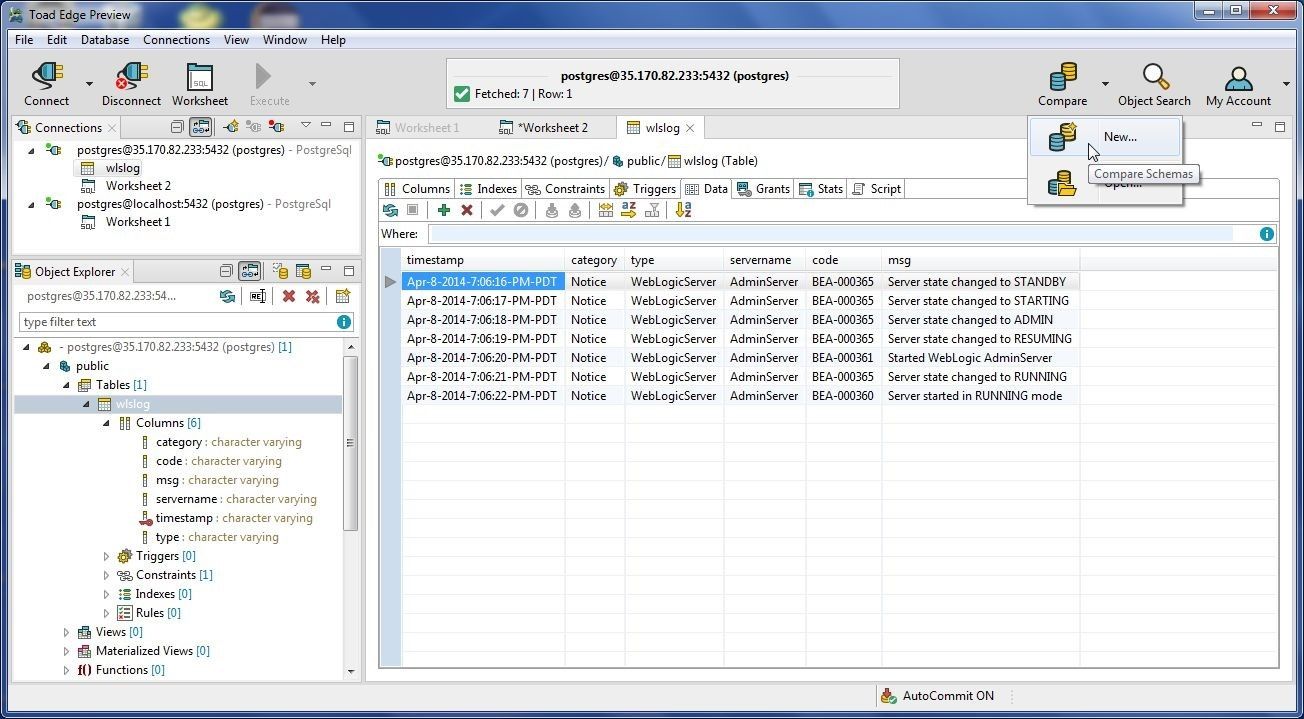
Figure 21. Compare>New
The Schema Compare wizard gets launched, as shown in Figure 22. Specify a Comparison Name and select the postgres schema in the connection to the ECS service. Select the connection to the local PostgreSQL database instance for the Target.
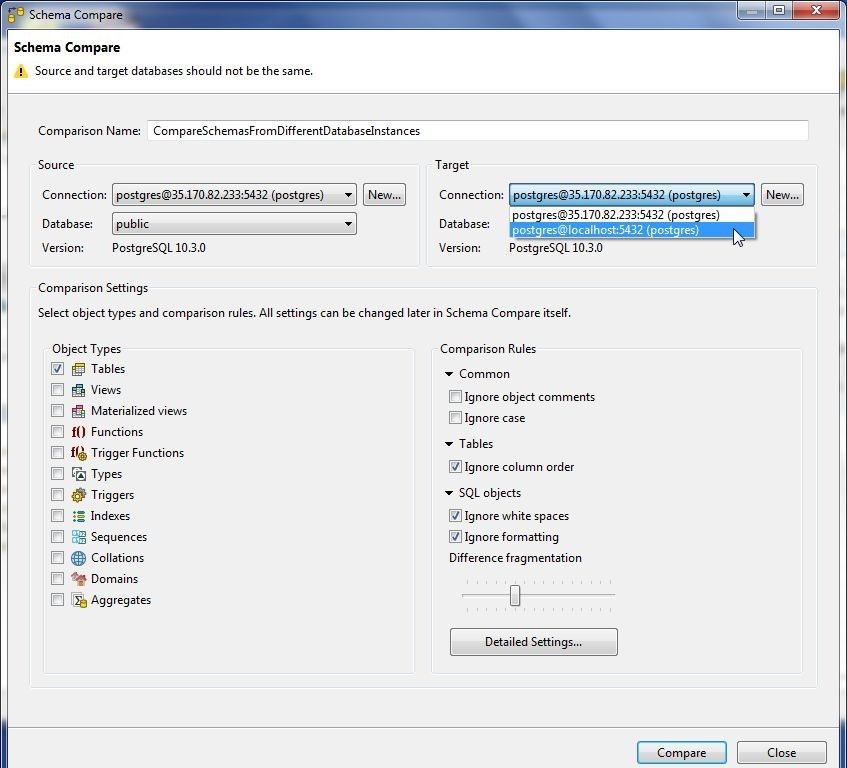
Figure 22. Selecting Target Connection as different from Source Connection
Select Object Types for comparison as Tables, Views, and Materialized Views as shown in Figure 23. Select the default settings for Comparison Rules and click on Compare.
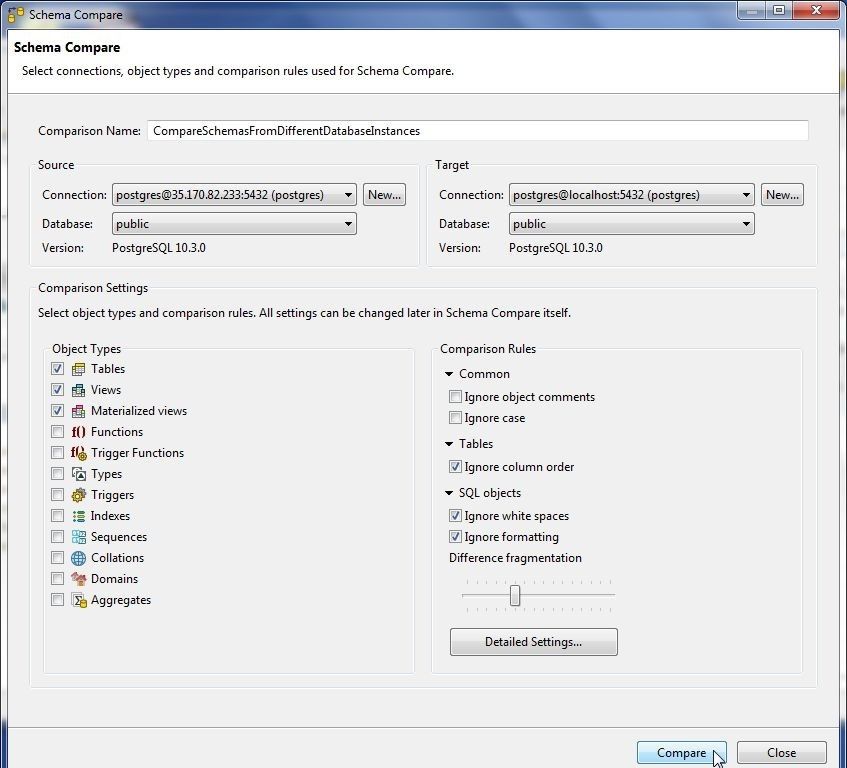
Figure 23. Selecting Object Types and starting Comparison
The Compare gets started, as shown in Figure 24.

Figure 24. Compare started
A compare result gets generated when the Compare is completed, as shown in Figure 25. A Script Definition is created for the source and target schema. Tables>Different lists the wlslog table being different in the source and target schemas.
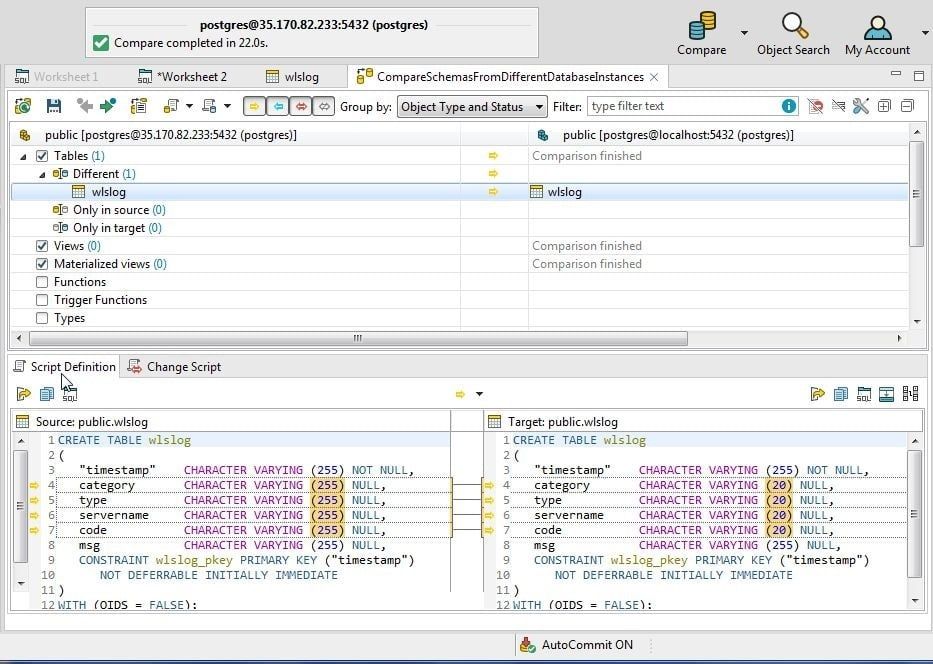
Figure 25. Compare completed
Select the Change Script tab to list the SQL script that would make the target schema table the same as the source schema table. Click on Deploy to deploy the change script as shown in Figure 26.
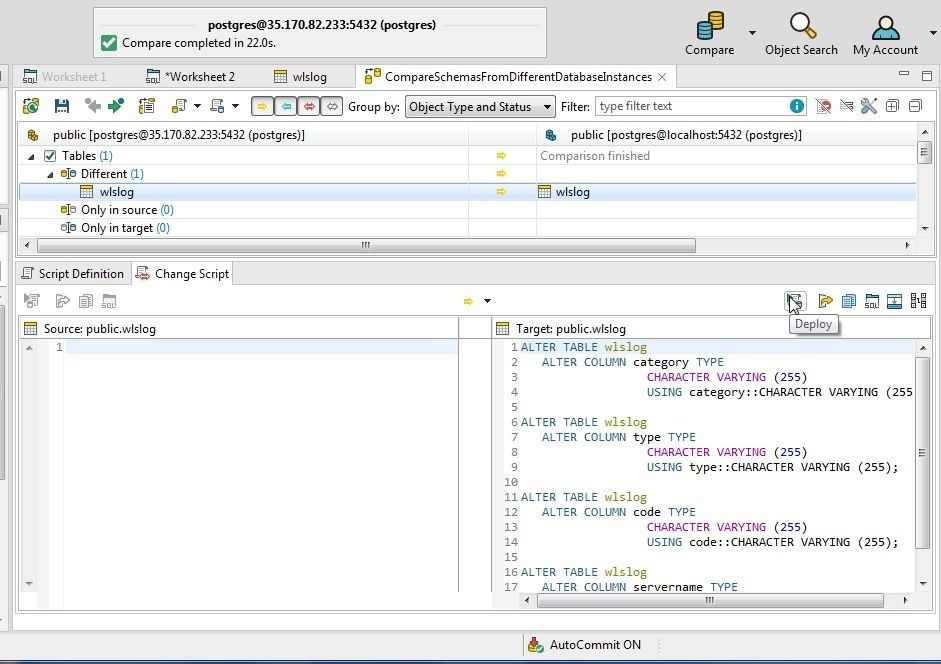
Figure 26. Deploying Change Script
The differences start to get applied, as shown in Figure 27.
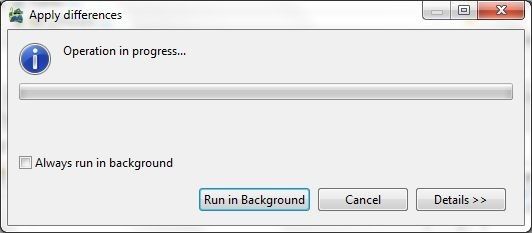
Figure 27. Apply Differences
After the differences have been applied the Change Script is applied and reconciled and the new Change Script is empty, as shown in Figure 28. because the source and target schemas have been made the same.
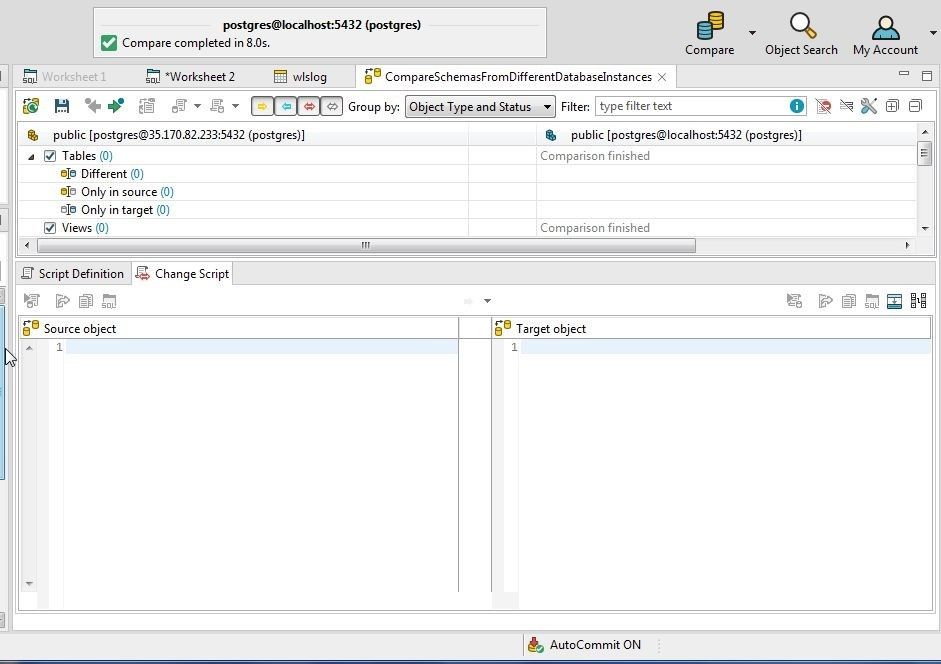
Figure 28. Change Script empty
Exporting Schema Compare Result
The schema compare result may be exported to HTML with Export HTML Report, as shown in Figure 29.
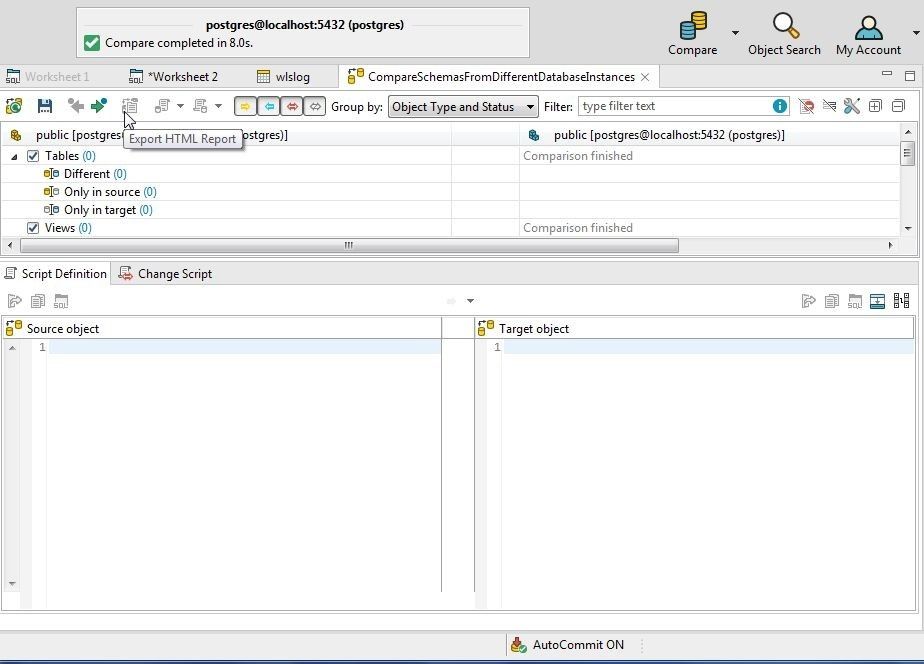
Figure 29. Export Schema Compare HTML Report
Recomparing Schemas
But exporting an empty Change Script would generate an empty report. Next, we shall compare schemas that have some differences so that the Change Script is not empty. Also, it would demonstrate recomparing schemas. To create a difference in source and target schemas, delete the wlslog table from the source schema connection with Edit>Delete as shown in Figure 30.
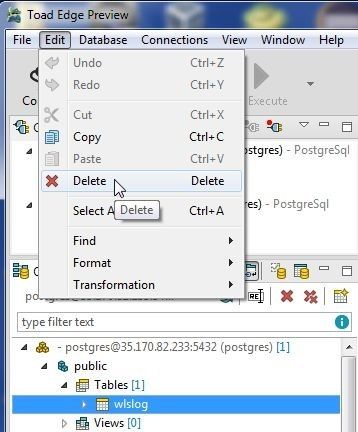
Figure 30. Edit>Delete
In Confirm click on OK as shown in Figure 31.
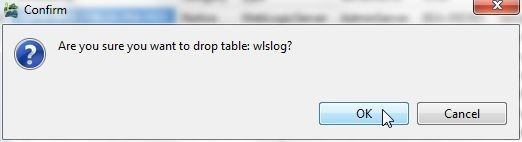
Figure 31. Confirm>OK
Click on Recompare All to recompare as shown in Figure 32.
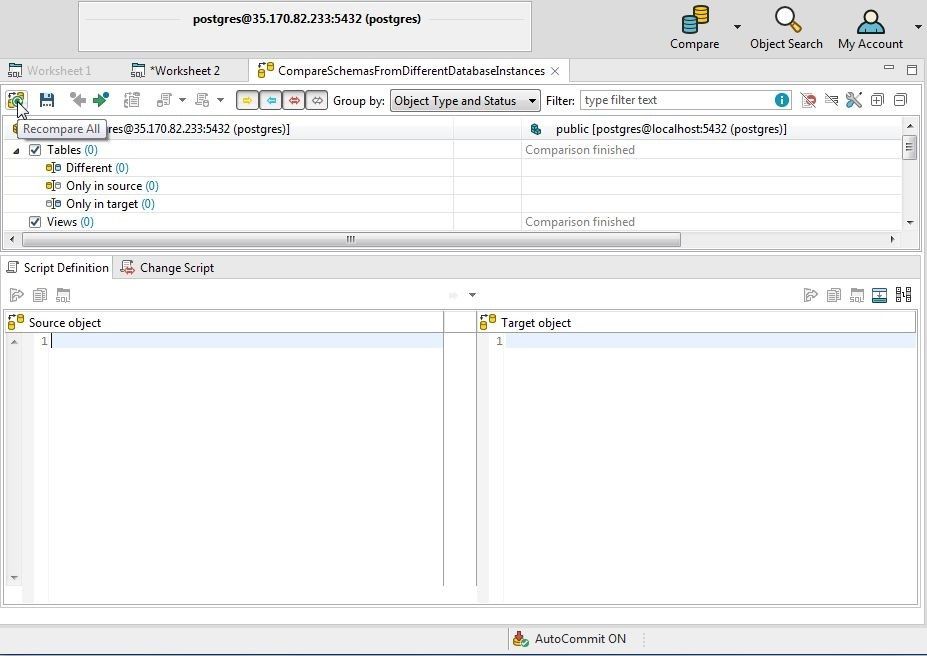
Figure 32. Recompare All
The comparison gets completed, as shown in Figure 33.
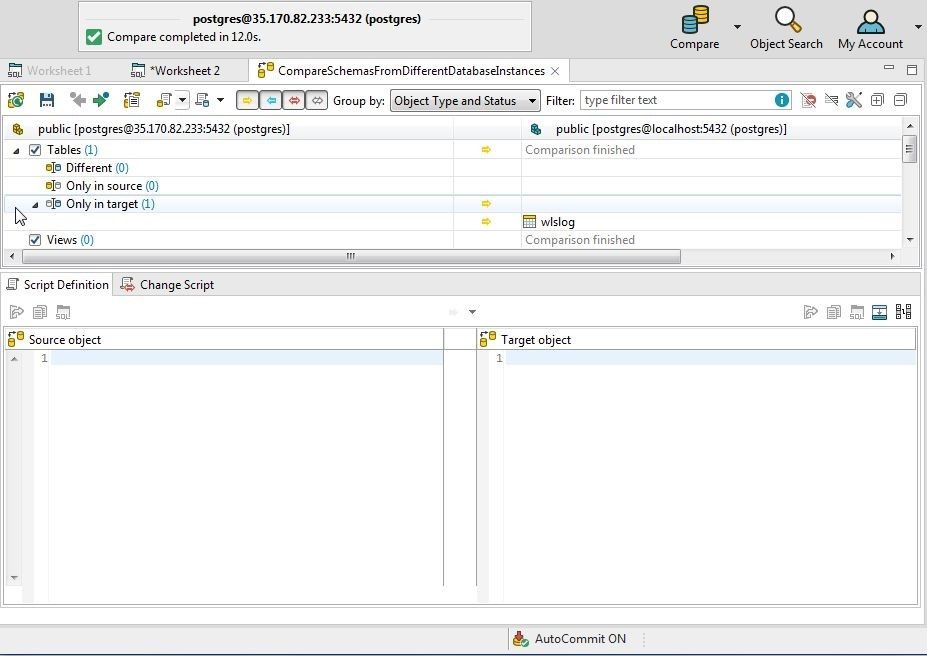
Figure 33. Comparison Completed
Subsequently click on Export HTML Report as shown in Figure 34.
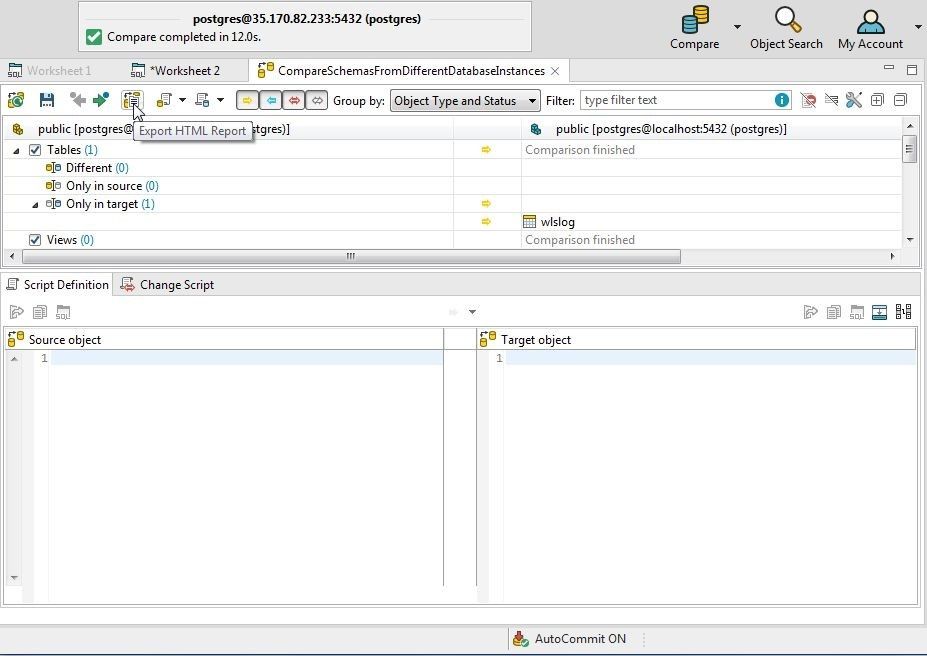
Figure 34. Export HTML Report
In Save As specify a File name and click on Save as shown in Figure 35.
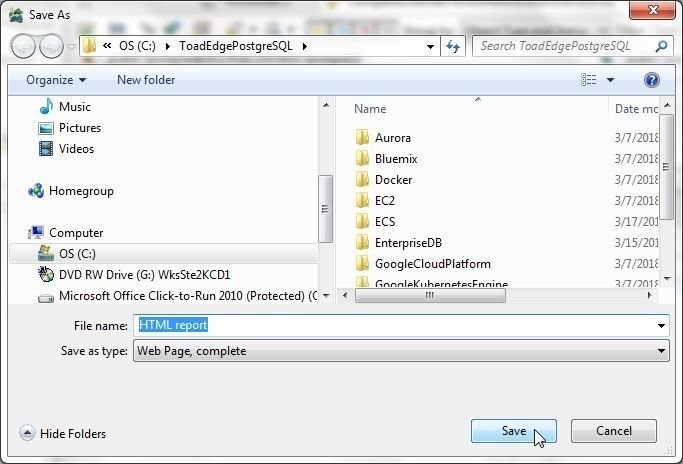
Figure 35. Save As>Save
As the Export Finished dialog in Figure 36 indicates that the export to HTML gets completed. Click on Open Report.
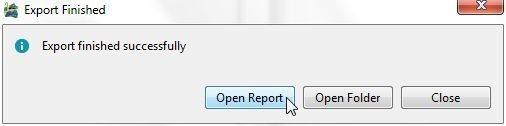
Figure 36. Export Finished
The HTML Report generated is shown in Figure 37.
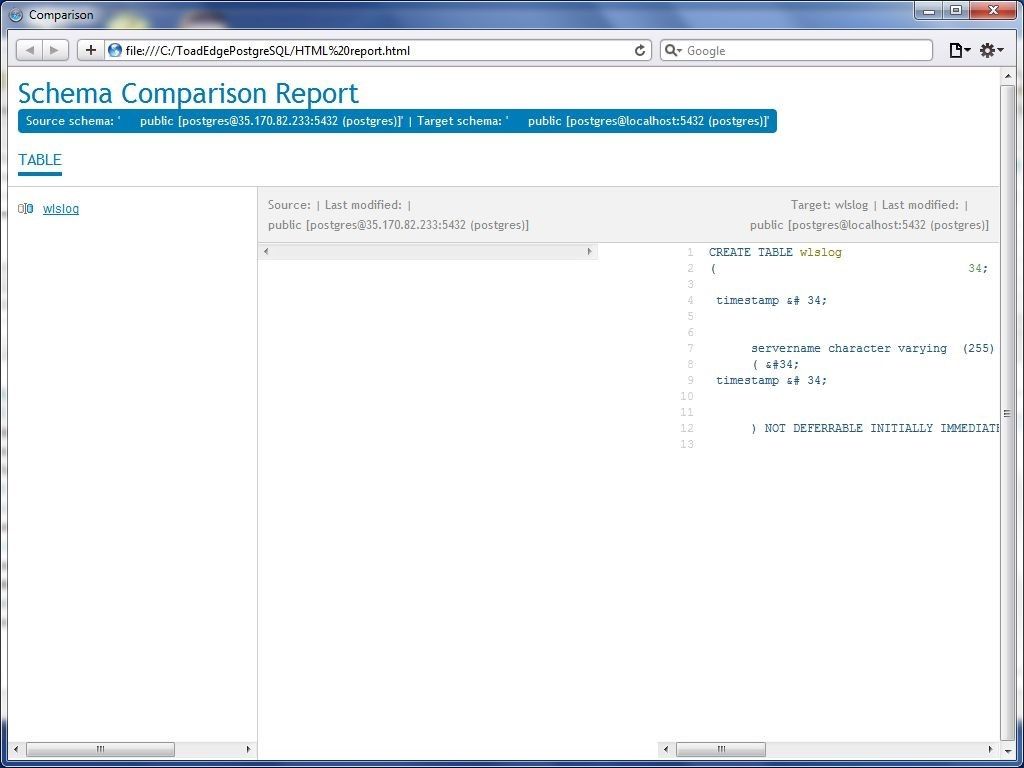
Figure 37. HTML Report
Conclusion
In two articles we have discussed using a PostgreSQL database instance on Amazon ECS Fargate with Toad Edge (Preview) 2.0.0. The benefit of using Toad Edge 2.0.0 is a client IDE for connecting to and managing PostgreSQL database. Toad Edge 2.0.0 provides several wizards and tools for the various management and development tasks including managing connections, creating database objects, taking schema snapshots, running SQL scripts, adding table data, importing and exporting data, and comparing schemas.
Start the discussion at forums.toadworld.com