Amazon Relational Database Service (RDS) is a managed service for relational databases. Not all relational databases are supported. PostgreSQL database is supported. The benefits of a managed service are that the infrastructure provisioning, database installation and configuration, backup and recovery, and snapshots are all performed automatically. Being an AWS service, RDS DB instances are integrated with the other AWS services, including CloudWatch for logging, IAM for authorization and authentication, and S3 for database backups. In this article we shall discuss using PostgreSQL database on RDS with Toad Edge Preview 2.0.0. This article has the following sections.
- Setting the Environment
- Creating an RDS DB Instance with PostgreSQL Engine
- Enabling Connectivity in the RDS DB Instance
- Obtaining Connection Parameters
- Creating a Connection in Toad Edge
- Creating a Database Table
- Importing Table Data
- Exporting Table Data to HTML Report
- Deleting RDS DB Instance
Setting the Environment
Download and install Toad Edge Preview 2.0.0.
The only other prerequisite is an AWS account, which may be created at https://aws.amazon.com/resources/create-account/. Log in to the AWS Console at https://console.aws.amazon.com/ and select the RDS service. Click on Get started now on the RDS service page, which may also be accessed directly at https://console.aws.amazon.com/rds after logging into the AWS Console.
Creating an RDS DB Instance with PostgreSQL Engine
The first screen in the RDS service is for selecting an engine, as shown in Figure 1.
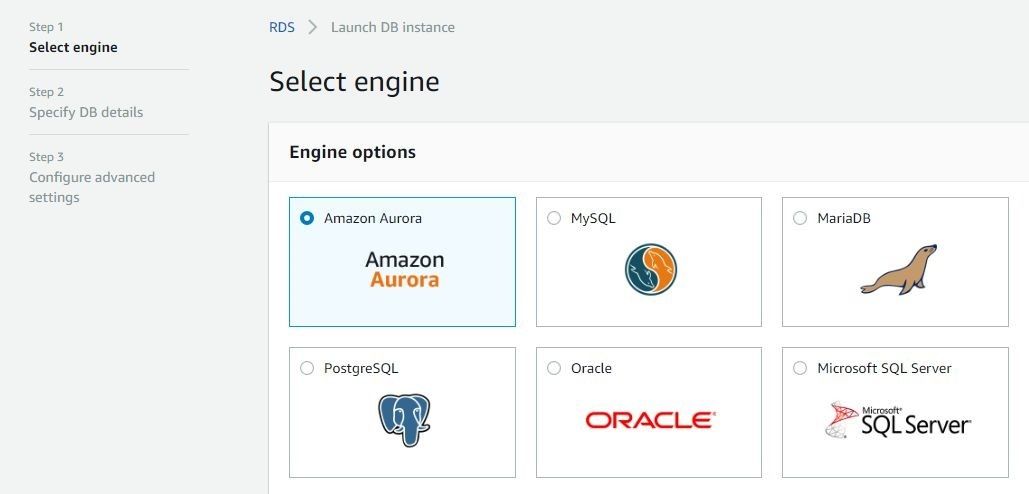
Figure 1. Select Engine
Select the PostgreSQL engine as shown in Figure 2 and click on Next.
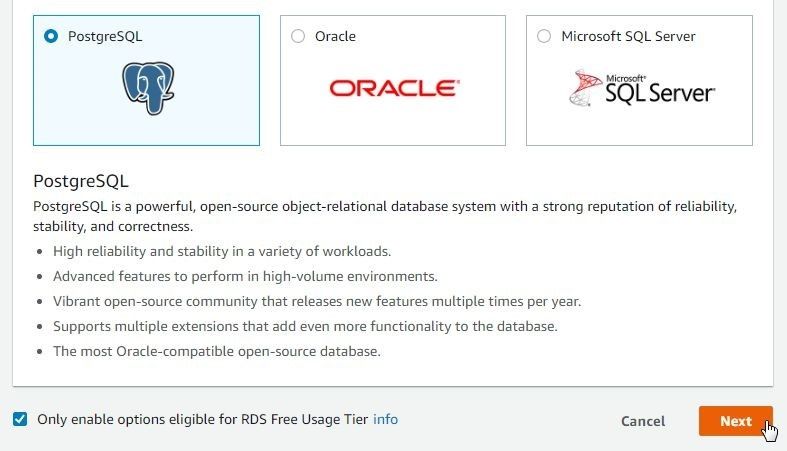
Figure 2. Selecting PostgreSQL Service in RDS
Next, specify DB details for the PostgreSQL DB engine instance, as shown in Figure 3. Keep the default selection for License model as postgresql-license. Select the latest PostgreSQL version supported on RDS; PostgreSQL 10.1 R1. If only free tier features are to be used, select the checkbox Only enable options eligible for RDS Free Usage Tier. Toad Edge Preview 2.0.0 is presently certified with PostgreSQL 10.0.0 but may also be used with PostgreSQL 10.1. PostgreSQL 10.0.0 is not available on RDS.
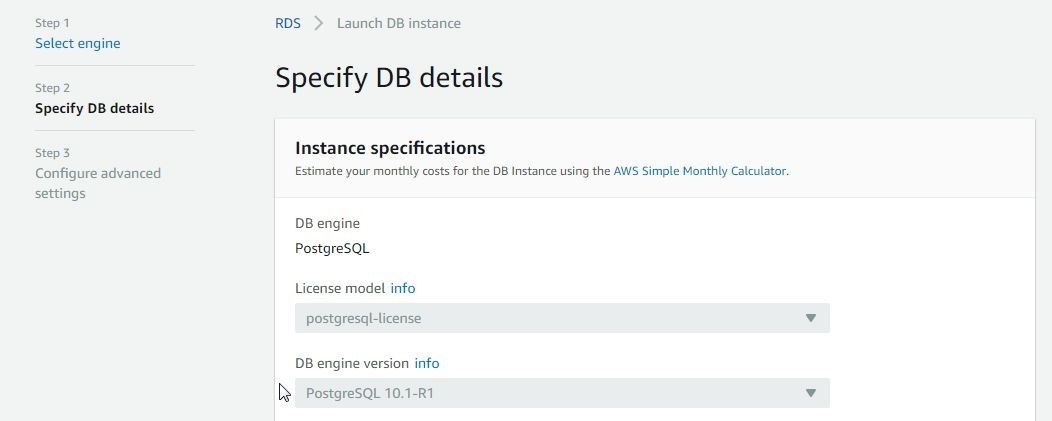
Figure 3. Selecting PostgreSQL version as 10.1 in Specify DB Details
Select the default DB instance class db.t2.micro – 1 vCPU and 1 GiB RAM as shown in Figure 4. Multi AZ deployment is not available for the free tier. Storage type is General Purpose (SSD) and cannot be modified. The default Allocated storage for selected instance type is 20 GB.
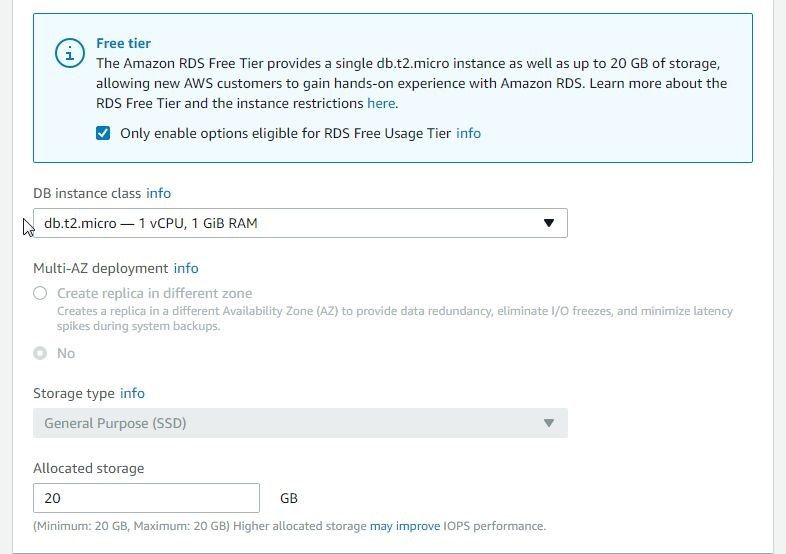
Figure 4. Selecting Instance Class
Next, specify settings for the DB instance as shown in Figure 5. Specify a DB instance name (postgresdb), which must be unique for all the DB instances in an account for a region. Specify a Master Username and Master password. The requirements for DB instance name, Master Username and Password are indicated in the input dialog. Click on Next.
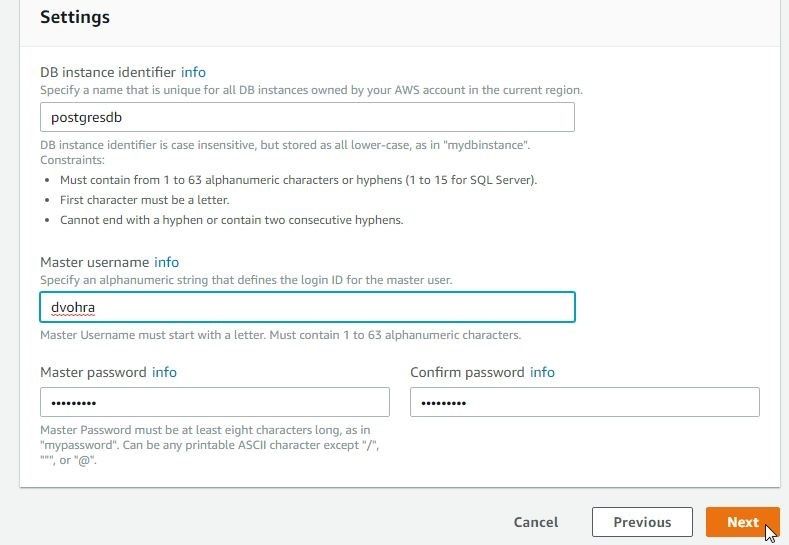
Figure 5. DB Instance Settings
Next, configure advanced settings for Network & Security, Database options, Encryption, Backup, Monitoring, and Maintenance as shown in Figure 6.
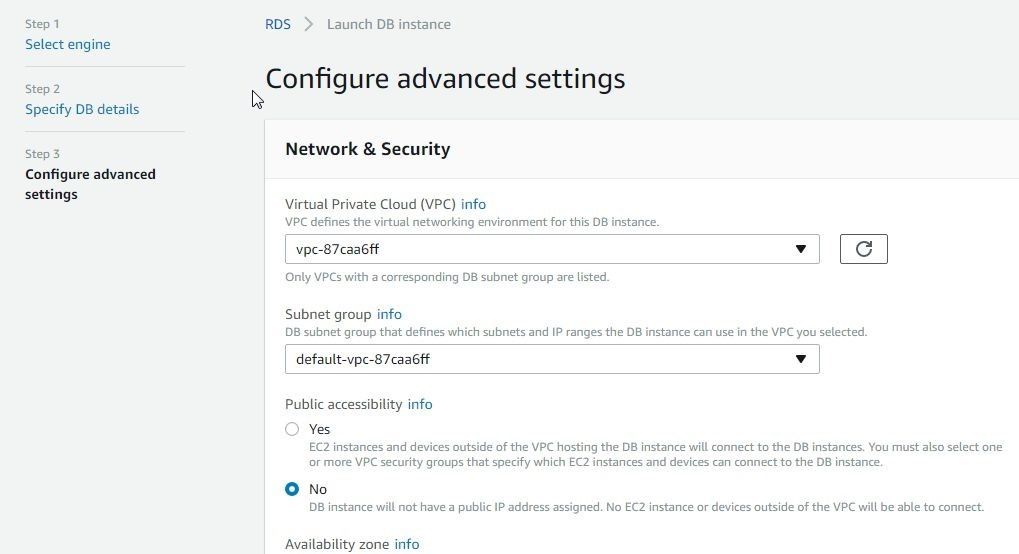
Figure 6. Configure Advanced Options
In Network & Security select a VPC and Subnet group and select Public accessibility as Yes as shown in Figure 7. Select Availability zone as No Preference. Select the option to Create new VPC security group.
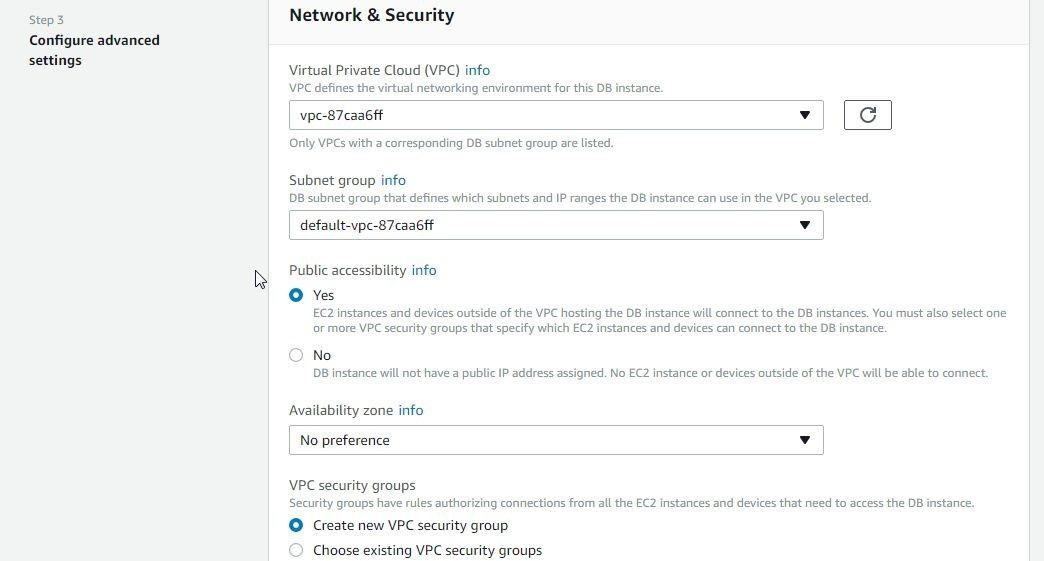
Figure 7. Configuring Network & Security
In Database options specify a Database name (postgresdb) and select the default Database port of 5432 as shown in Figure 8. Select the default DB Parameter group and Option group. A DB parameter group contains the configuration for the database engine. An Option group specifies configuration for additional features or options of database engine.
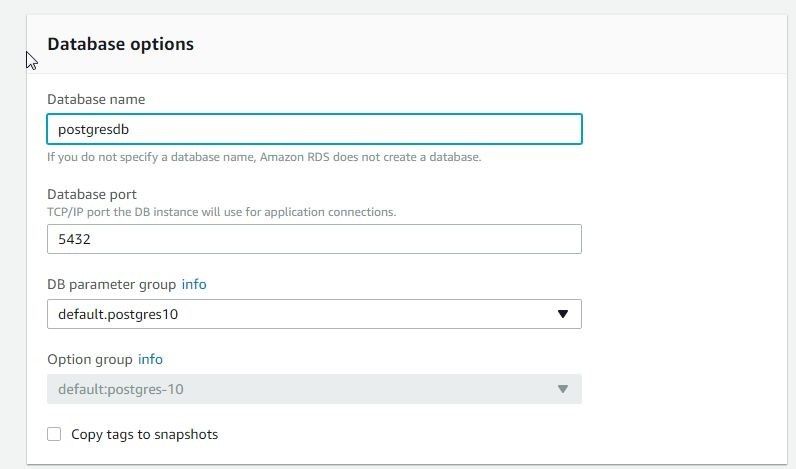
Figure 8. Database Options
Encryption may not be supported, as indicated by a message in Figure 9. The default backup retention period is 7 days. Select Backup window as No preference.

Figure 9. Configuring Encryption and Backup
In Monitoring select Disable enhanced monitoring and in Maintenance select Enable auto minor version upgrade as shown in Figure 10. Click on Launch DB Instance.
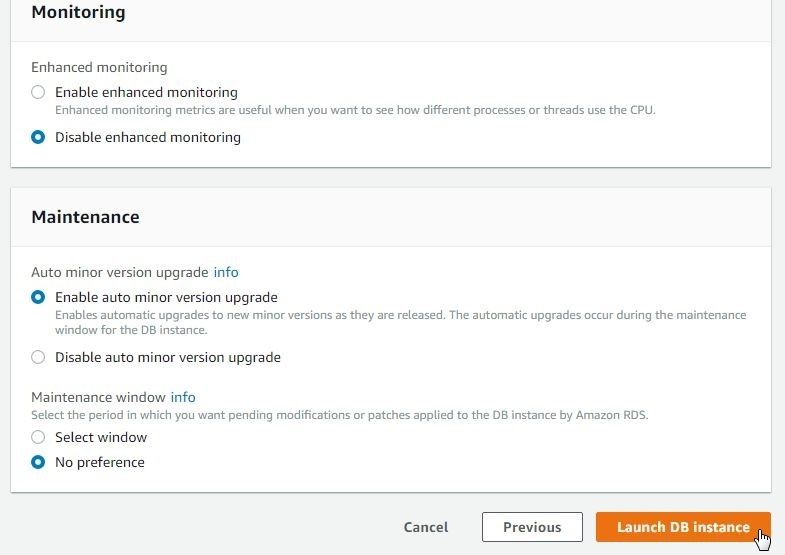
Figure 10. Configuring Monitoring and Maintenance
The DB instance postgresdb starts to get created, as indicated in the status column in Figure 11.

Figure 11. DB Instance postgresdb Creating
The DB instance status gets updated and may also be refreshed with the refresh button periodically. The status is shown to be backing-up on the Instances page in Figure 12.
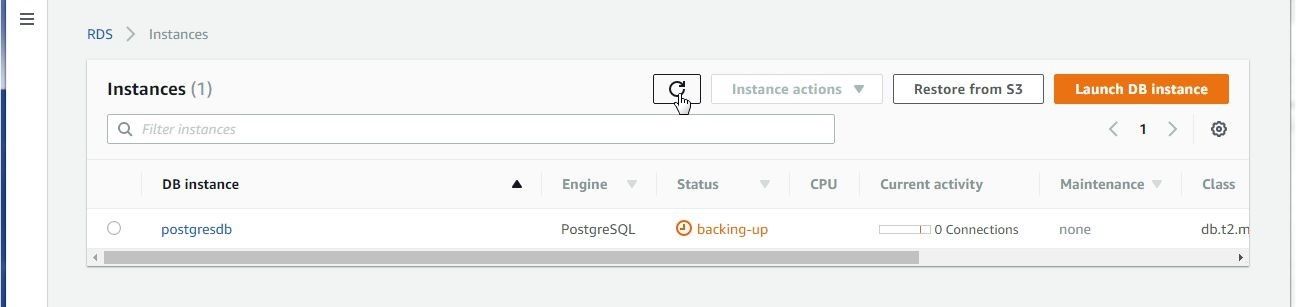
Figure 12. DB instance Status is backing-up
When the DB instance gets completed the Status becomes available, as shown in Figure 13.
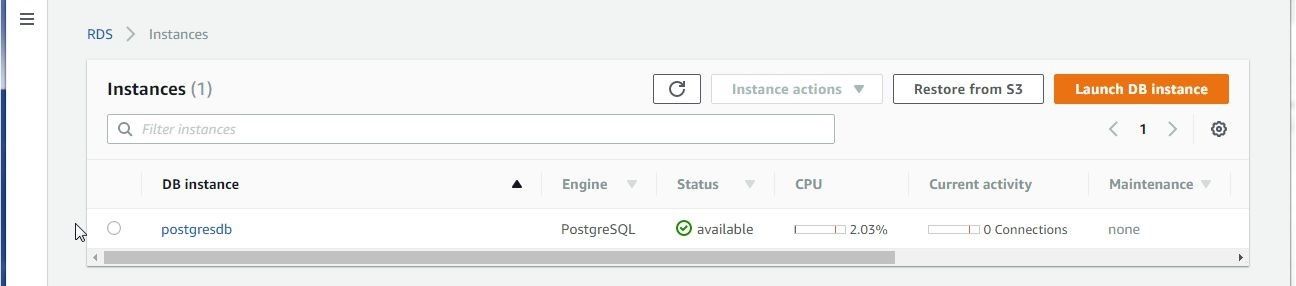
Figure 13. DB Instance status available
Click on postgresdb inInstances to list the instance detail page, as shown in Figure 14.
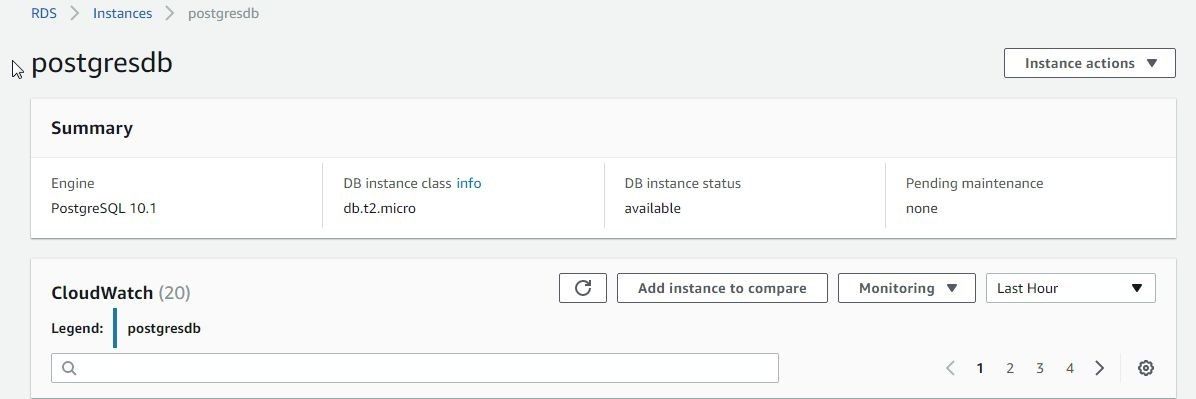
Figure 14. DB Instance Detail Page
Enabling Connectivity in the RDS DB Instance
By default the Security group associated with an RDS DB instance does not provide access from any IP outside the Subnet group of the RDS DB instance. Toad Edge Preview 2.0.0 on a local machine, for instance, won’t be able to connect with the RDS DB instance. To enable connectivity click on the Security groups link, which is listed in the Connect section on the DB Instance detail page and also in the Details section shown in Figure 15.
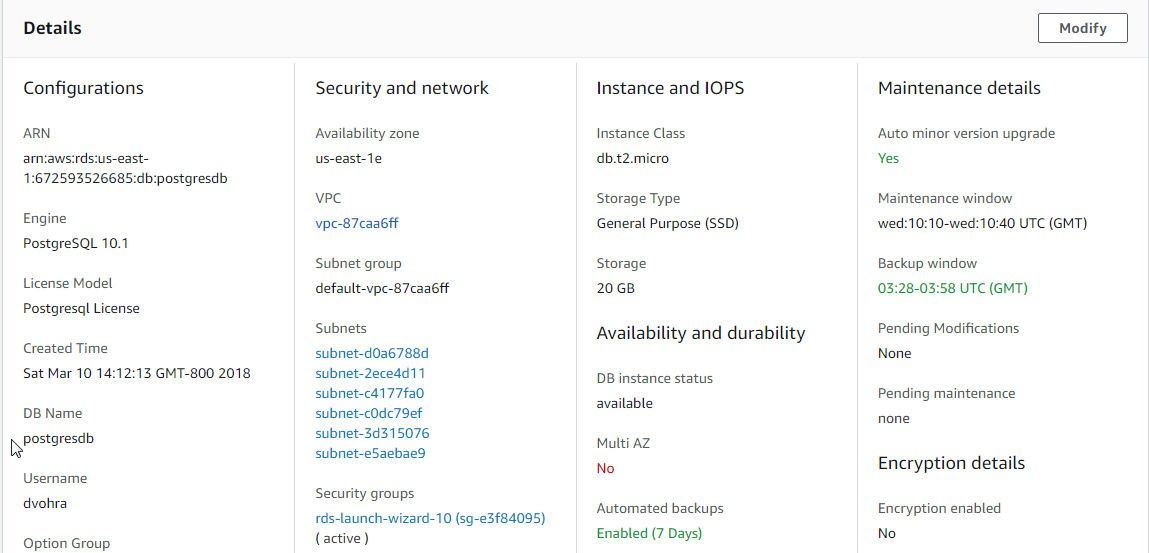
Figure 15. Security groups link
In the Security group console select the Inbound tab and click on Edit to add (or modify) an inbound rule to allow all traffic, as shown in Figure 16. Alternatively, an inbound rule may be added for a specific IP on which Toad Edge Preview 2.0.0 is installed.

Figure 16. Inbound Rule to allow All traffic
Obtaining Connection Parameters
We need connection parameters for the PostgreSQL host name, port and database. The host name is the Endpoint listed in the Connect section, as shown in Figure 17 on the DB instance detail page. The Port is also listed in the Connect section and is 5432 by default. Publicly accessible must be set to Yes.

Figure 17. Endpoint
The database name is the DB name specified when creating the DB instance in Database options in Figure 8 earlier. The DB Name may be obtained from the Details section on the DB instance page, as shown in Figure 18.
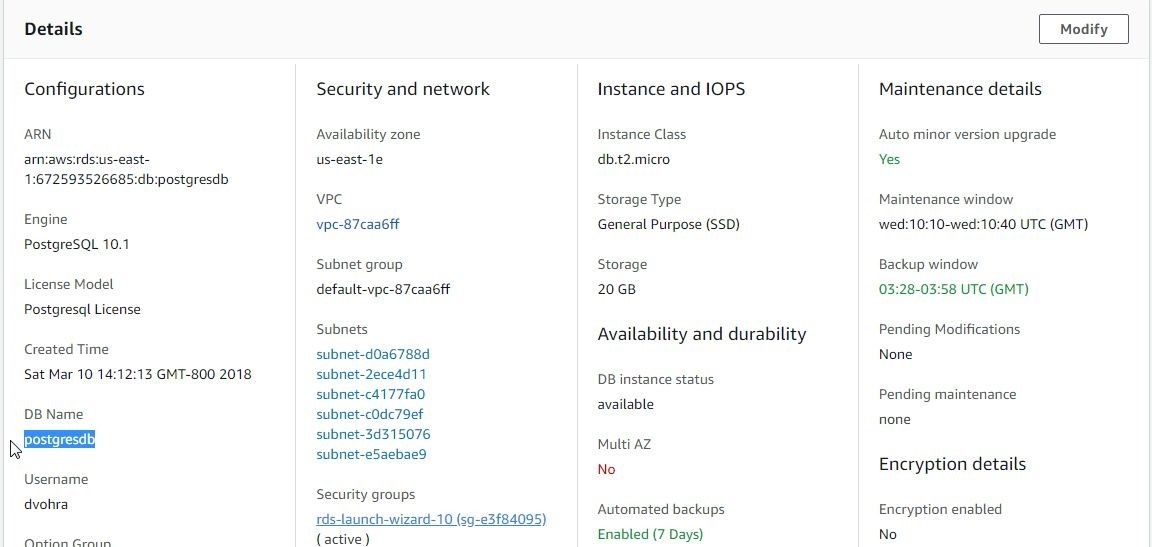
Figure 18. DB Name
Creating a Connection in Toad Edge
To create a connection select Connect>New Connection as shown in Figure 19.
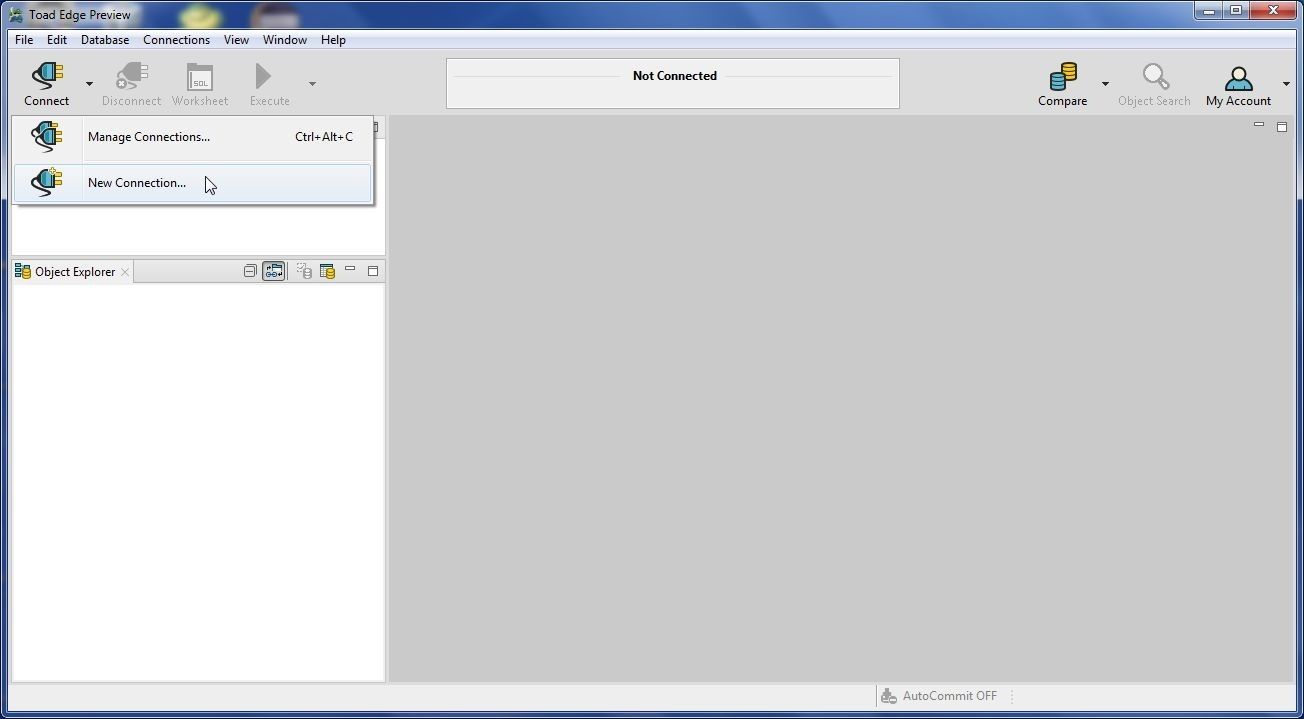
Figure 19. Connect>New Connection
In the New Connection wizard select PostgreSQL database platform as shown in Figure 20 and click on Next. The other option is to select EnterpriseDB (EDB) Postgres, which is not supported on RDS.
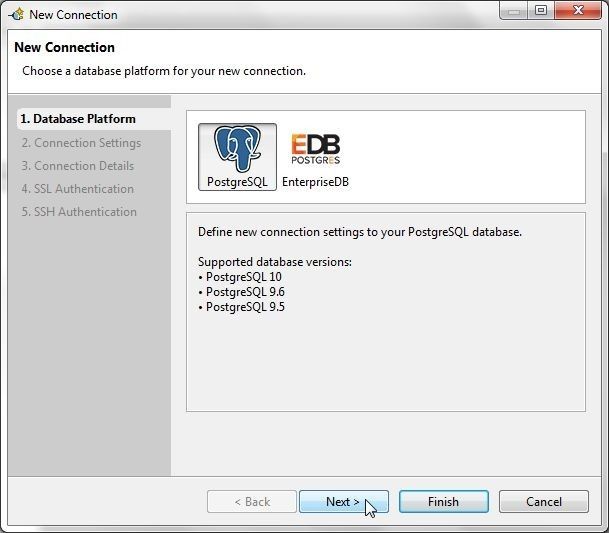
Figure 20. Selecting Database Platform
In Connection Settings specify Hostname as the Endpoint copied in Figure 17. Specify Database as postgresdb. Specify the Username as the Master Username configured when creating the DB instance. Specify Password as the Master Password. The connection string gets listed. An option to specify a custom connection string is also provided but is not suitable for connecting to RDS. Click on Test Connection to test the connection as shown in Figure 21.
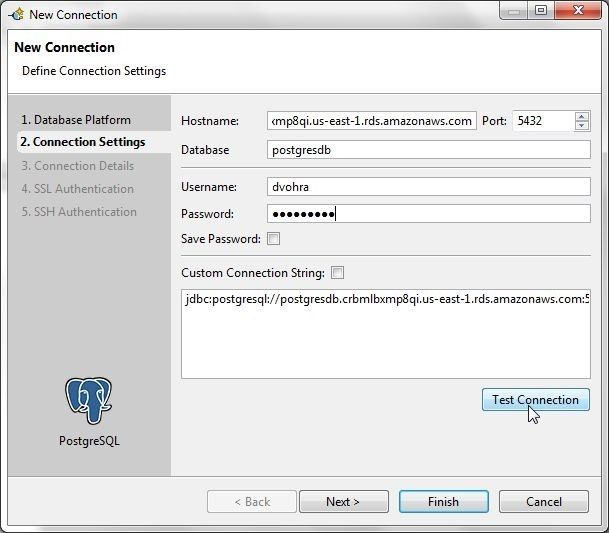
Figure 21. Connection Settings>Test Connection
The Connection is OK message gets displayed, as shown in Figure 22. Click on Next.
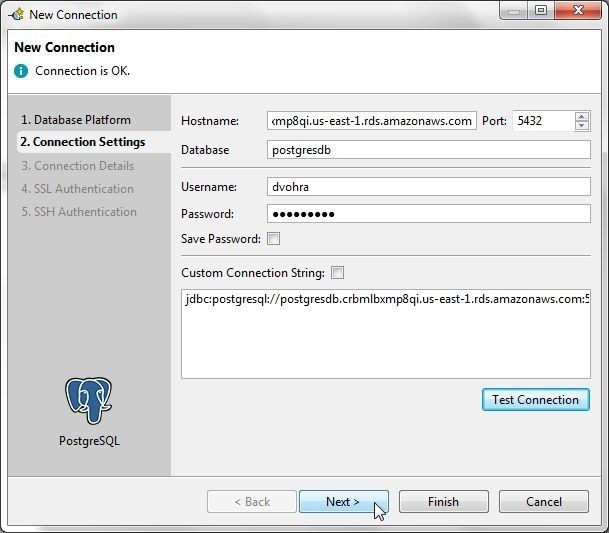
Figure 22. Connection is OK
In Connection Details select the option Enable Autocommit as shown in Figure 23. Click on Finish.
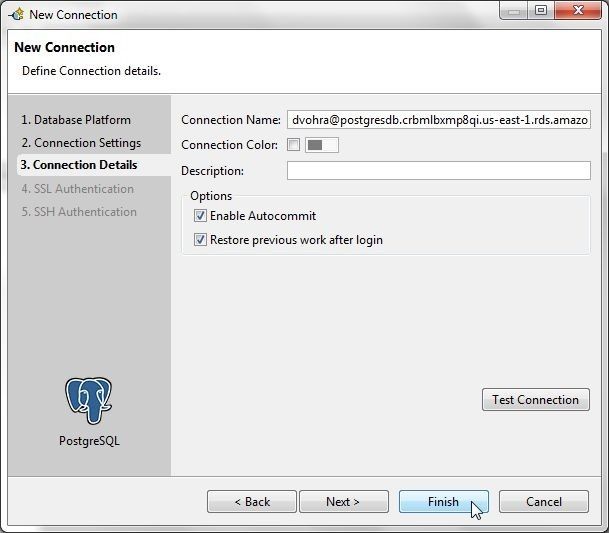
Figure 23. Connection Details>Finish
As PostgreSQL 10.0 is supported and certified but PostgreSQL 10.1 is not certified, the dialog Non-certified database gets displayed. as shown in Figure 24.
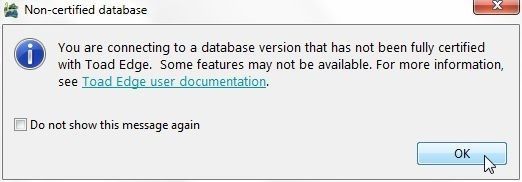
Figure 24. Non-certified Database
A connection gets created and added to the Connections view. as shown in Figure 25.
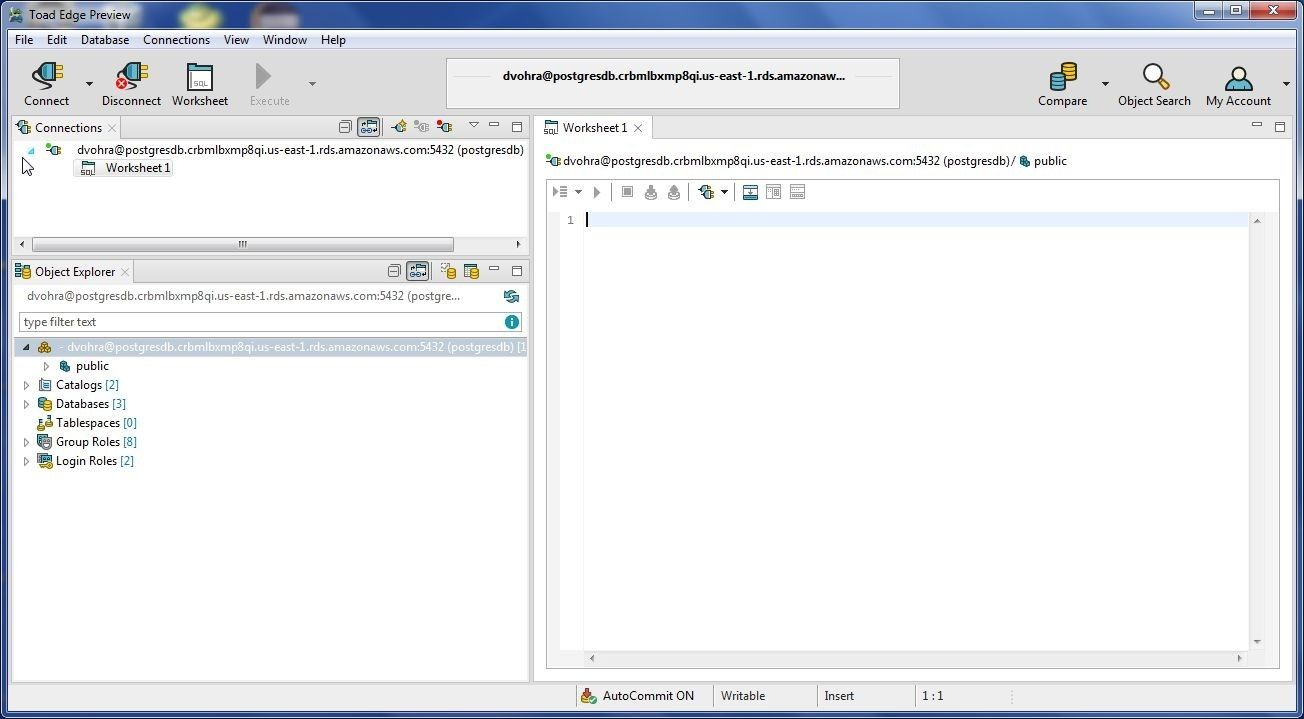
Figure 25. Connection added to Connections view
Creating a Database Table
To add a database table two options are available:
- Use the New Table wizard, which is launched from the Object Explorer
- Use the SQL Worksheet to run a DDL statement
We shall use a SQL Worksheet to run the following statement.
CREATE TABLE wlslog(timestamp VARCHAR(255),category VARCHAR(255),type VARCHAR(255),
servername VARCHAR(255), code VARCHAR(255),msg VARCHAR(255));
A Worksheet is associated with a connection by default, as shown in Figure 26. A new Worksheet may also be opened by selecting Open SQL Worksheet in the toolbar, also shown in Figure 26.
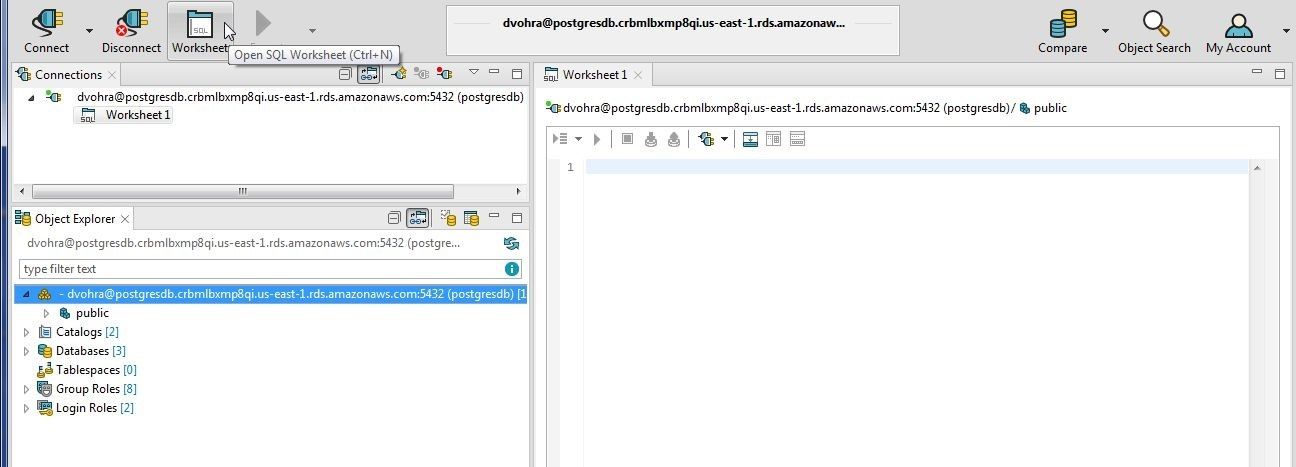
Figure 26. Open SQL Worksheet in toolbar and Worksheet associated with a connection
Add the DDL statement in the Worksheet and click on Execute SQL Statement as shown in Figure 27.
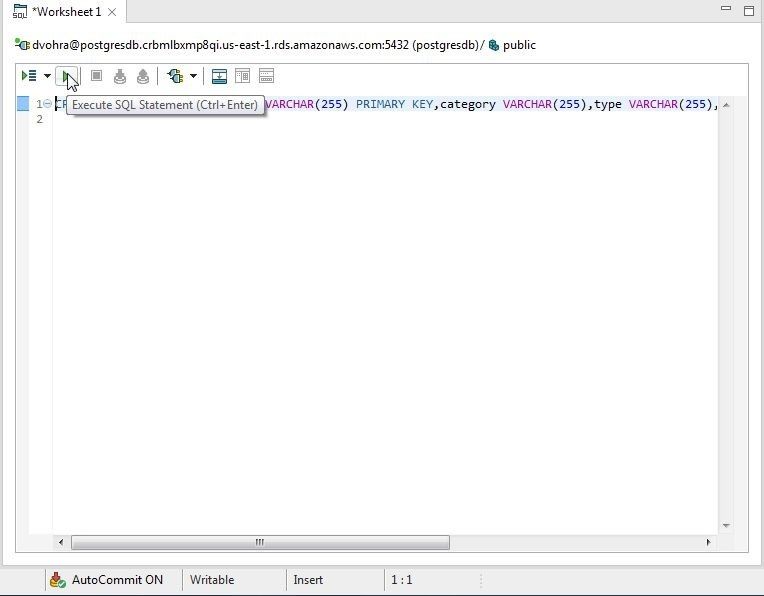
Figure 27. Execute SQL Statement
A new table wlslog gets created as indicated by the Create table processed message in Figure 28. Because AutoCommit is ON the DDL statement does not need to be committed explicitly.
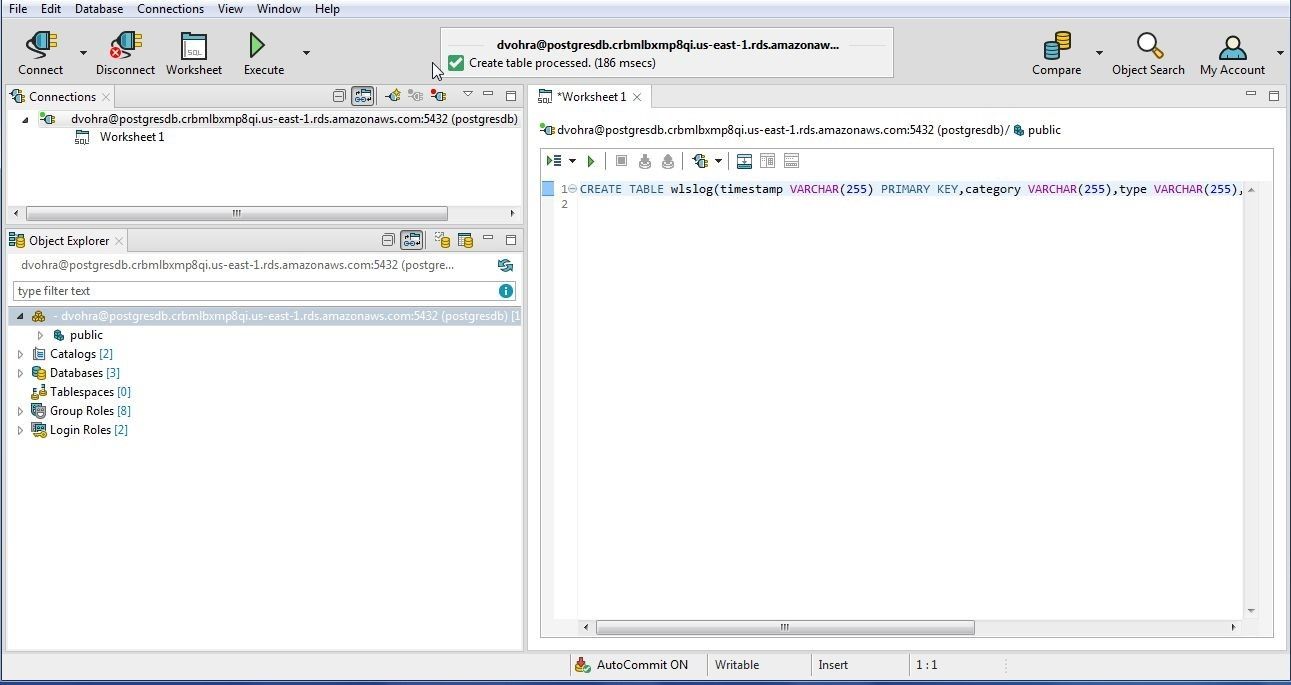
Figure 28. Create table processed
The new table wlslog gets listed in the Object Explorer as shown in Figure 29.
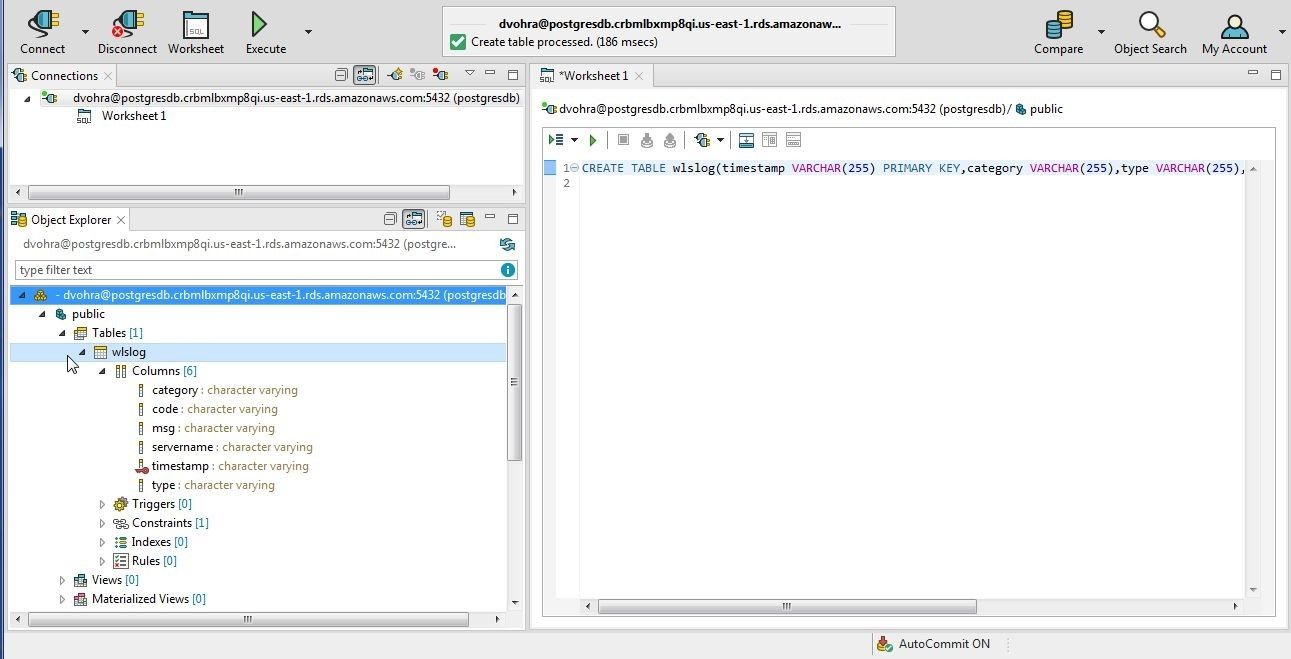
Figure 29. Table wlslog in Object Explorer
Several table options are available for table manipulation; for which, right-click on the wlslog table in Object Explorer as shown in Figure 30. Some of the table options are Refresh, Open (in a Data Editor), Rename, Copy Table…, and Record Count.
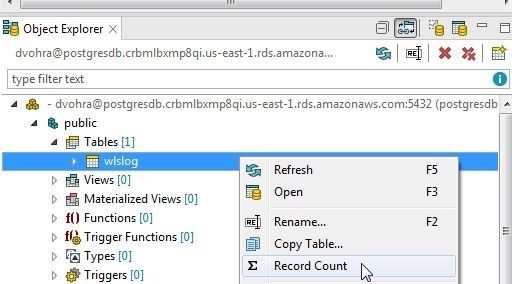
Figure 30. Table Options
Importing Table Data
Three options are available to add table data:
- Run DML SQL Statements in a SQL Worksheet
- Add data in Data Editor with Insert Row
- Import data from Object Explorer
Data may be imported from a CSV file or a SQL file. We shall import data from CSV; for which, create a file wlslog.csv and copy the following listing to the CSV file. The first row is for column headers and each row of data has CSV data fortimestamp, category, type, servername, code and msg.
timestamp,category,type,servername,code,msg

Apr-8-2014-7:06:16-PM-PDT,Notice,WebLogicServer,AdminServer,BEA-000365,Server state changed to STANDBY
Apr-8-2014-7:06:17-PM-PDT,Notice,WebLogicServer,AdminServer,BEA-000365,Server state changed to STARTING
Apr-8-2014-7:06:18-PM-PDT,Notice,WebLogicServer,AdminServer,BEA-000365,Server state changed to ADMIN
Apr-8-2014-7:06:19-PM-PDT,Notice,WebLogicServer,AdminServer,BEA-000365,Server state changed to RESUMING
Apr-8-2014-7:06:20-PM-PDT,Notice,WebLogicServer,AdminServer,BEA-000331,Started WebLogic AdminServer
Apr-8-2014-7:06:21-PM-PDT,Notice,WebLogicServer,AdminServer,BEA-000365,Server state changed to RUNNING
Apr-8-2014-7:06:22-PM-PDT,Notice,WebLogicServer,AdminServer,BEA-000360,Server started in RUNNING mode
By default a new table is empty, as shown in the Data Editor for the wlslog table in Figure 31. To import data right-click on Tables in Object Explorer and select Import Data as shown in Figure 31.
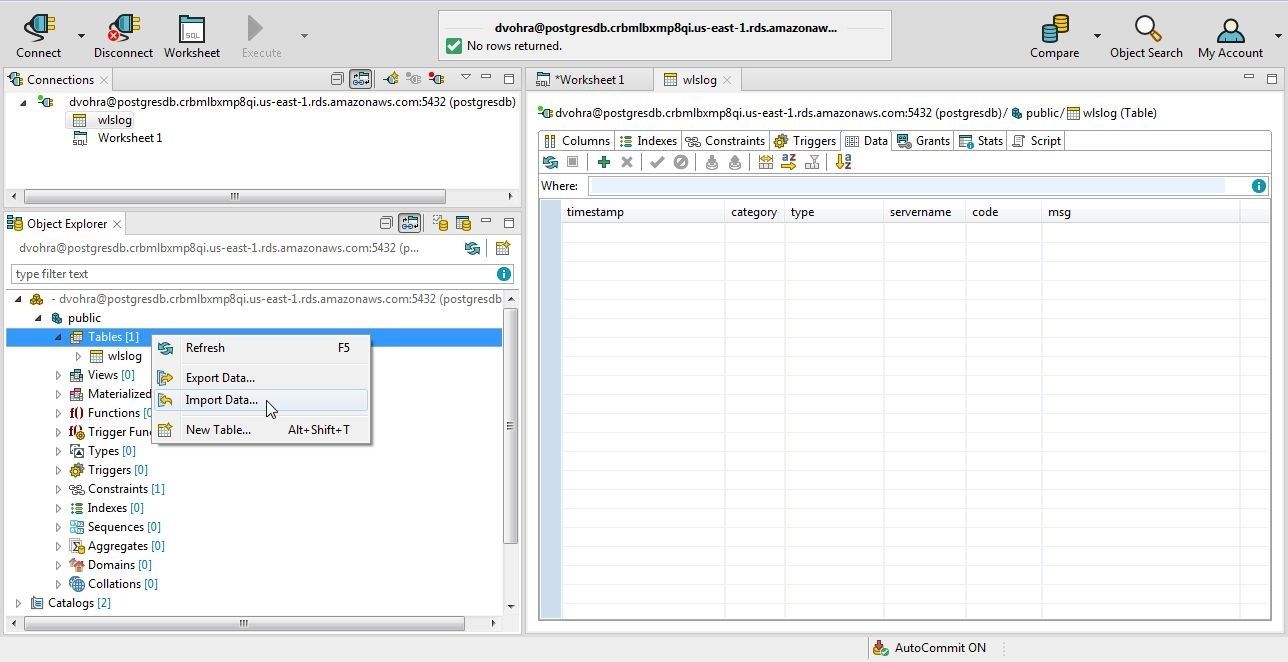
Figure 31. Tables>Import Data
The Import Data wizard gets launched, as shown in Figure 32. For Import Format select CSV file or ZIP archive with CSV content. Click on the selector (…) for the Source field and select the wlslog.csv file. The Error Log file directory is the same as the wlslog.csv file directory by default. Click on Next.
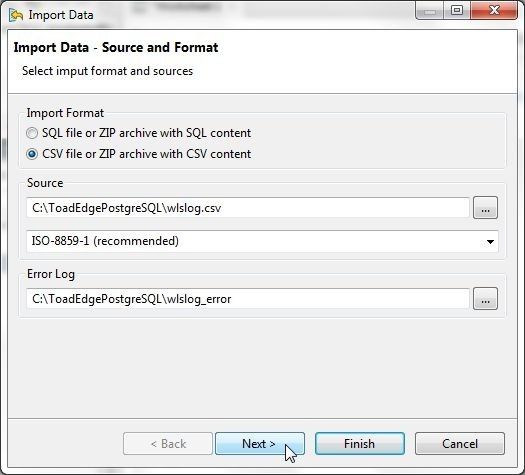
Figure 32. Selecting Source and Input Format
In CSV Settings the detailed settings, including Destination Database Table, CSV Format Settings, and Data Format Settings are listed, as shown in Figure 33. Data Format Preview is also displayed. Click on Finish.
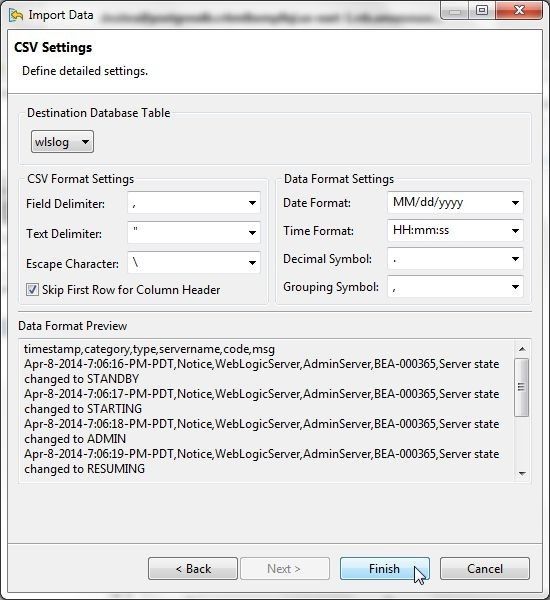
Figure 33. Import Data>CSV Settings
The data gets imported, as indicated in the Data Import Result dialog in Figure 34. The Refresh data in table (s) is selected by default and if de-selected the table data would need to be refreshed with the Refresh button. Click on Close.
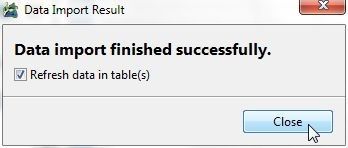
Figure 34. Data Import Result
The Data tab in the Data Editor lists the data imported, as shown in Figure 35.
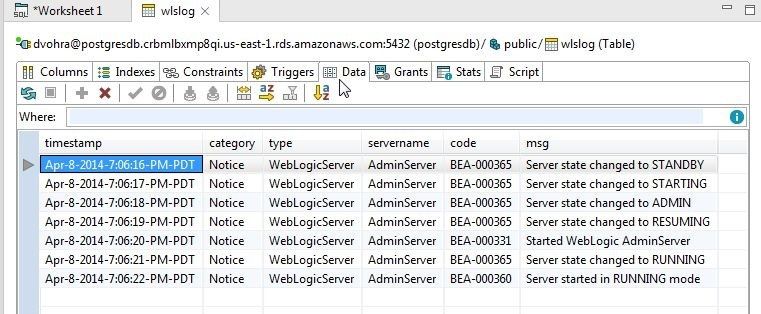
Figure 35. Data in Data Editor
The Columns tab displays the table columns including their data type and size and whether a column is Nullable, as shown in Figure 36.
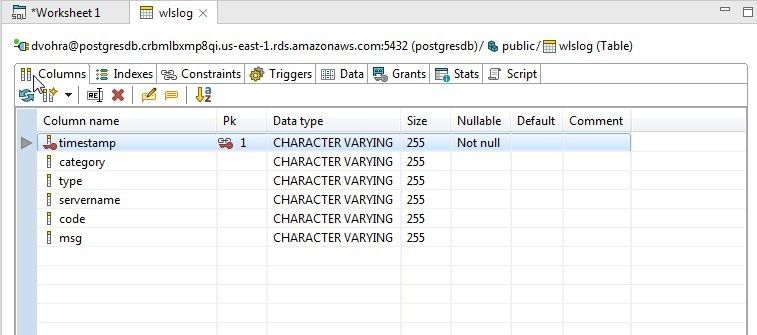
Figure 36. Columns
Exporting Table Data to HTML Report
To export data to HTML select the row/s of data to export. Multiple rows are selected with Shift+Row. Right-click in the Data Editor and select Export Grid selection>HTML as shown in Figure 37.
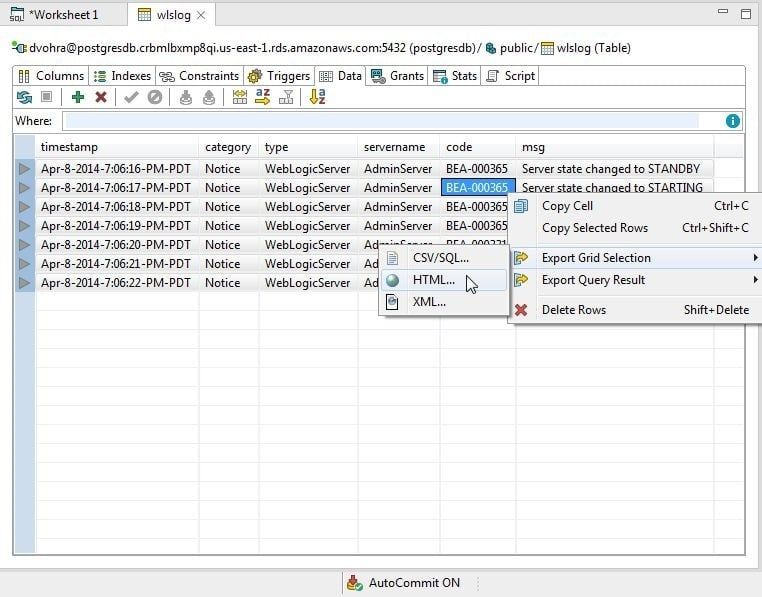
Figure 37. Export Grid Selection>HTML
In Save As specify a file name and click on Save as shown in Figure 38.
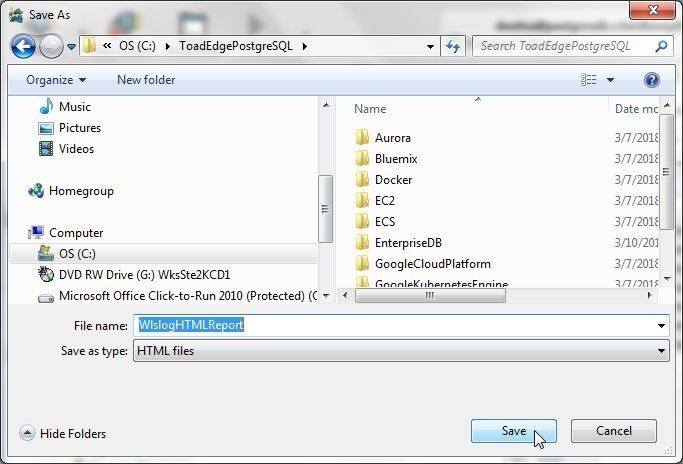
Figure 38. Save As
The Data gets exported to an HTML file, which is shown in a browser in Figure 39.
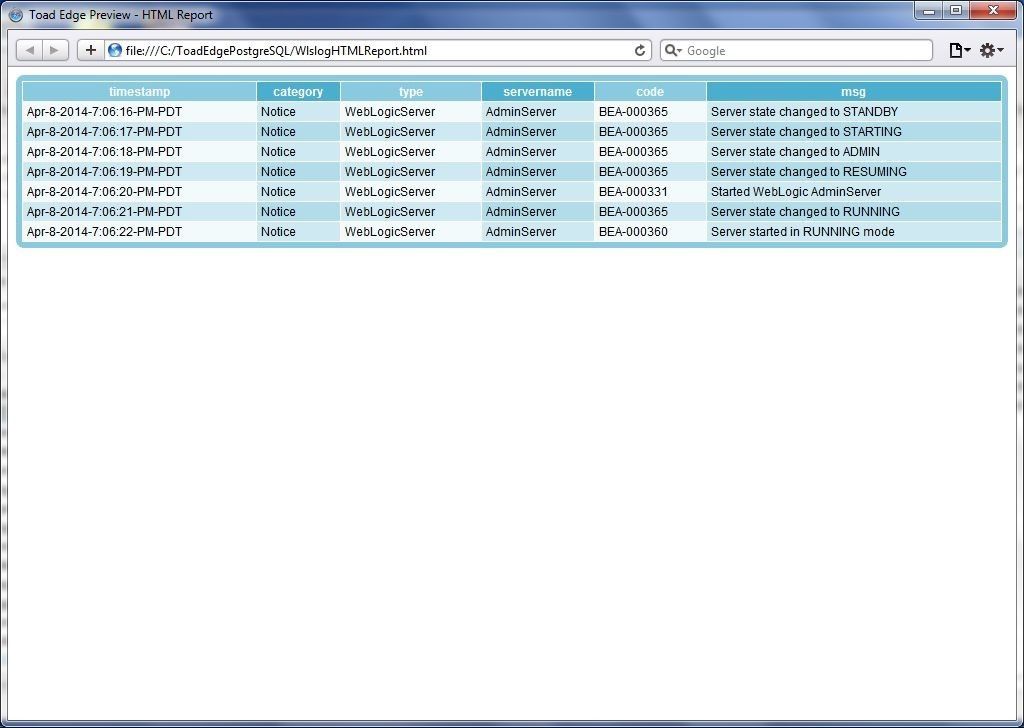
Figure 39. HTML Report
Deleting RDS DB Instance
When not being used the RDS DB instance may be stopped by selecting the DB instance in the Instances table and Instance Actions>Stop. To delete a DB instance select Instance Actions>Delete as shown in Figure 40.
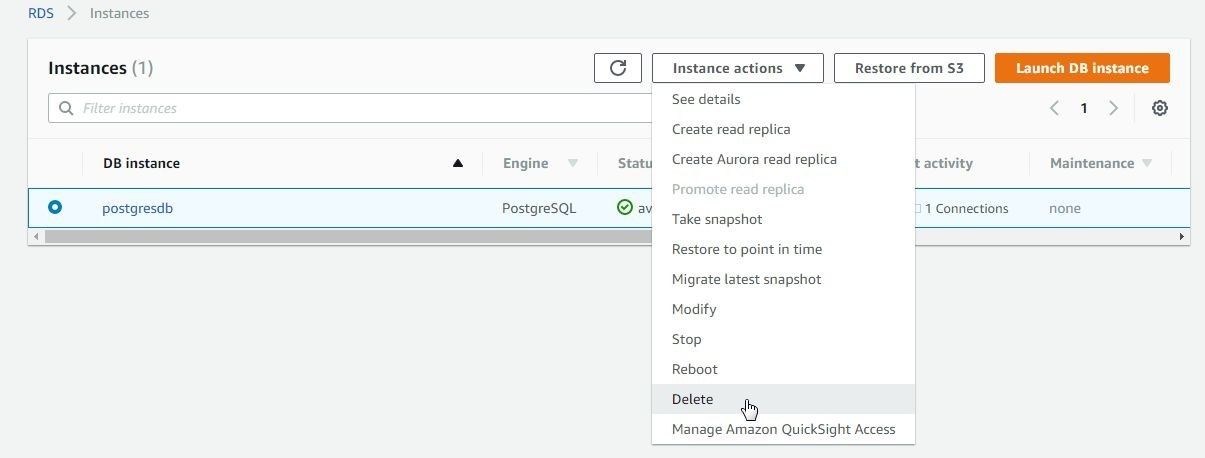
Figure 40. Instance Actions>Delete
In Delete DB Instance select Yes to create a final snapshot, as shown in Figure 41, and click on Delete.
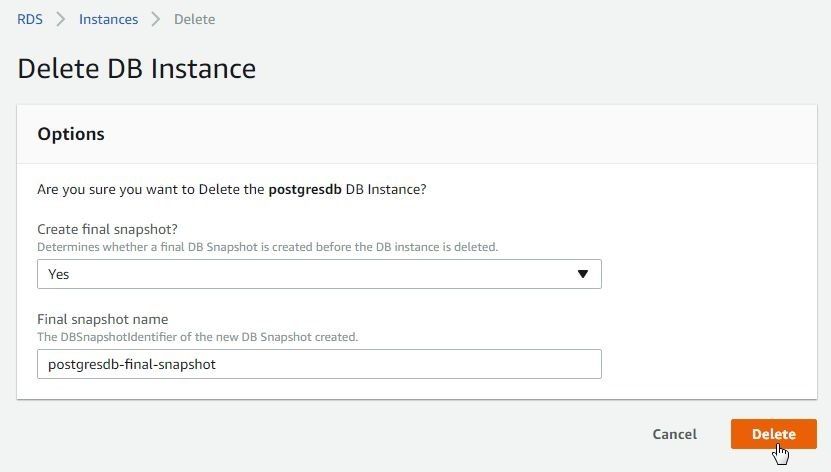
Figure 41. Delete DB Instance
The DB instance starts to get deleted, as shown by the deleting message in Figure 42. Select Snapshots to list the snapshots.

Figure 42. DB Instance deleting
The PostgreSQL database snapshot Details is shown in Figure 43.
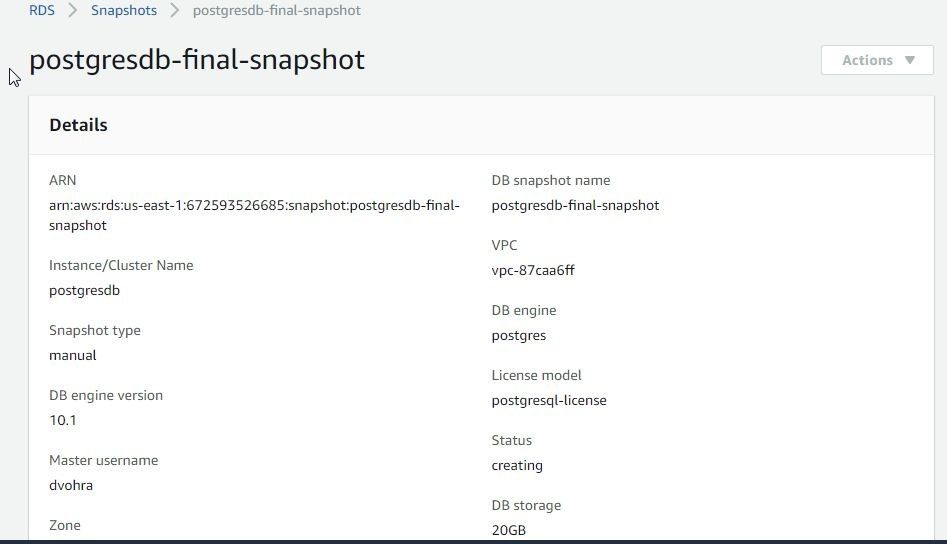
Figure 43. PostgreSQL Database Snapshot
Conclusion
In this article we discussed using Toad Edge Preview 2.0.0 with a PostgreSQL engine-based RDS DB instance on AWS. The benefit of using Toad Edge as a client is an integrated environment for connecting to PostgreSQL database and creating and browsing database objects with a wizard or tool each to create a table, add data, import table data, and export data.
Start the discussion at forums.toadworld.com