Introduction
PostgreSQL and MySQL databases are the top two open source databases. PostgreSQL has features that are comparable to or better than those of MySQL database. Toad Edge 1.0 to 1.2 is designed for MySQL database. Toad Edge 2.0.0 Preview is presently designed for only PostgreSQL database versions 9.5, 9.6, 10 and EnterpriseDB (EDB) Postgres 9.6, 10. The EDB Postgres platform is an enterprise-grade PostgreSQL with added tools and services and shall be discussed in a subsequent article.
Some of the salient features of Toad Edge Preview 2.0.0 are:
- Support for EnterpriseDB Postgres in addition to the open source PostgreSQL
- A New Connection Wizard with support for SSL and SSH
- Import Data Wizard
- Export to multiple output formats (CSV, SQL, HTML, and XML)
- Data Editor
- Schema Snapshots
- SQL Worksheet with support for code completion, syntax highlighting and syntax check
- Schema Comparison including snapshot comparison with a schema
In this article we shall explore Toad Edge 2.0.0 with PostgreSQL database 10. This article has the following sections.
- Setting the Environment
- Installing Toad Edge 2.0.0
- Installing PostgreSQL 10 Database
- Setting Preferences
- Creating a Connection in Toad Edge
- Setting Auto Commit Mode
- Taking a Schema Snapshot
- Creating a Database Table
- Adding Table Data in Data Editor
- Importing Data into a Table
- Comparing Schemas
- Comparing a Schema Snapshot with a Database
- Exporting Table Data to CSV or SQL
- Exporting Table Data to HTML
- Exporting Table Data to XML
- Using the SQL Worksheet
- Using Object and Text Search
- Managing Connection
Setting the Environment
Download application binaries for the following software on a local machine.
- PostgreSQL Database 10 (Windows)
- Toad Edge Preview 2.0.0
For system requirements refer to the System Requirements section.
Installing Toad Edge 2.0.0
To install Toad Edge 2.0.0 double-click on the Windows Installer Package ToadEdge_2.0.0_x64_En_Previe.msi. Sign In as shown in Figure 1. The Email and Password would be different for different users.
Figure 1. Sign In
Toad Edge Preview Setup Wizard gets started, as shown in Figure 2. Click on Next.
Figure 2. Toad Edge Preview Setup Wizard
In End User License Agreement accept the terms of the license agreement and click on Next as shown in Figure 3.
Figure 3. End User License Agreement
In Destination Folder select the default directory to install Toad Edge Preview as shown in Figure 4 and click on Next.
Figure 4. Destination Folder
In Ready to Install select the additional tasks for the setup as shown in Figure 5 and click on Install to start the installation.
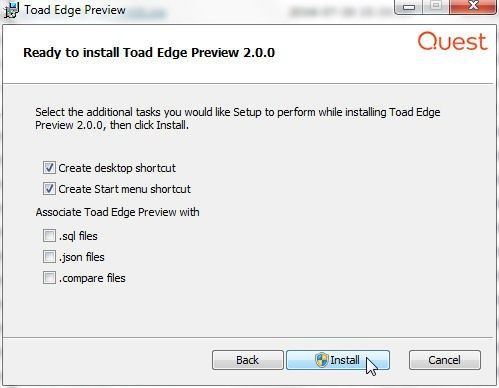
Figure 5. Ready to Install>Install
Toad Edge 2.0.0 begins to get installed, as shown in Figure 6.
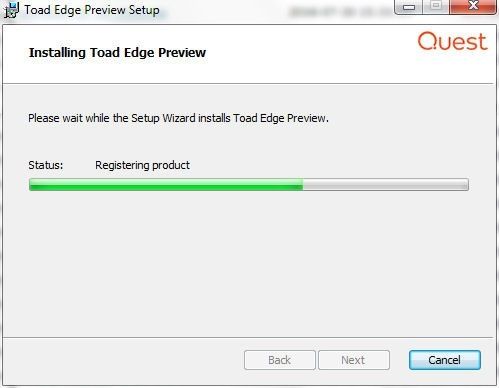
Figure 6. Installing Toad Edge Preview
When the installation has completed, as shown in Figure 7 click on Finish.
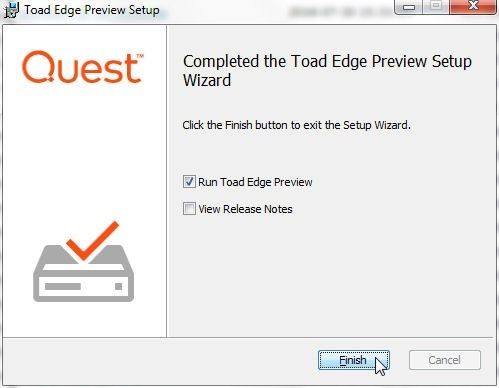
Figure 7. Installation Completed
Toad Edge Preview gets launched, as shown in Figure 8.

Figure 8. Toad Edge Preview launched
Installing PostgreSQL 10 Database
To install PostgreSQL 10 double-click on the application postgresql-10.3-1-windows-x64.exe to start the Setup wizard for PostgreSQL as shown in Figure 9. Click on Next.

Figure 9. Setup Wizard for PostgreSQL 10
Select the default installation directory C:Program FilesPostgreSQL as shown in Figure 10 and click on Next.
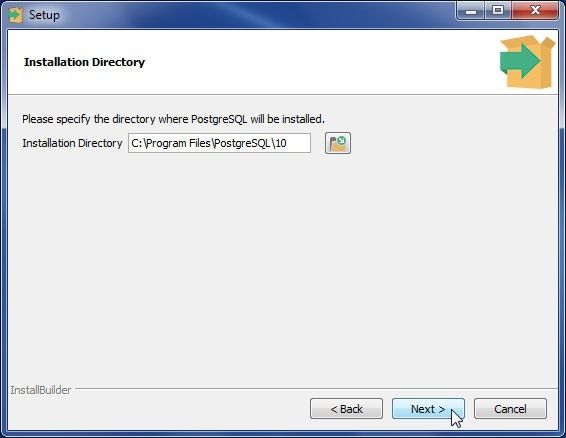
Figure 10. Selecting Installation Directory
Select the components to install as shown in Figure 11 and click on Next. At least PostgreSQL Server and Command Line tools must be selected.

Figure 11. Selecting Components to Install
Select the Data Directory as the default C:Program FilesPostgreSQLdata as shown in Figure 12 and click on Next
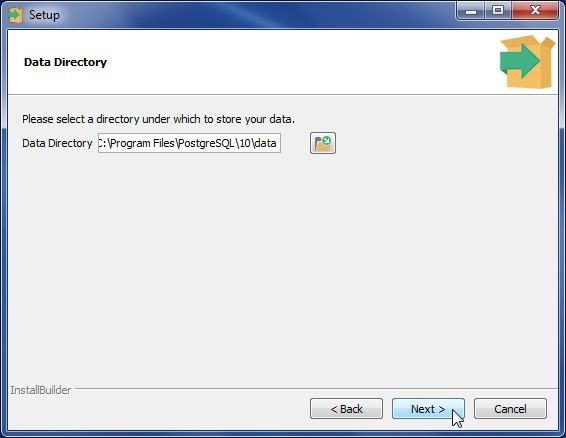
Figure 12. Selecting Data directory
When the setup has completed as shown in Figure 13, click on Finish.
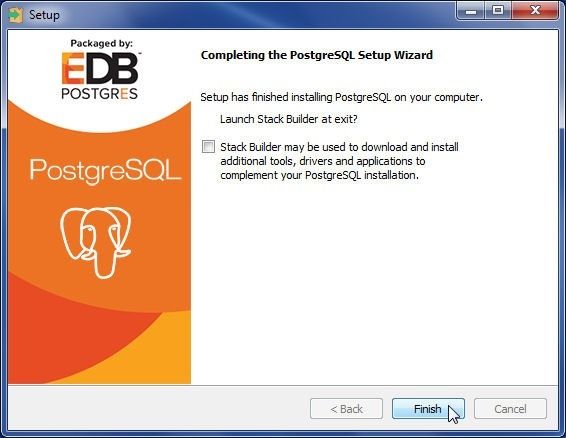
Figure 13. Setup Completed
Specify a password for the superuser postgres as shown in Figure 14 and click on Next.
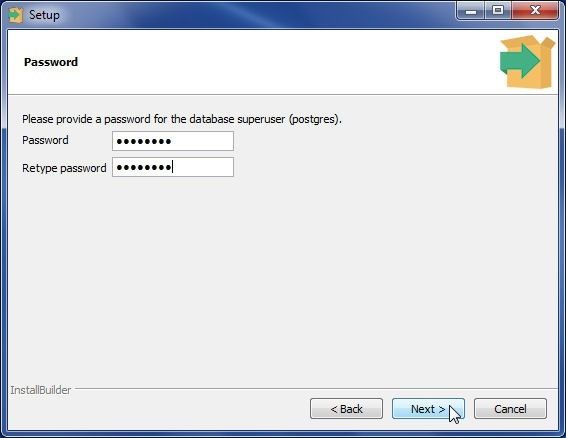
Figure 14. Specifying Password
Select the default port number 5432 for the PostgreSQL server to listen on as shown in Figure 15 and click on Next.
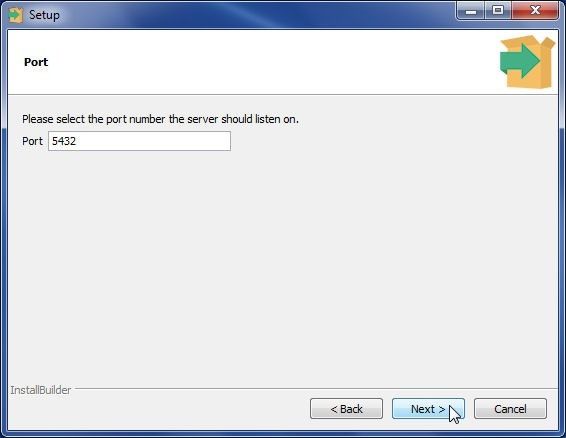
Figure 15. Selecting Server Port
In Advanced Options select the Default locale as shown in Figure 16 and click on Next.
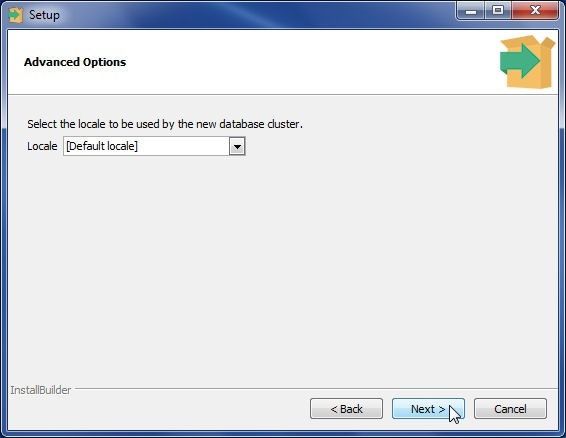
Figure 16. Advanced Options
The Pre Installation Summary gets displayed, as shown in Figure 17. Click on Next.
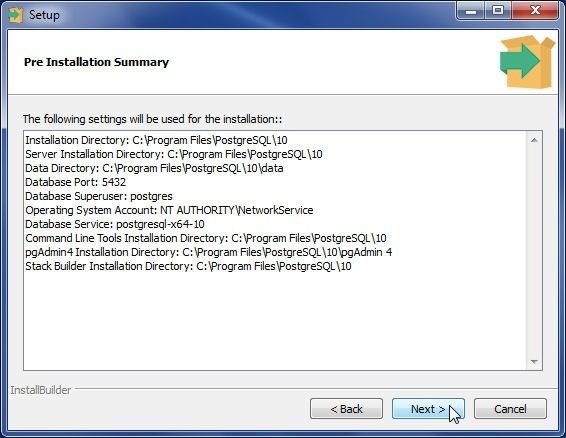
Figure 17. Pre Installation Summary
In Ready to Install click on Next as shown in Figure 18.
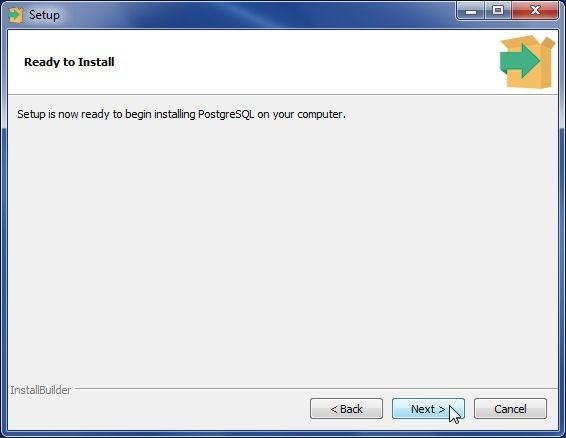
Figure 18. Ready to Install
The installation gets started. When the setup has completed as shown in Figure 19, click on Finish.

Figure 19. Setup Completed
Setting Preferences
The Toad Edge preferences are global settings for different features. To set or find the global preferences select View>Preferences as shown in Figure 20.
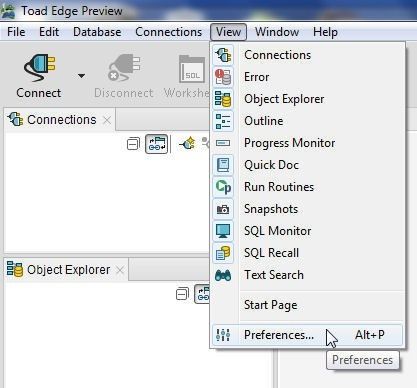
Figure 20. View>Preferences
The General preferences apply to Startup Options, Dialogs and Wizards, and User Interface, as shown in Figure 21.
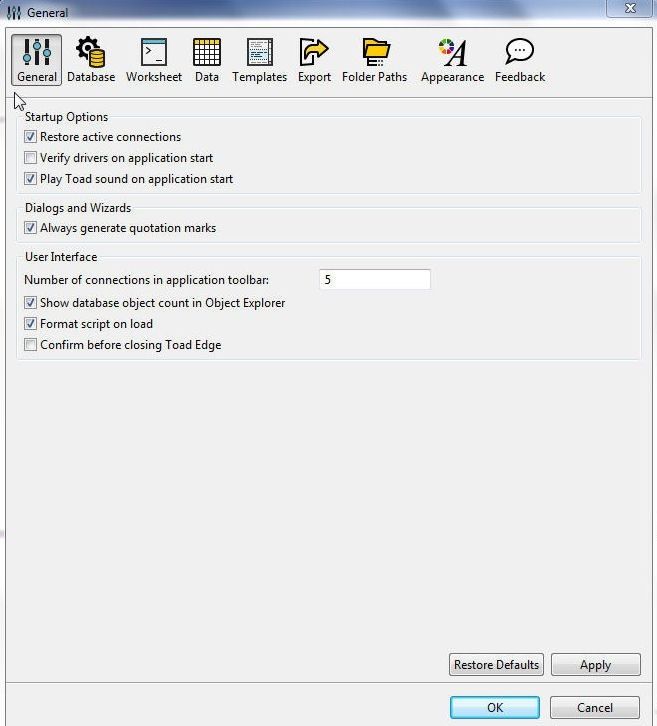
Figure 21. General Preferences
The Database preferences include the default JDBC driver and timeouts for the default driver, as shown in Figure 22.
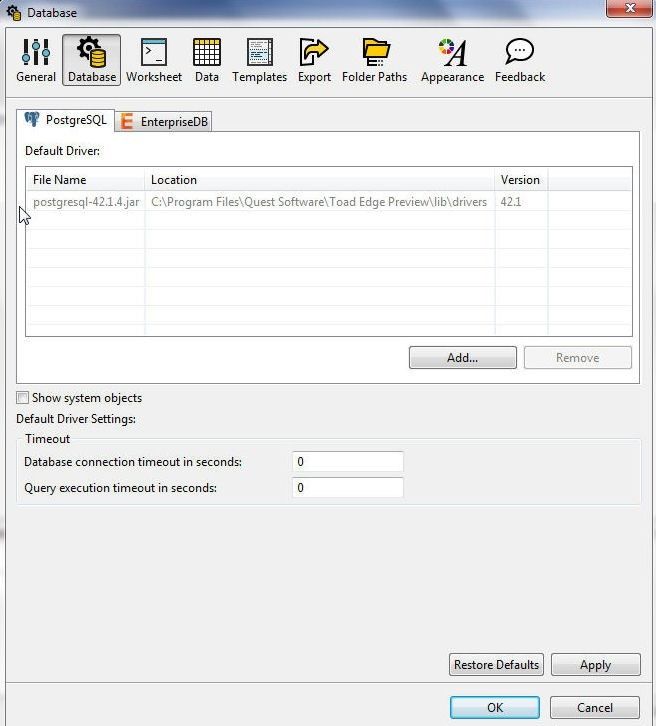
Figure 22. Database Preferences
The Folder Paths settings include the Document path, as shown in Figure 23.
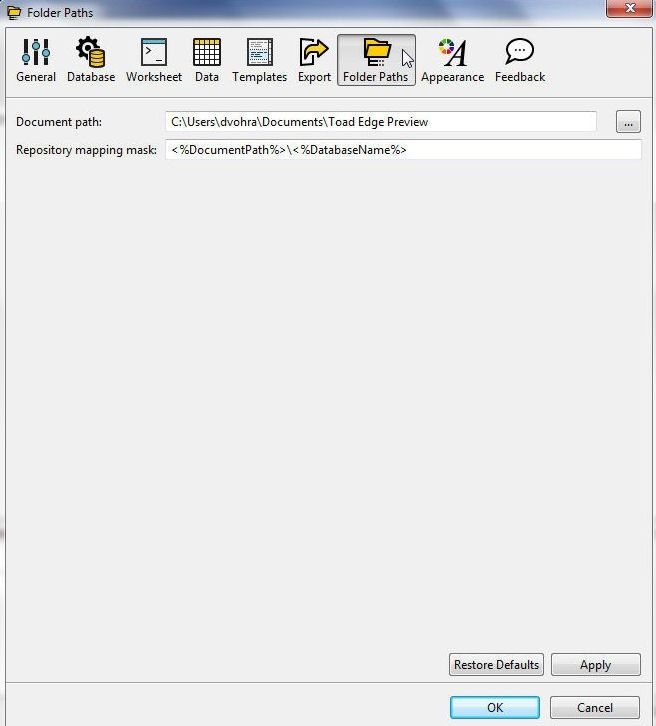
Figure 23. Folder Paths
Creating a Connection in Toad Edge
By default, a connection is not provisioned in Toad Edge 2.0.0, as indicated by the Not Connected message in Figure 24.
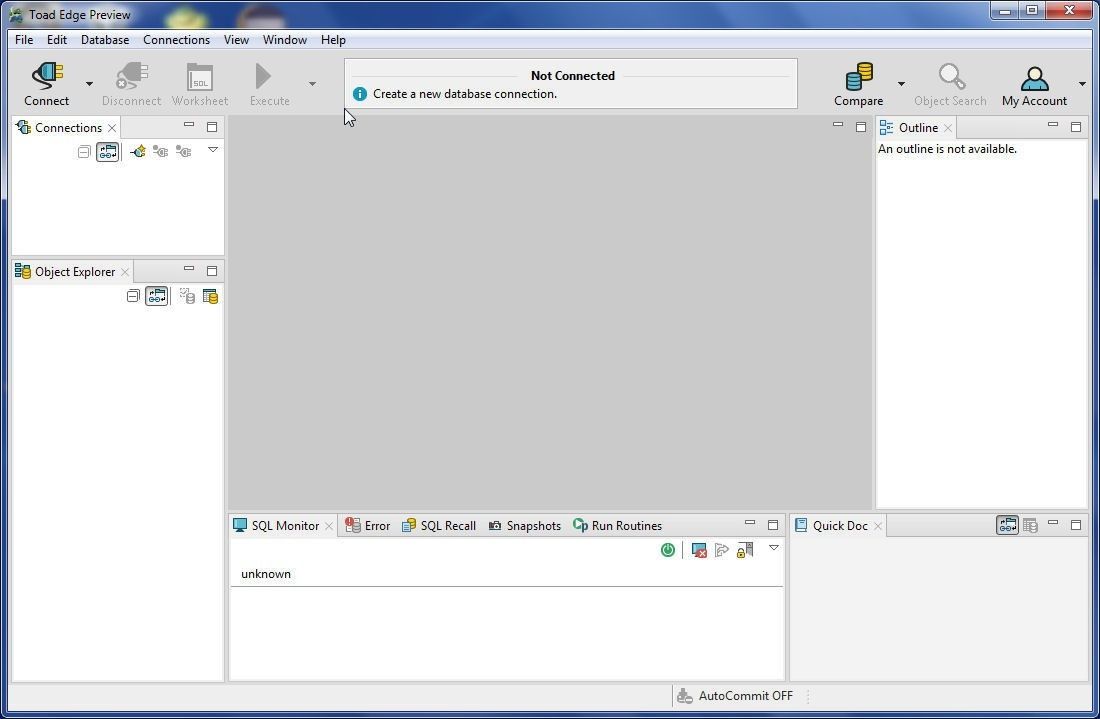
Figure 24. Not Connected
To create a connection select Connect>New Connection as shown in Figure 25.
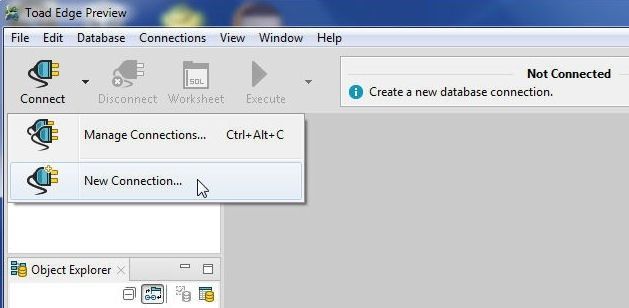
Figure 25. Connect>New Connection
The New Connection wizard gets started, as shown in Figure 26. Select from the two platforms: PostgreSQL or EnterpriseDB; PostgreSQL is shown selected. Click on Next.
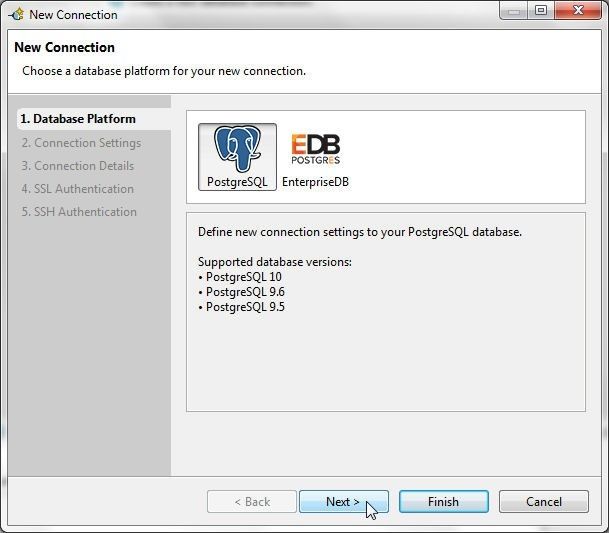
Figure 26. New Connection wizard
Next, specify the connection settings as shown in Figure 27. Specify Hostname as localhost, Port as 5432, Database as postgres, Username as postgres, and Password as the password configured for the superuser postgres when installing PostgreSQL database, which is postgres. Click on Test Connection to test the connection settings.
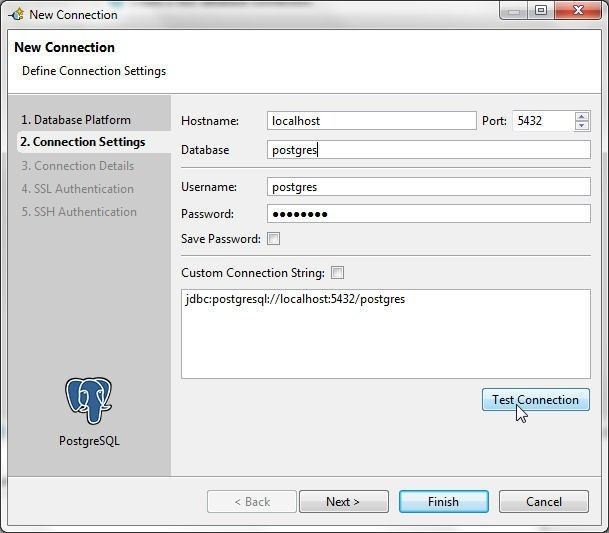
Figure 27. Connection Settings
The Connection is OK message shown in Figure 28 indicates that the connection gets established. Click on Next.
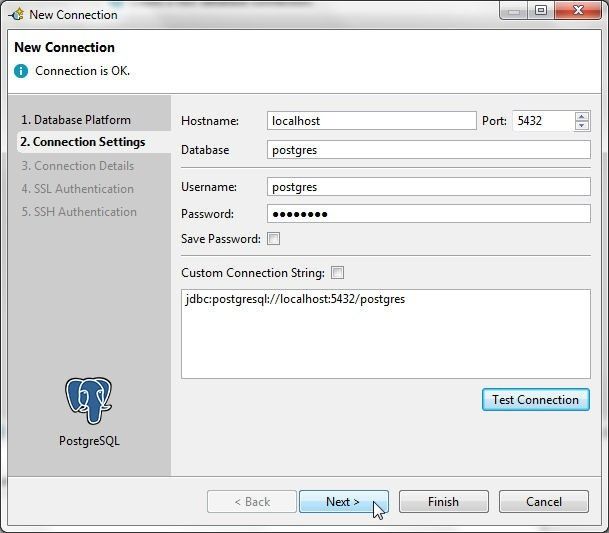
Figure 28. Connection is OK
In Connection details, select the option Enable Autocommit as shown in Figure 29. Click on Finish to complete the connection.
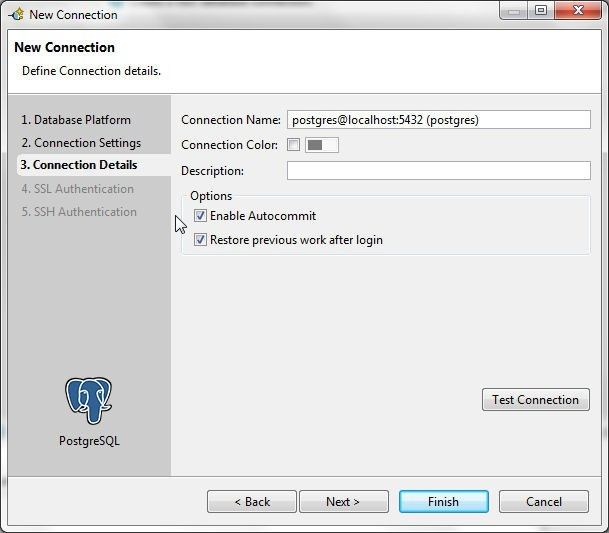
Figure 29. Enable Autocommit
Toad Edge preview 2.0.0 is presently certified with PostgreSQL 10.0. If a later 10.x version is used, a message dialog gets displayed to indicate that the database version is not fully certified with Toad Edge and some of the features may not be supported. Even though not fully certified, a later version may still be used. Click on OK. A connection gets created and added to Connections view, as shown in Figure 30. A SQL Worksheet (Worksheet1 for the first connection) gets associated with the connection. The public schema is listed in Object Explorer as the default schema.
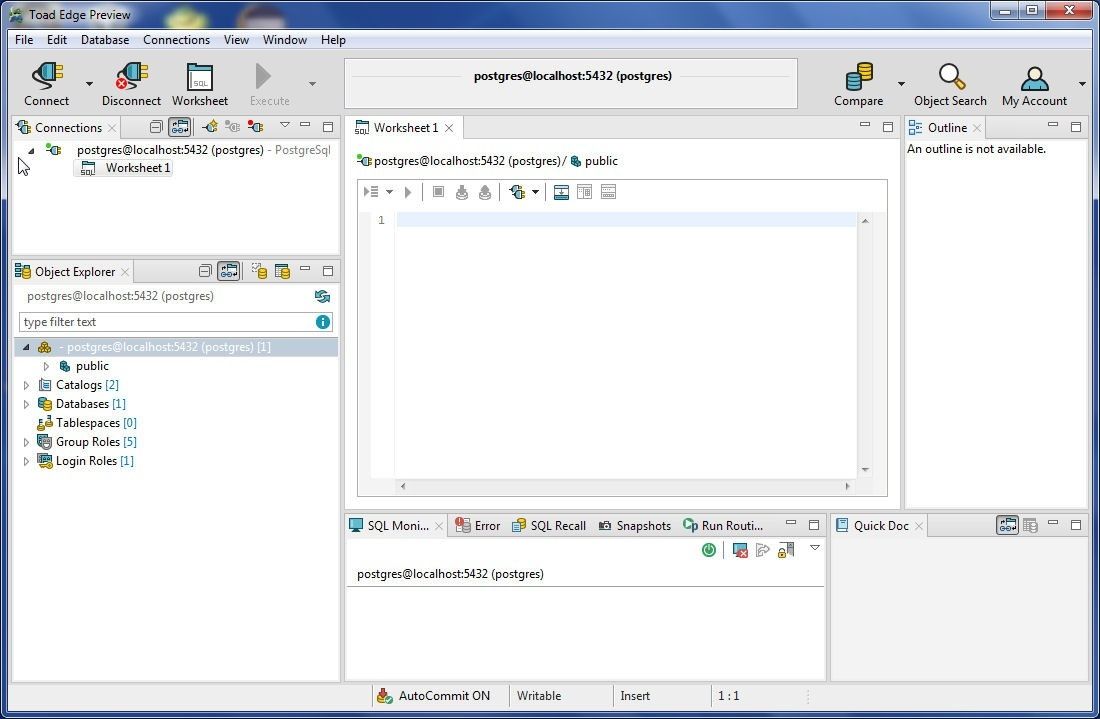
Figure 30. Connection and SQL Worksheet added to Connections view
Setting Auto Commit Mode
Because we selected Enable Auto Commit when configuring the new connection, AutoCommit is set to ON, as shown in Figure 31.
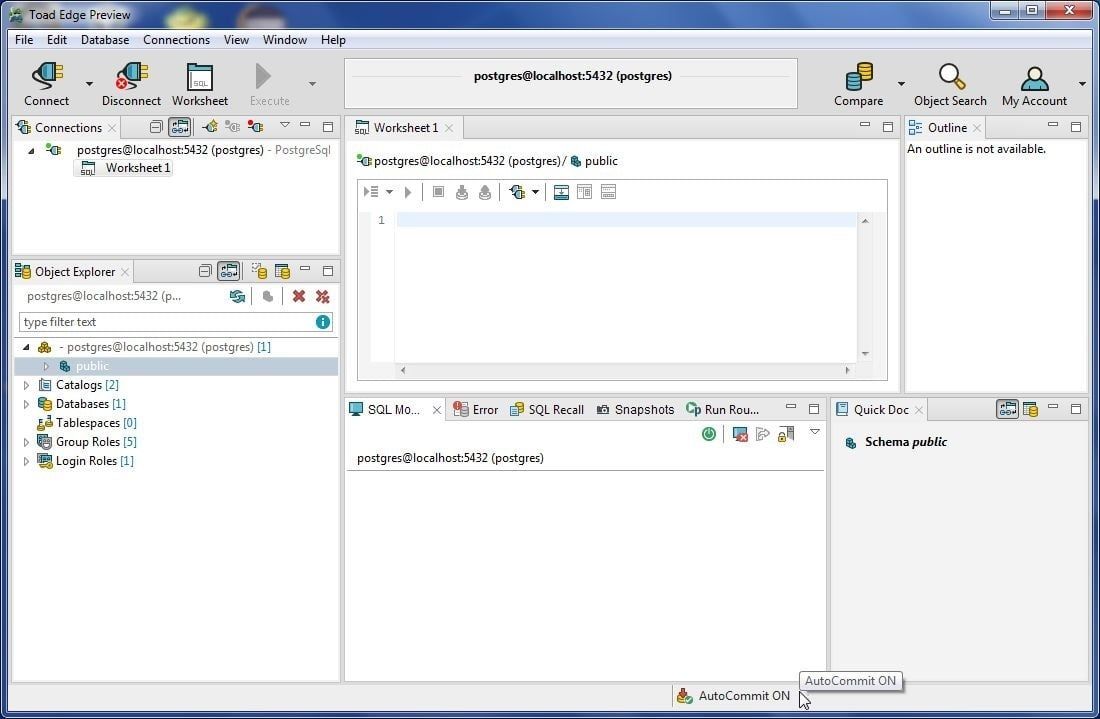
Figure 31. AutoCommit ON
The default setting when Auto Commit is not enabled is AutoCommit OFF, as shown in Figure 32.
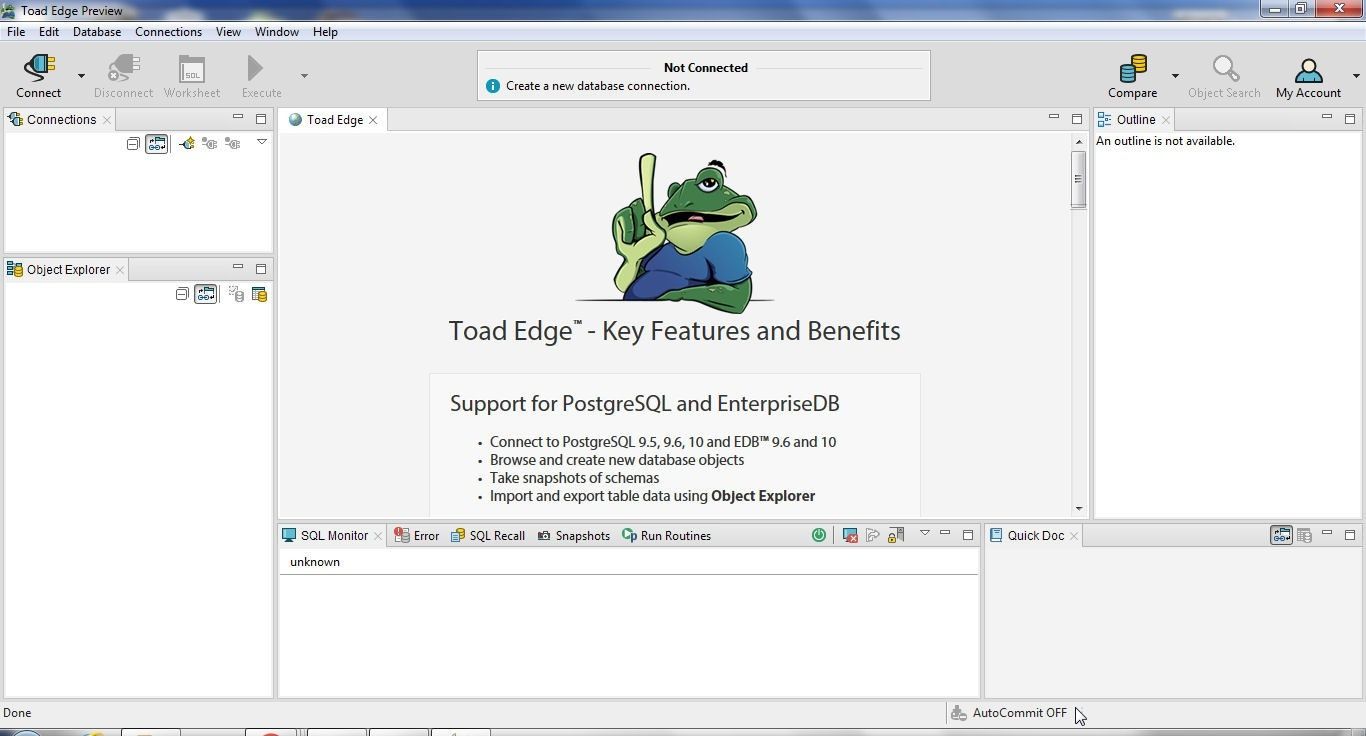
Figure 32. AutoCommit OFF
If Auto Commit is to be to set to OFF, select Database>Disable AutoCommit as shown in Figure 33.
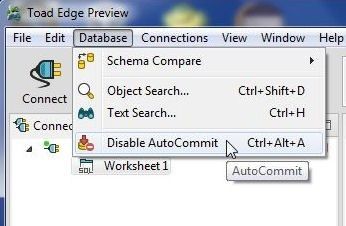
Figure 33. Database>Disable AutoCommit
If AutoCommit is to be set to ON, select Database>Enable AutoCommit as shown in Figure 34.
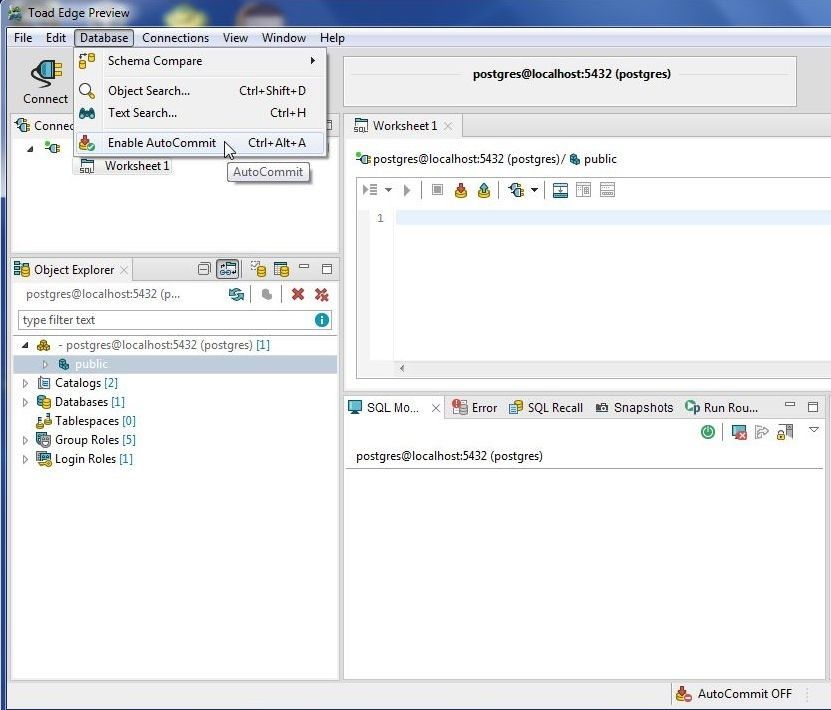
Figure 34. Database>Enable AutoCommit
Taking a Schema Snapshot
A schema snapshot is a backup of the database files. A database may be imported or restored from a snapshot if required. To create a snapshot of the public schema, right-click on the schema in Object Explorer and select Take Snapshot as shown in Figure 35.
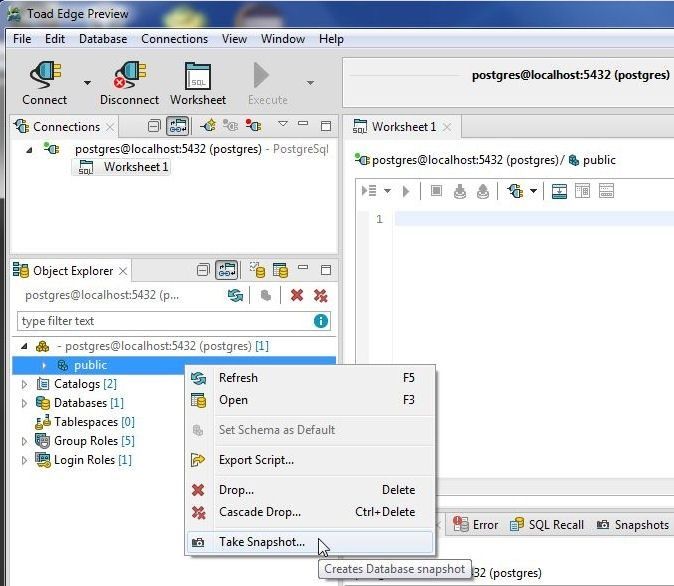
Figure 35. Object Explorer>public>Take Snapshot
In the Take Snapshot dialog specify a snapshot label (or select the default label) as shown in Figure 36 and click on OK.
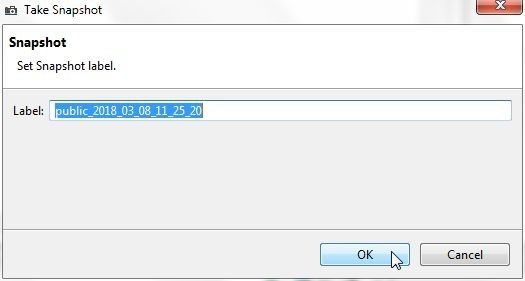
Figure 36. Snapshot Label
The Taking Snapshot progress message gets displayed, as shown in Figure 37.
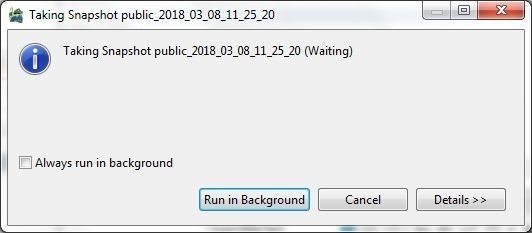
Figure 37. Taking Snapshot
When the snapshot has completed it gets added to the public schema in Snapshots view, as shown in Figure 38.
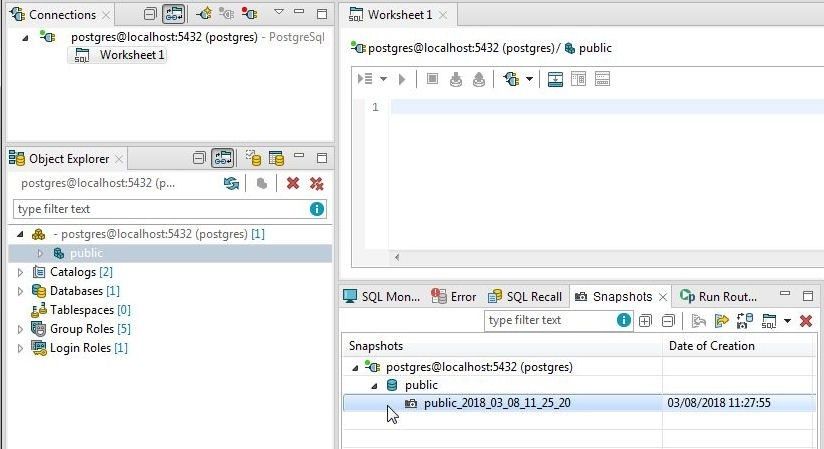
Figure 38. Snapshot added
Creating a Database Table
Two options are available to create a database table:
- Run a DDL SQL statement in a SQL Worksheet
- Use the New Table wizard
We shall use the New Table wizard as it generates the DDL automatically. To create a table right-click on public>Tables in Object Explorer as shown in Figure 39 and select New Table.
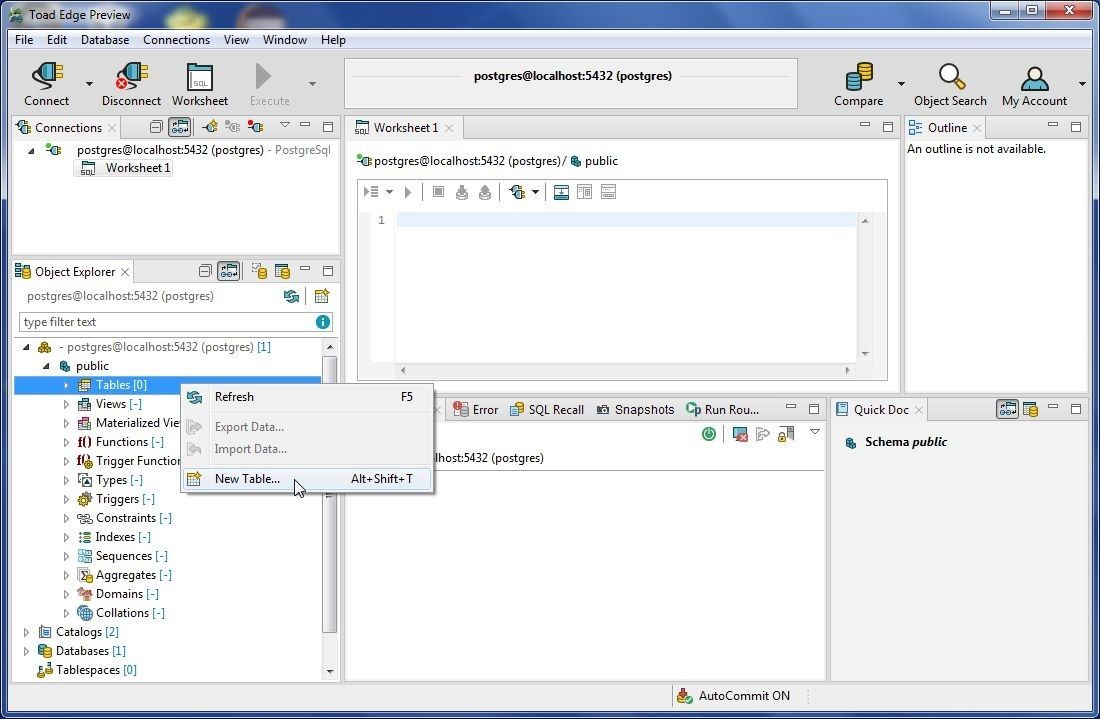
Figure 39. Selecting Object Explorer>public>Tables>Create Table
The New Table wizard gets started. The public schema is already selected as shown in Figure 40. Specify a Table name (wlslog) and click on Next.
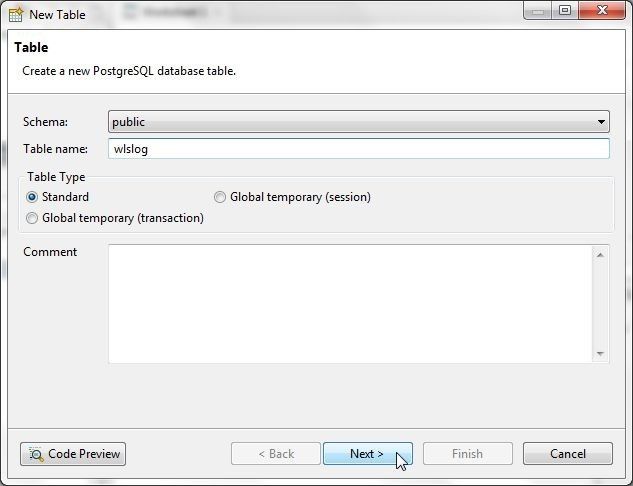
Figure 40. Specifying Table name in New Table wizard
Next, add table columns. The wlslog table has columns timestamp, category, type, servername, code and msg all of type VARCHAR with the timestamp being the primary key column. Click on New… in Table Columns as shown in Figure 41 to add a column.
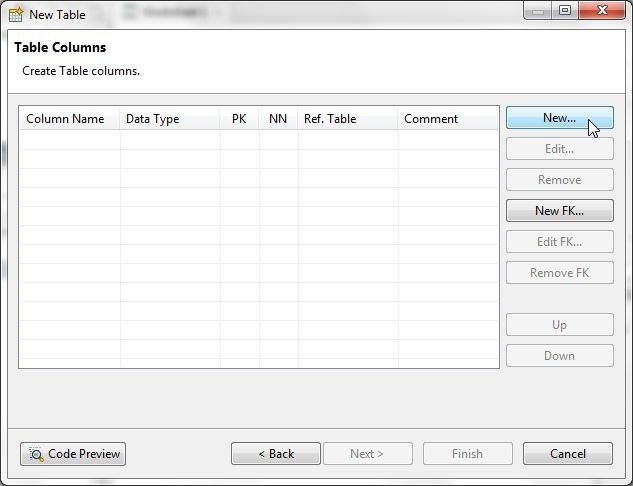
Figure 41. Table Columns>New…
The New Column wizard gets started, as shown in Figure 42.
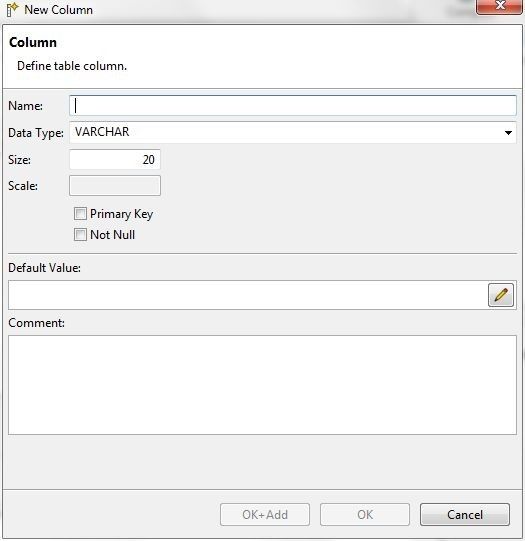
Figure 42. New Column wizard
Specify Name as timestamp, Size as 255 and click in the Primary Key checkbox as shown in Figure 43. Click on OK+Add to add the column and launch the New Column dialog again to add another column.
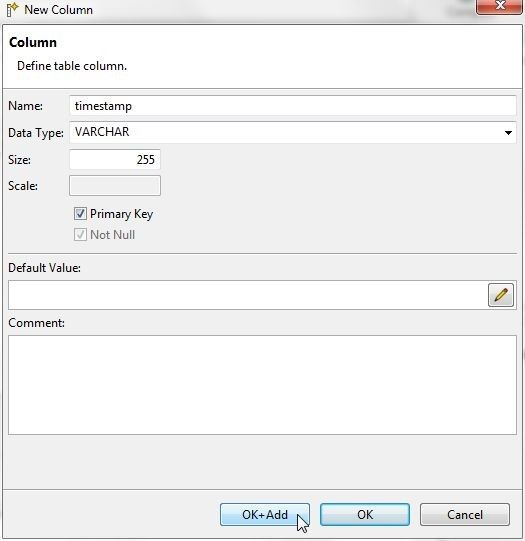
Figure 43. Adding primary key Column timestamp
Add the next column category, for which, do not select the Primary Key checkbox but specify a default value in Default Value field and click on OK+Add as shown in Figure 44.
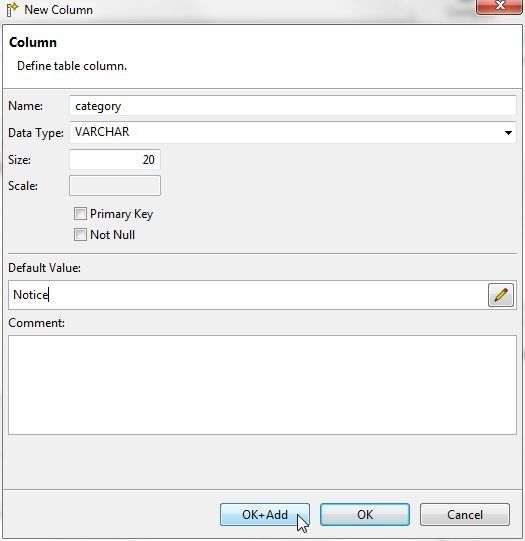
Figure 44. Adding a non-primary key Column with a default value
Similarly, add the type, servername, code and msg columns. Specify default value for type column as WebLogicServer and default value for servername as AdminServer. For the last column msg in the table click on OK instead of OK+Add, as shown in Figure 45.

Figure 45. Adding last column msg
When all the columns have been added click on Code Preview as shown in Figure 46 to preview the DDL that is run to create the table.

Figure 46. New Table>Code Preview
The Code Preview gets displayed, as shown in Figure 47.
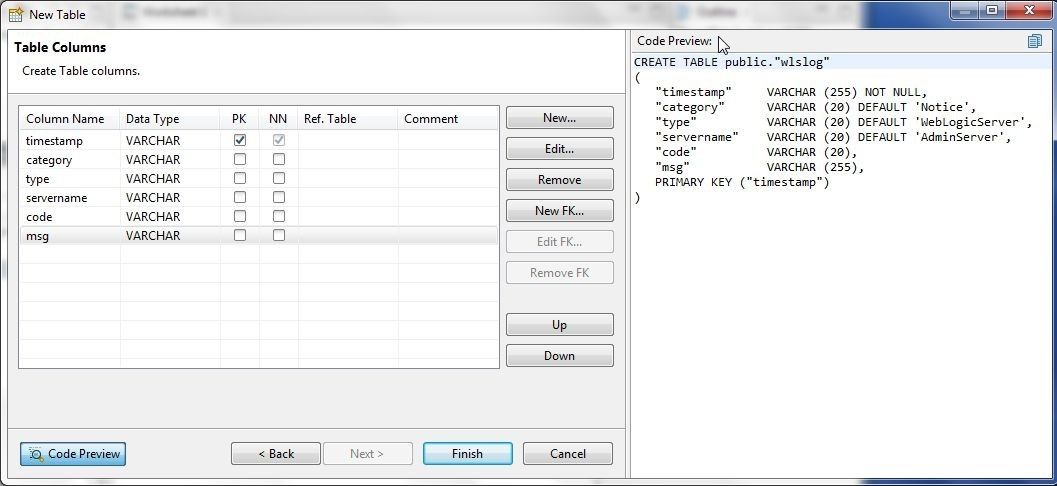
Figure 47. Code Preview displayed
Click on Code Preview again to close the code preview display. Click on Finish as shown in Figure 48 to create the table.
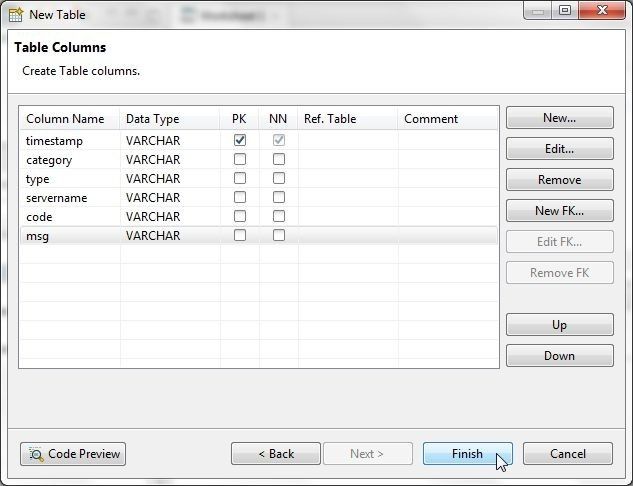
Figure 48. New Table>Finish
The table wlslog gets created and added to Object Explorer>Tables in schema public, as shown in Figure 49. A Data Editor gets displayed and a table Outline view also gets displayed.
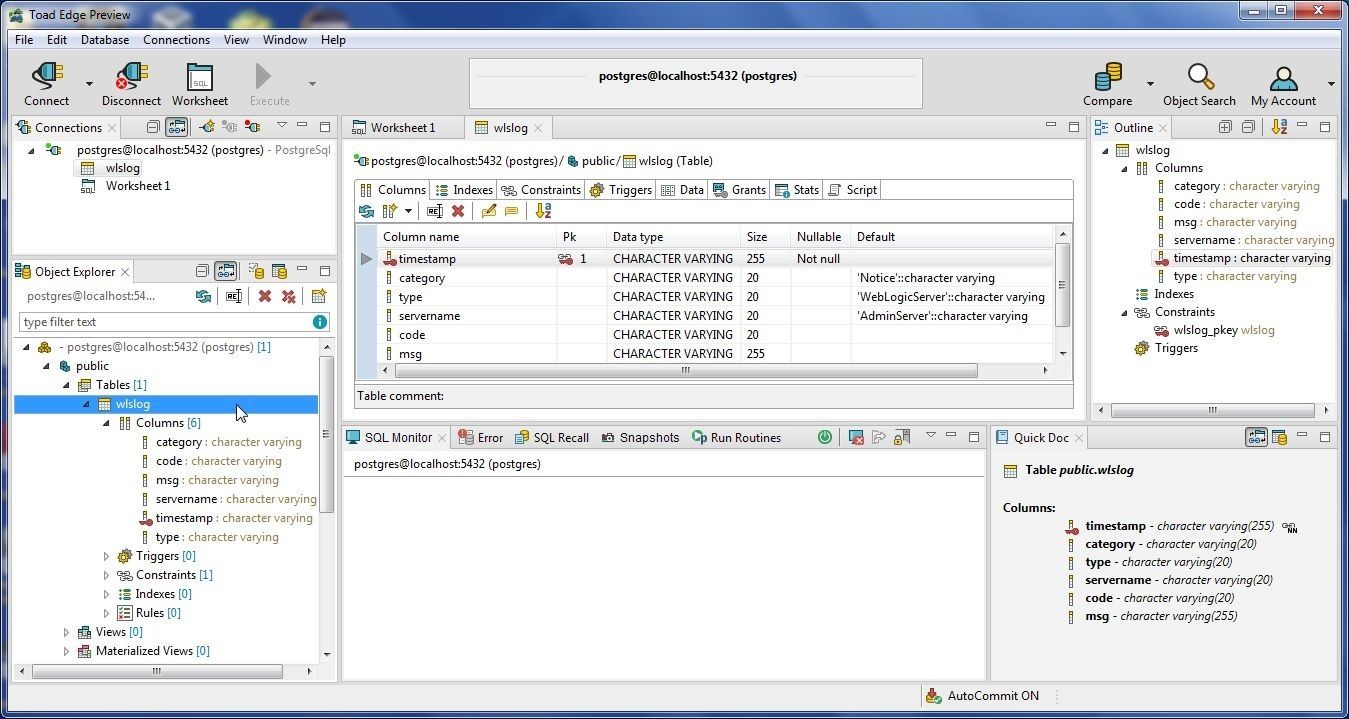
Figure 49. Table wlslog added
Adding Table Data in Data Editor
Table data may be added using the Data Editor or by importing data. We shall discuss both the approaches. If a few (1-2) rows are to be added the Data Editor is the more suitable option, and if several rows of data are to be added the Import Data is the more suitable option. The Data selection in Preferences provides settings for Data Grid and different type of data formats, as shown in Figure 50.
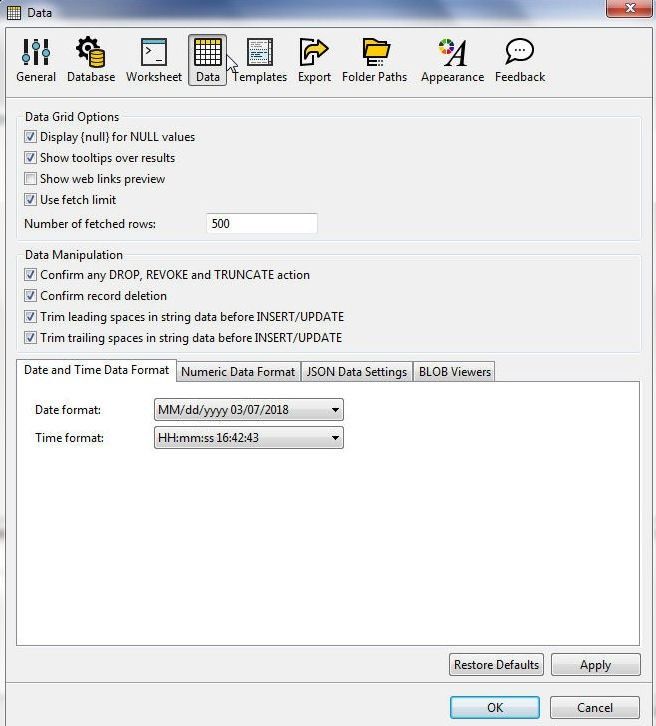
Figure 50. Preferences>Data
Select the Data tab in the Data Editor as shown in Figure 51.
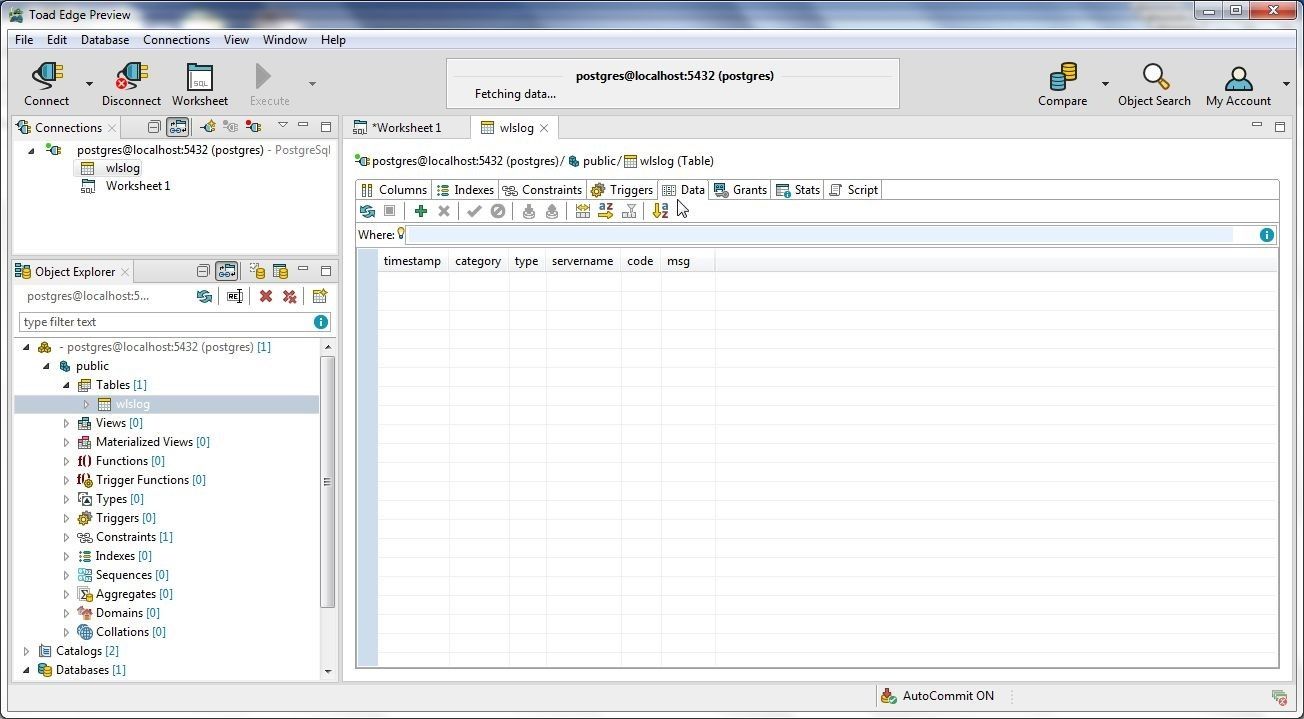
Figure 51. Selecting Data tab
In the Data Editor click on Insert Row, as shown in Figure 52, to add a data row.
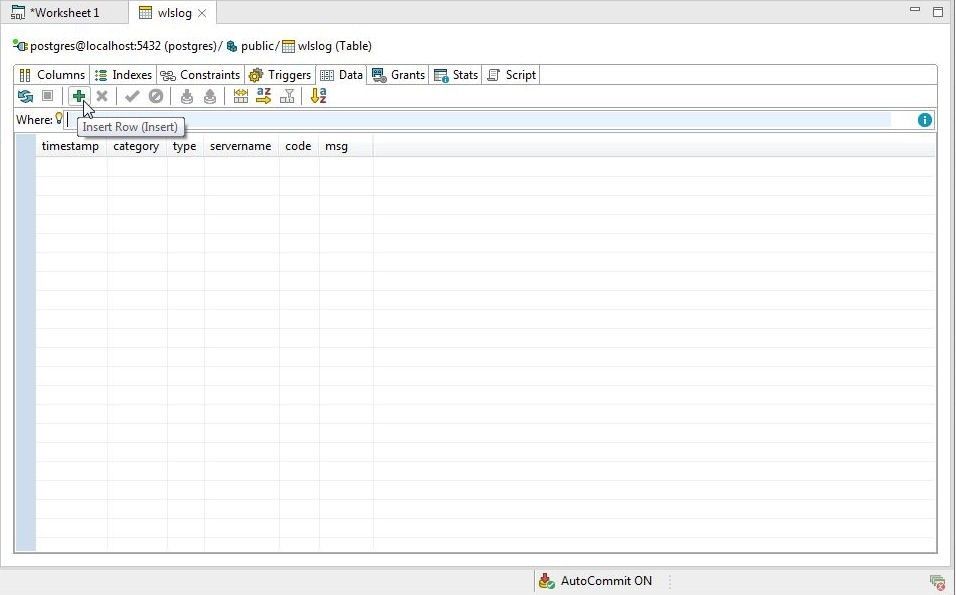
Figure 52. Insert Row
A blank row gets added, as shown in Figure 53. The primary key column timestamp is indicated with the required message. Default values for columns are set to null, as configured in Preferences>Data shown in Figure 50.
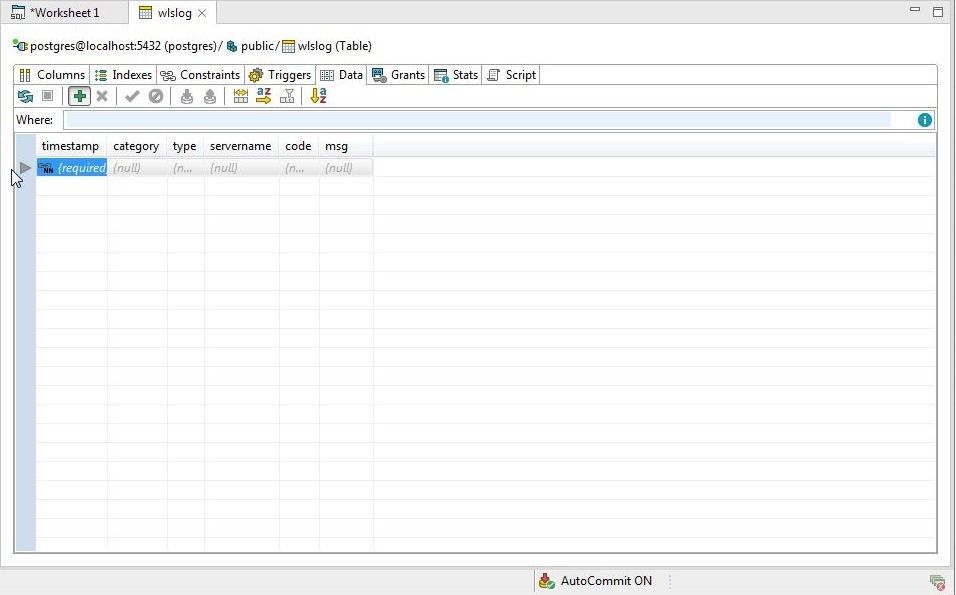
Figure 53. Blank row of data
Add a data row listed:
Apr-8-2014-7:06:16-PM-PDT,Notice,WebLogicServer,AdminServer,BEA-000365,Server state changed to STANDBY
Click on Define in Text Editor as shown in Figure 54 to add a value.
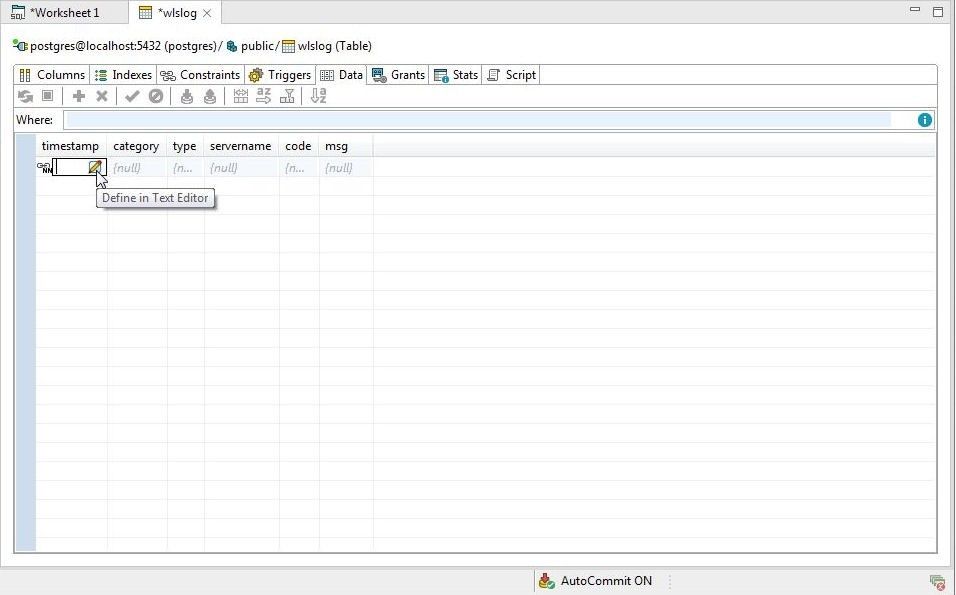
Figure 54. Define in Text Editor
A text editor gets displayed for the timestamp column (or the selected column) as shown in Figure 55. Click on OK after adding a value.
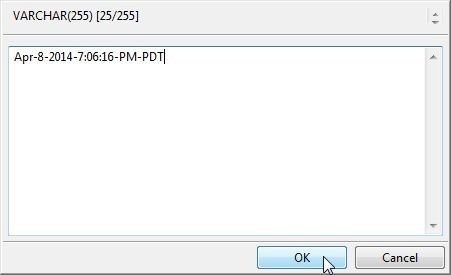
Figure 55. Adding a column value in text editor
Similarly, add column values for other columns, as shown in Figure 56. To format the data grid right-click in the grid and select Refresh.
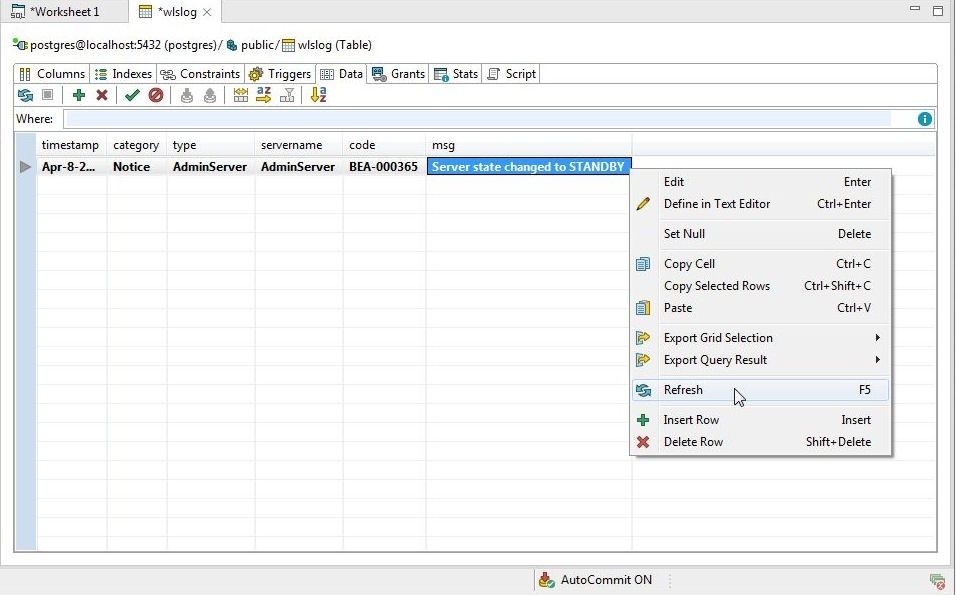
Figure 56. Data Grid>Refresh
The Data Grid gets formatted, as shown in Figure 57.
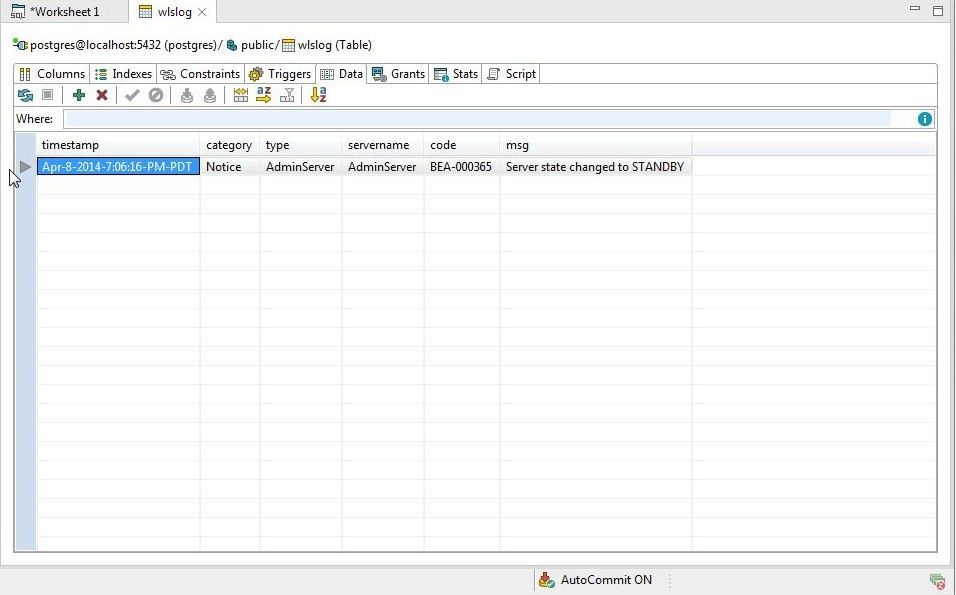
Figure 57. Data Grid Formatted
The Resize Columns to Data option shown in Figure 58 is provided to resize the columns to fit the data.
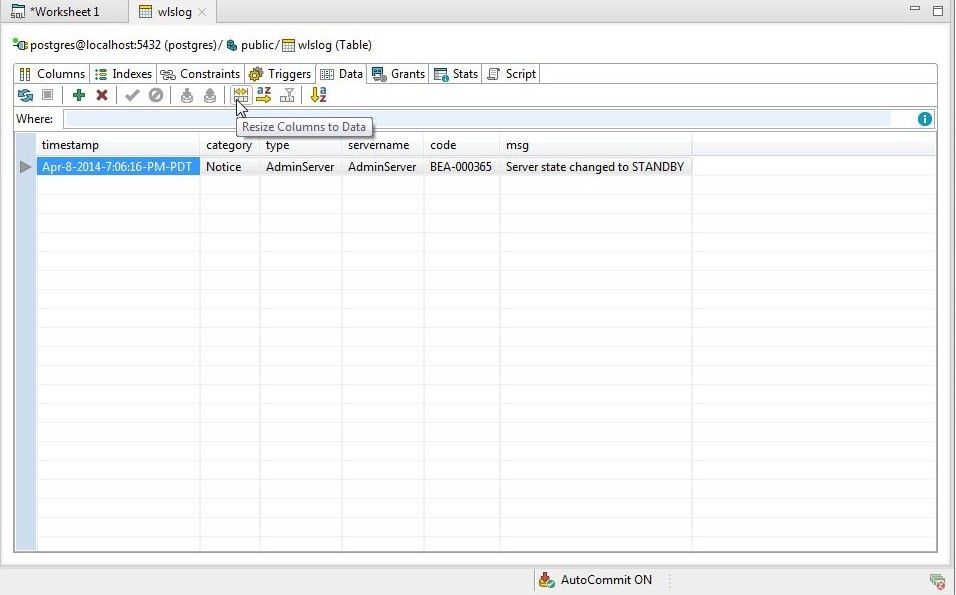
Figure 58. Resize Columns to Data
The Sort Columns Alphabetically option shown in Figure 59 sorts the columns alphabetically.
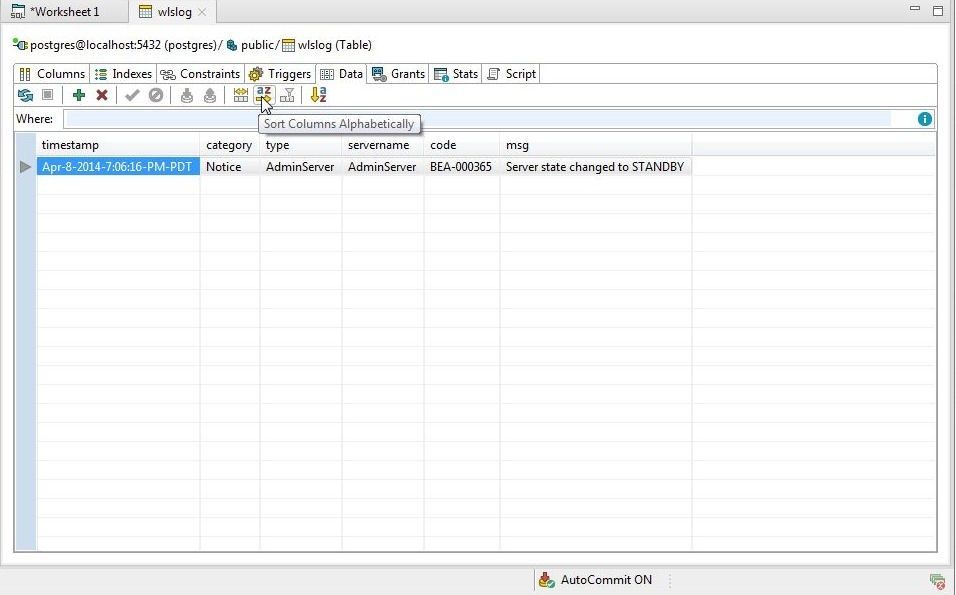
Figure 59. Sort Columns Alphabetically
The Sort Data option shown in Figure 60 sorts data.
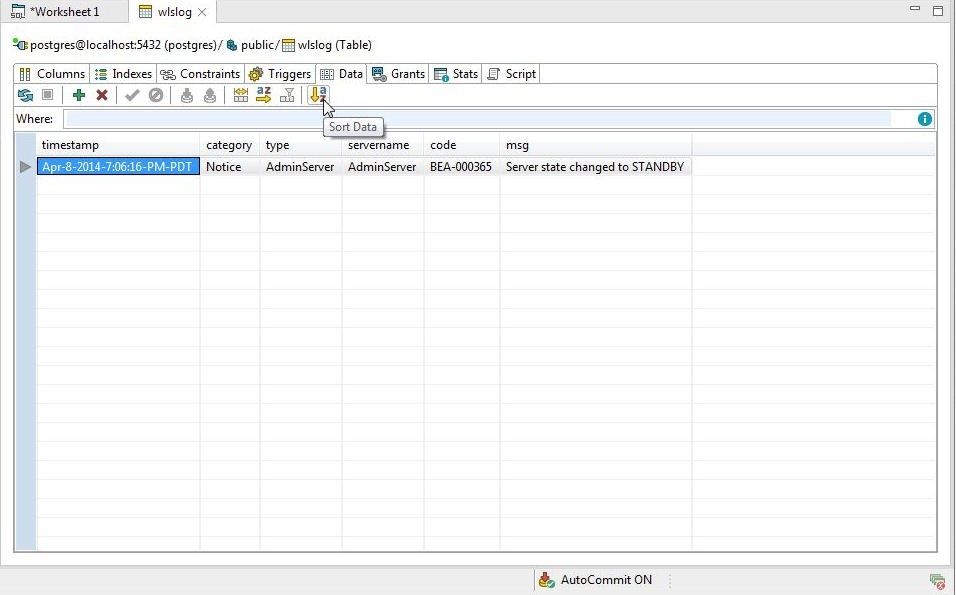
Figure 60. Sort Data
Importing Data into a Table
In this section we shall import data into the wlslog table with the Import Data wizard. Save the following data in a wlslog.csv file. The first row is for column headers. The Import Data wizard indicates whether any issues exist with the data. To demonstrate, the first row of data that was already added in the Data Editor is relisted in wlslog.csv. Another issue with the data is an empty line of data at the end of wlslog.csv.
timestamp,category,type,servername,code,msg

Apr-8-2014-7:06:16-PM-PDT,Notice,WebLogicServer,AdminServer,BEA-000365,Server state changed to STANDBY
Apr-8-2014-7:06:17-PM-PDT,Notice,WebLogicServer,AdminServer,BEA-000365,Server state changed to STARTING
Apr-8-2014-7:06:18-PM-PDT,Notice,WebLogicServer,AdminServer,BEA-000365,Server state changed to ADMIN
Apr-8-2014-7:06:19-PM-PDT,Notice,WebLogicServer,AdminServer,BEA-000365,Server state changed to RESUMING
Apr-8-2014-7:06:20-PM-PDT,Notice,WebLogicServer,AdminServer,BEA-000331,Started WebLogic AdminServer
Apr-8-2014-7:06:21-PM-PDT,Notice,WebLogicServer,AdminServer,BEA-000365,Server state changed to RUNNING
Apr-8-2014-7:06:22-PM-PDT,Notice,WebLogicServer,AdminServer,BEA-000360,Server started in RUNNING mode
To import the wlslog.csv file data to the wlslog table right-click on public>Tables in Object Explorer and select Import Data as shown in Figure 61.
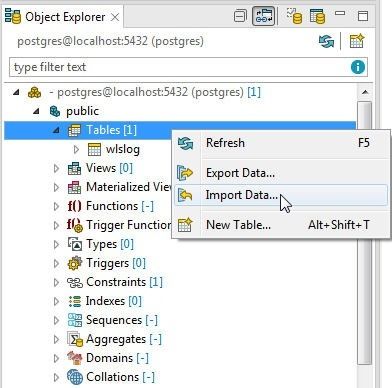
Figure 61. Selecting Object Explorer>public>Tables>Import Data
The Import Data wizard gets launched as shown in Figure 62. Two formats are supported for import: SQL and CSV. Select the Import Format CSV file or ZIP archive with CSV content. To select the CSV file to import from click on the selector (…) for Source field.
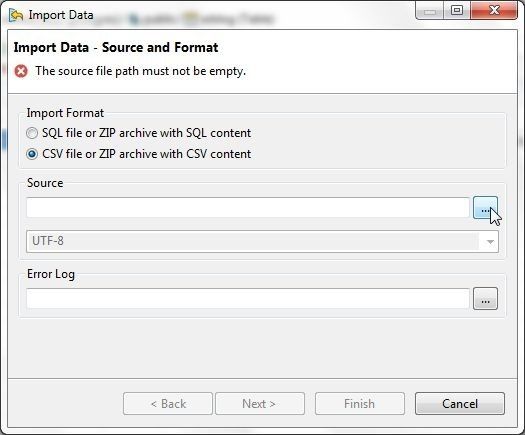
Figure 62. Import Data wizard
In Select File select the wlslog.csv file as shown in Figure 63. Click on Open.
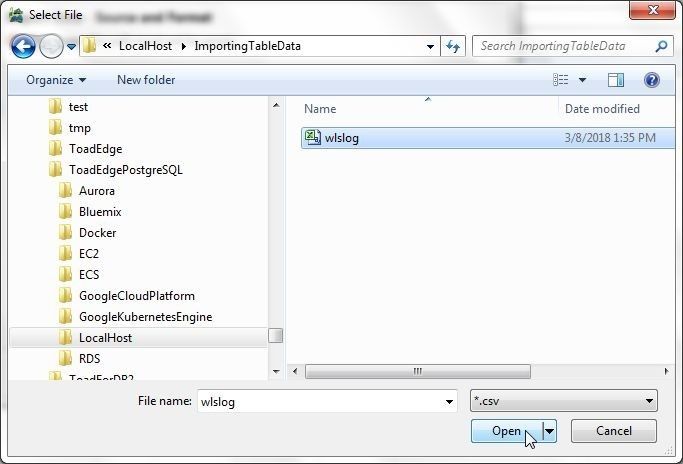
Figure 63. Selecting wlslog.csv file
The directory path for the source file gets added and the encoding gets set to ISO-8859-1 (recommended) as shown in Figure 64. An Error Log file also gets specified. Click on Next.

Figure 64. Source File and Error Log File
Next, specify the detailed CSV Settings as shown in Figure 65. Keep the default settings and click on Finish.

Figure 65. Detailed CSV Settings
The data starts to get imported. Because we had included a duplicate row of data a Data Processing Error dialog (Figure 66) indicates that the data that already exists. Click on Skip to skip including the duplicate row of data.
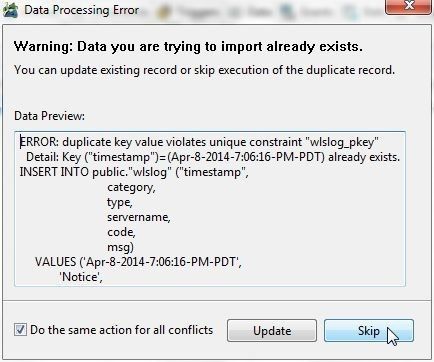
Figure 66. Skipping duplicate row of data
Because we had included an empty row in the wlslog.csv another Data Processing Error message gets displayed to indicate INSERT has more target columns than expressions as shown in Figure 67. Select Ignore all errors and click on Continue.
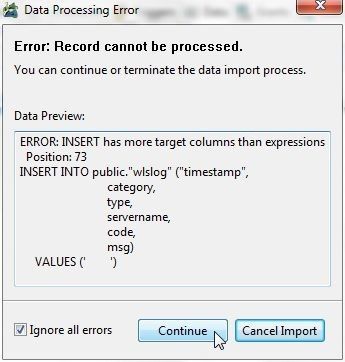
Figure 67. INSERT has more target columns than expressions
The data import gets completed with errors and warnings and the Data Import Result dialog in Figure 68 indicates this. Keep the options Refresh data in table (s) and Open log file and click on Close.
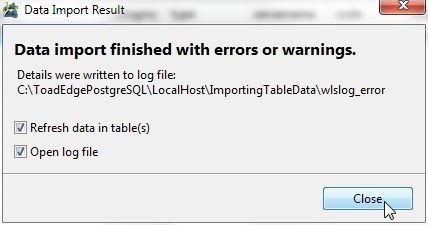
Figure 68. Data Import Result
The wlslog_error gets displayed, as shown in Figure 69, with the detail of the error log. As the first error message indicates a duplicate key value was provided in the data import but was skipped.
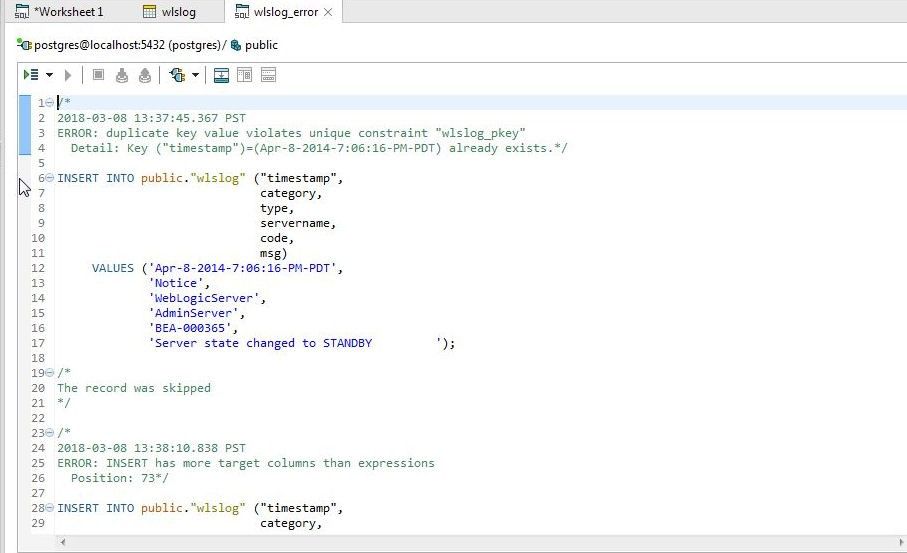
Figure 69. The wlslog_error log
The second error message indicates that INSERT has more target columns than expressions, as shown in Figure 70.
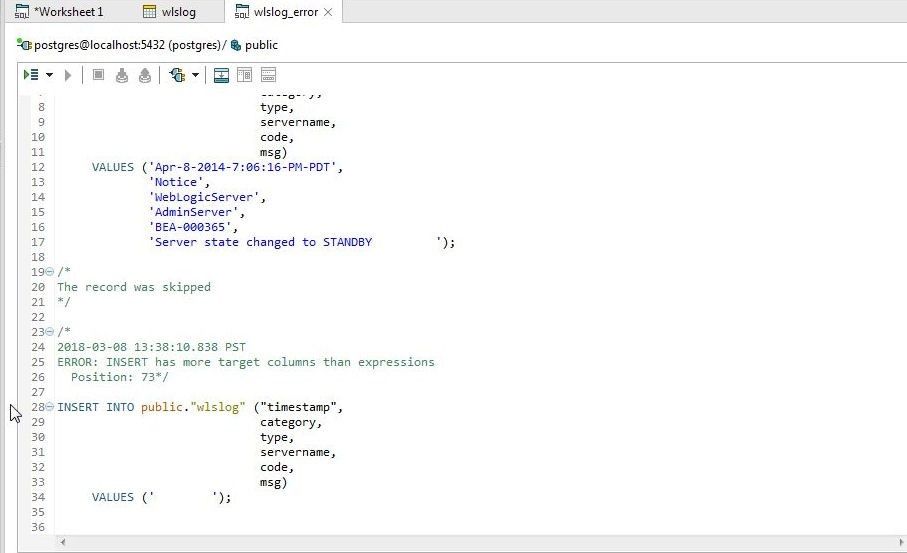
Figure 70. Thesecond error message in wlslog_error
Select the Data Editor for wlslog to list the data imported as shown in Figure 71.
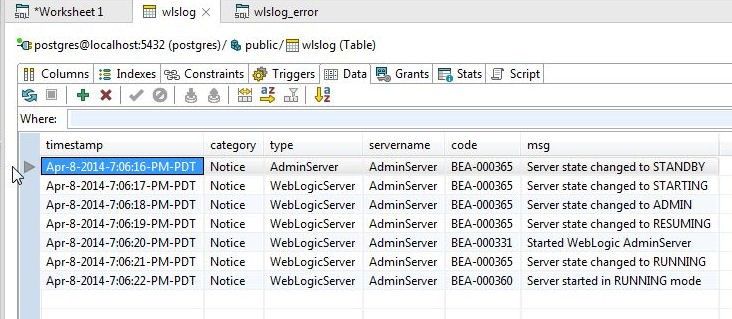
Figure 71. Data imported displayed in Data Grid
Additional data may be added with Insert Row as discussed earlier or with anther data import. Data may also be deleted with Delete Rows as shown in Figure 72.
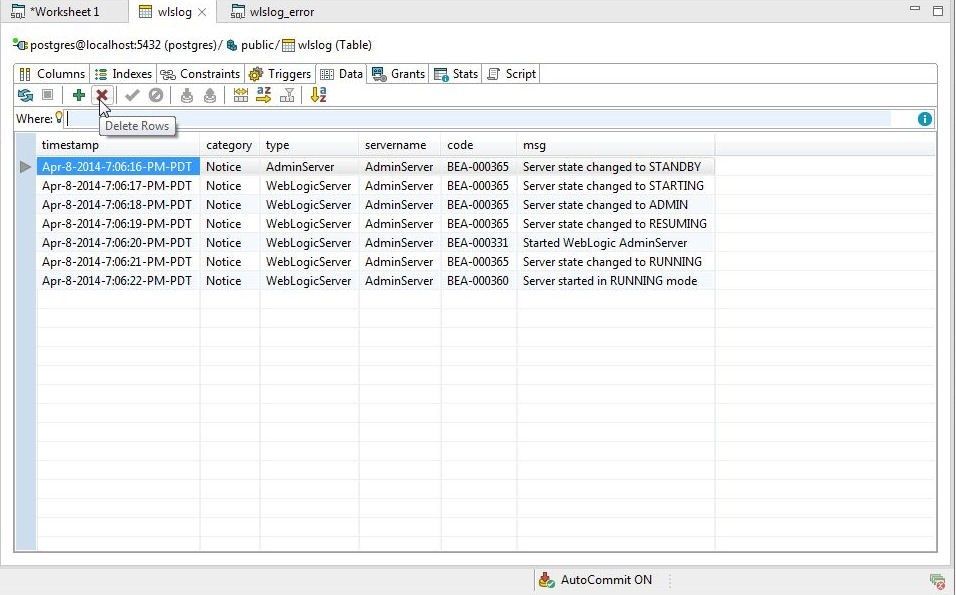
Figure 72. Delete Rows
Comparing Schemas
Next, we shall discuss comparing schemas. To launch the Schema Compare wizard select Compare>New as shown in Figure 73.
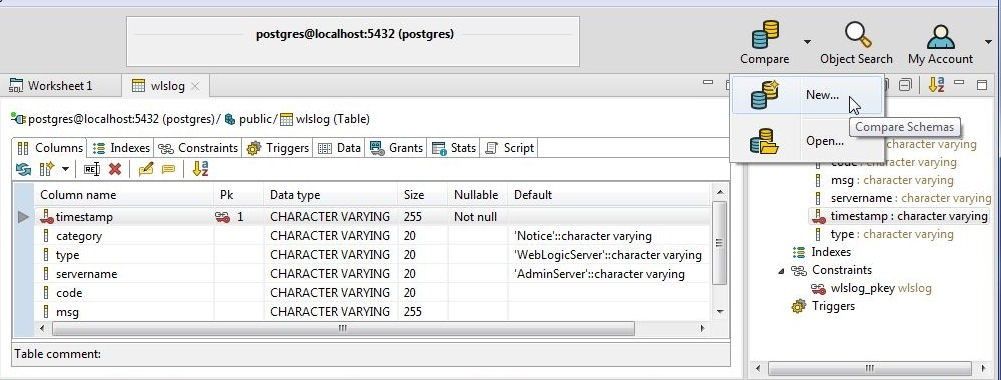
Figure 73. Compare>New
Alternatively, select Database>Schema Compare>New as shown in Figure 74.
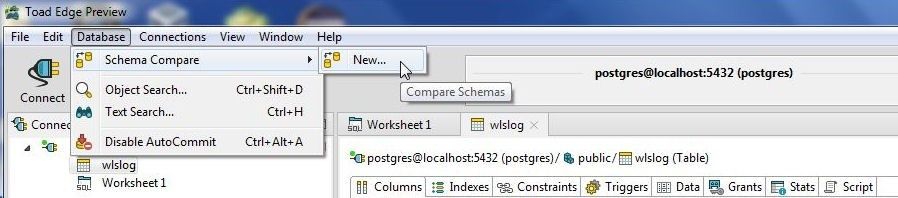
Figure 74. Database>Schema Compare>New
The Schema Compare wizard gets started, as shown in Figure 75. The Source and Target schemas must be different. With Source schema as public select Target schema as pg_temp_1.
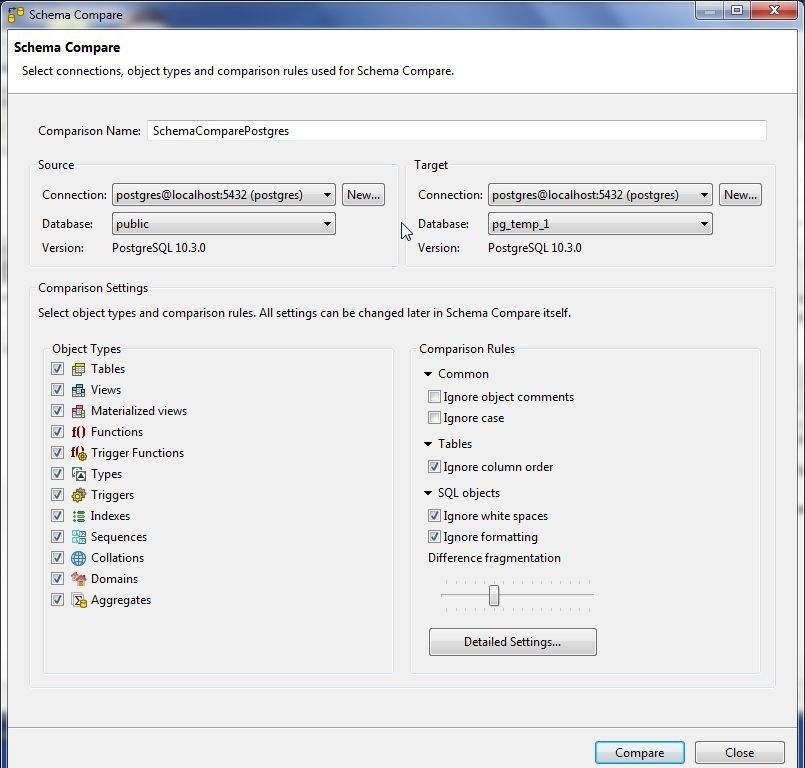
Figure 75. Selecting Target Schema as different than Source Schema
Next, select the Object Types to compare. Select only Tables. The Detailed Settings (Figure 76) may be used add more detailed settings such as column data type, default value. We have not used any detailed settings.
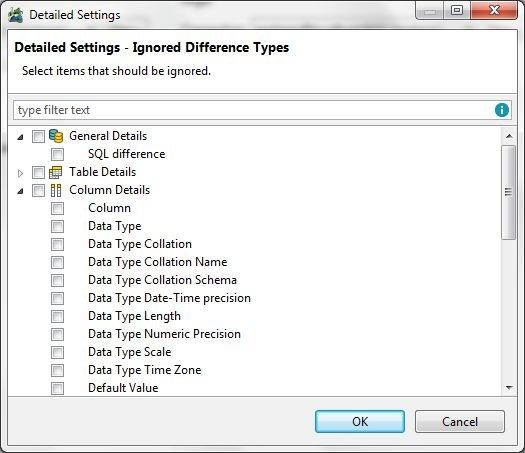
Figure 76. Detailed Settings
With other settings as default click on Compare as shown in Figure 77.
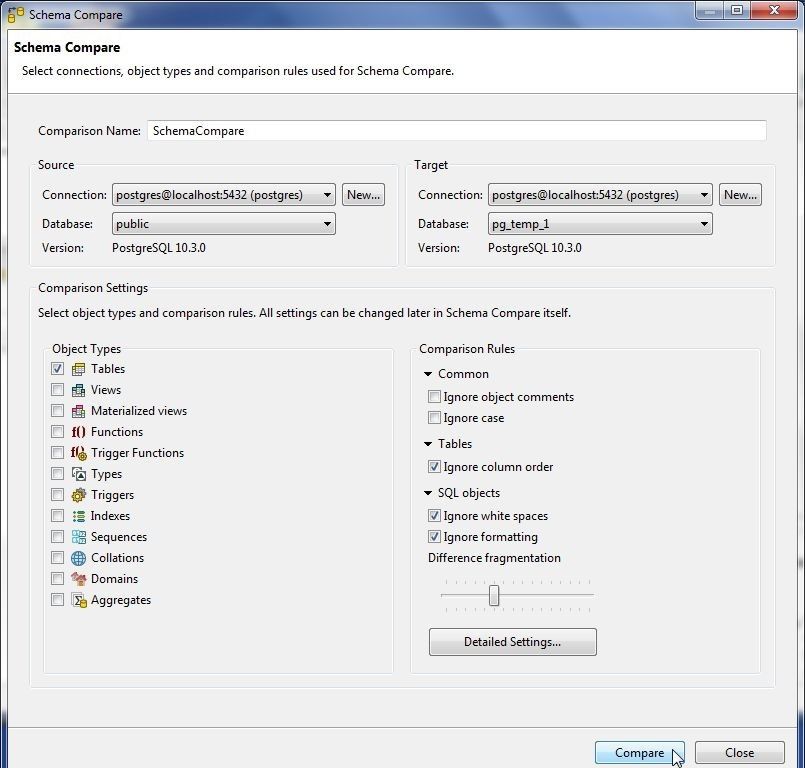
Figure 77. Schema Compare>Compare
A comparison of the select object types gets started, as shown in Figure 78.
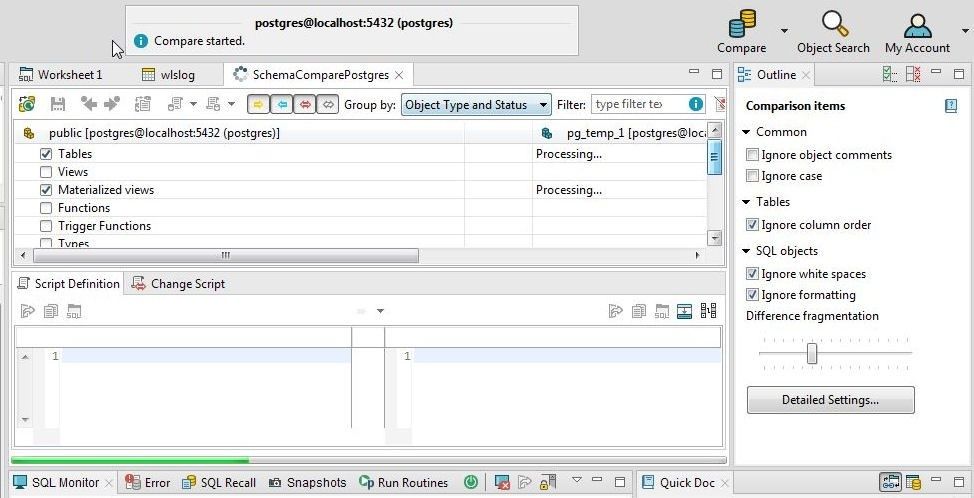
Figure 78. Comparison started
When the comparison gets completed one difference is listed, as shown in Figure 79. The difference is that the wlslog table is only in the Source schema public.
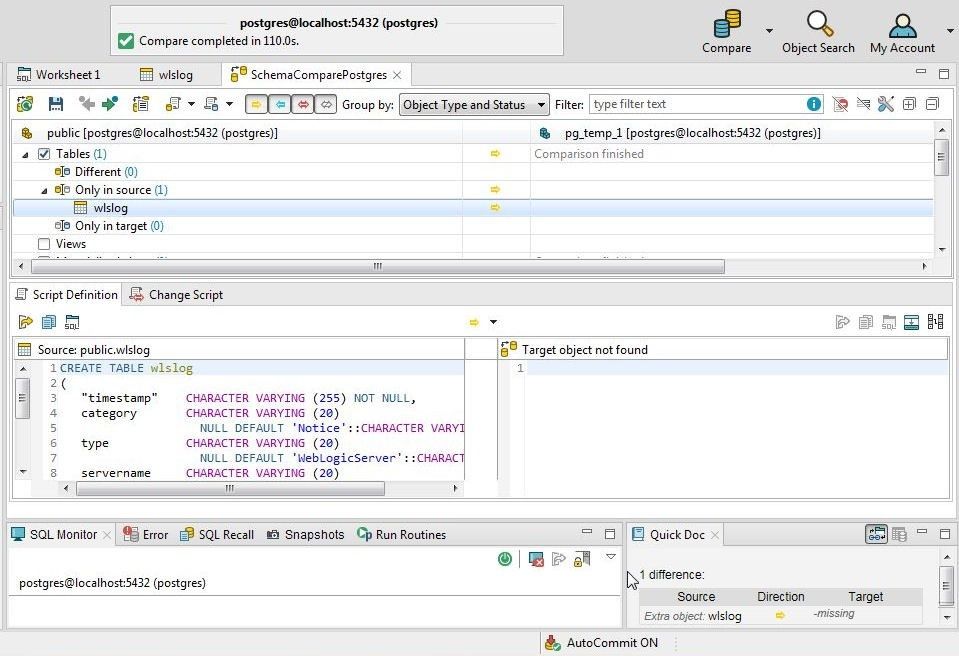
Figure 79. Comparison completed with one difference
Different options are provided for the Script Definition including Export Script (Figure 80), Copy Script, and Open in SQL Worksheet.
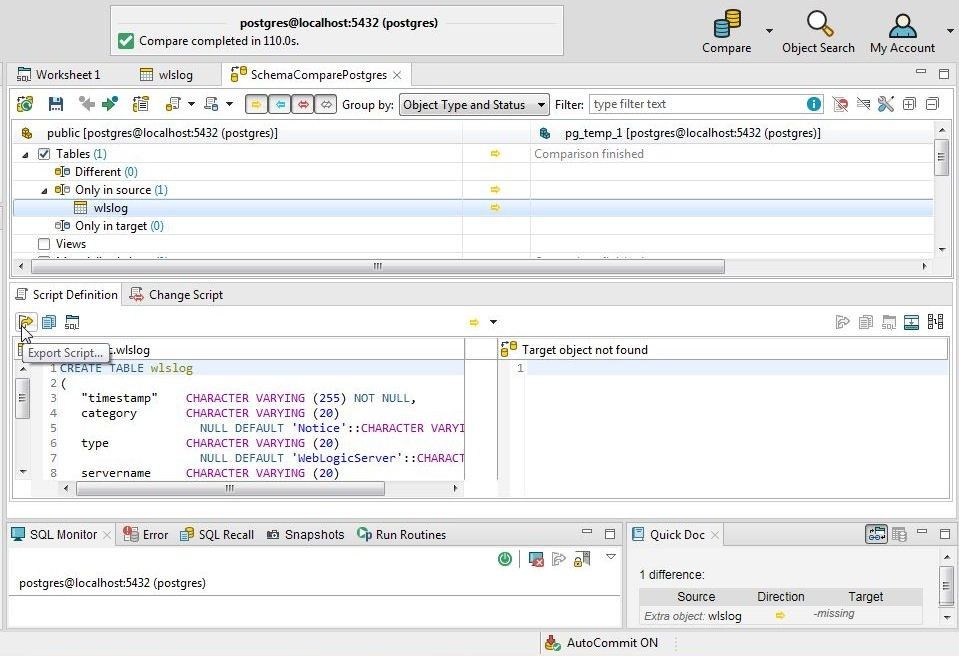
Figure 80. Script Definition options
The option to recompare is also provided; for which, right-click in the Script Definition field and select Recompare as shown in Figure 81.
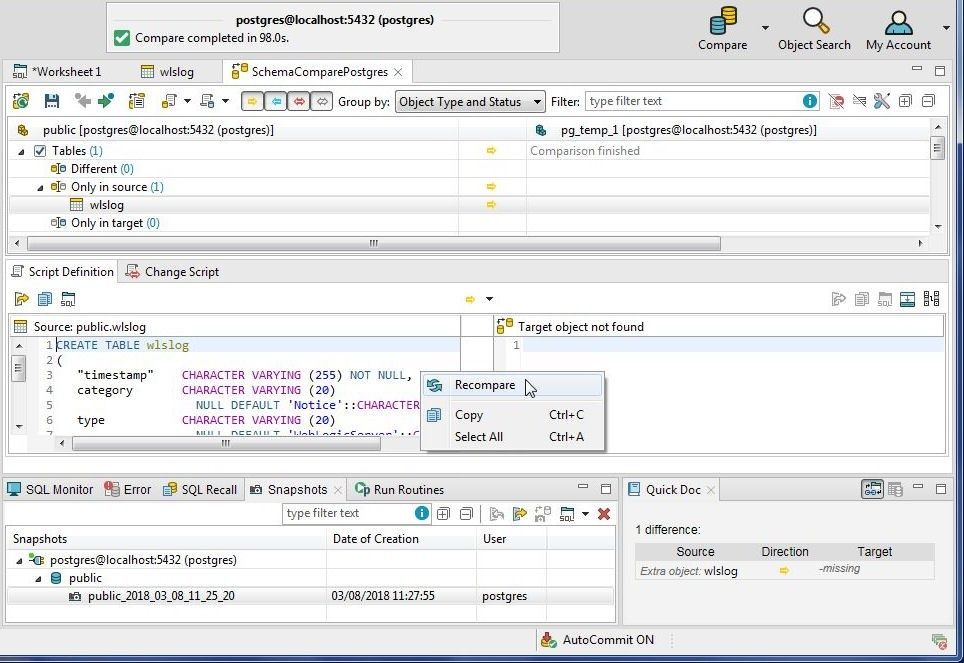
Figure 81. Recompare
Several other Schema Compare features are provided, such as :
- Change Source or Target schema or both schemas
- Save Schema Compare as a .compare file and Import later
- Export Schema Compare as HTML Report
- Generate Script for Source
- Open or select a Schema Compare created earlier from Compare in toolbar
As an example, to export Schema Compare to an HTML report select Export HTML Report as shown in Figure 82.

Figure 82. Export HTML Report
In Save As specify a File Name and click on Save as shown in Figure 83.

Figure 83. Save As HTML Report
When the export completes the Export Finished dialog gets displayed, as shown in Figure 84. Click on Open Report.
Figure 84. Export Finished
The Schema Comparison HTML Report gets displayed, as shown in Figure 85.
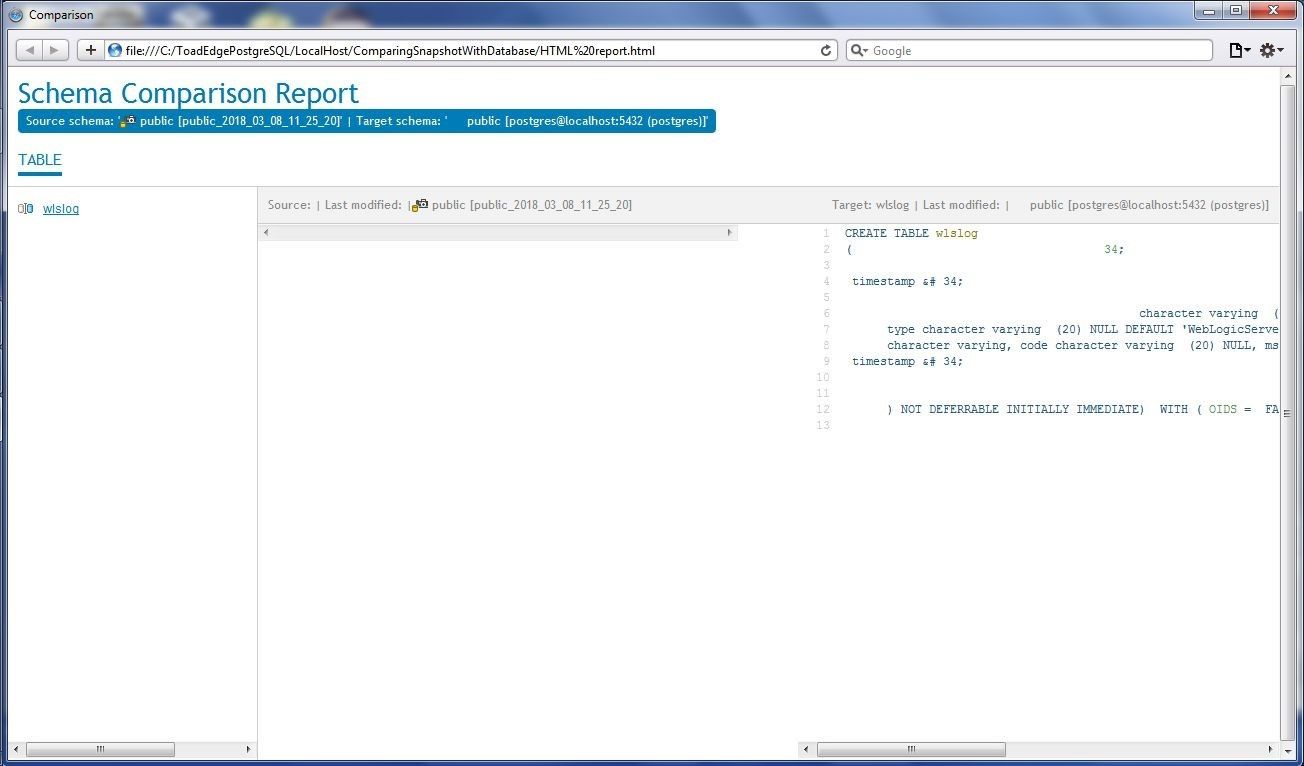
Figure 85. Schema Comparison Report
Comparing a Schema Snapshot with a Database
Comparison may be performed not only between schemas but also between a schema snapshot and the default schema/database. To compare the snapshot generated earlier, right-click on the snapshot in Snapshots view and select Compare with Default Database as shown in Figure 86.

Figure 86. Comparing Snapshot with Default Database
The schema compare gets completed and one difference of the wlslog table being in the target table is indicated. Select the Change Script tab to display the script that would make the target table to synchronize with the source table. Click on Deploy to run the Change Script on the target schema as shown in Figure 87.
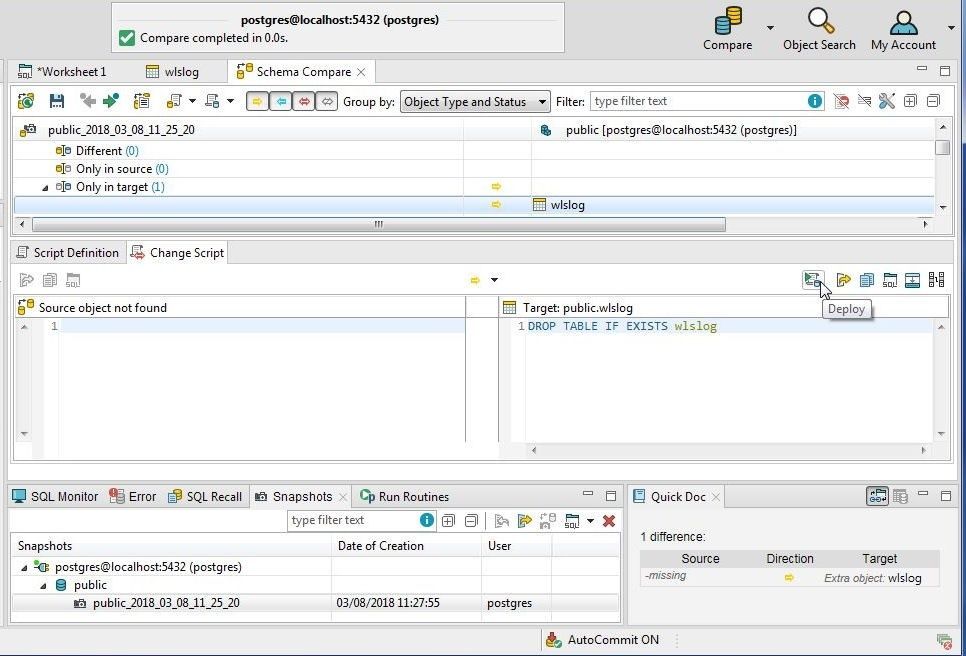
Figure 87. Deploying Change Script
The Change Script runs and the wlslog table gets dropped from the target schema, as shown in Figure 88.
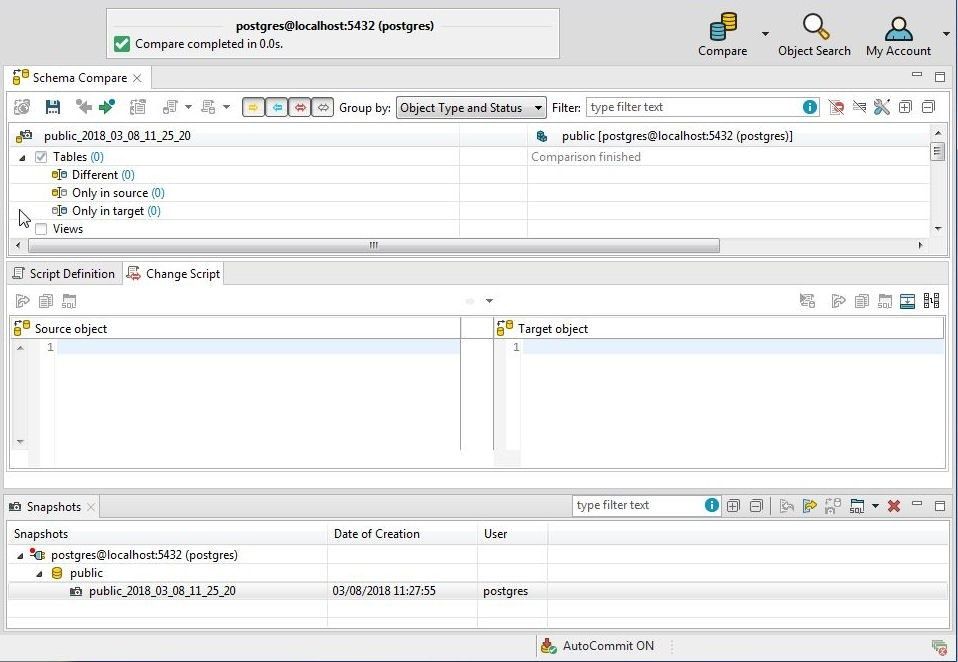
Figure 88. Table wlslog dropped from target schema
The wlslog table does not get listed in Object Explorer because it has been dropped, as shown in Figure 89.
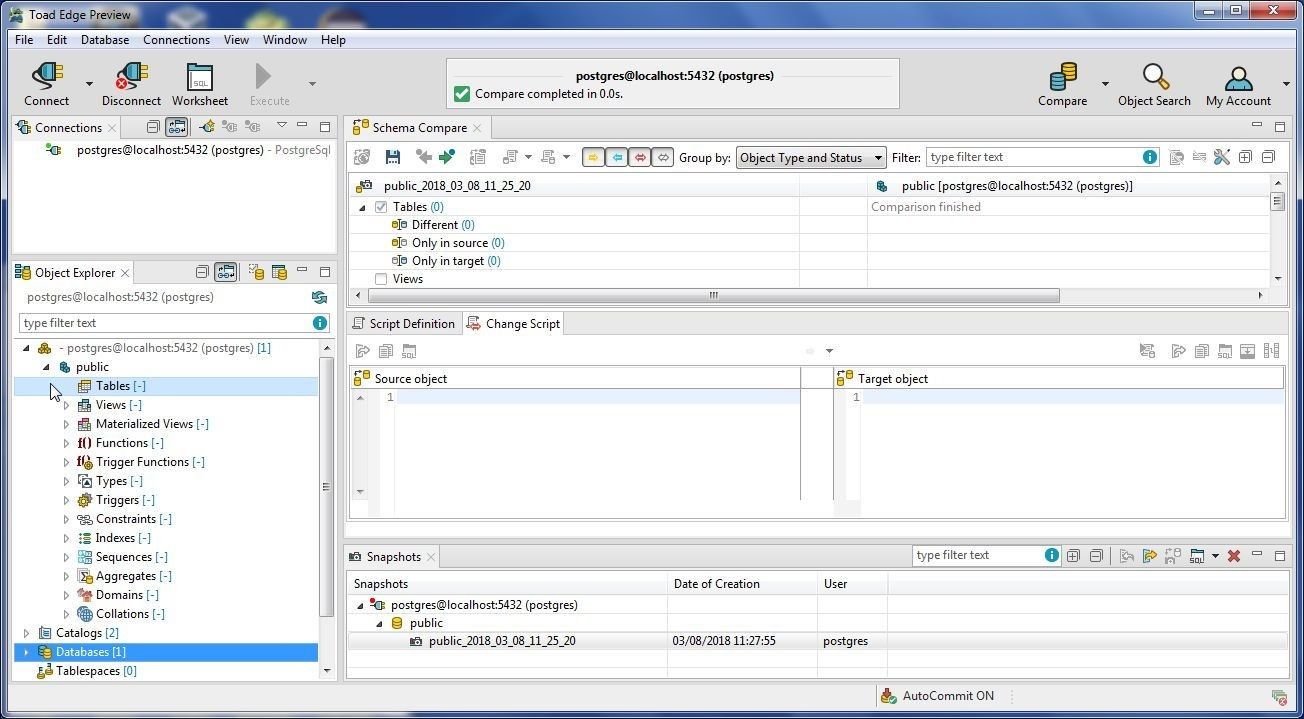
Figure 89. Table wlslog not listed in Tables
Exporting Table Data to CSV or SQL
Several options are available to export data to CSV, SQL, HTML, or XML.
- Object Explorer
- Grid Selection
- Query Result
Data may be exported in Object Explorer; for which, right-click on <schema name>>Tables>Export Data as shown for schema public in Figure 61 earlier. To export data in Data Editor select one or more rows of data, right-click and select Export Grid Selection>CSV/SQL as shown in Figure 90, in which one row is selected in the Data grid.
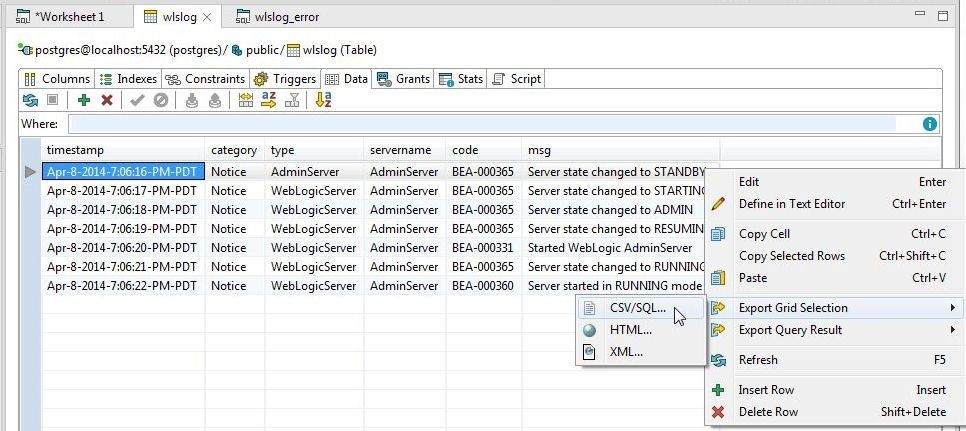
Figure 90. Export Grid Selection>CSV/SQL
In Export Data wizard select from the two output formats CSV and SQL. As an example, select CSV as shown in Figure 91. Select a destination export file and click on Next.
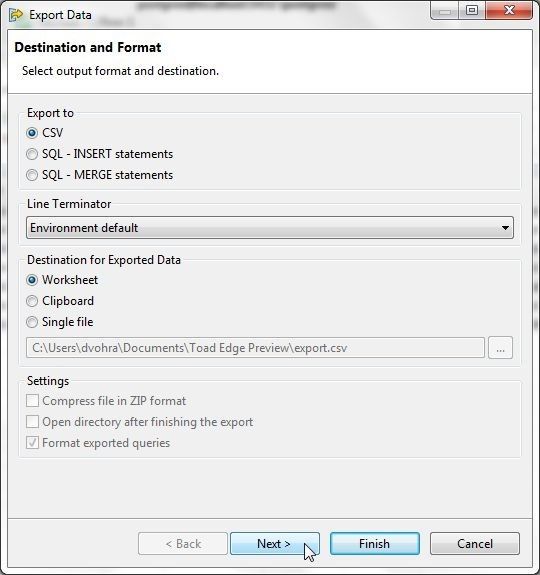
Figure 91. Export Data wizard
Next, select the default CSV Settings as shown in Figure 92 and click on Finish.
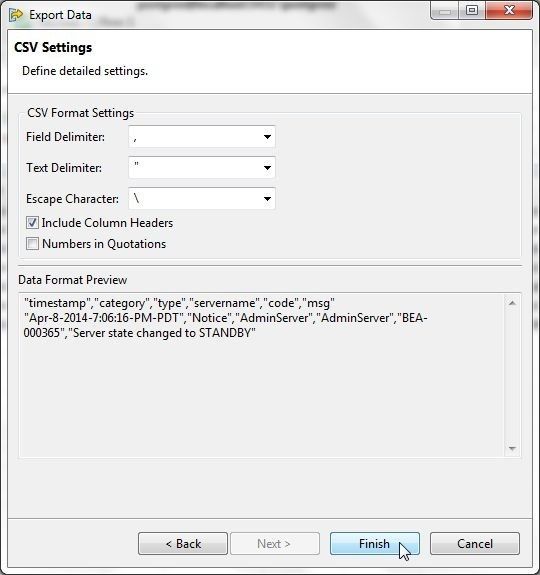
Figure 92. CSV Settings
The CSV export file generated is shown in Figure 93.

Figure 93. CSV Export file
As an example of exporting to SQL, right-click on the Data Editor data grid and select Export Query Result>CSV/SQL as shown in Figure 94.
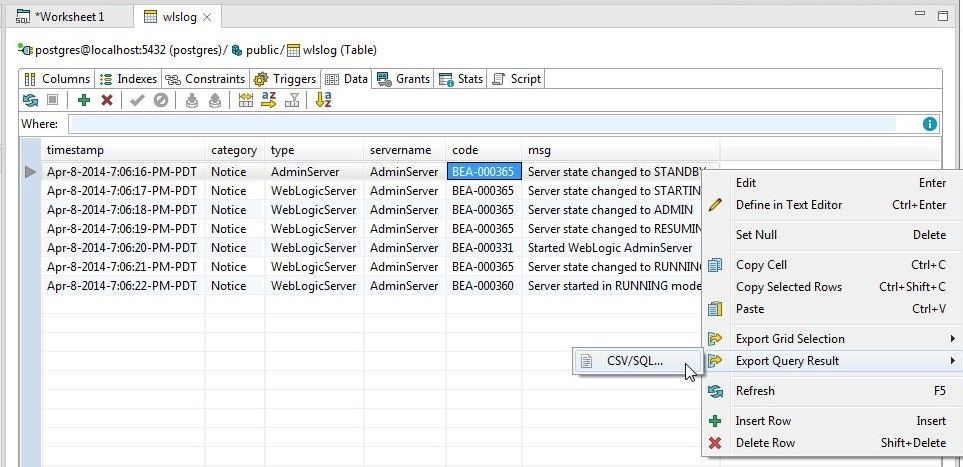
Figure 94.Export Query Result>CSV/SQL
In Export Data wizard select Export to as SQL – INSERT statements as shown in Figure 95. Keeping other settings as default click on Next.
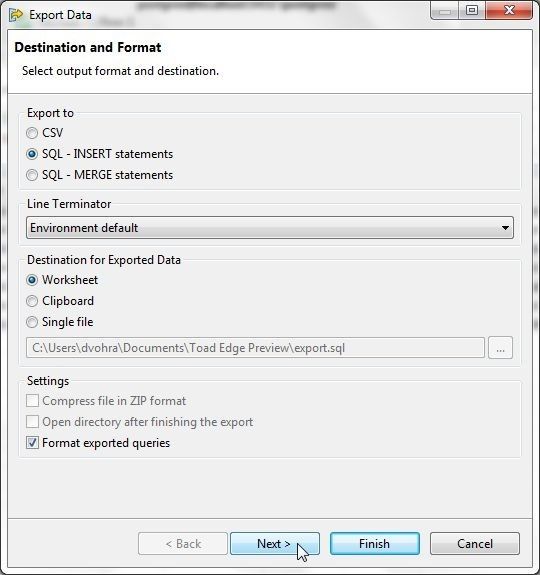
Figure 95. Export Data>Export to SQL
Keeping the default SQL Settings for Schema name and Table name, click on Finish as shown in Figure 96.
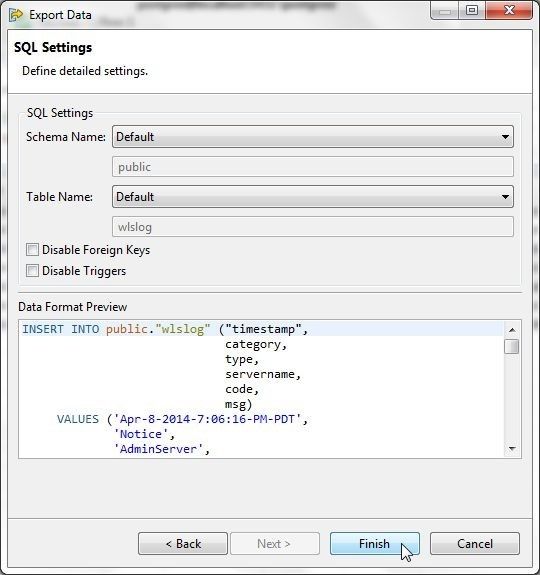
Figure 96. Export Data>Finish
The query result gets exported to SQL and a Worksheet gets added, as shown in Figure 97.
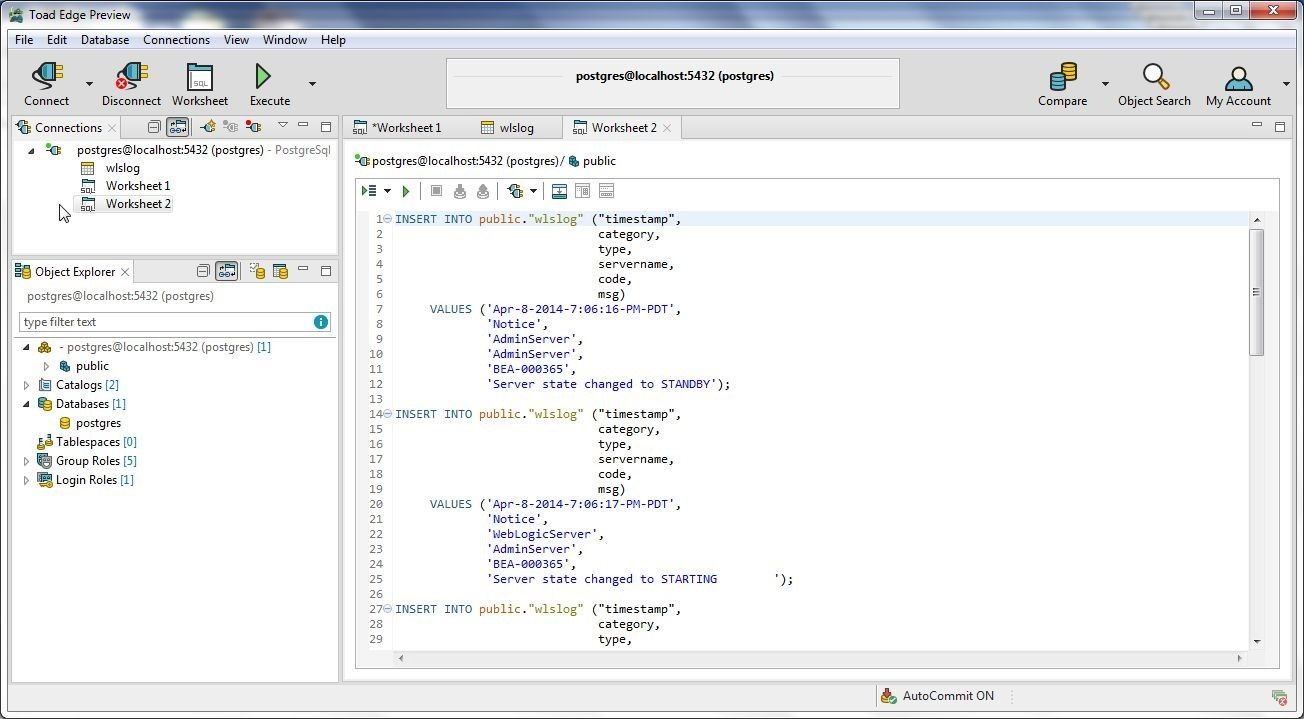
Figure 97. SQL Worksheet exported from Query Result
If Tables>Export Data is selected in Object Explorer the procedure is the same, except that first the table/s to export must be selected as shown in Figure 98.
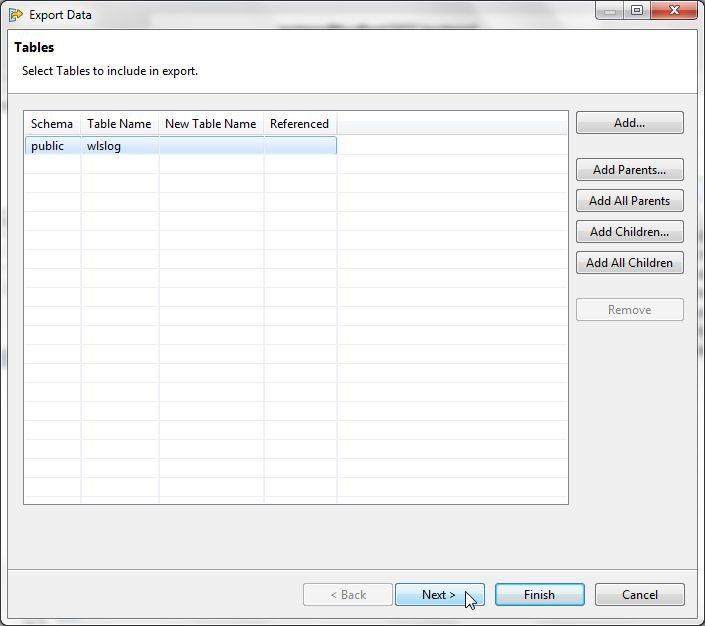
Figure 98. Selecting Table/s to Export
Exporting Table Data to HTML
In this section we shall demonstrate exporting to HTML. Select multiple data rows in Data Editor grid as shown in Figure 99. To select multiple rows press Shift and click on a row. Right-click in the Data Editor and select Export Grid Selection>HTML.
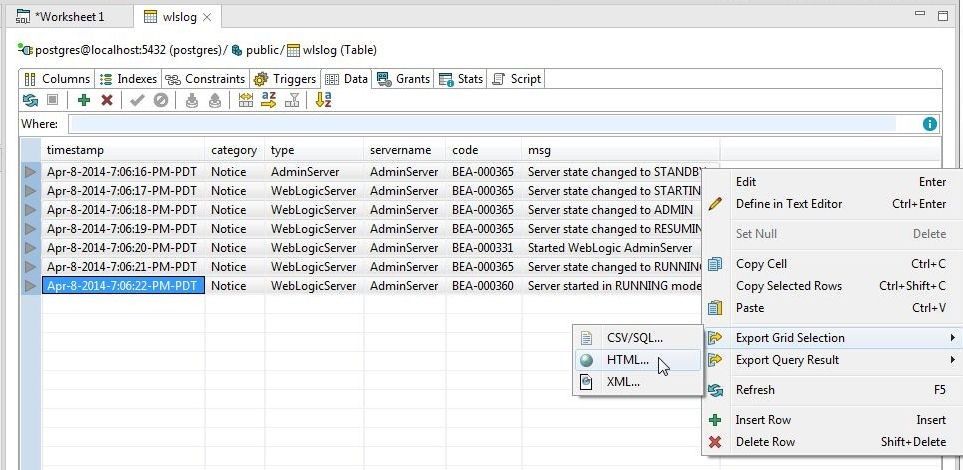
Figure 99. Export Grid Selection>HTML
In Save As specify a File name and click on Save as shown in Figure 100.
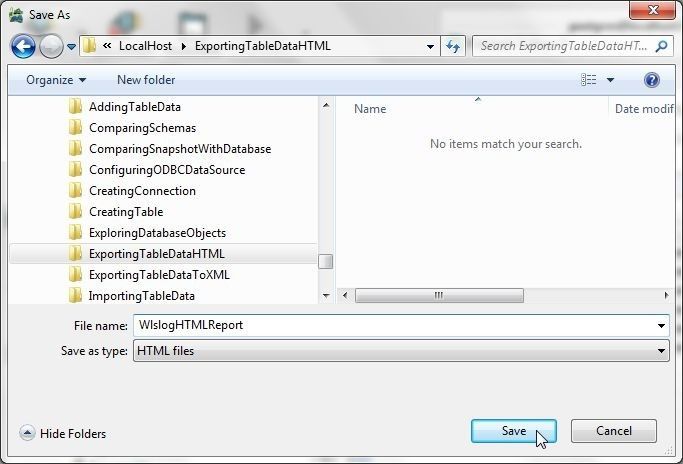
Figure 100. Save As>File name
The Data grid selection gets exported to an HTML Report, which is shown in Figure 101.
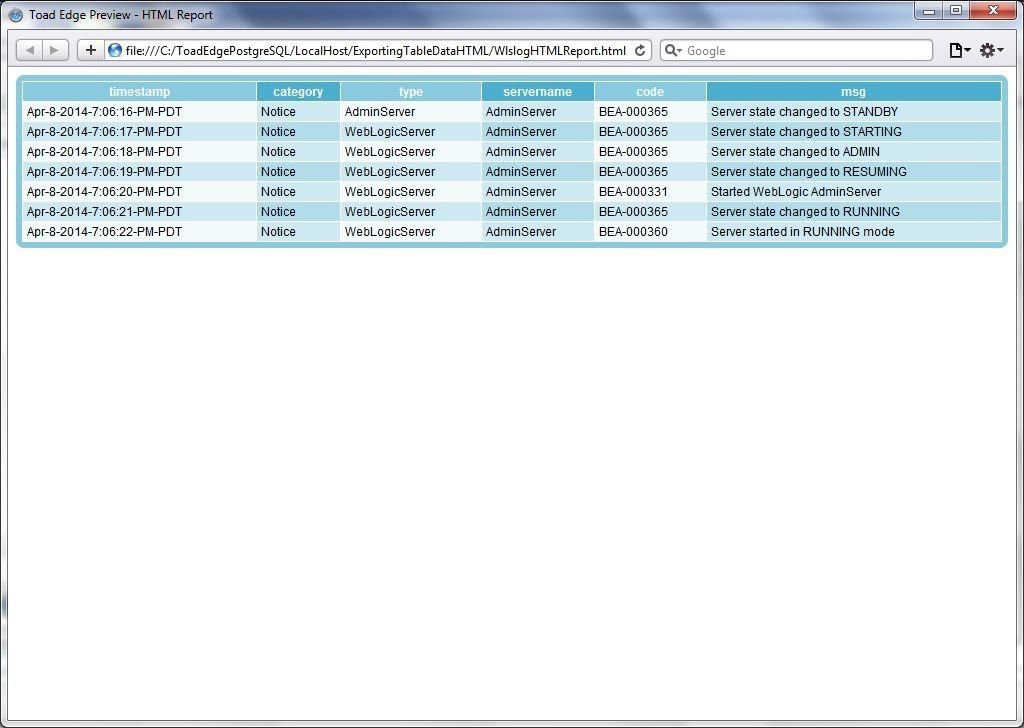
Figure 101. HTML Report generated from Data Grid Selection
The complete data grid does not have to be exported. An HTML report with only one row in the grid selection is shown in Figure 102.
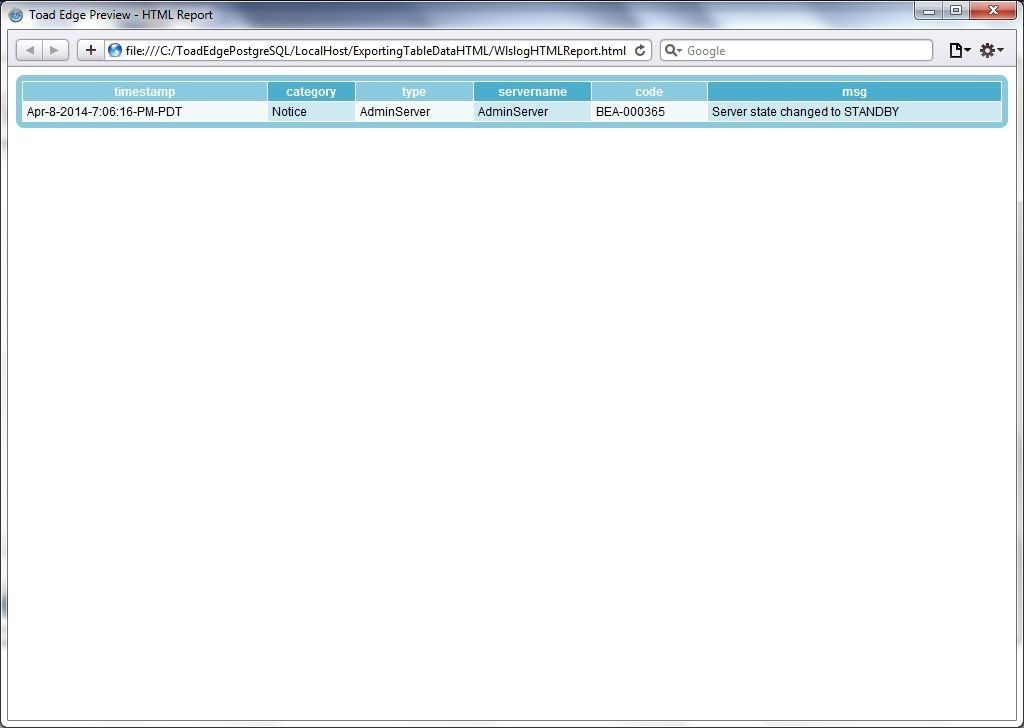
Figure 102. HTML Report with one row of data
Exporting Table Data to XML
To export to XML, first set the Export preferences for XML in Preferences as shown in Figure 103. By default the root tag for the XML file is ROWSET and the tag for a row of data is ROW.
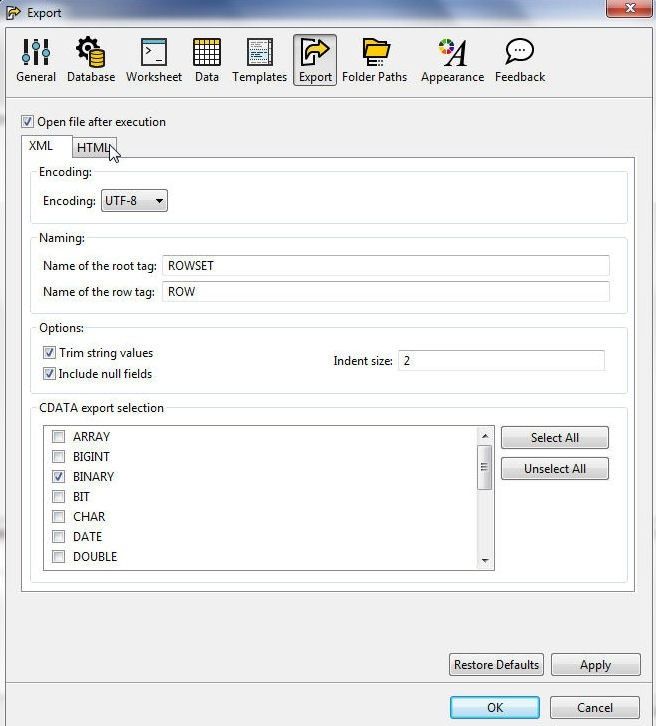
Figure 103. Export Preferences for XML
To export to XML right-click in Data Editor and select Export Grid Selection>XML as shown in Figure 104.
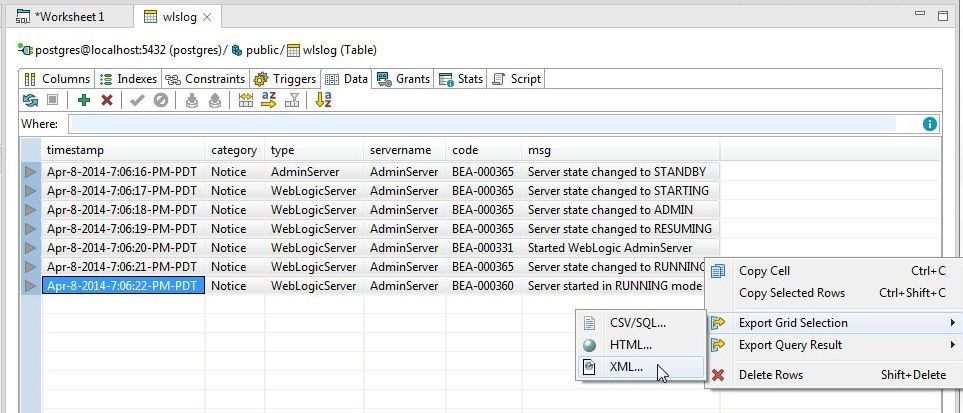
Figure 104. Export Grid Selection>XML
In Save As specify a File name ( ) and click on Save as shown in Figure 105.
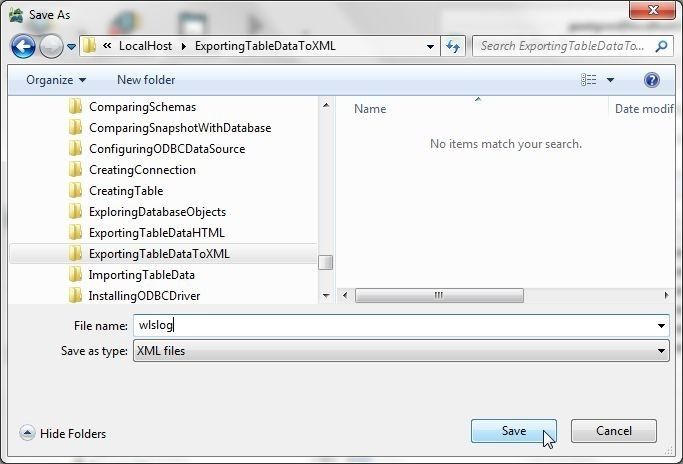
Figure 105. Save As>wlslog.xml
The wlslog.xml file generated is listed:
<?xml version="1.0" encoding="UTF-8"?><ROWSET>
<ROW>
   <column name="timestamp">Apr-8-2014-7:06:16-PM-PDT</column>
   <column name="category">Notice</column>
   <column name="type">AdminServer</column>
   <column name="servername">AdminServer</column>
 <column name="code">BEA-000365</column>
   <column name="msg">Server state changed to STANDBY</column>
</ROW>
<ROW>
   <column name="timestamp">Apr-8-2014-7:06:17-PM-PDT</column>
   <column name="category">Notice</column>
   <column name="type">WebLogicServer</column>
   <column name="servername">AdminServer</column>
   <column name="code">BEA-000365</column>
   <column name="msg">Server state changed to STARTING</column>
</ROW>
<ROW>
   <column name="timestamp">Apr-8-2014-7:06:18-PM-PDT</column>
   <column name="category">Notice</column>
   <column name="type">WebLogicServer</column>
   <column name="servername">AdminServer</column>
   <column name="code">BEA-000365</column>
   <column name="msg">Server state changed to ADMIN</column>
</ROW>
<ROW>
   <column name="timestamp">Apr-8-2014-7:06:19-PM-PDT</column>
   <column name="category">Notice</column>
   <column name="type">WebLogicServer</column>
   <column name="servername">AdminServer</column>
   <column name="code">BEA-000365</column>
   <column name="msg">Server state changed to RESUMING</column>
</ROW>
<ROW>
   <column name="timestamp">Apr-8-2014-7:06:20-PM-PDT</column>
   <column name="category">Notice</column>
   <column name="type">WebLogicServer</column>
   <column name="servername">AdminServer</column>
   <column name="code">BEA-000331</column>
   <column name="msg">Started WebLogic AdminServer</column>
</ROW>
<ROW>
   <column name="timestamp">Apr-8-2014-7:06:21-PM-PDT</column>
   <column name="category">Notice</column>
   <column name="type">WebLogicServer</column>
   <column name="servername">AdminServer</column>
   <column name="code">BEA-000365</column>
   <column name="msg">Server state changed to RUNNING</column>
</ROW>
<ROW>
   <column name="timestamp">Apr-8-2014-7:06:22-PM-PDT</column>
   <column name="category">Notice</column>
   <column name="type">WebLogicServer</column>
   <column name="servername">AdminServer</column>
   <column name="code">BEA-000360</column>
   <column name="msg">Server started in RUNNING mode</column>
</ROW>
</ROWSET>
Using the SQL Worksheet
A SQL Worksheet is used to run SQL statements and one is created by default for each new connection. An additional SQL Worksheet may be created by selecting Worksheet in the toolbar. Worksheet features include:
- Content Assist/Autocompletion
- Syntax check
- Syntax Highlighting
Worksheet preferences may be set in Preferences as shown in Figure 106.
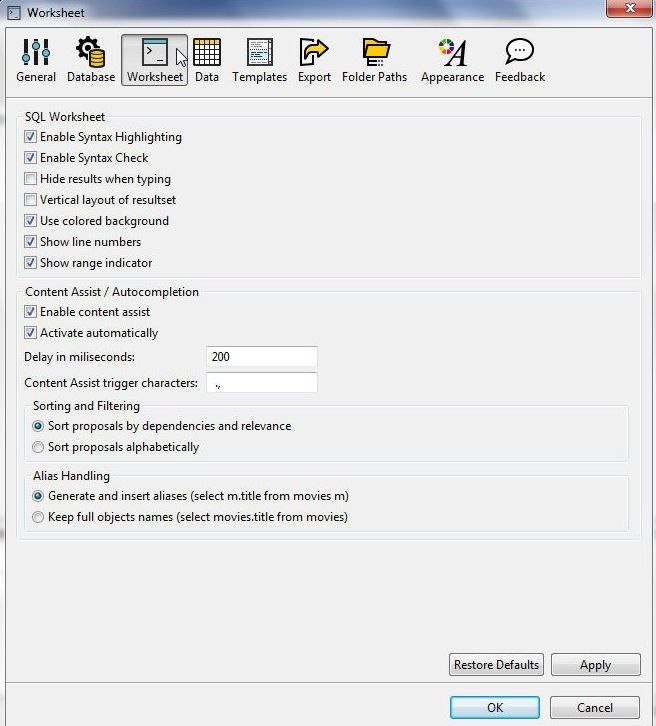
Figure 106. Worksheet Preferences
Autocompletion is performed using templates, and preferences for Templates may be configured using View>Preferences. The default Templates are shown in Figure 107.
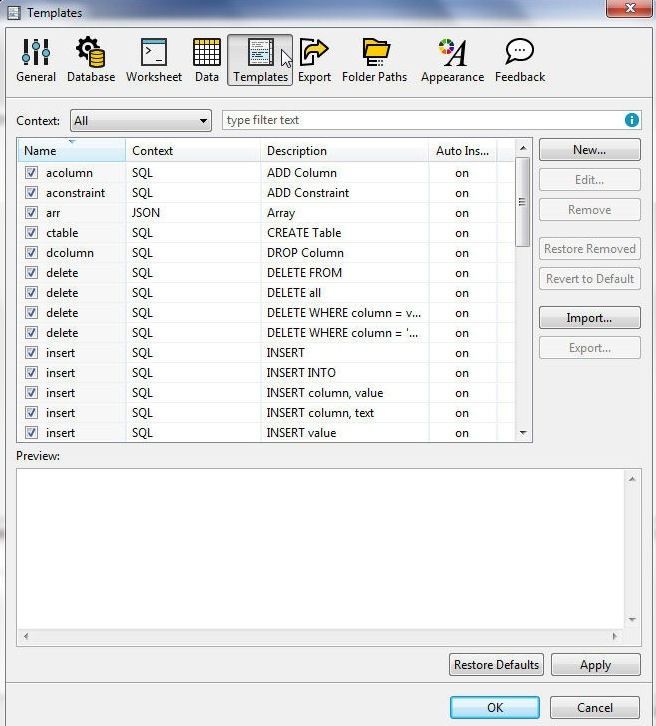
Figure 107. Templates
To demonstrate autocompletion add SELECT in a Worksheet and add a space. The content assist drop-down gets displayed, as shown in Figure 108. Select* from the content assist.
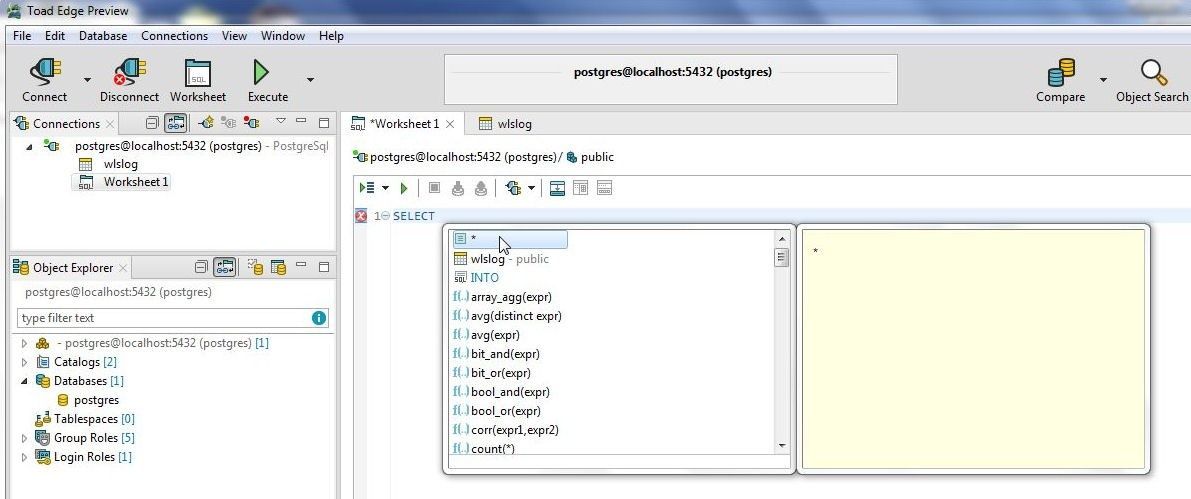
Figure 108.Selecting from Content Assist Drop-Down
After adding * add another space, and another content assist drop-down gets displayed; in which, select FROM as shown in Figure 109.

Figure 109. Selecting FROM in Content Assist
After adding FROM add another space, and another content assist drop-down gets displayed; from which, select the wlslog table in schema public as shown in Figure 110.
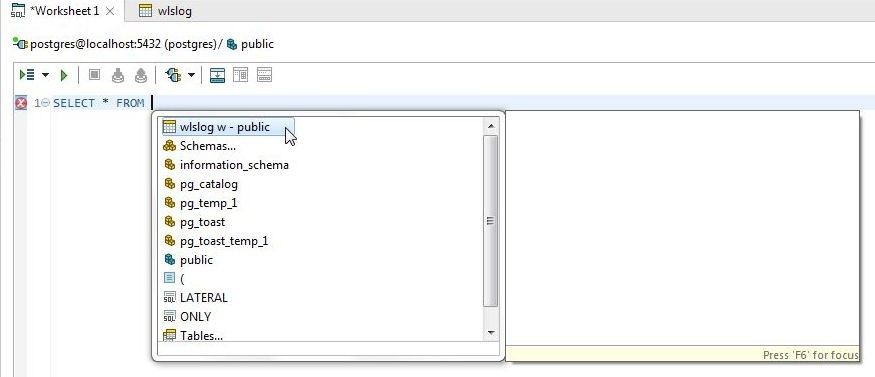
Figure 110. Selecting table from Content Assist Drop-Down
Complete the SQL statement as shown in Figure 111.
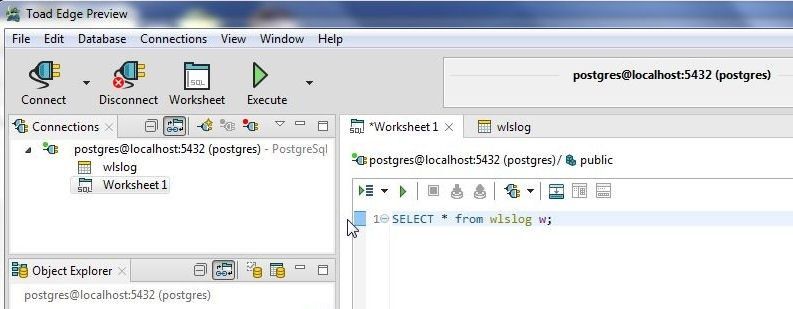
Figure 111. Complete SQL Statement
Several options are available to run a SQL statement or script. Select Execute in the toolbar to list the choices as shown in Figure 112.
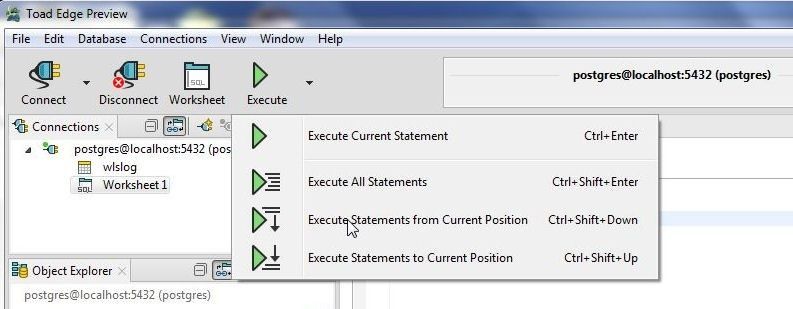
Figure 112. Choices to run SQL Statement/s
A single SQL statement may be run by selecting Execute SQL Statement, as shown in Figure 113.
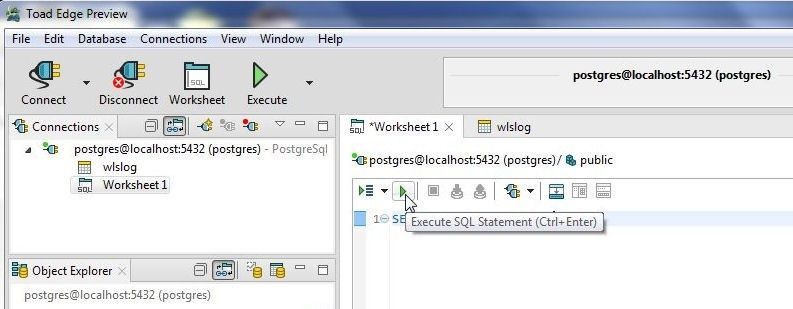
Figure 113. Execute SQL Statement
All SQL statements may be run by selecting the drop-down shown in Figure 114. Other options available are to run a SQL Script from the current position and run to current position.
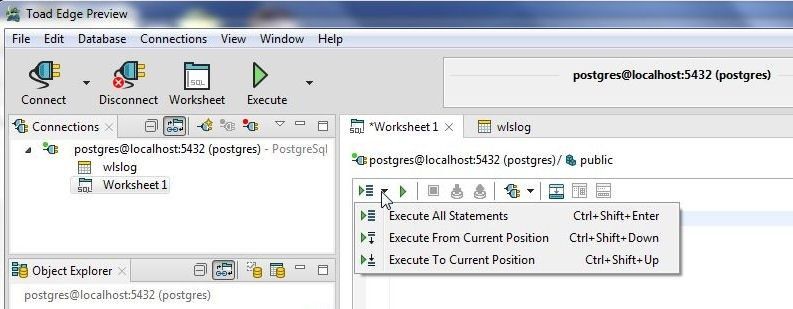
Figure 114. Running All SQL Statements or Statements From/To Current Position
Run the SQL statement to generate a result set as shown in Figure 115. The result grid generated is not editable, as shown by a message.
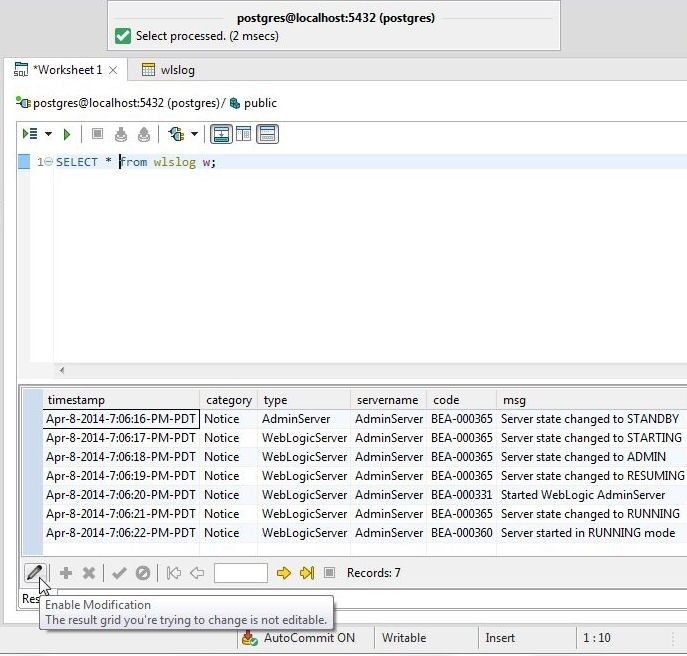
Figure 115. SQL Result Set
Right-click in a SQL Worksheet to display other options, including formatting, as shown in Figure 116.
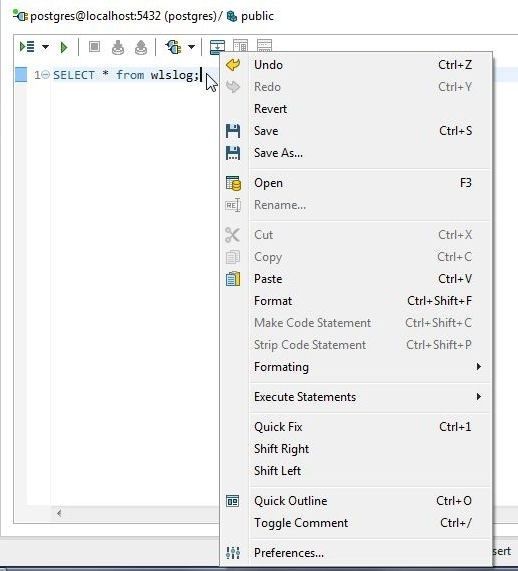
Figure 116. SQL Worksheet Options
The SQL Worksheet also provides syntax validation. To demonstrate add an incomplete SQL statement, as shown in Figure 117.
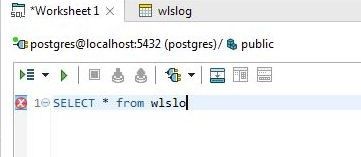
Figure 117. SQL Statement with Syntax error
Click on the error indicator to display the detailed error message as shown in Figure 118.
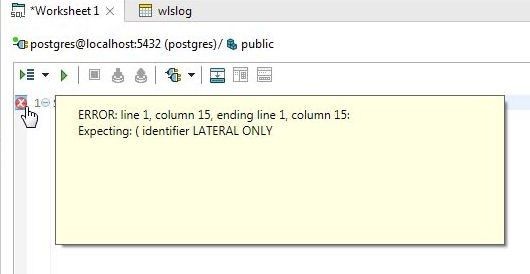
Figure 118. Syntax error detail message
Using Object and Text Search
Toad Edge Preview provides several other features, including Object search and Text Search. To use object search click on Object Search in the toolbar as shown in Figure 119.

Figure 119. Object Search
The Object Search wizard gets launched. Select the Schemas in which to search for database objects and select the Object Types as shown in Figure 120, in which Schemas has public schema selected and Object types has Table and Column selected. Search for wlslog in Enter name prefix or prefixes and the wlslog table gets listed.
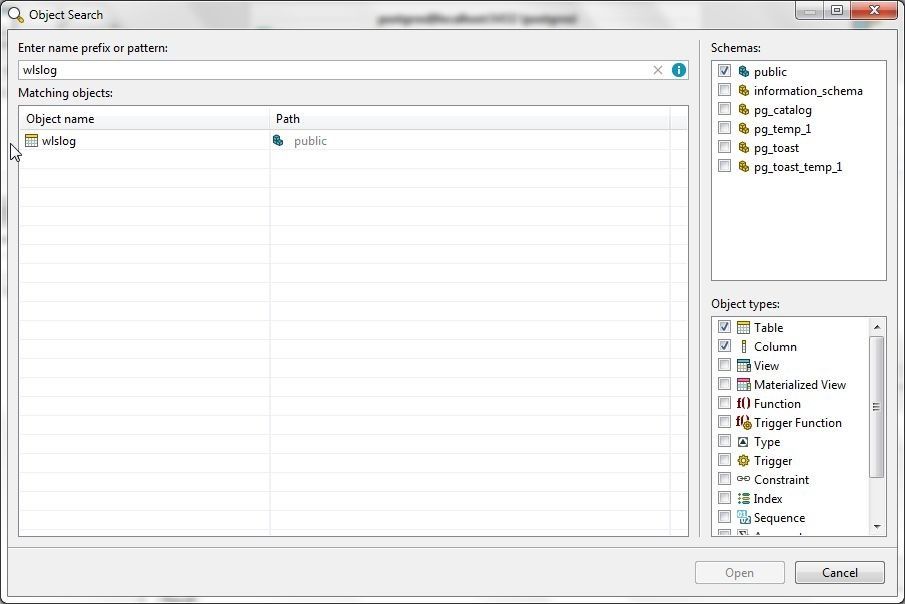
Figure 120. Object Search
Object Search may also be selected from Database. For text search select Database>Text Search as shown in Figure 121.

Figure 121. Database>Text Search
The Text Search wizard gets started as shown in Figure 122. Select the Schemas and Object Types in which to search. Specify what text to search for in the Containing text field; as an example, search for “SELECT”. Specify Object name patterns as *. Click on Search.
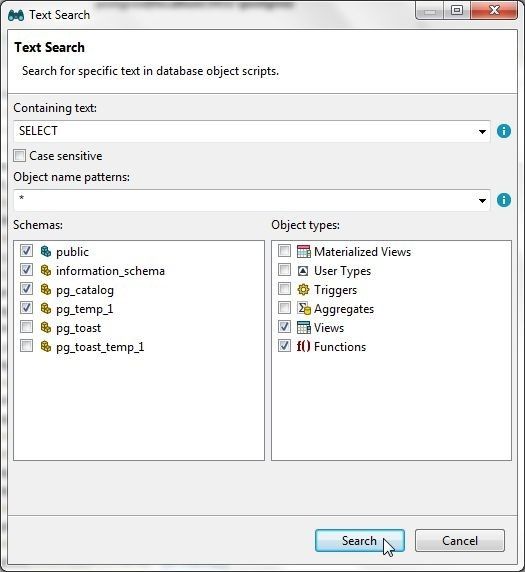
Figure 122. Text Search
The text search gets started, as shown in Figure 123.
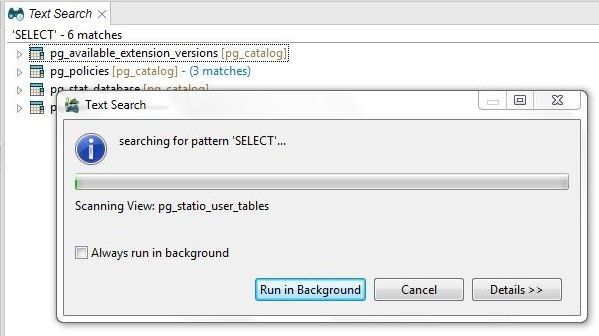
Figure 123. Text search started
When the text search completes all objects that contain the specified text get listed as shown in Figure 124. Click on an object to list the instances of the text.

Figure 124. Text Search Result
Managing Connections
Toad Edge Preview 2.0.0 provides several features for managing connections, including the following:
- Copy a Connection
- Export a Connection
- Import a Connection
- Disconnect a Connected Connection
- Connect a Disconnected Connection
- Reconnect a Connected Connection
Copying a Connection
To copy a connection right-click on the connection in the Connections view and select Copy Connection as shown in Figure 125.

Figure 125. Copy Connection
The Copy Connection dialog gets started, as shown in Figure 126. The Password is the only value that needs to be specified as we are copying a connection. Click on Test Connection to test the connection.
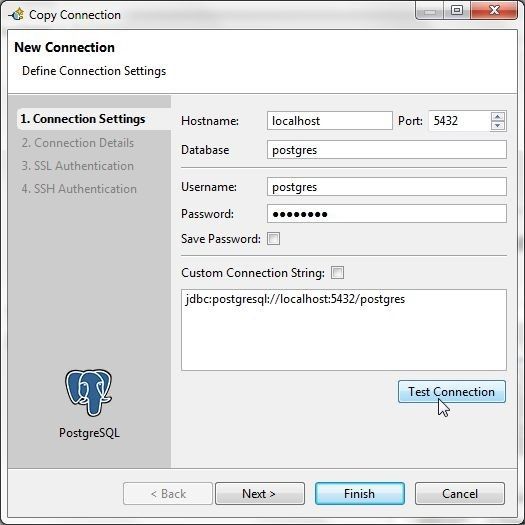
Figure 126. Copy Connection
If the Connection is OK message is displayed, as shown in Figure 127, click on Finish.
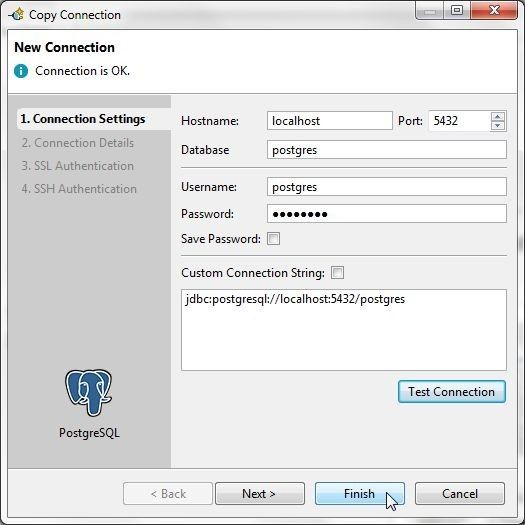
Figure 127. Copy Connection>Finish
A copy of the connection including an SQL Worksheet gets added in the Connections view, as shown in Figure 128.

Figure 128. Copy of a Connection
To compare the new connection with the original right-click on the connection in Connections and select Compare with…>postgres@localhost:5432 as shown in Figure 129.
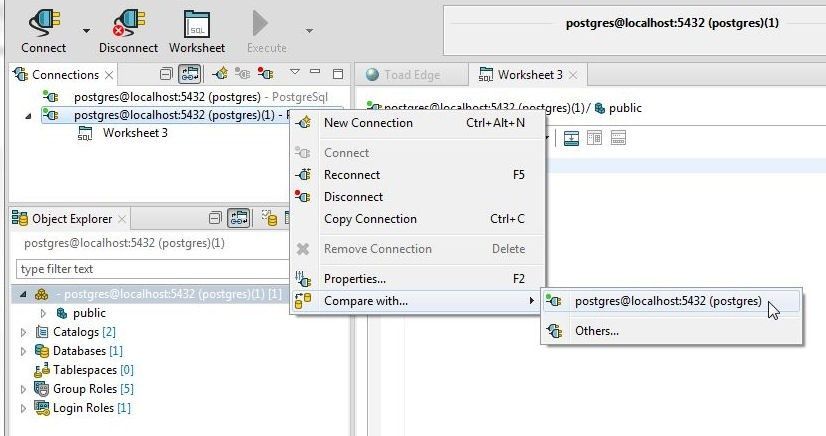
Figure 129. Comparing copy of a connection with the original Connection
The comparison gets completed and no differences are indicated, as shown in the comparison report in Figure 130. A copy of a connection has AutoCommit set to OFF, as shown in bottom bar.
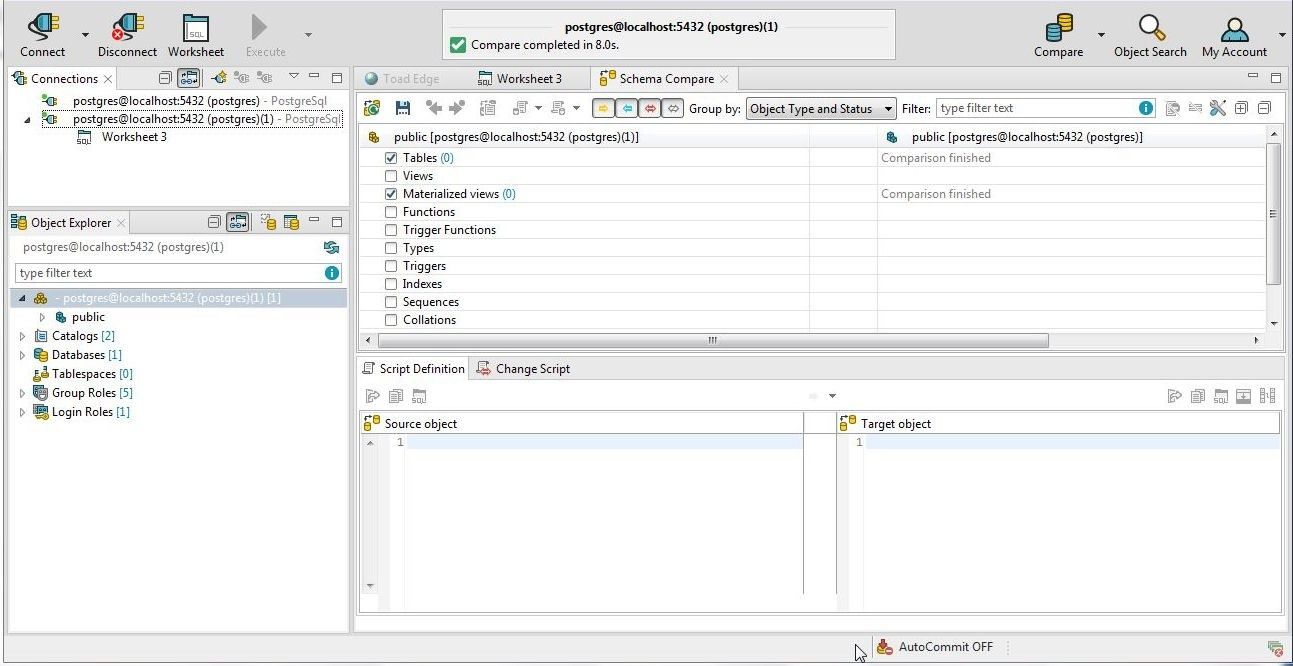
Figure 130. Comparison report indicates no differences
To enable AutoCommit select Database>Enable AutoCommit as shown in Figure 131.
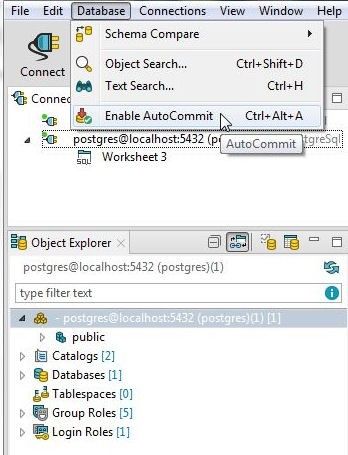
Figure 131. Enable AutoCommit for Copy of a Connection
The AutoCommit for the connection gets set to ON, as shown in Figure 132.
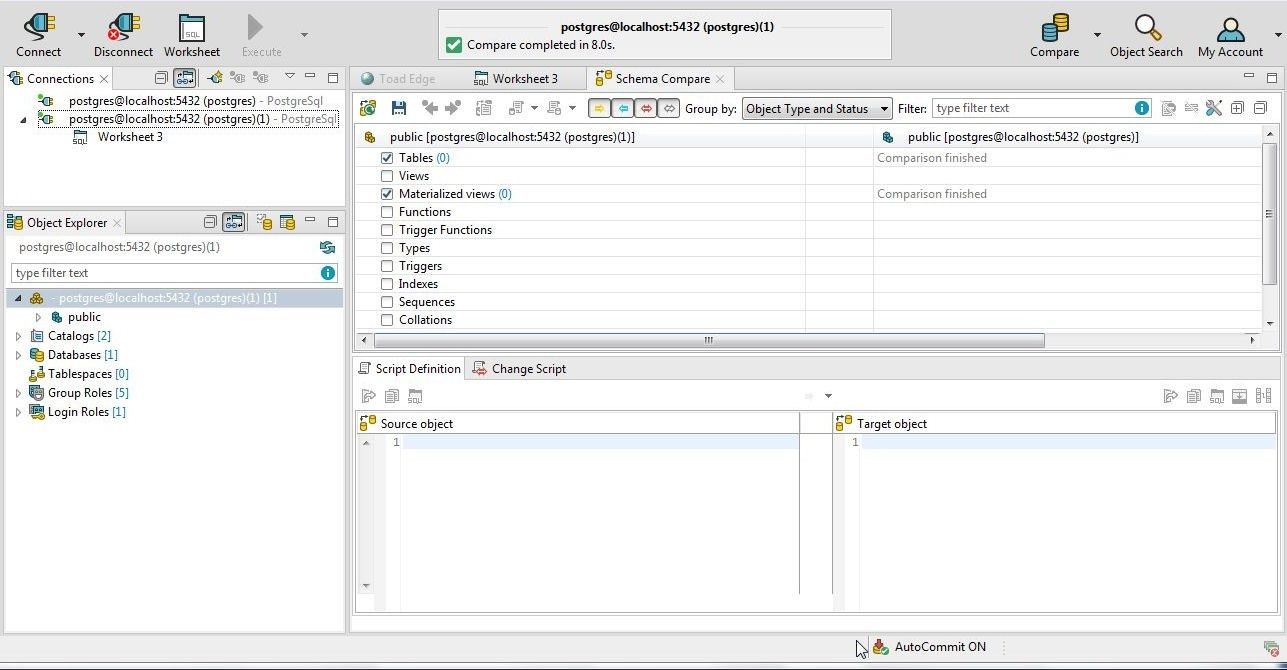
Figure 132. AutoCommit set to ON
No change script is generated, as shown in Figure 133, as the two connections are the same.
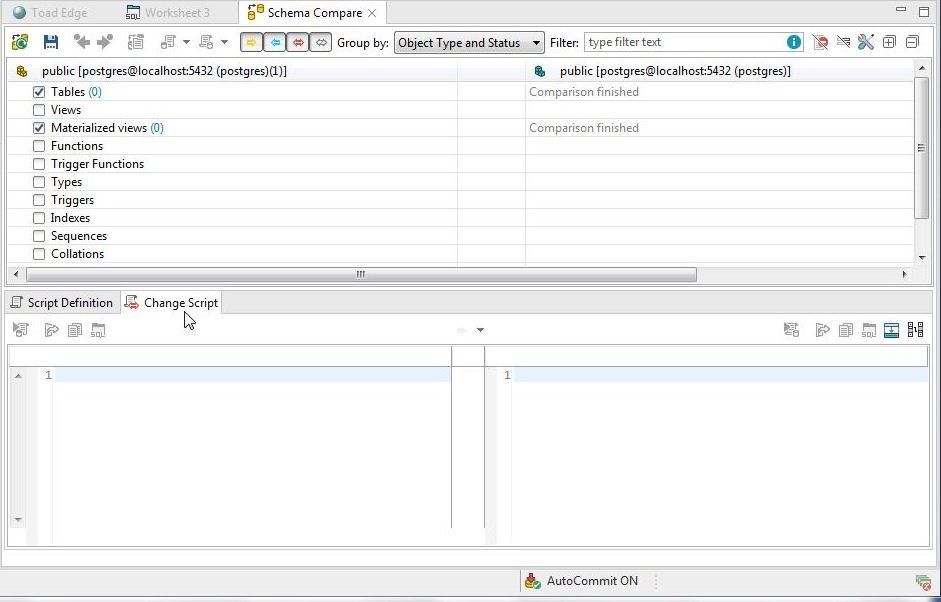
Figure 133. Change Script is empty
Both the original connection and the copy of the connection may be selected in Connect in the toolbar, as shown in Figure 134.
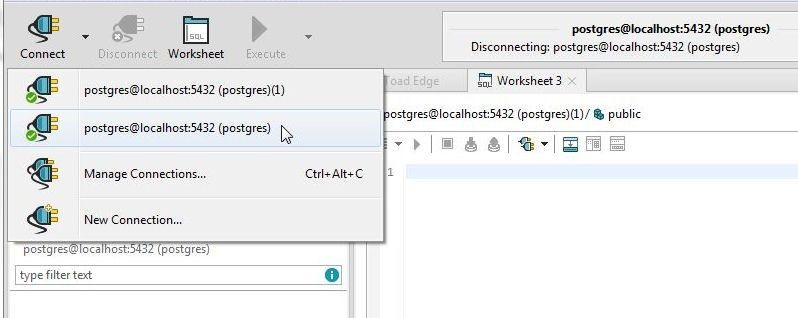
Figure 134. Selecting a Connection
Disconnecting and Connecting a Connection
Several options are available for disconnecting and connecting a connection. A connection may be disconnected by selecting Disconnect in the toolbar, as shown in Figure 135.
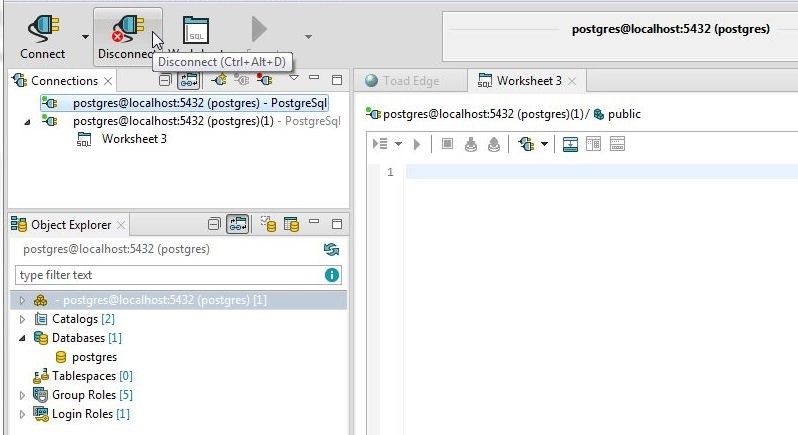
Figure 135. Selecting Disconnect in the toolbar
Alternatively, right-click on a connection in Connections view and select Disconnect as shown in Figure 136.
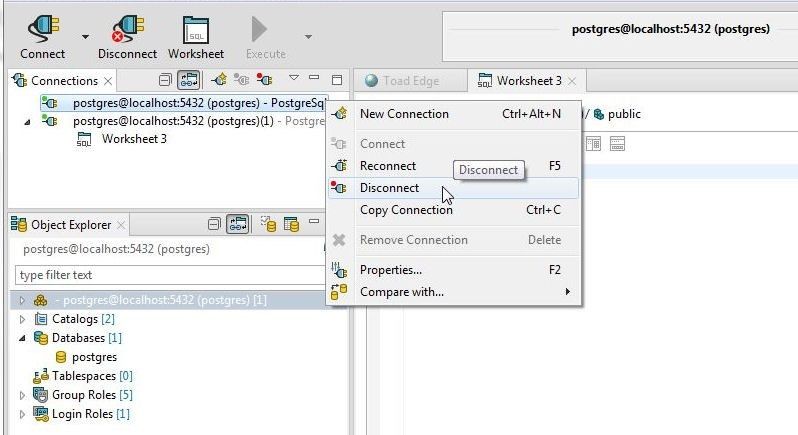
Figure 136. Selecting Disconnect in Connections View
With either option the connection gets disconnected, as shown in Figure 137.
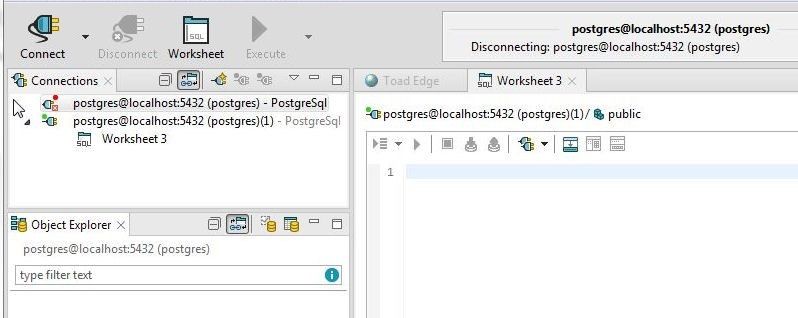
Figure 137. Disconnected Connection
A disconnected connection may be connected by selecting Connect in the toolbar, as shown in Figure 138.
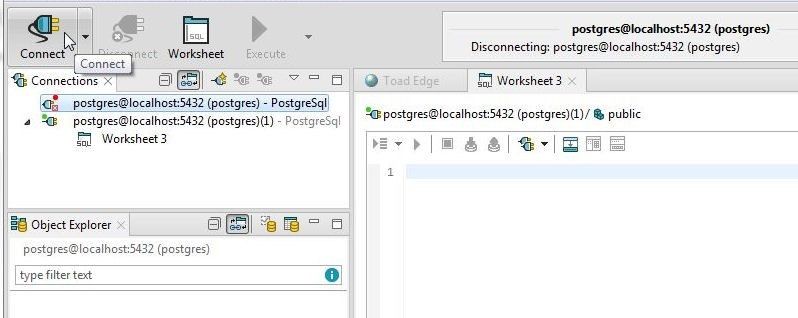
Figure 138. Selecting Connect in Toolbar
Alternatively, a disconnected connection may be connected in the Connections view, as shown in Figure 139.
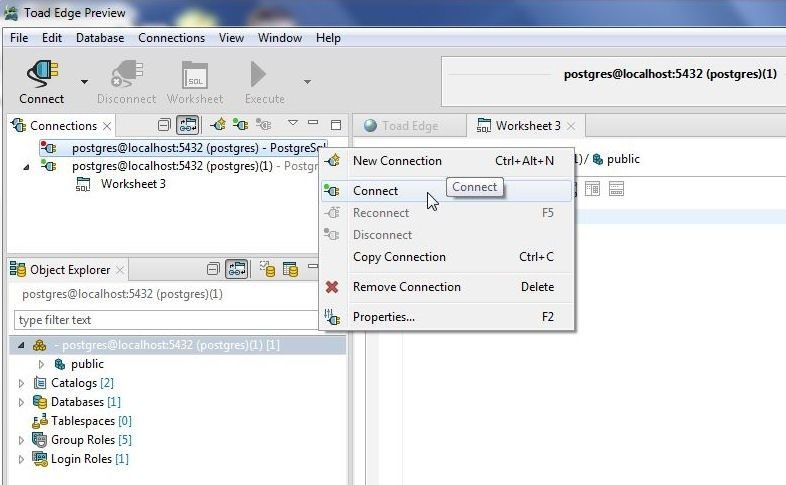
Figure 139. Connecting in Connections View
A disconnected connection starts to get connected, as shown in Figure 140.
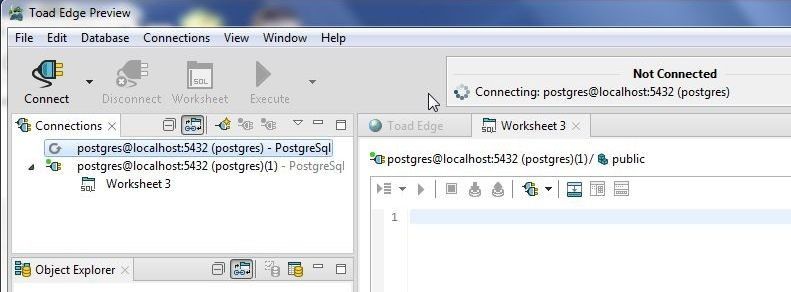
Figure 140. Connecting
Another option to Disconnect is available in the Connections drop-down, as shown in Figure 141.
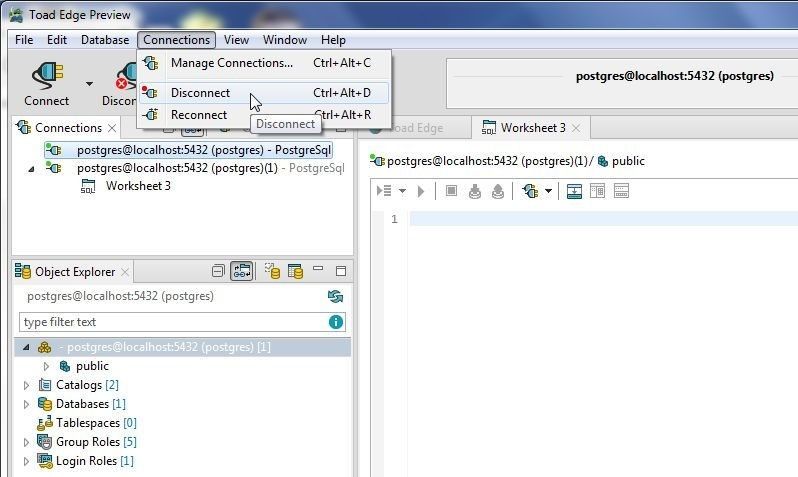
Figure 141. Connections>Disconnect & Connect
A connected connection may also be reconnected by selecting Reconnect in Connections view, Connections, or Database Connections.
Exporting Connection/s
To export one or all connections select Connections>Manage Connections… as shown in Figure 142.
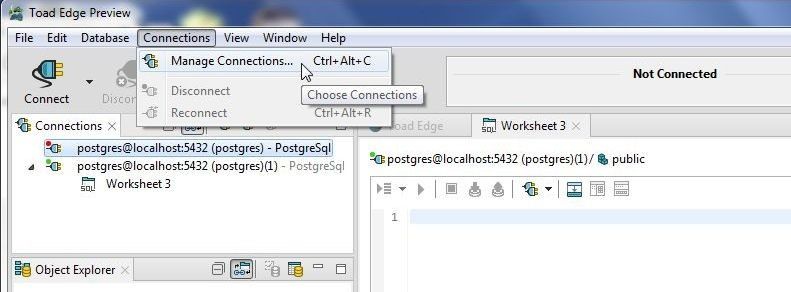
Figure 142. Connections>Manage Connections…
In Database Connections select Export All… as shown in Figure 143.
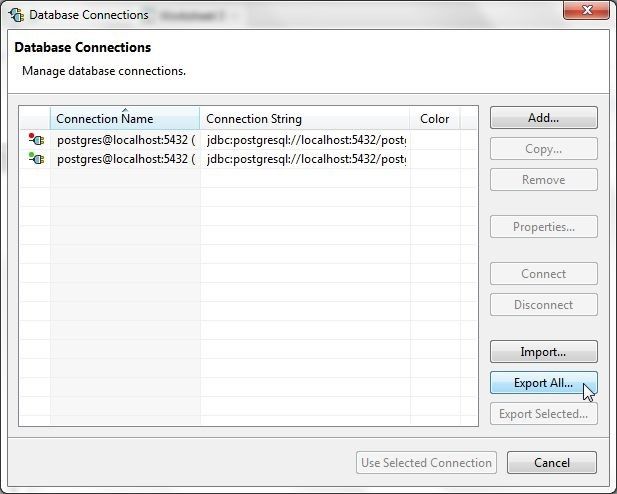
Figure 143. Export All…
In Export specify a File name (connections.xml) and click on Save as shown in Figure 144.
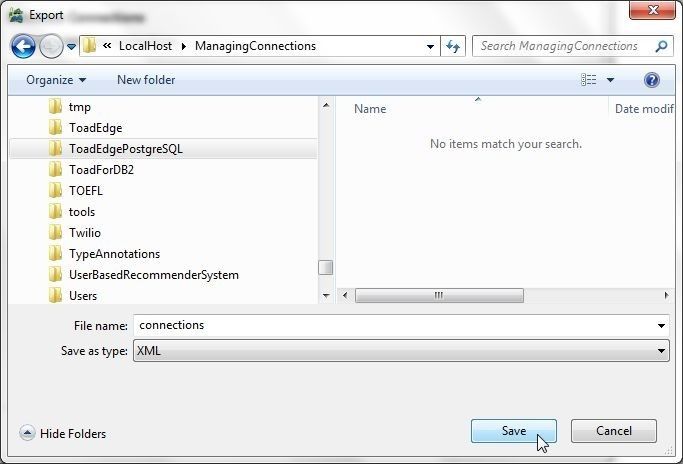
Figure 144. Export>File name>Save
The exported connections.xml file is listed:
<?xml version="1.0" encoding="UTF-8"?><Connections>
  <Connection SubType="POSTGRESQL" autoCommit="true" type="Jdbc">
    <Path>POSTGRESQL</Path>
    <Name>postgres@localhost:5432 (postgres)</Name>
    <Host>localhost</Host>
    <Port>5432</Port>
    <User>postgres</User>
    <SavePassword>false</SavePassword>
    <RestoreWork>true</RestoreWork>
    <LastConnectionDate>2018-03-08T16:50:02</LastConnectionDate>
    <Database>postgres</Database>
    <Options>
      <UUID>49f2f4c2-43f3-42f2-bea7-37b2d144843c</UUID>
      <Origin>toadedge</Origin>
      <AutoLogon>false</AutoLogon>
      <RestoreState>true</RestoreState>
      <Performance>1</Performance>
      <DriverPath>C:Program FilesQuest SoftwareToad Edge Previewlibdriverspostgresql-42.1.4.jar</DriverPath>
      <PerformanceOptions>
        <PerformanceOption>
          <Key>TYPES</Key>
          <Value>false</Value>
        </PerformanceOption>
        <PerformanceOption>
          <Key>TRIGGERS</Key>
          <Value>false</Value>
       </PerformanceOption>
        <PerformanceOption>
          <Key>TABLE_COLUMNS</Key>
          <Value>false</Value>
        </PerformanceOption>
        <PerformanceOption>
          <Key>INDEXES</Key>
          <Value>false</Value>
        </PerformanceOption>
        <PerformanceOption>
          <Key>MATERIALIZED_VIEW_RULES</Key>
          <Value>false</Value>
        </PerformanceOption>
        <PerformanceOption>
          <Key>AGGREGATES</Key>
          <Value>false</Value>
        </PerformanceOption>
        <PerformanceOption>
          <Key>VIEW_COLUMNS</Key>
          <Value>false</Value>
        </PerformanceOption>
        <PerformanceOption>
          <Key>TABLE_CONSTRAINTS</Key>
          <Value>false</Value>
        </PerformanceOption>
        <PerformanceOption>
          <Key>TABLE_INDEXES</Key>
          <Value>false</Value>
        </PerformanceOption>
        <PerformanceOption>
          <Key>CONSTRAINTS</Key>
          <Value>false</Value>
        </PerformanceOption>
        <PerformanceOption>
          <Key>DOMAINS</Key>
          <Value>false</Value>
        </PerformanceOption>
        <PerformanceOption>
          <Key>MATERIALIZED_VIEW_COLUMNS</Key>
          <Value>false</Value>
        </PerformanceOption>
        <PerformanceOption>
          <Key>TABLE_TRIGGERS</Key>
          <Value>false</Value>
        </PerformanceOption>
        <PerformanceOption>
          <Key>TRIGGER_FUNCTIONS</Key>
          <Value>false</Value>
        </PerformanceOption>
        <PerformanceOption>
          <Key>VIEW_RULES</Key>
          <Value>false</Value>
        </PerformanceOption>
        <PerformanceOption>
          <Key>FUNCTIONS</Key>
          <Value>false</Value>
        </PerformanceOption>
        <PerformanceOption>
          <Key>TABLE_RULES</Key>
          <Value>false</Value>
        </PerformanceOption>
        <PerformanceOption>
          <Key>MATERIALIZED_VIEWS</Key>
          <Value>false</Value>
        </PerformanceOption>
        <PerformanceOption>
          <Key>MATERIALIZED_VIEW_INDEXES</Key>
          <Value>false</Value>
        </PerformanceOption>
        <PerformanceOption>
          <Key>TABLES</Key>
          <Value>false</Value>
        </PerformanceOption>
        <PerformanceOption>
          <Key>COLLATIONS</Key>
          <Value>false</Value>
        </PerformanceOption>
        <PerformanceOption>
          <Key>VIEWS</Key>
          <Value>false</Value>
        </PerformanceOption>
        <PerformanceOption>
          <Key>SEQUENCES</Key>
          <Value>false</Value>
        </PerformanceOption>
        <PerformanceOption>
          <Key>VIEW_TRIGGERS</Key>
          <Value>false</Value>
        </PerformanceOption>
      </PerformanceOptions>
      <SSH>
        <Enable>false</Enable>
      </SSH>
      <SSL>
        <Enable>false</Enable>
      </SSL>
    </Options>
  </Connection>
  <Connection SubType="POSTGRESQL" autoCommit="true" type="Jdbc">
    <Path>POSTGRESQL</Path>
    <Name>postgres@localhost:5432 (postgres)(1)</Name>
    <Host>localhost</Host>
    <Port>5432</Port>
    <User>postgres</User>
    <SavePassword>false</SavePassword>
    <RestoreWork>true</RestoreWork>
    <LastConnectionDate>2018-03-08T16:43:55</LastConnectionDate>
    <Database>postgres</Database>
    <Options>
      <UUID>7b51e4fc-b8e4-4c81-9978-b13d48a1af67</UUID>
      <Origin>toadedge</Origin>
      <AutoLogon>false</AutoLogon>
      <RestoreState>true</RestoreState>
      <Performance>1</Performance>
      <DriverPath>C:Program FilesQuest SoftwareToad Edge Previewlibdriverspostgresql-42.1.4.jar</DriverPath>
      <PerformanceOptions>
        <PerformanceOption>
          <Key>TYPES</Key>
          <Value>false</Value>
        </PerformanceOption>
        <PerformanceOption>
          <Key>TRIGGERS</Key>
          <Value>false</Value>
        </PerformanceOption>
        <PerformanceOption>
          <Key>TABLE_COLUMNS</Key>
          <Value>false</Value>
        </PerformanceOption>
        <PerformanceOption>
          <Key>INDEXES</Key>
          <Value>false</Value>
        </PerformanceOption>
        <PerformanceOption>
          <Key>MATERIALIZED_VIEW_RULES</Key>
          <Value>false</Value>
        </PerformanceOption>
        <PerformanceOption>
          <Key>AGGREGATES</Key>
          <Value>false</Value>
        </PerformanceOption>
        <PerformanceOption>
          <Key>VIEW_COLUMNS</Key>
          <Value>false</Value>
        </PerformanceOption>
        <PerformanceOption>
          <Key>TABLE_CONSTRAINTS</Key>
          <Value>false</Value>
        </PerformanceOption>
        <PerformanceOption>
          <Key>TABLE_INDEXES</Key>
          <Value>false</Value>
        </PerformanceOption>
        <PerformanceOption>
          <Key>CONSTRAINTS</Key>
          <Value>false</Value>
        </PerformanceOption>
        <PerformanceOption>
          <Key>DOMAINS</Key>
          <Value>false</Value>
        </PerformanceOption>
        <PerformanceOption>
          <Key>MATERIALIZED_VIEW_COLUMNS</Key>
          <Value>false</Value>
        </PerformanceOption>
        <PerformanceOption>
          <Key>TABLE_TRIGGERS</Key>
          <Value>false</Value>
        </PerformanceOption>
        <PerformanceOption>
          <Key>TRIGGER_FUNCTIONS</Key>
          <Value>false</Value>
        </PerformanceOption>
        <PerformanceOption>
          <Key>VIEW_RULES</Key>
          <Value>false</Value>
        </PerformanceOption>
        <PerformanceOption>
          <Key>FUNCTIONS</Key>
          <Value>false</Value>
        </PerformanceOption>
        <PerformanceOption>
          <Key>TABLE_RULES</Key>
          <Value>false</Value>
        </PerformanceOption>
        <PerformanceOption>
          <Key>MATERIALIZED_VIEWS</Key>
          <Value>false</Value>
        </PerformanceOption>
        <PerformanceOption>
          <Key>MATERIALIZED_VIEW_INDEXES</Key>
          <Value>false</Value>
        </PerformanceOption>
        <PerformanceOption>
          <Key>TABLES</Key>
          <Value>false</Value>
        </PerformanceOption>
        <PerformanceOption>
          <Key>COLLATIONS</Key>
          <Value>false</Value>
        </PerformanceOption>
        <PerformanceOption>
          <Key>VIEWS</Key>
          <Value>false</Value>
        </PerformanceOption>
        <PerformanceOption>
          <Key>SEQUENCES</Key>
          <Value>false</Value>
        </PerformanceOption>
        <PerformanceOption>
          <Key>VIEW_TRIGGERS</Key>
          <Value>false</Value>
        </PerformanceOption>
      </PerformanceOptions>
      <SSH>
        <Enable>false</Enable>
      </SSH>
      <SSL>
        <Enable>false</Enable>
      </SSL>
    </Options>
  </Connection>
</Connections>
Removing a Connection
To remove a connection the connection first must be disconnected. Select a disconnected connection and click on Remove in the Database Connections as shown in Figure 145.
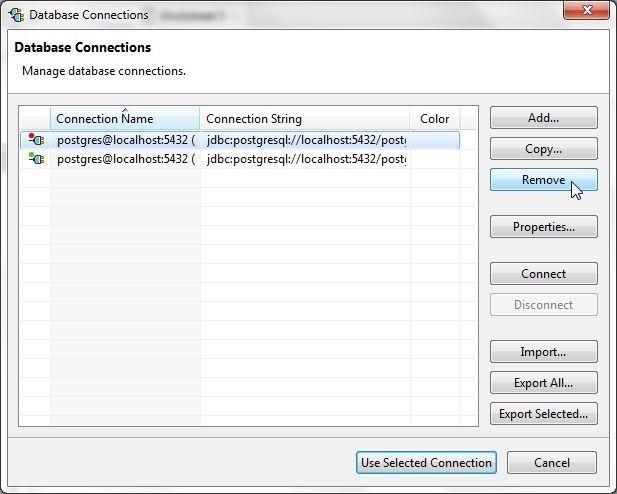
Figure 145. Removing a Connection
A disconnected connection may also be removed in Connections, as shown in Figure 146.
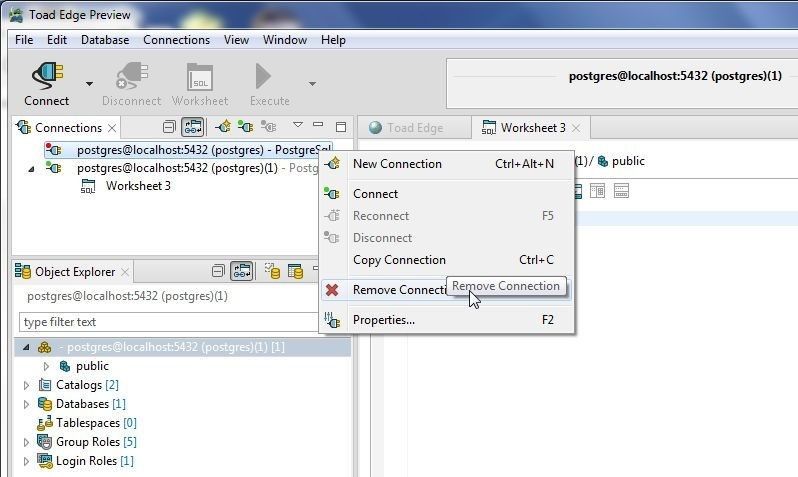
Figure 146. Remove Connection
A confirmation dialog gets displayed, as shown in Figure 147. Click on OK.
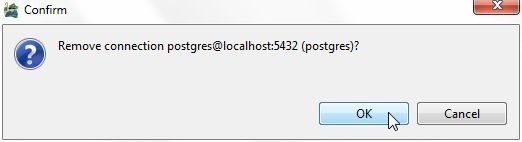
Figure 147. Confirmation dialog
The connection gets removed, as shown in Figure 148. Remove the other connection also, as we shall be demonstrating importing a connection.
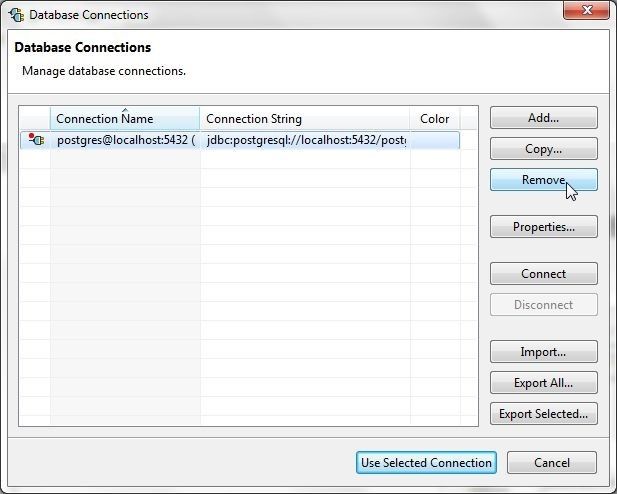
Figure 148. One of the two connections removed & removing a second connection
Importing a Connection
To import a connection from the connections.xml file that was previously exported, select Import in Database Connections, which is launched with Database>Manage Connections, as shown in Figure 149.
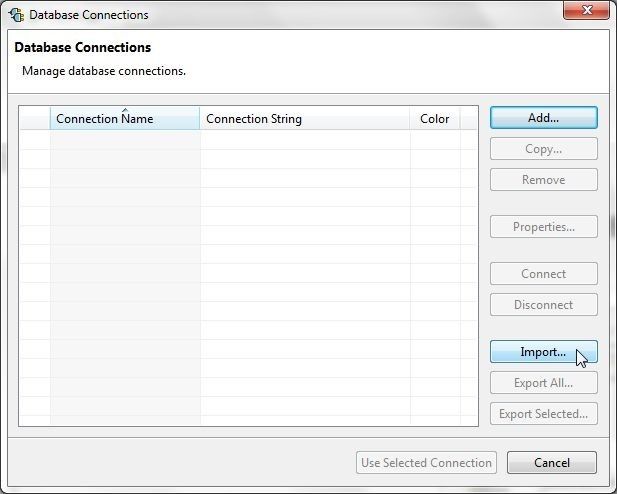
Figure 149. Import
In Import select the connections.xml as shown in Figure 150.
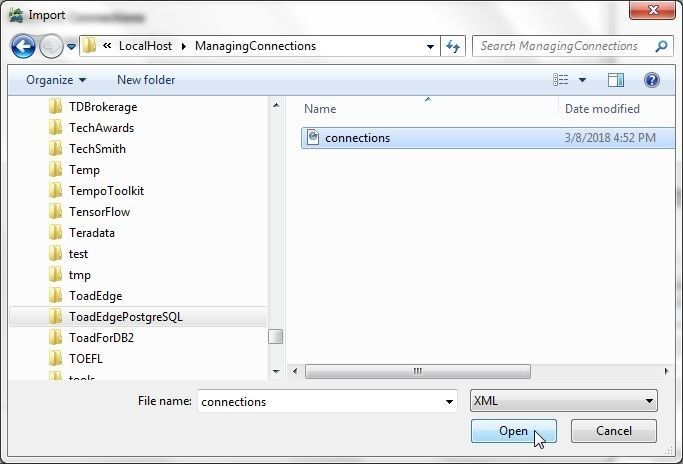
Figure 150. Import>connections.xml
The first connection inconnections.xml gets imported, as shown in Figure 151. Connection state also gets imported. To connect the connection click on Connect.
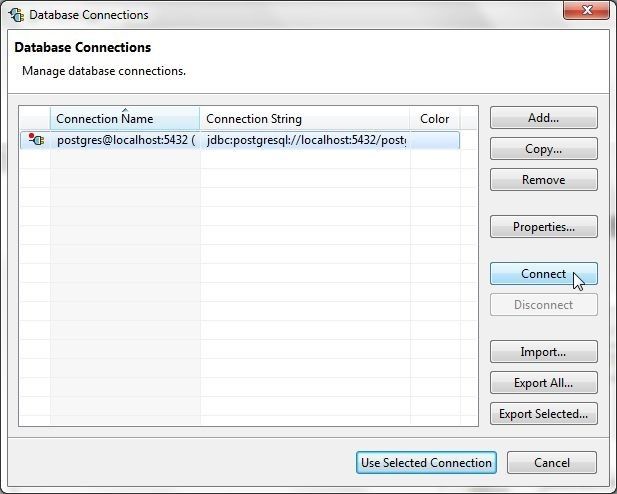
Figure 151. Connecting an Imported Connection
Specify Password in the Enter Password dialog as shown in Figure 152 and click on OK.
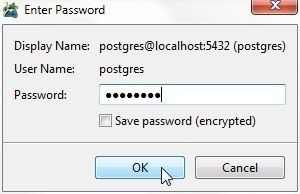
Figure 152. Enter Password
The imported connection gets connected. To use the connection click on Use Selected Connection as shown in Figure 153.
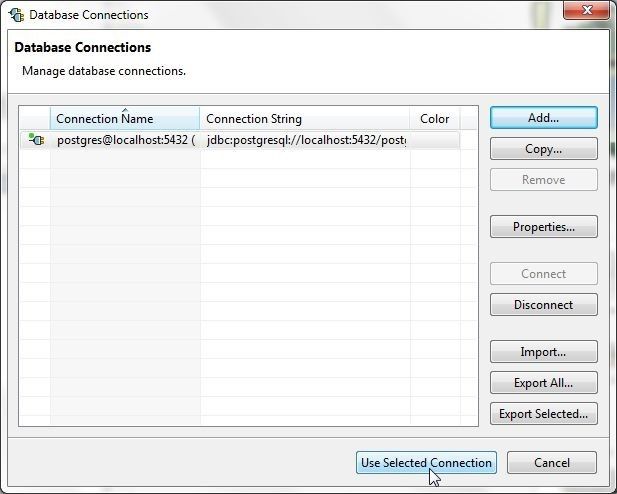
Figure 153. Use Selected Connection
The connection gets added to the Connections view, as shown in Figure 154.
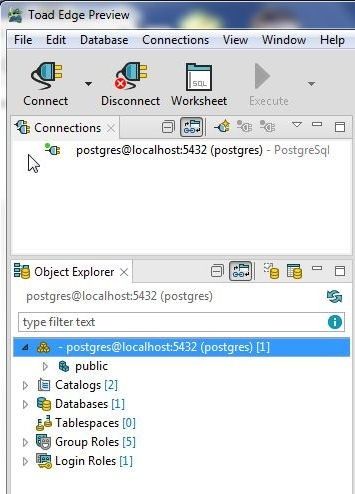
Figure 154. Selected Connection added to Connections View
If a disconnected connection is selected with Use Selected Connection, as shown in Figure 155, the connection gets connected.
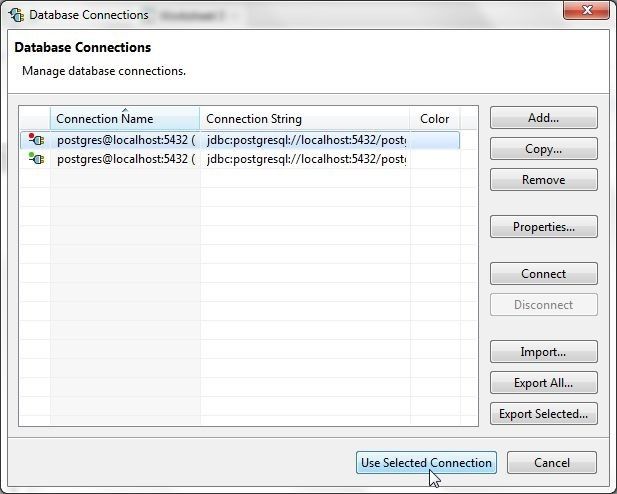
Figure 155. Selecting a Disconnected Connection to use
The Enter Password dialog gets displayed; in which, specify Password and click on OK. The connection gets connected and added to Connections, as shown in Figure 156.
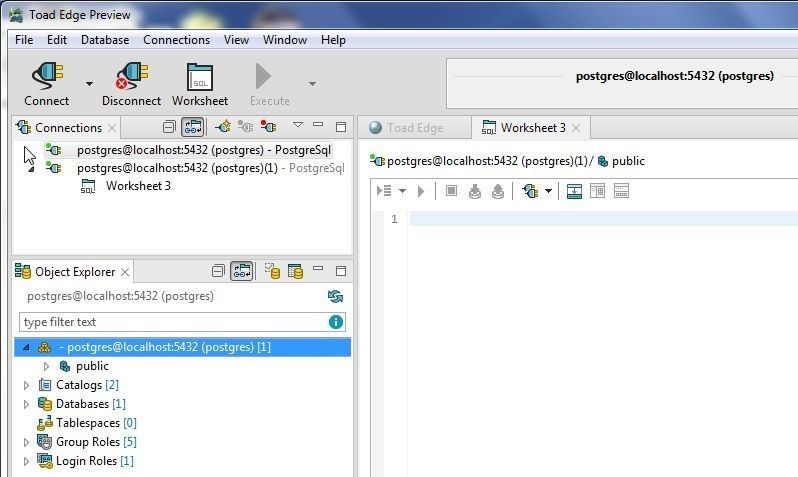
Figure 156. Adding a Disconnected Connection which gets connected
Conclusion
In this article we discussed using Toad Edge Preview 2.0.0 with PostgreSQL 10. Toad Edge 2.0.0 is an integrated development environment with wizards and tools to perform administration and development tasks such as managing database connections, creating database objects, adding table data, importing and exporting table data, performing schema comparison including for a snapshot, and exporting HTML reports for table data and schema comparison results.
Want to learn more?User guide: Access the Toad Edge User Guide. Product page: Click the following link to watch a video on our product page and learn how Toad Edge can help you simplify development and management tasks for open source databases. Blog: 7 hacks to use Toad Edge like a boss Blog: 5 blogs that teach you to effectively work in Toad Edge®
Try Toad Edge free for 30 daysFree 30-day trial of Toad Edge Already in a trial? If Toad Edge has helped you ramp up on open source RDBMSs fast, buy it now or contact a sales representative. |
Start the discussion at forums.toadworld.com