In our article series, we are exploring the capabilities of Oracle Enterprise Manager Cloud Control 13c for the private Database-as-a-Service (DBaaS) cloud – including the setup of such a cloud. In the previous parts, we started the setup of the private DBaaS cloud, including the configuration of the self-service portal. The full procedure includes setting up the Enterprise Manager software library, creating the PaaS infrastructure zones, database pools, and quotas for the users, service templates, and optionally chargeback plans to apply to the users for cloud allocation and cloud usage.
We configured the software library, set up the Enterprise Manager self update system, and downloaded the latest plug-ins from the external Enterprise Manager store. We created a custom cloud role in Enterprise Manager, and a Cloud SSA user named as "SAI_DAS". The next step was to create a PaaS infrastructure zone named as “Sainath_PaaS_Zone” – this is just a group of hosts that will be used for Platform as a Service (PaaS); in this case we will use it for Database as a Service. Members (hosts) were added to the PaaS infrastructure zone.
After the PaaS zone, a new database pool was created – this was a group of database servers where the database software had been preinstalled. All the servers in the database pool were required to be of the same platform as well as the same database version. Next, we added our Oracle Home targets to the pool, with each Oracle Home target belonging only to a single database pool. We also specified the Placement Policy Constraint “Maximum number of Database Instances per host” as 10 instances.
After the database pool was created, we selected “Quotas” from the left panel, and then entered the quotas for the role selected. The Quotas page allows the SSA administrator to configure the total amount of resources which are allocated to the self service user via the role. Quotas are an important aspect of the cloud and are required in order to control the usage of the self-service cloud. In our case, we have assigned the Memory quota as 16 GB, the Storage quota as 100 GB, the number of Database Requests as 10, the number of Schema Service Requests as 50, and the number of PDB Service Requests as 25.This is the total amount of resources that can be utilized by any SSA user to whom the custom role is assigned.
Next, we selected Data Sources from the left panel, and on the page that appears, clicked on the Data Profiles tab and created a new profile. In the creation wizard that started, we selected the Reference target as the “saiprod” database. This is the production database that will be used as the master source. We chose to include “Data Content” and “Structure and Data” by creating an RMAN backup from the source database. The profile will be used for the Database-as-a-Service functionality. You can set the schedule to repeat the profile creation at an interval; this means a new backup will be taken repeatedly and can be selected by the self-service user. It is also possible to set a purge policy, and if you do this you can purge the backups based on either the number of maximum snapshots, or the number of days. This helps in keeping the backups of the profile manageable.
After the database profile creation completed successfully, we could also refresh it at any time in the future to cater for changed data in the Saiprod database. As the cloud administrator, you would want any such new data to be available to the self-service user for creating a copy of the Saiprod database. In this case there is no need for the cloud administrator to recreate the profile, since there is a “Refresh Profile” capability which will create a new RMAN full backup with the changed data. This new backup version can then be selected by the SSA user at the time of self-service of the single instance database.
Select Setup | Cloud | Database and select Data Sources in the left pane. In the Data Profiles tab, select the RMAN Full Backup Profile. When you click on the Refresh Profile button, the question is asked: “This action creates a new snapshot under this profile. Are you sure that you want to continue with the refresh of selected Profile?” Click on Yes.
The Refresh profile procedure is submitted successfully. You can check the steps at the link provided. After the procedure completes, move back to the Data profiles tab. The new RMAN backup is displayed in the Contents section (Figure 21).

Figure 21: New RMAN backup displayed
Create Data Profile: Snap Clone Database
We now create a new database profile to be used for the Snap Clone functionality. Click on “Create” in the Data Profiles tab.
In the first step of the wizard, specify the reference target again as the “saiprod” database. Choose to include the “Structure and Data” by including an “RMAN Database Image” for this new profile instead of an RMAN backup. Select the credentials as before.
In the second step where you specify the Content Options, select Online Backup as the RMAN image mode and the Fast Recovery Area (or a special directory) as the Backup location.
This profile will be used for the Database-as-a-Service functionality using the Snap Clone functionality. So, in the third step, name this profile as “Database saiprod.sainath.com RMAN Datafile Image Backup Profile”. Schedule it to run immediately. As before, you can optionally set a repeating schedule, and a purge policy if required.
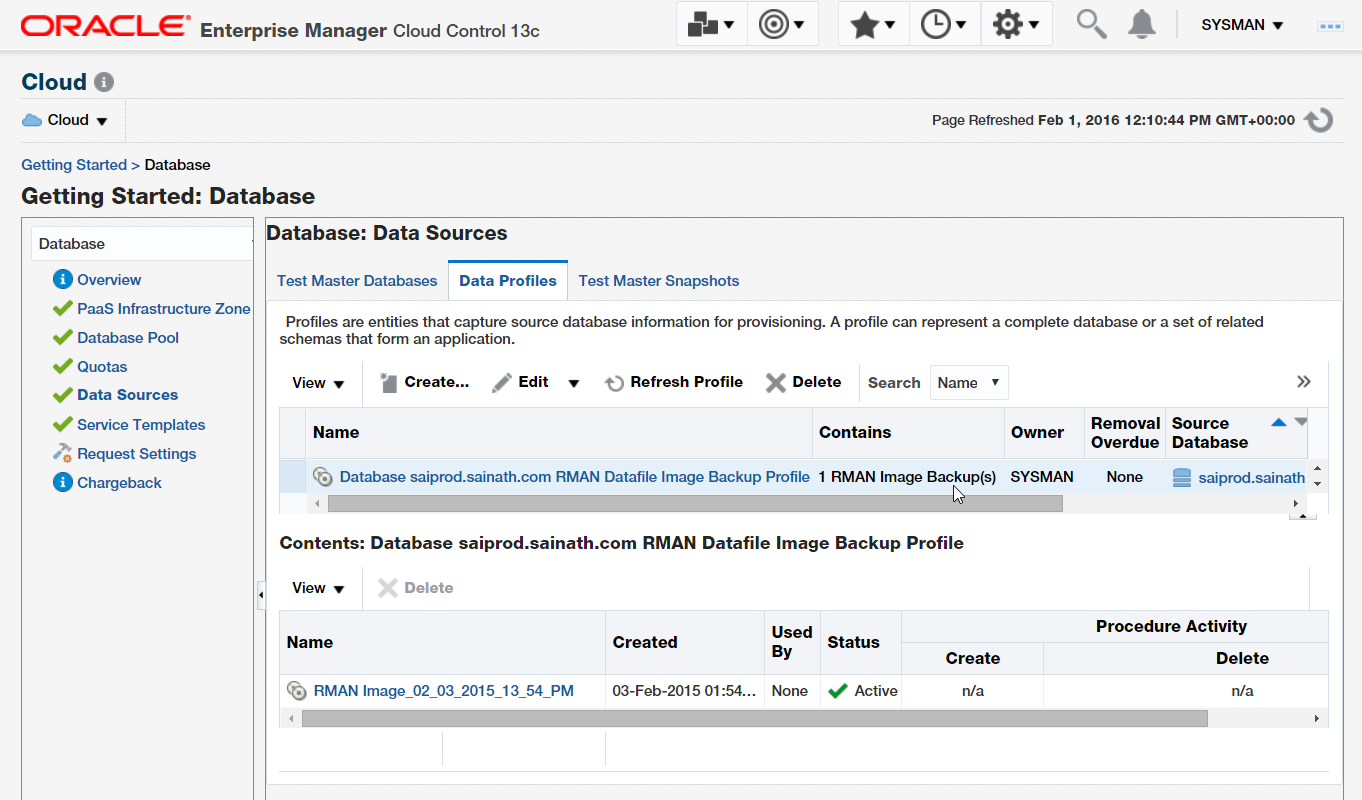
Figure 22: RMAN Image Backup
Note that “RMAN Image Backup” is clearly mentioned in the “Contains” column, as opposed to “RMAN Backup” in the previously created profile. The section in the lower half of the page shows the actual RMAN Datafile Image Backup that will be used by the profile.
If the production data has changed, the cloud administrator can click on “Refresh Profile” at any time after the profile creation; this will create a new RMAN Datafile Image backup.
We continue in the next part of this article series.
Start the discussion at forums.toadworld.com