In this blog post, I’ll show how we can build a three-node cassandra cluster on Docker for testing. I’ll use official cassandra images instead of creating my own images, so all process will take only a few minutes (depending on your network connection). I assume that you have Docker installed on your PC, have internet connection (I was born in 1976 so it’s normal for me to ask this kind of questions) and your PC has at least 8 GB RAM. First of all, we need to assign about 5 GB RAM to Docker (in case it has less RAM assigned), because each node will require 1.5+ GB RAM to work properly.
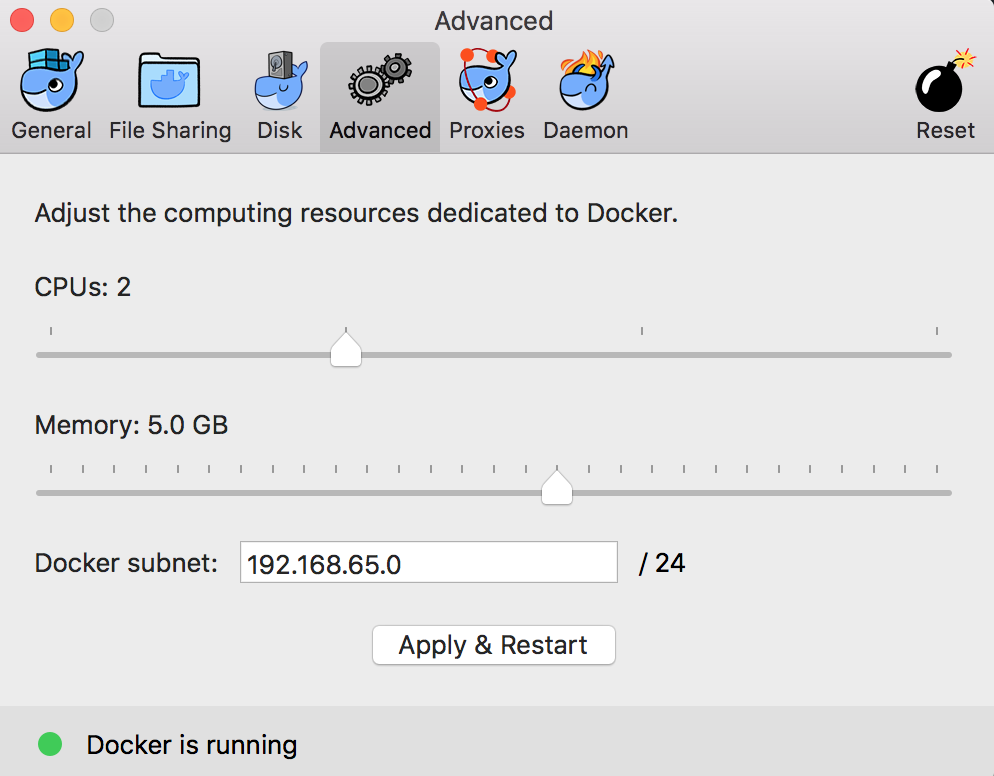
Open the docker preferences, click the advanced tab, set the memory to 5 GB or more, and click “apply and restart” docker service. Launch a terminal window, run “docker pull cassandra” command to fetch the latest official cassandra image.
I’ll use cas1, cas2, cas3 as the node names, and the name of my cassandra cluster will be “MyCluster” (a very creative and unique name). I’ll also configure cas1 and cas2 like they are placed in datacenter1, and cas3 like it’s placed in datacenter2. So we’ll have 3 nodes, two of them in datacenter1 and one in datacenter2 (to be able to test multi-DC replication support of Cassandra). For multi-DC support, my cassandra nodes will use “GossipingPropertyFileSnitch”. These extra information can be passed to docker containers using environment variables (with -e parameter):
Now it’s time to start the first node:
docker run --name cas1 -p 9042:9042 -e CASSANDRA_CLUSTER_NAME=MyCluster
-e CASSANDRA_ENDPOINT_SNITCH=GossipingPropertyFileSnitch -e CASSANDRA_DC=datacenter1 -d cassandra
The -p parameter is for publishing the container’s port to the host, so I would be able to connect to cassandra service from the outside of the docker container (for example using DataStax Studio or DevCenter). After the first node is up, I’ll add the cas2 and cas3 nodes but I need to tell them the IP address of cas1, so they can use it as the seed node and join to the cluster. We can find the ip address of cas1 by running the following command:
docker inspect --format='' cas1
I’ll add it to docker run command strings for cas2 and cas3:
docker run --name cas2 -e CASSANDRA_SEEDS="$(docker inspect
--format='' cas1)" -e CASSANDRA_CLUSTER_NAME=MyCluster
-e CASSANDRA_ENDPOINT_SNITCH=GossipingPropertyFileSnitch -e CASSANDRA_DC=datacenter1 -d cassandra
docker run --name cas3 -e CASSANDRA_SEEDS="$(docker inspect
--format='' cas1)" -e CASSANDRA_CLUSTER_NAME=MyCluster
-e CASSANDRA_ENDPOINT_SNITCH=GossipingPropertyFileSnitch -e CASSANDRA_DC=datacenter2 -d cassandra
Notice that I gave a different datacenter name (datacenter2) while creating the cas3 node. Run them one by one, give time to the new nodes to join the cluster, and then run “nodetool status” command from cas1 (or any other node):
docker exec -ti cas1 nodetool status
The above code, connects to cas1 node and runs “nodetool status” command. If everything went fine, you should see something similar to below output.
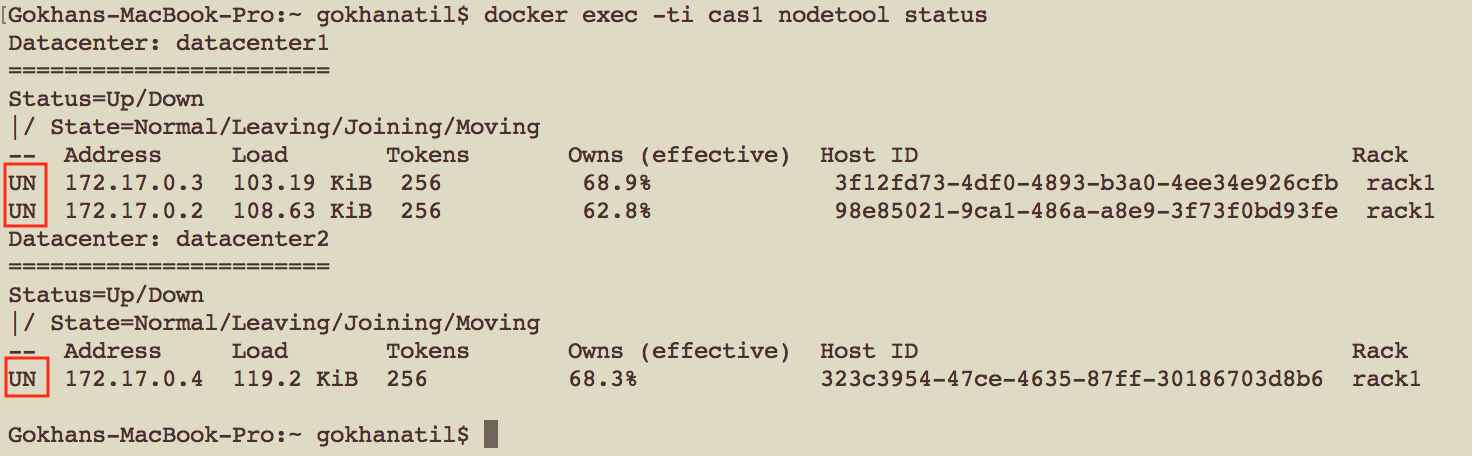
The status column of each node should show UN (node is UP and its state is Normal). If you see “UJ” that means your node is joining, just wait for a while and check it again. If your new nodes didn’t show up in the list, they probably crashed before they joined the cluster. In this case, you may restart the missing nodes. For example, if cas3 (the last node) didn’t joined to the cluster and it’s down, you can run “docker start cas3” command to start it. It’ll try to join the cluster automatically.
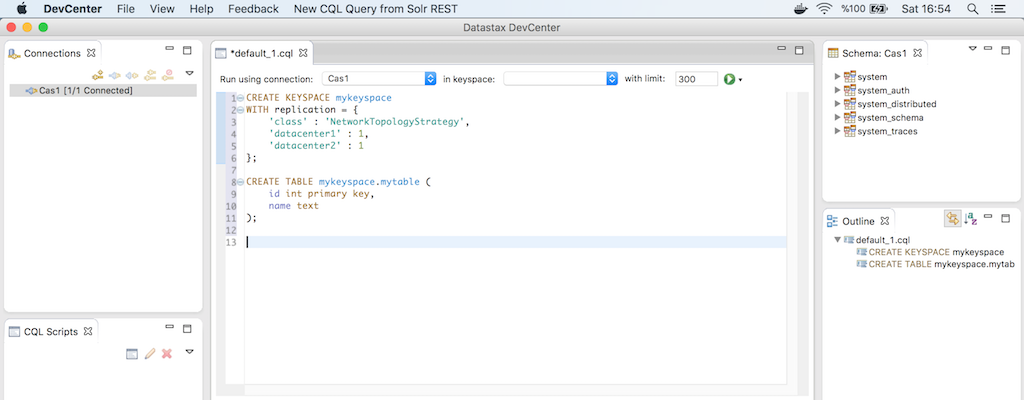
Now Let’s create a keyspace (database) which will be replicated to datacenter1 and datacenter2, and a table in this newly created keyspace. I’ll use NetworkTopologyStrategy for replicating data. Each datacenter will store one copy of data. Here’s the CQL (cassandra query language) commands to create the keyspace and table:
CREATE KEYSPACE mykeyspace
WITH replication = {
	'class' : 'NetworkTopologyStrategy',
	'datacenter1' : 1,
	'datacenter2' : 1
};
CREATE TABLE mykeyspace.mytable (
	id int primary key,
	name text
);
We can execute these commands using cqlsh by connecting one of our nodes:
docker exec -ti cas1 cqlsh
Or we can execute them using a client program such as DevCenter (you need to register to DataStax website to be able to download it). I tried to find a stable GUI for Cassandra, and DevCenter looks fine to me:
After we created the keyspace, we can use “nodetool status” to check its distribution:
docker exec -ti cas1 nodetool status mykeyspace
As you can see, I gave the name of the keyspace as a parameter to nodetool, so it will show the distribution of our newly created keyspace.
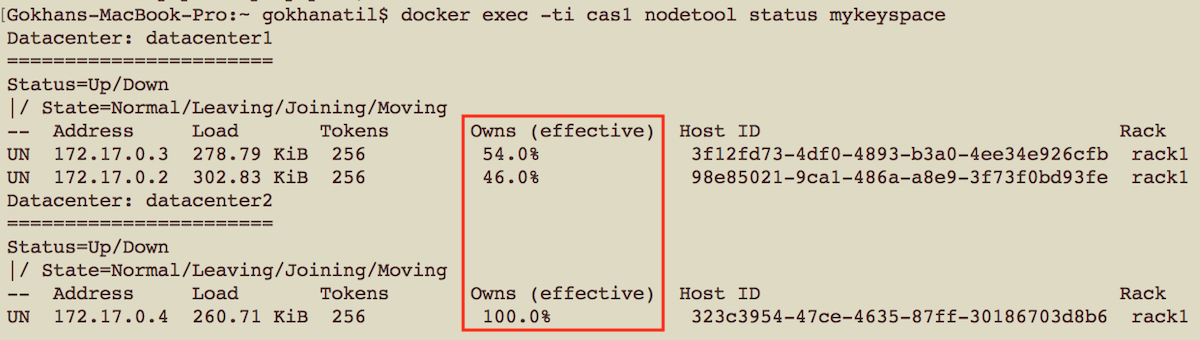
Did you notice that the nodes at datacenter1 shares data almost evenly, while the node at datacenter2 has replication of all data? Remember the replication strategy of our keyspace: Each datacenter stores one copy. Because there are two nodes in datacenter1, the data will be evenly distributed between these two nodes.
You can shutdown nodes using “docker stop cas1 cas2 cas3” and then start them again with “docker start cas1 cas2 cas3”. So, we have a working Cassandra cluster which is deployed to multiple data centers. Use it for your tests! Do not forget to check my presentation about Cassandra.
Start the discussion at forums.toadworld.com