 Introduction
Jenkins is an open source automation server suitable for automating Continuous Integration and Continuous Delivery pipelines. Toad DevOps Toolkit is a COM objects based tool for developing DevOps evaluations and workflows. Toad DevOps Toolkit supports running Windows PowerShell scripts in addition to VBA and PL/SQL scripts. Jenkins provides plugins to run different scripts including PowerShell, VBA and Pl/SQL scripts. In this article we shall use Jenkins plugin for PowerShell, the PowerShell plugin, to integrate with Toad DevOps Toolkit. The benefit of using the PowerShell plugin is being able to run PowerShell commands in a Jenkins pipeline. This article has the following sections.
- Setting the Environment
- Installing Jenkins
- Installing the PowerShell Plugin
- Running a Hello PowerShell Jenkins Pipeline
- Running Toad DevOps Toolkit with a Jenkins Pipeline
Setting the Environment
Download and install the following software on a Windows OS:
Installing Jenkins
To install Jenkins double-click on the jenkins.exe application to launch the Jenkins Setup wizard. Click on Next in the Welcome screen as shown in Figure 1.
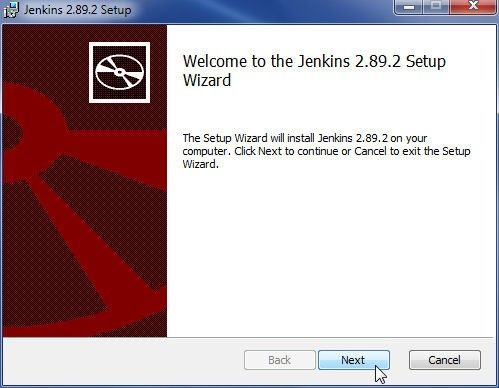
Figure 1. Jenkins Setup Wizard
Specify a directory in which to install Jenkins (a default directory is listed) as shown in Figure 2 and click on Next.
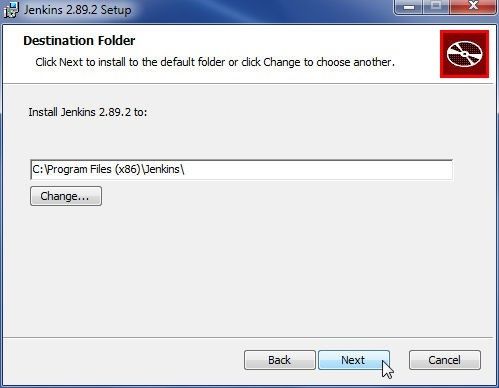
Figure 2. Selecting Destination Folder
In Ready to Install click on Install as shown in Figure 3.
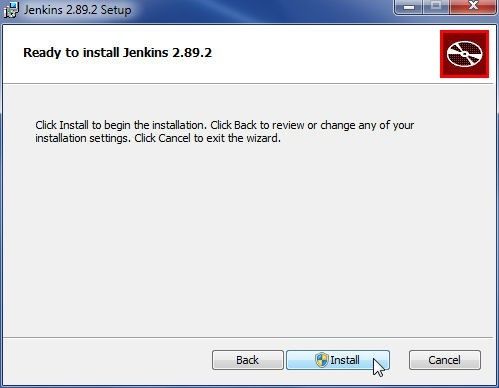
Figure 3. Ready to Install>Install
Jenkins begins to get installed, as shown in Figure 4.
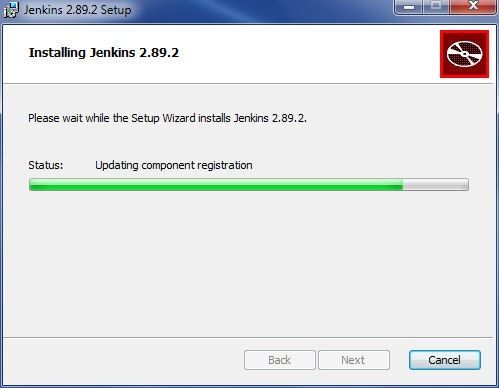
Figure 4. Installing Jenkins
When Jenkins installation has completed click on Finish in the Setup wizard as shown in Figure 5.
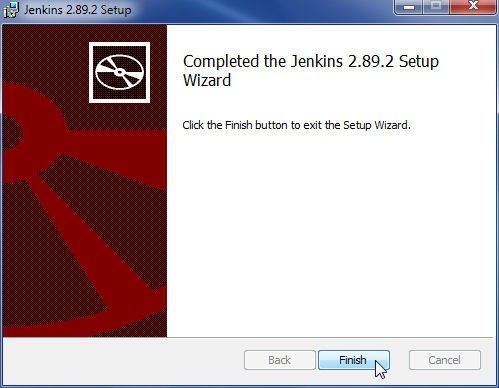
Figure 5. Jenkins Installation completed
To login to Jenkins without using admin user, modify config.xml. Open Notepad as an administrator and open the C:\Program Files (x86)\Jenkins\config.xml configuration file. Replace:
<useSecurity>true</useSecurity>
with:
<useSecurity>false</useSecurity>
Login to the Jenkins Web UI at URL http://localhost:8080 as shown in Figure 6.
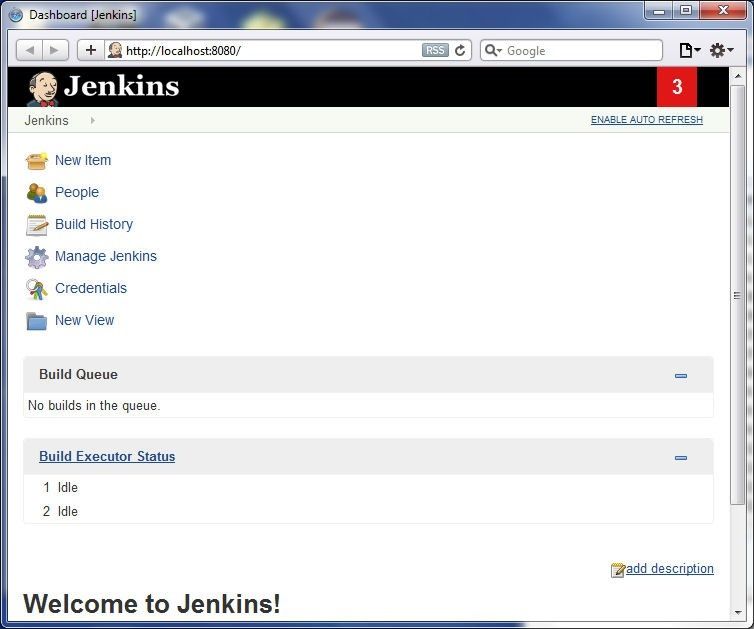
Figure 6. Jenkins Web UI
Installing the PowerShell Plugin
To install the PowerShell plugin click on Manage Jenkins as shown in Figure 7 in the Web UI.
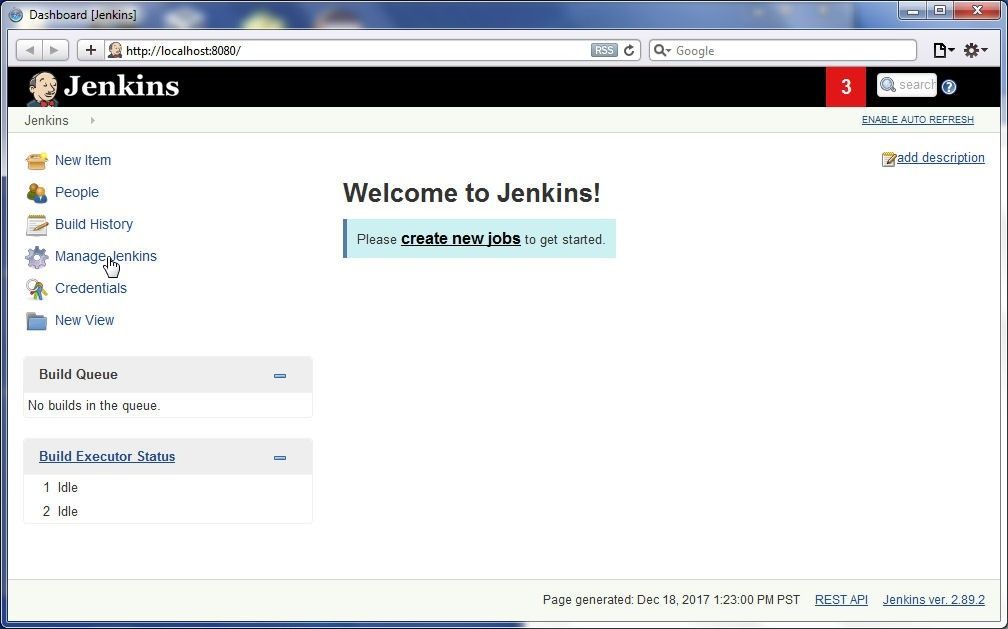
Figure 7. Manage Jenkins
In Manage Jenkins select Manage Plugins as shown in Figure 8.
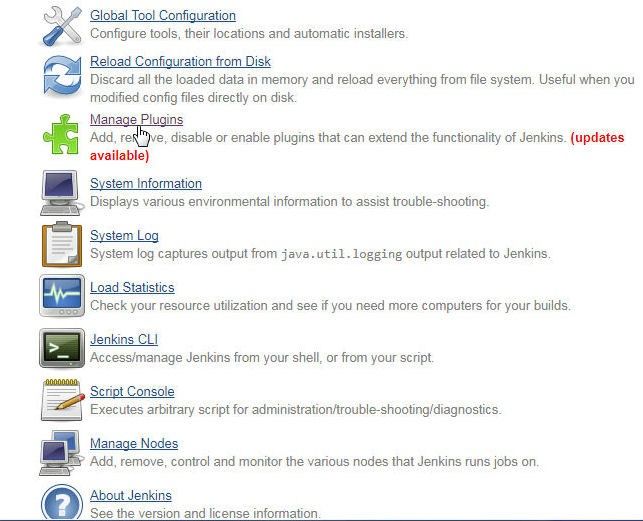
Figure 8. Manage Jenkins>Manage Plugins
Specify “PowerShell” in the Filter to list the PowerShell plugin, as shown in Figure 9. Select the PowerShell plugin and click on Install without restart, as shown in Figure 9.

Figure 9. PowerShell Plugin>Install without restart
The PowerShell plugin and the dependency plugins start to get installed, as shown in Figure 10. Select the option to restart Jenkins after installation has completed.
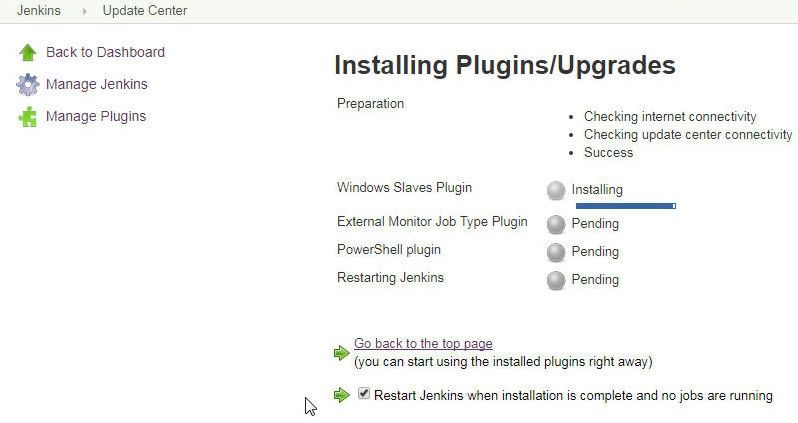
Figure 10. Installing PowerShell Plugin
After the PowerShell plugin has installed the Jenkins begins to restart, as shown in Figure 11.

Figure 11. Restarting Jenkins
After Jenkins has restarted select Manage Jenkins>Manage Plugins and select the Installed tab as shown in Figure 12.
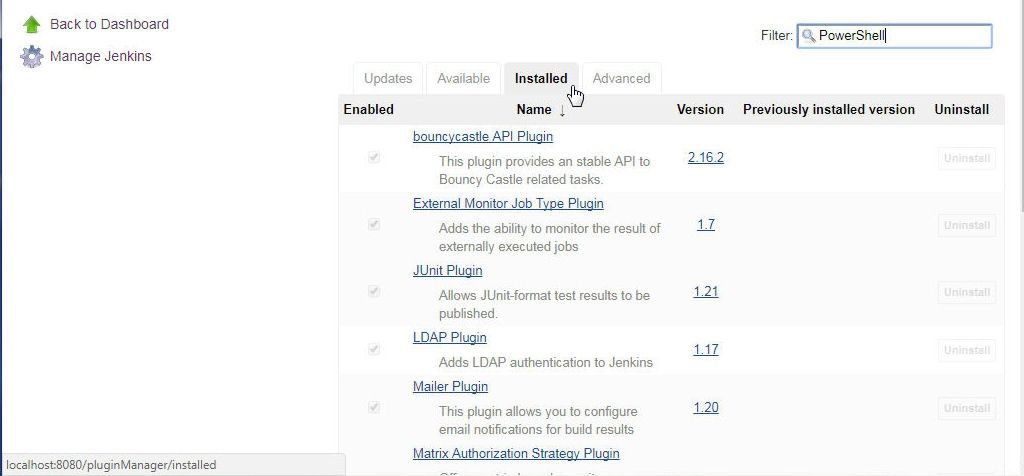
Figure 12. Manage Jenkins>Manage Plugins>Installed
The PowerShell plugin is listed as being installed, as shown in Figure 13.
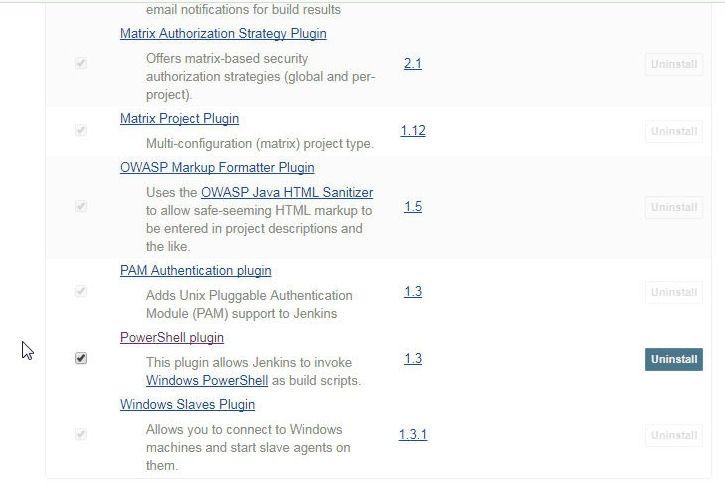
Figure 13. PowerShell Plugin Installed
Running a Hello PowerShell Jenkins Pipeline
The PowerShell plugin lets a user run PowerShell scripts from a Jenkins Pipeline. The PowerShell plugin provides the powershell step, which supports the parameters in Table 1.
Table 1. Parameters for the powershell step
|
Parameter |
Type |
Description |
Required |
|
script |
String |
Runs a batch script in which multiple lines may be added. |
Yes |
|
encoding |
String |
The encoding of the stdout |
No |
|
returnStatus |
boolean |
The return status to indicate if the script succeeded or failed. The value may be true or false. The return status is 0 if the script succeeds. If the script fails the status code is returned and an exception generated. |
No |
|
returnStdout |
boolean |
If set to true the standard output stream from the task is returned as a String. The other output streams (error stream, warning stream, verbose stream, and debug stream) are redirected to the console output. |
No |
To create a Jenkins pipeline click on create new jobs as shown in Figure 14. Alternatively, click on New Item.

Figure 14. Create new jobs
In the New Item wizard specify an Item name (PowerShellPipeline) and select the job type as Pipeline as shown in Figure 15. Click on OK.
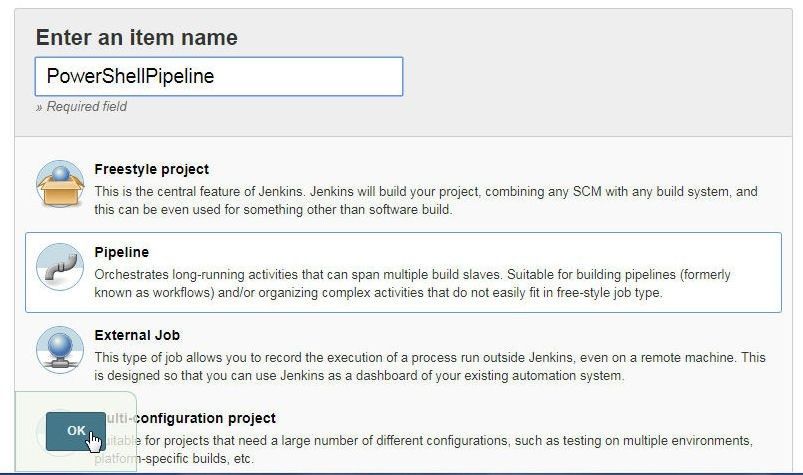
Figure 15. Selecting Job type as Pipeline and specifying Pipeline name
The detailed pipeline configuration fields get listed, as shown in Figure 16. The General tab is selected by default. Click on Save as shown in Figure 16 to save the pipeline configuration after making any modifications.
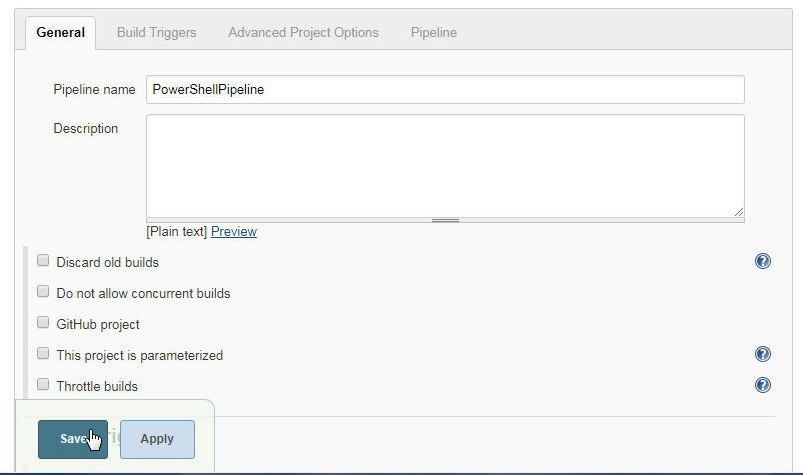
Figure 16. Pipeline Configuration
Select the option to build the pipeline periodically and specify a schedule, as an example, every 5 minutes, as shown in Figure 17. The syntax used to specify the build schedule may be obtained from the help (?) icon.
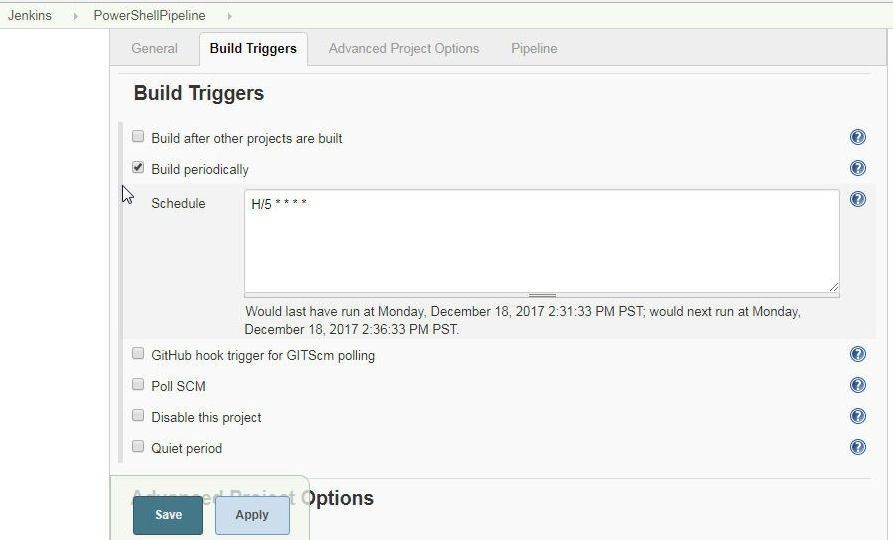
Figure 17. Specifying a Build Schedule
In Advanced Project Options specify a Display Name (PowerShell) as shown in Figure 18.
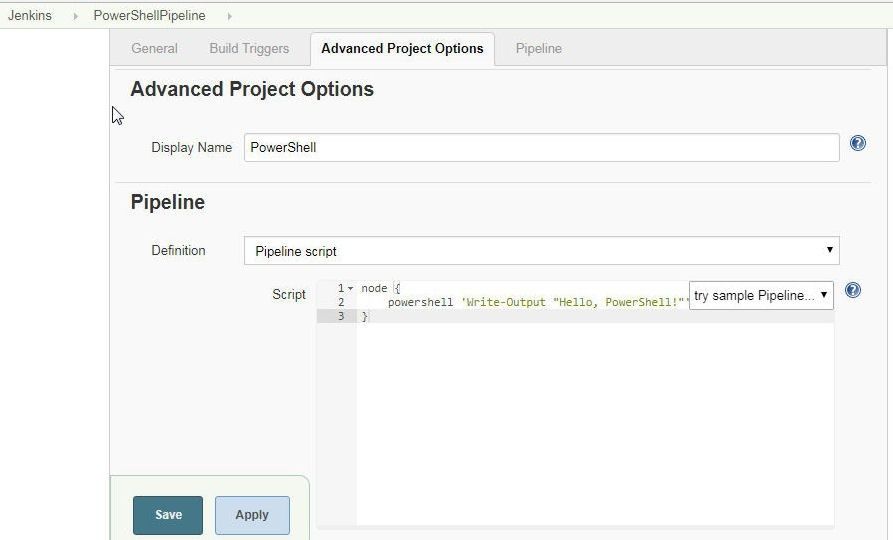
Figure 18. Specifying a Display Name
In the Pipeline tab specify a script using a node step. The powershell step is used to run a PowerShell script. The powershell step supports cmdlets and inline PowerShell scripts, or a mixture of the two. In the following script the powershell step invokes the Write-Output cmdlet to output a Hello message.
node {
   powershell 'Write-Output "Hello, PowerShell!"'
}
Copy the script to the Script field as shown in Figure 19. Click on Apply. Click on Save to complete the pipeline configuration.
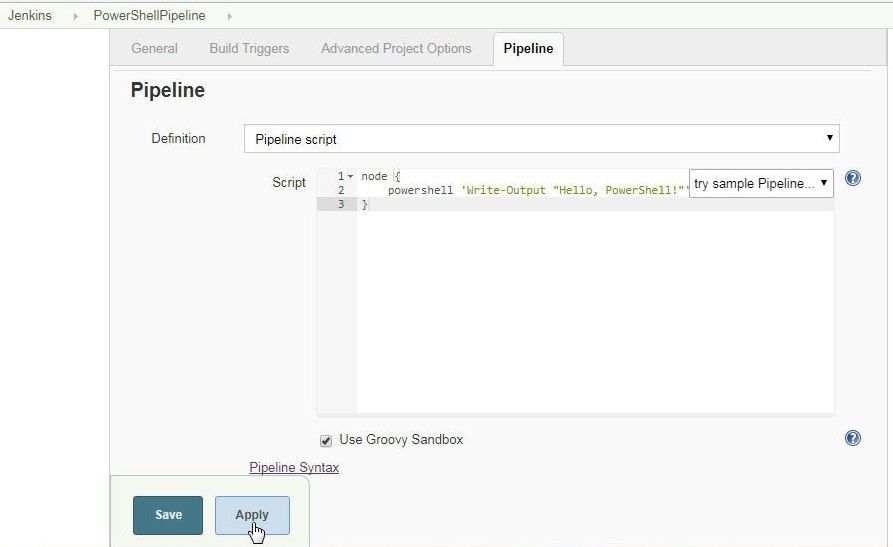
Figure 19. Pipeline Script
The PowerShell pipeline runs every 5 minutes (or on the configured schedule) to output the Hello message. The pipeline may be run with Build Now, as shown in Figure 20 outside the schedule.
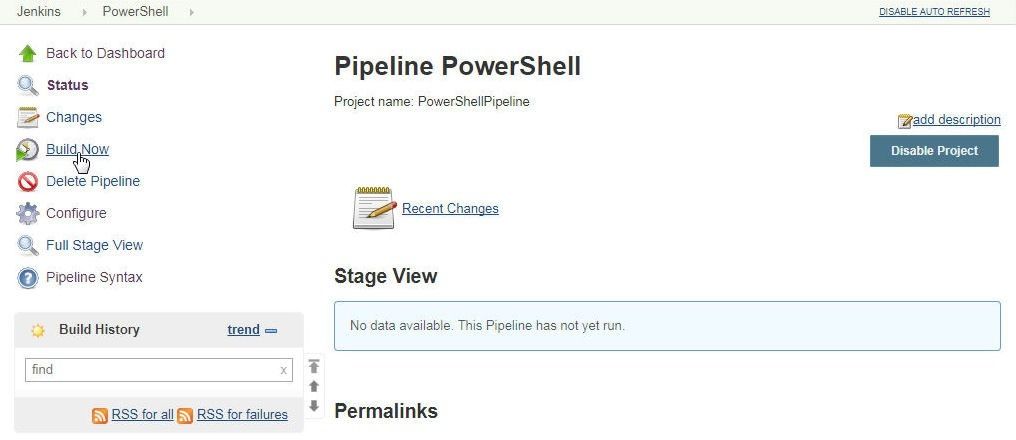
Figure 20. Build Now runs the pipeline outside a schedule
The pipeline starts to run, as indicated by the progress bar in the Build History in Figure 21.
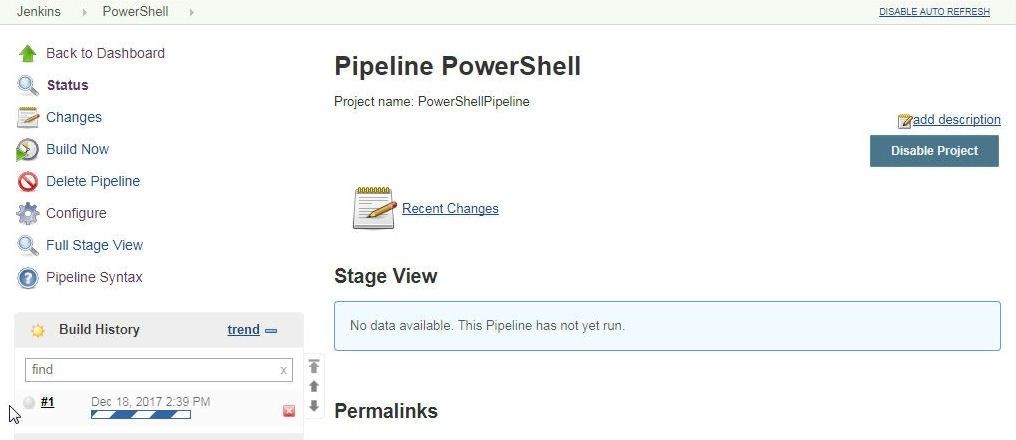
Figure 21. Build History lists the Pipeline as running
When the pipeline has completed running, click on the pipeline dropdown icon and select Console Output as shown in Figure 22.
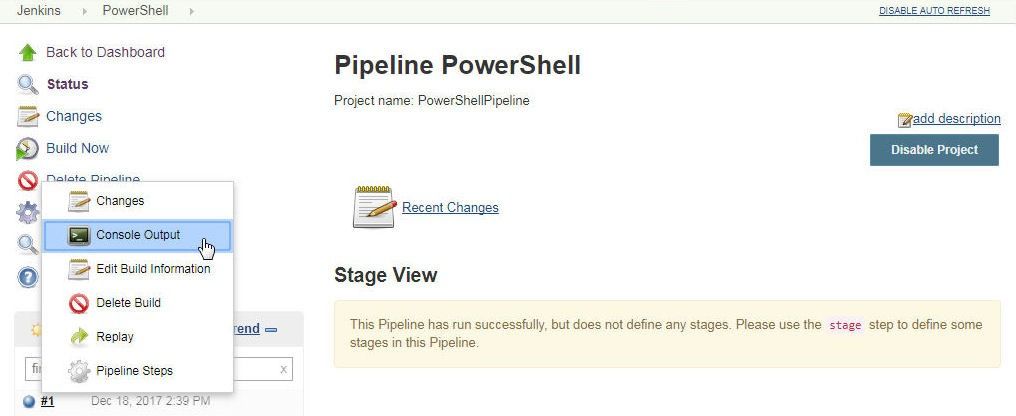
Figure 22. Console Output
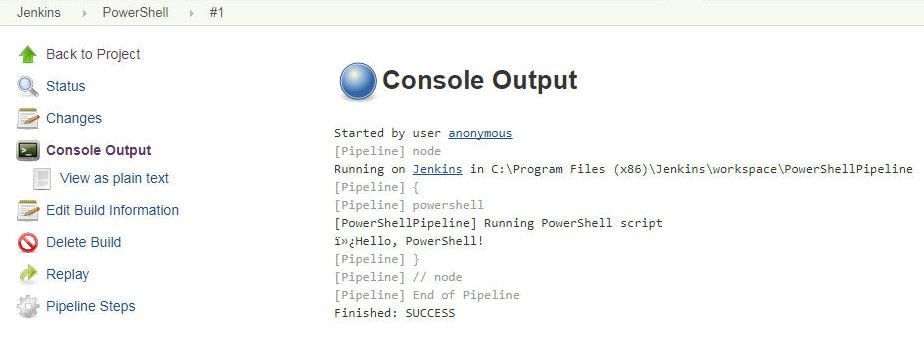
The Console Output lists the Hello PowerShell! Message, as shown in Figure 23.

Figure 23. Console Output from running the Pipeline
Click on Console Output>View as plain text, as shown in Figure 24, to display the console output as plain text.
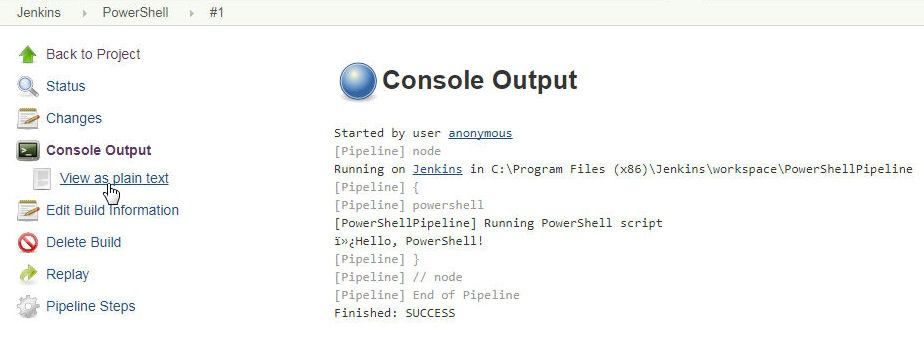
Figure 24. Console Output>View as plain text
The Console Output text gets displayed in a browser, as shown in Figure 25.
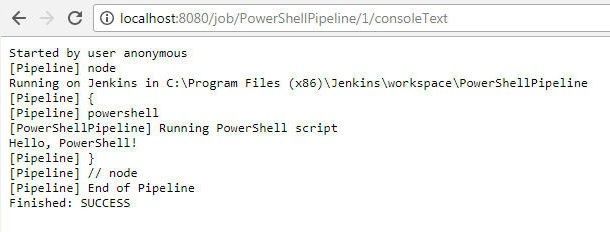
Figure 25. Console Output Text
Because the pipeline is configured with a schedule to run every 5 minutes, multiple builds are listed in Build History in Figure 26.
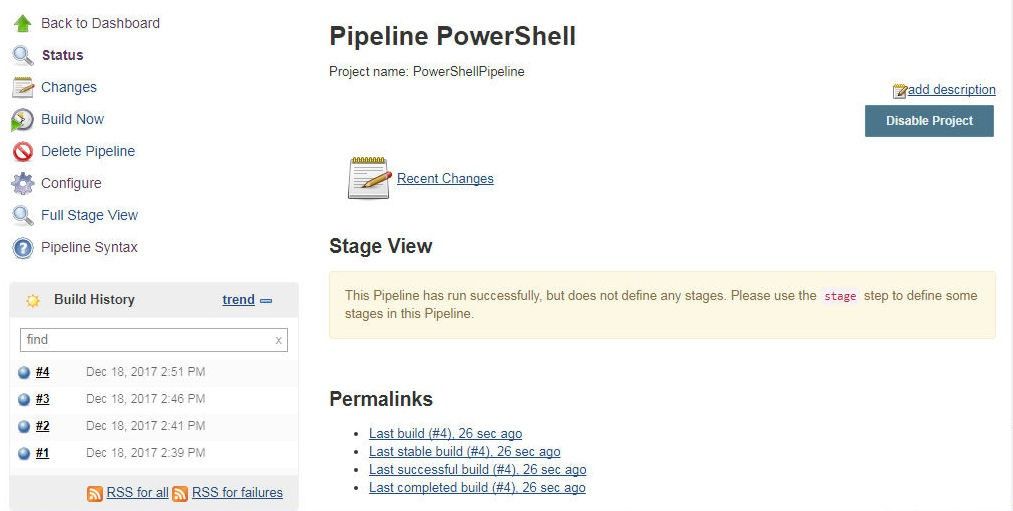
Figure 26. Build History lists multiple builds
The PowerShell pipeline is shown in the Dashboard in Figure 27.

Figure 27. Pipeline in Dashboard
Running Toad DevOps Toolkit with a Jenkins Pipeline
In this section we shall create a Toad DevOps Toolkit COM instance using a Jenkins Pipeline, making use of the PowerShell plugin to invoke cmdlets/scripts from Jenkins. What a Jenkins pipeline provides is the ability to automate the process of invoking cmdlets/scripts, to schedule running a pipeline at a specified interval, and to run the cmdlets/scripts in sequence and conditionally based on the status of an earlier script.
Click on New Item in Jenkins Web UI as shown in Figure 28 to create a new Jenkins Pipeline.

Figure 28. New Item
Specify a Pipeline name (PowerShellPipelineFromScript), select item type as Pipeline, and click on OK, as shown in Figure 29.
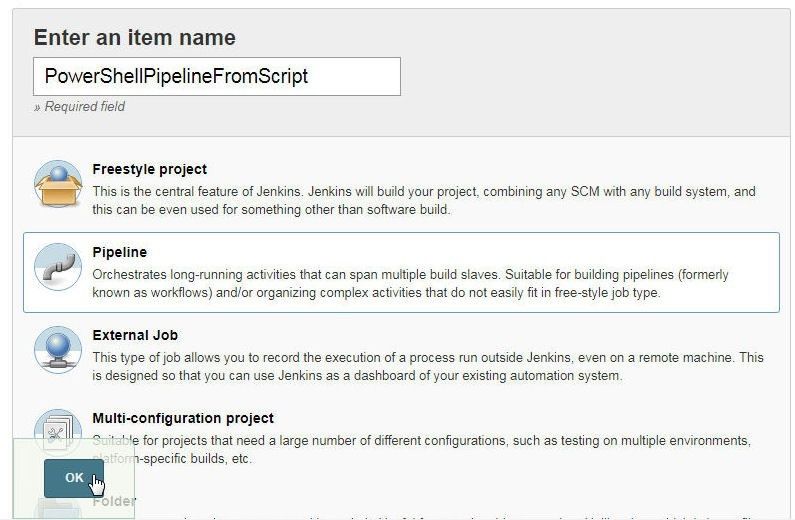
Figure 29. Specifying a Pipeline Name
The pipeline configuration wizard gets launched, as shown in Figure 30.
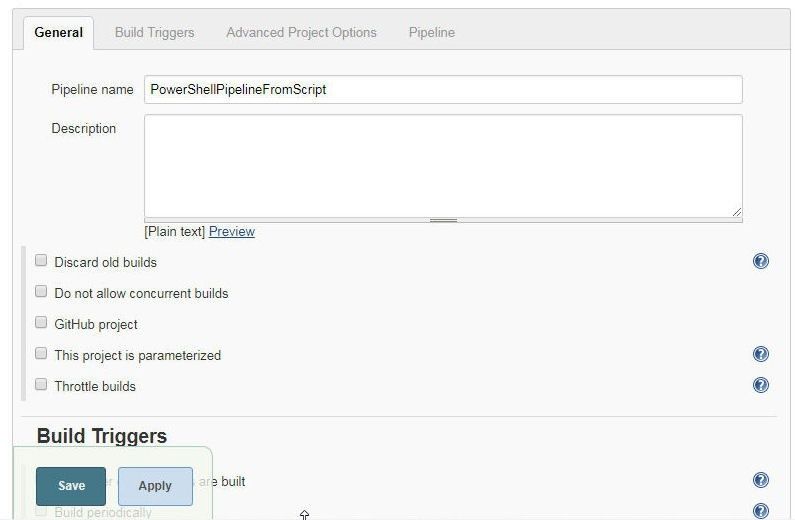
Figure 30. Jenkins Pipeline Configuration
If the pipeline is to be run periodically select the Build periocially option and specify a Schedule as shown in Figure 31.
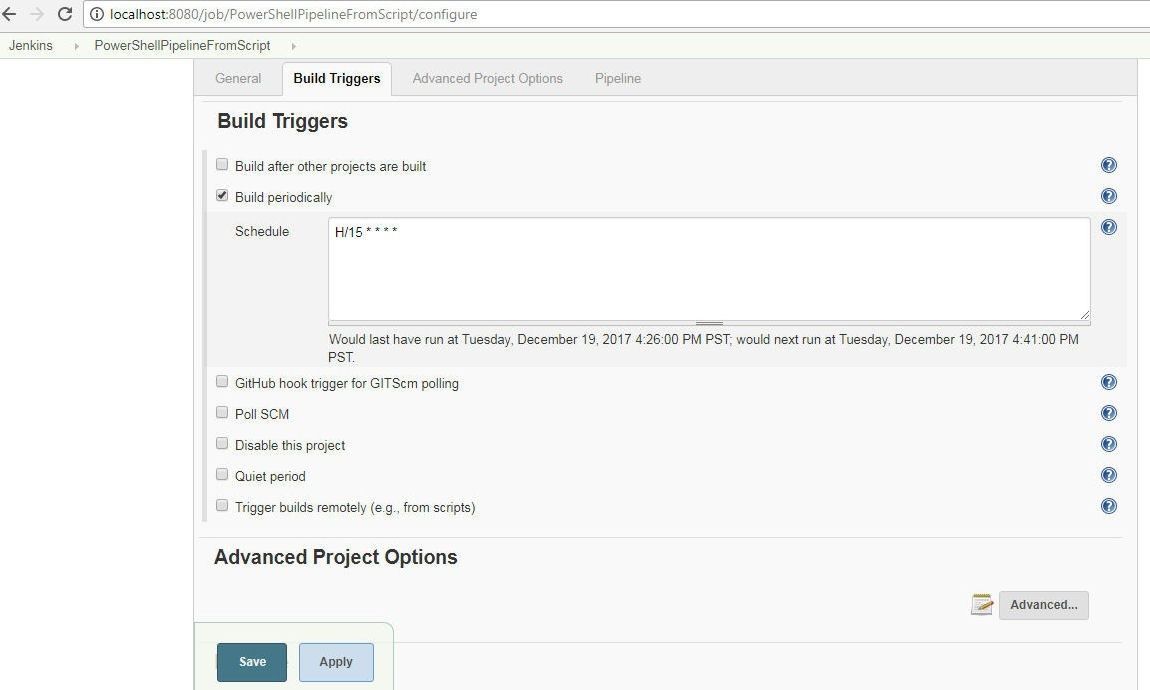
Figure 31. Specifying a Build Schedule
Create a script to invoke thepowershell step to create a Toad.ToadAutoObject object using the New-Object cmdlet. Set returnStdoutto true to return the standard output from creating a Toad.ToadAutoObject object. The powershell step to create a Toad DevOps Toolkit instance may be run based on the status of a preceding powershell step in which the Write-Output cmdlet is invoked to output a Hello PowerShell message. If status is 0 it implies the PowerShell script ran successfully. Setting returnStatus to true returns the status of running the PowerShell script.
node {
    def status = powershell(returnStatus: true, script: 'Write-Output "Hello PowerShell"')
    if (status == 0) {
        def msg = powershell(returnStdout: true, script: 'New-Object -ComObject Toad.ToadAutoObject')
        println msg
    }
}
Copy the preceding script listing to the Script field of the Pipeline as shown in Figure 32.
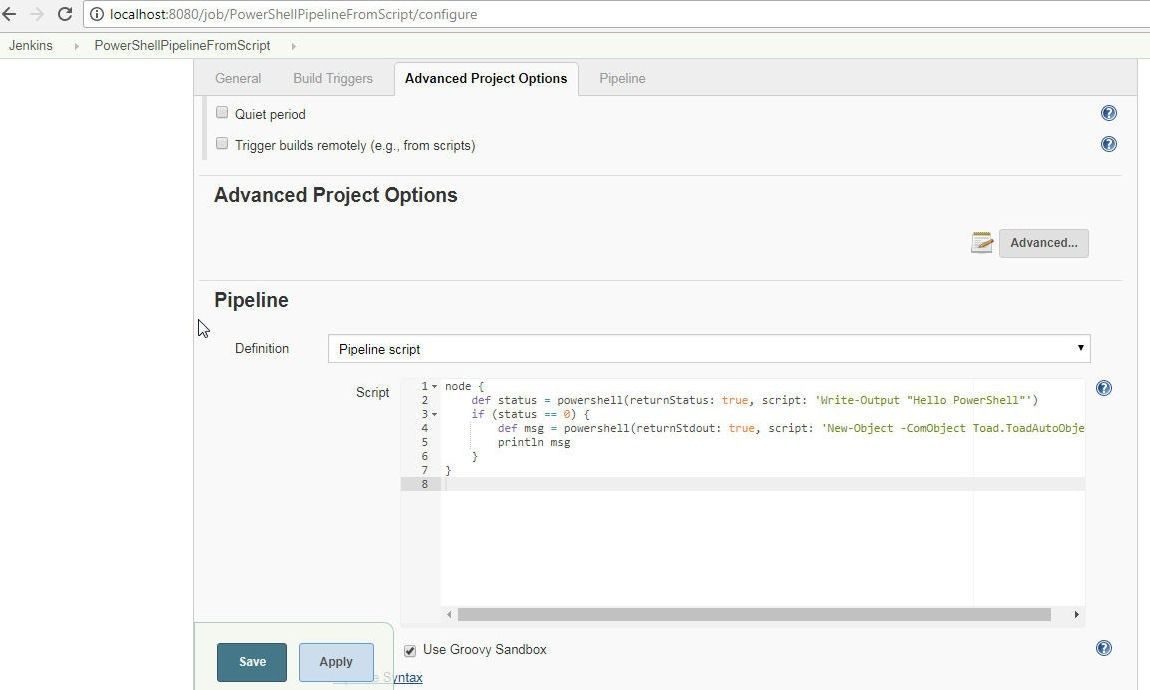
Figure 32. Pipeline Script
Click on Build Now to build the pipeline as shown in Figure 33.
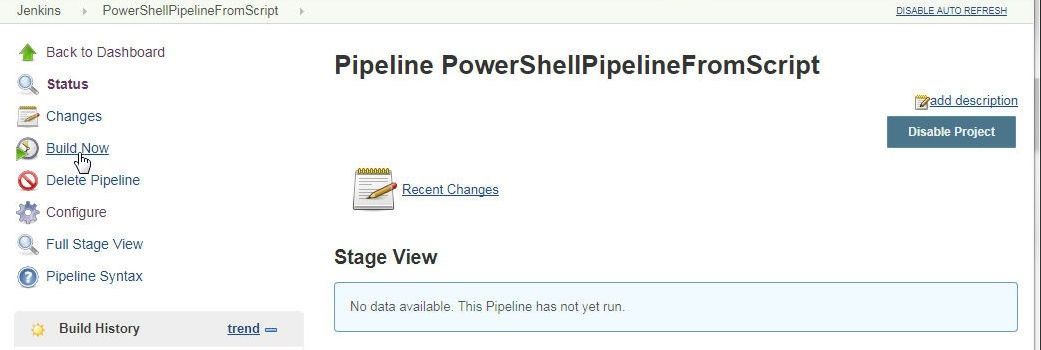
Figure 33. PowerShellPipelineFromScript>Build Now
When the pipeline has completed running select Console Output from the build as shown in Figure 34.
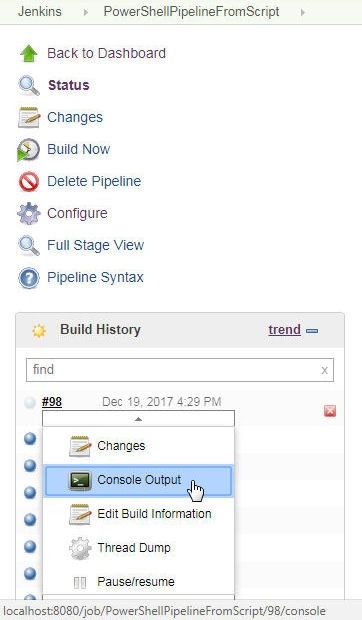
Figure 34. Console Output
The Console Output gets listed, as shown in Figure 35. The output from running the pipeline creates a Toad DevOps Toolkit instance and the COM objects created are listed in the output.
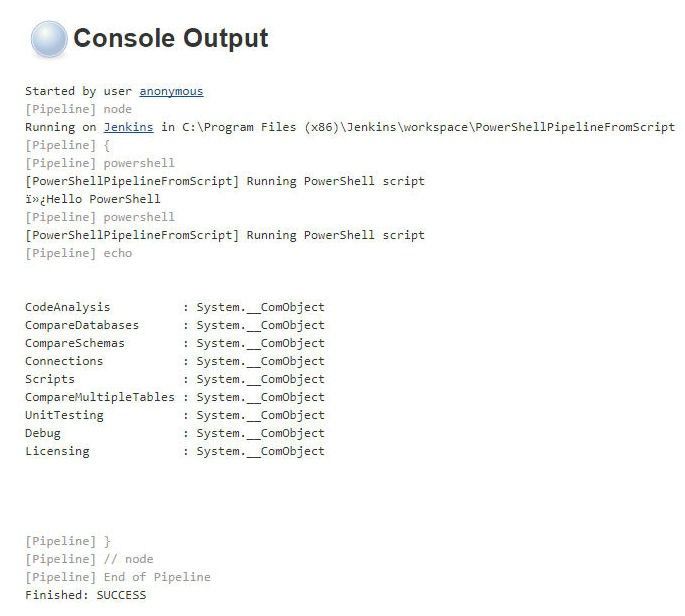
Figure 35. Console Output from running a Jenkins Pipeline to create a Toad.ToadAutoObject Object
Toad DevOps Tookit API-based scripts may be run directly in a powershell step. The two Jenkins pipelines used in this article are displayed on the Dashboard in Figure 36.

Figure 36. Jenkins Pipelines
Conclusion
In this article we discussed integrating Toad DevOps Toolkit with Jenkins using the PowerShell plugin. With a Jenkins pipeline, Toad DevOps Toolkit cmdlets and scripts may be automated.
Start the discussion at forums.toadworld.com