Introduction
AWS EC2 provides several AMIs for Oracle Database in addition to the managed service for relational databases, Relation Database Service (RDS). RDS cannot be used with Toad DevOps Toolkit because Toad DevOps Toolkit requires a user with SYSDBA privileges and RDS does not allow access to the SYS schema, which has SYSDBA privileges. The Master User that RDS creates by default does not have SYSDBA privileges, either. In this article we shall use Toad DevOps Toolkit with Oracle Database on AWS EC2. This article has the following sections.
- Setting the Environment
- Creating AWS EC2 Instances for Oracle Database
- Creating Source Oracle Database
- Creating Target Oracle Database
- Configuring TNSNames.ora
- Connecting to PowerShell
- Starting Toad DevOps Toolkit
- Running Install
- Running Validation Checks
- Running Compare Databases
- Running Compare Schemas
- Uninstalling the DEMO
- Stopping EC2 Instances
Setting the Environment
Download and install the following software:
Any of the supported Oracle Databases may be installed. Why is a local installation of Oracle Database required when the Oracle Databases to be used are actually on AWS EC2? Because we need to use the network configuration files of a local database. As discussed later, we shall configure the Public DNS of the EC2 instances in tnsnames.ora so that Toad DevOps Toolkit connects to the Oracle Database instances on the EC2. We also need a local SQL*Plus application for Toad DevOps Toolkit to run SQL and PL/SQL commands. Set or modify the environment variables listed in Table 1.
Table 1. Environment Variables to Set or Modify
|
Environment Variable |
Value |
|
ORACLE_HOME |
C:\oraclexe\app\oracle\product\11.2.0\server |
|
TNS_ADMIN |
C:\oraclexe\app\oracle\product\11.2.0\server\network\ADMIN |
|
PATH |
C:\oraclexe\app\oracle\product\11.2.0\server\bin |
Create an AWS account, if not already registered, at https://aws.amazon.com/resources/create-account/.
Creating AWS EC2 Instances for Oracle Database
First, we need to select an AMI that installs Oracle Database on the host EC2 instance. Several Oracle Database based AMIs are available at AWS Marketplace. Any AMI that installs Oracle Database 10g, 11g or 12c may be used.
We have selected an Oracle Database 11g based AMI, as shown in Figure 1.

Figure 1. Selecting Oracle Database 11g Standard Edition AMI
The selected AMI may not support all the instance types. Select an instance type that the AMI does support. The AMI selected for this article supports the m3.xlarge instance type, as shown in Figure 2. Click on Next: Configure Instance Details after selecting the instance type.

Figure 2. Selecting an Instance Type
In Configure Instance Details specify Number of Instances as 2 because one database instance is required as the Source and another as the Target with Toad DevOps Toolkit. Select a VPC in the Network field and select a Subnet in one of the Availability Zones. For Auto-assign Public IP select Enable. Click on Next: Add Storage after specifying the instance details as shown in Figure 3.
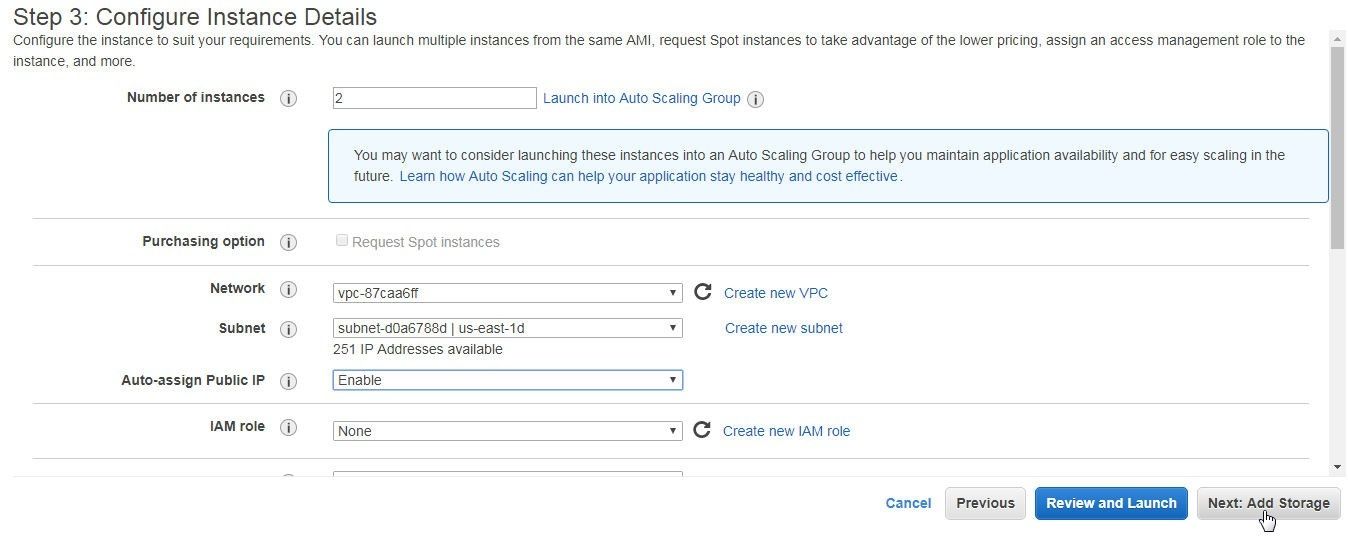
Figure 3. Specifying Number of Instances as 2
In Add Storage the default size of the Root volume is 10 GiB. Increase the Root storage to 100 GiB. Click on Next: Add Tags. No tags need to be added. Click on Next: Configure Security Group in Add Tags. In Configure Security Group modify default rule Type to All Traffic, Protocol to All, Port Range to 0-65535 and Source Anywhere. Click on Review and Launch. In the Review page click on Launch as shown in Figure 4.

Figure 4. Launch
In Select an existing key pair or create a new key pair select or create a key pair and click on Launch Instances as shown in Figure 5.
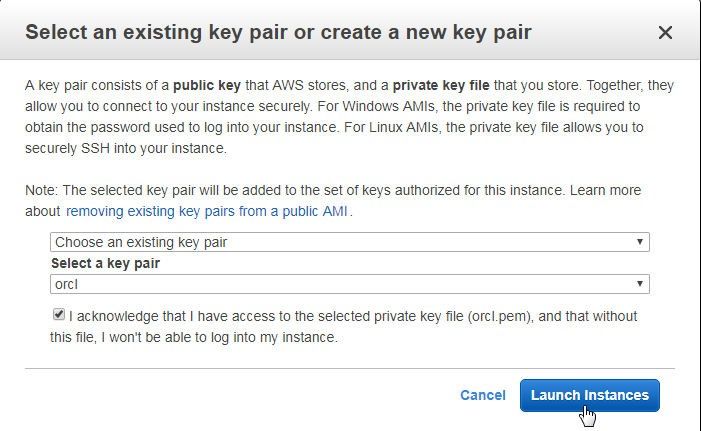
Figure 5. Launch Instances
The Launch Status indicates that the instances are launching, as shown in Figure 6.
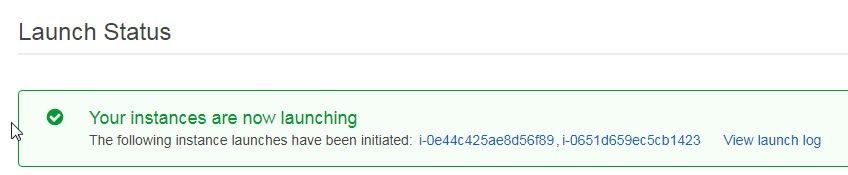
Figure 6. Launch Status
Click on View Instances on the same page to list the instances, which would initially be running status checks, as shown in Figure 7. By default new instances do not have a name assigned to them.
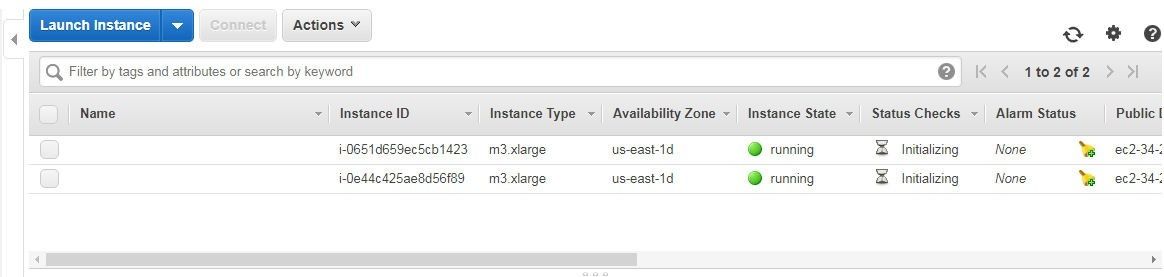
Figure 7. EC2 Instances
Specify instances names as shown in Figure 8. Copy the IPv4 Public IPs, which we shall need to access the instances, as shown for one of the instances in Figure 8.
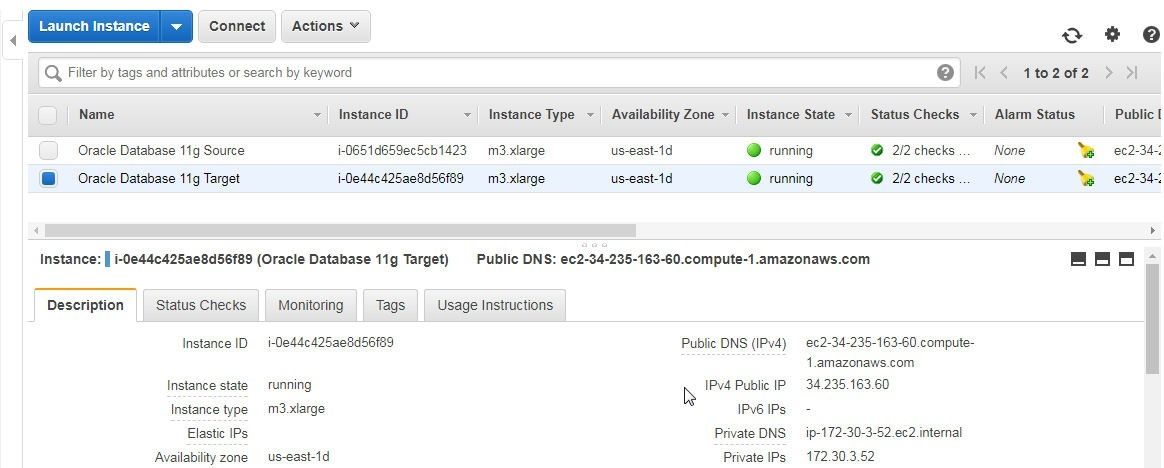
Figure 8. Assigning Instance Name and Obtaining Public IP
Similarly, obtain the Public IP of the 2nd instance as shown in Figure 9.
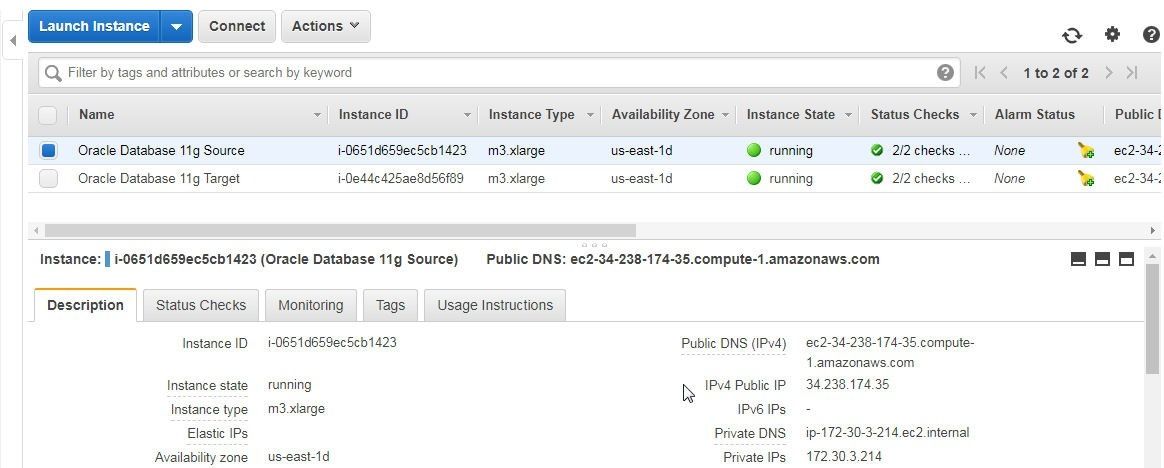
Figure 9. Public IP of the 2nd Instance
Creating Source Oracle Database
Any of the EC2 instances could be made the Source/Target instance for Toad DevOps Toolkit. To create the source database, connect to an EC2 instance from a local Linux machine using the Public IP and the private key. If the private key is new set the permissions on the private key to 400 (read-only by user).
chmod 400 orcl.pem
ssh -i orcl.pem ec2-user@34.238.174.35
After a user is connected a prompt is displayed: Would you like to create a database now[y|n], as shown in Figure 10. Specify y and click on Enter.
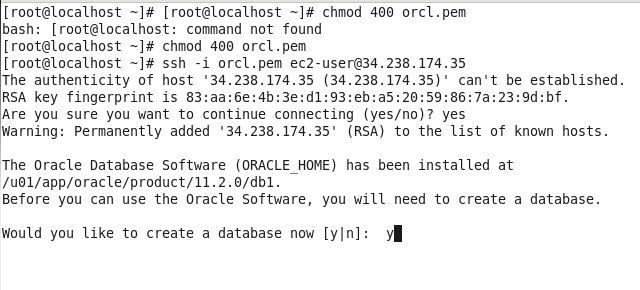
Figure 10. Command prompt to create a new Oracle Database after connecting to an EC2 instance
The next prompt is to specify an ORACLE SID as shown in Figure 11. Specify an Oracle SID (ORCL) and click on Enter.
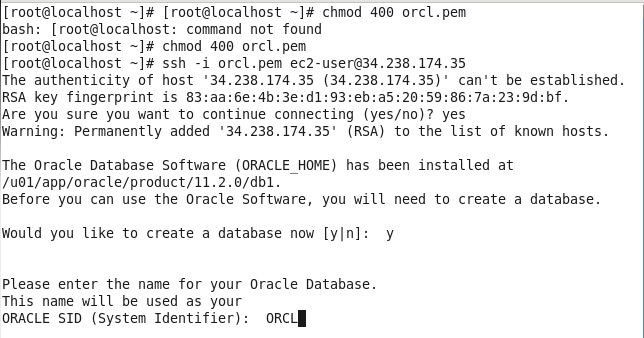
Figure 11. Specifying an Oracle SID
Next, a user is prompted to specify a password for the SYS, SYSTEM, DBSNMP, SYSMAN and ADMIN users. After the password for each of the users is specified the database starts to get created, as shown in Figure 12.

Figure 12. Starting to create Database
The database gets installed, as indicated by a message in Figure 13.
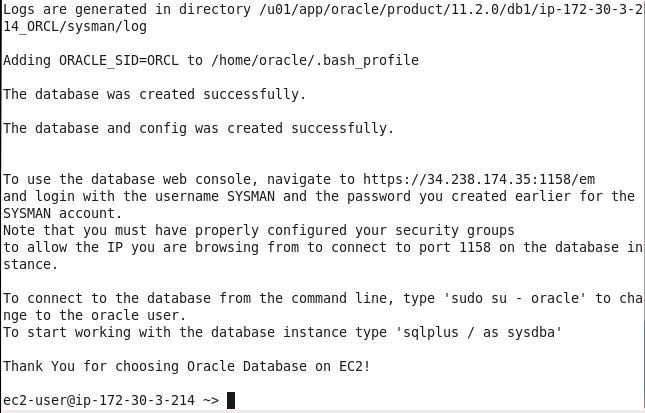
Figure 13. Oracle Database is installed
A more detailed output from creating the database is listed:
 [root@localhost ~]# ssh -i orcl.pem ec2-user@34.238.174.35
The authenticity of host '34.238.174.35 (34.238.174.35)' can't be established.
RSA key fingerprint is 83:aa:6e:4b:3e:d1:93:eb:a5:20:59:86:7a:23:9d:bf.
Are you sure you want to continue connecting (yes/no)? yes
Warning: Permanently added '34.238.174.35' (RSA) to the list of known hosts.
The Oracle Database Software (ORACLE_HOME) has been installed at
/u01/app/oracle/product/11.2.0/db1.
Before you can use the Oracle Software, you will need to create a database.
Would you like to create a database now [y|n]:  y

Please enter the name for your Oracle Database.
This name will be used as your
ORACLE SID (System Identifier):  ORCL
Please specify the passwords for the database administrative accounts.
All passwords must be a minimum of 6 characters in length
and must contain a combination of letters and numbers.
SYS (Database Administrative Account) Password:
Confirm SYS password:
SYSTEM (Database Administrative Account) Password:
Confirm SYSTEM password:
DBSNMP (Enterprise Manager Administrative Account) Password:
Confirm DBSNMP password:
SYSMAN (Enterprise Manager Administrative Account) Password:
Confirm SYSMAN password:
ADMIN Password:
Confirm ADMIN password:
Please wait while your database is created, it may take up to 15 minutes.
Copying database files
1% complete
3% complete
37% complete
Creating and starting Oracle instance
40% complete
45% complete
50% complete
55% complete
56% complete
57% complete
60% complete
62% complete
Completing Database Creation
66% complete
70% complete
73% complete
85% complete
96% complete
100% complete
Look at the log file "/u01/app/oracle/cfgtoollogs/dbca/ORCL/ORCL.log" for further details.
Oracle Enterprise Manager 11g Database Control Release 11.2.0.4.0
Copyright (c) 1996, 2013 Oracle Corporation.  All rights reserved.
https://ip-172-30-3-214:1158/em/console/aboutApplication
Stopping Oracle Enterprise Manager 11g Database Control ...
 ...  Stopped.
SQL*Plus: Release 11.2.0.4.0 Production on Tue Dec 12 13:46:25 2017
Copyright (c) 1982, 2013, Oracle.  All rights reserved.
SQL> Connected.
SQL> Database closed.
Database dismounted.
ORACLE instance shut down.
SQL> ORACLE instance started.

Total System Global Area 4676636672 bytes
Fixed Size           2261048 bytes
Variable Size          939528136 bytes
Database Buffers 3724541952 bytes
Redo Buffers        10305536 bytes
Database mounted.
SQL>
Database altered.
SQL>
Database altered.

SQL> Disconnected from Oracle Database 11g Release 11.2.0.4.0 - 64bit Production
Oracle Enterprise Manager 11g Database Control Release 11.2.0.4.0
Copyright (c) 1996, 2013 Oracle Corporation.  All rights reserved.
https://ip-172-30-3-214:1158/em/console/aboutApplication
Starting Oracle Enterprise Manager 11g Database Control .... started.
------------------------------------------------------------------
Logs are generated in directory /u01/app/oracle/product/11.2.0/db1/ip-172-30-3-214_ORCL/sysman/log
Adding ORACLE_SID=ORCL to /home/oracle/.bash_profile
The database was created successfully.
The database and config was created successfully.
To use the database web console, navigate to https://34.238.174.35:1158/em
and login with the username SYSMAN and the password you created earlier for the SYSMAN account.
Note that you must have properly configured your security groups
to allow the IP you are browsing from to connect to port 1158 on the database instance.
To connect to the database from the command line, type 'sudo su - oracle' to change to the oracle user.
To start working with the database instance type 'sqlplus / as sysdba'
Thank You for choosing Oracle Database on EC2!
ec2-user@ip-172-30-3-214 ~>
Creating Target Oracle Database
To create the second database (the target database) connect to the second EC2 instance.
ssh -i orcl.pem ec2-user@34.235.163.60
Specify y at the prompt Would you like to create a database now [y|n]: as before. Specify Oracle SID at the prompt ORACLE SID (System Identifier): . The Oracle SID specified may be the same (ORCL) as for the first database. Specify password for each of the SYS, SYSTEM, DBSNMP, SYSMAN and ADMIN users. The database gets created as shown in Figure 14.
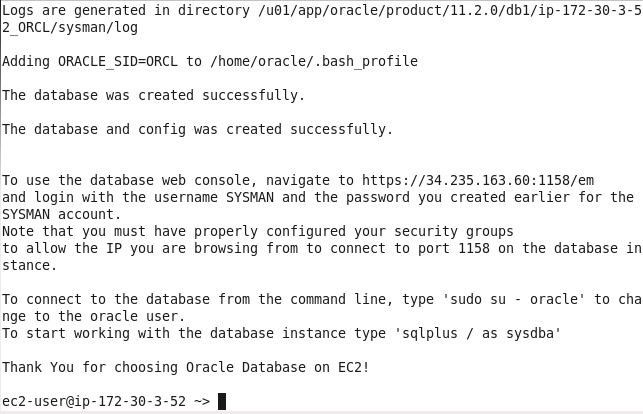
Figure 14. Oracle Database created for target of Toad DevOps Toolkit
Configuring TNSNames.ora
Toad DevOps Toolkit on a local machine is able to connect with an Oracle Database instance on AWS EC2 using the database’s configuration in the configured environment variables TNS_ADMIN and ORACLE_HOME. Toad DevOps Toolkit finds the SQL*Plus application to start from the PATH environment variable. Toad DevOps Toolkit finds the tnsnames.ora configuration file, in which the connect descriptors are listed, from the TNS_ADMIN variable. The tnsnames.ora file specifies a mapping of the net service names to connect descriptors in the following syntax.
SVC1 =
  (DESCRIPTION =
    (ADDRESS = (PROTOCOL=TCP)(HOST=<Public IP>)(PORT=1521))
    (CONNECT_DATA=
      (SID=<Service Name>)
    )
  )

SVC2 =
  (DESCRIPTION =
    (ADDRESS = (PROTOCOL = TCP)(HOST=<Public IP>)(PORT = 1521))
    (CONNECT_DATA =
      (SID = <Service Name>)
    )
  )
Add two net service names mappings, one for the source database and the other for the target database, to the tnsnames.ora as listed in the preceding listing. Next, add values for the variables.
Obtain the Public DNS of the first EC2 instance from the Dashboard as shown in Figure 15. Specify the Public DNS in the Host field of the first service SVC1 in the tnsnames.ora.
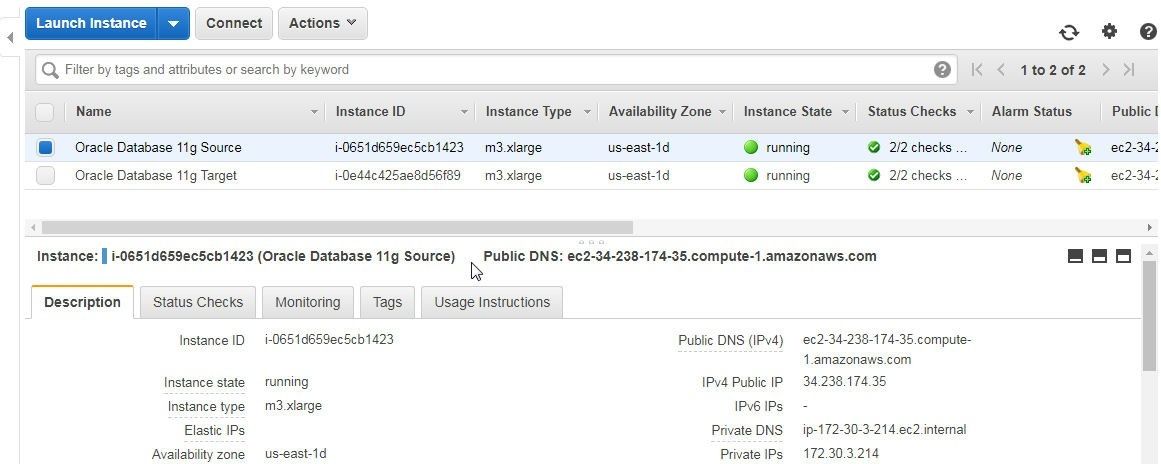
Figure 15. Obtaining the Public DNS of EC2 Instance
Obtain the Public DNS of the second EC2 instance from the Dashboard as shown in Figure 16. Specify the Public DNS in the Host field of the second service SVC2 in the tnsnames.ora.
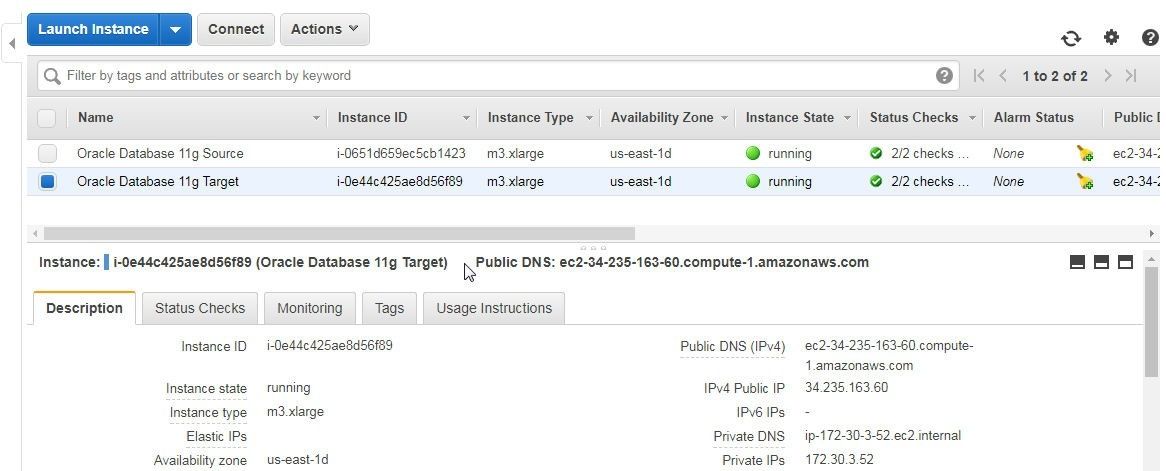
Figure 16. Obtaining the Public DNS of Second EC2 Instance
The net service names for the two services to be added to the tnsnames.ora are listed:
SVC1 =
  (DESCRIPTION =
    (ADDRESS = (PROTOCOL=TCP)(HOST=ec2-34-238-174-35.compute-1.amazonaws.com)(PORT=1521))
    (CONNECT_DATA=
      (SID=ORCL)
    )
  )

SVC2 =
  (DESCRIPTION =
    (ADDRESS = (PROTOCOL = TCP)(HOST=ec2-34-235-163-60.compute-1.amazonaws.com)(PORT = 1521))
    (CONNECT_DATA =
      (SID = ORCL)
    )
  )
Connecting to Windows PowerShell
To launch and connect to Windows PowerShell right-click on the application icon and select Run as administrator as shown in Figure 17.

Figure 17. Windows PowerShell>Run as administrator
The Windows PowerShell gets started, as shown in Figure 18.

Figure 18. Windows PowerShell Command Prompt
Starting Toad DevOps Toolkit
Create an instance of Toad.ToadAutoObject using the New-Object cmdlet.
$TDT = New-Object -ComObject Toad.ToadAutoObject
The cmdlet does not generate any output, as shown in Figure 19, and an instance of Toad DevOps Toolkit (TDT) gets started.

Figure 19. Creating an instance of Toad DevOps Toolkit
The COM Objects in the TDT instance may be listed with $TDT as shown in Figure 20.
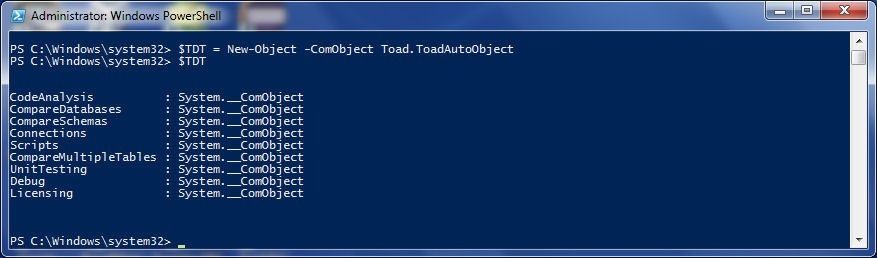
Figure 20. Listing ComObjects
Running Install Script
First, we shall install the DEMO schema on both the source and target databases. Change directory (cd) to the PowerShell examples directory.
cd "C:\Program Files\Quest Software\Toad DevOps Toolkit\Toad DevOps Toolkit 1.0\examples\PowerShell"
Launch the INSTALL batch script from the examples directory with the./INSTALL command, as shown in Figure 21. The user is prompted to provide the login information for the Source database and the Target database. Specify Source Database Name as SVC1. Specify Source Username as SYS, which has the required SYSDBA privileges. Specify the password for the SYS schema. The SYS password was configured when creating the database on an EC2 instance. Specify Target database name as SVC2 and target username as SYS. Specify the password for the SYS schema which was configured when creating the database on an EC2 instance. After the login information for the source and target databases is provided the prompt
DEMOschema will be created on SVC1and SVC2. Continue? appears, as shown in Figure 21. Specify Y to continue.
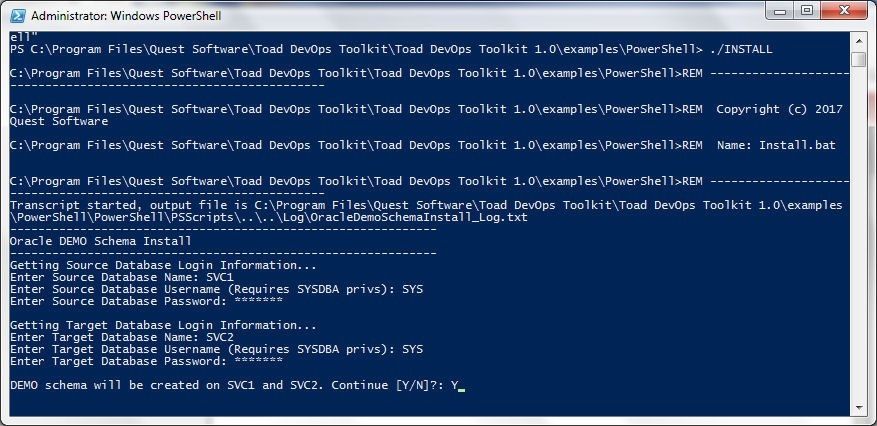
Figure 21. Running INSTALL Script
The install.sql script starts to run, as shown in Figure 22, and the source database gets connected first. The DEMO database gets created and the required privileges are granted.
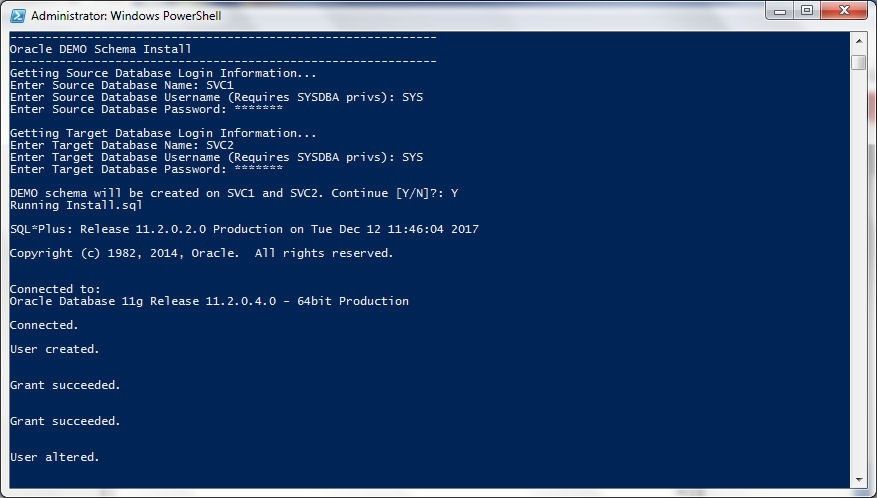
Figure 22. The install.sql script starts to run
After the DEMO schema has been created on the source database theinstall.sql disconnects from the source database and connects with the target database. After the DEMO schema has been created on both the source and target databases the script ends and outputs a log file, as shown in Figure 23.
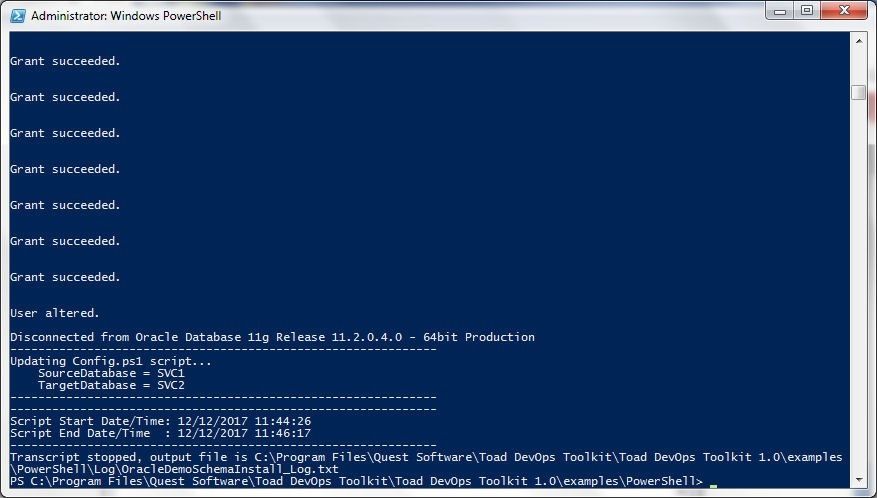
Figure 23. INSTALL Script Completed
Running Validation Checks
The ValidationChecks PowerShell script runs connectivity tests on the source and target databases and also verifies whether the Toad.ToadAutoObject exists and is started. Run the script with the ./ValidationChecks command as shown in Figure 24. The output indicates that the Toad.ToadAutoObject exists and is started, and the source and target databases get connected to disconnected from. The ValidationChecks script should be run after installing the DEMO schema with the INSTALL script and before running any other script.
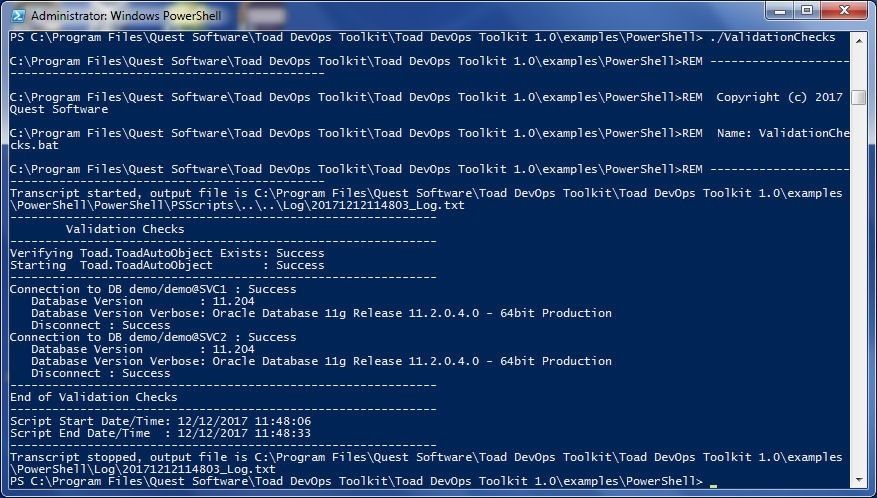
Figure 24. Running the ValidationChecks Script
Running Compare Databases
- The CompareDatabases script compares source and target databases and generates a report. Run the script with the ./CompareDatabases command as shown in Figure 25.
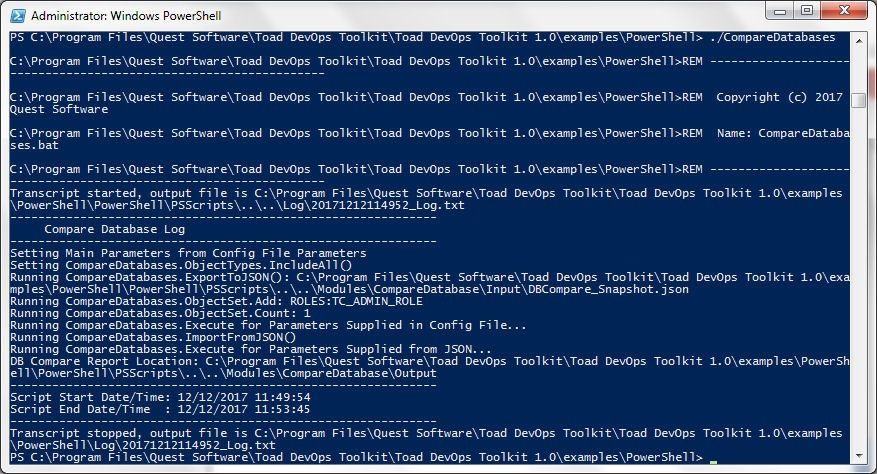
Figure 25. Running the ComapreDatabases Script
Output scripts and reports listed in Figure 26 get generated in the C:\Program Files\Quest Software\Toad DevOps Toolkit\Toad DevOps Toolkit 1.0\examples\PowerShell\Modules\CompareDatabase\Output directory.
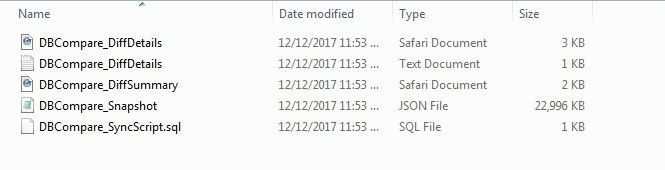
Figure 26. Output Scripts from CompareDatabases
Open the DBCompare_DiffDetails.html file in a browser to display the HTML report generated by the CompareDatabases script, as shown in Figure 27. The DBCompare_DiffDetails.html report describes the differences between the two databases. The report includes HTML tables for objects in both the source and target databases with Differences, Objects in Source Only, Objects in Target Only, and Extracted By.
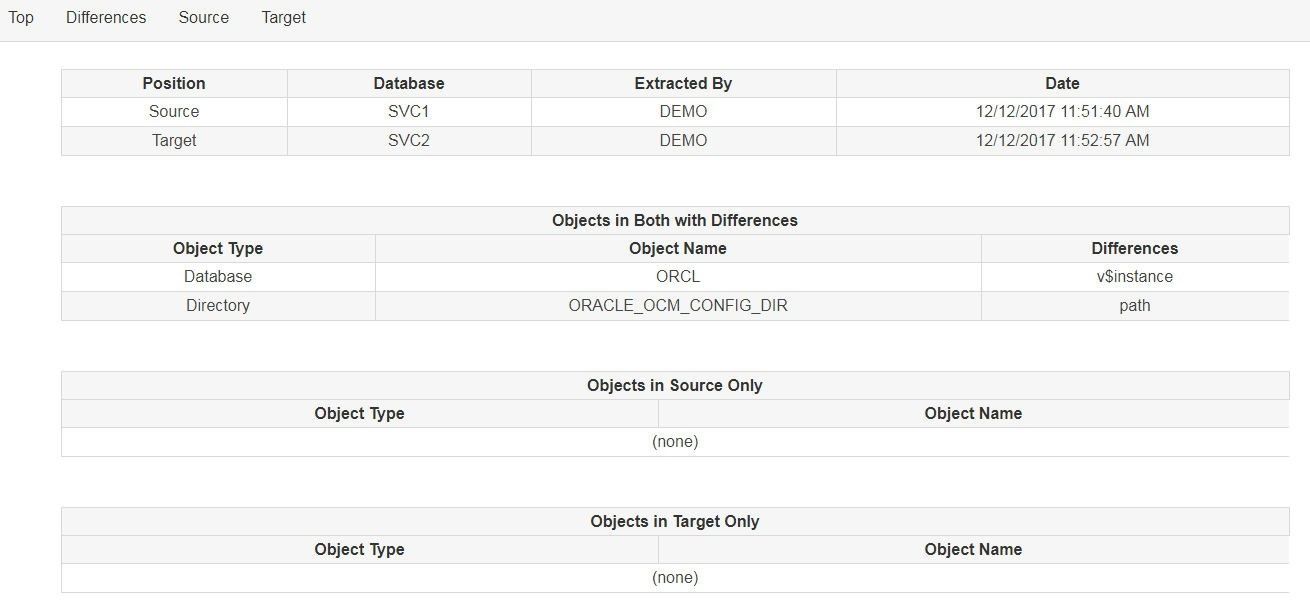
Figure 27. DBCompare_DiffDetails Report for the Differences Between Databases
The DBCompare_DiffSummary.html file is an HTML report that describes the summary of the differences between the databases, as shown in Figure 28.

Figure 28. The DBCompare_DiffSummary.html Summary report
Running Compare Schemas
The CompareSchemas script compares schemas in the source and target databases and generates a report. Run the script with the ./CompareSchemas command in PowerShell. The script generates HTML and Excel CSV reports in the C:\Program Files\Quest Software\Toad DevOps Toolkit\Toad DevOps Toolkit 1.0\examples\PowerShell\Modules\CompareSchema\Output directory as shown in Figure 29.

Figure 29. Output reports from CompareSchemas
The HTML and CSV reports have a column for Object Name, Object Type, Exists in Both, Exists in Source, Exists in Target, and Differs By. The Excel CSV report is shown in Figure 30.
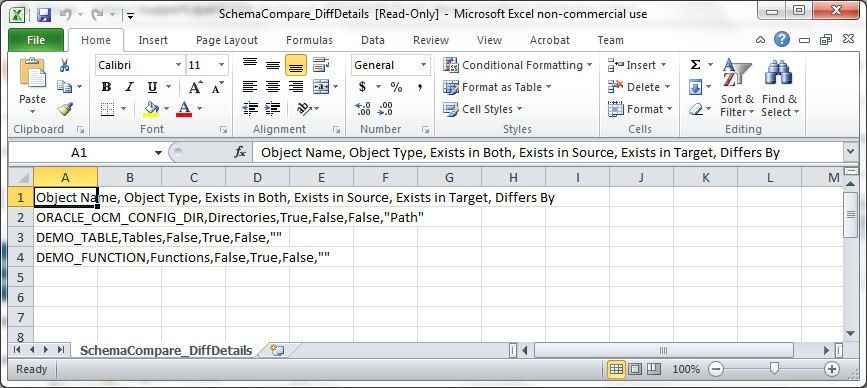
Figure 30. Excel CSV Report
The SchemaCompare_DiffDetails.html HTML report is shown in Figure 31.

Figure 31. HTML Report generated by CompareSchemas
Uninstalling the DEMO
To uninstall the DEMO schema from the source and target databases, run the ./UNINSTALL command. The user is prompted to specify the Username and Password for the source and target databases, as shown in Figure 32. Each of the databases gets connected to and the user DEMO gets dropped.
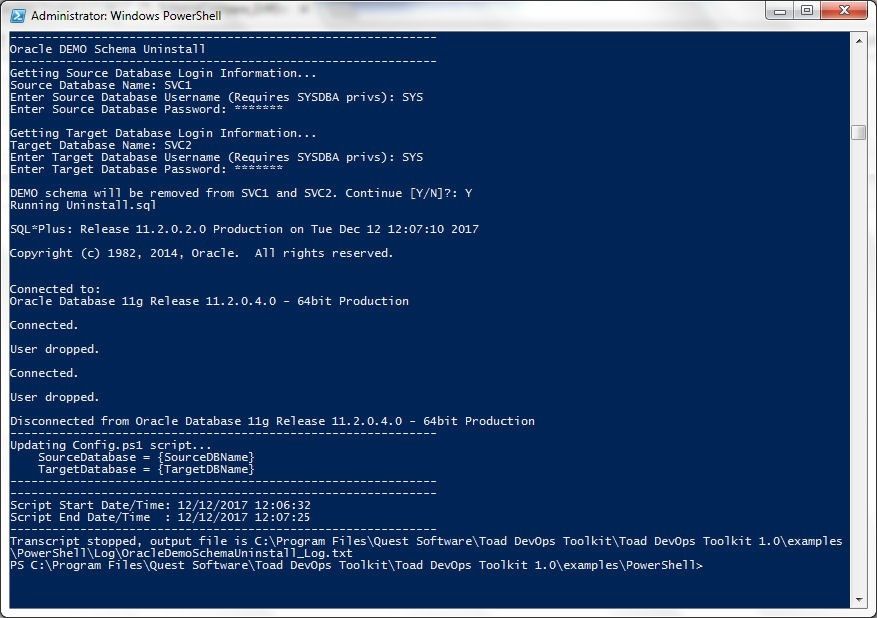
Figure 32. Running the UNINSTALL Script in PowerShell
Stopping EC2 Instances
When not being used the EC2 instances may be stopped. Stopping an EC2 instance makes the Oracle databases on the EC2 instances inaccessible. To stop and EC2 instance select Actions>Instance State>Stop as shown in Figure 33.
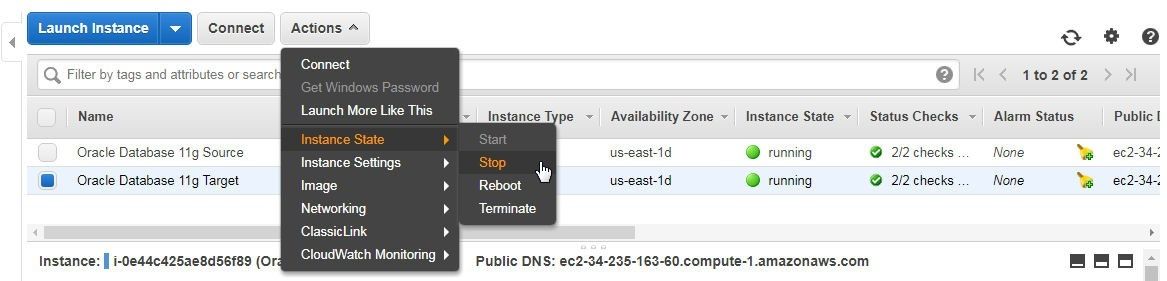
Figure 33. Actions>Instance State>Stop
In the Stop Instances dialog click on Yes, Stop to confirm the stopping of the instances. The instances start to get stopped, as shown in Figure 34. If required, the EC2 instances may be started again.

Figure 34. EC2 Instances Stopping
In this article we discussed using Toad DevOps Toolkit (TDT) with Oracle Database instances running on AWS EC2. AWS RDS cannot be used with TDT because RDS does not allow access to the SYS schema, which has the SYSDBA privileges required by TDT to connect to a database.
Start the discussion at forums.toadworld.com