Introduction
In an earlier article on using Toad Edge 1.1 with MySQL Database we discussed running MySQL on Docker Engine and connecting to the MySQL database with Toad Edge. In this continuation article we shall discuss some of the Toad Edge features including creating a new database with the New Database wizard, creating a new database table with the New Table wizard, Text Search (added in Toad Edge 1.1), importing data with the Import Data wizard, and setting the default database. The default database was called the active database in Toad Edge 1.0.
Creating a Database
By default only the mysql database is created for a user and the other databases are system databases. To create a new user database right-click on the Object>Explorer>Databases node and select New Database as shown in Figure 1.
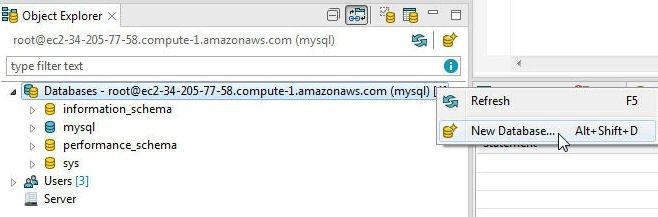
Figure 1. Databases>New Database
In the New Database wizard specify a database Name, test as an example, as shown in Figure 2. Click on Finish.
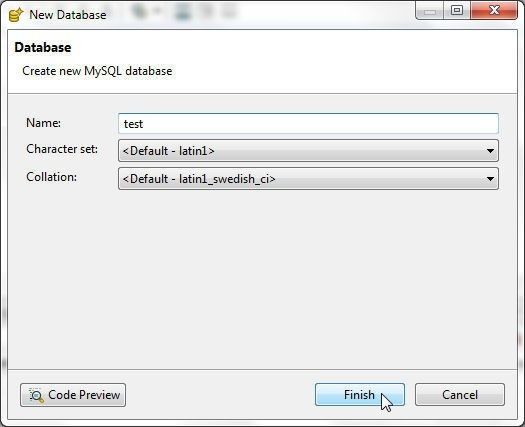
Figure 2. New Database
The new database test gets added as listed in the Object Explorer>Databases in Figure 3.
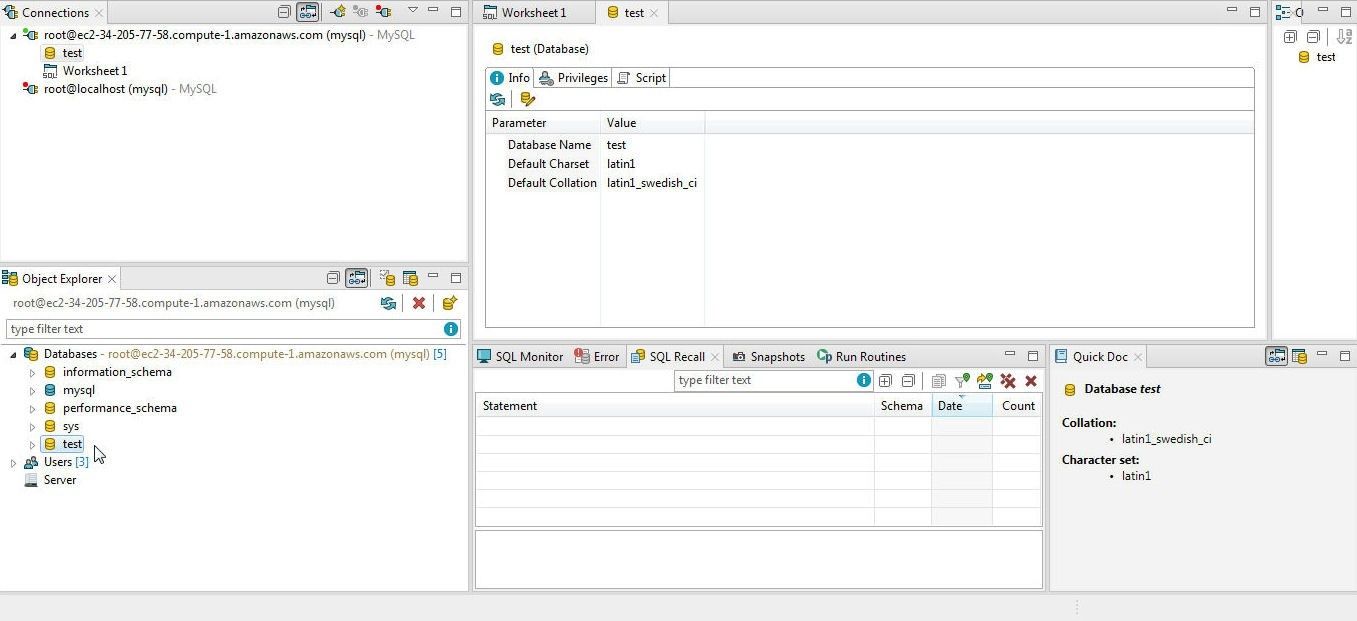
Figure 3. New Database test
Right-click on test database to list the various options for the database as shown in Figure 4.
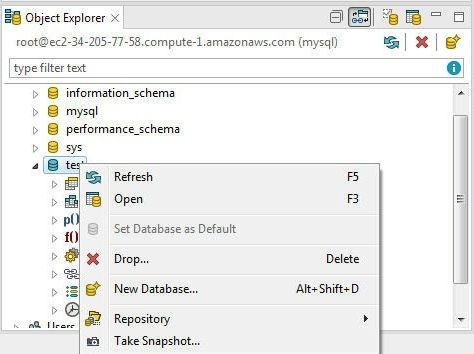
Figure 4. Database Options
By default a database is in AutoCommit ON mode. A database may be set in AutoCommit Off mode by selecting Database>Disable AutoCommit as listed in Figure 5.
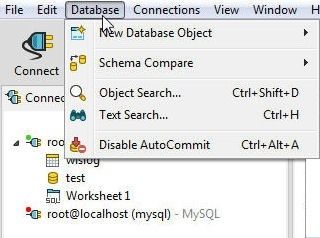
Figure 5. Database Options
A new feature added in Toad Edge 1.1 is Text Search, which is selected with Database>Text Search, as shown in Figure 6.
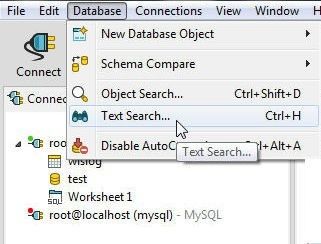
Figure 6. Database>Text Search
In Text Search the databases listed may be searched for database objects from the Object types selected, as shown in Figure 7.
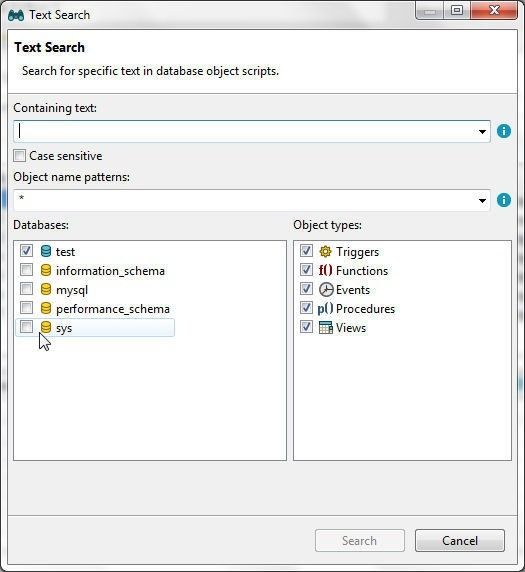
Figure 7. Text Search
Setting the Database as the Default
The database in blue (ish) color is the default (active) database. SQL scripts run in a Worksheet are run on the default database, which was called active database in Toad Edge 1.0. Only one database may be set as the default database. To set test as the default database right-click on test and select Set Databaseas Default as shown in Figure 8.
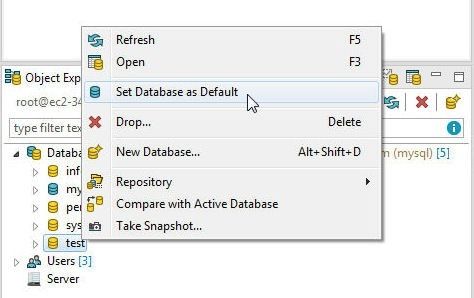
Figure 8. Selecting test>Set Database as Default
The test database becomes the default database, as shown in Figure 9.
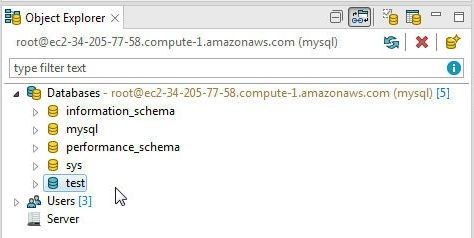
Figure 9. The test Database as the Default Database
The different database objects are listed in the test database node, as shown in Figure 10.
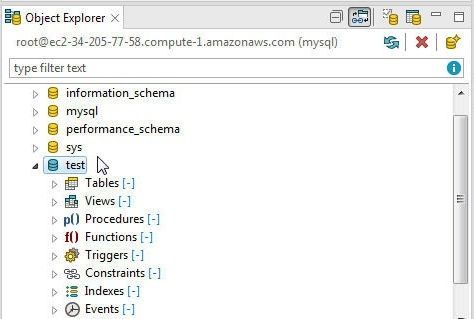
Figure 10. Database Objects in test Database
Creating a Database Table
In this section we shall create a database table in the test database. Right-click on the test>Tables node and select New Table as shown in Figure 11.
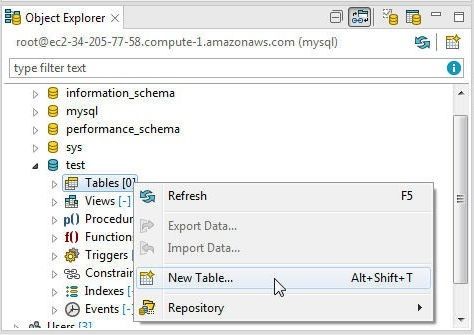
Figure 11. Selecting test>Tables>New Table
The New Table wizard gets started, as shown in Figure 12. Other than the Table name all the other fields have default settings. Comment is an optional field.
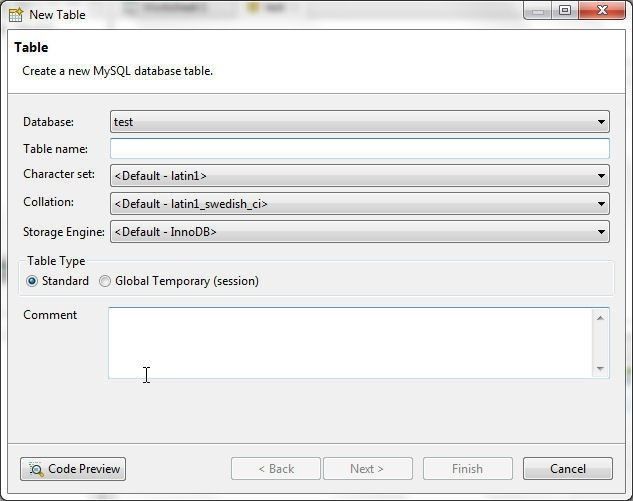
Figure 12. New Table
Specify a Table name (wlslog) and click on Next as shown in Figure 13.

Figure 13. Setting Table Name
In Table Columns click on New to add columns as shown in Figure 14.
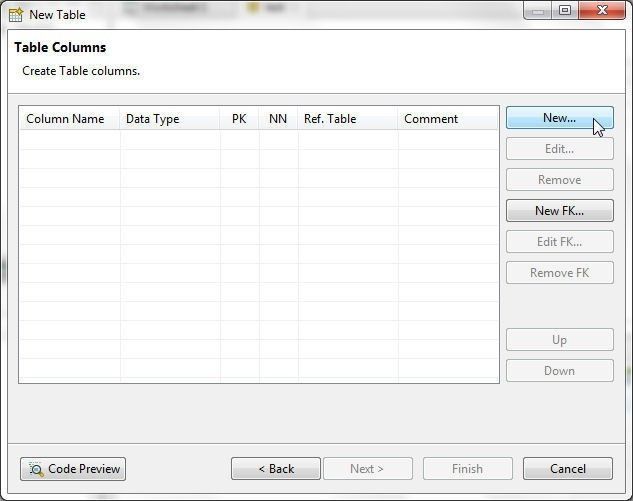
Figure 14. Table Columns>New
The New Column wizard gets started, as shown in Figure 15.
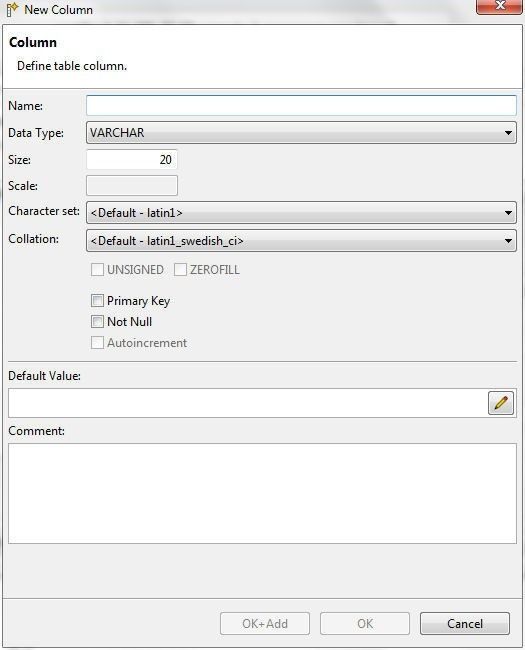
Figure 15. New Column Wizard
Addlogid, time_stamp, category, type, servername, code, and msg columns to the table. Specify a column name (logid) and select a Data TypeINT as shown in Figure 16.
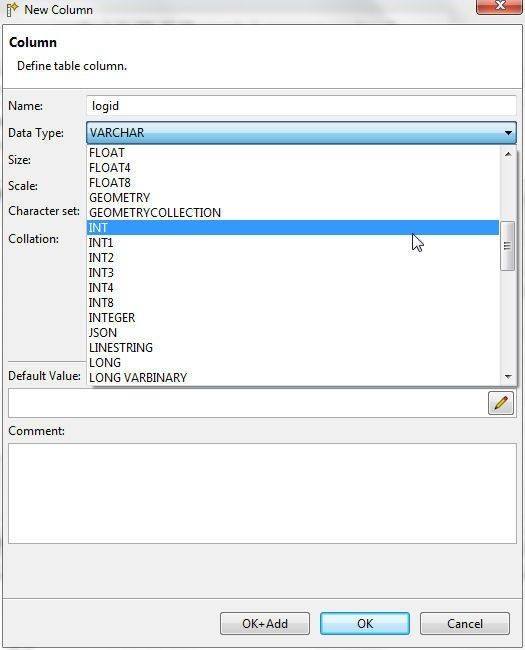
Figure 16. Selecting Data Type
Different data types have different additional fields for which a value must be specified. For data type INT specify Precision (10 is default). Select the Primary Key checkbox to make the column as the primary key. A primary key is Not Null by default. Optionally a Default Value and Comment may be specified. Click on OK as shown in Figure 17.
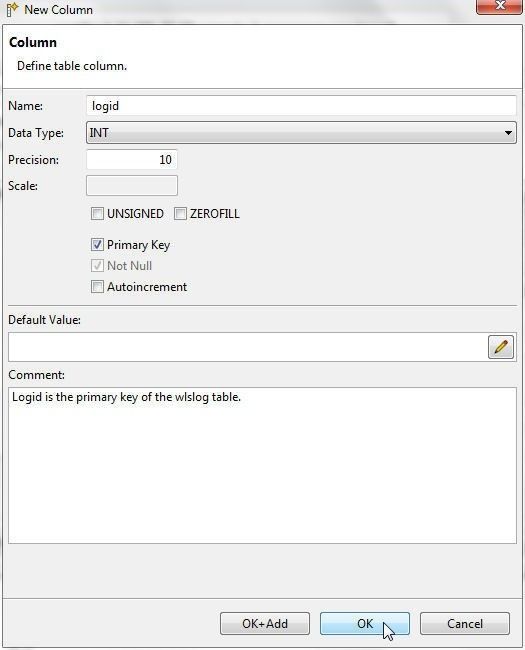
Figure 17. Adding a Column
The logid column gets added as shown in Figure 18.
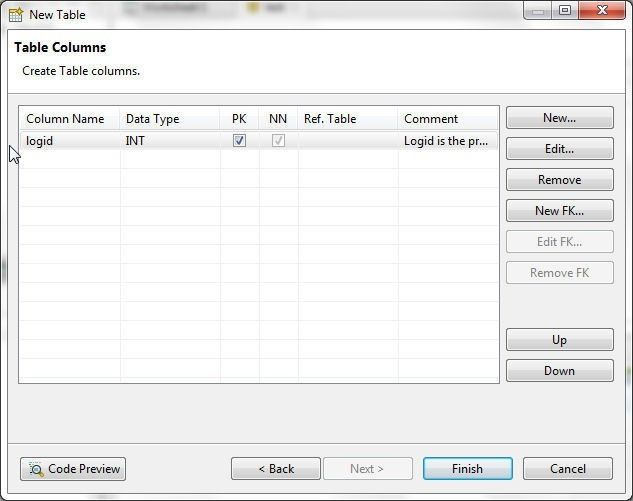
Figure 18. The logid Column
To add another column click on New again as shown in Figure 19.
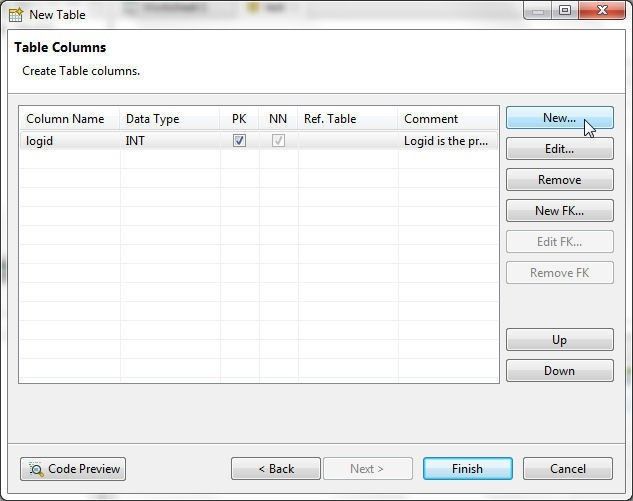
Figure 19. Adding another column
Add the time_stamp column of Data TypeVARCHAR with default Size (20), and default Character set (Default -latin1) as shown in Figure 20. Click on OK.
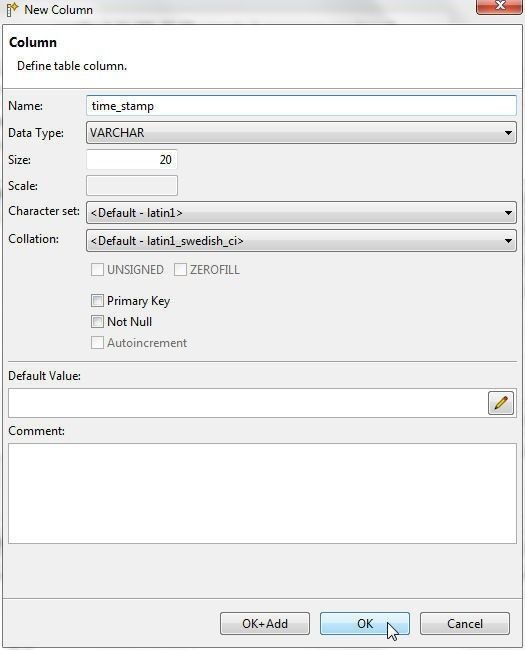
Figure 20. Adding time_stamp Column
The time_stamp column gets added, as shown in Figure 21.
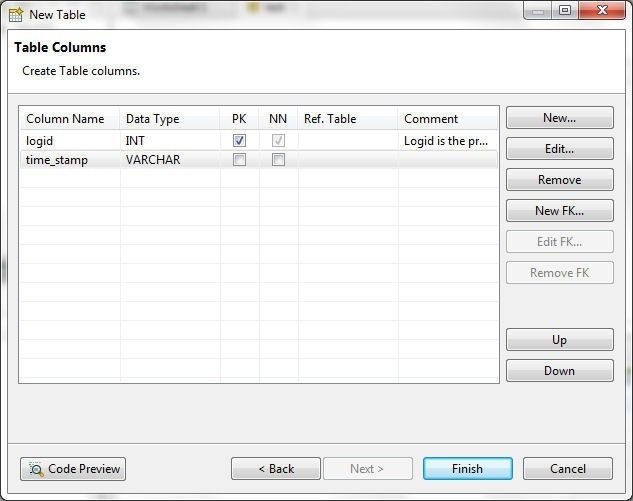
Figure 21. The time_stamp Column
Similarly, add the other columns category, servername, type, code and msg as shown in Figure 22.
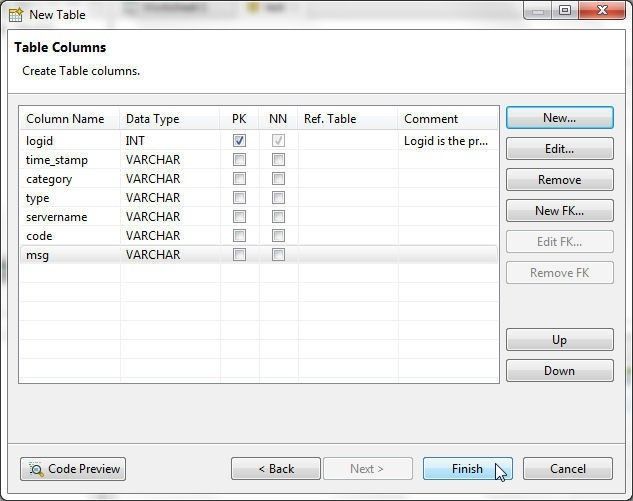
Figure 22. Completing the Table Columns
The wlslog table columns get added as shown in the Object Explorer in Figure 23.
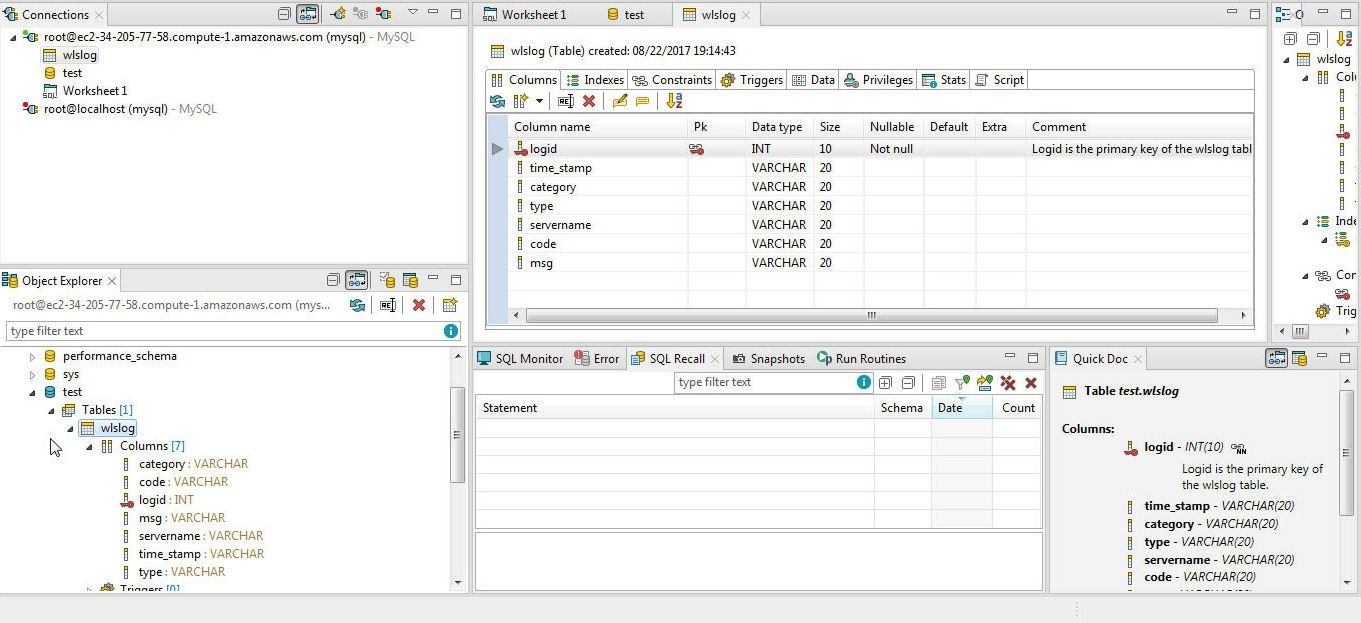
Figure 23. The wlslog Table Columns
After creating a database table the table properties may need to be modified. The column data type or column size may need to be modified, for example. We shall add table data in the next section and the sample data requires some of the column widths to be increased. Increase the column width for the msg and the time_stamp column as the default setting of 20 may not be enough for the sample data. To increase the column width from the default 20 double-click on the time_stamp column as shown in Figure 24.
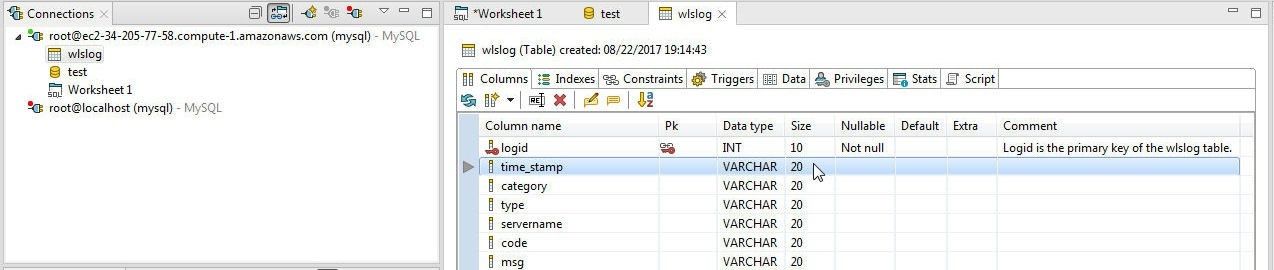
Figure 24. Selecting the time_stamp Column for Modification
In the Edit Column Data Type dialog modify the Size from 20 to 200 as shown in Figure 25. Click on OK.
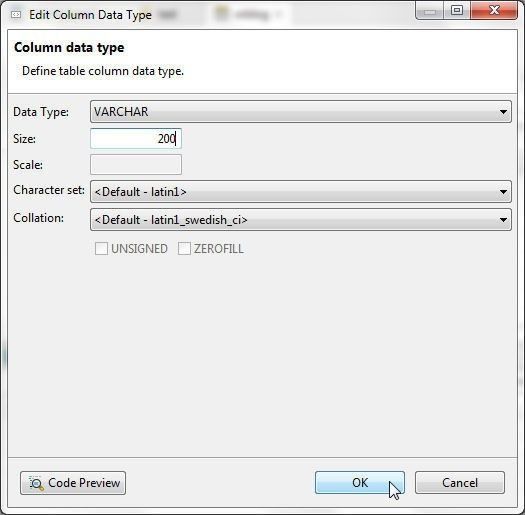
Figure 25. Increasing Column Size to 200
Similarly, increase the column size for the msg column. The Column sizes for the time_stamp and msg column are shown as increased in Figure 26.
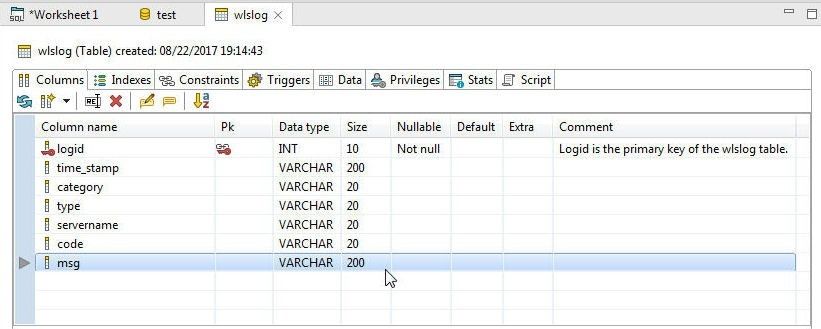
Figure 26. Modified Column Size
Next, we shall add data to the wlslog table. Table data may be added by running a SQL Script with DML statements as shown in Figure 27.

Figure 27. Running SQL Script
Alternatively, data may be imported as we shall discuss in the next section.
Importing Data into Table
In this section we shall import data to the wlslog table. Create a CSV file (wlslog.csv) and copy the following sample data to the file. The first line in the wlslog.csv file is for the column headers. The field delimiter in the sample data is “,” and the text delimiter is single quotes.
logid, time_stamp, category, type,servername,code, andmsg

1,'Apr-8-2014-7:06:16-PM-PDT','Notice','WebLogicServer','AdminServer','BEA-000365','Server state changed to STANDBY'
2,'Apr-8-2014-7:06:17-PM-PDT','Notice','WebLogicServer','AdminServer','BEA-000365','Server state changed to STARTING'
3,'Apr-8-2014-7:06:18-PM-PDT','Notice','WebLogicServer','AdminServer','BEA-000365','Server state changed to ADMIN'
4,'Apr-8-2014-7:06:19-PM-PDT','Notice','WebLogicServer','AdminServer','BEA-000365','Server state changed to RESUMING'
5,'Apr-8-2014-7:06:20-PM-PDT','Notice','WebLogicServer','AdminServer','BEA-000361','Started WebLogic AdminServer'
6,'Apr-8-2014-7:06:21-PM-PDT','Notice','WebLogicServer','AdminServer','BEA-000365','Server state changed to RUNNING'
7,'Apr-8-2014-7:06:22-PM-PDT','Notice','WebLogicServer','AdminServer','BEA-000360','Server started in RUNNING mode'
The number of fields in the CSV file should be the same as the number of columns in which data is to be imported. The wlslog.csv file is shown in Figure 28
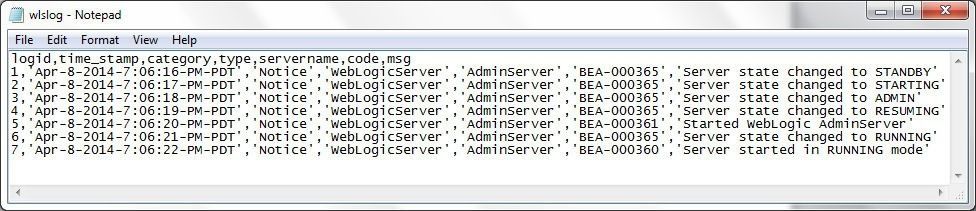
Figure 28. Sample data wlslog.csv File
Next, right-click on the wlslog table and select Import Data as shown in Figure 29.
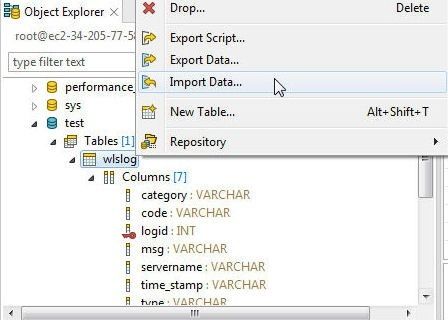
Figure 29. Import Data
In the Import Data dialog select the Import Format as shown in Figure 30. Select the CSV file or ZIP archive with CSV content. Click on the browse button for the Source field to select the CSV file to import data from.
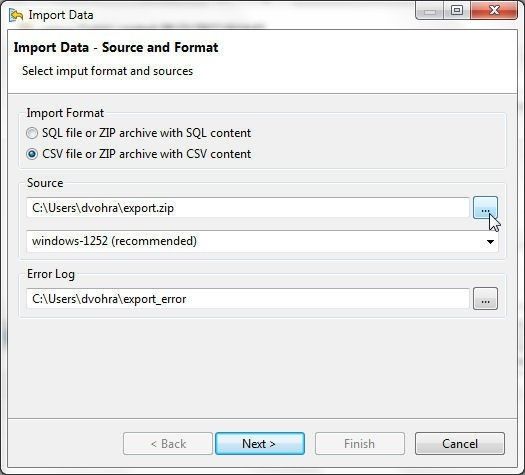
Figure 30. Import Data
Select the wlslog.csv file as shown in Figure 31 and click on Next.
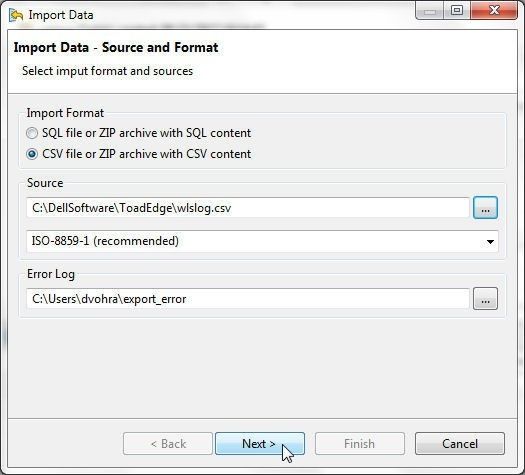
Figure 31. Selecting the wlslog.csv
The CSV settings (default) get displayed, as shown in Figure 32.The Destination Database Table is selected as wlslog. The CSV Format Settings should include the Field Delimiter as “,” and the Text Delimiter as single quotes "''". Click on Finish.
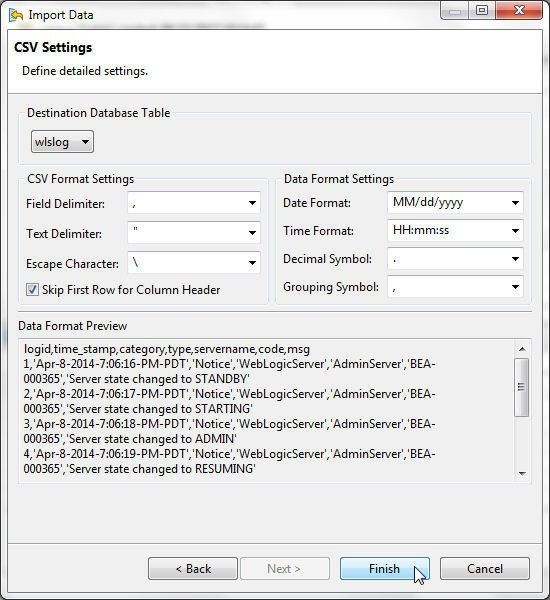
Figure 32. CSV Settings
The Data Import Result dialog indicates that Data import finished successfully, as shown in Figure 33. Click on Close.
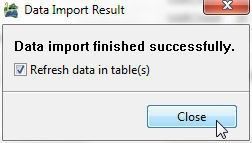
Figure 33. Data Import Result
In the wlslog table detail click on the Data tab as shown in Figure 34.
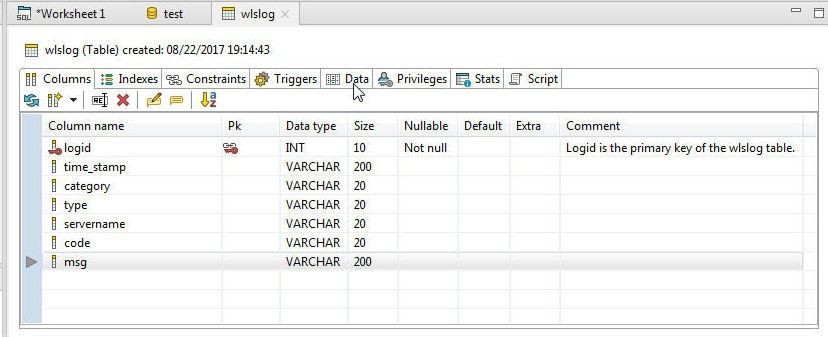
Figure 34. Selecting the Data tab
The sample data imported gets displayed, as shown in Figure 35.
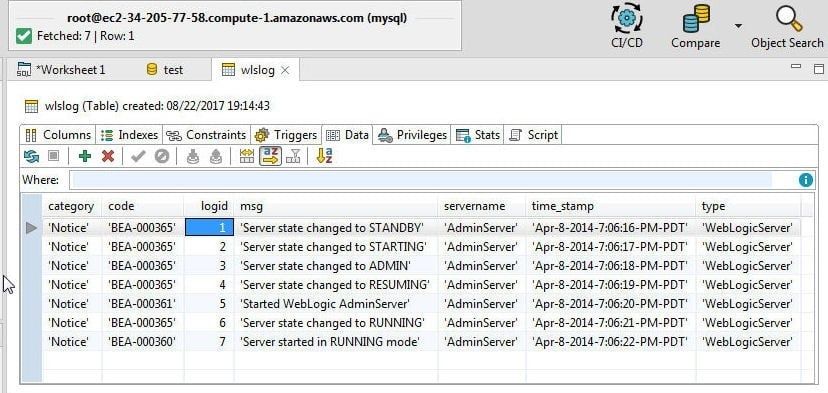
Figure 35. Sample Data in wlslog Table
To export data right-click on the wlslog table and select Export Data as shown in Figure 36.
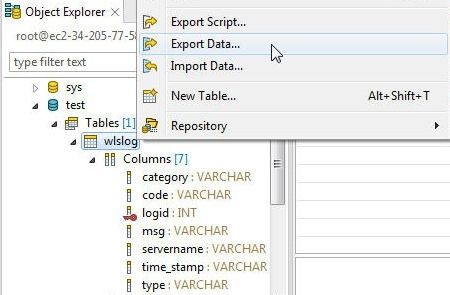
Figure 36. Export Data
Disconnecting a Connection
To disconnect a connection right-click on the connection in the Connections view and select Disconnect as shown in Figure 37.
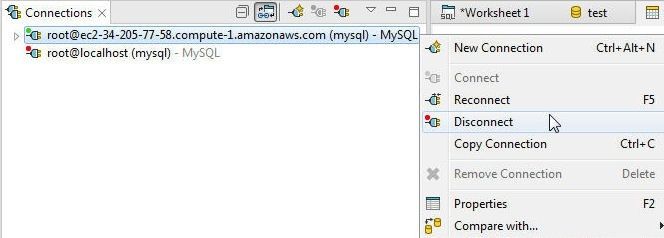
Figure 37. Disconnect
The connection gets disconnected as shown in Figure 38.
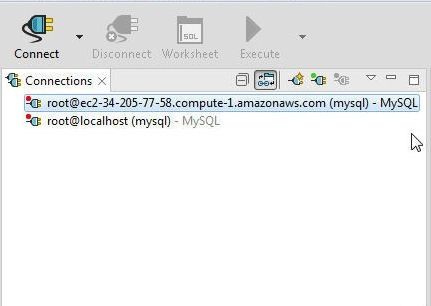
Figure 38. Disconnected Connection
A disconnected connection may be connected again by selecting Connect. To remove a connection select Remove Connection as shown in Figure 39. In Confirm click on OK.

Figure 39. Remove Connection
Removing the Docker Service
To remove the Docker service run the docker service rm command.
docker service rm mysql
The Docker service gets removed. Subsequently, list the services and the mysql service does not get listed as shown in Figure 40.

Figure 40. Removing Docker Service mysql
Conclusion
In this article we discussed some of the new features in Toad Edge 1.1 such as the Text Search feature and the active database (Toad Edge 1.0) being called the default database.
Start the discussion at forums.toadworld.com