Introduction
In an earlier article we discussed using PostgreSQL database on localhost with Toad Data Point. In this continuation article we shall discuss using PostgreSQL database on AWS RDS and Docker Engine with Toad Data Point. This article has the following sections.
- Using Toad Data Point with PostgreSQL on AWS RDS
- Running PostgreSQL Database on AWS RDS
- Configuring PostgreSQL ODBC Data Source
- Connecting to PostgreSQL on AWS RDS with Toad Data Point
- Using Toad Data Point with PostgreSQL on Docker Engine
- Running PostgreSQL Database on Docker Engine
- Configuring PostgreSQL ODBC Data Source
- Connecting to PostgreSQL on Docker Engine with Toad Data Point
- Removing Docker Service for PostgreSQL
Using Toad Data Point with PostgreSQL on AWS RDS
In this section we shall run PostgreSQL database on AWS RDS and connect to the database from Toad Data Point.
Running PostgreSQL Database on AWS RDS
First, create a PostgreSQL database instance on AWS RDS; for which, select Engine as PostgreSQL in RDS as shown in Figure 1.
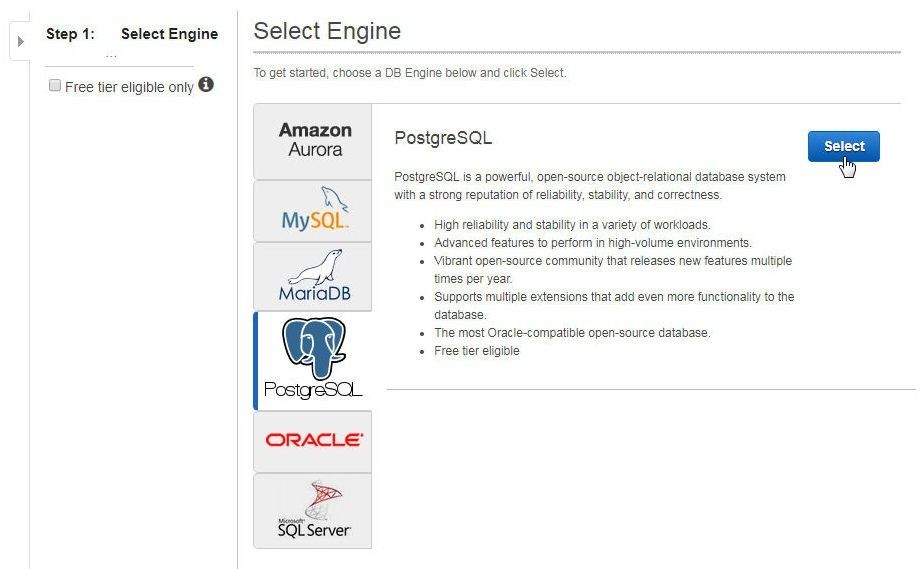
Figure 1. Selecting Engine in RDS as PostgreSQL
Using the RDS wizard, create a PostgreSQL database. User input includes specifying a database name, user name, and password. A PostgreSQL database on RDS gets created, as shown in Figure 2.
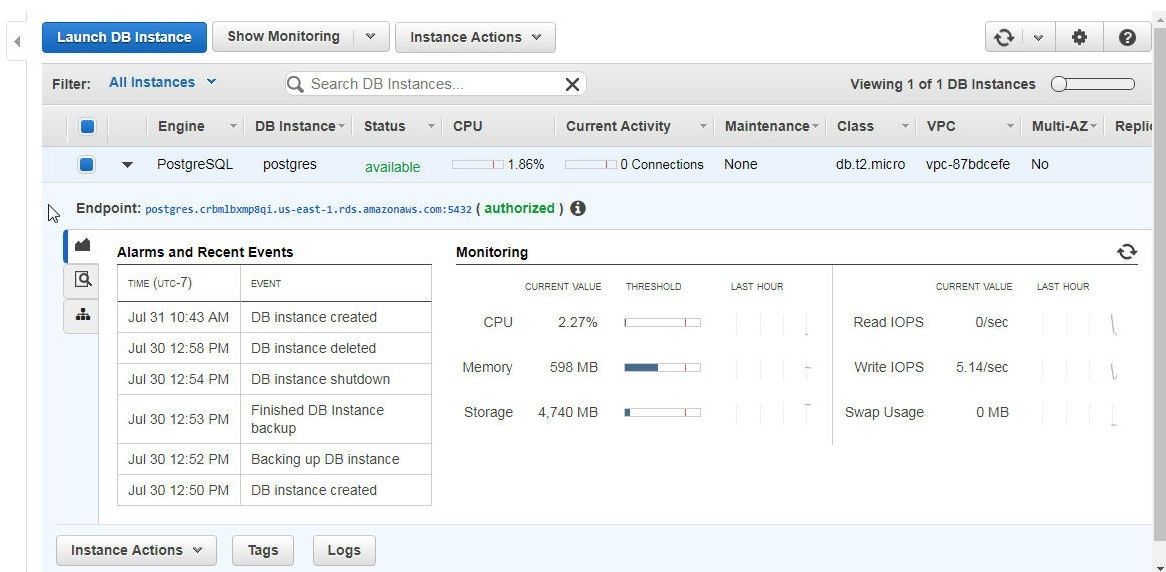
Figure 2. PostgreSQL Database on RDS
Configuring PostgreSQL ODBC Data Source
We added an ODBC Data Source for connecting with PostgreSQL database on a local machine. Modify those settings for PostgreSQL database on RDS. Select Control Panel>Administrative Tools>Data Sources (ODBC) as before and the ODBC Data Source Administrator gets displayed, as shown in Figure 3. Select the PostgreSQL data source already configured and click on Add.
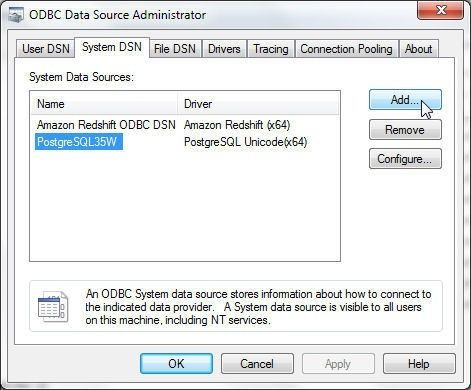
Figure 3. Modifying PostgreSQL Data Source
In Create New Data Source select PostgreSQL Unicode driver as shown in Figure 4 and click on Finish.
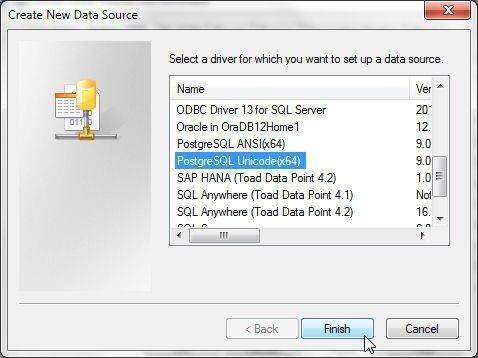
Figure 4. Selecting PostgreSQL Driver
The PostgreSQL Unicode ODBC Driver Setup wizard gets started and the settings are configured for the localhost, as shown in Figure 5.
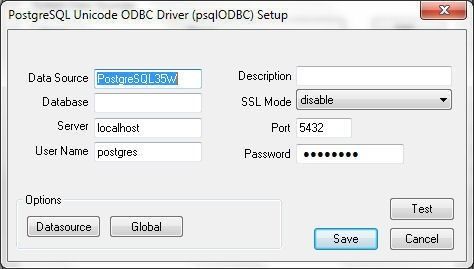
Figure 5. PostgreSQL Unicode ODBC Driver Setup
We need to modify the settings. For Server, copy the Endpoint for the PostgreSQL database on RDS as shown in Figure 6. The Endpoint is generated automatically.
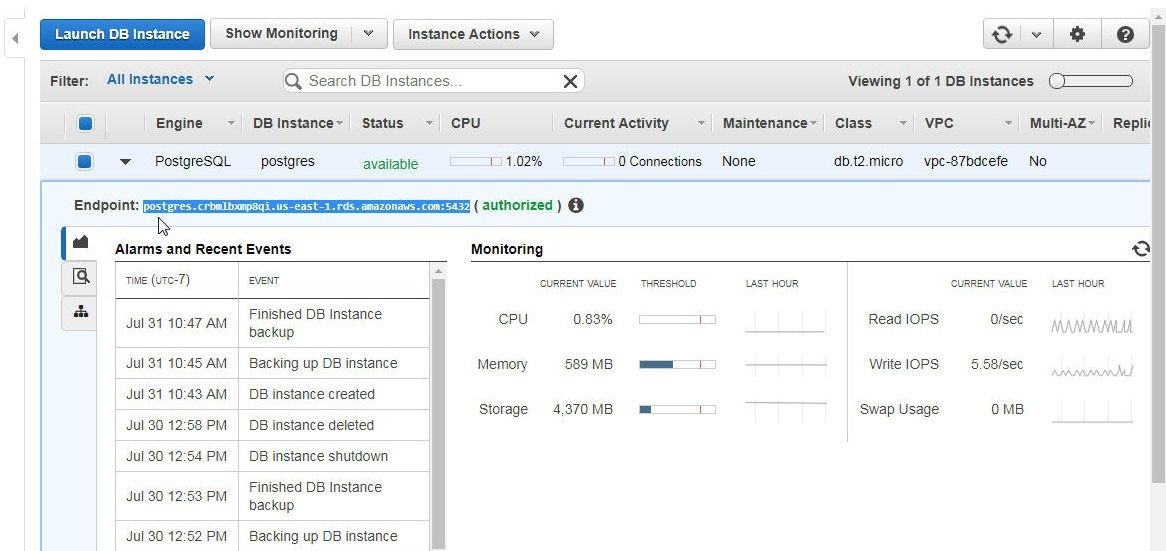
Figure 6. Copying Endpoint for PostgreSQL on RDS
For Database, copy the DB Name (postgresdb) from the Configuration Details of the RDS PostgreSQL DB instance as shown in Figure 7. The DB Name is user supplied when the RDS DB instance is created.
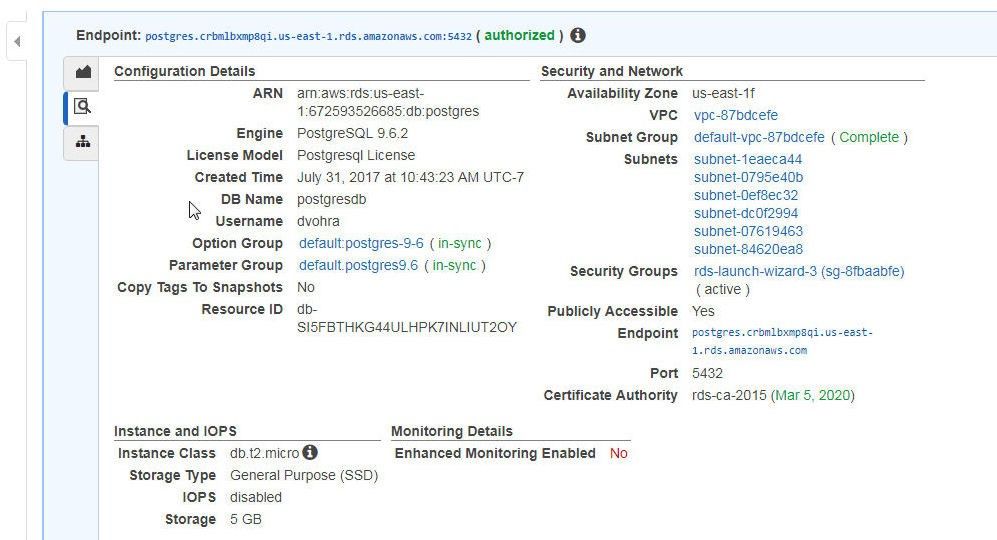
Figure 7. Copying DB Name for PostgreSQL on RDS
Add the DB Name to the Database field as shown in Figure 8. Remove the port suffix “:5432” from the Endpoint and copy the Endpoint to the Server field. Specify the port separately in the Port field. Specify User Name and Password, which are user supplied when creating the PostgreSQL DB instance on RDS, and click on Test to test the data source connection.
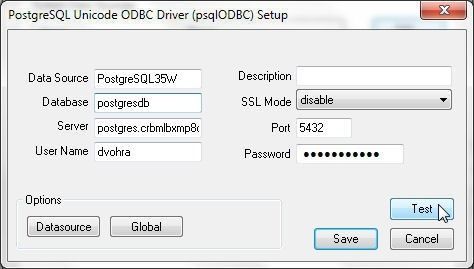
Figure 8. Configuring and Testing Data Source for PostgreSQL Database on RDS
If the connection is successful the message shown in Figure 9 gets displayed.

Figure 9. Connection Test Successful
The data source is not created or modified yet. Click on Save in the Setup as shown in Figure 10.
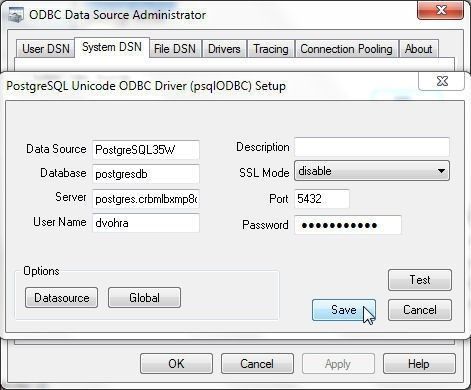
Figure 10. Saving Data Source Configuration
The Data Source listed in the ODBC Data Source Administrator gets modified with settings for RDS. Click on OK as shown in Figure 11.
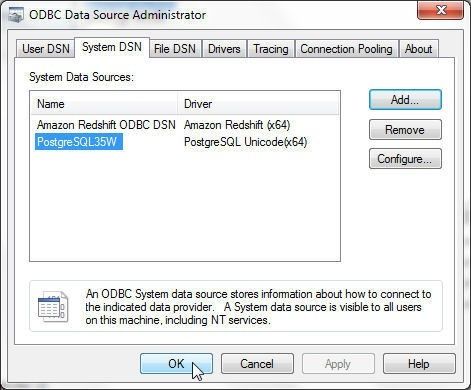
Figure 11. Data Source in ODBC Data Source Administrator
Connecting to PostgreSQL on AWS RDS with Toad Data Point
To connect to PostgreSQL database on RDS click on Connect>New Connection. Select the checkbox “Use data source name”. Select the Data source name as the data source created in the ODBC Data Source Administrator. Specify User and Password, which were supplied when creating PostgreSQL DB instance on RDS. Specify Database (postgresdb), which is also user supplied when creating an RDS instance and may be obtained from the RDS Console, as listed in Figure 7. Click on Connect as shown in Figure 12.
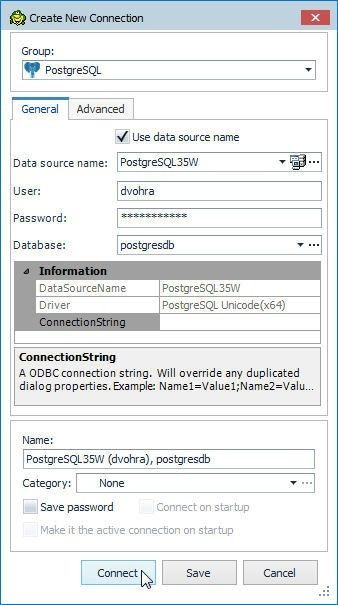
Figure 12. Create New Connection>Connect
A new connection gets added to Navigation Manager. To use the new connection we need to make the connection the current connection. Right-click on the connection in Navigation Manager and select Set As Current as shown in Figure 13.
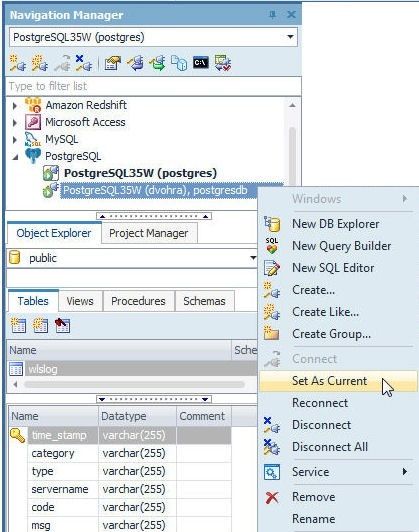
Figure 13. Setting PostgreSQL Connection added in Navigation Manager as Current
The PostgreSQL connection for RDS DB instance becomes the current connection. The icon for a current connection is different than a connection that is not current, as shown in Figure 14 (it has a square around the plug ).
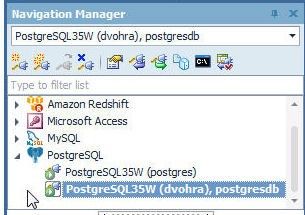
Figure 14. PostgreSQL Connection for RDS DB Instance set as Current
A SQL Editor may be used to run a SQL script to create a database table, similar to creating a database table in a local installation of PostgreSQL, as discussed earlier. However, the same SQL Editor cannot be used, because a SQL Editor is associated with a connection, so a new SQL Editor must be started. To start a new SQL Editor select the connection in Navigation Manager, right-click and select New SQL Editor as shown in Figure 15.
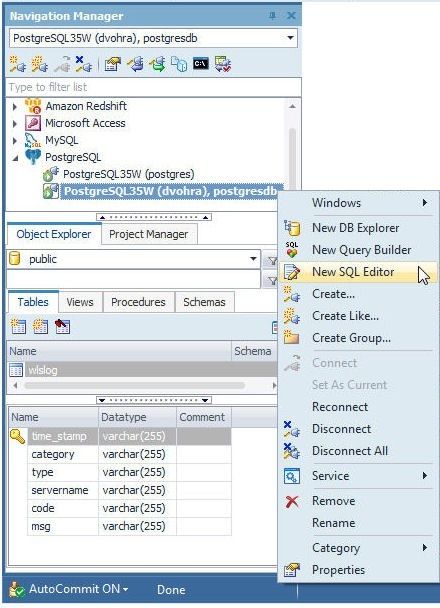
Figure 15. Launching a New SQL Editor for the new PostgreSQL Connection
Alternatively, select the connection in Navigation Manager and subsequently click on the SQL Editor link as shown in Figure 16.
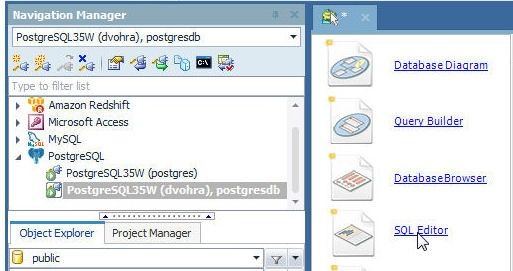
Figure 16. Launching a New SQL Editor with SQL Editor Link
To query a database table, a SQL statement may be run, as was discussed for the PostgreSQL localhost connection. Or, the Query Builder may be used. To start a Query Builder, right-click on the connection in the Navigation Manager and click on New Query Builder as shown in Figure 17.
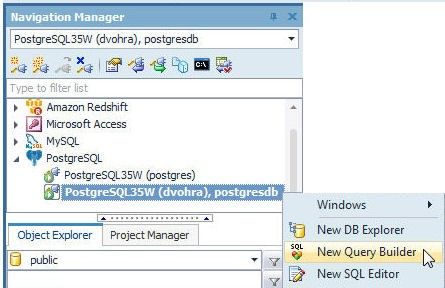
Figure 17. Launching New Query Builder
Click on the database table to be queried in the Object Explorer>Tables as shown in Figure 18. Drag and drop the table icon to the Query Builder.

Figure 18. Selecting a Database Table to add to Query Builder
Select the columns to be included in the query in the class diagram for the database table which generates a SQL statement for the query. The Query Builder class diagram has an option to Add All Columns, as shown in Figure 19.
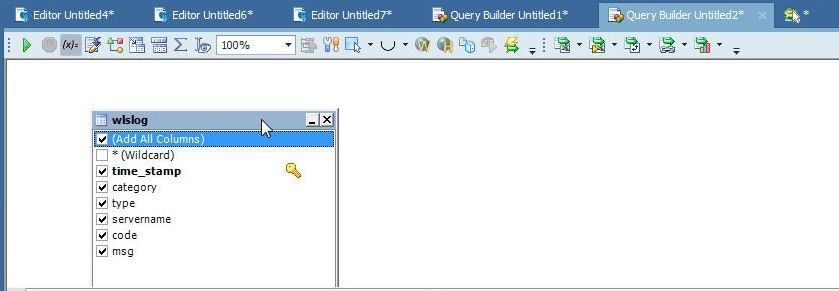
Figure 19. Query Builder Class Diagram
And click on the Execute the SQL Statement as shown in Figure 20.
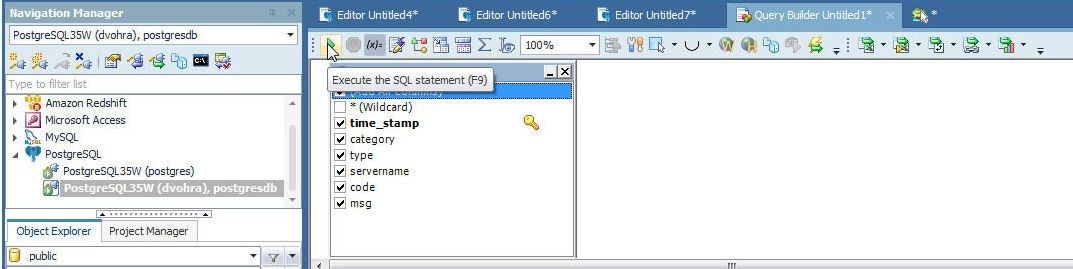
Figure 20. Running SQL Statement in Query Builder
The result Set for the query gets generated, as shown in Figure 21.
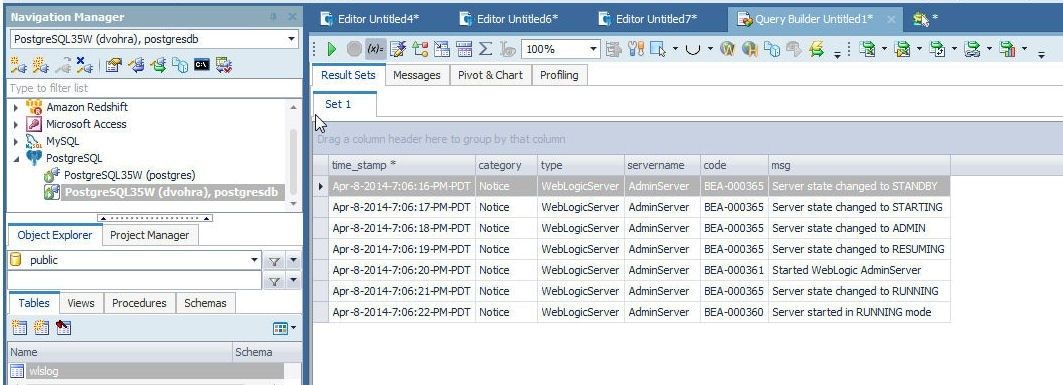
Figure 21. Result Set in Query Builder
Using Toad Data Point with PostgreSQL on Docker Engine
In this section we shall run PostgreSQL database on Docker Engine and connect to the database from Toad Data Point.
Running PostgreSQL Database on Docker Engine
To run PostgreSQL database on Docker engine we shall create a three-node Docker Swarm and create a Docker service for PostgreSQL. For the three nodes of the Docker Swarm start EC2 instances using the AMI Container Linux by CoreOS (Stable) as shown in Figure 22.

Figure 22. Selecting CoreOS AMI
Specify Number of instances as 3 as shown in Figure 23.
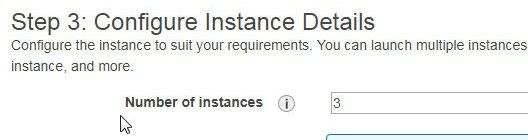
Figure 23. Specifying Number of Instances
Select or create a key pair and click on Launch Instances as shown in Figure 24.
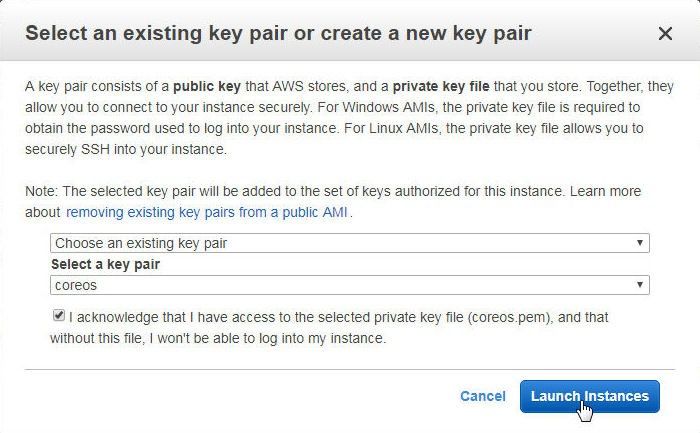
Figure 24. Launching CoreOS Instances
Three CoreOS Instances get launched, as shown in the EC2 Console in Figure 25. The Instance names are user added. To SSH login to the Swarm manager instance, copy the public IP address of the Swarm manager instance, as shown in Figure 25.
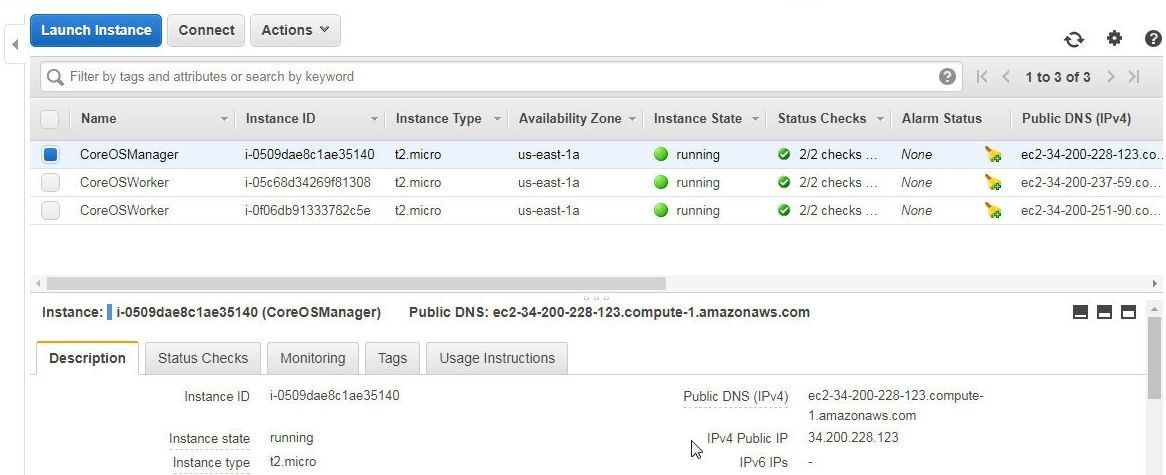
Figure 25. CoreOS Instances for Docker Swarm
SSH Login to the Swarm manager instance.
ssh -i "coreos.pem" core@34.200.228.123
To initialize the Docker Swarm mode, copy the private IP of the Swarm manager instance as shown in Figure 26.
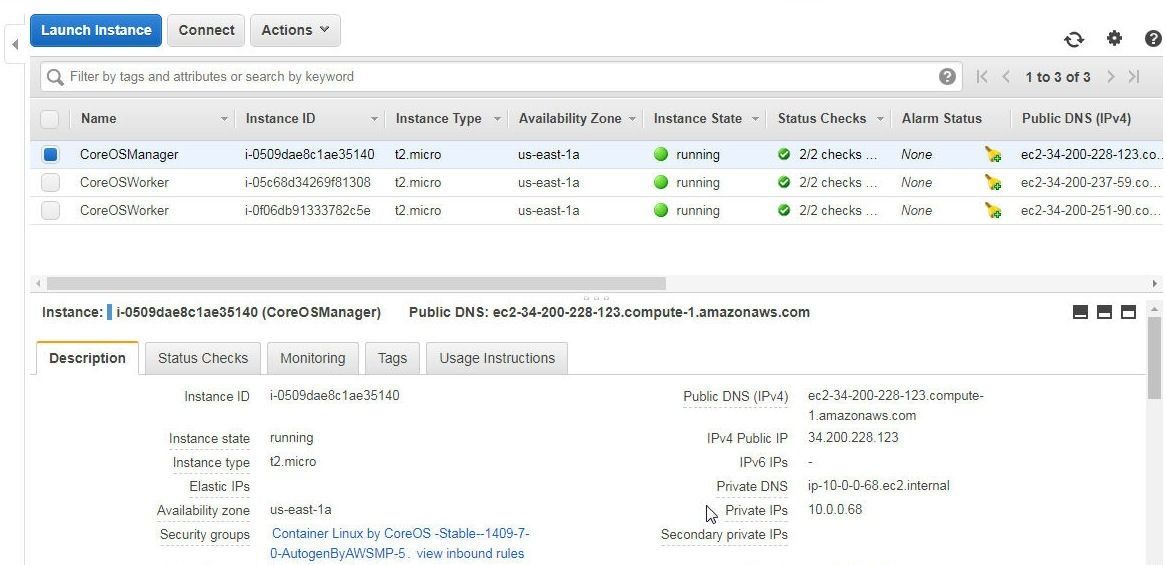
Figure 26. Private IP
Run the following command to initialize the Swarm mode.
docker swarm init --advertise-addr 10.0.0.68
The Swarm mode gets initialized and a docker swarm join command gets output to join worker nodes to the Swarm, as shown in Figure 27.
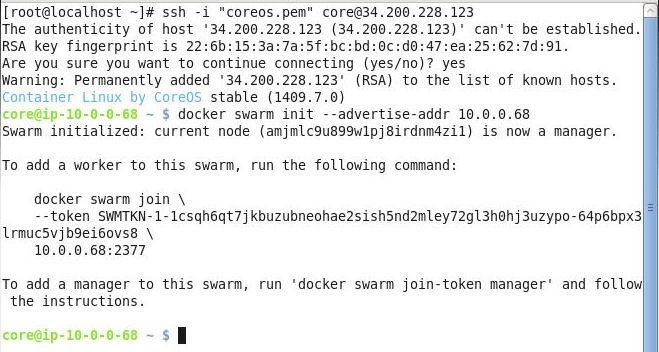
Figure 27. Initializing Docker Swarm Mode
To add Swarm worker nodes, copy the public IPfor the EC2 instance on which a worker node is to be created and SSH login to the worker instance.
ssh -i "coreos.pem" core@34.200.237.59
On the worker instance run the docker swarm join command output when initializing the Swarm mode, as shown in Figure 28, to add the worker node to the Swarm.
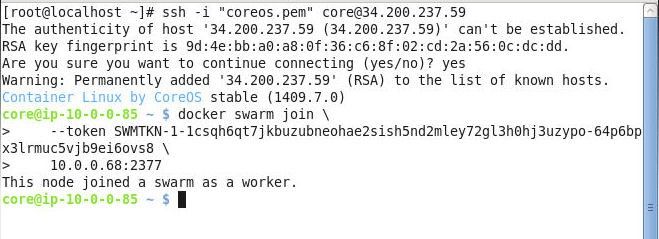
Figure 28. Adding a Worker Node to Swarm
Similarly, SSH login to the other worker instance and join the worker node to the Swarm as shown in Figure 29.

Figure 29. Joining 2nd Worker Node to Swarm
From the Swarm manager instance, list the Swarm nodes with the docker node ls command. Three nodes should get listed, as shown in Figure 30.
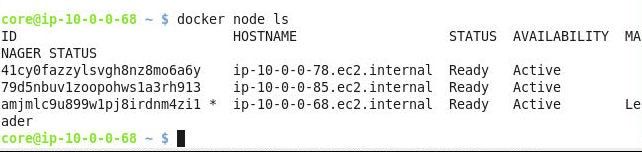
Figure 30. Listing Swarm Nodes
Next, create a Docker service for PostgreSQL Database with the following command, which includes a password for PostgreSQL Database.
docker service create
  --replicas 3
  -p 5432:5432
  --env POSTGRES_PASSWORD='postgres'
  --name postgres
     postgres
A Docker service gets created. List the Docker service with the docker service ls command as shown in Figure 31.
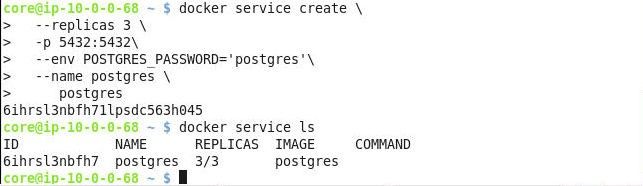
Figure 31. Creating and Listing Docker Service for PostgreSQL Database
List the Docker service tasks with the docker service ps postgres command as shown in Figure 32.
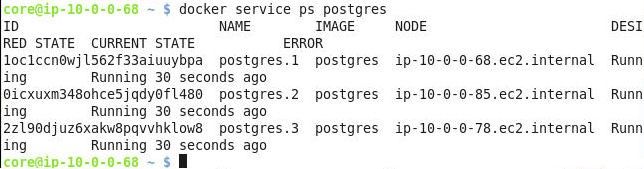
Figure 32. Listing Service Tasks for PostgreSQL Database
Configuring PostgreSQL ODBC Data Source
To connect to the PostgreSQL Database running on Docker we need to configure the ODBC Data Source for the Docker connection settings. Start the ODBC Data Source Administrator as before by selecting Control>Administrative Tools>Data Sources (ODBC). In the ODBC Data Source Administrator select the PostgreSQL Data Source and click on Add as shown in Figure 33. We won’t actually be adding a new data source but would be modifying the data source already configured.
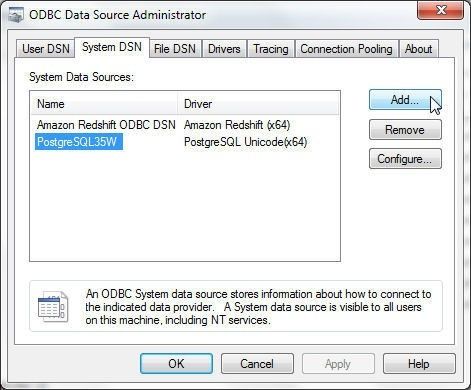
Figure 33. ODBC Data Source Administrator>Add
Select the PostgreSQL Unicode driver as shown in Figure 34 and click on Finish.
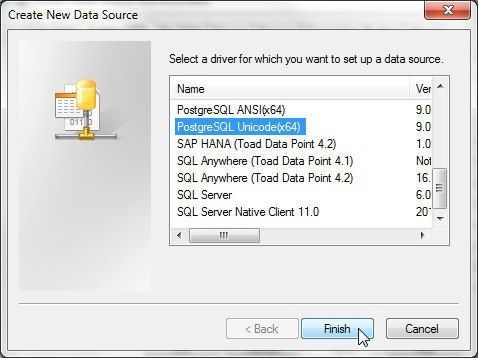
Figure 34. Selecting the PostgreSQL Driver
The PostgreSQL Unicode ODBC Driver Setup wizard gets started as before. In it we need to modify the Database, Server, Username, Password and Port for the PostgreSQL database on Docker. The Server name to be specified is the Public DNS of the EC2 instance on which the Docker Swarm is created. Copy the DNS Name from the EC2 Console as shown in Figure 35.
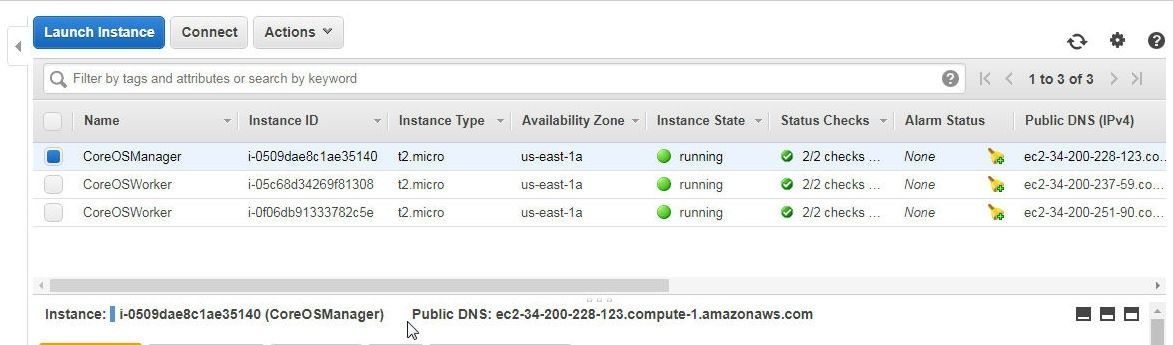
Figure 35. Public DNS for Swarm Manager Instance
Specify Database name as postgres, which is preconfigured in the Docker image used to create the Docker service for PostgreSQL. Set Server as the Public DNS for the Swarm manager instance. Specify Username as postgres, which is also preconfigured in the Docker image postgres. Set Password as the password specified when creating the Docker service. Set Port as 5432. Click on Test to test the data source as shown in Figure 36.
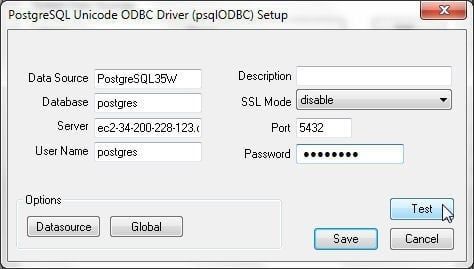
Figure 36. Testing Data Source
If the connection test is successful the message shown in Figure 37 gets displayed.
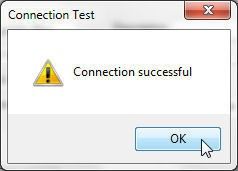
Figure 37. Connection Test Successful
Click on Save in the driver Setup wizard as shown in Figure 38.
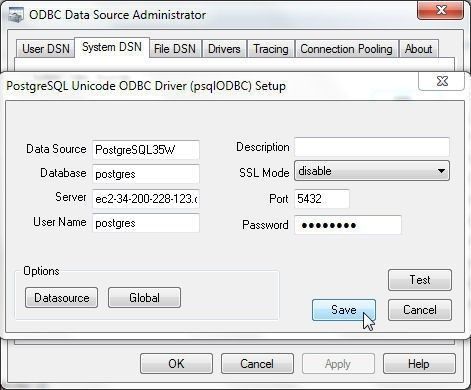
Figure 38. Saving Driver Settings for Data Source
Click on OK in ODBC Data Source Administrator as shown in Figure 39.
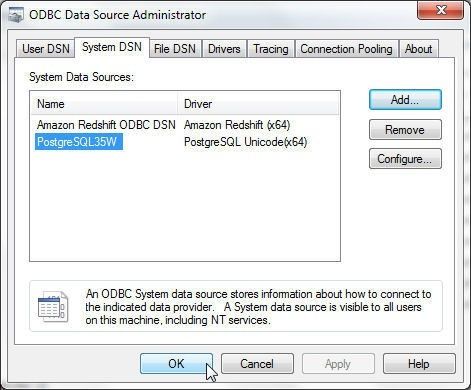
Figure 39. ODBC Data Source Administrator>OK
Connecting to PostgreSQL on Docker Engine with Toad Data Point
To connect with the PostgreSQL Database on Docker Engine, select Connect>New Connection as before. Select PostgreSQL from the list of data sources as before and as shown in Figure 23 in the first article. In Create New Connection select the General tab and select the “Use data source name” checkbox as shown in Figure 40. Select the Data source name configured in the ODBC Data Sources Administrator. The same data source is used for each of the three connections in this tutorial with different connection settings. Specify User and Password and specify Database as postgres, which is preconfigured in the Docker image postgres from which the Docker service for PostgreSQL database is created. Click on Connect as shown in Figure 40.
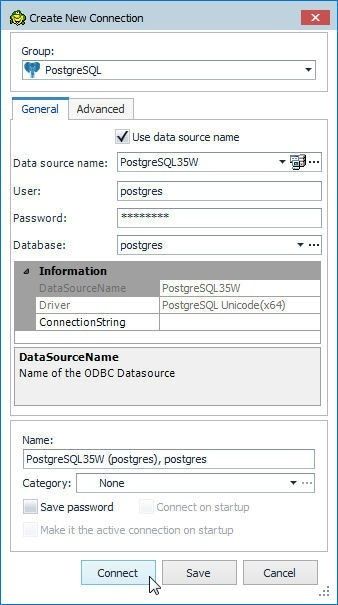
Figure 40. Connecting with PostgreSQL on Docker
If a connection gets created, a Connection Successful message gets displayed. Click on OK in the message dialog. A new connection gets added to the Navigation Manager, as shown in Figure 41. The Navigation Manager has three connections listed, each with a different icon. The first connection is connected but it is not the current connection. The second connection is not connected. And the third connection, which is for PostgreSQL on Docker, is connected and is the current connection.
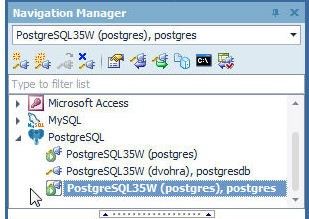
Figure 41. Connection added to Navigation Manager
To run a SQL script on the current connection click on SQL Editor as shown in Figure 42.
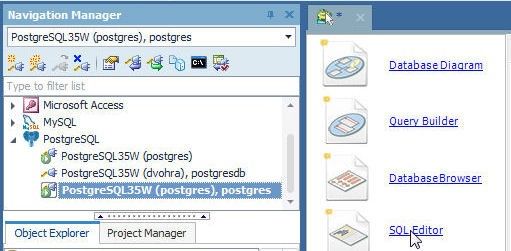
Figure 42. Starting SQL Editor for PostgreSQL Connection
The procedure to create and query a database table is the same as for the previous two connections.
Removing Docker Service for PostgreSQL
To remove the Docker service for PostgreSQL run the following command.
docker service rm postgres
Listing the services subsequently does not list the postgres service. List the images with docker images and the postgres image gets listed. To remove the Docker image for postgres run the following command.
docker rmi postgres
The output from the preceding commands is shown in Figure 43.
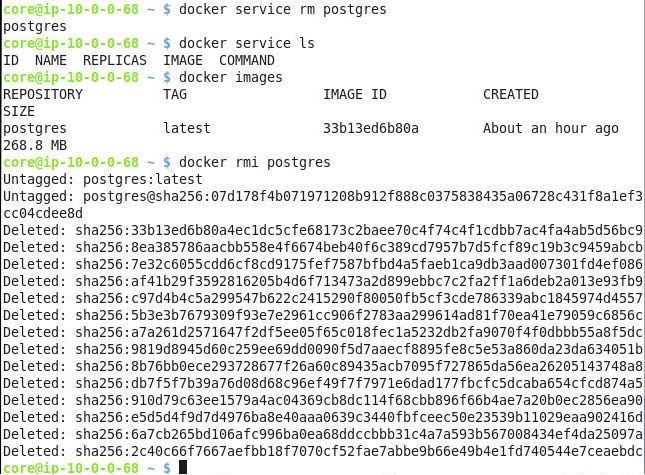
Figure 43. Removing Docker Service and Docker Image for Postgres
Conclusion
In two articles we have discussed using PostgreSQL database running on a local machine, AWS RDS, and Docker with Toad Data Point. The benefit of Toad Data Point is a simplified, integrated development environment for connecting to PostgreSQL database, running SQL statements in a SQL Editor, querying a database with a Query Builder and other database development and administration.
Start the discussion at forums.toadworld.com