Introduction
SSH (Secure Shell) is a protocol for secure remote login to a machine. SSH is designed for a client-server model; connecting an SSH Client to an SSH Server. While SSH supports several options for user authentication, the main options are using a public/private key pair, and using a password. After a connection is established the data is transferred in an encrypted form. The non-protected alternatives to SSH include telnet and rlogin. In this tutorial we shall discuss using an SSH connection from Toad Edge 1.1 to a MySQL database. We shall also discuss some of the other Toad Edge 1.1 features not discussed in earlier tutorials; features such as adding table data using Insert Row, exporting table data to a SQL script, and exporting SQL script for creating a table. This tutorial has the following sections.
- Setting the Environment
- Creating a Docker Service for MySQL Database
- Creating an SSH User
- Configuring a Connection in Toad Edge with MySQL Database
- Adding SSH and Creating a Connection
- Creating a Database Table
- Adding Table Data
- Exporting SQL Script
- Exporting Table Data

Setting the Environment
We shall use a Docker service for running MySQL database. Any platform that supports SSH login may be used. First, launch an EC2 instance with AMI Container Linux by CoreOS (Stable), which has Docker installed out-of-the-box. The Security Group used for the EC2 instance should have Inbound/Outbound rules set to allow access from the Public IPv4 address of the machine on which the Toad Edge client is installed. The EC2 instance is launched using a key pair and is shown in Figure 1. The private key is used along with the Public DNS or the Public IP Address to login to the instance with SSH.

Figure 1. CoreOS EC2 Instance
For Toad Edge to be able to connect to MySQL database on the EC2 instance, the Security Group for the EC2 instance must have Inbound/Outbound rules set to allow traffic from the Public IPv4 address of the machine on which Toad Edge is installed. If the Public IPv4 address of the local machine is not known or not easily found, allow access from Public IPv4 address 0.0.0.0/0, which allows access from all IPv4 address. Click on the Security Group link associated with the EC2 instance as shown in Figure 2.
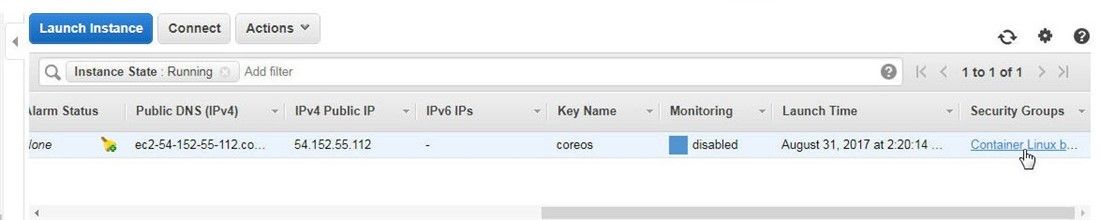
Figure 2. Security Group Link
Click on the Inbound tab and add an inbound rule for access from the local machine’s Public IPv address. Or, allow all traffic by setting the Public IPv4 address to access the EC2 instance as 0.0.0.0/0, as shown in Figure 3.
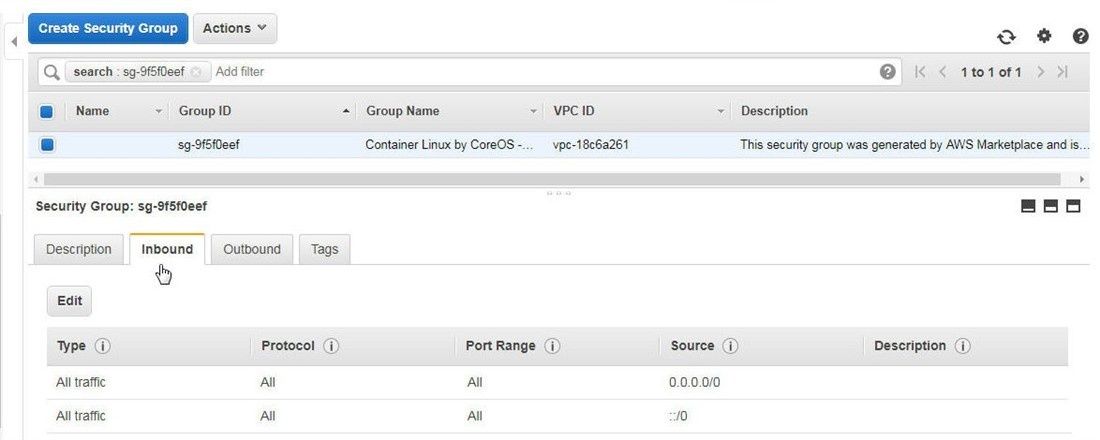
Figure 3. Inbound Rules
Click on the Outbound tab for the outbound rules as shown in Figure 4. Outbound traffic is allowed to all IPv4 addresses by setting Destination as 0.0.0.0/0.
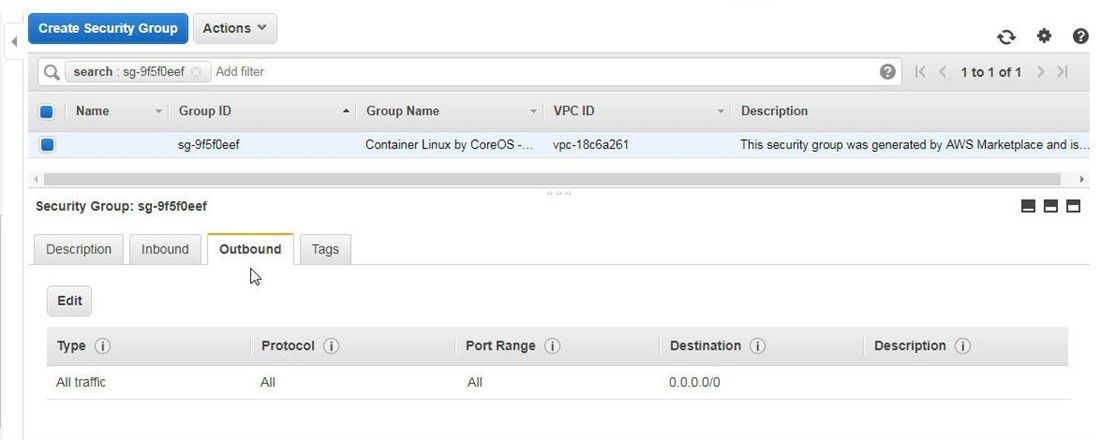
Figure 4. Outbound Rules
To SSH login to the CoreOS instance, obtain the Public IPv address from the EC2 management console as shown in Figure 1. With user as core and the private key for the EC2 instance, SSH login to the instance.
ssh -i "coreos.pem" core@54.152.55.112
Next, we shall initialize the Docker Swarm mode. Obtain the Private IP address of the EC2 instance from the Dashboard as shown in Figure 5.
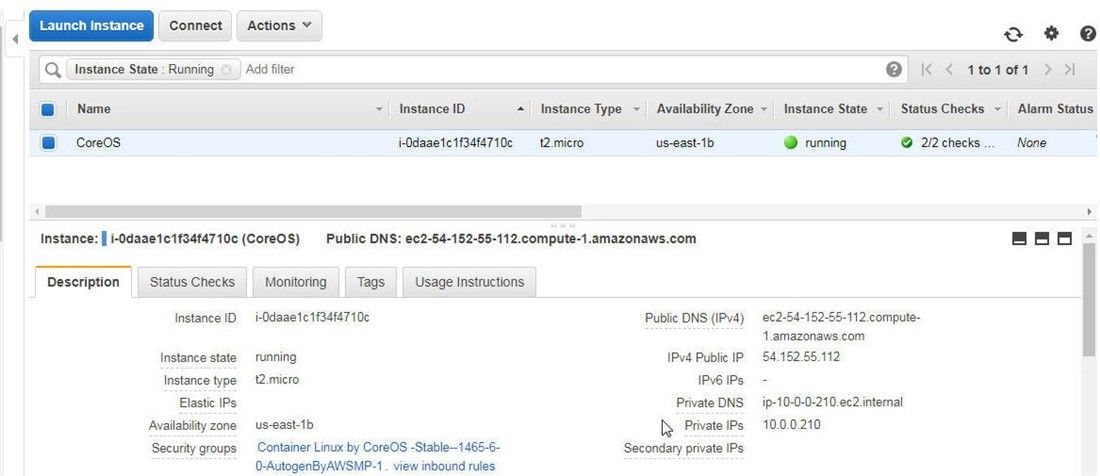
Figure 5. Private IP Address
Initialize the Swarm mode using the docker swarm init command.
docker swarm init --advertise-addr 10.0.0.210
The Swarm mode gets initialized and the current node becomes the manager node, as indicated by the output in Figure 6.
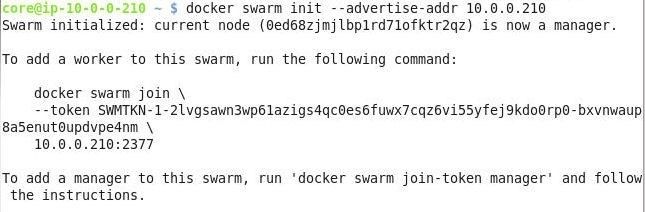
Figure 6. Initializing the Swarm Mode
List the Swarm nodes.
docker node ls
The single node in the Swarm gets listed, as shown in Figure 7. If additional nodes are to be added, start EC2 instances with CoreOS AMI and run the docker swarm join command output when the Swarm is initialized.

Figure 7. Listing the Nodes in the Swarm
Creating a Docker Service for MySQL Database
Next, create a Docker service for MySQL database using the docker service create command with Docker image mysql. Set the number of replicas with the –replicas option, the host port on which to expose the service with –p, the mandatory environment variable MYSQL_ROOT_PASSWORD for the mysql Docker image with –env, and service name with the –name option.
docker service create \
  --replicas 1 \
  -p 3306:3306\
  --env MYSQL_ROOT_PASSWORD='mysql'\
  --name mysql \
     mysql
A String for the service id gets output, as shown in Figure 8.

Figure 8. Creating a Docker Service for MySQL Database
List the services.
docker service ls
The mysql service gets listed, as shown in Figure 9. While the service is being started the service may be listed with 0/1 replicas.

Figure 9. Listing the Docker Service mysql
List the service replicas.
docker service ps mysql
The one replica gets listed, as shown in Figure 10.

Figure 10. Listing Service Replicas
The password for MySQL database and the port on which the MySQL database service is exposed on the host were set with the docker service create command. If the password or the port are not known to a user, list the service details which include the password used for the MySQL database and the port on which the service is exposed on the host.
docker service inspect mysql
The ContainerSpec lists the password, as shown in Figure 11.
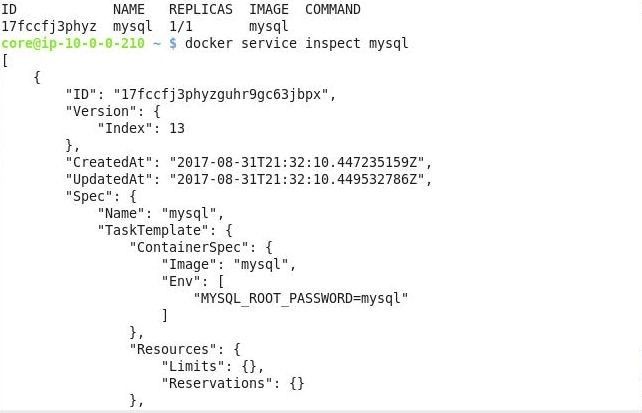
Figure 11. Listing Service Detail
The Ports lists the PublishedPort, as shown in Figure 12.
Figure 12. Finding PublishedPort and other Service Detail
Creating an SSH User
The default user for a CoreOS instance is “core” and the core user is not associated with a password. To be able to login with SSH protocol from Toad Edge the SSH user must be associated with a password. Create a new user (example, a user called “mysql”) and add the user to the sudo group.
sudo useradd -p "*" -U -m mysql -G sudo
The useradd command does not create a password for the user and only initializes the password field with “*”. The –m option creates the new user’s home directory. Subsequently, set the password with the passwd command.
sudo passwd mysql
Specify the password when prompted, as shown in Figure 13.

Figure 13. Creating User and setting Password
Using the new user, establish an ssh connection to the EC2 instance with the following command, which, unlike the command used earlier, does not specify the private key for the EC2 instance.
ssh mysql@54.152.55.112
Specify the password at the Password prompt, and the SSH connection gets established, as shown in Figure 14.
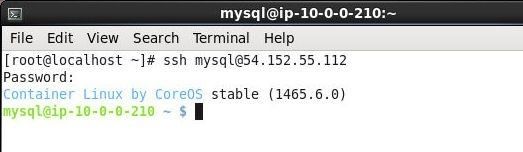
Figure 14. Connecting to EC2 Instance with SSH
We shall use the user we created to create an SSH connection in Toad Edge next.
Configuring a Connection in Toad Edge with MySQL Database
To create a new connection, select Connect>New Connection, as shown in Figure 15.
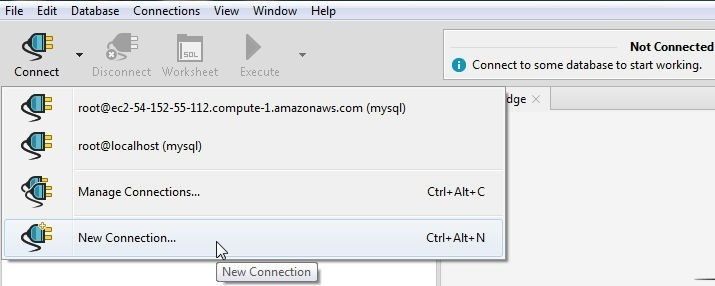
Figure 15. Connect>New Connection
The New MySQL Connection wizard gets started. We need to configure a connection with the MySQL database on the EC2 instance. For Host specify the Public DNS of the EC2 instance. Obtain the Public DNS from the EC2 Dashboard, as shown in Figure 16.
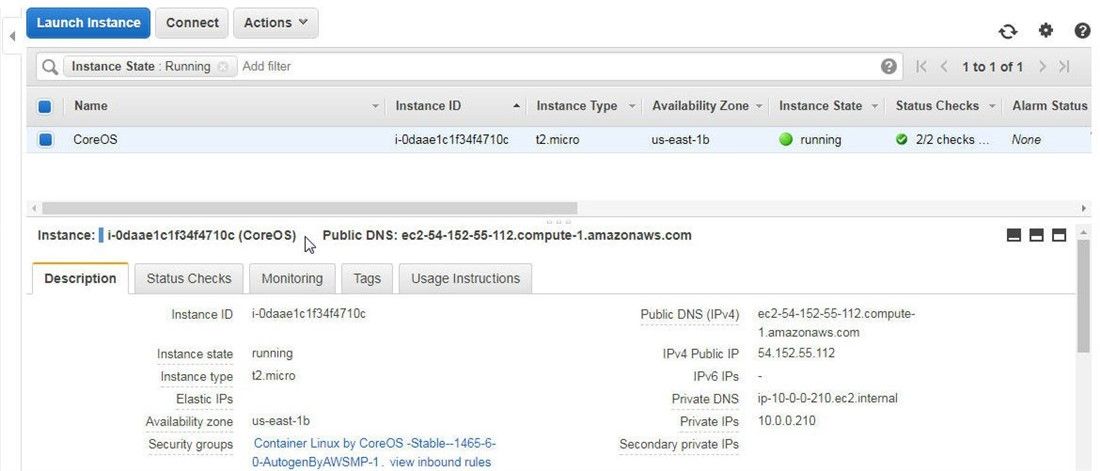
Figure 16. Public DNS
Specify the Host as the Public DNS as shown in Figure 17. Specify Port as 3306. Specify Database as mysql. For Authentication specify User as root and Password as the password configured with the MYSQL_ROOT_PASSWORD env variable in the docker service create command. By default, the Options to enable AutoCommit and restore previous connections after login are selected. Click on Test Connection to test the connection, as shown in Figure 17.
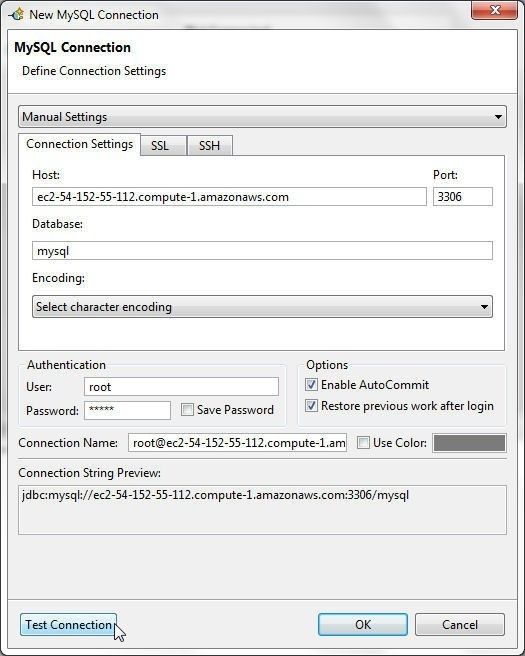
Figure 17. Configuring and Testing the Connection
If the connection gets established the message Connection is OK gets output, as shown in Figure 18.
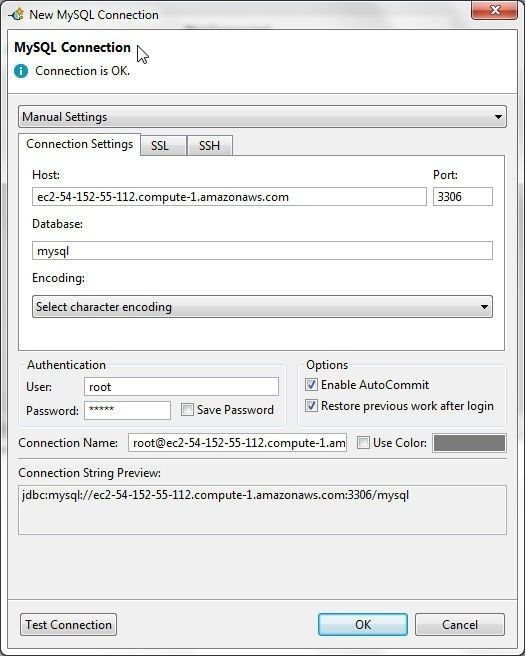
Figure 18. Connection is OK
The connection should not be finalized (created) with OK yet, as we shall be adding SSH to the connection next.
Adding SSH and Creating a Connection
To add SSH to the connection so that the connection will be secure, click on the SSH tab as shown in Figure 19.

Figure 19. SSH Tab
Click in the Enable SSH checkbox as shown in Figure 20.
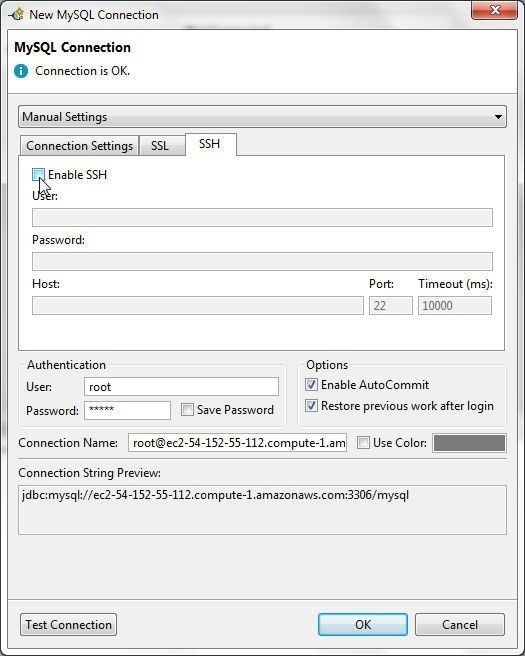
Figure 20. Enabling SSH
Specify User as the SSH user mysql created earlier. Specify Password as the password set on the user. Specify Host as the Public DNS of the EC2 instance. The Port is set to 22 by default and the Timeout is 10000 ms. Click on Test Connection as shown in Figure 21.
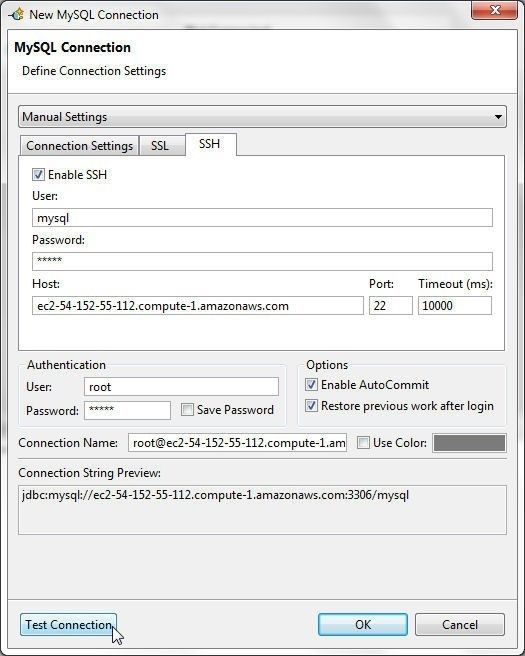
Figure 21. Test Connection
If the message is Connection is OK as shown in Figure 22 click on OK.
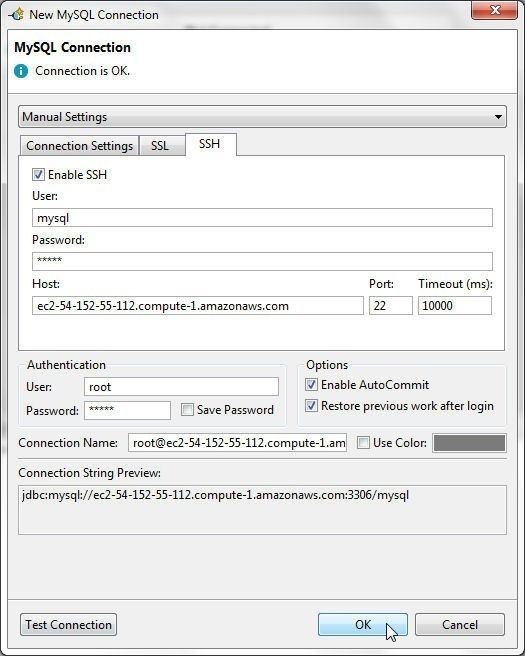
Figure 22. Configuring SSH
A new connection with SSH enabled gets created and gets added to the Connections view, as shown in Figure 23.

Figure 23. New Connection Added
Creating a Database Table
To create a database table, right-click on the default database, which is mysql, as shown by the blue (ish) color in the ObjectExplorer>Databases. This is shown in Figure 24.
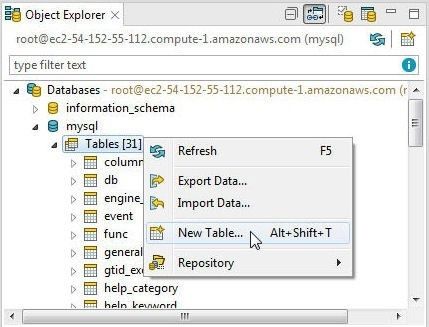
Figure 24. New Table
In the New Table wizard specify a Table Name (wlslog) as shown in Figure 25.
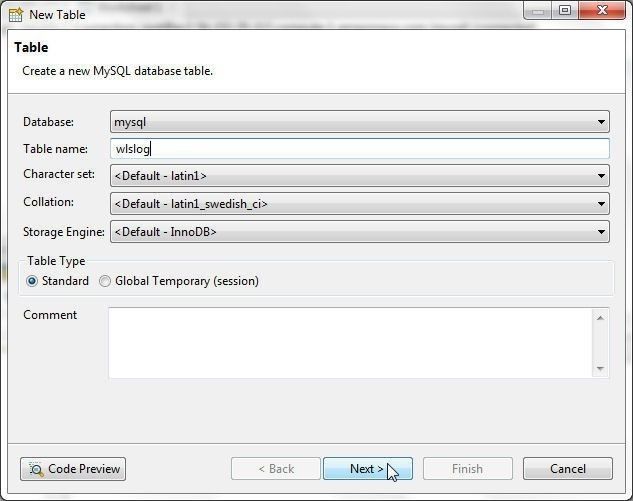
Figure 25. New Table
Next add the table columns logid, time_stamp, category, type, servername, code, and msg. In Table Columns click on New to add a column as shown in Figure 26.
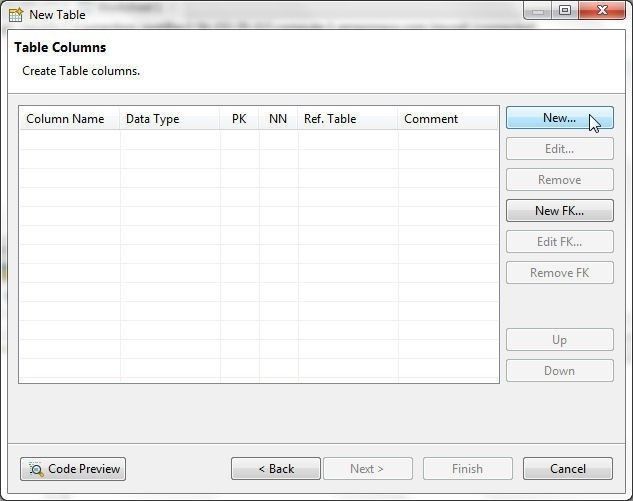
Figure 26. Table Columns>Add
In the New Column wizard specify a column Name (logid) and select the column Data Type as shown in Figure 27. Specify the column Precision (10) and click in Primary Key checkbox to make the logid column as the primary key column. Click on OK.

Figure 27. Adding a New Column
The logid column gets added, as shown in Figure 28. To add another column click on New again.
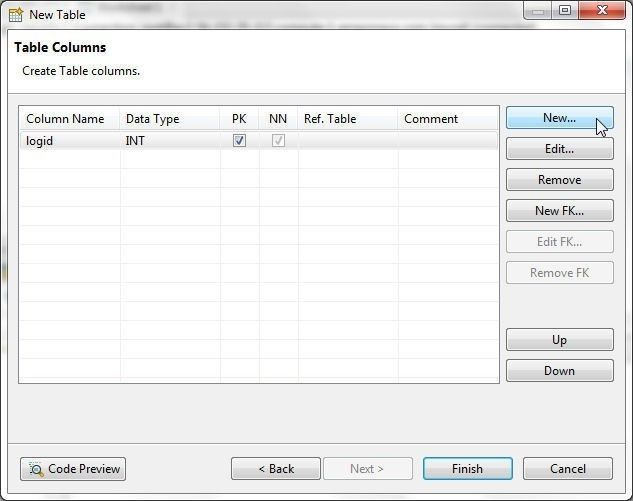
Figure 28. Column logid Added
In the New Column wizard add the column name for the column and select the Data Type, as shown in Figure 29. Click on OK.
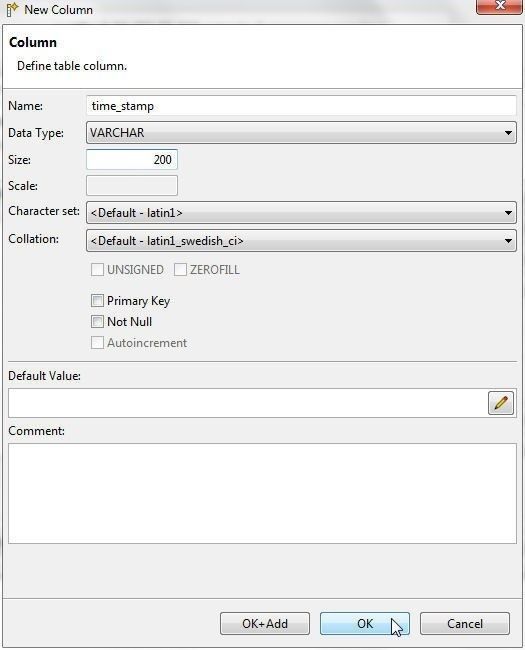
Figure 29. Adding another Column
Similarly add other columns. The Table Columns are shown in Figure 30. Click on Finish to create the new table.
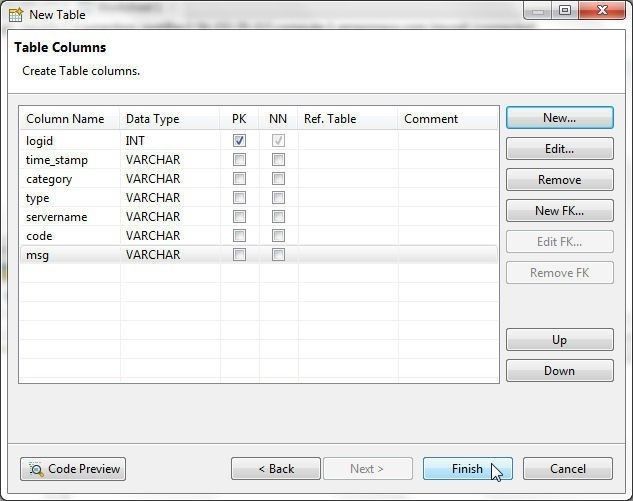
Figure 30. Table Columns
A new table wlslog gets created, as shown in Figure 31.
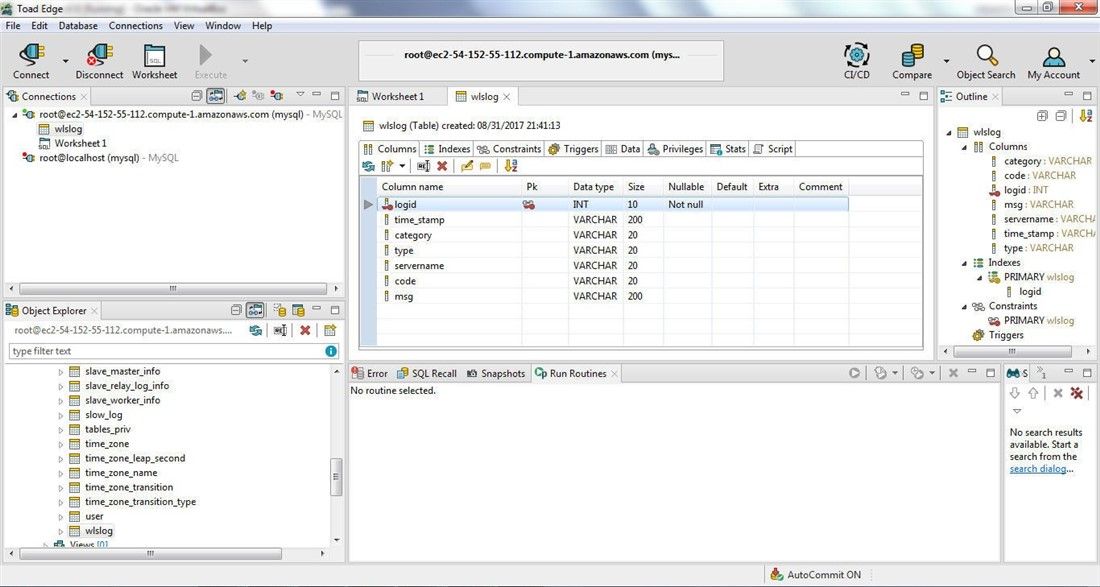
Figure 31. Table wlslog Created
Initially the new table does not include any table data, as indicated by the Data tab not listing any data in Figure 32.
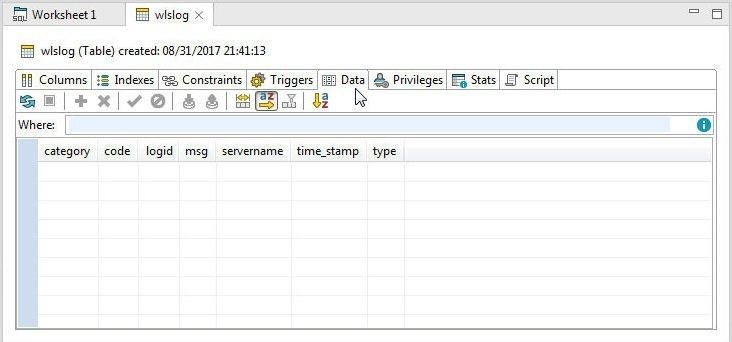
Figure 32. The new Table is Empty
Adding Table Data
In this section we shall add data to the new table. Several options exist to add data:
-Run DML SQL statements in a SQL Worksheet
-Import Data into the Table
-Use Insert Row
We have discussed the first two options in earlier tutorials. In this tutorial we shall use the third option. Right-click below the columns header row and select Insert Row as shown in Figure 33.
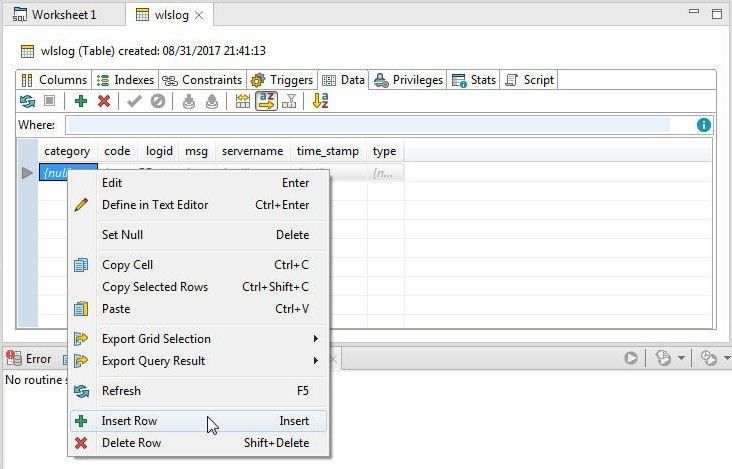
Figure 33. Insert Row
A row with empty (null value) columns gets added, as shown in Figure 34.
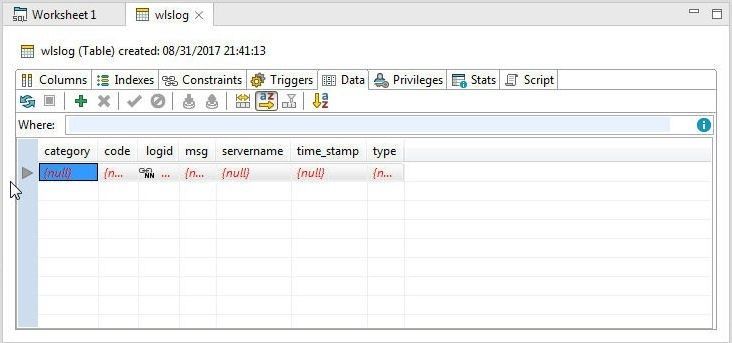
Figure 34. An empty row added
Next, we shall add the following data (the first row is the columns header row) to the table.
logid,time_stamp,category,type,servername,code,msg
1,'Apr-8-2014-7:06:16-PM-PDT','Notice','WebLogicServer','AdminServer','BEA-000365','Server state changed to STANDBY'
2,'Apr-8-2014-7:06:21-PM-PDT','Notice','WebLogicServer','AdminServer','BEA-000365','Server state changed to RUNNING'
To add column data, click in the column; as an example, the category column shown in Figure 35. The data may be directly copied into the column or you can click on Define in Text Editor, as shown in Figure 35.
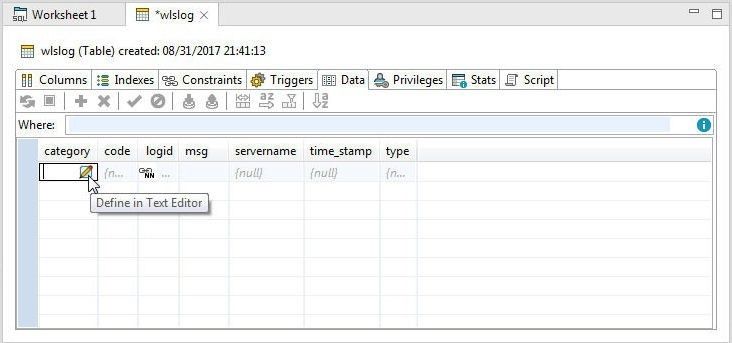
Figure 35. Define in Text Editor
In the text editor add the data as shown in Figure 36 and click on OK.
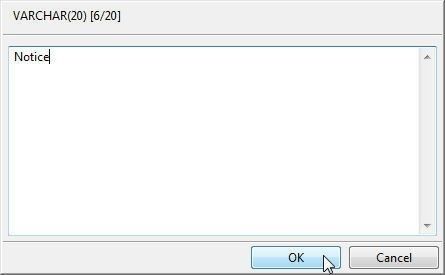
Figure 36. Adding Column Data in Text Editor
The column data gets added, as shown in Figure 37. Similarly, click on Define in Text Editor for the code column.
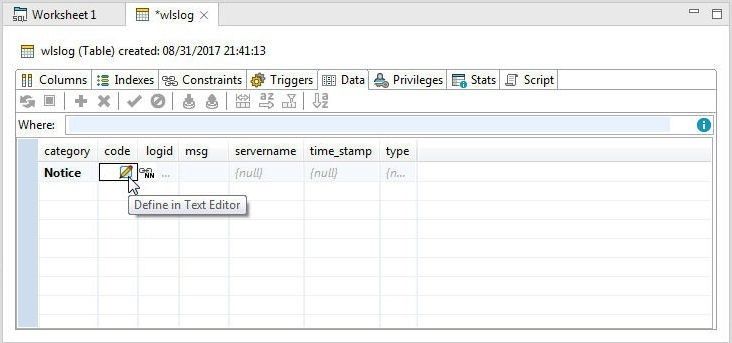
Figure 37. Column Data added for category Column
Specify data in the Text Editor and click on OK as shown in Figure 38.
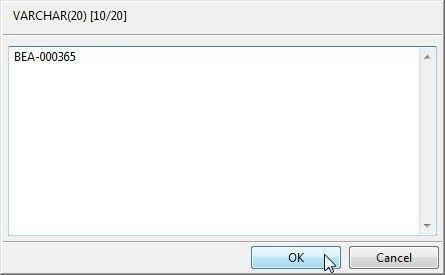
Figure 38. Adding Data in Text Editor
The code column data also gets added, as shown in Figure 39. Required columns are indicated by the (required) field text, as shown for the primary key column logid in Figure 39.
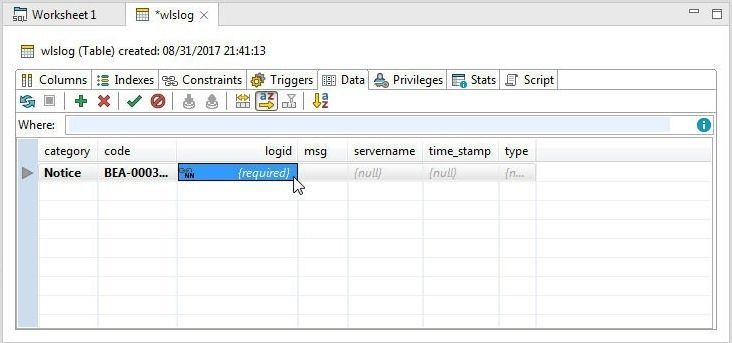
Figure 39. Required Column logid
Click on Define in Editor as shown in Figure 40.
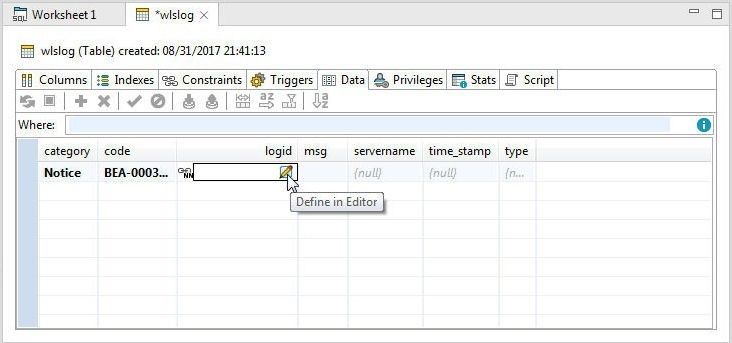
Figure 40. Define in Editor
Specify the logid in the Editor and click on OK as shown in Figure 41.
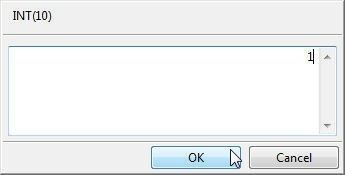
Figure 41. Adding logid in Editor
The logid gets added, as shown in Figure 42. Add the data in the msg column with Define in Text Editor as shown in Figure 42.
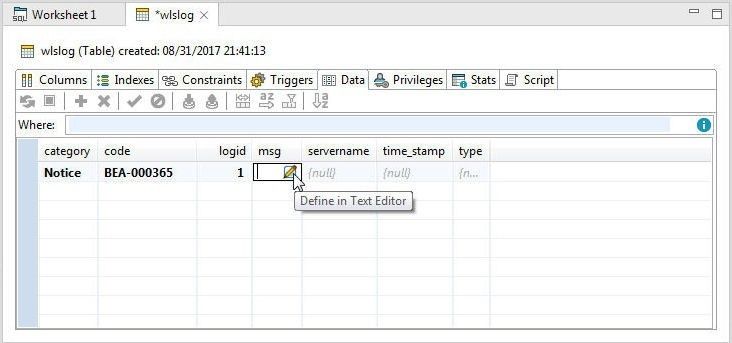
Figure 42. Adding data to msg Column with Define in Text Editor
In the Text Editor add the data and click on OK as shown in Figure 43.

Figure 43. Adding Data in Text Editor
Similarly, add data in the other columns in the first row as shown in Figure 44.

Figure 44. Adding a Row of Data
To refresh the data, right-click on the row and select Refresh as shown in Figure 45.
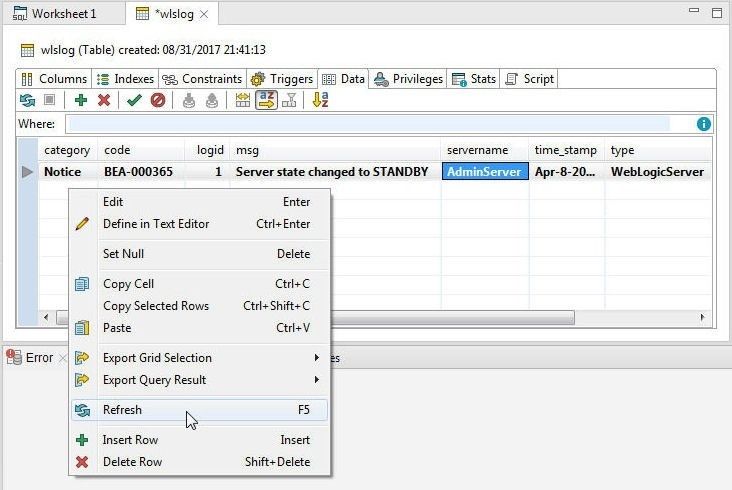
Figure 45. Refresh
Because Auto Commit is ON by default, the row of data gets committed with Refresh and the one row of data gets fetched, as shown in Figure 46.
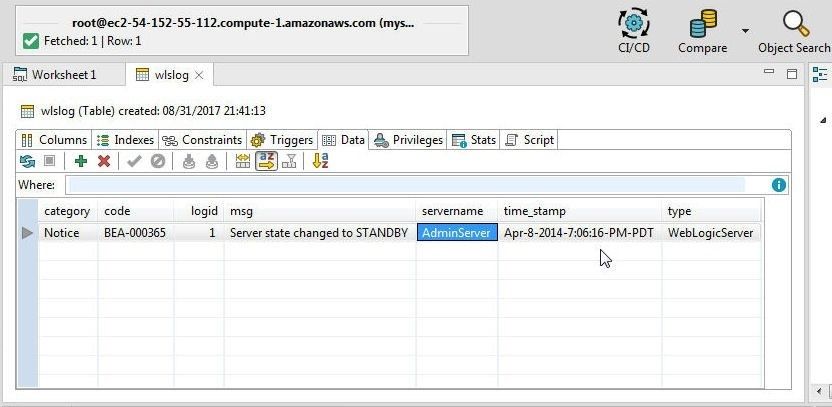
Figure 46. One row of Data Committed and Fetched
To add the second row of data, right-click below the first row of data and select Insert Row as shown in Figure 47.
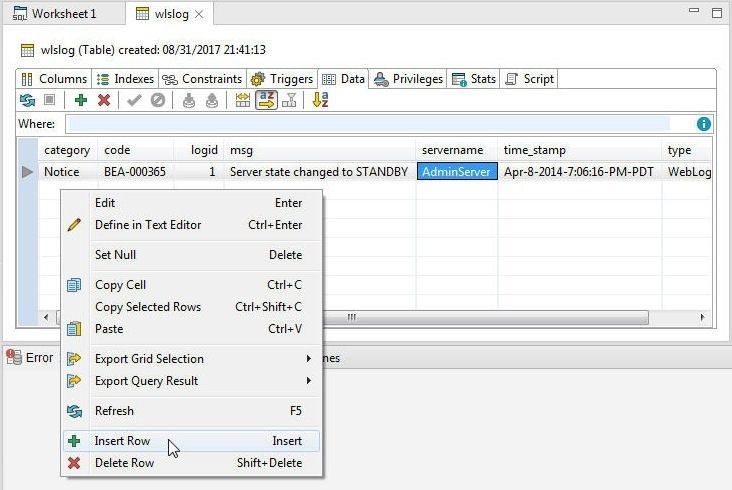
Figure 47. Insert Row
An empty (null value) row gets added, as shown in Figure 48.
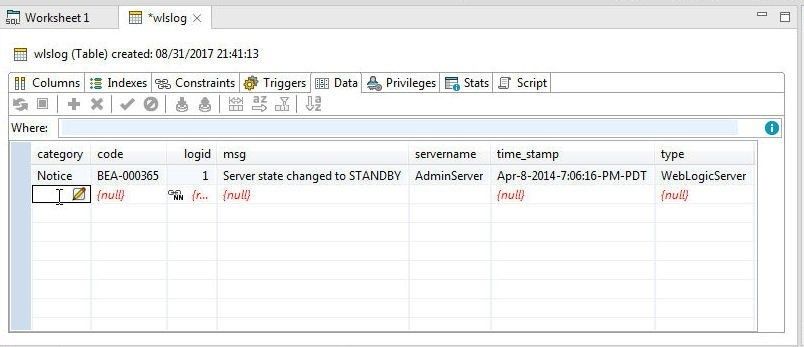
Figure 48. An empty Row Added
Adding data to the second and subsequent rows is simplified by providing the data-assist feature. If the column data is the same as a previous row’s column data the data may be selected from the data-assist drop-down, as shown in Figure 49.
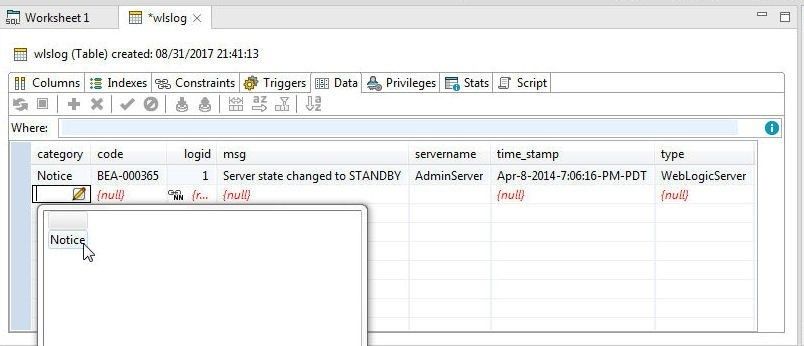
Figure 49. Selecting Data from Data-Assist Drop-Down
Similarly, add data using data-assist for the code column as shown in Figure 50.
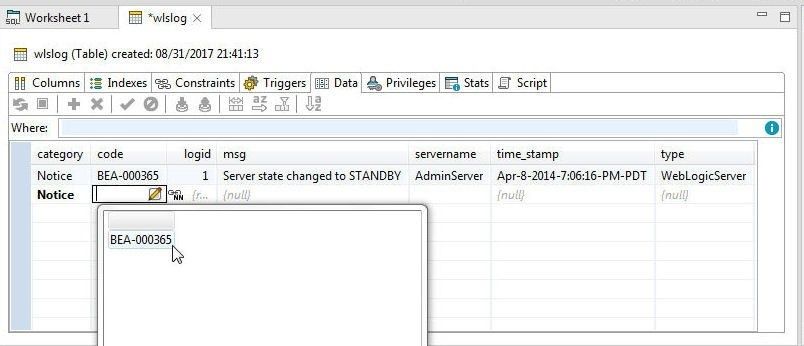
Figure 50. Adding Data to the Code Column with Data Assist
The logid is a unique field, being the primary key field, and the data assist is not available for it, but column data may be added using an Editor, as shown in Figure 51.
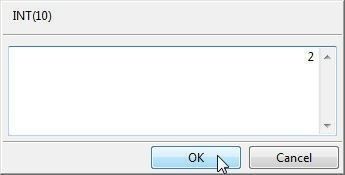
Figure 51. Adding Logid for 2nd Row in an Editor
If the column value is different, the data assist cannot be used, as for the msg column, and new data must be added either directly in the column or with Define in Text Editor, as shown in Figure 52.
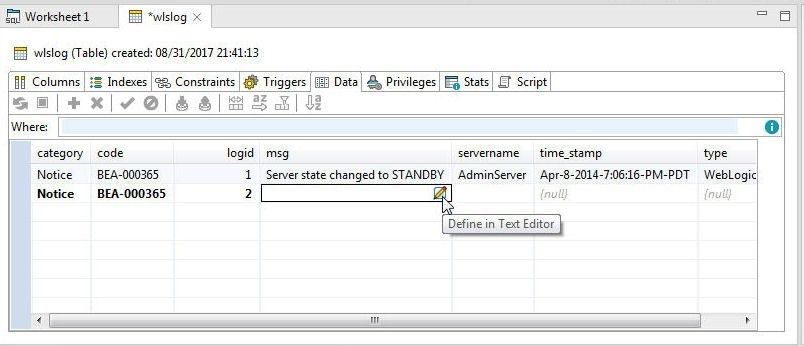
Figure 52. Define in Text Editor for a Field with a Different Value
Add field value in the Text Editor and click on OK as shown in Figure 53.
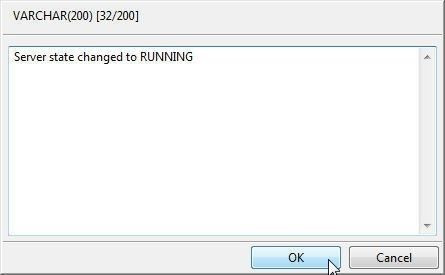
Figure 53. Adding Data in Text Editor
Similarly, add column values for the other columns. To commit and fetch the data right-click on the row and select Refresh as shown in Figure 54.
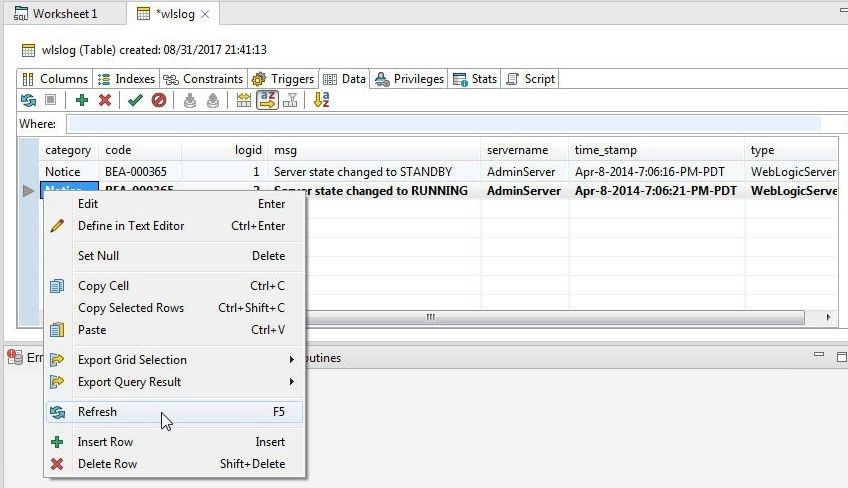
Figure 54. Refreshing 2nd Row
The second row data gets refreshed, as shown in Figure 55.
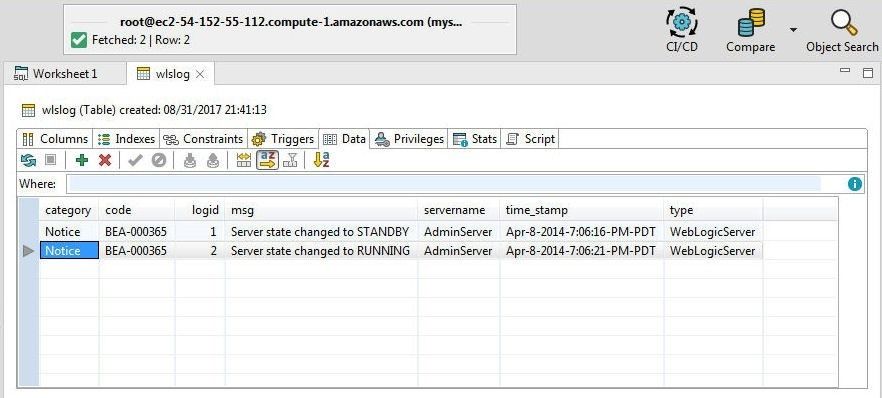
Figure 55. Displaying Table Data
Table data may be refreshed with the refresh button in the table toolbar, as shown in Figure 56.

Figure 56. Refresh Button in the Toolbar
The wlslog table view with the data added and the Connections and Object Explorer views is shown in Figure 57.
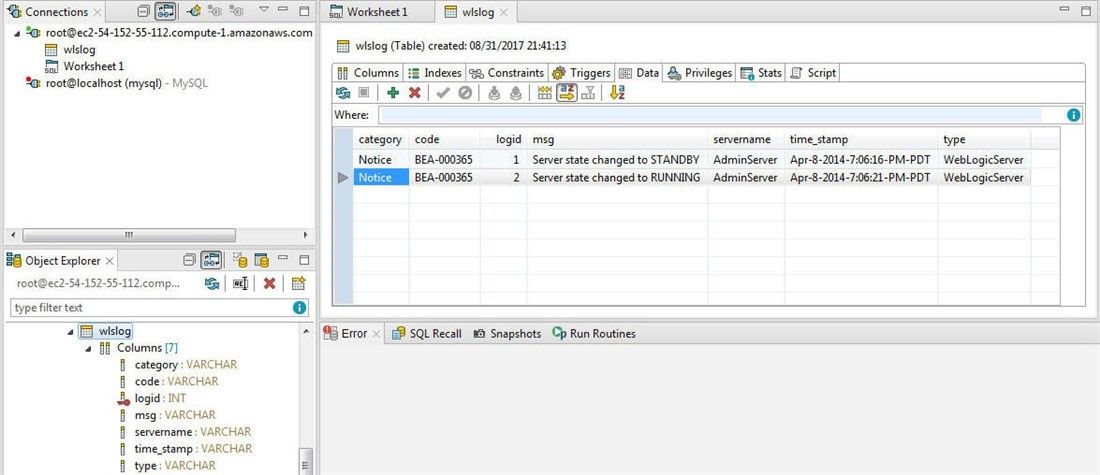
Figure 57. The wlslog Table View including Connections and Object Explorer Views
Exporting the SQL Script
To export the SQL script (the CREATE TABLE script) right-click on the table in the Object Explorer>Databases>mysql>Tables>wlslog and select Export Script as shown in Figure 58.
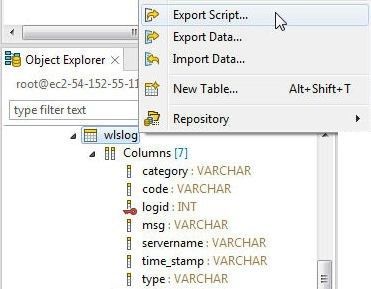
Figure 58. Object Explorer>Databases>mysql>Tables>wlslog >Export Script
In the Export Script wizard select Destination for Exported Script from one of the three options (Worksheet, Clipboard, and Single File) as shown in Figure 59. Select options from the Script Options. The Script Preview displays the SQL script that shall get exported. Click on Finish to export the SQL script.
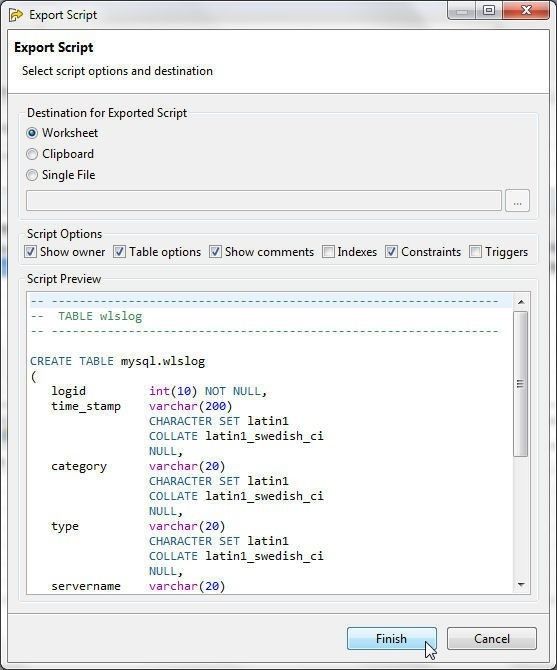
Figure 59. Export Script
The SQL Script gets exported to a Worksheet. If the SQL Script is to be exported to a file, select Destination for Exported Script as Single File and click on the browse button to select an external file as shown in Figure 60.
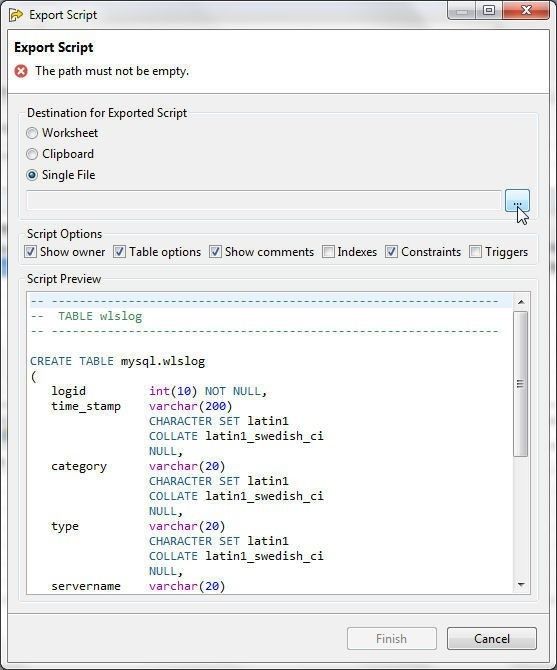
Figure 60. Using the Single File Option
Select a file path as shown in Figure 61 and click on Finish as shown in Figure 61.
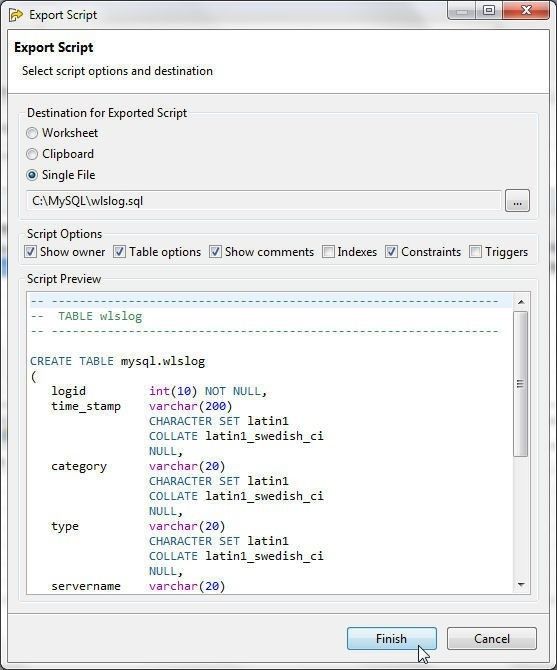
Figure 61. Exporting SQL Script to a Single File
If the SQL Script gets exported the Script Export Finished dialog gets displayed, as shown in Figure 62.
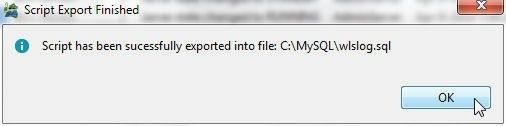
Figure 62. Script Export Finished
The SQL Script exported is listed.
-- ----------------------------------------------------------------
--  TABLE wlslog
-- ----------------------------------------------------------------

CREATE TABLE mysql.wlslog
(
   logid         int(10) NOT NULL,
   time_stamp    varchar(200)
                 CHARACTER SET latin1
                 COLLATE latin1_swedish_ci
                 NULL,
   category      varchar(20)
                 CHARACTER SET latin1
                 COLLATE latin1_swedish_ci
                 NULL,
   type          varchar(20)
                 CHARACTER SET latin1
                 COLLATE latin1_swedish_ci
                 NULL,
   servername    varchar(20)
                 CHARACTER SET latin1
                 COLLATE latin1_swedish_ci
                 NULL,
   code          varchar(20)
                 CHARACTER SET latin1
                 COLLATE latin1_swedish_ci
                 NULL,
   msg           varchar(200)
                 CHARACTER SET latin1
                 COLLATE latin1_swedish_ci
                 NULL,
   PRIMARY KEY(logid)
)
ENGINE InnoDB
COLLATE 'latin1_swedish_ci'
ROW_FORMAT DEFAULT;
Exporting Table Data
To export table data right-click on the Object Explorer>Databases>mysql>Tables>wlslog>Export Data as shown in Figure 63.
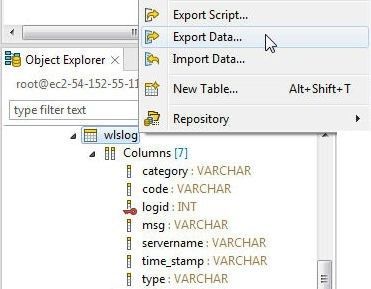
Figure 63. Object Explorer>Databases>mysql>Tables>wlslog>Export Data
In the Export Data wizard select the table/s to export as shown in Figure 64 and click on Next.
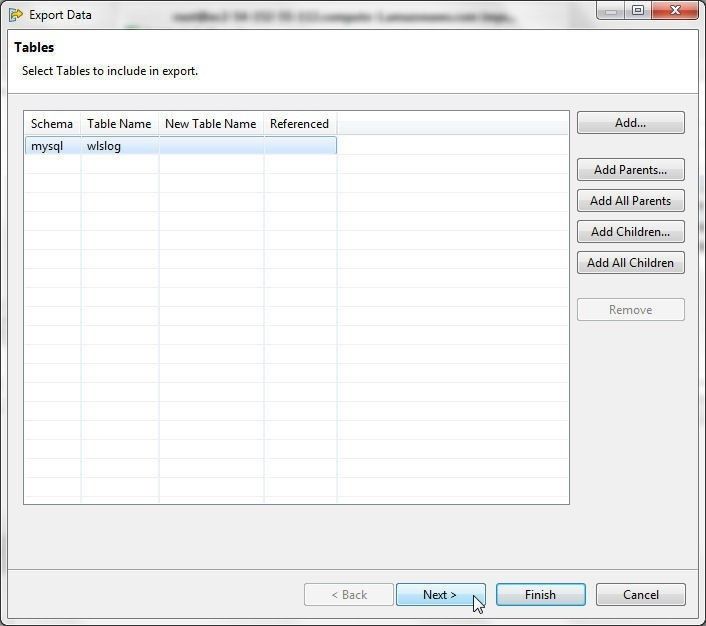
Figure 64. Selecting Tables to Export
In Destination and Format select one of the export formats from the Export As listing. Select the default format CSV as shown in Figure 65. The Line Terminator is Environmental Default. The Destination for Exported Data has three options: Worksheet, Clipboard and Single File; the Worksheet is the default. Click on Next.
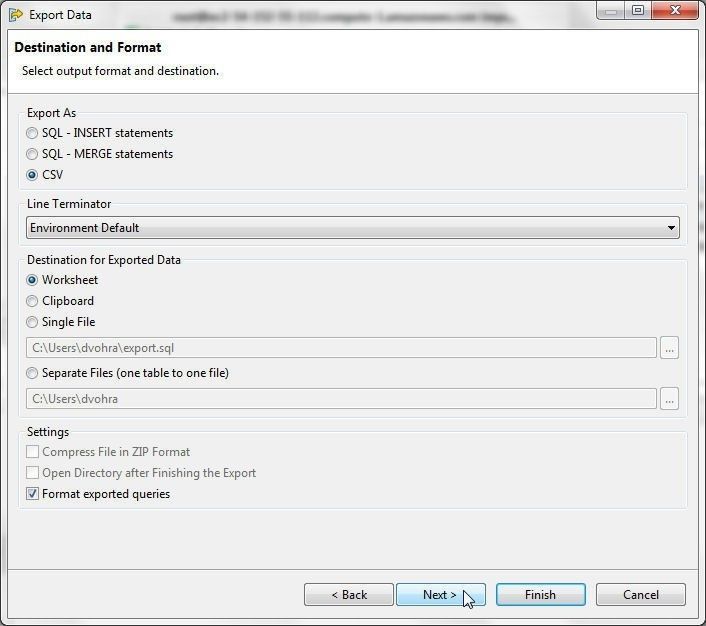
Figure 65. Selecting Tables to Export
In Excluded Data Types, the data types to exclude in the export may be selected, as shown in Figure 66. By default none of the data types are excluded from the export. Click on Next.
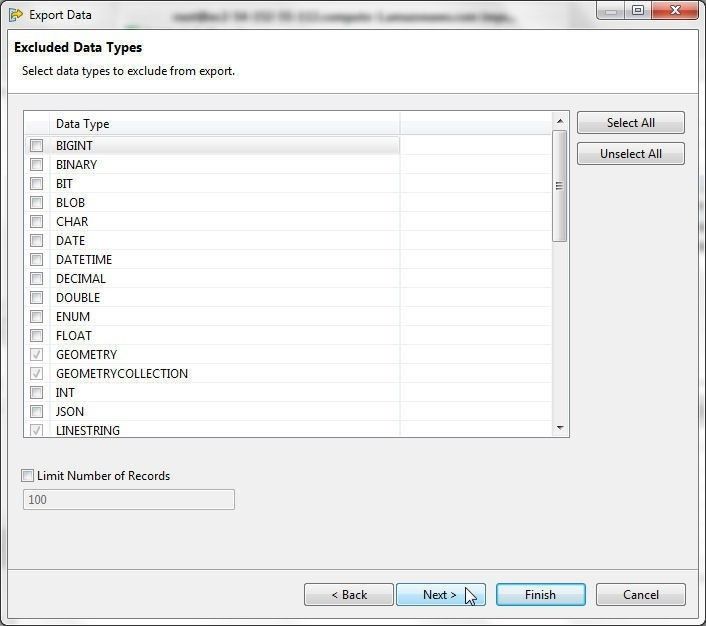
Figure 66. Excluded Data Types
Next, select columns to include in the export as shown in Figure 67. By default all columns are selected. Click on Next.
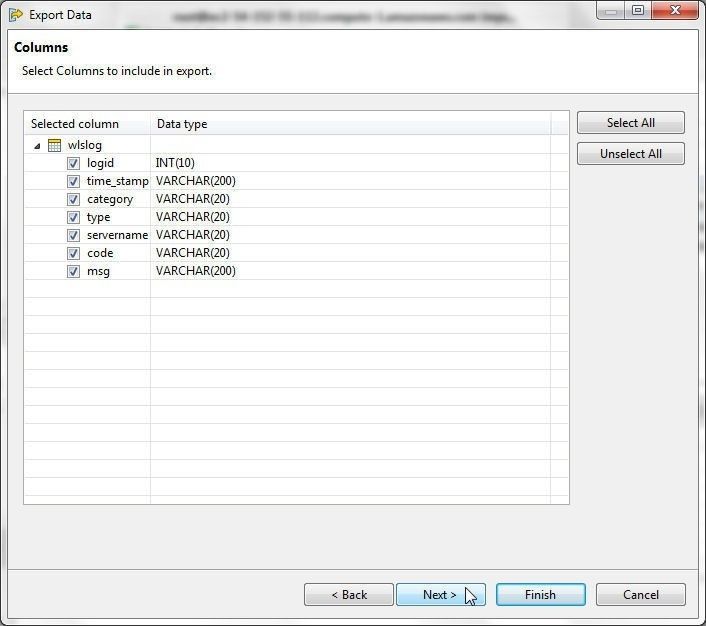
Figure 67. Selecting Columns to Include in Import
In SQL Settings the Data Format Preview is displayed, as shown in Figure 68. Click on Finish.
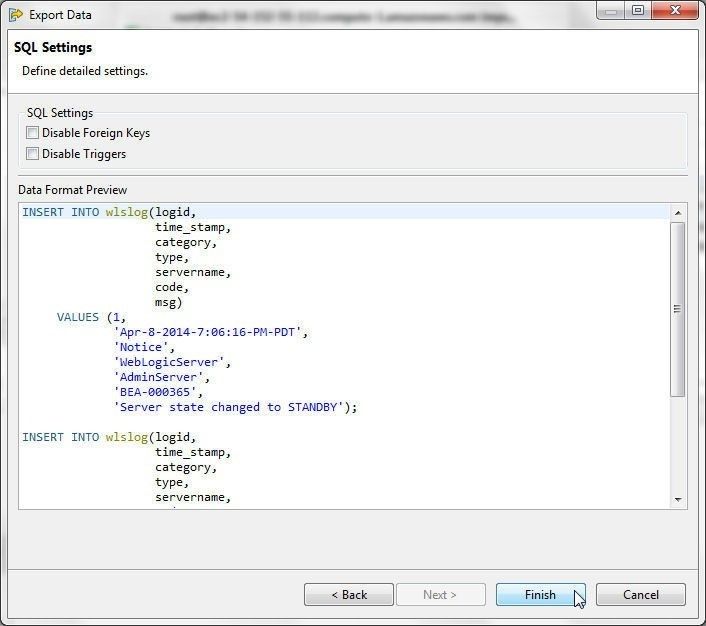
Figure 68. SQL Settings
The table data gets exported to a Worksheet as DML statements, as shown in Figure 69.
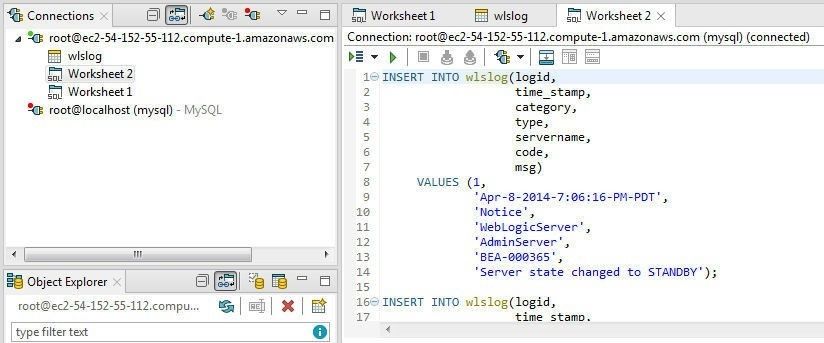
Figure 69. Table Data Exported as DML Statements to a Worksheet
If table data is to be exported to a file, designate Destination for Exported Data as Single File, select a file path, and click on Next as shown in Figure 70.
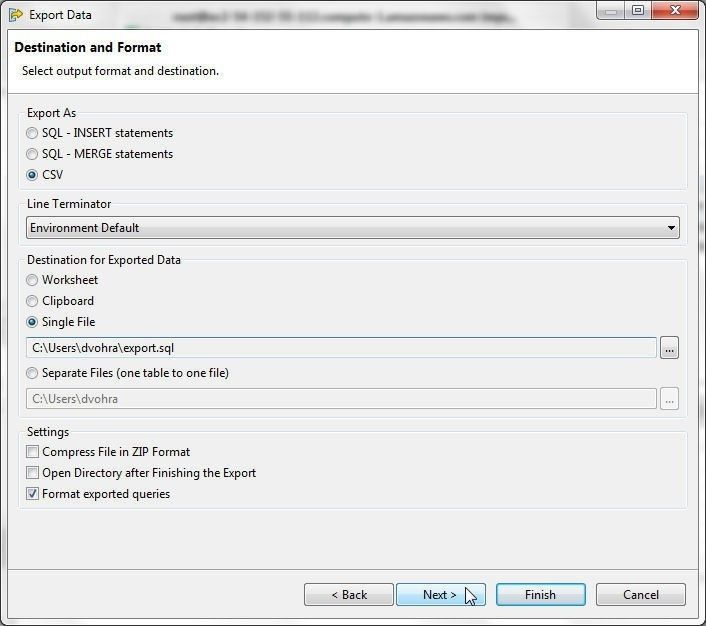
Figure 70. Exporting to a Single File
The subsequent procedure is the same (Figure 66, Figure 67, Figure 68) as for exporting to a Worksheet. The Export Data finished dialog gets displayed when the export is complete, as shown in Figure 71. Click on OK.
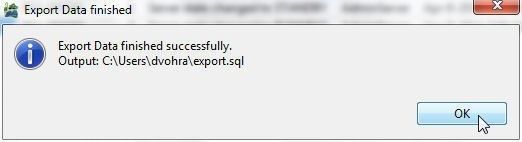
Figure 71. Export Data Finished
The data exported to the export.sql file is listed:
INSERT INTO wlslog(logid,
                   time_stamp,
                   category,
                   type,
                   servername,
                   code,
                   msg)
     VALUES (1,
             'Apr-8-2014-7:06:16-PM-PDT',
             'Notice',
             'WebLogicServer',
             'AdminServer',
             'BEA-000365',
             'Server state changed to STANDBY');

INSERT INTO wlslog(logid,
                   time_stamp,
                   category,
                   type,
                   servername,
                   code,
                   msg)
     VALUES (2,
             'Apr-8-2014-7:06:21-PM-PDT',
             'Notice',
             'WebLogicServer',
             'AdminServer',
             'BEA-000365',
             'Server state changed to RUNNING');
COMMIT;
Conclusion
In this tutorial we discussed some of the other features in Toad Edge not discussed in earlier tutorials, including using SSH to connect to MySQL database, adding table data with Insert Row, exporting SQL Script, and exporting table data. Toad Edge 1.1 is an integrated development environment (IDE) for accessing and managing MySQL database.
Want to learn more?User guide: Access the Toad Edge User Guide. Product page: Click the following link to watch a video on our product page and learn how Toad Edge can help you simplify development and management tasks for open source databases. Blog: 7 hacks to use Toad Edge like a boss Blog: 5 blogs that teach you to effectively work in Toad Edge®
Try Toad Edge free for 30 daysFree 30-day trial of Toad Edge Already in a trial? If Toad Edge has helped you ramp up on open source RDBMSs fast, buy it now or contact a sales representative. |
Start the discussion at forums.toadworld.com