Introduction
Virtualization is one of the core assets of today’s data center infrastructure. The benefits and capabilities of virtualization are driving organizations towards virtualization technologies. Virtualization offers efficient utilization of hardware; we can isolate workloads by designating multiple virtual servers on the same hardware.
Organizations are moving to the cloud for hosting their application services. Any business application requires an operating system to run its services and for efficient utilization of hardware virtualization is used to divide a physical server into multiple virtual servers. Virtualization has a major role in cloud services.
Multiple virtualization technologies are currently available in the market. Each operating system has its own virtualization technology and there are companies that offer bare-metal virtualization services; to name a few, VMware, Xen and OracleVM.
In this article, we will discuss Linux Containers (LXC) and Dockers, and how these technologies can help us isolate enterprise workloads.
Linux Containers (LXC)
Linux containers are a built-in, lightweight virtualization technology provides the ability to run multiple isolated Linux virtual machines on a single server. The major benefit of Linux containers is that they let you run the full copy of Linux operating system inside a system container without the overhead of a level-2 hypervisor such as VMware.
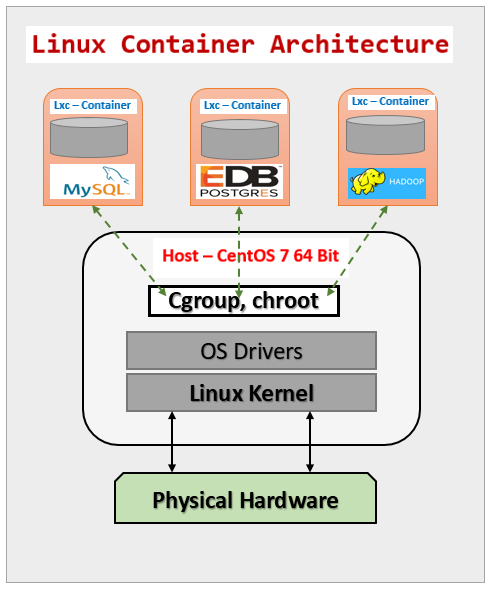
Linux containers share the kernel with the host and hence all files and processes from containers are visible to the host. However, there are certain limitations with respect to modules/drivers inside the containers.
The core components of Linux containers is “cgroup”(control groups) and “namespace”. cgroup has capabilities for partitioning/dividing the system resources that can be assigned to containers based on business requirements.
Benefits of Linux Containers:
1- Lightweight built-in virtualization
2- Application/server isolation
3- Easy deployment and management
4- No additional licensing
Weaknesses of Linux Containers:
1- Locked into the host kernel
2- Supported only on Linux
In this article, we are not going to deep-dive about container technology. I’ll simply provide a brief introduction to Linux containers and how we can use them in our real-world environments.
This article will illustrate how we can configure the Linux container and install Enterprise DB PostgreSQL inside a Linux container.
Environment details
Host Server – CentOS 7 (64 Bit)
Database – Enterprise Database/PostgreSQL 9.6 (EDB)
Assumption:
1- CentOS 7 with GUI is already installed as a host server
2- Local (or) public YUM repository configured
High-Level Installation Plan
- Install required OS packages (rpm’s) for container
- Verify the container service
- Create CentOS container
- Start/stop container from host
- Complete OS prerequisites for EDB/PostgreSQL
- Install EDB/PostgreSQL
- Connect to Database
1. Install required OS packages (rpm’s) for container:
Some specific packages are required for the creation of containers. These packages are not installed by default. After installation of these rpm packages, we can create a Linux Container (LXC)
Check the packages:
[root@racdb1 ~]# rpm -qa | grep btrfs
[root@racdb1 ~]# rpm -qa | grep lxc
[root@racdb1 ~]# rpm -qa | grep wget
wget-1.12-1.4.el6.x86_64
[root@racdb1 ~]#
If any one of the above rpm’s is not available then we must install it. Here in our case, “btrfs” & “lxc” are missing.
[root@localhost ~]# rpm -qa | grep lxc
[root@localhost ~]# yum install lxc
Loaded plugins: fastestmirror, langpacks
Loading mirror speeds from cached hostfile
 * base: mirrors.daskal.co.il
 * epel: epel.scopesky.iq
 * extras: centos.aumix.net
 * updates: centos.aumix.net
Resolving Dependencies
--> Running transaction check
---> Package lxc.x86_64 0:1.0.10-2.el7 will be installed
--> Processing Dependency: lua-lxc(x86-64) = 1.0.10-2.el7 for package: lxc-1.0.10-2.el7.x86_
………..
…………
  Verifying  : lua-filesystem-1.6.2-2.el7.x86_64                                   4/5
  Verifying  : lxc-libs-1.0.10-2.el7.x86_64                                        5/5

Installed:
  lxc.x86_64 0:1.0.10-2.el7

Dependency Installed:
  lua-alt-getopt.noarch 0:0.7.0-4.el7        lua-filesystem.x86_64 0:1.6.2-2.el7
  lua-lxc.x86_64 0:1.0.10-2.el7              lxc-libs.x86_64 0:1.0.10-2.el7

Complete!
[root@localhost ~]#
We should also install templates for Linux containers; there are preconfigured container templates available for various operating systems. In this article we will use the CentOS template.
[root@localhost ~]# yum install lxc-templates
Loaded plugins: fastestmirror, langpacks
Loading mirror speeds from cached hostfile
 * base: mirrors.daskal.co.il
 * epel: epel.scopesky.iq
 * extras: centos.aumix.net
 * updates: centos.aumix.net
Resolving Dependencies
--> Running transaction check
---> Package lxc-templates.x86_64 0:1.0.10-2.el7 will be installed
--> Finished Dependency Resolution

Dependencies Resolved

=======================================================================================
 Package                 Arch             Version                 Repository      Size
=======================================================================================
Installing:
 lxc-templates           x86_64           1.0.10-2.el7            epel            81 k

Transaction Summary
=======================================================================================
Install  1 Package

Total download size: 81 k
Installed size: 332 k
Is this ok [y/d/N]: y
Downloading packages:
lxc-templates-1.0.10-2.el7.x86_64.rpm                           |  81 kB  00:00:01
Running transaction check
Running transaction test
Transaction test succeeded
Running transaction
  Installing : lxc-templates-1.0.10-2.el7.x86_64                                   1/1
  Verifying  : lxc-templates-1.0.10-2.el7.x86_64                                   1/1

Installed:
  lxc-templates.x86_64 0:1.0.10-2.el7

Complete!
[root@localhost ~]#
Once the packages are installed, we should verify the Linux container service.
2. Verify the container service
We can use the “systemctl” command from super user to verify the container service. By default, after installation the container service will be started. If it does not start automatically, we should enable the service and start it manually.
[root@localhost ~]# systemctl start libvirtd
[root@localhost ~]# systemctl status libvirtd
● libvirtd.service - Virtualization daemon
   Loaded: loaded (/usr/lib/systemd/system/libvirtd.service; enabled; vendor preset: enabled)
   Active: active (running) since Mon 2017-08-21 14:14:24 AST; 1s ago
     Docs: man:libvirtd(8)
           http://libvirt.org
 Main PID: 3700 (libvirtd)
   CGroup: /system.slice/libvirtd.service
           ├─1570 /sbin/dnsmasq --conf-file=/var/lib/libvirt/dnsmasq/default.conf --...
           ├─1577 /sbin/dnsmasq --conf-file=/var/lib/libvirt/dnsmasq/default.conf --...
           └─3700 /usr/sbin/libvirtd

Aug 21 14:14:24 localhost.localdomain systemd[1]: Starting Virtualization daemon...
Aug 21 14:14:24 localhost.localdomain systemd[1]: Started Virtualization daemon.
Aug 21 14:14:24 localhost.localdomain dnsmasq[1570]: read /etc/hosts - 2 addresses
Aug 21 14:14:24 localhost.localdomain dnsmasq[1570]: read /var/lib/libvirt/dnsmasq/...s
Aug 21 14:14:24 localhost.localdomain dnsmasq-dhcp[1570]: read /var/lib/libvirt/dnsm...
Hint: Some lines were ellipsized, use -l to show in full.
[root@localhost ~]#
The service “libvirtd” is up and running. This service is responsible for communicating with the host kernel.
3. Create CentOS container
In this section we will see how to create a simple container based on that CentOS template, and later in this article we will see how we can install EDB PostgreSQL inside this container. We will create our Linux container with name PEDB01.
Check the available templates:
By default all templates are located under the directory “/usr/share/lxc/templates/”
[root@localhost ~]# ls -alh /usr/share/lxc/templates/
total 344K
drwxr-xr-x. 2 root root 4.0K Aug 21 14:36 .
drwxr-xr-x. 6 root root  106 Aug 21 14:12 ..
-rwxr-xr-x. 1 root root  11K Jun 10 15:03 lxc-alpine
-rwxr-xr-x. 1 root root  14K Jun 10 15:03 lxc-altlinux
-rwxr-xr-x. 1 root root  11K Jun 10 15:03 lxc-archlinux
-rwxr-xr-x. 1 root root 9.5K Jun 10 15:03 lxc-busybox
-rwxr-xr-x. 1 root root  29K Jun 10 15:03 lxc-centos
-rwxr-xr-x. 1 root root  11K Jun 10 15:03 lxc-cirros
-rwxr-xr-x. 1 root root  18K Jun 10 15:03 lxc-debian
-rwxr-xr-x. 1 root root  18K Jun 10 15:03 lxc-download
-rwxr-xr-x. 1 root root  49K Jun 10 15:03 lxc-fedora
-rwxr-xr-x. 1 root root  28K Jun 10 15:03 lxc-gentoo
-rwxr-xr-x. 1 root root  14K Jun 10 15:03 lxc-openmandriva
-rwxr-xr-x. 1 root root  14K Jun 10 15:03 lxc-opensuse
-rwxr-xr-x. 1 root root  35K Jun 10 15:03 lxc-oracle
-rwxr-xr-x. 1 root root  12K Jun 10 15:03 lxc-plamo
-rwxr-xr-x. 1 root root 6.7K Jun 10 15:03 lxc-sshd
-rwxr-xr-x. 1 root root  24K Jun 10 15:03 lxc-ubuntu
-rwxr-xr-x. 1 root root  12K Jun 10 15:03 lxc-ubuntu-cloud
[root@localhost ~]#
We will use the “lxc-centos” template in this demonstration.
Creation of container PEDB01:
[root@localhost ~]# lxc-create -n PEDB01 btrfs -t centos
Host CPE ID from /etc/os-release: cpe:/o:centos:centos:7
Checking cache download in /var/cache/lxc/centos/x86_64/7/rootfs ...
Downloading CentOS minimal ...
Trying other mirror.
base                                                                                             | 3.6 kB  00:00:00
updates                                                                                          | 3.4 kB  00:00:00
Determining fastest mirrors
 * base: mirrors.daskal.co.il
 * updates: centose5.centos.org
Resolving Dependencies
--> Running transaction check
---> Package chkconfig.x86_64 0:1.7.2-1.el7_3.1 will be installed
--> Processing Dependency: rtld(GNU_HASH) for package: chkconfig-1.7.2-1.el7_3.1.x86_64
--> Processing Dependency: libpopt.so.0(LIBPOPT_0)(64bit) for package: chkconfig-1.7.2-1.el7_3.1.x86_64
--> Processing Dependency: libc.so.6(GLIBC_2.8)(64bit) for package: chkconfig-1.7.2-1.el7_3.1.x86_64
…………………….
……………..
Copy /var/cache/lxc/centos/x86_64/7/rootfs to /var/lib/lxc/PEDB01/rootfs ...
Copying rootfs to /var/lib/lxc/PEDB01/rootfs ...
sed: can't read /var/lib/lxc/PEDB01/rootfs/etc/init/tty.conf: No such file or directory
Storing root password in '/var/lib/lxc/PEDB01/tmp_root_pass'
Expiring password for user root.
passwd: Success
sed: can't read /var/lib/lxc/PEDB01/rootfs/etc/rc.sysinit: No such file or directory
sed: can't read /var/lib/lxc/PEDB01/rootfs/etc/rc.d/rc.sysinit: No such file or directory
Container rootfs and config have been created. Edit the config file to check/enable networking setup. The temporary root password is stored in:
'/var/lib/lxc/PEDB01/tmp_root_pass'
The root password is set up as expired and will require it to be changed at first login, which you should do as soon as possible. If you lose the root password or wish to change it without starting the container, you can change it from the host by running the following command (which will also reset the expired flag):
chroot /var/lib/lxc/PEDB01/rootfs passwd
Once the container is created it will create a temporary password for root; this password will be stored in the file “/var/lib/lxc/PEDB01/tmp_root_pass”. You will be prompted to change the password at first login.
Once logged in we should verify that the container is working well without any issues. If there are no issues reported in the logs, we are ready to prepre for EDB Postgres installation.
4. Start/stop container from host
We must ensure that the container PEDB01 is stopping and starting without any issues before installing the database.
[root@localhost ~]#lxc-stop –name PEDB01
[root@localhost ~]#lxc-stop –name PEDB01
We can use commands lxc-stop and lxc-start for the stopping and starting of containers.
5. Complete OS prerequisites for EDB/PostgreSQL
EDB supports command line and GUI installation. We will be using the graphical interactive installer for installation of the database.
Every software installation has some prerequisites in order to install and function properly. In this section, we will see the prerequisites required for Enterprise DB
Configure SELINUX
Set selinux to be Permissive; if it’s set to Enforcing, the installation will fail. In our demo it’s already disabled so no action is needed.
[root@PEDB01 ~]# sestatus
SELinux status:                 disabled
[root@PEDB01 ~]#
If it is enabled in your environment you can change the value as below:
[root@localhost ~]# setenforce Permissive
Once the installation is completed, you can revert it back to Enforcing.
[root@localhost ~]#setenforce Enforcing
Install required rpm’s
GUI interactive installation of EDB PostgreSQL needs the “redhat-lsb” rpm installed for the GUI-based windows to work. If the yum repository is already configured then we can simply install this package using a yum command.
[root@PEDB01 ~]# yum install redhat-lsb
Loaded plugins: fastestmirror
Loading mirror speeds from cached hostfile
 * base: mirror.isoc.org.il
 * extras: centosn4.centos.org
 * updates: mirror.isoc.org.il
Resolving Dependencies
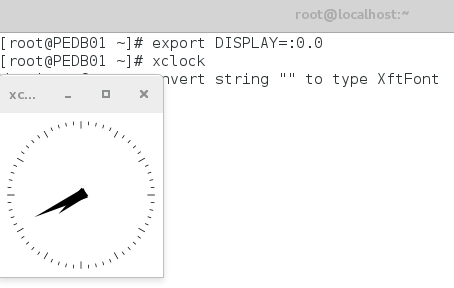
xhost is also required for running gui windows. Make sure its already installed inside container.
[root@PEDB01 ~]# yum install xclock
Loaded plugins: fastestmirror
Loading mirror speeds from cached hostfile
 * base: mirror.isoc.org.il
 * extras: mirror.isoc.org.il
 * updates: mirror.isoc.org.il
Resolving Dependencies
There are unfinished transactions remaining. You might consider running yum-complete-
transaction, or "yum-complete-transaction --cleanup-only" and "yum history redo last",
first to finish them. If those don't work you'll have to try removing/installing packages
by hand (maybe package-cleanup can help).
The program yum-complete-transaction is found in the yum-utils package.
--> Running transaction check
---> Package xorg-x11-apps.x86_64 0:7.7-6.el7 will be installed
--> Finished Dependency Resolution
Enable GUI inside Linux container
By default, the GUI will not work inside the Linux container; some additional configuration is required for the GUI-based windows to work inside the containers.
Add the following lines in the PEDB01 config file for the display to work.
[root@localhost PEDB01]# pwd
/var/lib/lxc/PEDB01
[root@localhost PEDB01]# tail -10 config
#lxc.network.hwaddr = 00:16:3e:77:52:20
#    persistent veth device name on host side
#        Note: This may potentially collide with other containers of same name!
#lxc.network.veth.pair = v-PEDB01-e0
#######DISPLAY#####
lxc.mount.entry = tmpfs tmp tmpfs defaults
lxc.mount.entry = /dev/dri dev/dri none bind,optional,create=dir
lxc.mount.entry = /dev/snd dev/snd none bind,optional,create=dir
lxc.mount.entry = /tmp/.X11-unix tmp/.X11-unix none bind,optional,create=dir
lxc.mount.entry = /dev/video0 dev/video0 none bind,optional,create=file
[root@localhost PEDB01]#
After editing this file, we should restart the container.
Copy media inside container
We cannot directly copy media from outside into the container; we should first copy the media to the host server and from there we can copy the media to the container PEDB01. The container root filesystem will be located under “/var/lib/lxc/<container>/rootfs/”.
[root@localhost mnt]# pwd
/var/lib/lxc/PEDB01/rootfs/mnt
[root@localhost mnt]# mkdir sw_home
[root@localhost mnt]# cd sw_home/
[root@localhost sw_home]# pwd
/var/lib/lxc/PEDB01/rootfs/mnt/sw_home
[root@localhost sw_home]# cp -pr /run/media/root/EDB_96_Linux64/postgresql-9.6.4-1-linux-x64.run  .
[root@localhost sw_home]# ls
postgresql-9.6.4-1-linux-x64.run
[root@localhost sw_home]# pwd
/var/lib/lxc/PEDB01/rootfs/mnt/sw_home
[root@localhost sw_home]#
We have copied the software to PEDB01 “/mnt/sw_home” directory from the host media.
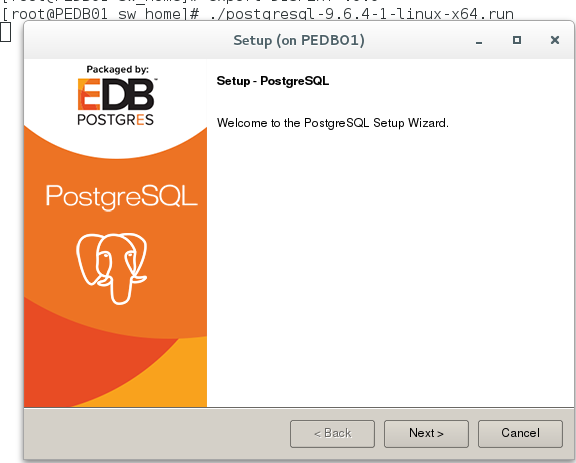
6. Installation of EDB/PostgreSQL
Once the preparation has completed successfully, we are ready to start the installation. Follow the GUI screens to complete the installation.
– Set the display variable and execute the installer:
This is the main welcome screen for the EDB installer:
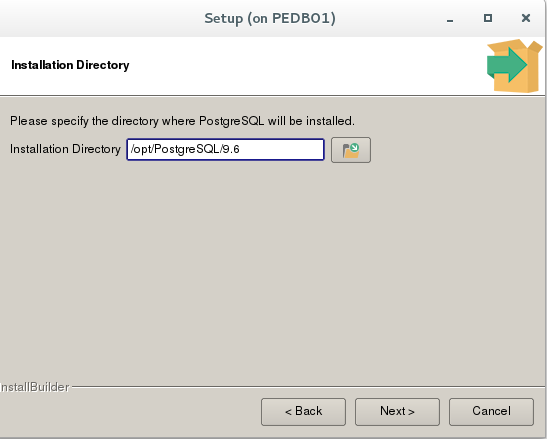
This is the directory where PostgreSQL software will be installed:
This is the directory of PostgreSQL datafiles:
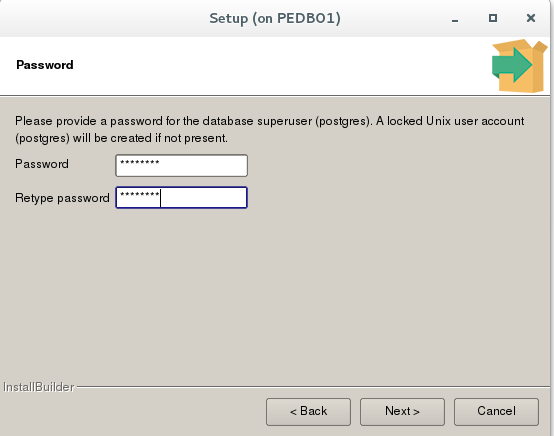
Provide the password; this password is required for connecting to the database, as shown below:
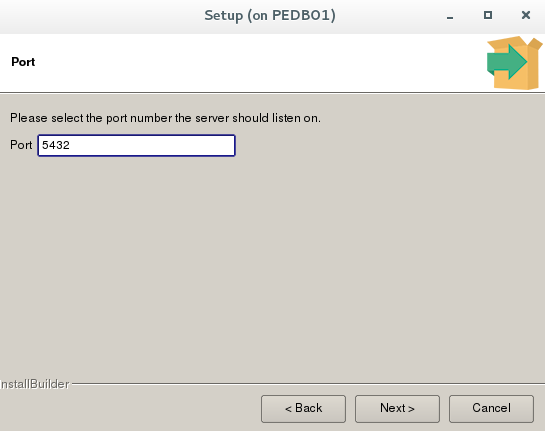
We should provide the communication port for the database: by default, the community version will listen on port 5432.
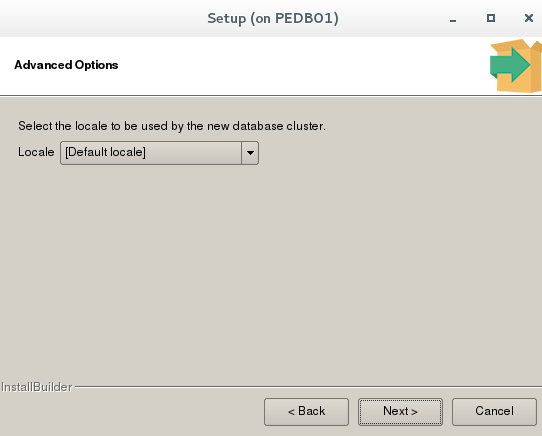
If needed we can select any other language as well:
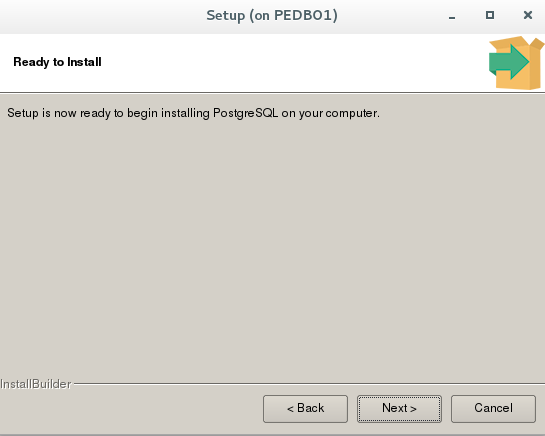
As shown below, the setup is ready to proceed with installation.
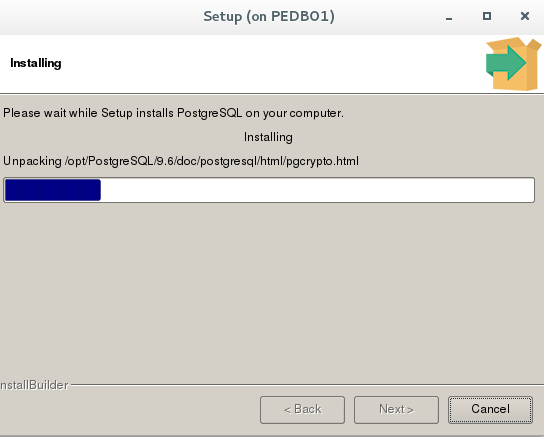
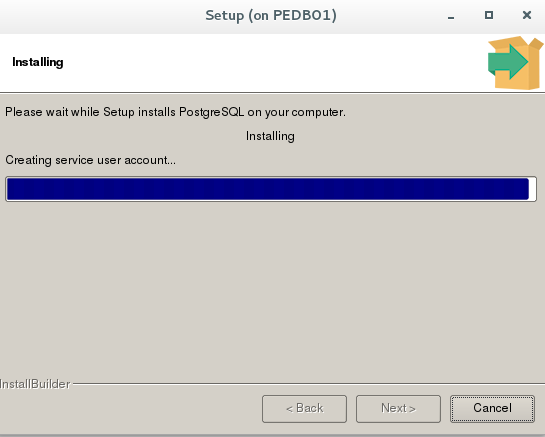
Installation progress (2 images):
Installation of PostgreSQL completed successfully, as shown below. We can launch “stack builder” from this window if any additional software needs to be installed, such as PEM, Migration toolkit, etc. otherwise, just uncheck the stack builder to close the installer.

The Installation of PostgreSQL completed successfully.
In this article, we have shown the installation of PostgreSQL packaged by EnterpriseDB. The Installation of PostgrePlus Advanced Server (PPAS) is identical; however, we need to provide product keys while installing PPAS.
7. Connect to the Database
The Installer will create an OS user account “postgres”. Which we should use to connect to the database. Before connecting to the database, we need to setup the environment variables as shown below:
[root@PEDB01 ~]# su - postgres
Last login: Tue Aug 22 14:52:08 AST 2017 on pts/6
-bash-4.2$ export PATH=/opt/PostgreSQL/9.6/bin:$PATH
-bash-4.2$ export PGDATA=/opt/PostgreSQL/9.6/data

-          Using psql command for connecting to the database:
-bash-4.2$ psql
Password:
psql.bin (9.6.4)
Type "help" for help.

postgres=# \
Invalid command \. Try \? for help.
postgres=# \l
                                  List of databases
   Name    |  Owner   | Encoding |   Collate   |    Ctype    |   Access privileges
-----------+----------+----------+-------------+-------------+-----------------------
 postgres  | postgres | UTF8     | en_US.UTF-8 | en_US.UTF-8 |
 template0 | postgres | UTF8     | en_US.UTF-8 | en_US.UTF-8 | =c/postgres          +
           |          |          |             |             | postgres=CTc/postgres
 template1 | postgres | UTF8     | en_US.UTF-8 | en_US.UTF-8 | =c/postgres          +
           |          |          |             |             | postgres=CTc/postgres
(3 rows)

postgres=#
Conclusion
In this article we discussed the built-in virtualization technology available in Linux operating systems. This article demonstrated using the open source CentOS flavor of Linux. Linux container (LXC) is available and supported by most of the enterprise Linux vendors. We have seen how easy and simple it is to deploy a Linux container. We have also seen how we can install the PostgreSQL database inside the Linux container. Linux containers are lightweight virtual machines that can help organizations to isolate databases and applications workload that are existing on the same physical hosts. Linux container is a best suit for creating the Development and Testing environments.
This article covers the creation of a Linux container and installation of PostgreSQL inside the Linux container. In future articles, we will see how we can communicate between one databases and another database/application running in another Linux container.
Start the discussion at forums.toadworld.com