Toad Data Point is a data preparation, analysis, and reporting tool with data access to several of the commonly used data sources. RDBMS databases is just one of the categories of data sources that may be accessed from Toad Data Point, the others being Toad data sources, File data sources, Business Intelligence data sources and NoSQL data sources. In this tutorial we shall discuss accessing Oracle, MySQL, and IBM DB2 databases from Toad Data Point. This tutorial has the following sections.
- Setting the Environment
- Creating a Connection with Oracle Database
- Creating a Connection with MySQL Database
- Creating a Connection with IBM DB2 Database
Setting the Environment
We have used Windows OS. Download the following software for this tutorial.
Oracle Database (XE 11g)
IBM DB2 (Version 10.x or 11.x)
Obtain the Oracle database service and instance information with the following command.
lsnrctl status
As shown in Figure 1, the xe service and instance are started. The HOST (dvohra-PC, which would be different for different users), PORT and SID information is also output.
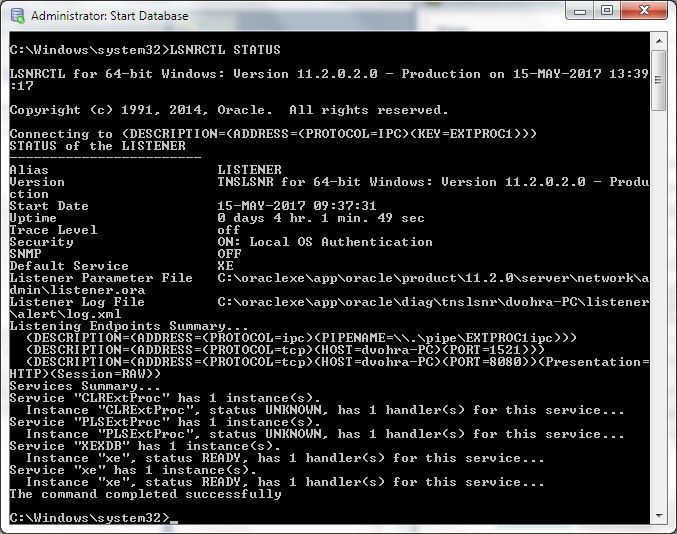
Figure 1. Obtaining the Oracle Database Instance Information
For the MySQL Database start the MySQL CLI to verify that the MySQL database is running. For DB2 create the SAMPLE database.
Creating a Connection with Oracle Database
Start Toad Data Point and click on Connect>New Connection as shown in Figure 2 to create a new connection with Oracle Database.

File 2. Connect>New Connection
From the list of data sources to select from, select Oracle as shown in Figure 3.
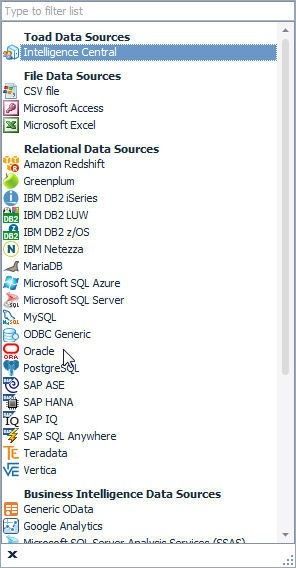
Figure 3. Selecting Oracle Data Source
In the Create New Connection select Database name as XE as shown in Figure 4.
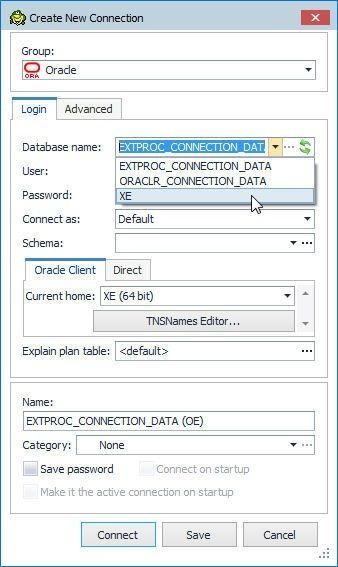
Figure 4. Selecting Database Name
Specify the User (OE) and the Password and set Connect as to Default. Click on TNSNames Editor to modify thetnsnames.ora file as shown in Figure 5.
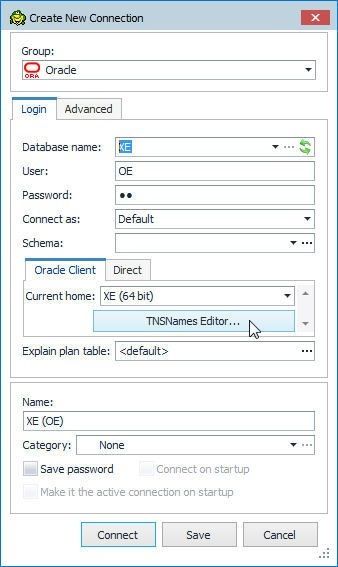
Figure 5. TNSNames.ora Editor
In the TNSNames Editor modify the tnsnames.ora file, which is located in the C:oraclexeapporacleproduct.2.0servernetworkADMIN directory to specify the HOST, PORT and SID, as shown in Figure 6. Set HOST, PORT and SID as obtained from the lsnrctl status command. Click on Save file. If the file does not get saved, the folder permissions for the C:oraclexe directory may need to be modified.

Figure 6. Modifying tnsnames.ora
Select a Category from Development, Production, Test and click on Connect as shown in Figure 7.
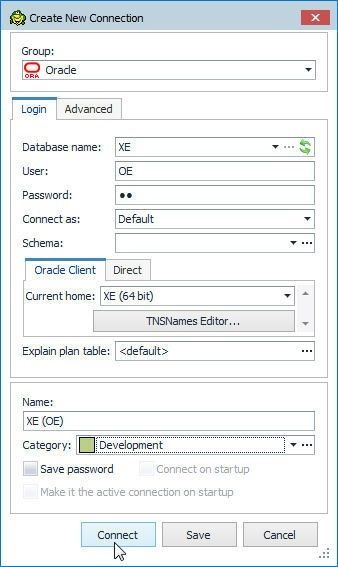
Figure 7. Connect
A connection to Oracle Database gets created and added to the Navigation Manager, as shown in Figure 8.
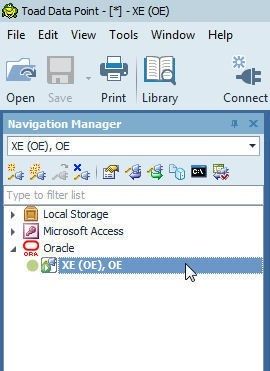
Figure 8. Connection created
The Object Explorer lists the database objects including Tables, as shown in Figure 9. Select a table (wlslog) and the table structure gets displayed.
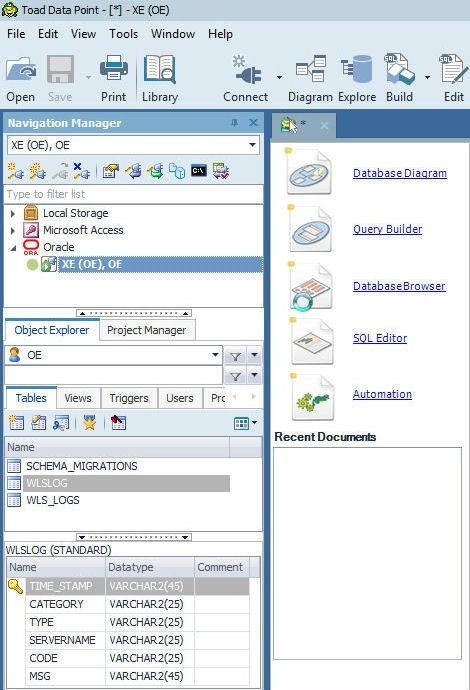
Figure 9. Object Explorer
With the WLSLOG table selected in Object Explorer, right-click on the connection and select New DB Explorer as shown in Figure 10.
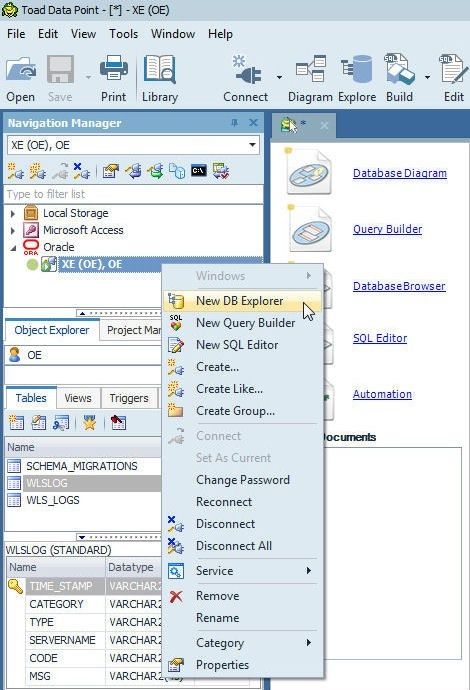
Figure 10. New DB Explorer
The DB Explorer gets started and displays the table detail in various tabs, the Columns tab being the default, as shown in Figure 11.
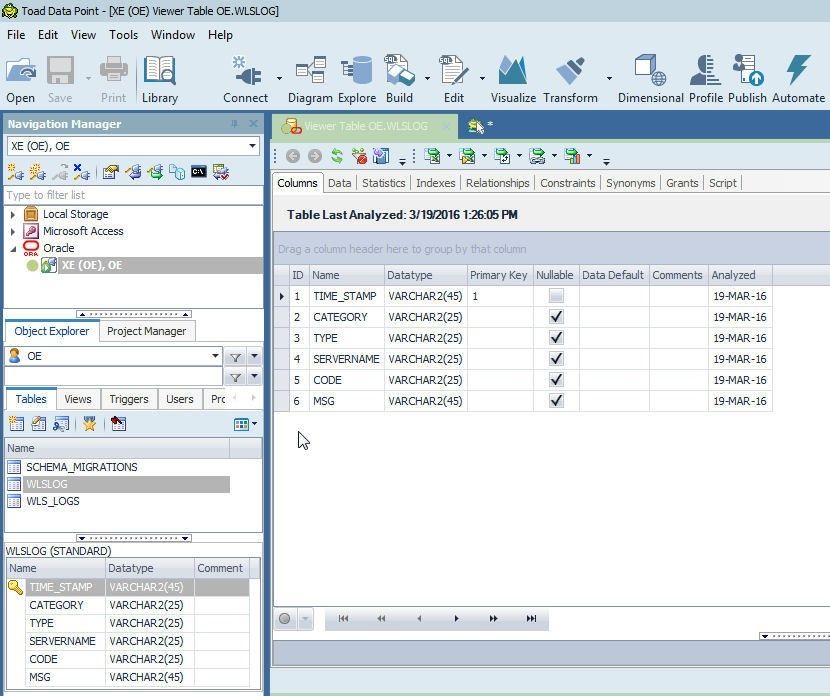
Figure 11. DB Explorer
Click on the Data tab to display the table data as shown in Figure 12.
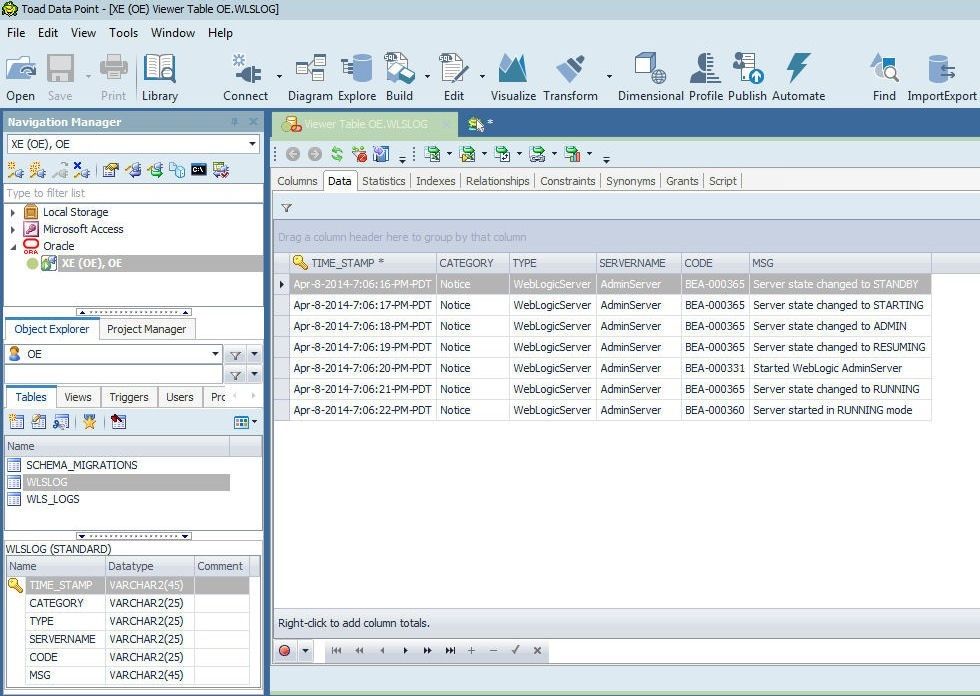
Figure 12. Table Data
To display a diagram for the tables and any related tables click on the Relationships tab. The table diagram gets displayed, as shown in Figure 13. The diagram may also be created with a right click on a table in Object Explorer and by subsequently selecting Diagram.
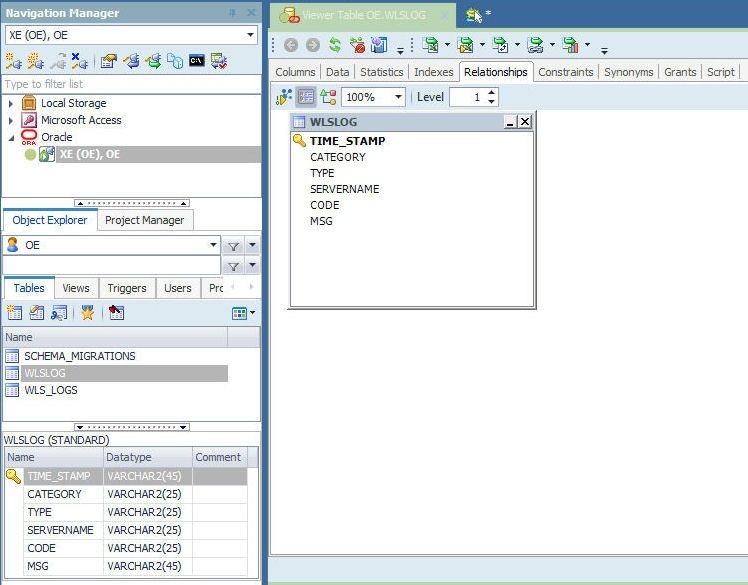
Figure 13. Table Diagram
The Query Builder is provided to build and run a query. Several options are available to open and use a Query Builder instance:
-Right-click on a table in Object Explorer and select Query Builder. The selected table gets added to the Query Builder.
– Right-click on the connection in Navigation Manager and select New Query Builder. No table is added by default in the Query Builder. Drag and drop tables and views from the Object Explorer and add to Query Builder.
Using the second option to query a table, right-click on the connection and select New Query Builder as shown in Figure 14.
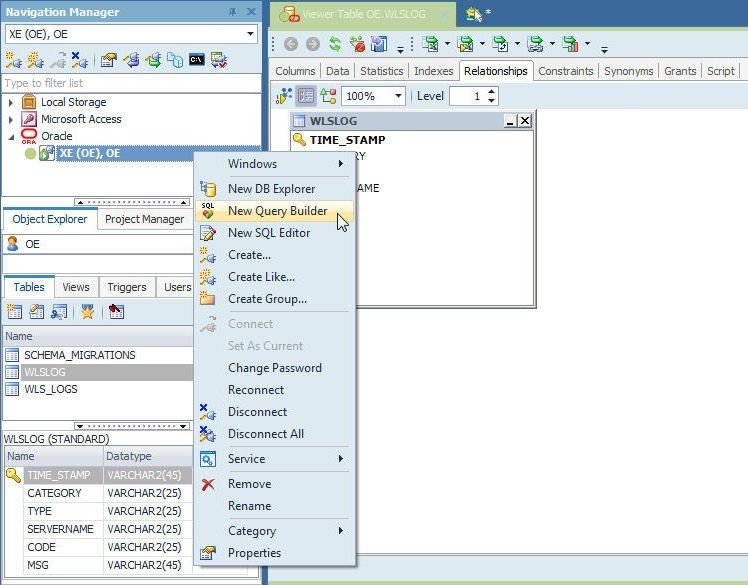
Figure 14. New Query Builder
Drag and drop the tables and views to be queried from the Object Explorer to the Query Builder. Add the wlslog table as shown in Figure 15.

Figure 15. Adding a table to the Query Builder
In the Query Builder select the columns to be included in the query as shown in Figure 16. Click on the Query tab to display the SQL query.
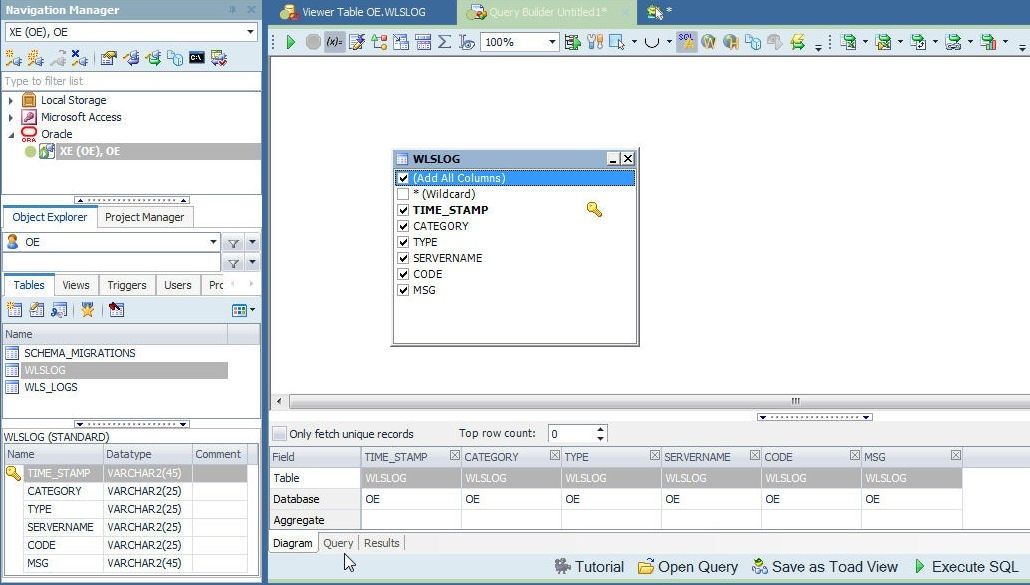
Figure 16. Selecting Columns
The SQL statement gets displayed, as shown in Figure 17. Click on Execute the SQL Statement to run the SQL Query.
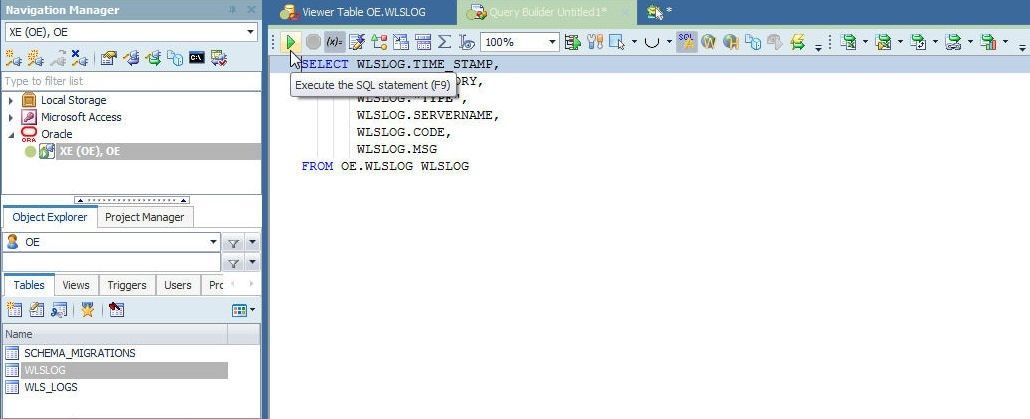
Figure 17. SQL Query
The SQL query result set gets displayed, as shown in Figure 18.
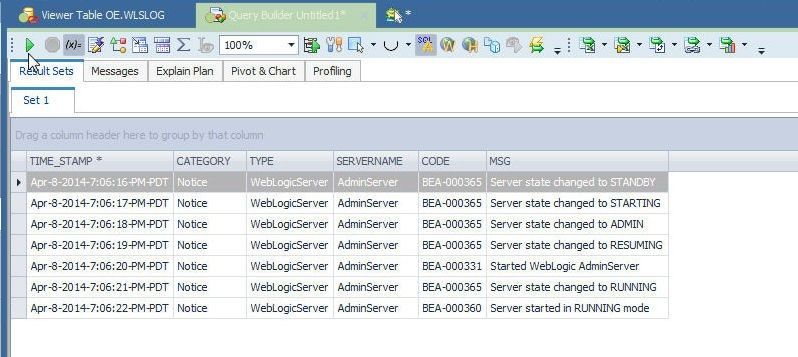
Figure 18. SQL Query Result Set
Creating a Connection with MySQL Database
To connect to MySQL database select Connect>New Connection as shown in Figure 2 (above). Select MySQL as the data source as shown in Figure 19.
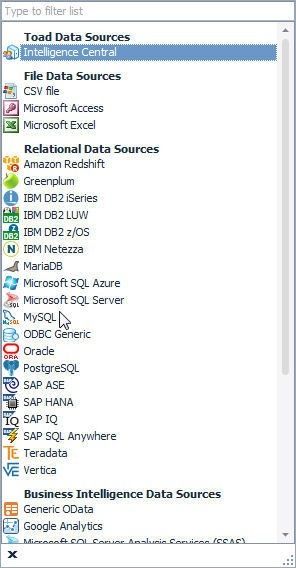
Figure 19. Selecting Data Source as MySQL
In Create New Connection select Connection Type as TCP and HOST as localhost as shown in Figure 20. Specify User (root) and Password, select Database as mysql and port as 3306.The connection Name must be unique and gets auto-generated by default. Click on Connect.
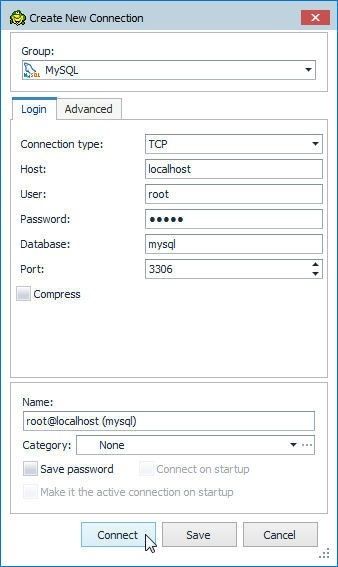
Figure 20. Configuring a Connection to MySQL
A connection to MySQL database gets created, as shown in Figure 21. The Object Explorer lists the database objects including tables.
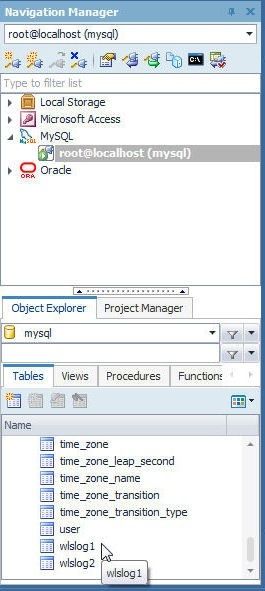
Figure 21. Connection to MySQL Database Added
Using the DB Explorer and Query Builder is the same as for Oracle Database. To run a query on the wlslog1 table right-click on the table in the Object Explorer and select Query Builder as shown in Figure 22.
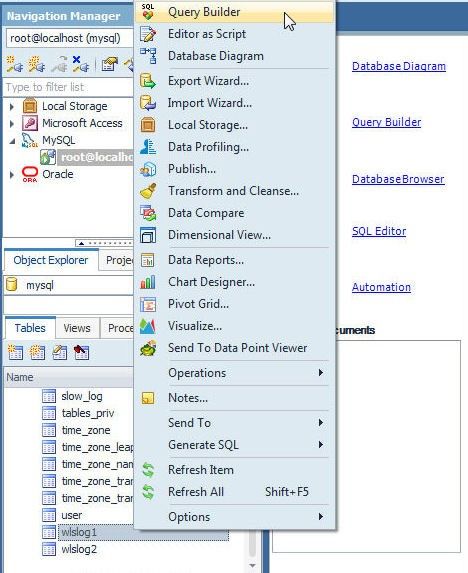
Figure 22. wlslog>Query Builder
A Query Builder gets started with the selected table added, as shown in Figure 23.
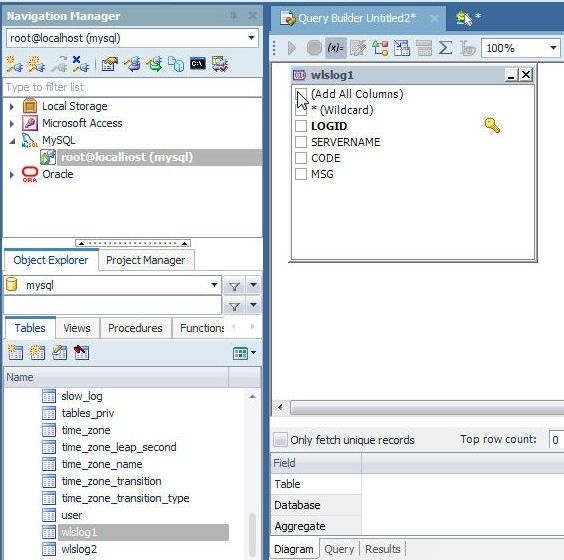
Figure 23. Query Builder with wlslog1 Table
Select the columns to be included in the query as shown in Figure 24. Click on the Query tab to display the SQL statement.
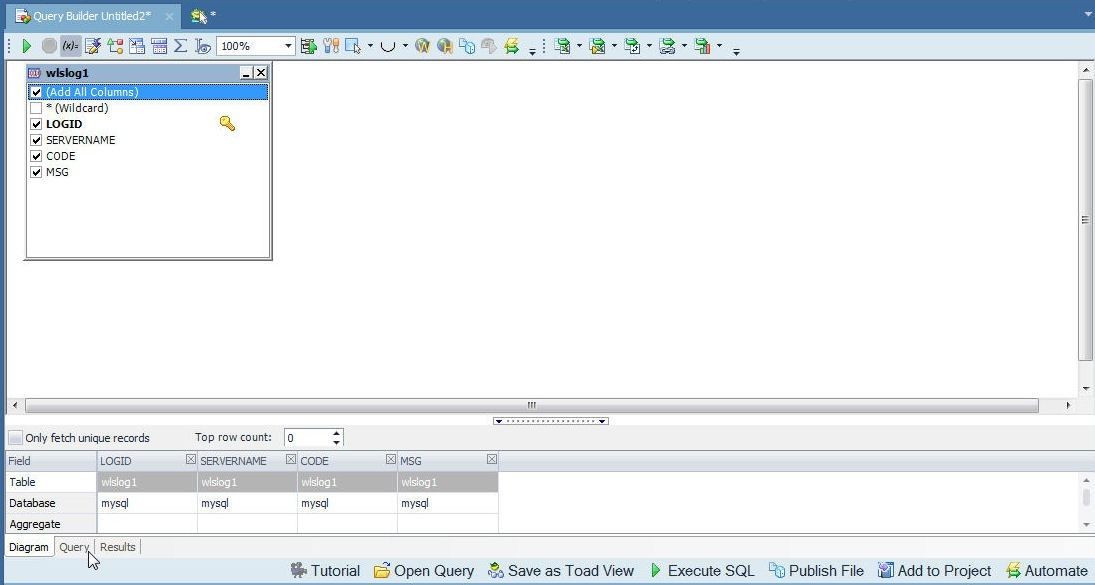
Figure 24. Selecting Columns to include in Query
Click on Execute the SQL statement to run the SQL Query as shown in Figure 25.
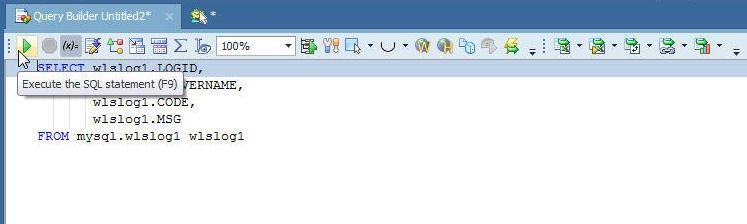
Figure 25. Execute the SQL Statement
The query result is displayed in the Results tab, as shown in Figure 26.
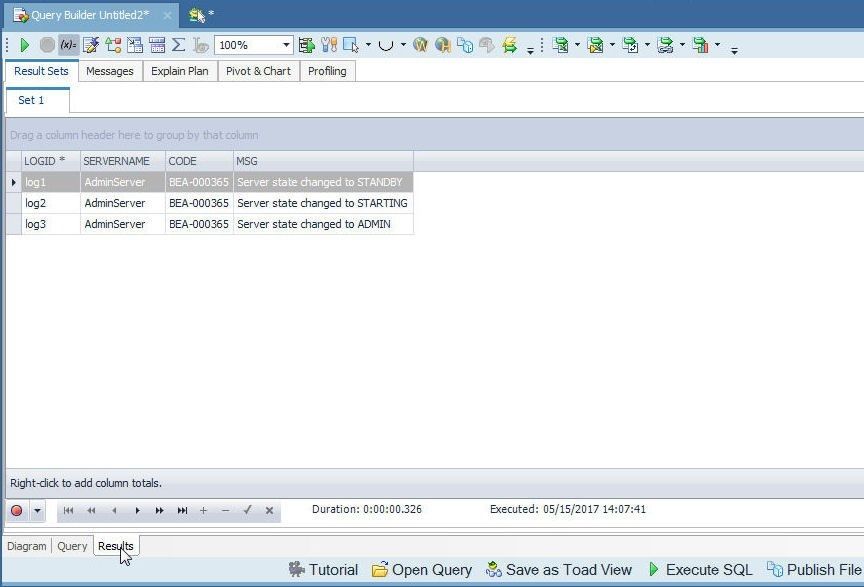
Figure 26. Query Results
Creating a Connection with IBM DB2 Database
To create a connection to IBM DB2 database select Connect>New Connection as shown in Figure 27.
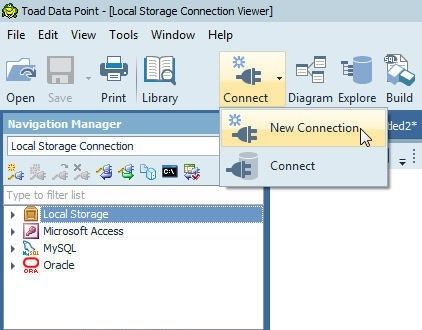
Figure 27. Connect>New Connection
Select IBM DB2 LUW in the list of data sources as shown in Figure 28.
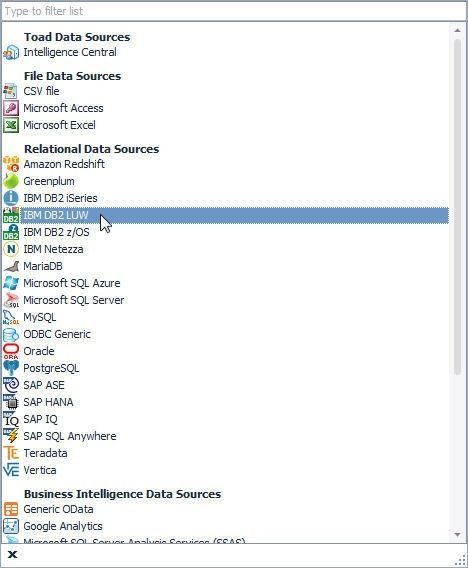
Figure 28. Selecting IBM DB2 LUW Data Source
Create New Connection has two options for connecting: Connect using Cataloged connection or Connection string, as shown in Figure 29. Specify Database as SAMPLE, Host name as localhost, Login as db2admin and the Password, and Port as 50000. Click on Connect.
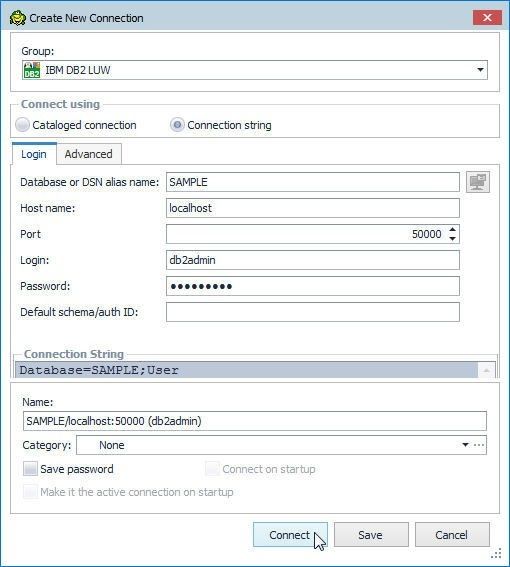
Figure 29. Selecting Connection Parameters
The password may be reset if required with the passwd command, as shown in Figure 30.
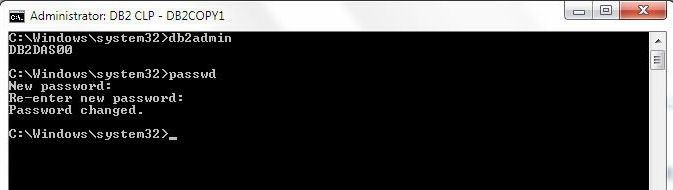
Figure 30. Setting or Resetting Password
A new connection gets created and added to Navigation Manager, as shown in Figure 31.
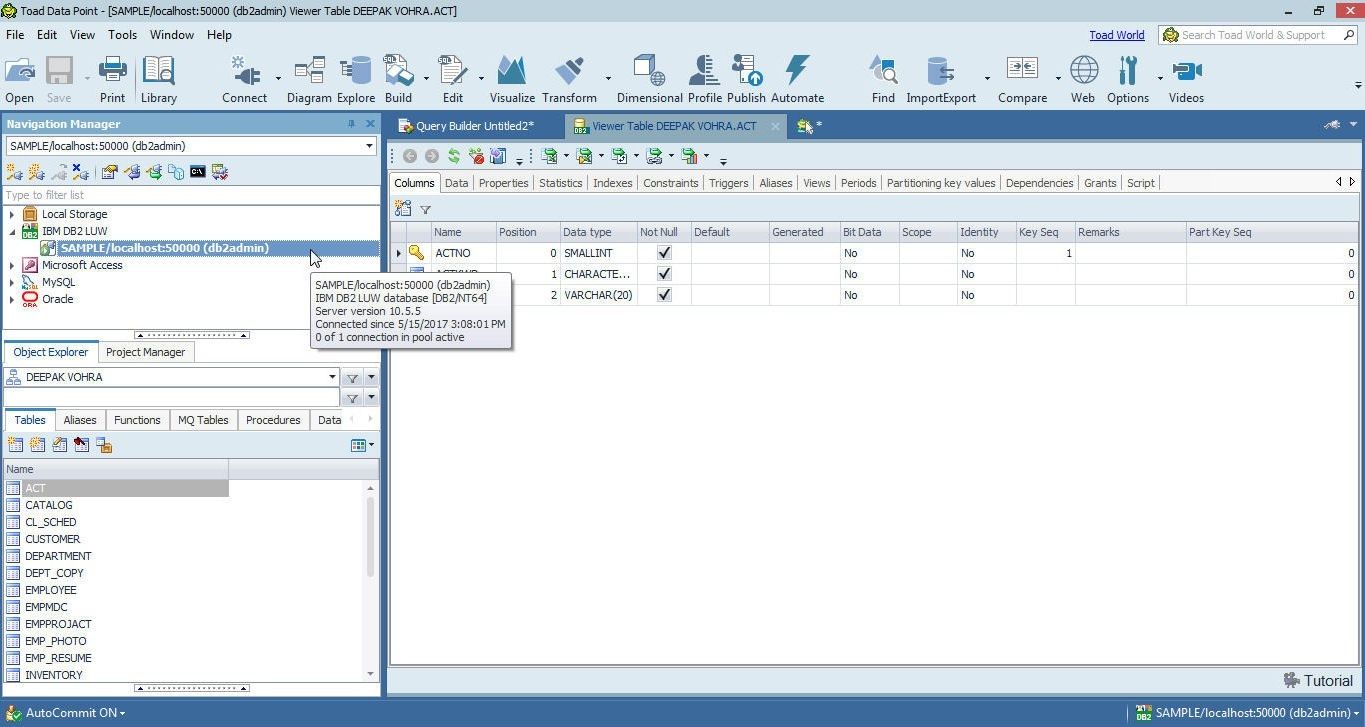
Figure 31. New Connection for IBM DB2 Database
To run SQL scripts right-click on the connection and select New SQL Editor as shown in Figure 32.
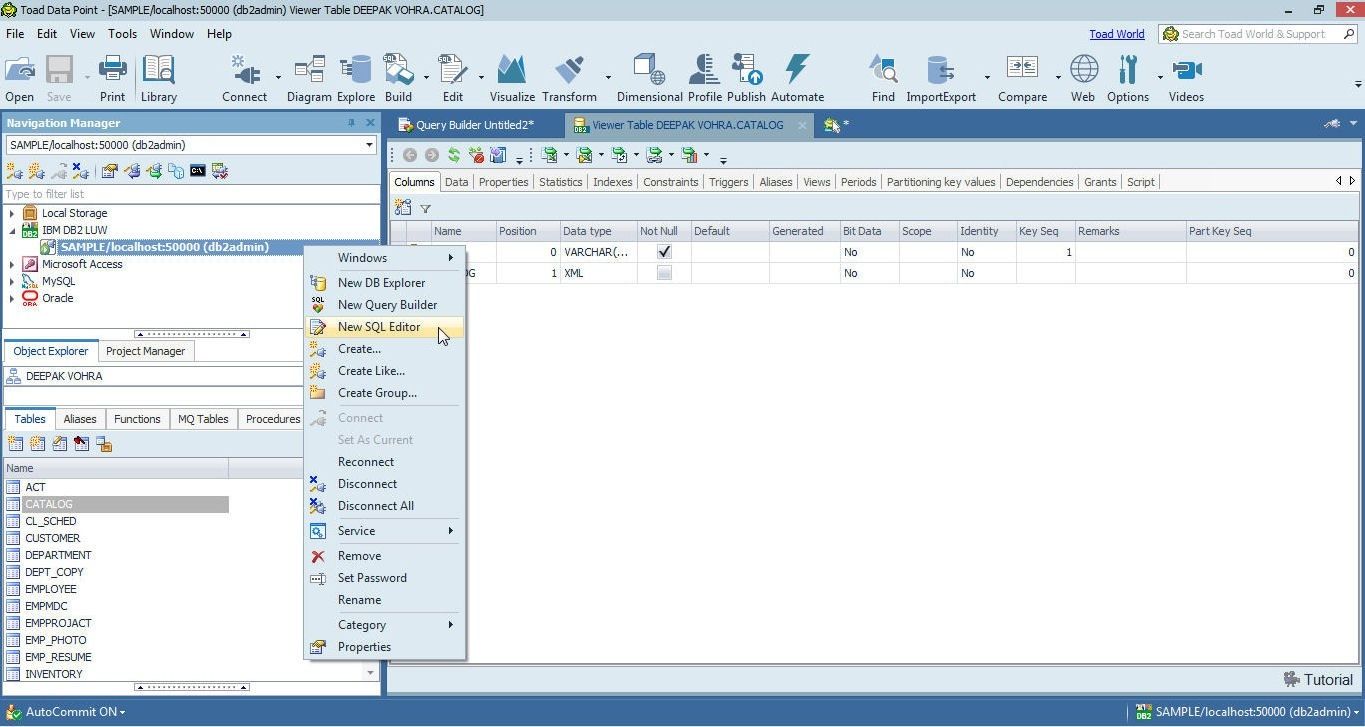
Figure 32. New SQL Editor
Add the following SQL statement to the SQL Editor. The primary key (or a unique key) must be set to NOT NULL for IBM DB2, which is not required for Oracle and MySQL databases.
CREATE TABLE wlslog(time_stamp VARCHAR(255) PRIMARY KEY NOT NULL,category VARCHAR(255),type VARCHAR(255),
servername VARCHAR(255), code VARCHAR(255),msg VARCHAR(255));
Click on Execute Scripts as shown in Figure 33.
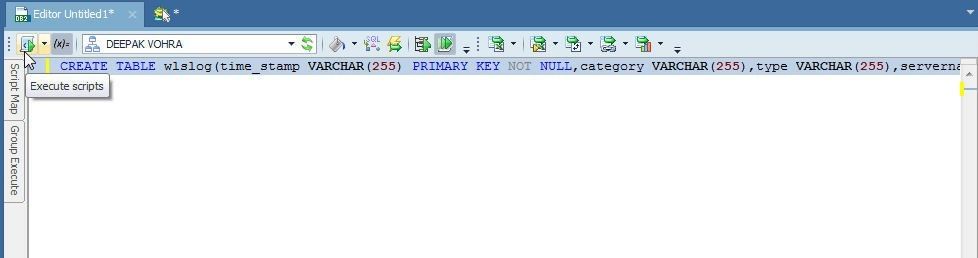
Figure 33. Execute Scripts
The wlslog table gets created and added to Object Explorer, as shown in Figure 34.
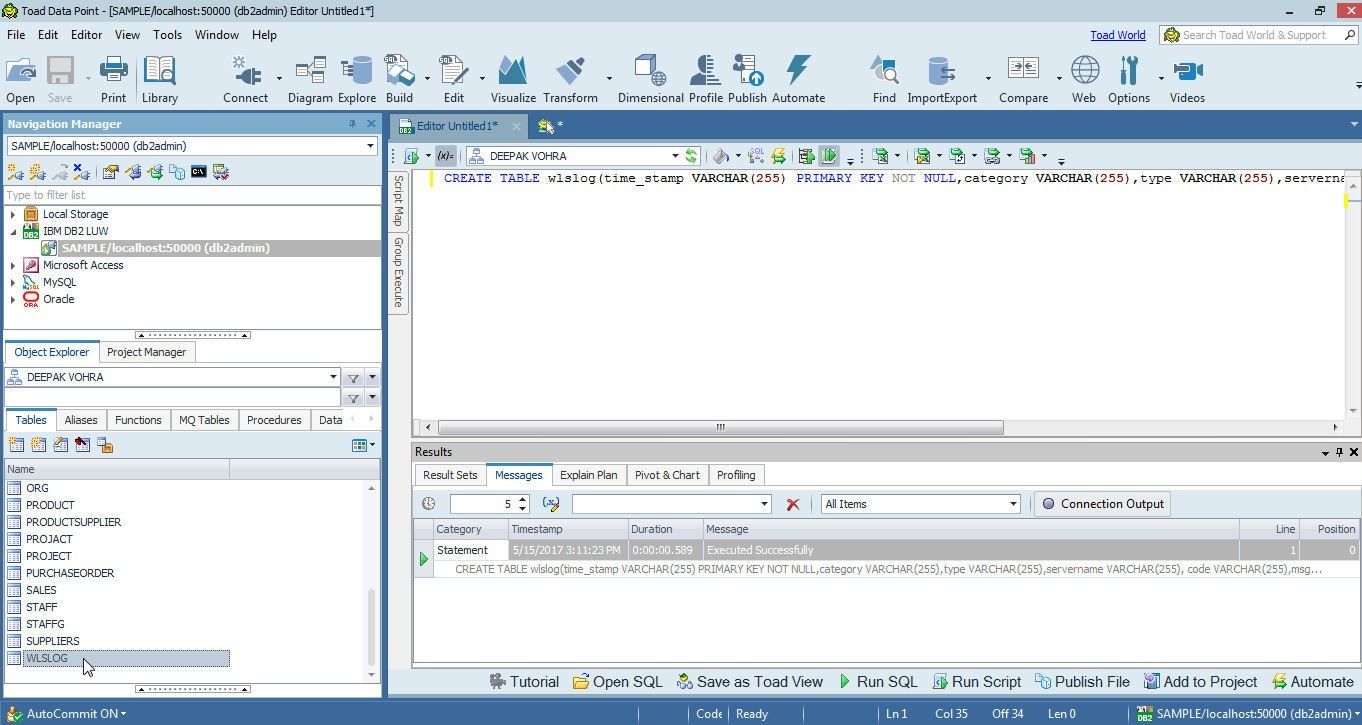
Figure 34. Table wlslog
Subsequently run DML INSERT statements in the SQL Editor to add data to the WLSLOG table as shown in Figure 35.
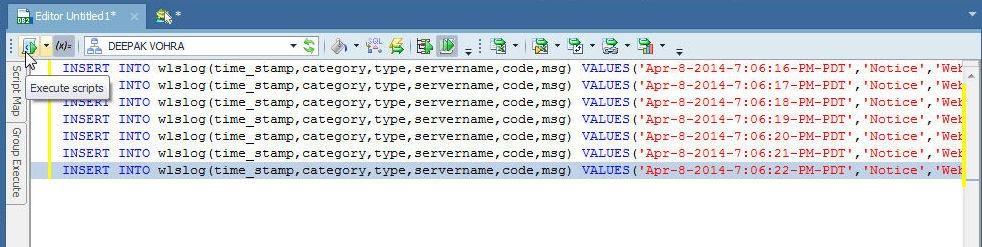
Figure 35. Running DML SQL Statements
Data gets added, as shown in the Messages tab in Figure 36. To query the table right-click on the wlslog table in Object Explorer and select Query Builder.
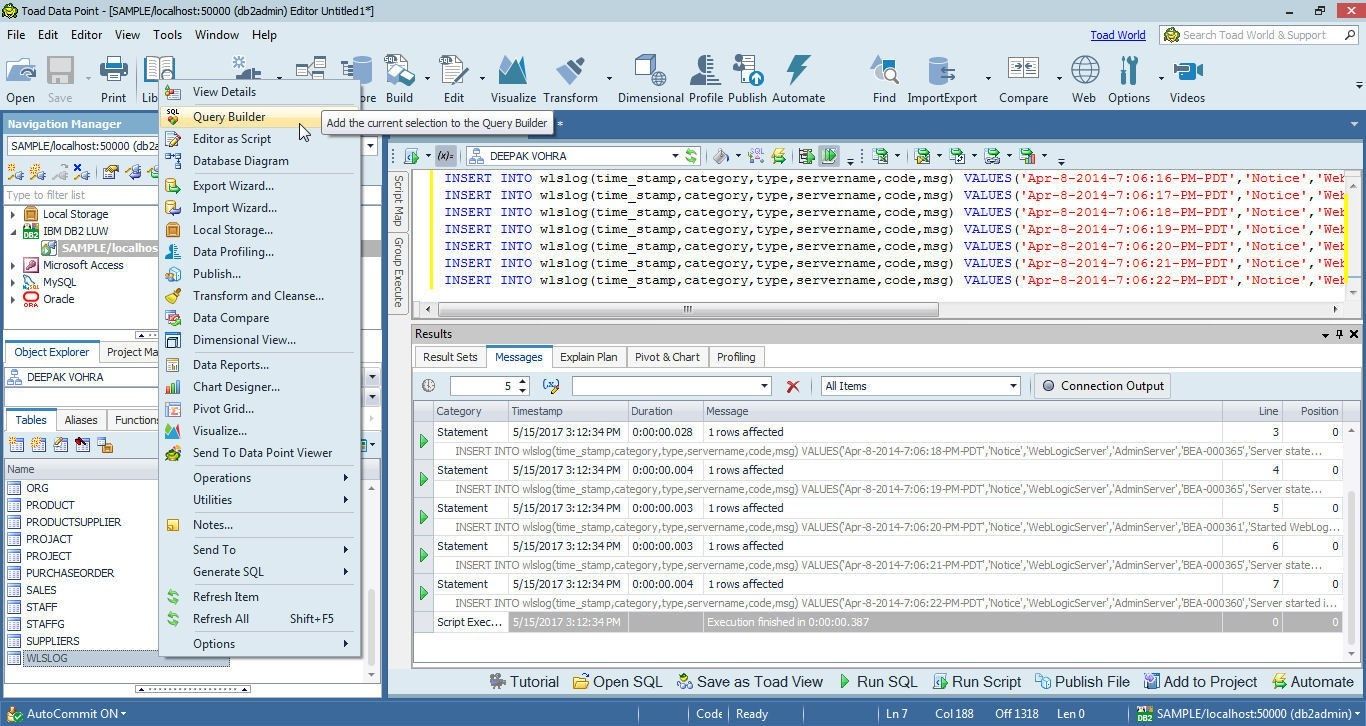
Figure 36. Query Builder
Select the columns in the Diagram in Query Builder as shown in Figure 37. Click on Execute the SQL Statement.
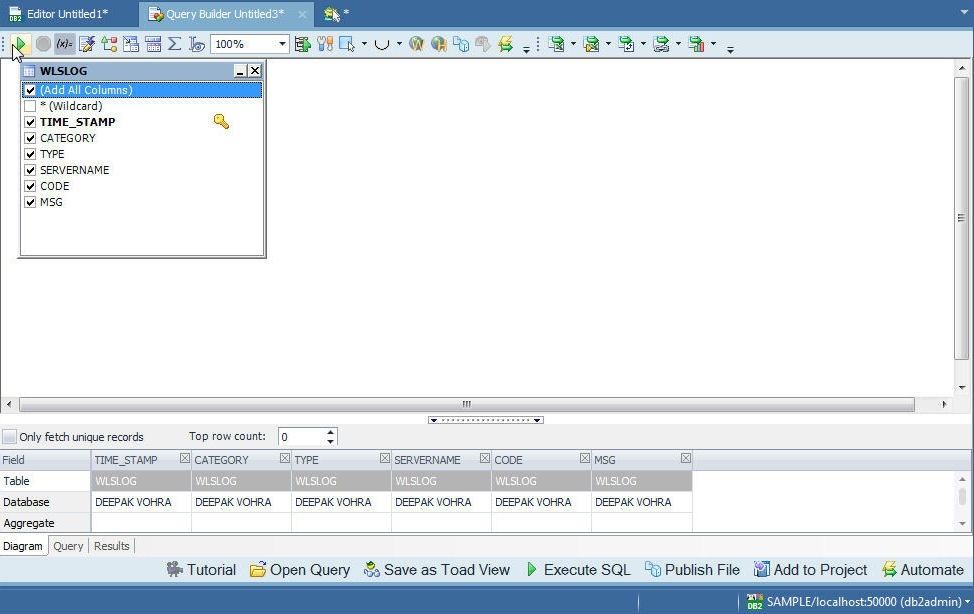
Figure 37. Selecting Columns for SQL Query
The result set gets displayed, as shown in Figure 38.
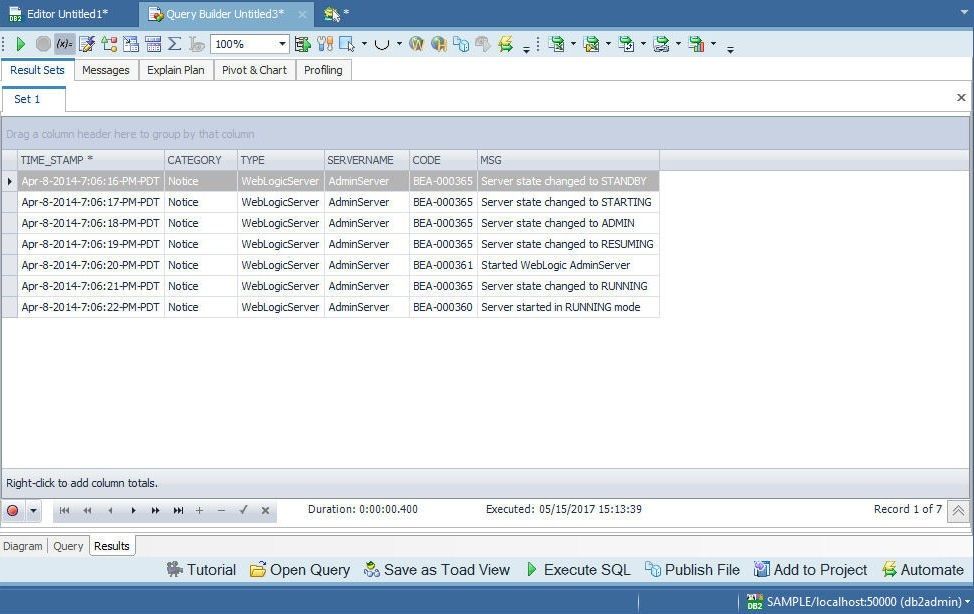
Figure 38. Result Set
To generate SQL for DDL/DML statements right-click on the wlslog table and select Generate SQL as shown in Figure 39.
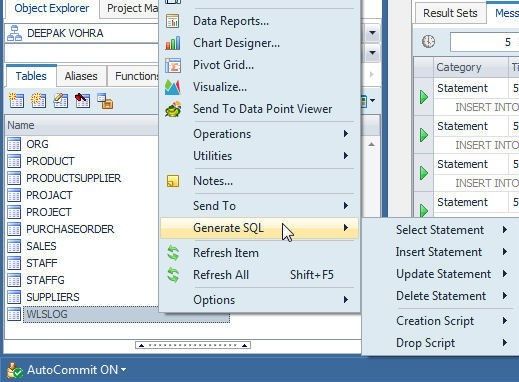
Figure 39. Generate SQL
To open the DB Explorer right-click on the connection in the Navigation Manager and select New DB Explorer as shown in Figure 40.
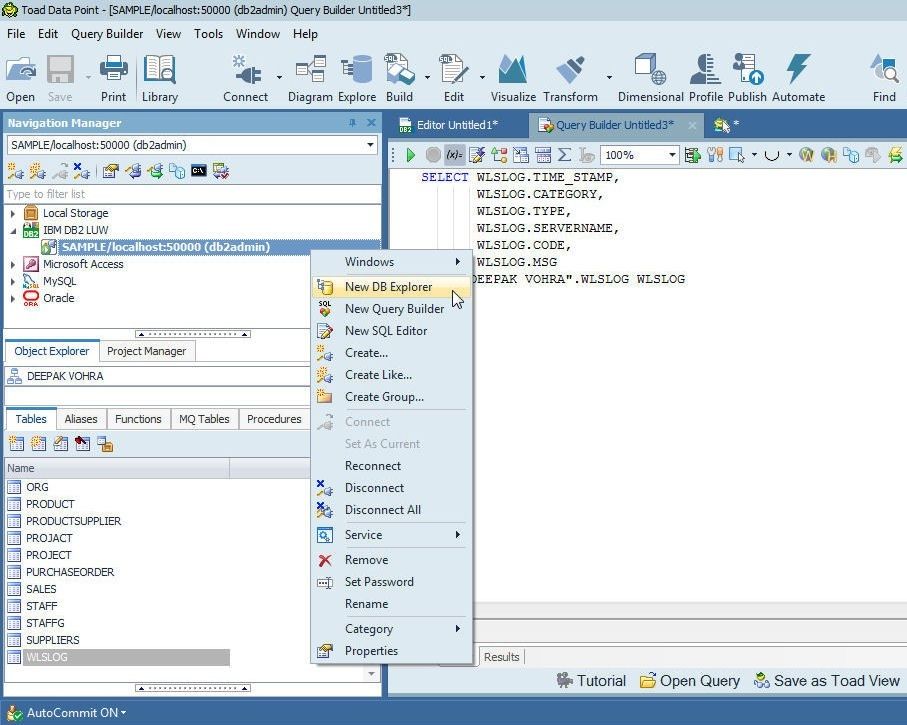
Figure 40. New DB Explorer
The table columns get displayed, as shown in Figure 41.
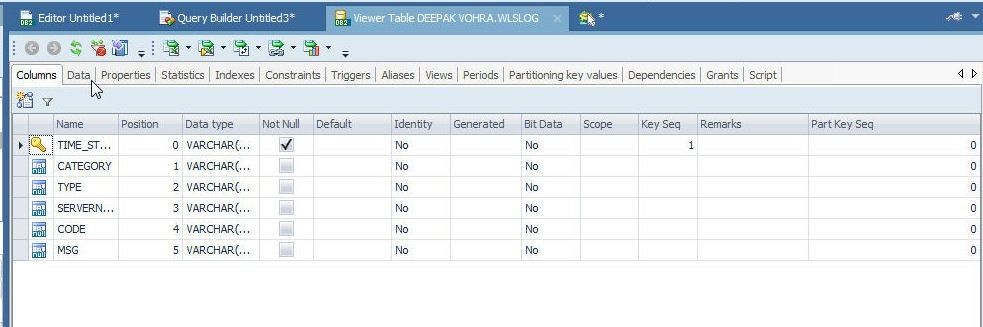
Figure 41. Table Columns and other Table Detail
Click on the Data tab to display the table data as shown in Figure 42.
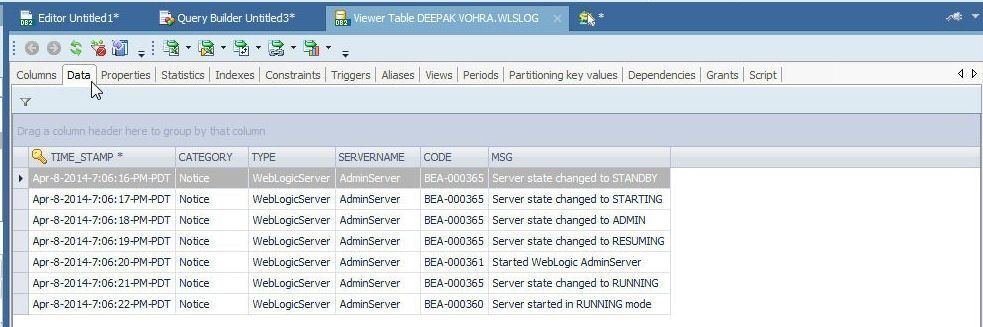
Figure 42. Table Data
Conclusion
In this tutorial we discussed using Toad Data Point to connect to and access relational database systems Oracle database, MySQL database and IBM DB2 database. Other RDBMS may be used similarly with connection parameters and SQL statements being different for different databases. Toad Data Point is more than just a data source access tool as it provides features for SQL development, data blending and reporting.
Start the discussion at forums.toadworld.com