In our article series, we are exploring the capabilities of Oracle Enterprise Manager Cloud Control 13c for the private Database as a Service (DBaaS) Cloud – including the setup of such a cloud. In the previous parts, we started the setup of the private DBaaS cloud.
The essential task was to configure the Self Service portal, which is the main gateway that the Self Service Application (SSA) user logs into, in order to request new databases on the servers in the database pool. For this, certain steps needed to be completed by the cloud administrator. These included the set up of the software library, the creation of user privileges, the creation of roles that can access the pools of database servers, the creation of the PaaS infrastructure zones, database pools, specification of quotas for users, service templates, and optionally, the creation of chargeback plans.
We first configured the software library, where the database profiles and gold images are stored for the purpose of provisioning. The next step was to set up the Enterprise Manager self update system, whereby you can download the latest plug-ins from the external Enterprise Manager store. This can either be done online (recommended) or offline, depending on your company policy. Since we selected the online mode, My Oracle Support (MOS) credentials were specified.
After this, we set up Enterprise Manager self update by logging in as SYSMAN or a super administrator and selecting Setup | Extensibility | Self Update, and clicking on the “Check Updates” button. A job was submitted to check for new updates from the Enterprise Manager store. Drilling down to the Job Details, we saw that the self update job completes in less than a minute. We now continue the process.
Move back to the Self Update page (Setup | Extensibility | Self Update). Scroll down to the “Plug-In” Type, and click on the link to drill down. This is seen in Figure 6.
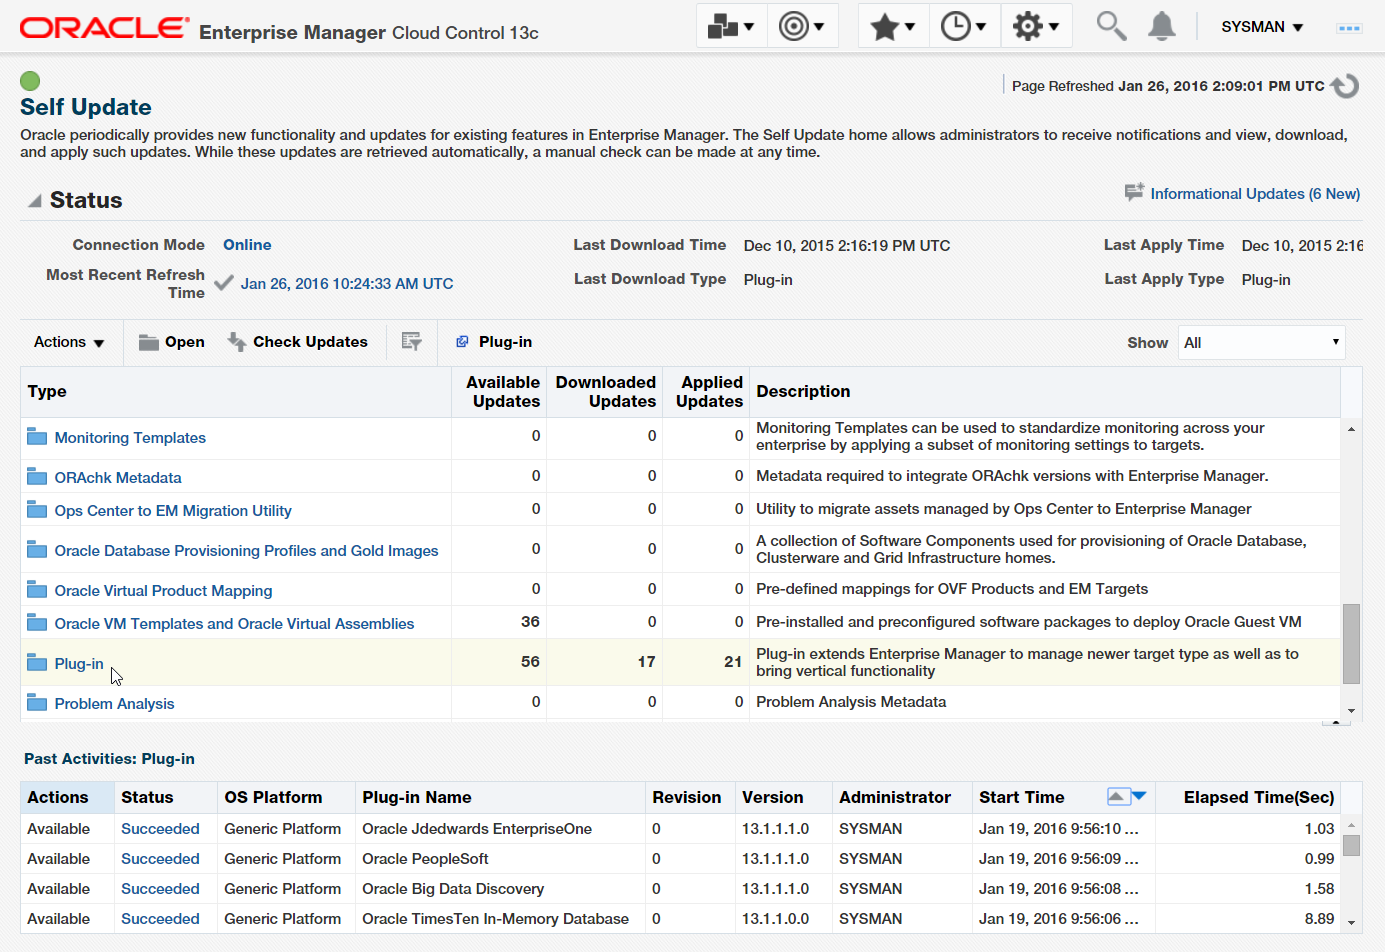
Figure 6: Drill down on Plug-In Type
The Plug-in updates screen appears (Figure 7). Click on the Sort Ascending icon (upright triangle) on the “Plug-in Name” column, and scroll down.
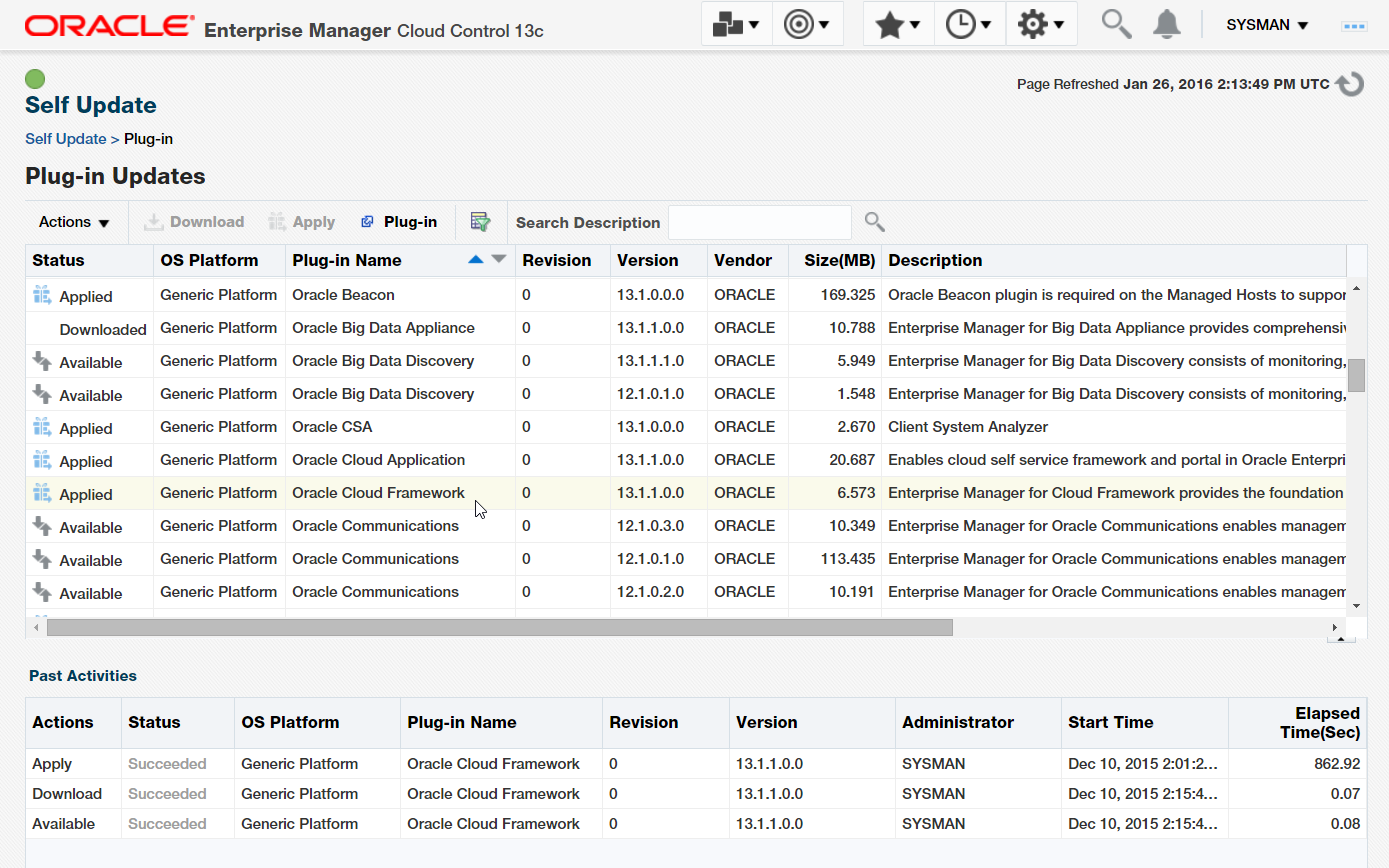
Figure 7: Plug-in updates
The plug-ins required to enable Database as a Service (DBaaS) are listed below, with their names as they appear in Self Update. (You need to check to see if any new versions of the following plug-ins are displayed on the screen with Status “Available”.)
- Oracle Cloud Framework
- Oracle Database
- Oracle Fusion Middleware (Mandatory even if not performing any Fusion Middleware or Middleware as a Service operations).
- Oracle Virtualization
- Oracle Cloud Application
- Oracle Storage Management Framework
- Oracle Consolidation Planning and Chargeback
Starting from the first plug-in in the list, check each plug-in name to see if there is any row with the status shown as “Available”. If such a row exists, it means a new version of the plug-in is available. There may be multiple rows with multiple versions, so locate the most recent version of the plug-in. Select the corresponding row, and click on the “Download” button.
Once all the plug-ins in the above list are downloaded, click on "Apply”. When you click on the Apply button, you are taken to the Plug-in Manager Console (Figure 8), where you can deploy or un-deploy plug-ins.
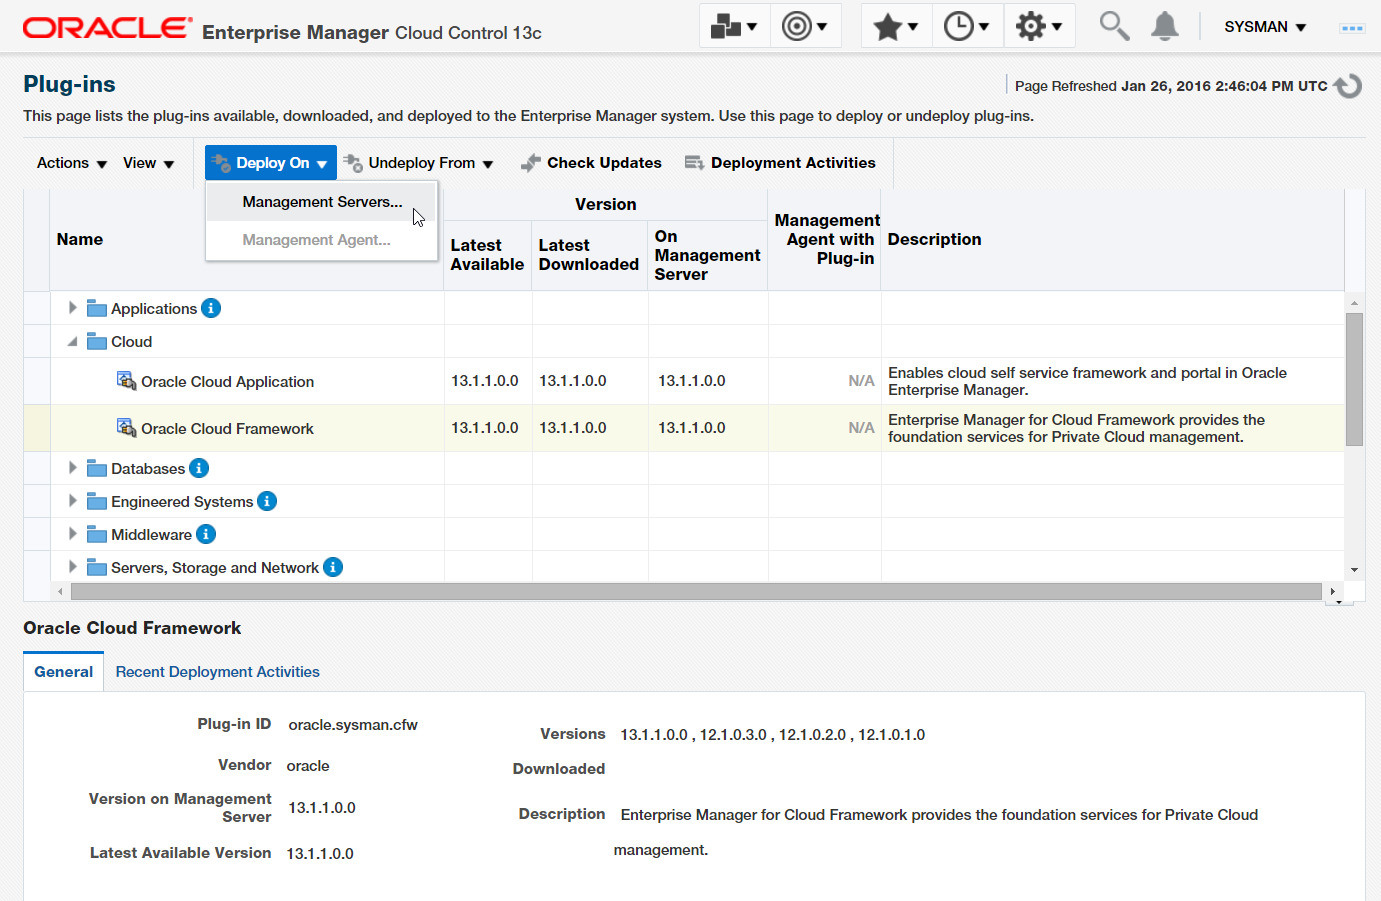
Figure 8: Plug-in Console
In the console, find the plug-in you want to deploy and check the version numbers under “Latest Available”, “Latest Downloaded” and “On Management Server”. If the Latest Downloaded is a higher version than the version under the On Management Server column, click on the Deploy button.
Note that some plug-ins can be deployed only on the Management Server, and some on both the Management Server and the Management Agent. For example, as seen in Figure 8, the “Oracle Cloud Framework” plug-in can only be deployed on the Management Server. Management Agent cannot be selected.
Remember to perform the Deploy in the exact same order as per the above list; i.e., deploy the Cloud Framework plug-in before the Oracle Database plug-in, and so on.
Create Portal Role and User
The next step is to create a Global Host “Named Credential” that is able to access the Database Servers you intend to use in the Database Pool.
Select Setup | Security | Named Credentials and create the new Global Credential. Specify Oracle as the UNIX user, with the Run Privilege set to None. The user name and password needs to be the same on all the Servers, since you are using a Global Host Credential. You can name the credential as NC_DBZONE_ORACLE.
You can also set up a similar global credential NC_DBZONE_ROOT for the root user, or set up a user with Sudo access. This is optional, but needed if you plan to use the database pool for snap clone database requests.
A custom cloud role now needs to be created in Enterprise Manager. Although pre-defined out-of-the-box Roles such as EM_SSA_USER (for Cloud Self Service end users) are available, these cannot be granted to zones or service templates. this is because the predefined roles will not appear in the selection list, only custom cloud roles can be selected.
As SYSMAN or another super administrator, select Setup | Security | Roles. Click on Create. Name the new role as "SAINATH_SSA_USER_ROLE " and assign to it the predefined Role of EM_SSA_USER. Click on Finish. The new role is created.
You now need to create the Cloud SSA user. This is an Enterprise Manager user who will be assigned this role. As SYSMAN or a super administrator, select Setup | Security | Administrators. Click on Create.
You can name the new Cloud SSA User as "SAI_DAS", and assign to it the previously created role of "SAINATH_SSA_USER_ROLE ". However, remove the roles EM_USER and PUBLIC from the list of selected roles. This is to make sure the SSA user does not log in to the main Enterprise Manager console, but only to the SSA console.
For the rest of the screens, accept the defaults until you come to the Review screen, then click on the Finish button to create the new User.
We will continue in the next part of this article series.
Start the discussion at forums.toadworld.com