Introduction
IBM Bluemix is the cloud platform by IBM. Bluemix is a complete cloud platform that includes compute infrastructure, compute services, storage, network, data and analytics, DevOps, application services, and a catalog of services. Bluemix provides ClearDB Managed MySQL database service for provisioning MySQL in the cloud platform. ClearDB is a MySQL based Database-as-a-Service (DBaaS) platform which is available on most cloud platforms, including Azure, Google Cloud Platform, Amazon Web Services ,and IBM Bluemix. ClearDB is highly available and fault tolerant, with multi-regional replication and zero downtime. ClearDB provides secure connections, making use of 256-bit SSL encryption and client certificates. ClearDB is a fully managed database service; which implies automated backups, automated patching, automatic failover, and no-downtime scaling.
In this tutorial we shall discuss using MySQL on Bluemix from Toad Edge. This article has the following sections:
- Setting the Environment
- Creating a MySQL Database on Bluemix
- Creating a Connection to MySQL on Bluemix
- Setting the Active Database
- Creating and Querying a MySQL Table
- Creating a SSL Connection to MySQL on Bluemix
- Disconnecting and Removing a MySQL Connection
- Dropping a Database
- Deleting a MySQL Database Service in Bluemix
Setting the Environment
The only prerequisite is an IBM Bluemix account, which may be created at https://console.bluemix.net/registration/.
Creating a MySQL Database on Bluemix
Bluemix offers ClearDB Managed MySQL Database. Login into Bluemix and select the ClearDB Managed MySQL Database service in the Data & Analytics category of the Catalog as shown in Figure 1.

Figure 1. Selecting ClearDB Managed MySQL Database
Specify a Service name (or select the default name), select the Free edition of ClearDB Managed MySQL Database to start with, and click on Create as shown in Figure 2.
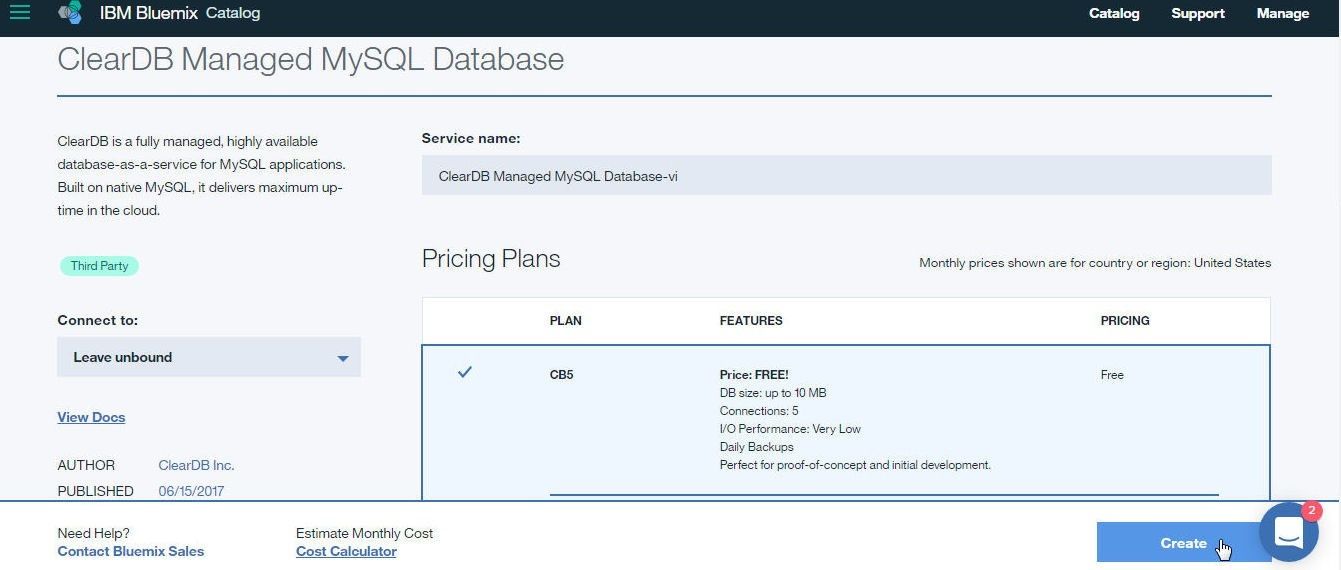
Figure 2. Selecting the Free Edition of ClearDB Managed MySQL Database
The managed MySQL database service gets launched. Click on the button to open the managed service Dashboard as shown in Figure 3.
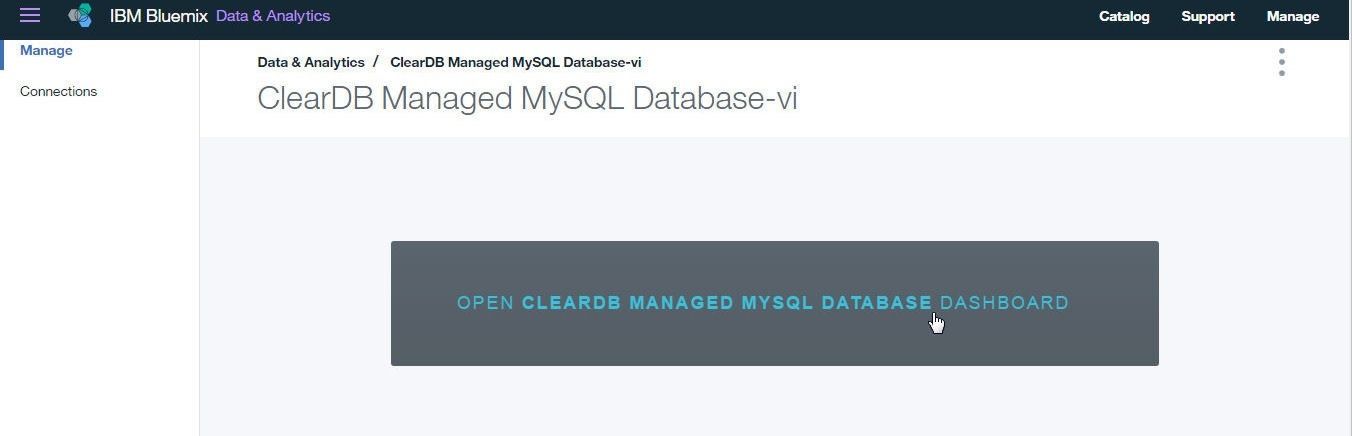
Figure 3. Opening ClearDB MySQL Dashboard
The ClearDB dashboard gets displayed with a list of databases, as shown in Figure 4. Click on the database link to display database cluster details.
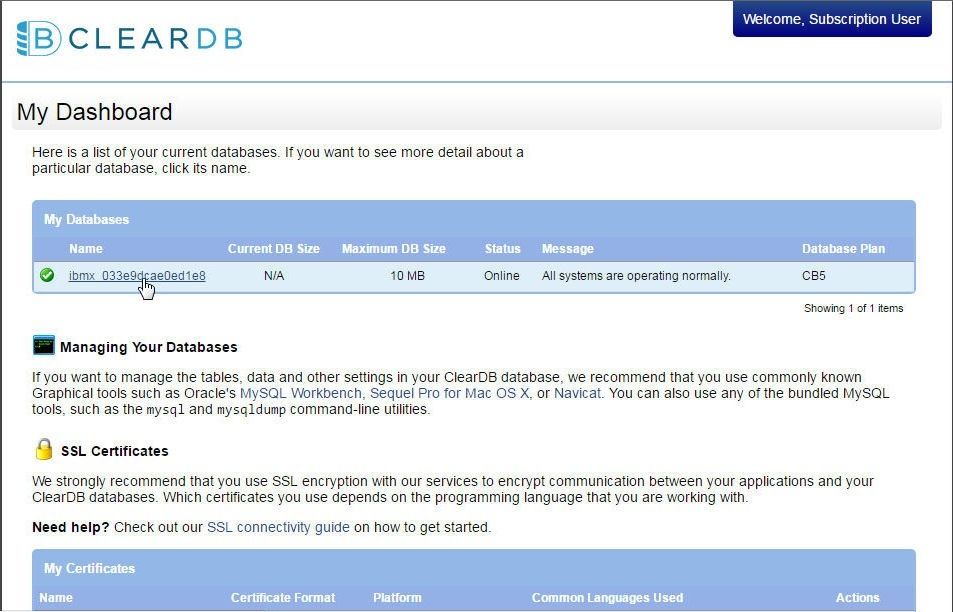
Figure 4. ClearDB Dashboard
The cluster details for the database get displayed. Select the Endpoint Information tab to display the Cluster Gateway Hostname and Cluster Nodes as shown in Figure 5. The Access Credentials, consisting of a Username and Password, are also displayed. When connecting to ClearDB MySQL we shall use the Hostname and the access credentials.
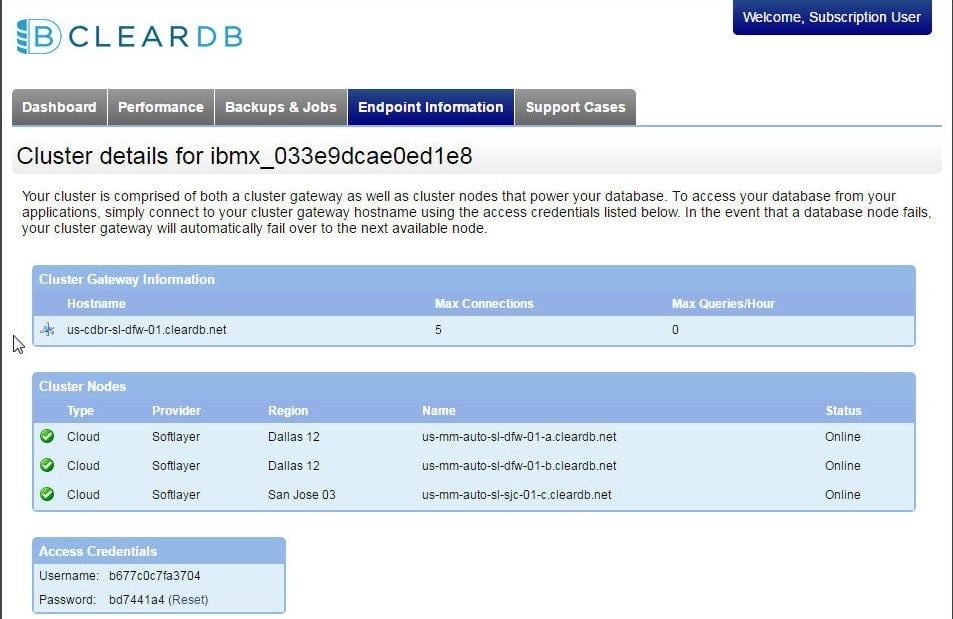
Figure 5. Cluster Details
Multiple database services for ClearDB may be created, as shown in Figure 6.
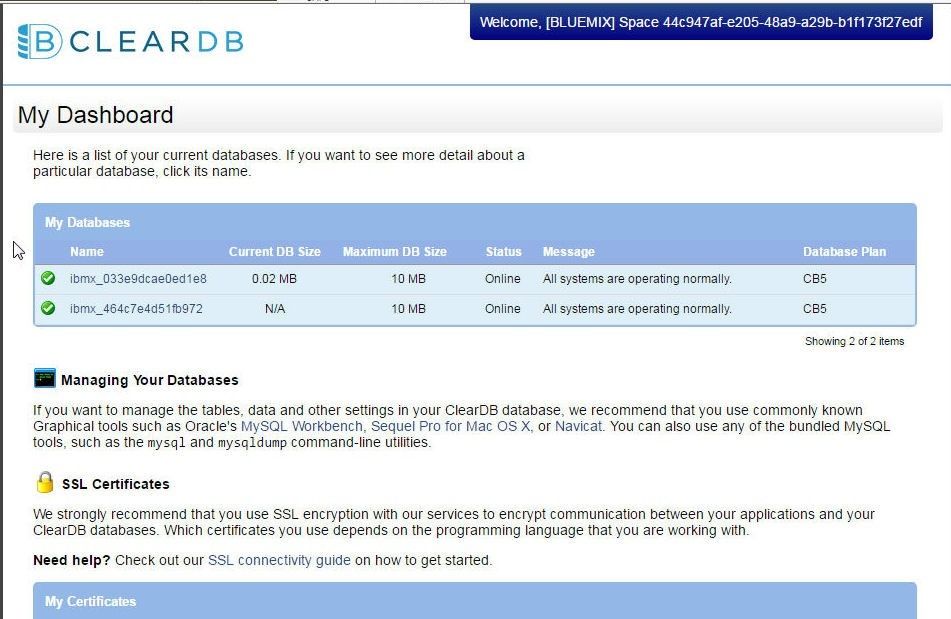
Figure 6. Multiple Databases
The SSL Certificates required to connect to the managed service for MySQL database on Bluemix using SSL are also listed on the Dashboard, as shown in Figure 7.

Figure 7. SSL Certificates
Creating a Connection to MySQL on Bluemix
To connect to MySQL database from Toad Edge copy the following connection parameters.
Hostname: us-cdbr-sl-dfw-01.cleardb.net
Username:    b677c0c7fa3704
Password:    bd7441a4
The preceding information is obtained from the Dashboard, as shown in Figure 5. To create a connection to MySQL from Toad Edge select Connect>New Connection as shown in Figure 8.
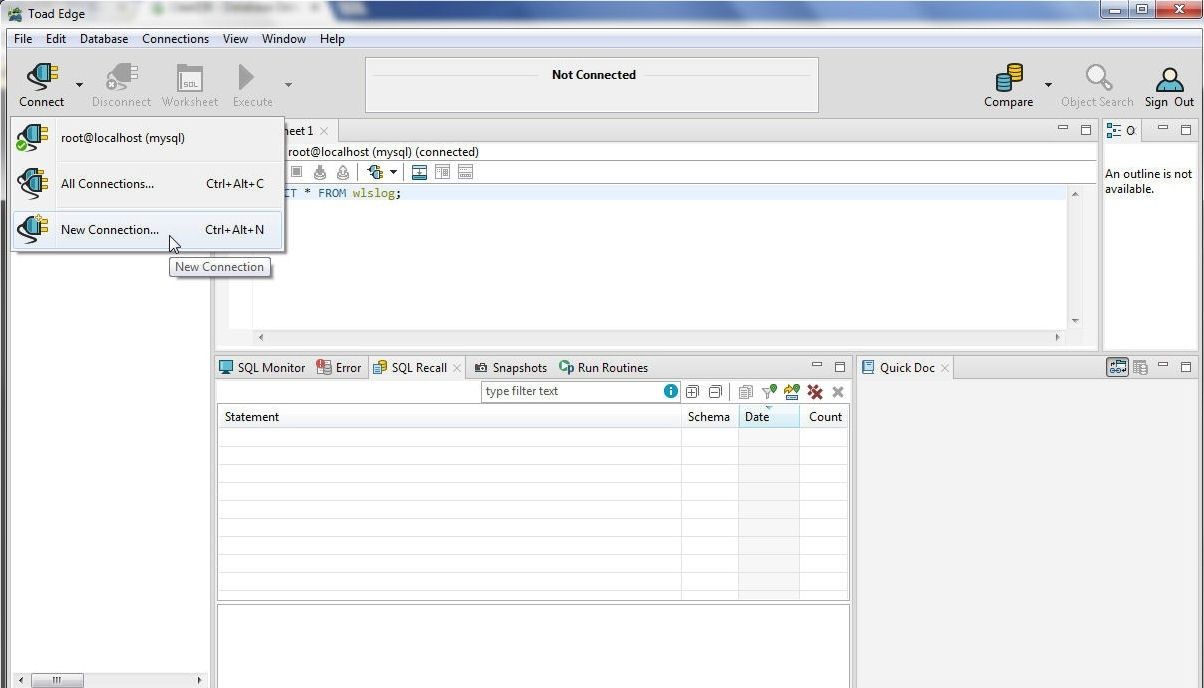
Figure 8. Connect>New Connection
In the New MySQL Connection wizard specify Host as the Hostname (us-cdbr-sl-dfw-01.cleardb.net) of the database on Bluemix. Port is set to 3306. Enable AutoCommit option should be selected. Specify User and Password as the access credentials for the MySQL database on Bluemix. Click on Test Connection and if the “Connection is OK” message gets displayed click on OK, as shown in Figure 9.
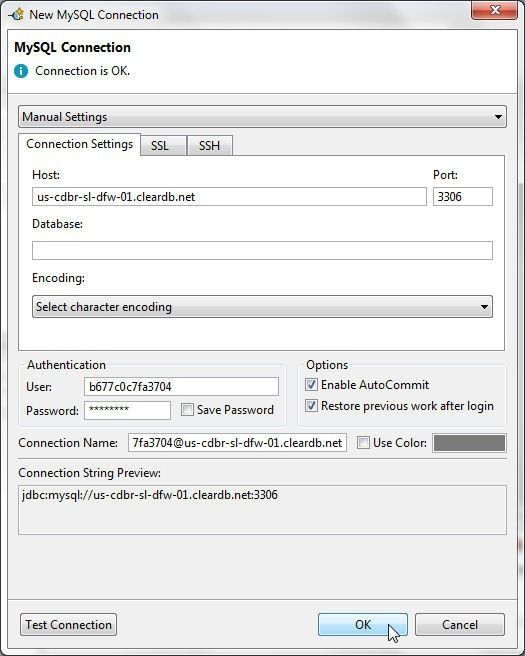
Figure 9. Configuring a Connection in Toad Edge
A connection for the MySQL database gets created and added to the Connections navigator, as shown in Figure 10. A message indicates that an “Active database is not defined”. An active database is the database currently being used, and we shall select an active database next.
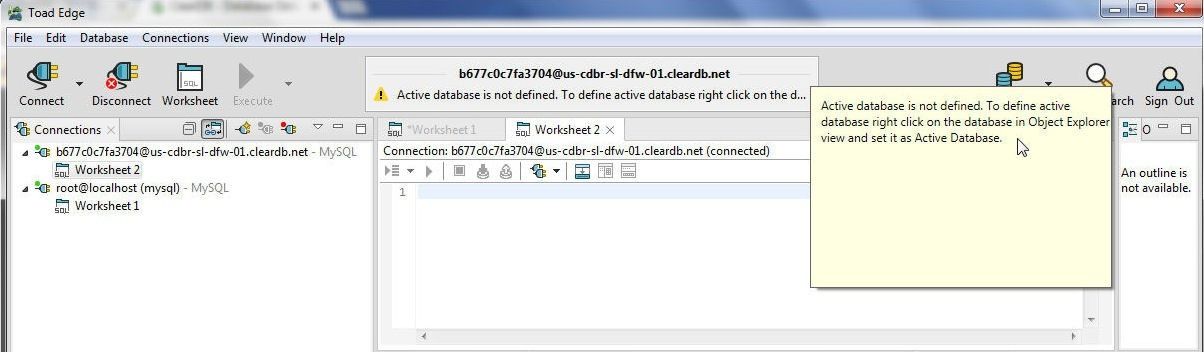
Figure 10. Connection to MySQL Database Added
Multiple database connections may be added and used in Toad Edge simultaneously, as indicated by the two connections listed in Connections in Figure 11.
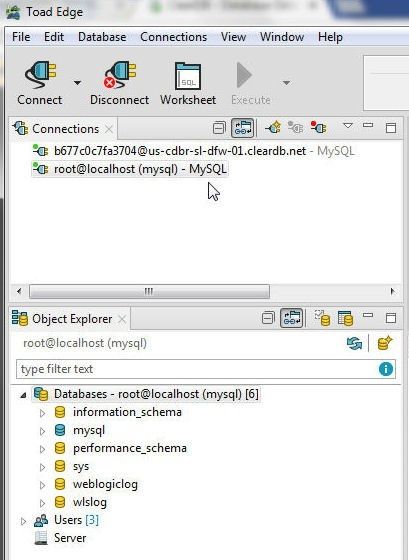
Figure 11. Multiple Connections
Setting the Active Database
To set the active database we need to open the Object Explorer. Open the Object Explorer by selecting View>Object Explorer as shown in Figure 12.

Figure 12. View>Object Explorer
The Databases for the ClearDB connection get listed in the Object Explorer. Right-click on the Databases node and select Refresh to refresh the databases, as shown in Figure 13.
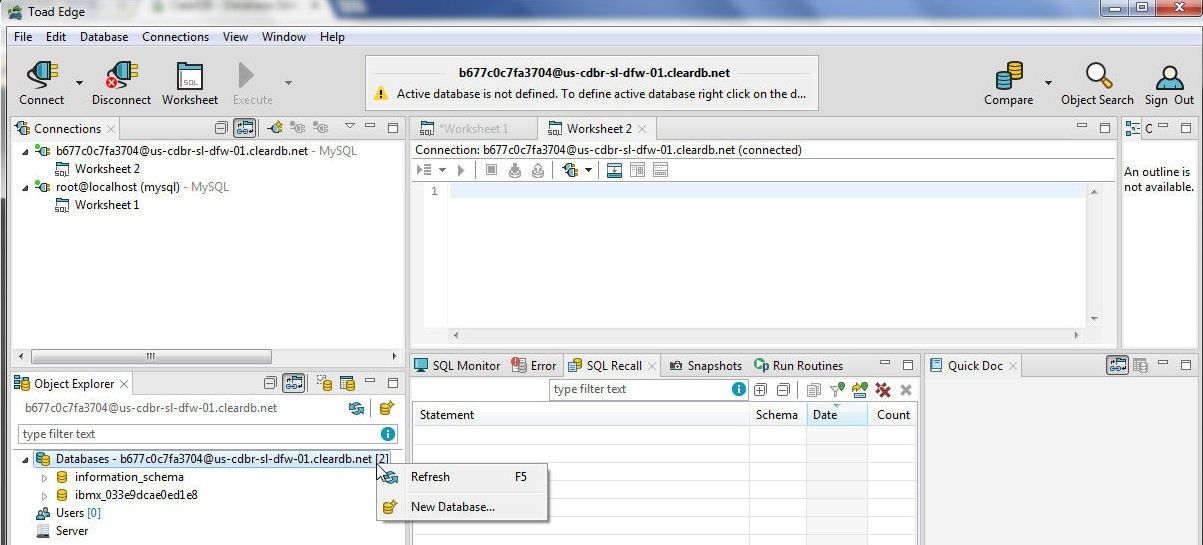
Figure 13. Refreshing Databases
Right-click on the database to be made the active database and select Set Active Database as shown in Figure 14.
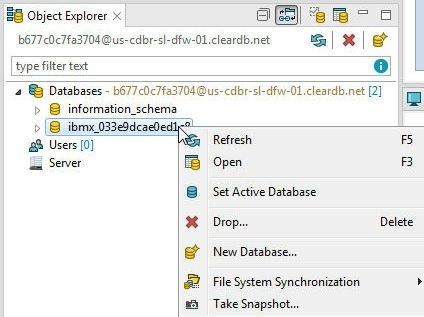
Figure 14. Setting Active Database
The selected database becomes the active database, as shown in Figure 15. Only one database may be made active at a time.
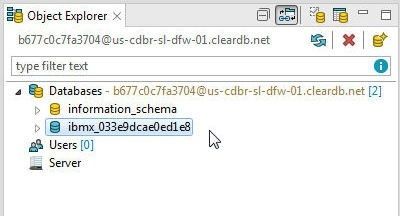
Figure 15. Active Database
Creating an SSL Connection to MySQL on Bluemix
SSL (Secure Sockets Layer) is a data security technology for establishing an encrypted connection between a web server and a client browser. All data exchanged through an SSL connection is secure and reliable. SSL encryption in ClearDB makes use of three certificates.
- ClearDB CA (Certificate Authority) Certificate (cleardb-ca.pem file)
- Client SSL Certificate (-cert.pem suffix file)
- Client SSL Private Key (-key.pem suffix file)
Download the SSL certificate files from the ClearDB Dashboard on Bluemix as shown in Figure 16.
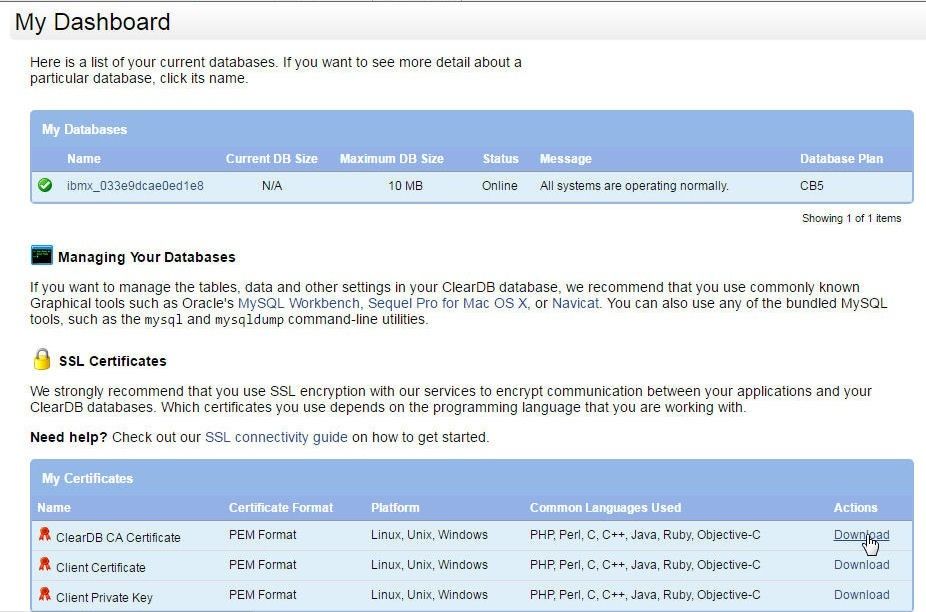
Figure 16. Downloading SSL Certificates from ClearDB Dashboard in Bluemix
The private key (a41165380258c5-key.pem) is associated with a password or passphrase. Generate an RSA (no password) version of the private key with the following command in a command shell.
openssl rsa -in a41165380258c5-key.pem -text -out a41165380258c5-key.pem
To create an SSL connection, select Connect>New Connection as before (Figure 8) and in New MySQL Connection specify the same Host, Port, User and Password. Click on the SSL tab to enable SSL as shown in Figure 17.

Figure 17. Selecting SSL Tab
Click in the Enable SSL checkbox. Upload the SSL CA File, SSL Cert File, and SSL Key File, as shown in Figure 18. Click on Test Connection to test the SSL connection and the message Connection is OK indicates that the SSL connection gets established. Click on OK.
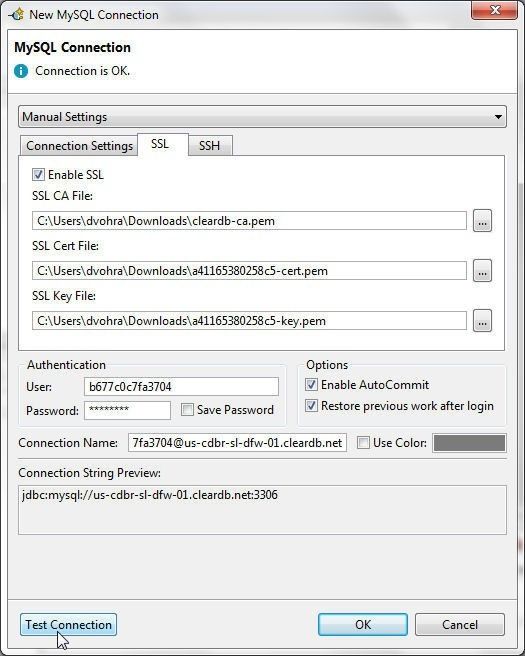
Figure 18. Testing SSL Connection
A SSL connection gets added, as shown in Figure 19. The connection name is the same as the non-SSL connection except for ‘ssl’ included in the connection name.
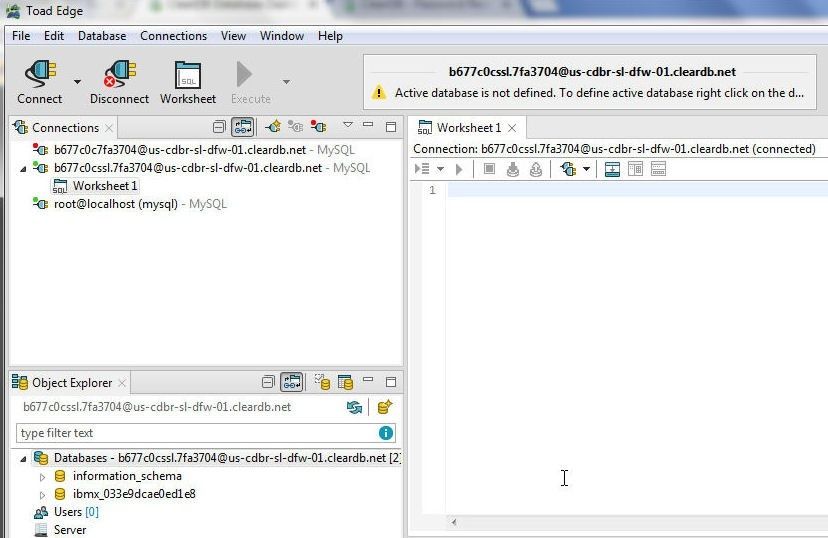
Figure 19. SSL Connection added
The active database needs to be set for an SSL connection; for which, right-click on a database and select Set Active Database, as shown in Figure 20.
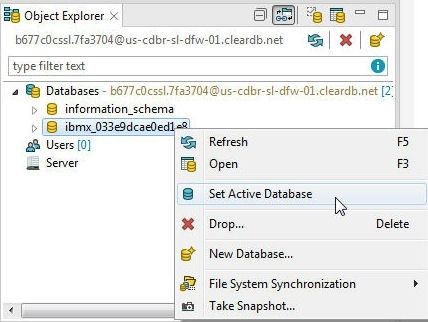
Figure 20. Setting Active Database
The active database for the SSL connection gets set, as shown in Figure 21.
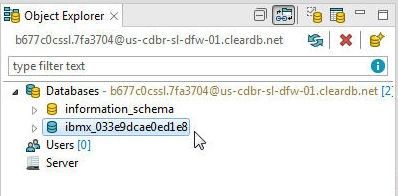
Figure 21. Active Database for SSL Connection
Creating and Querying a MySQL Table using SSL Connection
Open a SQL Worksheet associated with the database connection to ClearDB MySQL and copy the following SQL statement to the worksheet.
INSERT INTO weblogiclog(time_stamp,category,type,servername,code,msg) VALUES('Apr-8-2014-7:06:16-PM-PDT',
'Notice','WebLogicServer','AdminServer','BEA-000365','Server state changed to STANDBY');

INSERT INTO weblogiclog(time_stamp,category,type,servername,code,msg) VALUES('Apr-8-2014-7:06:17-PM-PDT',
'Notice','WebLogicServer','AdminServer','BEA-000365','Server state changed to STARTING');

INSERT INTO weblogiclog(time_stamp,category,type,servername,code,msg) VALUES('Apr-8-2014-7:06:18-PM-PDT',
'Notice','WebLogicServer','AdminServer','BEA-000365','Server state changed to ADMIN');

INSERT INTO weblogiclog(time_stamp,category,type,servername,code,msg) VALUES('Apr-8-2014-7:06:19-PM-PDT',
'Notice','WebLogicServer','AdminServer','BEA-000365','Server state changed to RESUMING');

INSERT INTO weblogiclog(time_stamp,category,type,servername,code,msg) VALUES('Apr-8-2014-7:06:20-PM-PDT',
'Notice','WebLogicServer','AdminServer','BEA-000361','Started WebLogic AdminServer');

INSERT INTO weblogiclog(time_stamp,category,type,servername,code,msg) VALUES('Apr-8-2014-7:06:21-PM-PDT',
'Notice','WebLogicServer','AdminServer','BEA-000365','Server state changed to RUNNING');

INSERT INTO weblogiclog(time_stamp,category,type,servername,code,msg) VALUES('Apr-8-2014-7:06:22-PM-PDT',
'Notice','WebLogicServer','AdminServer','BEA-000360','Server started in RUNNING mode');
The SQL Worksheet with the preceding SQL script is shown in Figure 22.
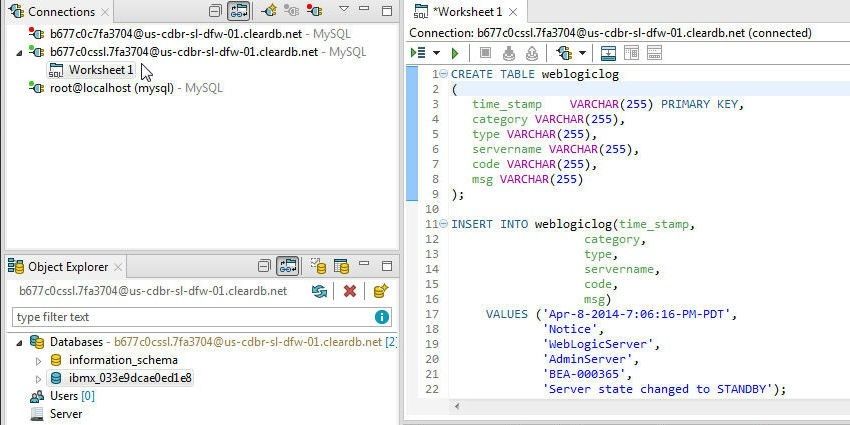
Figure 22. SQL Worksheet with SQL Script
Click on Execute All Statements as shown in Figure 23.
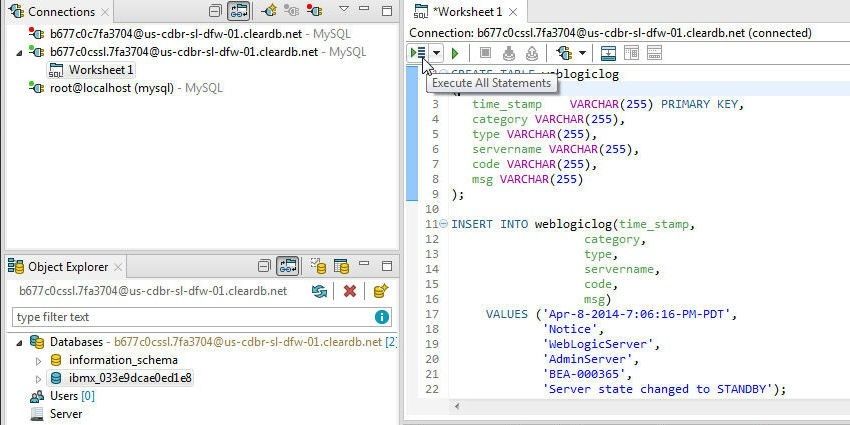
Figure 23. Execute All Statements
The SQL statements get processed, as indicated by the message in Figure 24. Database table weblogiclog gets created.
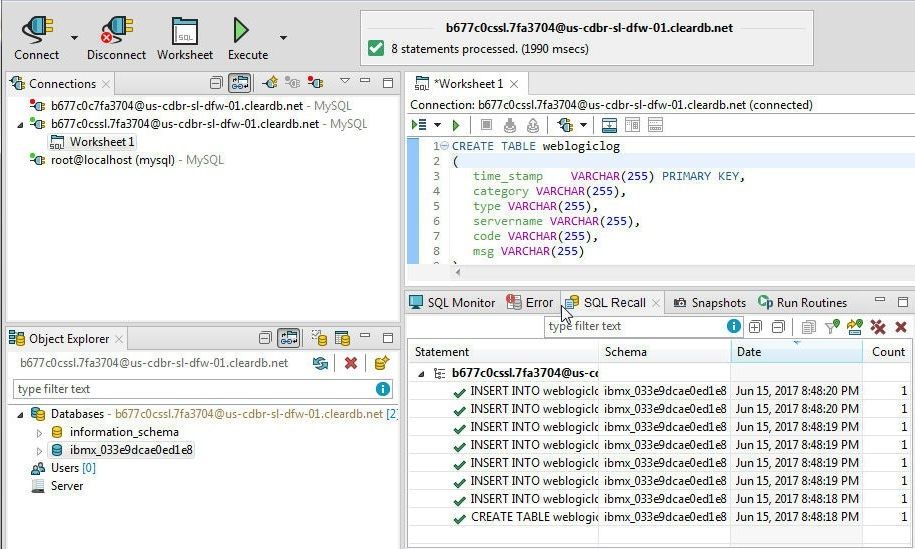
Figure 24. SQL Statements Processed
Open another SQL Worksheet and run SQL statement SELECT * FROM weblogiclog to generate a SQL result set, as shown in Figure 25.
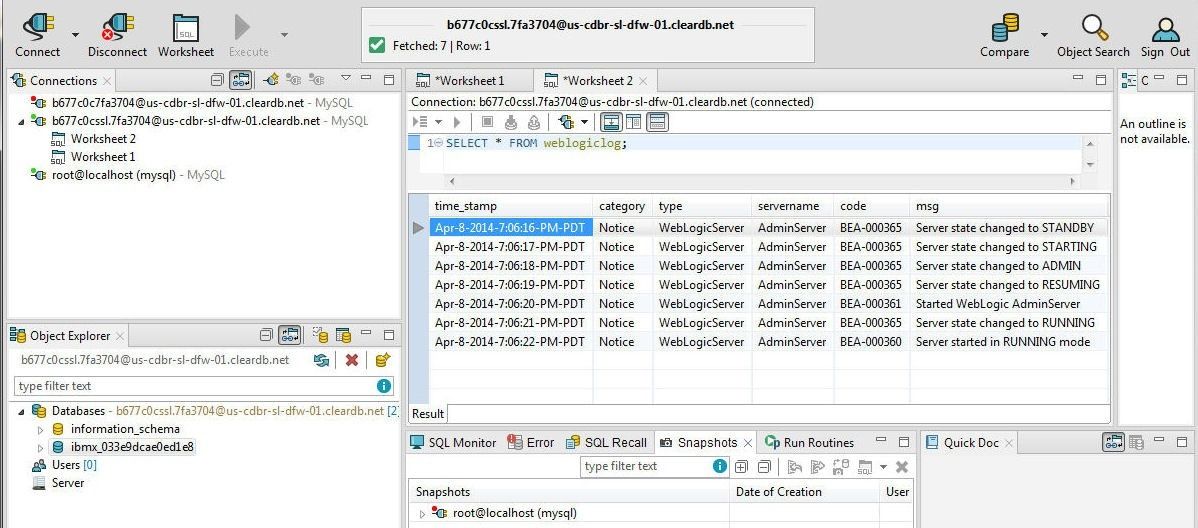
Figure 25. SQL Query Result
Disconnecting and Removing a MySQL Connection
A connection that is connected is distinguished from a connection that is not connected by a red marker in the disconnected connection. The non-SSL connection in Figure 26 is disconnected, and the SSL connection is connected. To disconnect a SSL connection right-click on the connection and select Disconnect as shown in Figure 26.
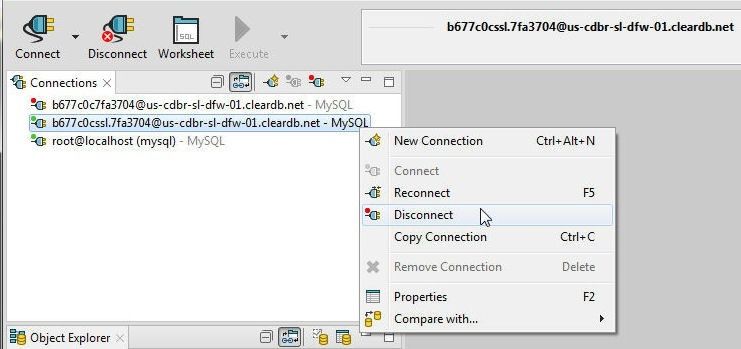
Figure 26. Disconnect
The SSL connection gets disconnected and a red marker gets added to the connection node in Connections, as shown in Figure 27.
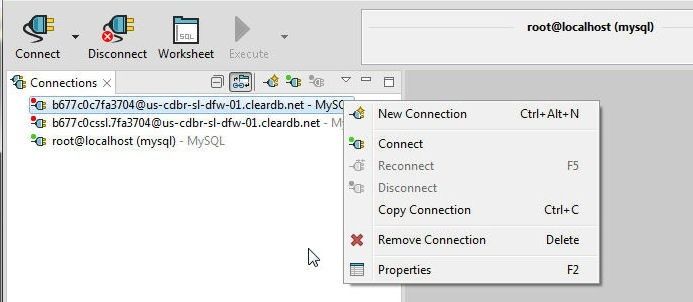
Figure 27. SSL Connection Disconnected
The SSL connection may be connected again by selecting Connect. To remove the SSL connection right-click on the connection node and select Remove Connection as shown in Figure 28.
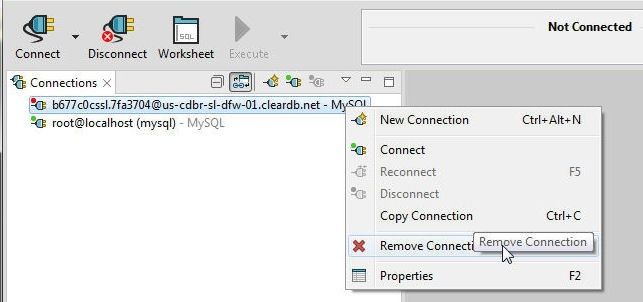
Figure 28. Remove Connection
Click on OK in the Confirm dialog as shown in Figure 29.
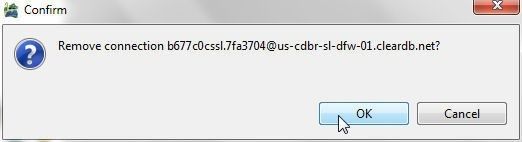
Figure 29. Confirm dialog for removing a SSL Connection
Dropping a Database
To drop a database, whether for an SSL or non-SSL connection, right-click on the database (ibmx_ prefix connection as an example) and select Drop as shown in Figure 30.
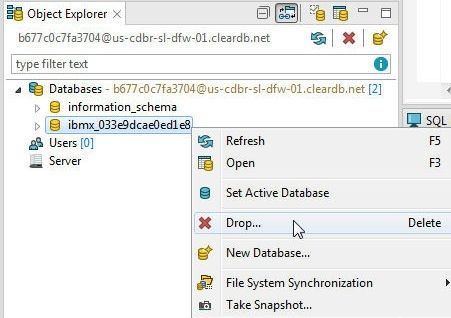
Figure 30. Dropping a Database
Click on OK in the Confirm dialog as shown in Figure 31.
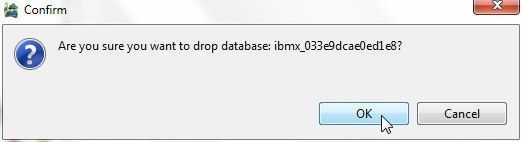
Figure 31. Confirm dialog
The ibmx_ prefix database gets dropped and is not listed in Figure 32.
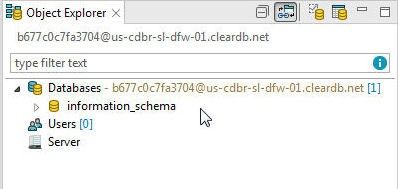
Figure 32. Theibmx_ Database not listed as it has been dropped
Deleting a MySQL Database Service in Bluemix
To delete a ClearDB MySQL database service on Bluemix select Delete Service from the Data & Analytics services dashboard as shown in Figure 33.
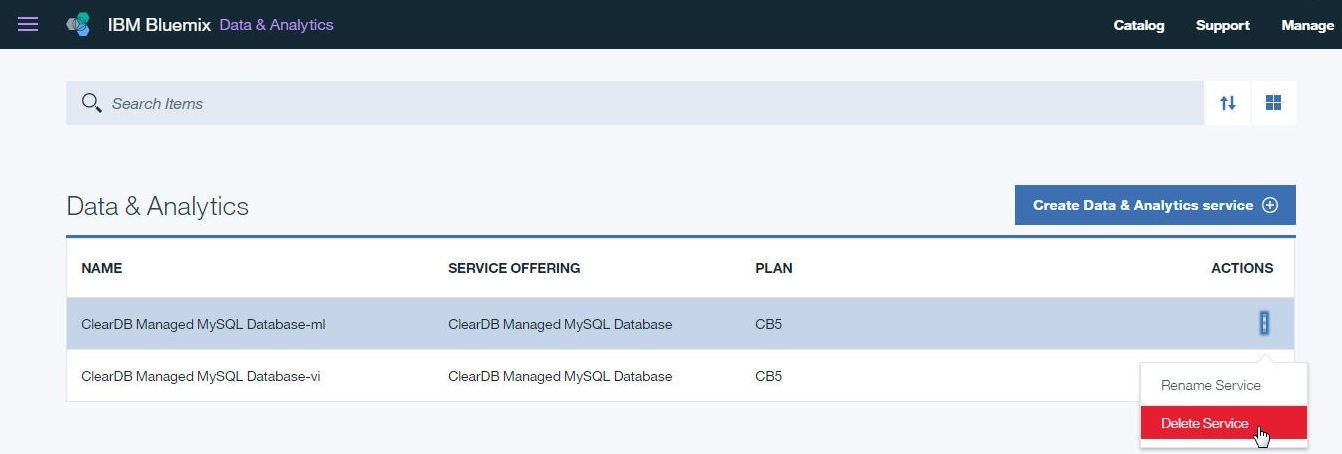
Figure 33. Deleting ClearDB MySQL Database Service
Click on Delete in the Delete Service dialog as shown in Figure 34.
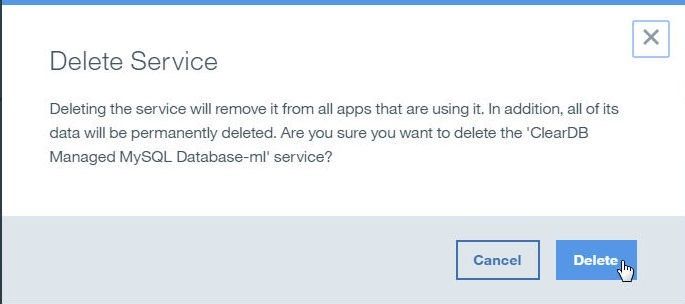
Figure 34. Delete Service
Similarly, delete the other service, and the Data & Analytics dashboard with no ClearDB MySQL Database services running is shown in Figure 35.
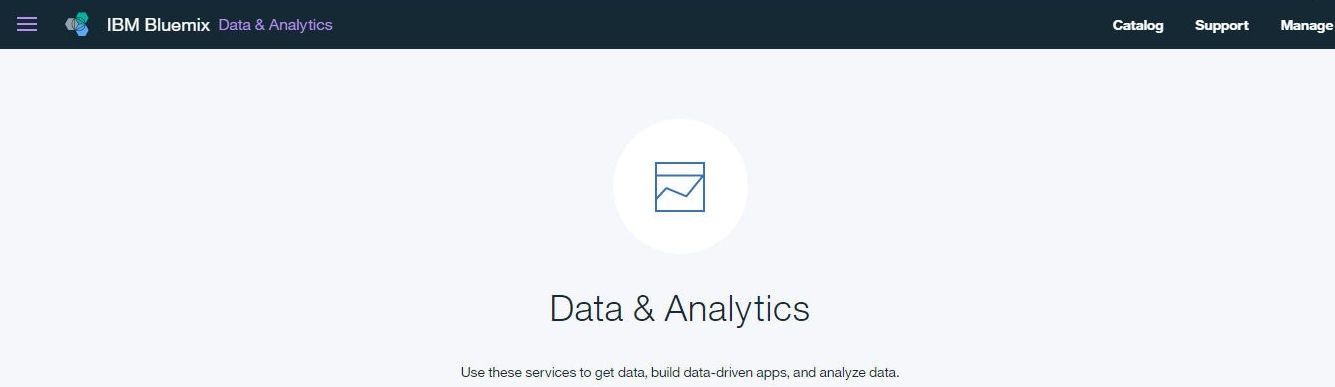
Figure 35. Data & Analytics Dashboard with no ClearDB MySQL Database Services
Even when all ClearDB databases have been deleted the SSL Certificates continue to be listed, as shown in the ClearDB Dashboard in Figure 36.
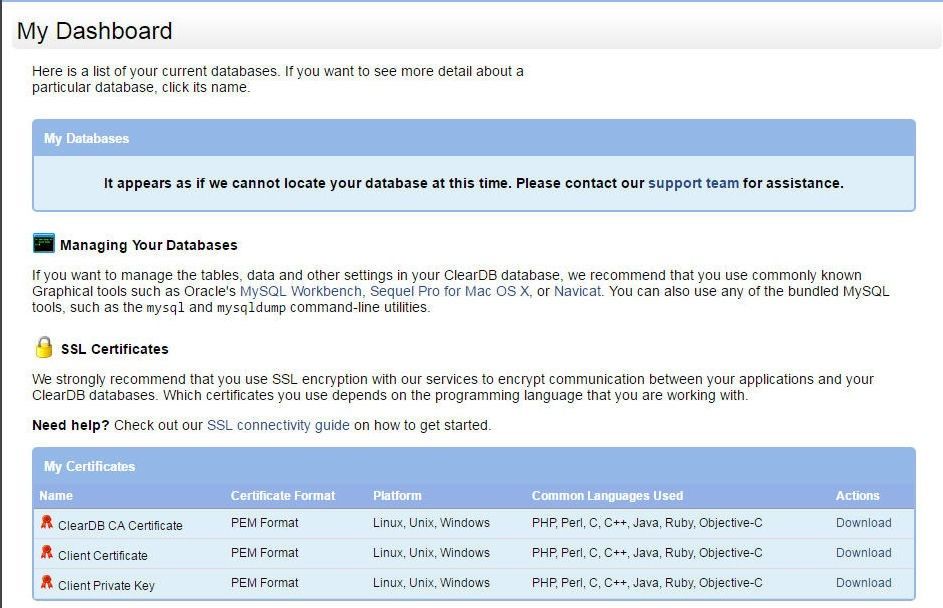
Figure 36. SSL Certificates still listed after the Databases have been removed
Conclusion
In this article we discussed using ClearDB MySQL Database managed service on IBM Bluemix with Toad Edge. One of the main benefits in addition to using a managed service for MySQL database, the ClearDB MySQL Database on Bluemix, is the support for using SSL encryption for database connections.
Start the discussion at forums.toadworld.com