Aurora is a scalable, MySQL-compatible, RDS-managed relational database designed for high read and write performance and high transaction response time. An Aurora cluster consists of a primary node (instance) and one or more replicas (a maximum of 15). While the primary instance is designed for write operations with support for read operations, the replicas are provided for scaling the read operations only. While the cluster volume stores multiple copies of the data. the data is represented with a single logical volume and all the replicas serve the same data.
‘MySQL compatible’ implies that the code, applications, drivers, and tools that are usable with MySQL may be used with Aurora with zero-to-minor changes. The database performance and efficiency are achieved by using fewer I/Os, minimizing network packets, caching prior results, offloading database engine, processing asynchronously, and reducing latency path.
Replicas provide scalability, fault tolerance, failover, high availability, and durability. If a replica fails it is automatically replaced. If a database process fails it is automatically recycled. Aurora makes continuous backups to S3. The database recovery in Aurora is faster as it is done in parallel and is distributed & asynchronous. The failover in Aurora is faster than traditional database. Aurora provides zero downtime patching as user sessions stay active through patching. Aurora is also PostgreSQL 9.6 compatible.
In this article we shall discuss using Aurora with Toad Edge Preview and Toad Data Point. We shall make use of some of the new features in Aurora, such as a single-reader endpoint for all the read replicas. Single-reader endpoint makes it feasible to run replicas in different Availability Zones and as a result provides high availability. A single-reader endpoint also provides load balancing across the multiple replicas. Aurora can also be used to read-scale a MySQL DB instance (on RDS or external to RDS) by creating replicas.
This tutorial has the following sections.
- Setting the Environment
- Creating an Aurora Cluster and Instance
- Creating an Aurora Replica
- Connecting from Toad Edge Preview
- Creating Database Table and Adding Data
- Connecting from Toad Data Point
- Using DB Explorer
- Using Query Builder
Setting the Environment
The following software must be installed for this tutorial.
The other prerequisite is an AWS account, which may be created at https://aws.amazon.com/resources/create-account/.
Creating an Aurora Cluster
In this section we shall create an Aurora cluster consisting of a primary instance for read-write and a replica for read-only access. Click on Get Started Now in RDS service as shown in Figure 1.
Figure 1. RDS>Get Started Now
In Select Engine select the Aurora database as shown in Figure 2.
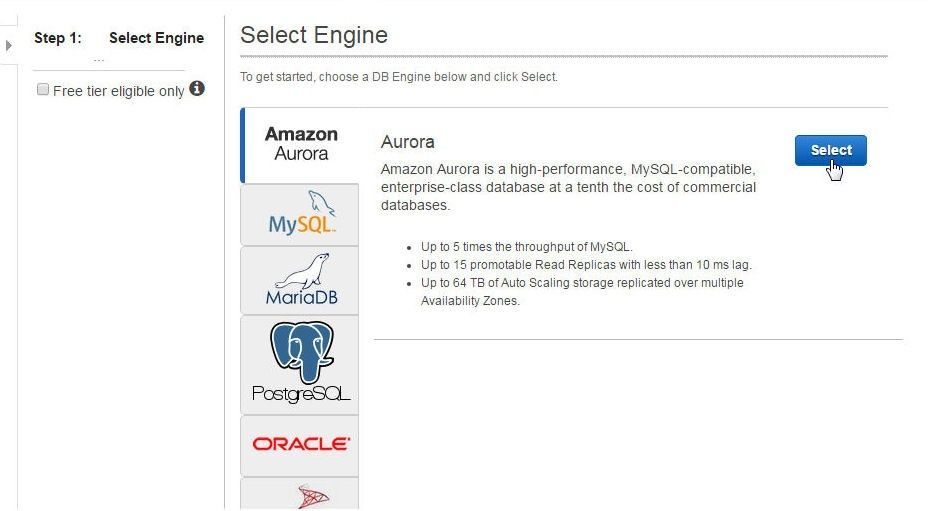
Figure 2. Selecting Aurora
In Specify DB Details in the Instance Specifications include the DB Engine, the DB Instance Class, and whether the replica is to be created in a different availability zone for multi-az deployment, as shown in Figure 3. Specify a DB Instance Identifier (auroradb), Master Username, and Master Password, and click on Next Step.
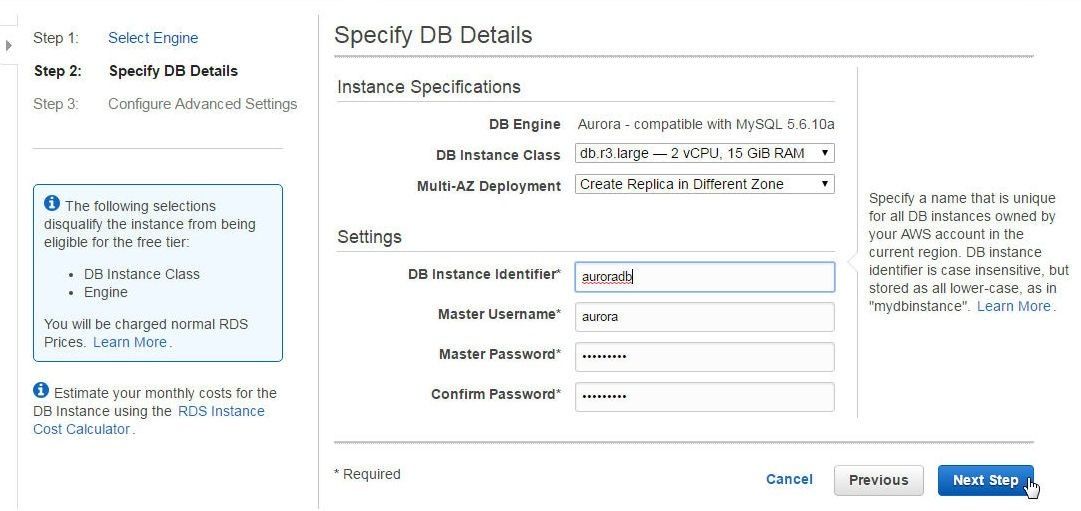
Figure 3. Specifying DB Details
In Configure Advanced Settings specify Network & Security to create a new VPC, create new DB Subnet Group, and create a new Security Group, as shown in Figure 4. Public Accessibility is enabled by default and Availability Zone is set to No Preference.
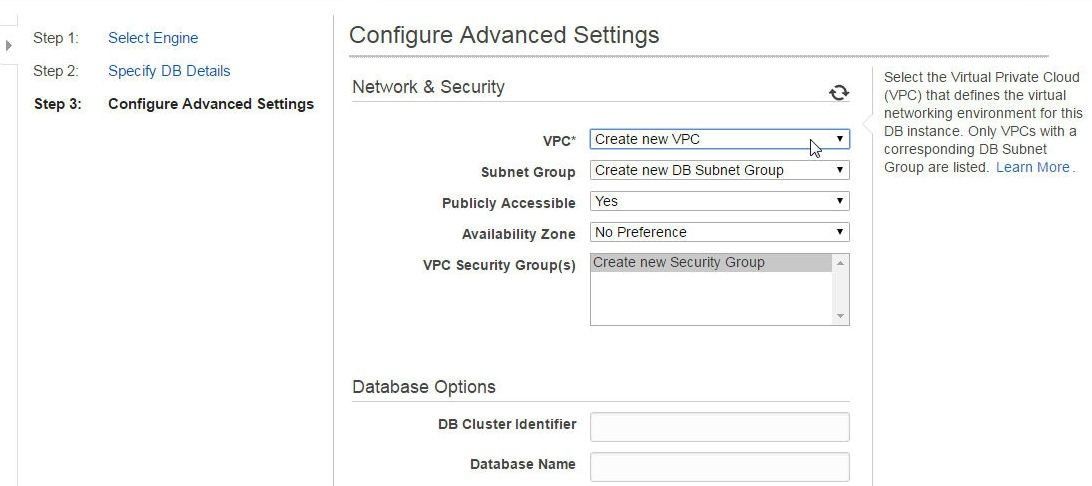
Figure 4. Configuring Advanced Settings>Network & Security
In Database Options specify a DB Cluster Identifier (aurora-cluster), Database Name (auroradb), and Database Port (3306) as shown in Figure 5. IAM DB authentication and encryption are not enabled by default. Optionally, a Failover Priority may be selected. Backup Retention Period is set to 1 day by default.
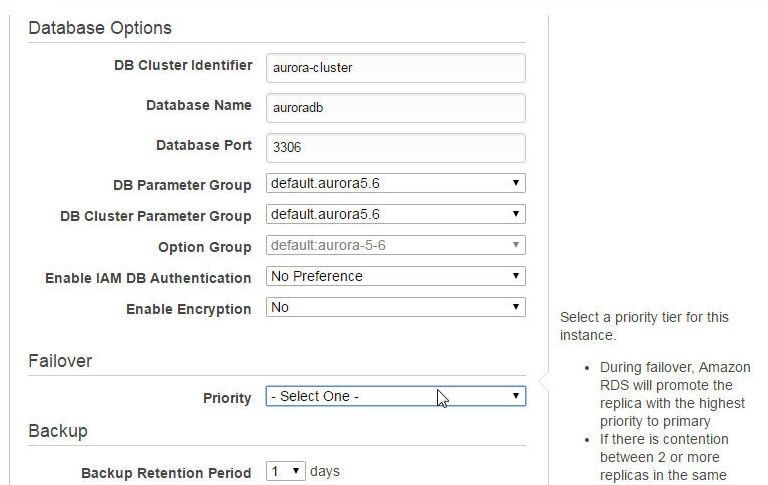
Figure 5. Database Options
By default, Enhanced Monitoring and Auto Minor Version Upgrade are enabled. Click on Launch DB Instance as shown in Figure 6.
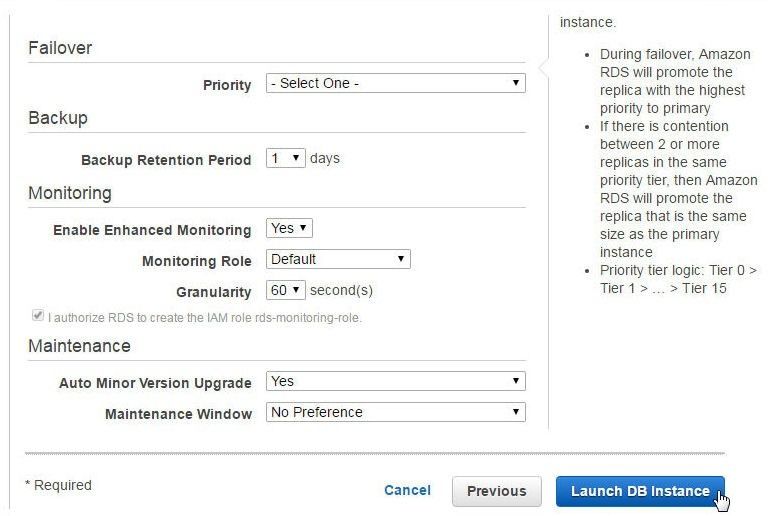
Figure 6. Monitoring and Maintenance Settings
The message “Your DB Instance is being created” should get displayed, as shown in Figure 7.

Figure 7. DB Instance being created
Click on View Your DB Instances as shown in Figure 8.
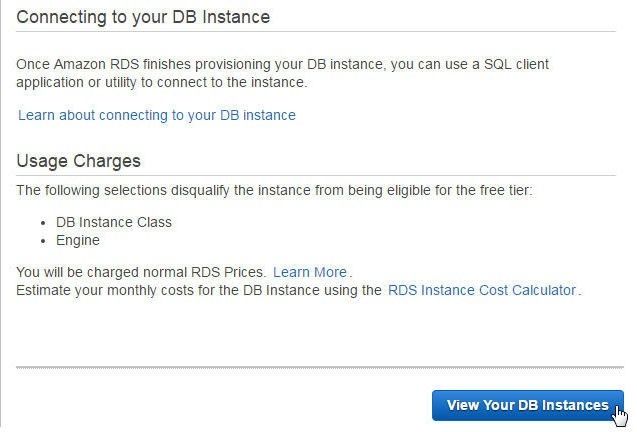
Figure 8. View Your DB Instances
The Aurora primary instance and replica are shown as “creating” in Figure 9.
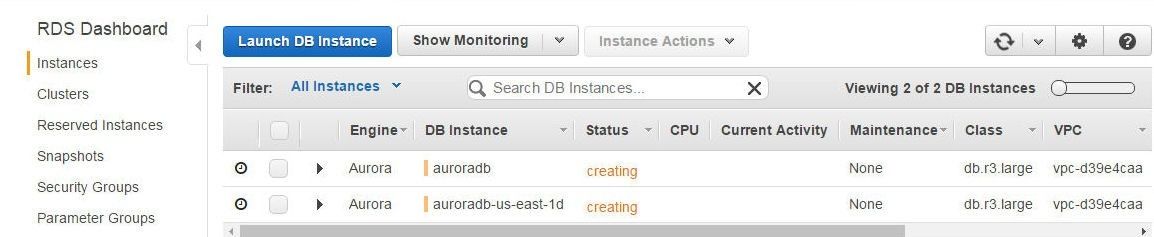
Figure 9. Aurora Primary Instance and Replica creating
When the Primary instance and replica become available, the Status becomes “available”, as shown for the primary instance in Figure 10. The DB Cluster Details list the cluster name, Cluster Endpoint, Reader Endpoint and Port, as shown in Figure 10. The DB Cluster Members table lists two instances: the primary instance (auroradb) with writer role and a replica (auroradb-us-east-1d); each in a different availability zone.
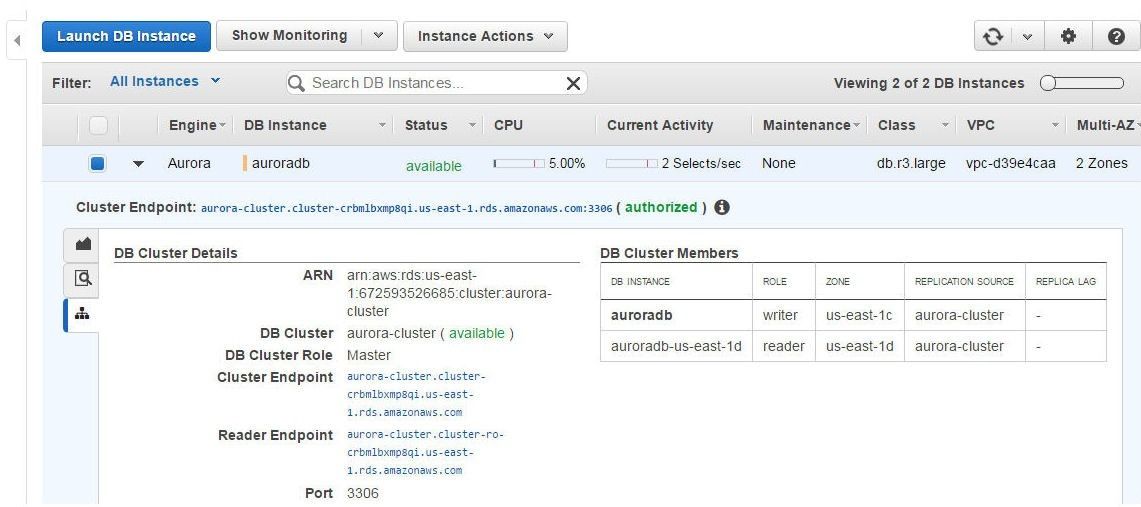
Figure 10. Aurora Cluster Details
Creating an Aurora Replica
Additional replicas (up to a maximum of 15) may be added to the cluster. To add a replica, click on Instance Actions>Create Aurora Replica as shown in Figure 11.
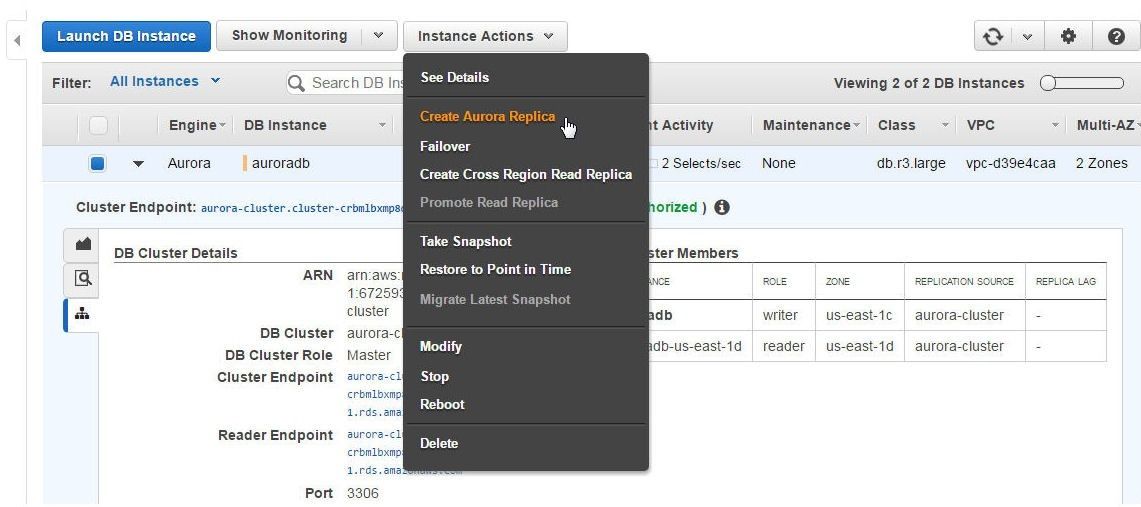
Figure 11. Instance Actions>Create Aurora Replica
In Create Aurora Replica the DB Instance Class is pre-specified as db.r3.large and the Aurora Replica Source is pre-specified too as auroradb, which is the primary instance. Specify a DB Instance Identifier (aurorareplica-1), as shown in Figure 12.
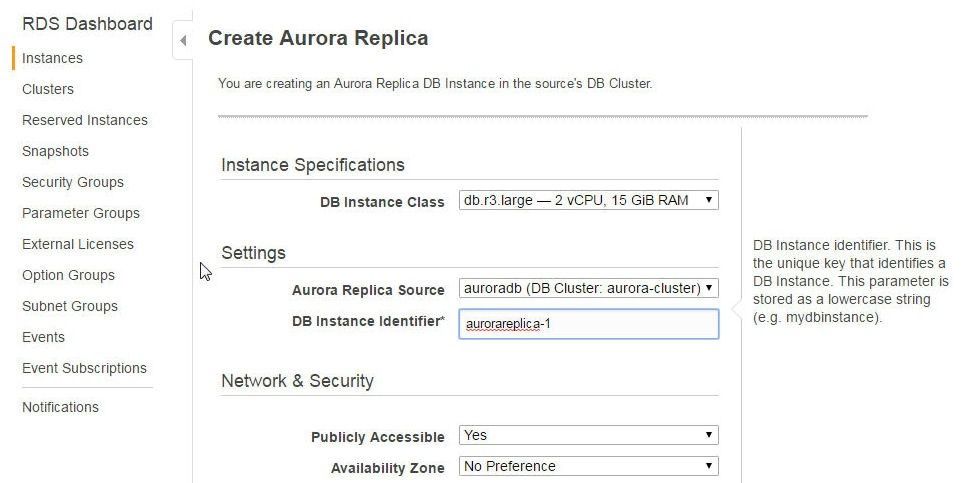
Figure 12. Specifying DB Instance Identifier
In Network & Security Publicly Accessible is set to Yes and Availability Zone is set to No Preference by default. Failover priority is not selected by default. Database Options include the Database Port as 3306. Enhanced Monitoring is not enabled by default. Auto Minor Version Upgrade is not enabled by default. Click on Create Aurora Replica as shown in Figure 13.
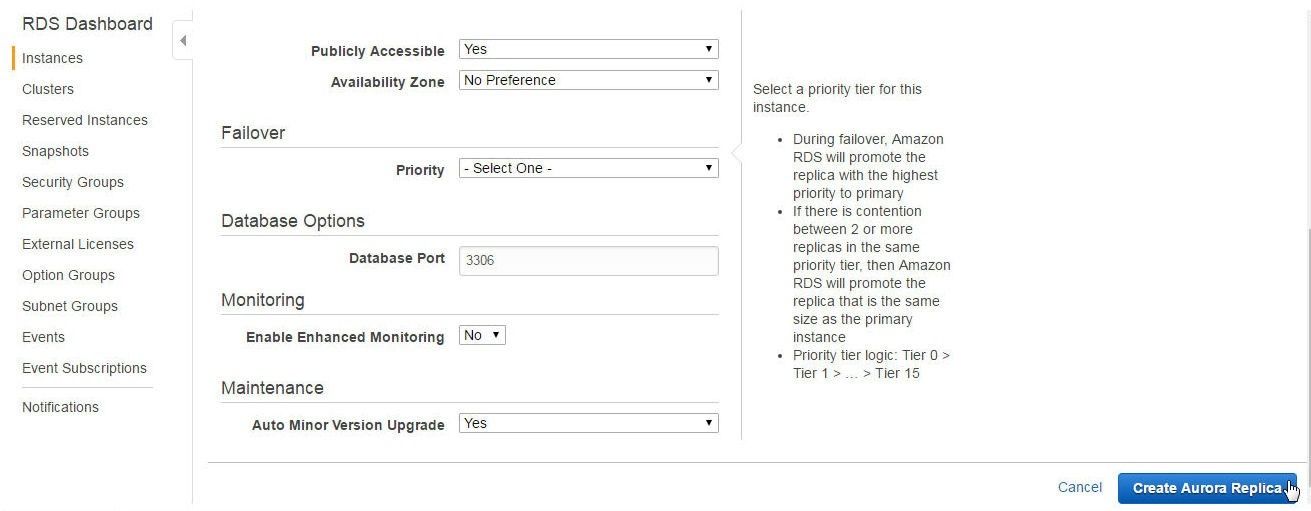
Figure 13. Create Aurora Replica
An Aurora replica (aurorareplica-1) gets added, as shown in Figure 14. The three Aurora instances are shown in Figure 14: primary instance, default replica, and a user-created replica.
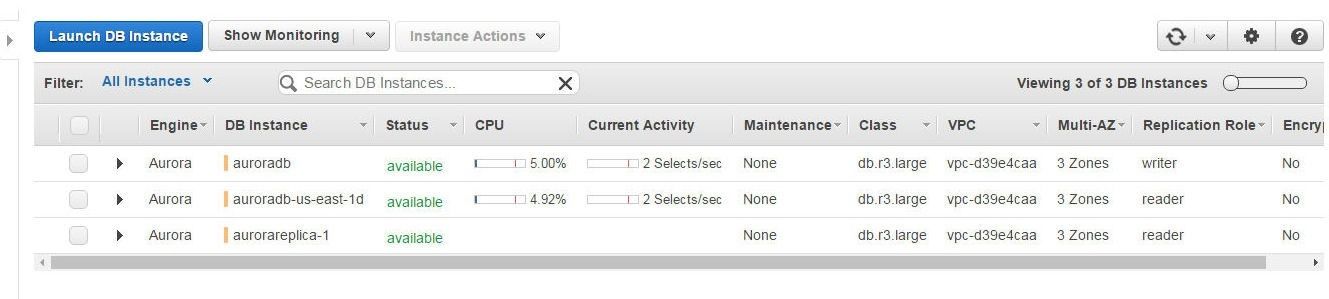
Figure 14. Aurora DB Instances
The DB Cluster Details may be listed for any of the instances and include the Cluster Endpoint, the Reader Endpoint, and the DB Cluster Members, which include three instances, as shown in Figure 15.
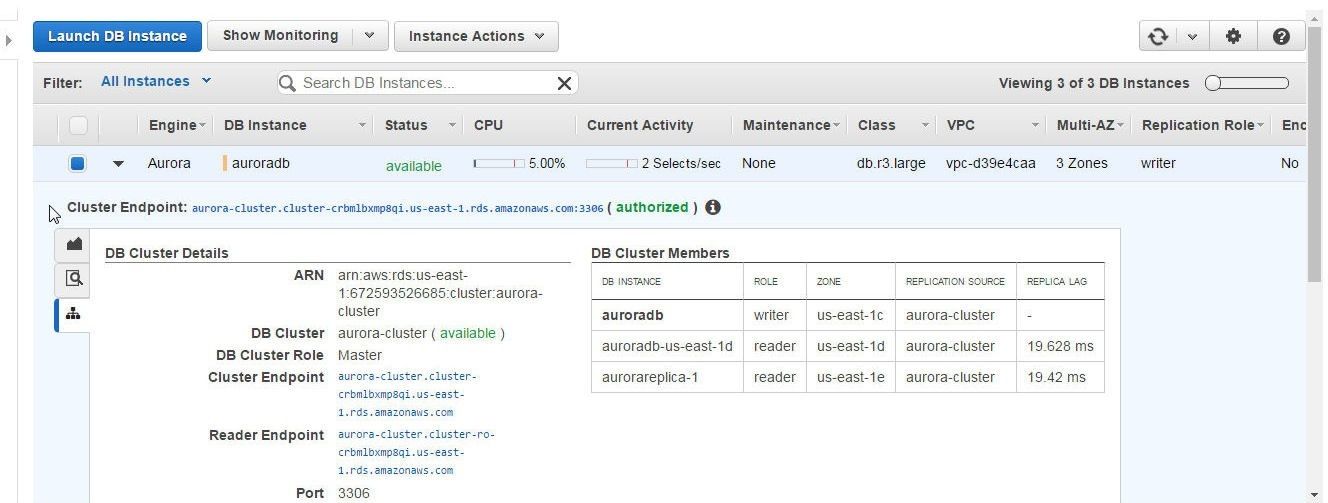
Figure 15. DB Cluster Details
Connecting from Toad Edge Preview
In this section we shall connect to Aurora from Toad Edge Preview. Start Toad Edge Preview and click on Connect>New Connection as shown in Figure 16.
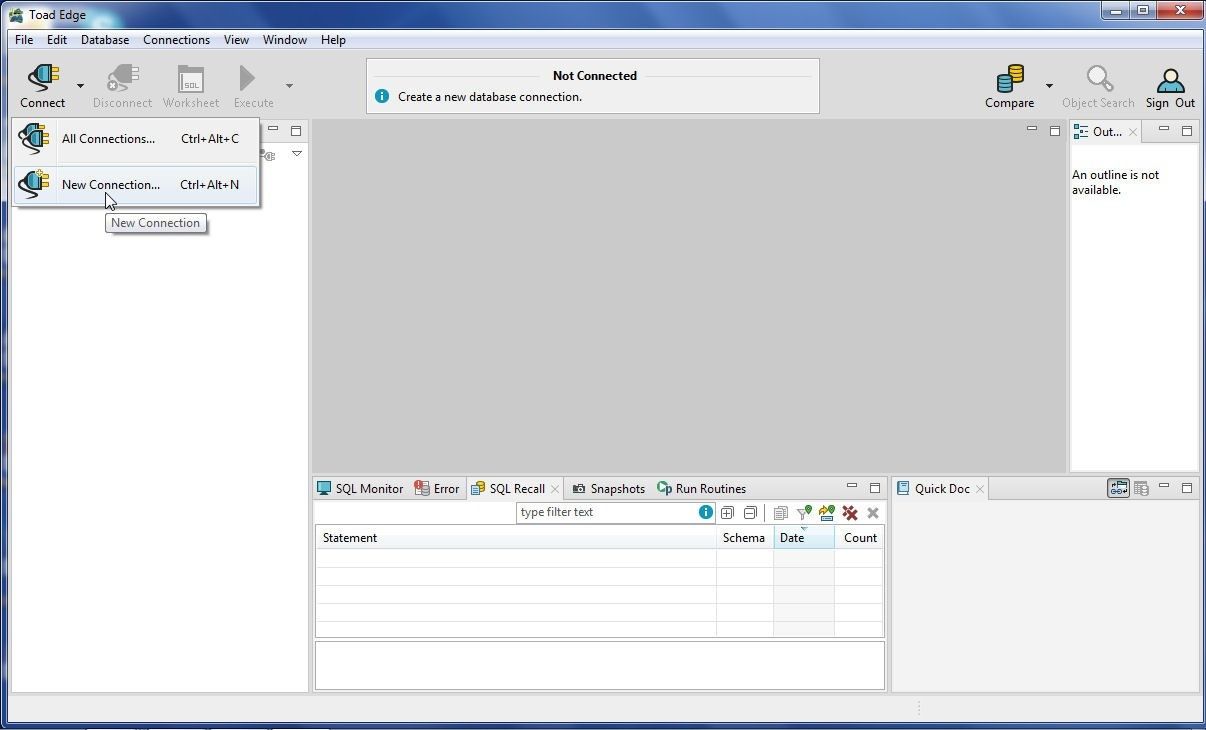
Figure 16. Connect>New Connection
The New MySQL Connection dialog gets started, as shown in Figure 17.
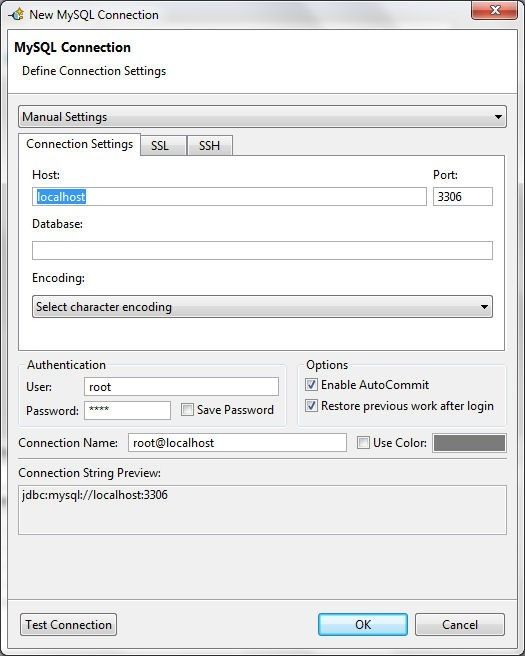
Figure 17. New MySQL Connection
The default settings need to be modified for the Aurora DB. Copy the Reader Endpoint from DB Cluster Details as shown in Figure 18.
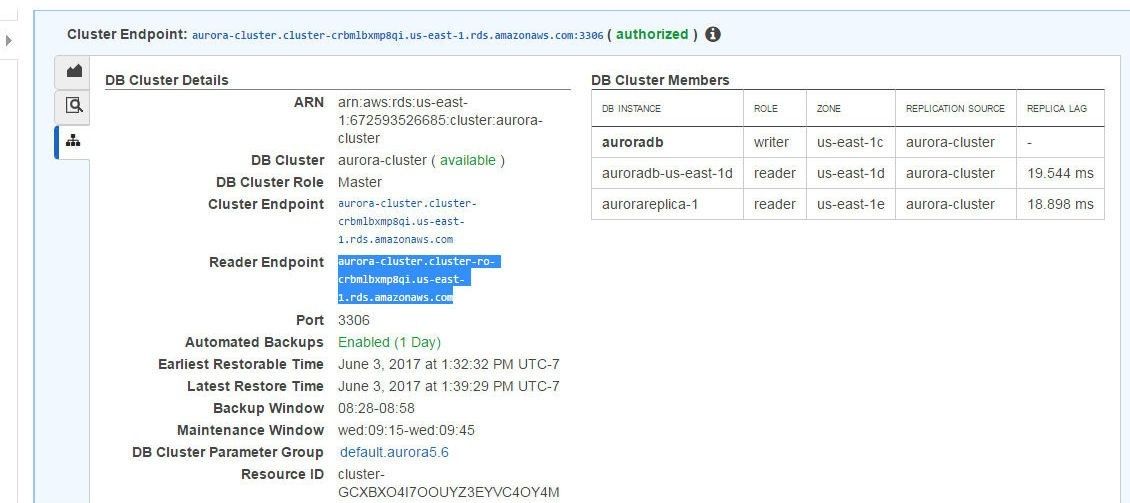
Figure 18. Reader Endpoint
Also obtain the DB Name from the Configuration Details as shown in Figure 19.
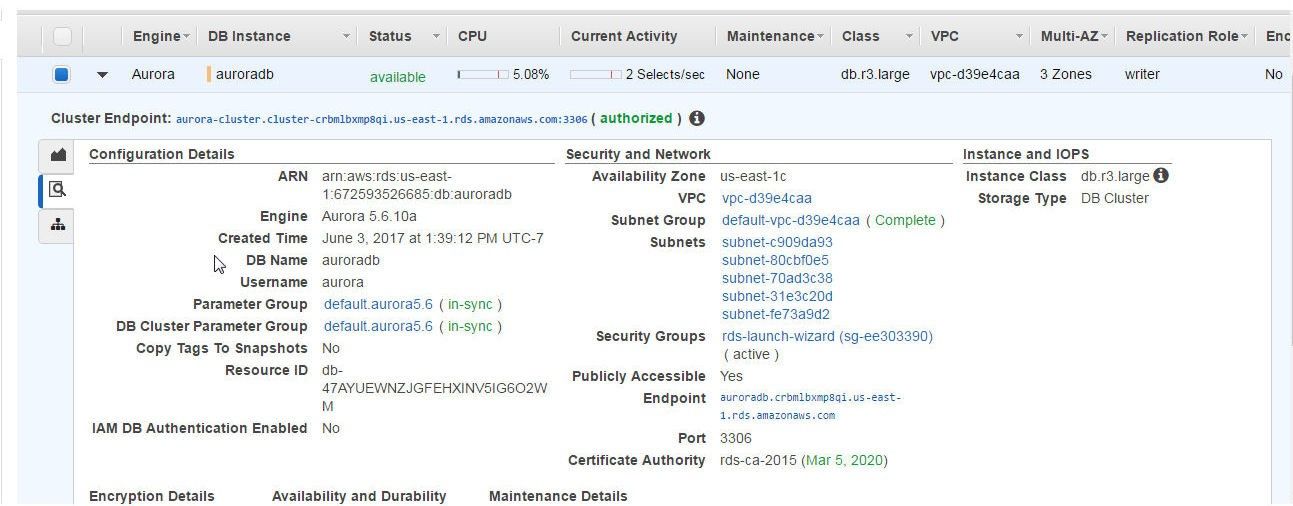
Figure 19. DB Name
Specify the Host as the Reader Endpoint, Port as 3306, and Database as the DB Name auroradb, User as aurora, the Password, and click on Test Connection, as shown in Figure 20.

Figure 20. Configuring New MySQL Connection
If the Connection is OK message gets displayed, as shown in Figure 21, click on OK to complete the connection configuration.
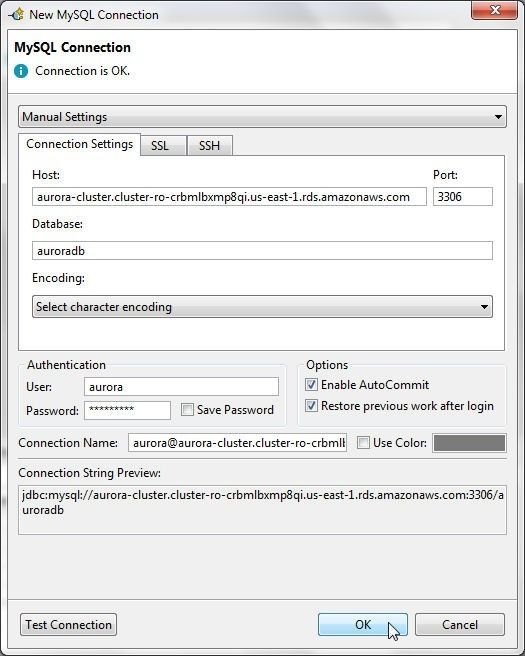
Figure 21. Completing MySQL Connection Configuration
A new connection gets created and added to the Connections, as shown in Figure 22.
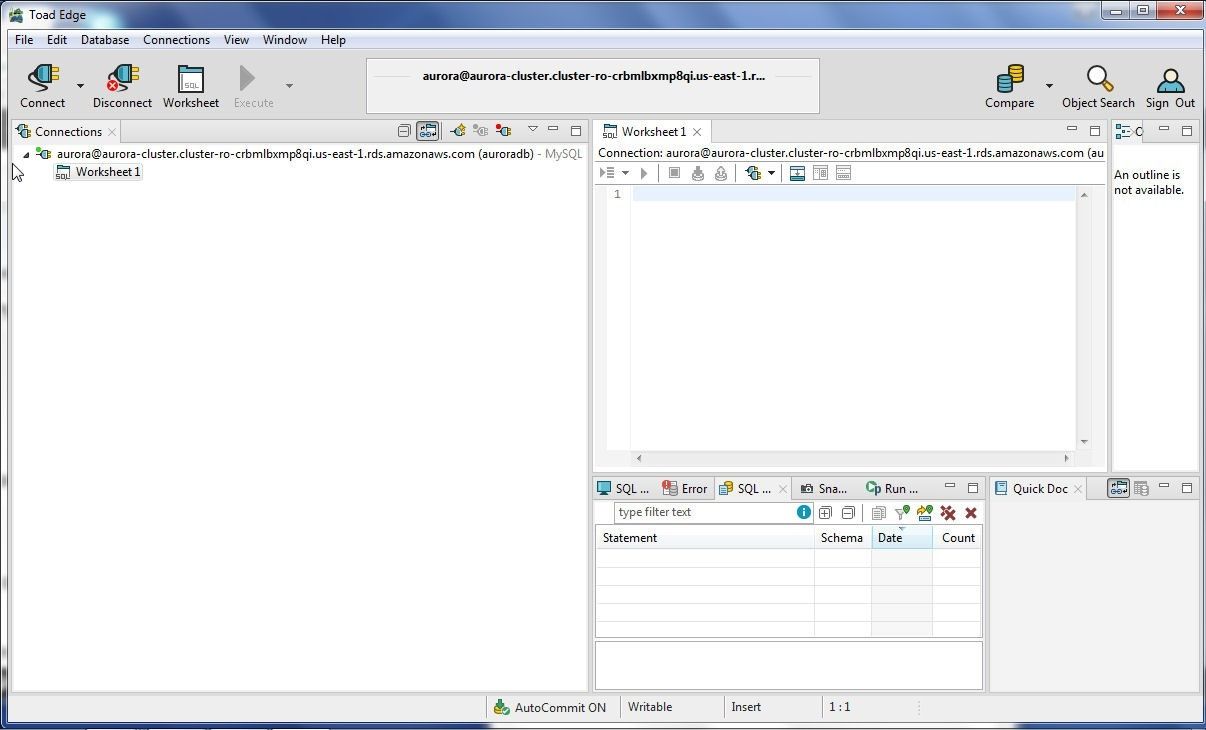
Figure 22. New Connection to Aurora DB
Creating Database Table and Adding Data
In this section we shall create a database table and add data to the table using a worksheet. One SQL Worksheet is created by default with a new connection. Copy the following CREATE TABLE statement to the worksheet.
CREATE TABLE wlslog(time_stamp VARCHAR(255) PRIMARY KEY,category VARCHAR(255),type VARCHAR(255),
servername VARCHAR(255), code VARCHAR(255),msg VARCHAR(255));
Click on Execute SQL Statement as shown in Figure 23.

Figure 23. Running a SQL Statement to create a Table in Aurora DB
A database table gets created, as shown in Figure 24.
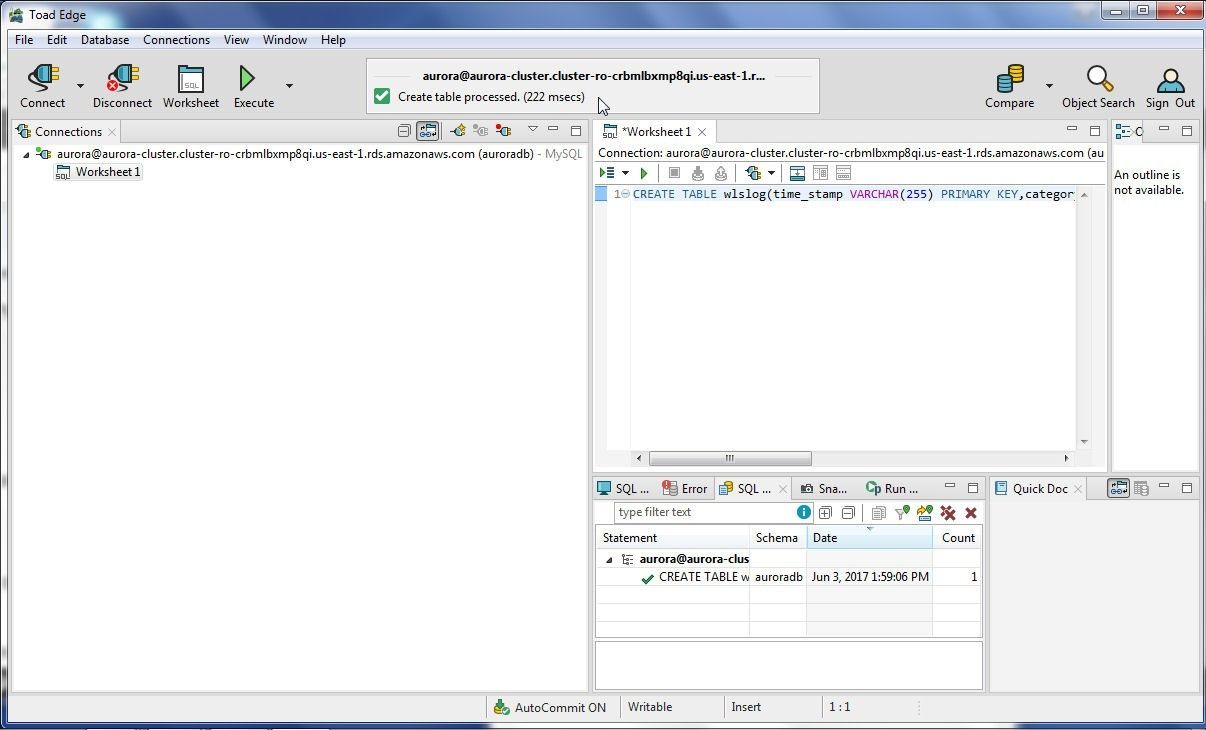
Figure 24. New Table created
Next, copy the following SQL statements to add data to the same worksheet or a new worksheet.
INSERT INTO wlslog(time_stamp,category,type,servername,code,msg) VALUES('Apr-8-2014-7:06:16-PM-PDT',
'Notice','WebLogicServer','AdminServer','BEA-000365','Server state changed to STANDBY');

INSERT INTO wlslog(time_stamp,category,type,servername,code,msg) VALUES('Apr-8-2014-7:06:17-PM-PDT',
'Notice','WebLogicServer','AdminServer','BEA-000365','Server state changed to STARTING');

INSERT INTO wlslog(time_stamp,category,type,servername,code,msg) VALUES('Apr-8-2014-7:06:18-PM-PDT',
'Notice','WebLogicServer','AdminServer','BEA-000365','Server state changed to ADMIN');

INSERT INTO wlslog(time_stamp,category,type,servername,code,msg) VALUES('Apr-8-2014-7:06:19-PM-PDT',
'Notice','WebLogicServer','AdminServer','BEA-000365','Server state changed to RESUMING');

INSERT INTO wlslog(time_stamp,category,type,servername,code,msg) VALUES('Apr-8-2014-7:06:20-PM-PDT',
'Notice','WebLogicServer','AdminServer','BEA-000361','Started WebLogic AdminServer');

INSERT INTO wlslog(time_stamp,category,type,servername,code,msg) VALUES('Apr-8-2014-7:06:21-PM-PDT',
'Notice','WebLogicServer','AdminServer','BEA-000365','Server state changed to RUNNING');

INSERT INTO wlslog(time_stamp,category,type,servername,code,msg) VALUES('Apr-8-2014-7:06:22-PM-PDT',
'Notice','WebLogicServer','AdminServer','BEA-000360','Server started in RUNNING mode');
Click on Execute All Statements as shown in Figure 25.
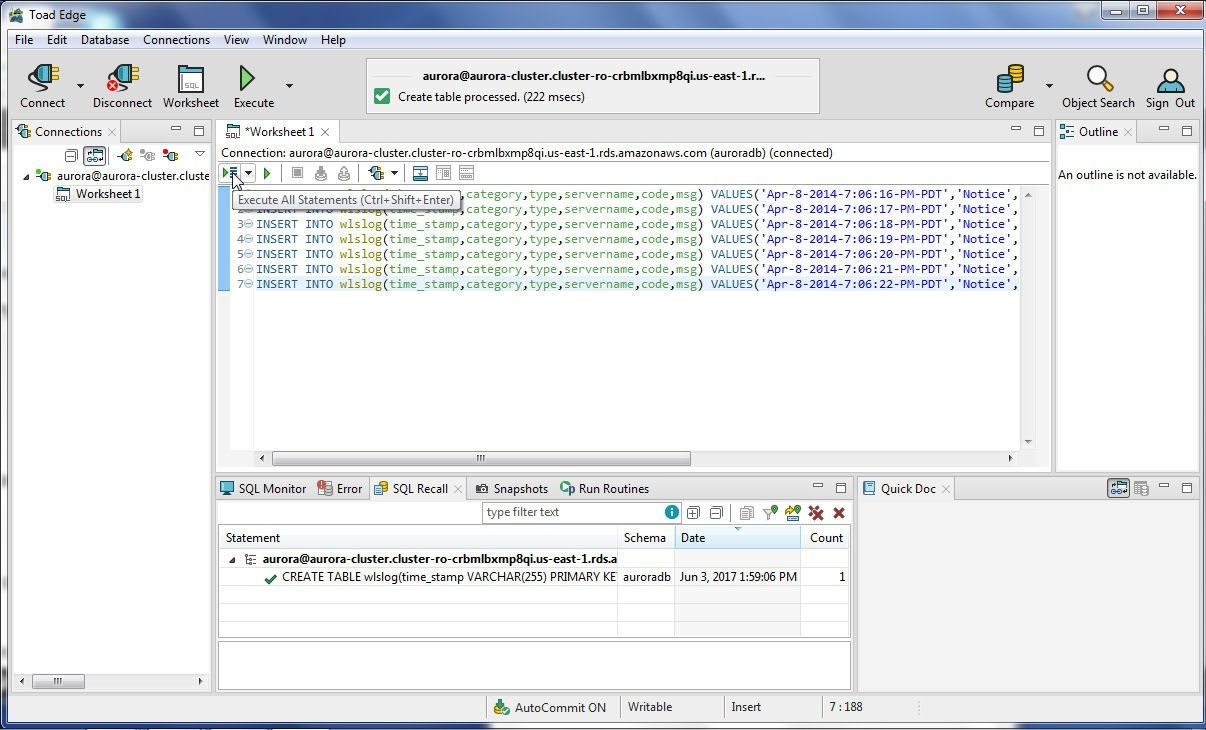
Figure 25. Running multiple SQL Statements
The SQL Statements get processed, as shown in Figure 26.
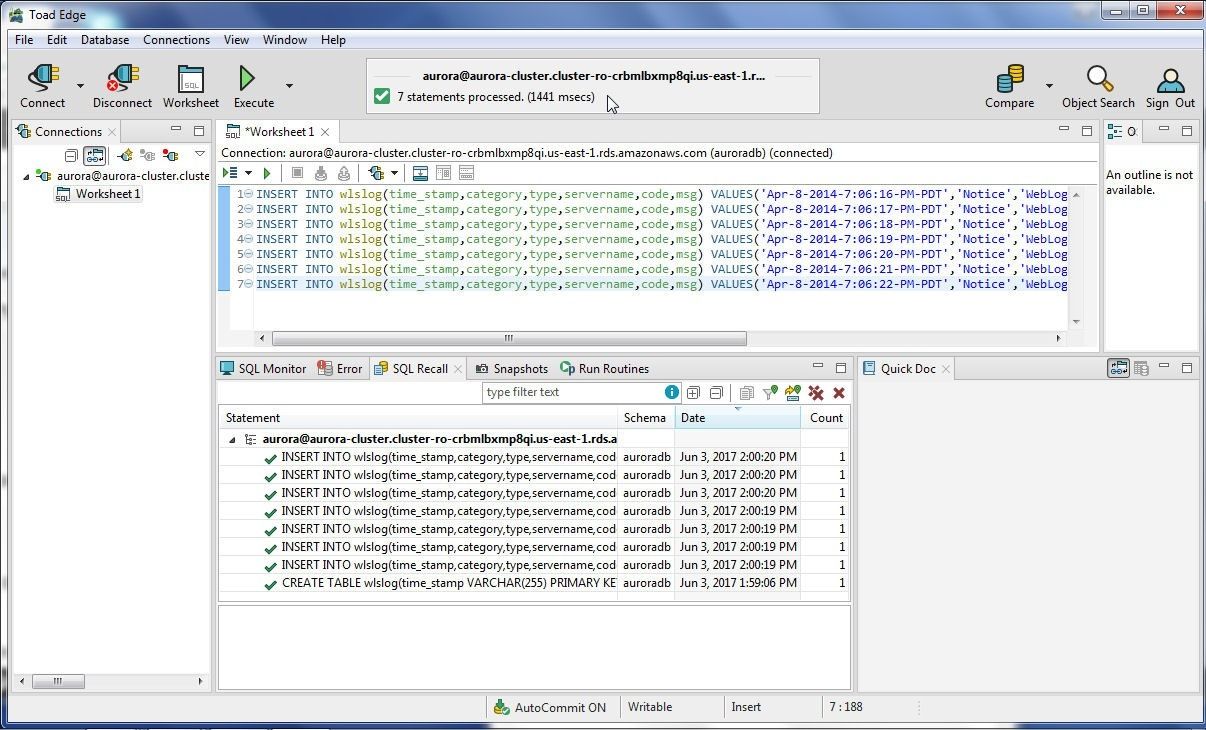
Figure 26. SQL Statements to add Data get Processed
Connecting from Toad Data Point
In this section we shall connect to Aurora from Toad Data Point. Click on Connect>New Connection in Toad Data Point as shown in Figure 27.
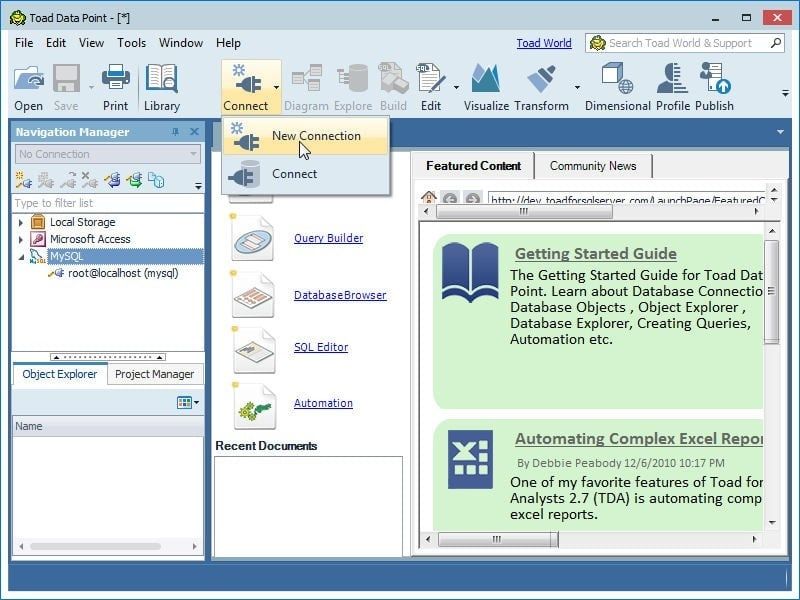
Figure 27. Connect>New Connection
Select MySQL in Relational Data Sources as shown in Figure 28.
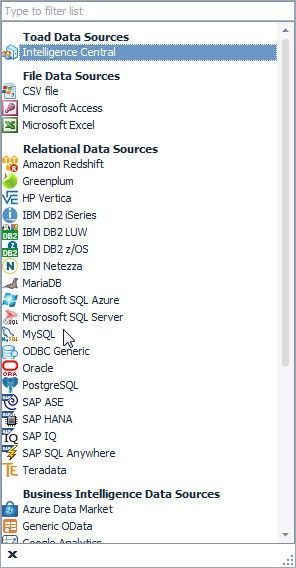
Figure 28. Selecting Relational Data Sources>MySQL
The Create New Connection wizard gets started, as shown in Figure 29. The default setting of Host as “localhost” is not usable with the Aurora DB.

Figure 29. Create New Connection
Obtain the Aurora Reader Endpoint from RDS Console as shown in Figure 19 and copy into the Host field as shown in Figure 30. Specify User name, Password, Database, and Port, and click on Connect.

Figure 30. Connecting to Aurora DB
A connection to Aurora DB instance gets added to Navigation Manager, as shown in Figure 31. The database (auroradb), table (wlslog), and table structure get displayed in Object Explorer .
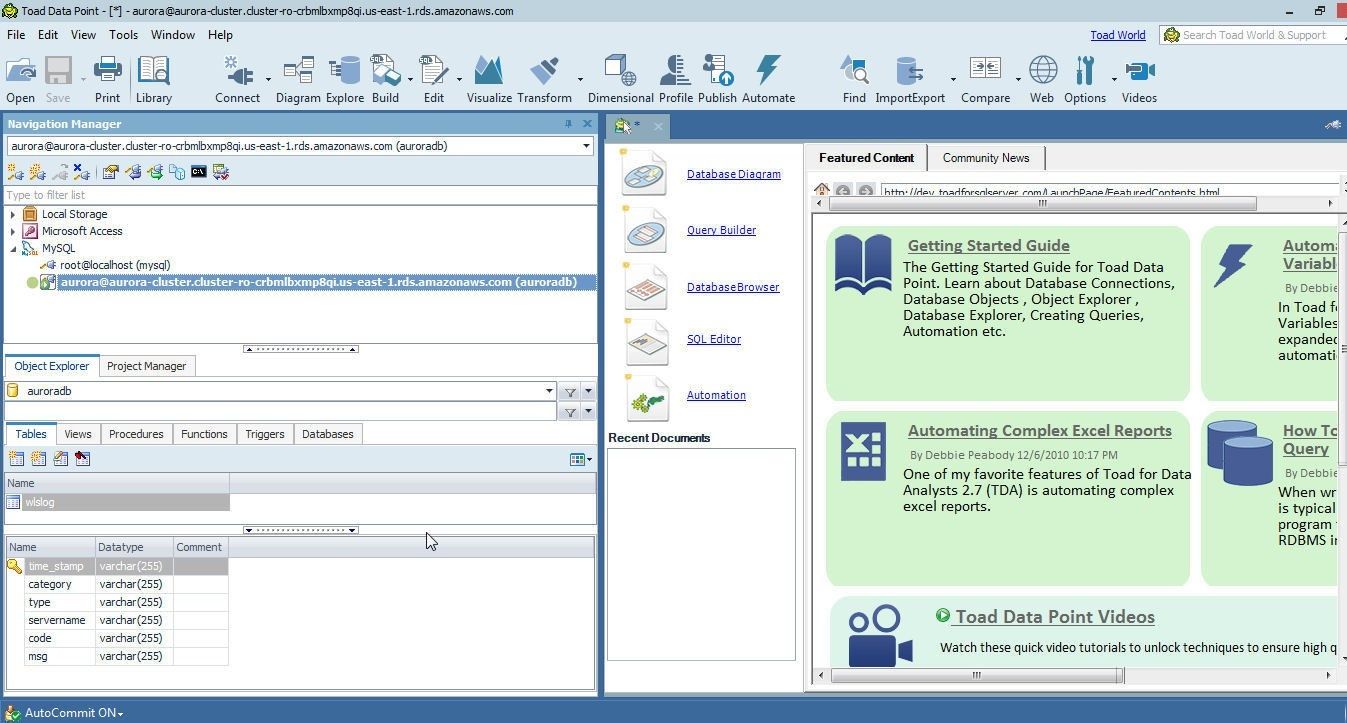
Figure 31. Connection to Toad Data Point
Using DB Explorer
The DB Explorer is used to display database objects, their structure and data. To start the DB Explorer, display wlslog table by selecting the wlslog table in Object Explorer. Right-click on the connection in Navigation Manager and select New DB Explorer as shown in Figure 32.
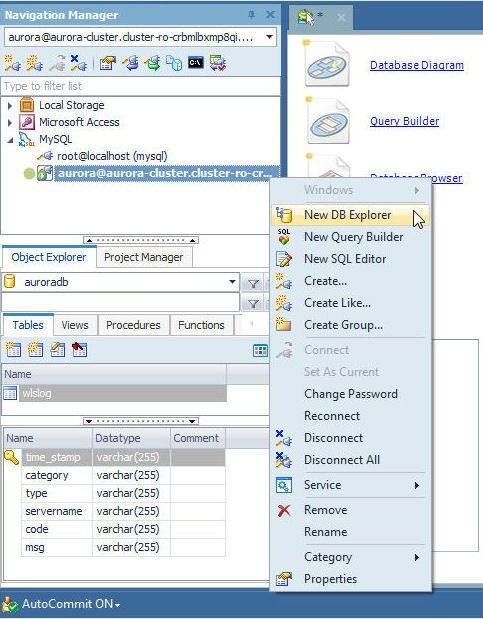
Figure 32. Selecting New DB Explorer
The Columns in the wlslog table get displayed, as shown in Figure 33.
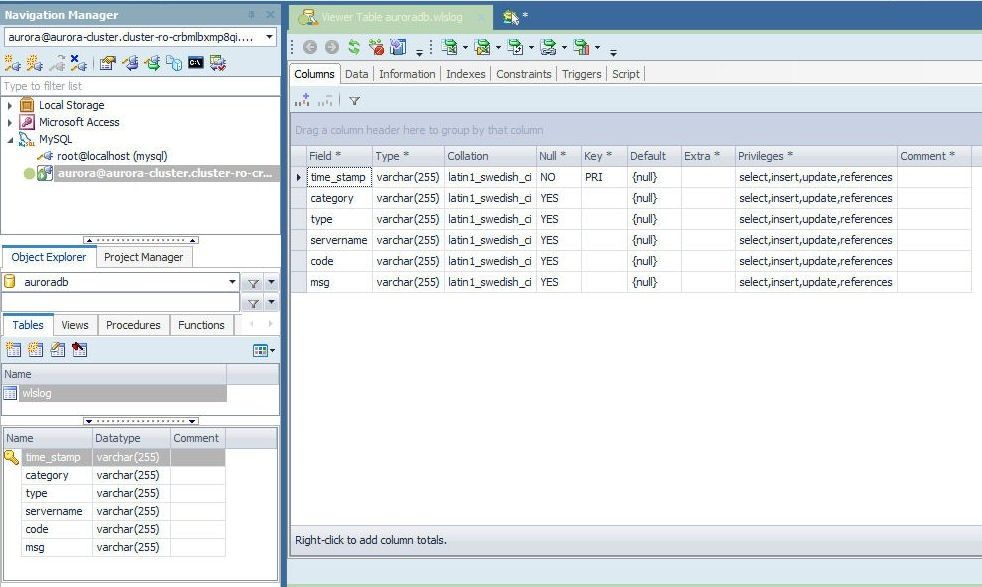
Figure 33. Table Columns
Click on the Data tab to display the table data as shown in Figure 34.
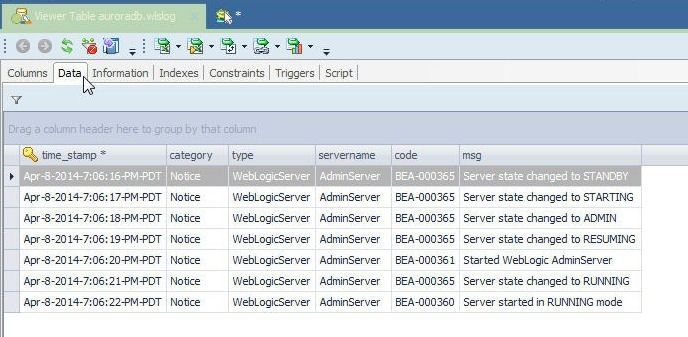
Figure 34. Displaying Table Data
Using Query Builder
The Query Builder is used to build and run SQL queries. To start Query Builder right-click on the connection in Navigation Manager and select New Query Builder as shown in Figure 35.
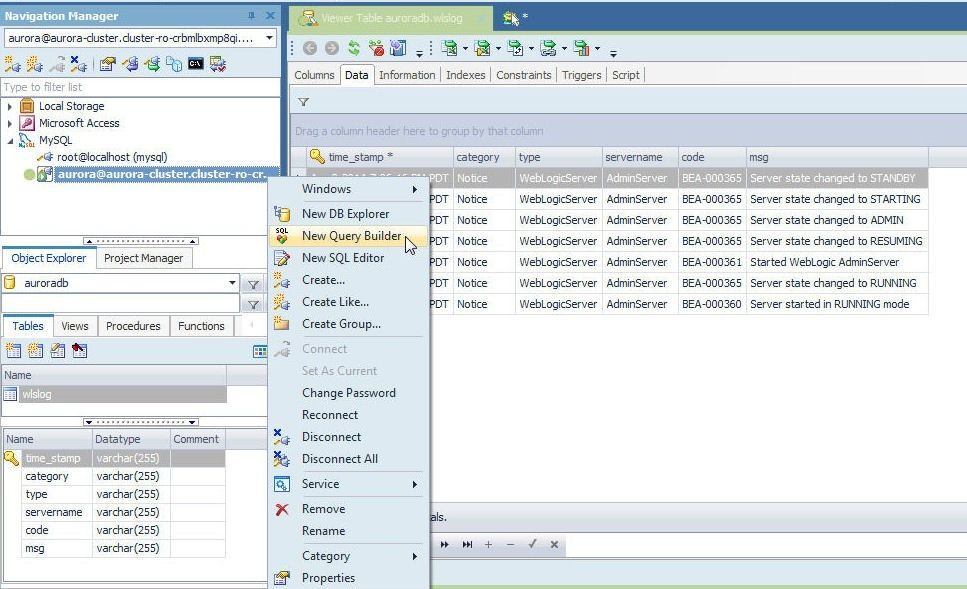
Figure 35. New Query Builder
Select the table (wlslog) on which a query is to be built from Object Explorer and drag onto the Query Builder as shown in Figure 36.
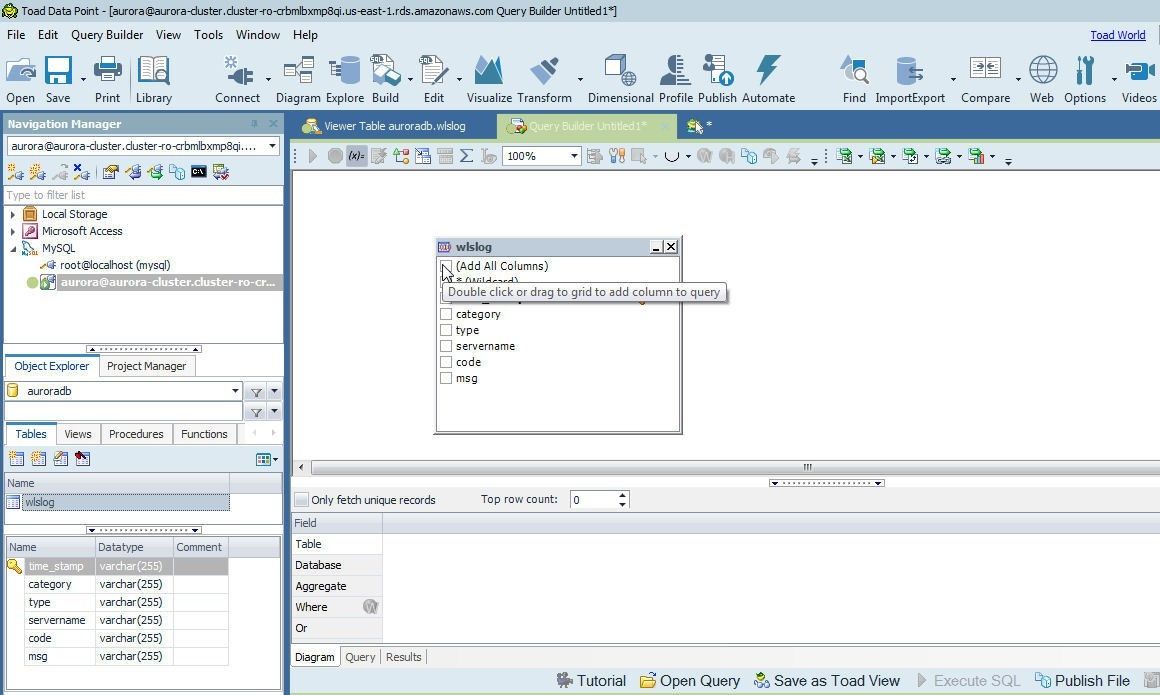
Figure 36. Adding wlslog with Drag and Drop on to Query Builder
Select columns to add to query. Columns to add may be selected individually; or, the Add All Columns selection adds all columns. Select all columns as shown in Figure 37. Select the Query tab to display the query.
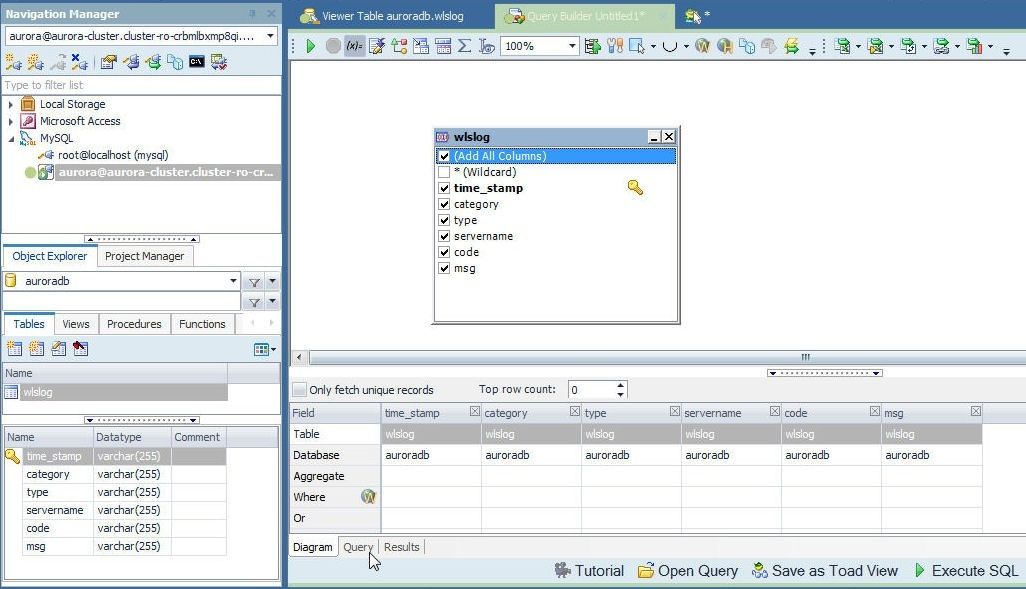
Figure 37. Selecting Query Tab
Click on Execute the SQL Statement as shown in Figure 38.
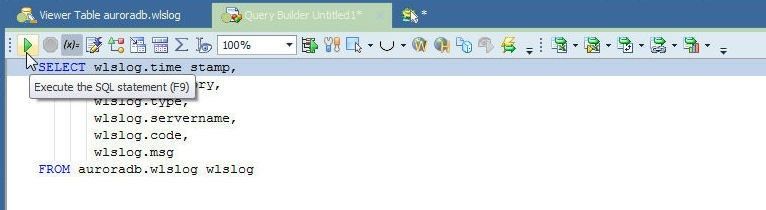
Figure 38. Execute the SQL Statement
The Query results get displayed, as shown in Figure 39.
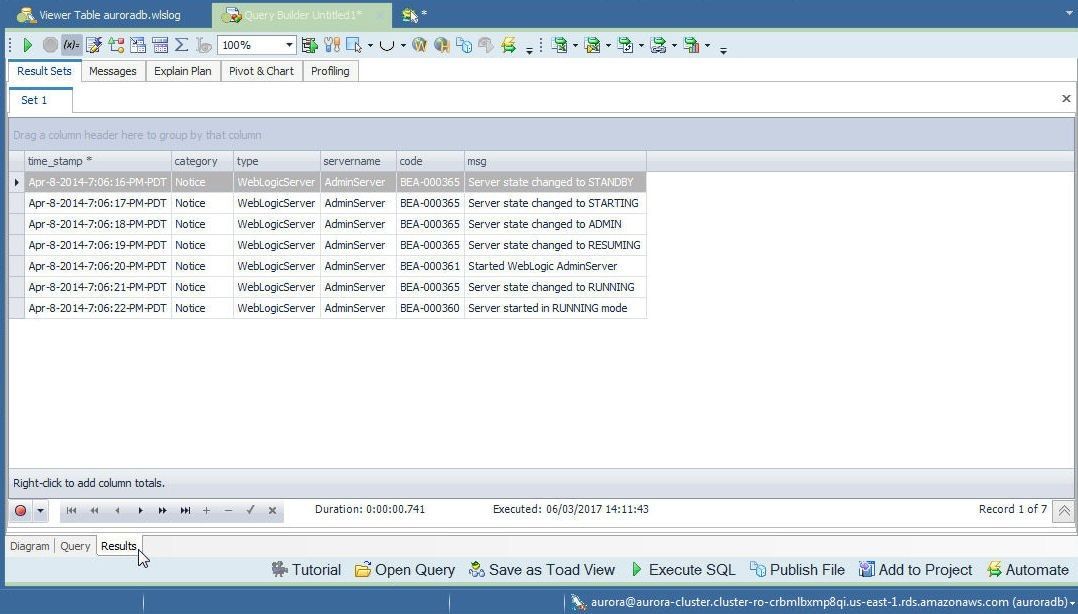
Figure 39. Query Result
Conclusion
In this tutorial we introduced the RDS managed Aurora DB. Starting with creating an Aurora cluster consisting of a primary instance and a replica, we added another replica to make a three-instance cluster. Using the single Reader EndPoint, we connected to Aurora from Toad Edge and created a database table. We aso connected to Aurora from Toad Data Point to display and query the Aurora table added. Toad Data Point provides some features that complement Toad Edge’s such as exporting the results of a SQL query to reports in different formats including PDF and Excel.
Start the discussion at forums.toadworld.com