Modularization has become essential as the scale of database usage has increased. Oracle Database 12c introduced Container Databases (CDBs) and Pluggable Databases (PDBs) around the middle of 2013. A Container Database (CDB) consists of zero, one, or more PDBs. A Pluggable Database is a portable collection of schemas, schema objects, and non-schema objects that appears to an Oracle Net Client the same as a pre-Oracle Database 12c non-CDB. Benefits of CDBs and PDBs include database consolidation, portability with being able to plug/unplug PDBs into a CDB, centralized management and performance tuning, and the separation of data code and administration and as a result fewer database patches and upgrades. A CDB consists of the following containers:
- One root container CDB$ROOT, which stores Oracle provisioned metadata and common users.
- One seed PDB PDB$SEED, which is a template that a CDB may use to create a new PDB.
- Zero or more PDBs, a PDB being a user-defined and created container with data and code for a specific application.
Docker Engine, also introduced in 2013, provides Docker containers as a lightweight alternative to virtual machines. While some other containerization platforms are available, Docker Engine has become the most commonly used containerization platform. While a VM packages a complete OS, a Docker container is an encapsulation or snapshot of an underlying database and multiple Docker containers may be run in isolation on the same OS. Docker Engine is another example of modularization. For an introduction to Docker Engine refer Getting Started with Docker Engine.
In this article we shall discuss using Oracle Database containers and PDBs on Docker Engine containers providing modularization at two levels: database level and OS level. This article has the following sections:
- Setting the Environment
- Creating the Docker Image
- Running a Docker Container for CDB and PDB
- Listing Docker Container and Docker Image
- Listing the Docker Container Logs
- Starting a Bash Shell to Connect to Docker Container
- Listing the Environment Variables
- Connecting to the Container Database (CDB) with SQL*Plus
- Finding if the Database is a CDB
- Listing the PDBs
- Listing the Datafiles
- Listing the Tempfiles
- Connecting to a PDB with SQL*Plus
- Creating a Database Table in the PDB
- Creating a PDB from another PDB
- Creating a PDB from PDB Seed
- Altering a Pluggable Database
- Connecting to a PDB with CONNECT Command
- Dropping a Pluggable Database
- Stopping and Starting the Docker Container
Setting the Environment
The only requirement is an OS running Docker Engine. Docker is supported on several OS platforms but most require Docker to be installed. CoreOS Linux has Docker pre-installed and we shall use CoreOS. Create an EC2 instance from CoreOS Stable AMI. Copy the Public IP Address of the CoreOS instance from the AWS Console as shown in Figure 1.
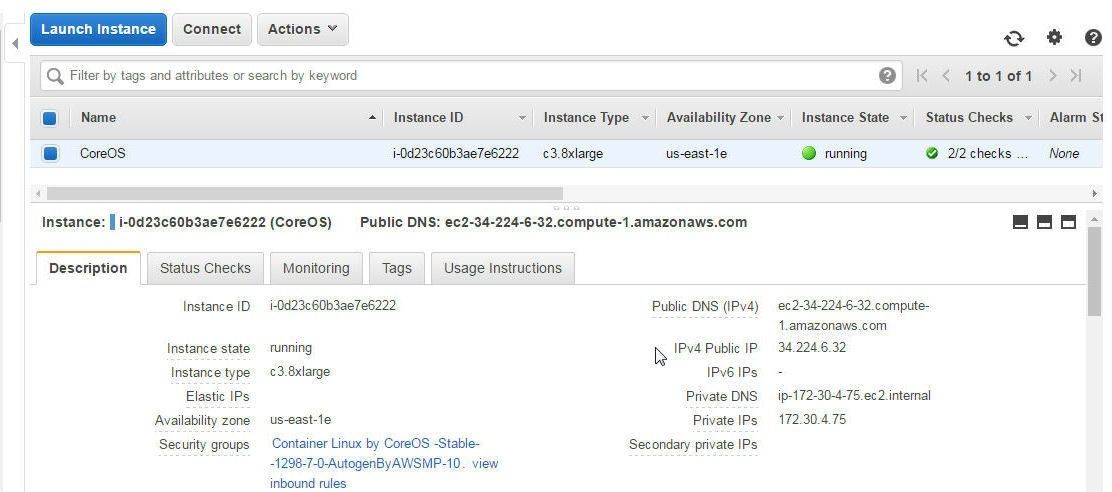
Figure 1. CoreOS EC2 Instance
SSH login into the CoreOS instance using the Key pair used in creating the EC2 instance and the Public IP Address.
ssh -i "coreos.pem" core@34.224.6.32
Creating the Docker Image
Oracle software runs inside a Docker container created from a Docker image. A few pre-built Docker images are available for creating a Docker container for Oracle Database 12c CDB and PDBs. Oracle Database requires that the Oracle Database binaries be downloaded by the end-user by accepting a license. We shall use the Docker image source code for Oracle Database supplied by Oracle and available at https://github.com/oracle/docker-images/tree/master/OracleDatabase to create a Docker image. A Docker image must be built using a local copy of the Oracle Database binaries (linuxx64_12201_database.zip), which may be downloaded from http://www.oracle.com/technetwork/database/security/downloads/index.html by first selecting Accept License Agreement.
First, download the Oracle Docker images from Github.
git clone https://github.com/oracle/docker-images.git
The Oracle Docker images source code gets downloaded as shown in Figure 2.
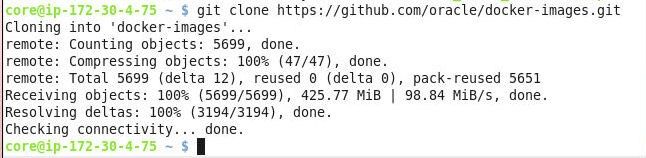
Figure 2 Downloading Oracle Docker Images Source Code
Copy the Oracle Database 12.2.0.1 binaries linuxx64_12201_database.zip to the docker-images/OracleDatabase/dockerfiles/12.2.0.1 directory, which should list the binaries zip file as shown in Figure 3.
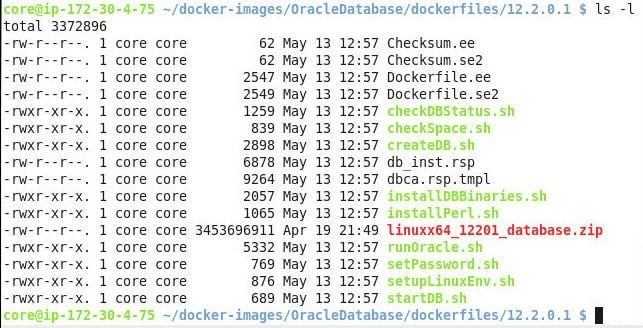
Figure 3. The Oracle Database binaries file linuxx64_12201_database.zip
Change directory to the dockerfiles directory.
cd docker-images/OracleDatabase/dockerfiles
Run the following command to build the Docker image using Dockerfile and binaries for Oracle Database 12.2.0.1.
./buildDockerImage.sh -v 12.2.0.1 –e
The output from the preceding command is shown in Figure 4.
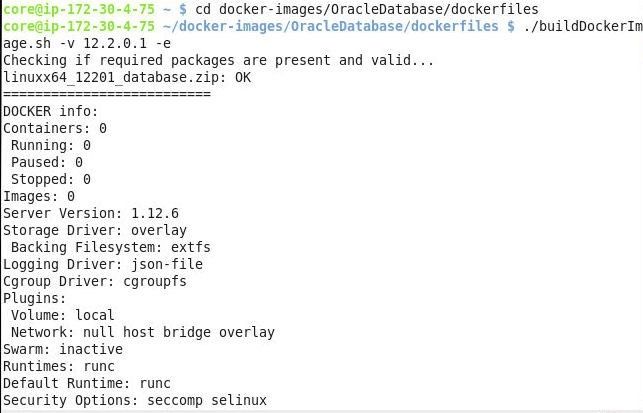
Figure 4. Output from buildDockerImage.sh
Oracle Database 12c Docker image oracle/database- 12.2.0.1-ee gets built as shown in Figure 5.
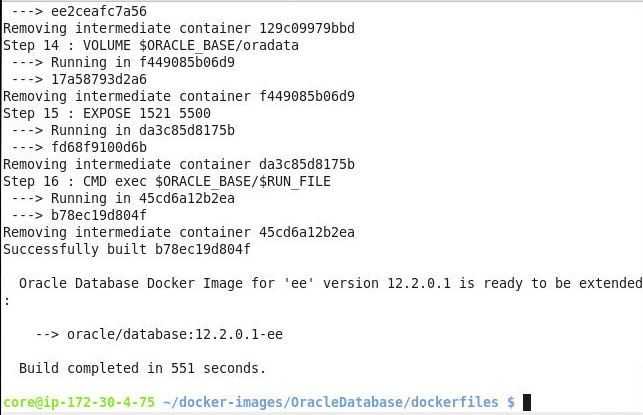
Figure 5. Oracle Database Docker image oracle/database- 12.2.0.1-ee
The Docker image can be listed.
docker images
The Docker image oracle/database- 12.2.0.1-ee gets listed as shown in Figure 6.
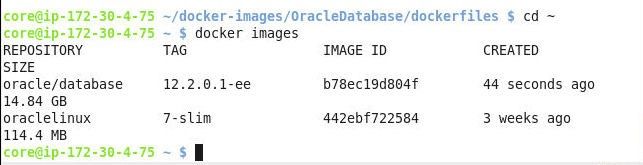
Figure 6. Listing Docker Images
The Docker image should not be distributed publicly, but may be uploaded to a private repo on Docker Hub or some other Docker image repo. The Docker image may need to be tagged if the Docker repo does not allow the default Docker image name format, which includes a‘/’. Tag the Docker image using the docker tag command as shown in Figure 7.
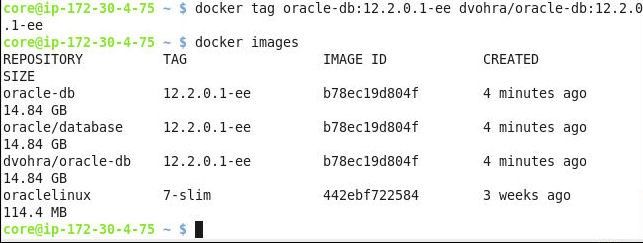
Figure 7. Tagging the Docker Image
Create a private repo on Docker Hub to upload the Docker image. Docker Hub private repo dvohra/oracle-db:12.2.0.1-ee is used, but different users would need to create a different private repo if the Docker image is to be stored in a Docker image repository. Push the Docker image to the Docker Hub repo with the docker push command as shown in Figure 8.
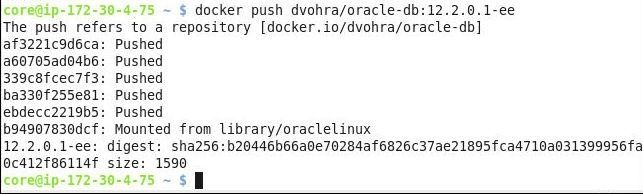
Figure 8. Pushing the Docker Image to Docker Hub
Subsequently, the Docker image gets listed in the Docker Hub private repo as shown in Figure 9.

Figure 9. Docker Image on a Private Repo on Docker Hub
Running a Docker Container for CDB and PDB
We shall use the Docker image oracle/database:12.2.0.1-ee tagged as dvohra/oracle-db:12.2.0.1-ee. Run the following docker run command to create a Docker container for Oracle database CDB and PDBs.
sudo docker run --name orclcdb
  -p 1521:1521 -p 5500:5500
  -e ORACLE_SID=ORCLCDB
  -e ORACLE_PDB=ORCLPDB1
  -e ORACLE_PWD=oracle
  dvohra/oracle-db:12.2.0.1-ee
The Docker image gets pulled from the Docker Hub repo if not already downloaded and a Docker container gets created, as shown in Figure 10.
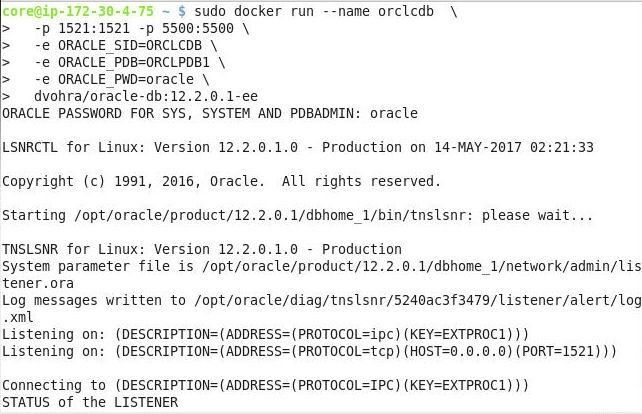
Figure 10. Creating a Docker Container
As shown in Figure 11, the pluggable database ORCLPDB1 gets created.
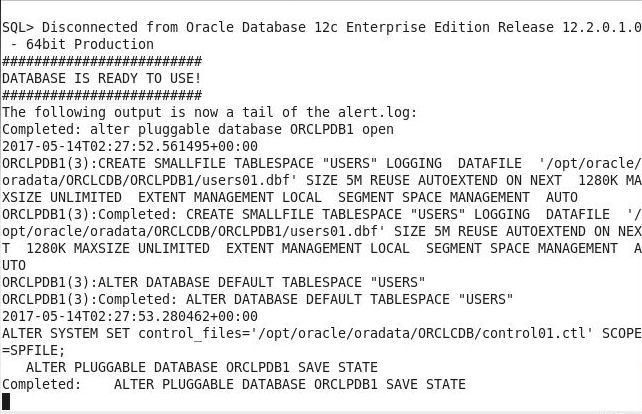
Figure 11. Pluggable Database ORCLPDB1 Created
Listing the Docker Container
List the Docker container created including other running Docker containers.
docker ps
The Docker container orclcdb gets listed, as shown in Figure 12.
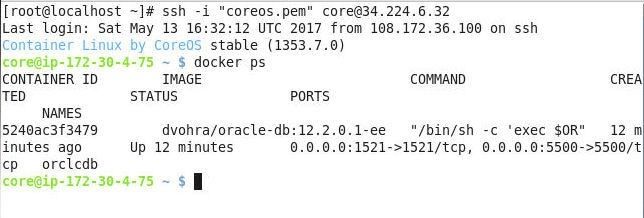
Figure 12. Docker Container for Oracle Database CDB and PDBs
The Docker container has started and Oracle database 12c in the Docker container has become available.
Listing the Docker Container Logs
List the Docker container logs for orclcdb. The logs can be listed after the container has been created.
docker logs orclcdb
The output from the docker logs command is shown in Figure 13.
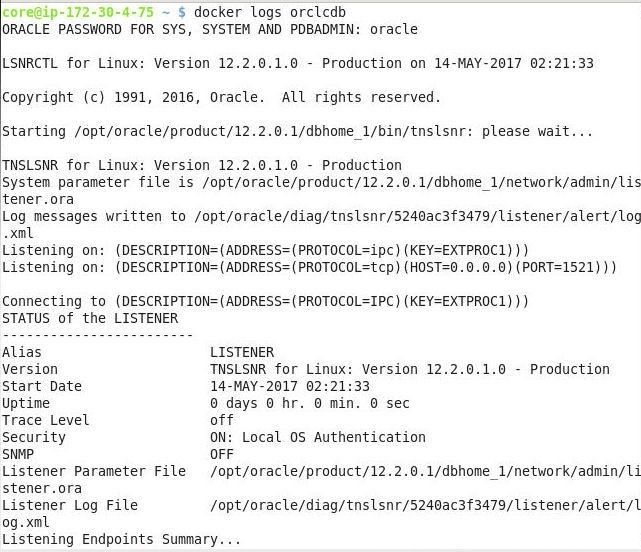
Figure 13. Docker Container Logs
When the database becomes available, the “Database is ready to use.” message should get output as shown in Figure14.
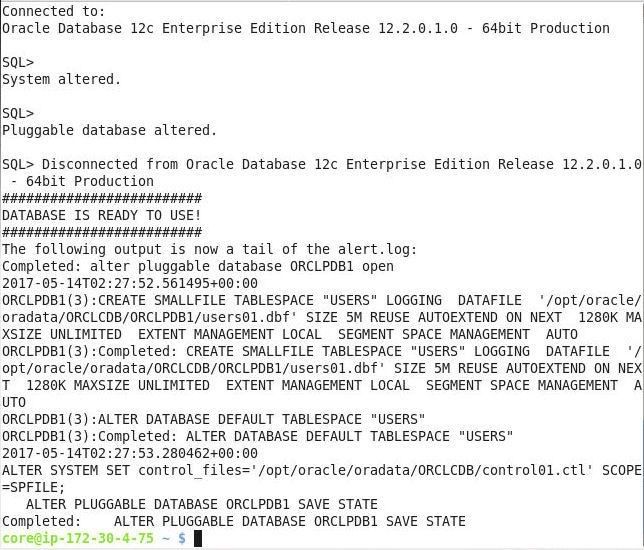
Figure 14. Database is Ready to Use
Starting a Bash Shell to Connect to Docker Container
To be able to access the Oracle database we need to start a Bash shell for the Docker container.
docker exec –it orclcdb bash
The bash shell command prompt gets displayed, as shown in Figure 15.

Figure 15. Starting a Bash Shell
Find the Listener status with the lsnrctl status command as shown in Figure 16.
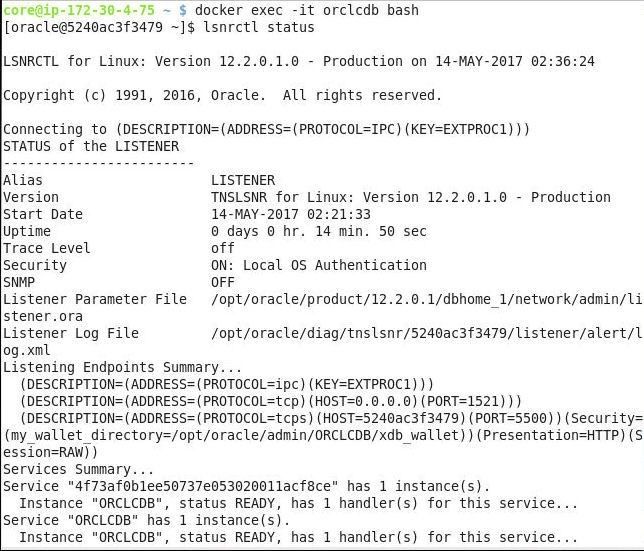
Figure 16. lsnrctl status Command Output
Instance ORCLCDB status should be READY and services ORCLCDB, ORCLCDBXDB, and ORCLPDB1 should get listed as being associated with the ORCLCDB instance, as shown in Figure 17. The service ORCLCDB is for the Oracle container database and service ORCLPDB1 is for the PDB.
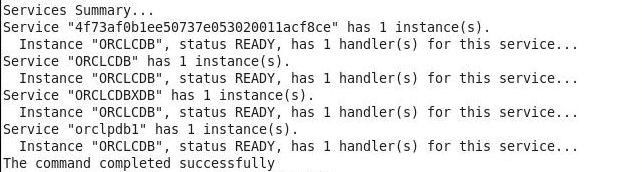
Figure 17. lsnrctl status Command Output
Listing the Environment Variables
List or echo the environment variable values for Oracle SID and PDB.
echo $ORACLE_SID
echo $PDB_NAME
The Oracle SID is ORCLCDB, as shown in Figure 18, and only one SID is defined across all PDBs and the one CDB. The one PDB created by the Docker container as preconfigured in the Docker image is ORCLPDB1. Additional PDBs may be created, as we shall discuss in later sections.

Figure 18. Listing Environment Variable Values
Connecting to the Container Database (CDB) with SQL*Plus
Start a SQL*Plus CLI and connect to the CDB service ORCLCDB with user SYS as SYSDBA with database host as localhost and port as 1521.
sqlplus sys/oracle@localhost:1521/ORCLCDB as sysdba
The SQL*Plus command-line interface gets connected to Oracle Database 12c EE 12.2.0.1.0, as shown in Figure 19.
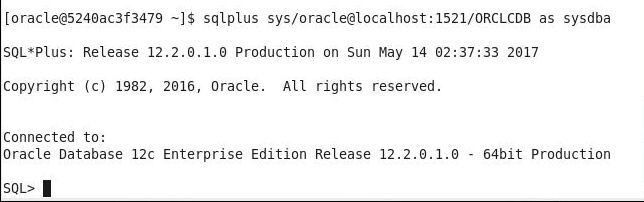
Figure 19. Starting SQL*Plus CLI
Container IDs are numbered with the scheme listed in Table 1.
Table 1. Container ID Scheme
|
Container ID |
Scheme |
|
0 |
Applies to the whole CDB |
|
1 |
Applies to the Root Container |
|
n |
Applies to PDBs |
Display the current container name and container ID with the following show commands.
show con_name
show con_id
The current container name gets listed as CDB$ROOT and the container ID is 1, as shown in Figure 20.
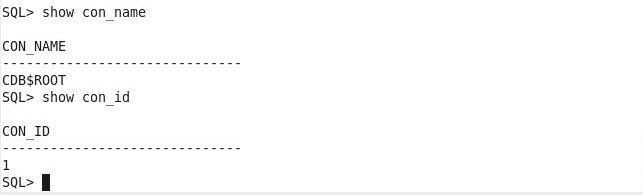
Figure 20. Starting SQL*Plus for CDB Root Container
Similarly, the system user may connect to CDB Root with the SQL*Plus CLI:
sqlplus system/oracle@localhost:1521/ORCLCDB
A SQL*Plus CLI gets started for the CDB Root container, as shown in Figure 21.
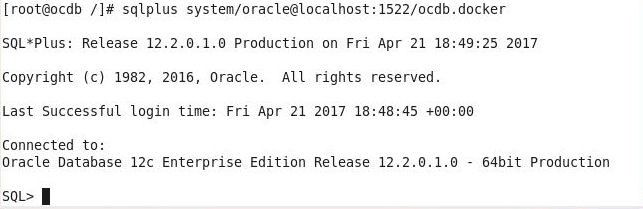
Figure 21. Connecting to CDB Root as system
To exit the SQL*Plus CLI and subsequently the bash shell, run the exit command.
Finding if the Database is a CDB
The CDB column in the v$database view, which is available in the CDB$ROOT, indicates with a YES or a NO whether the database is a CDB. Find the value of the CDB column.
select cdb from v$database;
A YES gets output, as shown in Figure 22, indicating that the database is a CDB.
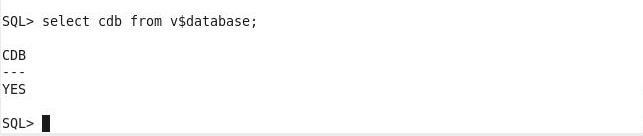
Figure 22. Finding if the Database is a CDB
Listing the PDBs
The v$pdbs view, which is available in the CDB$ROOT, provides information about the PDBs associated with the current database. Output the container ID, PDB ID, and PDB name.
select con_id, dbid, name from v$pdbs;
The PDB$SEED and ORCLPDB1 containers get listed, as shown in Figure 23.
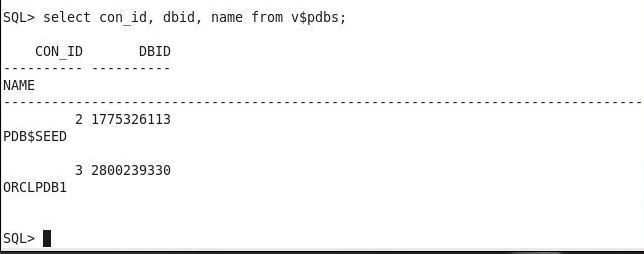
Figure 23. Listing the PDBs
Before being able to use a PDB, the column in the v$pdbs view most of interest is open_mode, which may be found with the following command:
select name, open_mode from v$pdbs;
The PDB$SEED is READ ONLY and ORCLPDB1 is READ WRITE, as shown in Figure 24. To be able to add data to a PDB the open mode must be READ WRITE. The other supported values are MOUNTED and MIGRATE.
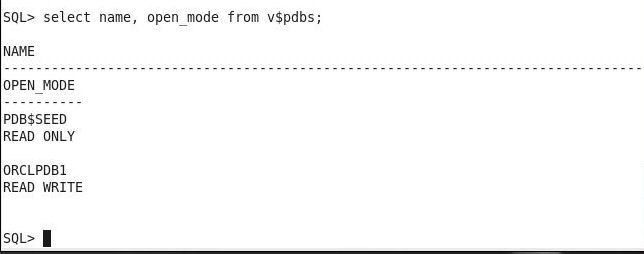
Figure 24. Finding Open Mode for PDBs
The pluggable database is open and available to be used.
Listing the Datafiles
Another view of interest in the CDB$ROOT is the v$datafile view, which lists the datafiles for the CDB and the PDBs.
select name from v$datafile;
The datafiles for the root container, the PDB$SEED container, and the ORCLPDB1 get listed, as shown in Figure 25.
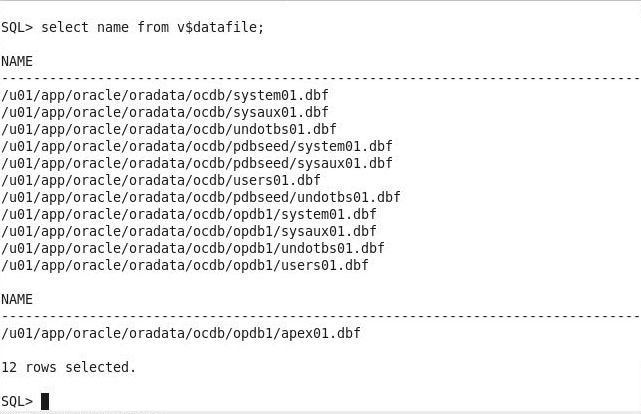
Figure 25. Listing the Datafiles
The datafiles in theCDB$ROOT container may be listed by settingcon_id to 1.
select name from v$datafile where con_id=1;
The system01.dbf, sysaux01.dbf,undotbs01.dbf, and users01.dbf get listed, as shown in Figure 26.
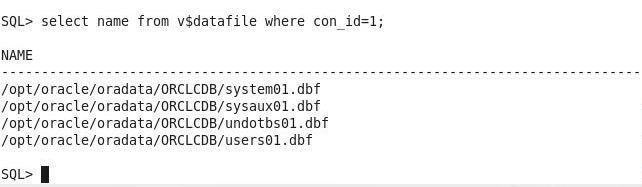
Figure 26. Datafiles in the Root Container
Select the datafiles in the PDB$SEED container by setting container ID to 2.
select name from v$datafile where con_id=2;
Thesystem01.dbf, sysaux01.dbf, and undotbs01.dbf get listed, as shown in Figure 27.
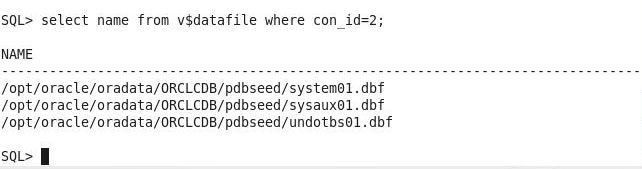
Figure 27. Datafiles in the PDB$SEED container
Similarly, select the datafiles in theORCLPDB1 container by setting container ID to 3.
select name from v$datafile where con_id=3;
The datafiles system01.dbf, sysaux01.dbf and undotbs01.dbf, users01.dbf, and apex01.dbf in the ORCLPDB1 container get listed, as shown in Figure 28.
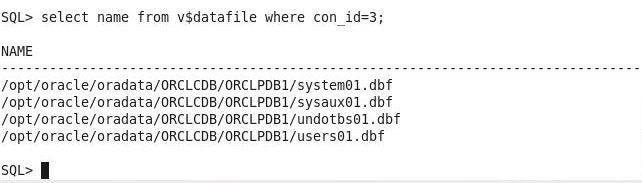
Figure 28. Datafiles in the ORCLPDB1 Container
Listing the Tempfiles
The v$tempfile view in the CDB$ROOT provides information about the temp files. Output the container ID and temp file name.
select con_id,name from v$tempfile;
The temp files get listed, as shown in Figure 29. The //orclcdb/temp01.dbf is for the CDB$ROOT container, the //orclcdb/ORCLPDB1/temp01.dbf temp file is for the ORCLPDB1 PDB, and the third temp file is for the PDB$SEED container.
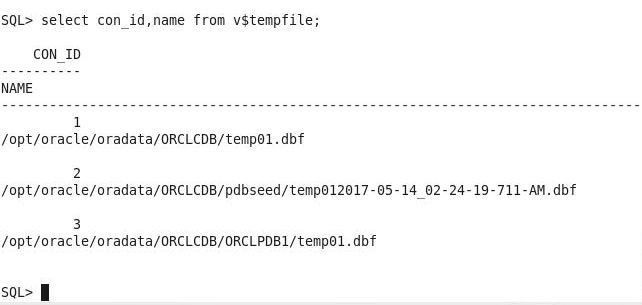
Figure 29. Temp Files
Connecting to a PDB with SQL*Plus
To connect to a PDB with SQL*Plus CLI, the service name associated with the PDB should be included in the sqlplus command. Connect as userpdbadmin.
sqlplus pdbadmin/oracle@//localhost:1521/ORCLPDB1
Run the preceding command from the bash shell and a SQL*Plus CLI gets connected to the ORCLPDB1 PDB, as shown in Figure 30.
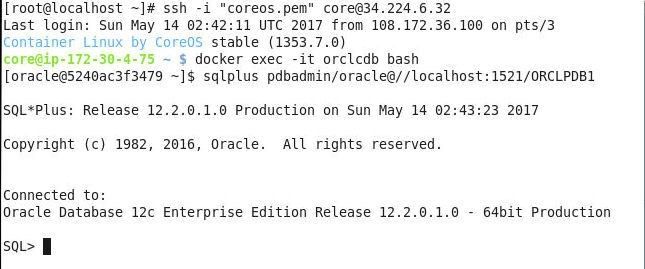
Figure 30. Starting a SQL*Plus for ORCLPDB1
List the connection name and connection ID, as shown in Figure 31. The connection name is ORCLPDB1 and the connection ID is 3. Referring to Table 1, the connection ID applies to a PDB.
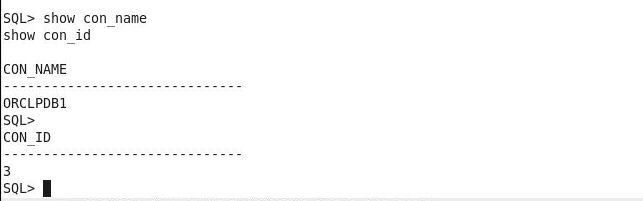
Figure 31. Listing Connection Details for a PDB
To find the privileges granted to the user, query the SESSION_PRIVS system table as shown in Figure 32.
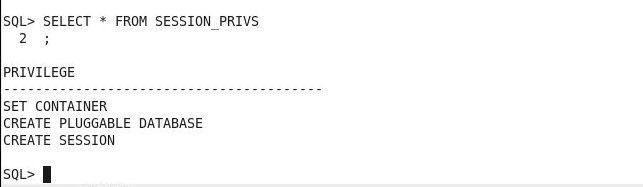
Figure 32. Querying the SESSION_PRIVS Table
Creating a Database Table in the PDB
A database table may be created in a PDB specific to an application or a user. A database table may also be created in a CDB root container CDB$ROOT, but CDB root container is generally reserved for storing metadata for data dictionary tables and view definitions, common users, and PL/SQL packages. To create a table in a PDB the following procedure is used:
- Connect as SYS or SYSTEM to the ORCLCDB service.
- Set current container as the PDB in which a database is to be created.
- Create database table in the PDB.
As an example, create a database table wlslog to store log information from a WebLogic server.
CREATE TABLE wlslog(time_stamp VARCHAR2(255) PRIMARY KEY,category VARCHAR2(255),type VARCHAR2(255),
servername VARCHAR2(255), code VARCHAR2(255),msg VARCHAR2(255));
First, start a SQL*Plus CLI to connect to ORCLCDB services as user SYS or SYSTEM.
sqlplus sys/oracle@localhost:1521/ORCLCDB as sysdba
Set the current container as ORCLPDB1 with the alter session command as shown in Figure 33.
alter session set container = ORCLPDB1;

Figure 33. Setting current Container as ORCLPDB1
Run the SQL script from a SQL*Plus CLI connected to ORCLPDB1 to create a database table, as shown in Figure 34.
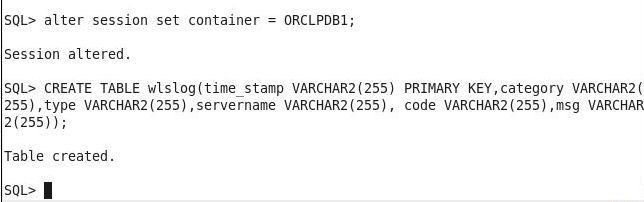
Figure 34. Creating a Database Table in ORCLPDB1
Add data to the wlslog table with the following SQL script.
INSERT INTO wlslog(time_stamp,category,type,servername,code,msg) VALUES('Apr-8-2014-7:06:16-PM-PDT',
'Notice','WebLogicServer','AdminServer','BEA-000365','Server state changed to STANDBY');

INSERT INTO wlslog(time_stamp,category,type,servername,code,msg) VALUES('Apr-8-2014-7:06:17-PM-PDT',
'Notice','WebLogicServer','AdminServer','BEA-000365','Server state changed to STARTING');

INSERT INTO wlslog(time_stamp,category,type,servername,code,msg) VALUES('Apr-8-2014-7:06:18-PM-PDT',
'Notice','WebLogicServer','AdminServer','BEA-000365','Server state changed to ADMIN');

INSERT INTO wlslog(time_stamp,category,type,servername,code,msg) VALUES('Apr-8-2014-7:06:19-PM-PDT',
'Notice','WebLogicServer','AdminServer','BEA-000365','Server state changed to RESUMING');

INSERT INTO wlslog(time_stamp,category,type,servername,code,msg) VALUES('Apr-8-2014-7:06:20-PM-PDT',
'Notice','WebLogicServer','AdminServer','BEA-000361','Started WebLogic AdminServer');

INSERT INTO wlslog(time_stamp,category,type,servername,code,msg) VALUES('Apr-8-2014-7:06:21-PM-PDT',
'Notice','WebLogicServer','AdminServer','BEA-000365','Server state changed to RUNNING');

INSERT INTO wlslog(time_stamp,category,type,servername,code,msg) VALUES('Apr-8-2014-7:06:22-PM-PDT',
'Notice','WebLogicServer','AdminServer','BEA-000360','Server started in RUNNING mode');
Table data gets added, as shown in Figure 35.
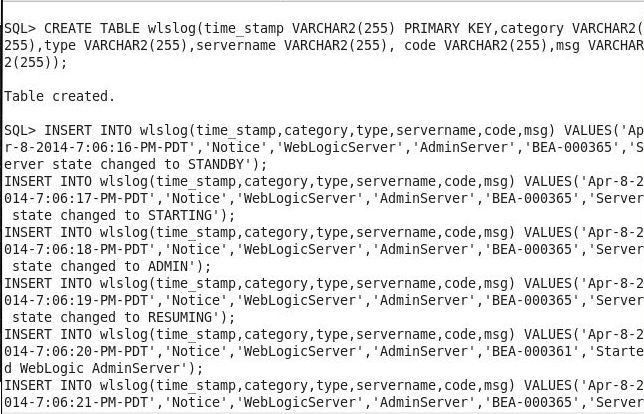
Figure 35. Adding Database Table Data
Query the database table with the following SELECT statement.
SELECT time_stamp || ' ' || category || ' ' || type || ' ' || servername || ' ' ||code || ' ' || msg from wlslog;
The SQL query result is shown in Figure 36.
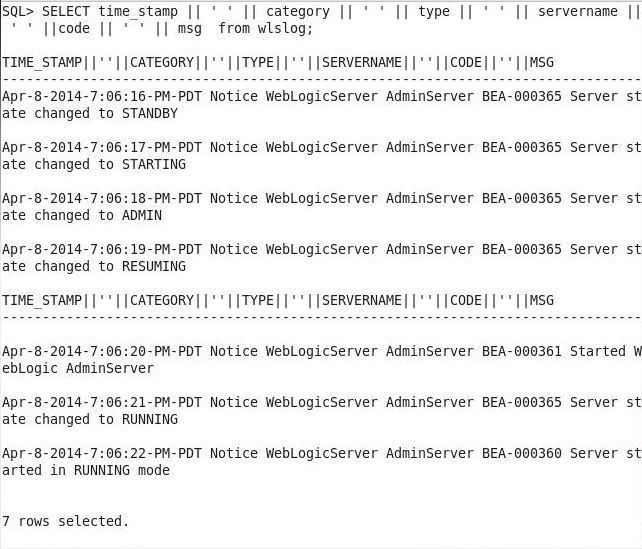
Figure 36. SQL Query Result
A database table may also be created in the CDB$ROOT container, but typically the root container is for Oracle-supplied metadata and common users.
Creating a PDB from another PDB
A PDB may be created from another PDB or from the PDB$SEED. To create another PDB ORCLPDB2 from PDB ORCLPDB1, which already exists, run the CREATE PLUGGABLE DATABASE statement shown below in SQL*Plus CLI connected to the container database (CDB). The FILE_NAME_CONVERT clause determines how the database generates the names of files such as datafiles. The PATH_PREFIX clause specifies the file paths for directory objects for the new PDB. First, start a SQL*Plus session to connect to the ORCLCDB service as user SYS or SYSTEM, as shown in Figure 37.
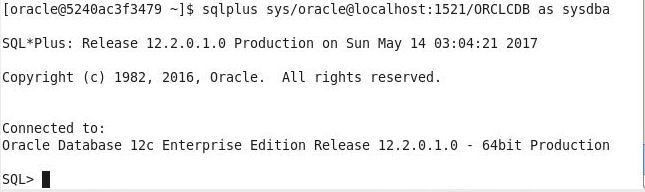
Figure 37. Connecting to ORCLCDB with SQL*Plus
Set current container as ORCLPDB1 as shown in Figure 38. Also create an example database table wlslog to demonstrate that the database tables from a PDB get copied into the new PDB created from the original PDB.

Figure 38. Setting Current Container as ORCLPDB1
Create a pluggable database for which the container must be set to CDB$ROOT as shown in Figure 39. Next, run the following command to create a pluggable database ORCLPDB2 from pluggable database ORCLPDB1.
CREATE PLUGGABLE DATABASE ORCLPDB2 FROM ORCLPDB1
  FILE_NAME_CONVERT =('/opt/oracle/oradata/orclcdb/ORCLPDB1/', '/opt/oracle/oradata/orclcdb/ORCLPDB2/')
  PATH_PREFIX='/opt/oracle/oradata/orclcdb/ORCLPDB2';
The preceding command should not include any empty spaces, for instance, before or after an “=” , “’”, “(“, and “)”. A new pluggable database ORCLPDB2 gets created from ORCLPDB1, as shown in Figure 39.
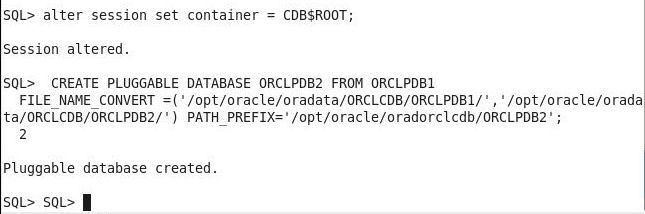
Figure 39. Creating a Pluggable Database from another Pluggable Database
The CREATE PLUGGABLE DATABASE command must be run from the CDB root container and cannot be run from a pluggable database, as indicated by the error message in Figure 40.
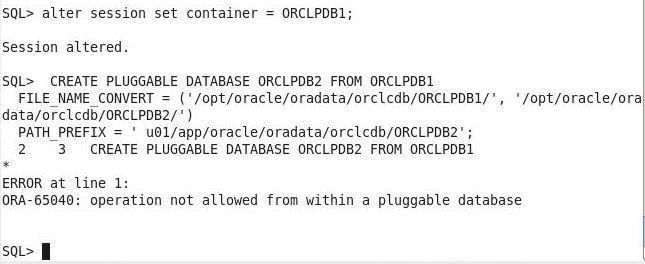
Figure 40. The CREATE PLUGGABLE DATABASE Command cannot be run from a Pluggable Database
Initially the new PDB is not open. To find the Open mode run the following SELECT statement.
select name, open_mode from v$pdbs;
The open mode for the new PDB ORCLPDB2 is MOUNTED, as shown in Figure 41.
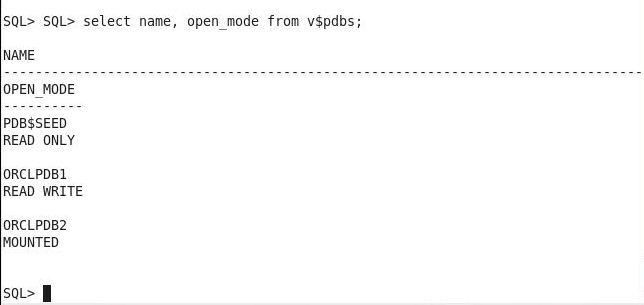
Figure 41. Finding Open Mode for new PDB
To open the new PDB in READ WRITE mode, run the following ALTER PLUGGABLE DATABASE command.
ALTER PLUGGABLE DATABASE ORCLPDB2 OPEN READ WRITE;
The pluggable database gets altered as shown in Figure 42. Subsequently find the open mode again and the open mode is READ WRITE, also shown in Figure 42.
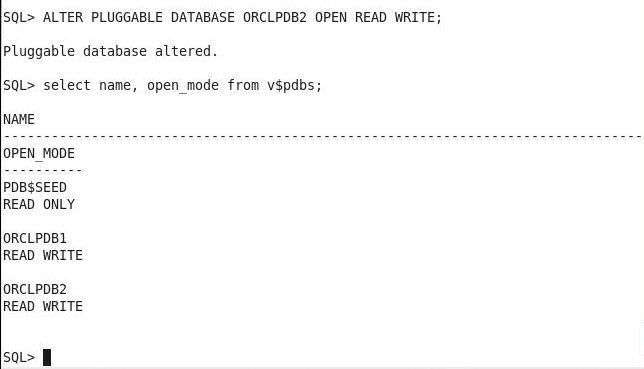
Figure 42. Opening new PDB
The new PDB gets assigned a container ID incrementally from the existing container IDs. To list the container ID, database ID and database name, select from the view v$pdbs.
select con_id, dbid, name from v$pdbs;
The ORCLPDB2 PDB has container ID 4, as shown in Figure 43.
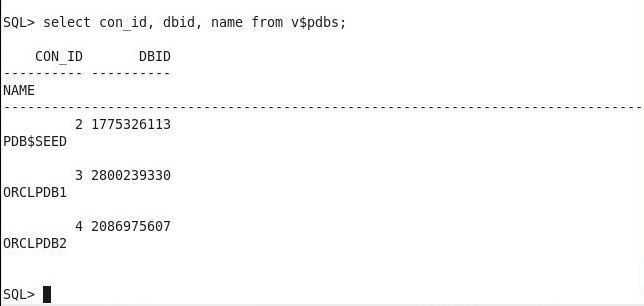
Figure 43. Finding Container ID of new PDB
The datafiles for the new PDB may be listed by selecting from the v$datafile view with container ID as 4.
select name from v$datafile where $con_id=4;
The datafiles copied over from ORCLPDB1 get listed, as shown in Figure 44.
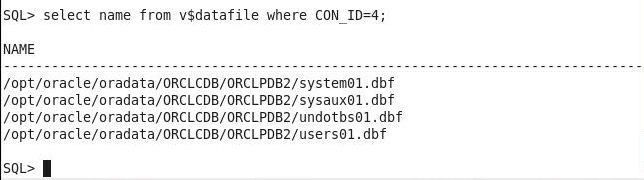
Figure 44. Datafiles in the new PDB
Having created and opened a new pluggable database, you can create a database table by setting the current container to ORCLPDB2 as shown in Figure 45.
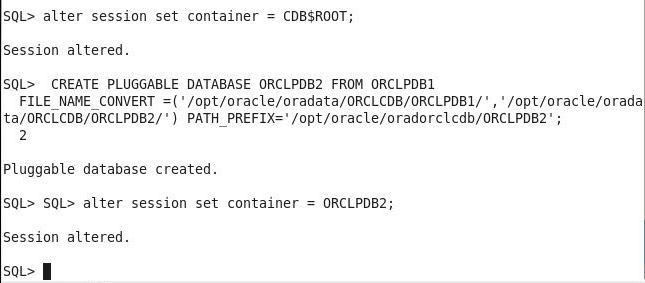
Figure 45. Setting Current Container to ORCLPDB2
The database objects, including database tables, get copied from ORCLPDB1 when the ORCLPDB2 PDB is created. As an example, run a SQL statement to create database table wlslog, which exists in ORCLPDB1 and gets copied to ORCLPDB2. An error message “name is already used by an existing object” gets output, as shown in Figure 46.
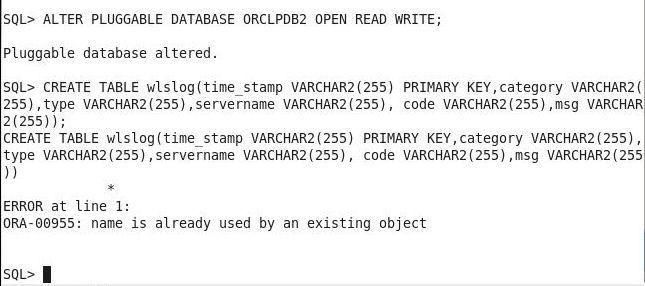
Figure 46. A database table name that is copied from ORCLPDB1 does not get created in ORCLPDB2
A database table wlslog2 does get created, as shown in Figure 47.
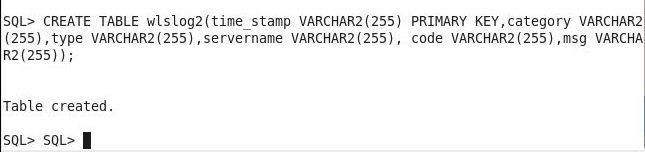
Figure 47. Creating a Database Table in the new PDB
Creating a PDB from PDB Seed
To create a pluggable database from the PDB seed, the FILE_NAME_CONVERT clause in the CREATE PLUGGABLE DATABASE command must specify the PDB seed directory /opt/oracle/oradata/orclcdb/pdbseed/ from which to create the new PDB’s. Run the following CREATE PLUGGABLE DATABASE command to create a new PDB ORCLPDB3; empty spaces should not be included in the command, just as for the command to create a PDB from another PDB.
CREATE PLUGGABLE DATABASE ORCLPDB3
  ADMIN USER dvohra IDENTIFIED BY oracle
  ROLES = (dba)
  DEFAULT TABLESPACE opdbtblsp
    DATAFILE '/opt/oracle/oradata/orclcdb/ORCLPDB3/ORCLPDB3_01.dbf' SIZE 250M AUTOEXTEND ON
  FILE_NAME_CONVERT = ('/opt/oracle/oradata/orclcdb/pdbseed/',
                   '/opt/oracle/oradata/orclcdb/ORCLPDB3/')
  STORAGE (MAXSIZE 2G)
  PATH_PREFIX = '/opt/oracle/oradata/orclcdb/ORCLPDB3/';
A new PDB orclpddb3 gets created, as shown in Figure 48.
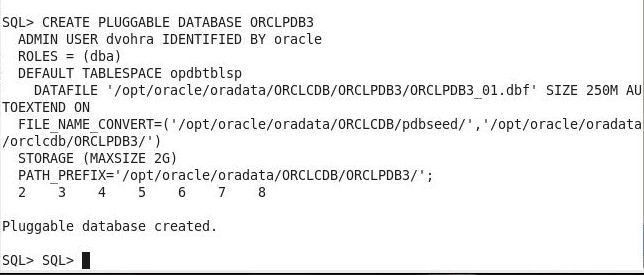
Figure 48. Creating a PDB from PDB Seed
The new PDB is MOUNTED but not OPEN, as shown in Figure 49.

Figure 49. New PDB is MOUNTED but not OPEN
To open the new PDB in READ WRITE mode run the following ALTER PLUGGABLE DATABASE command.
ALTER PLUGGABLE DATABASE ORCLPDB3 OPEN READ WRITE;
The new PDB gets opened, as shown in Figure 50.

Figure 50. Opening new PDB
Find the container ID assigned to the new PDB from the v$pdbs view.
select con_id, dbid, name from v$pdbs;
The ORCLPDB3 PDB has container ID 5, as shown in Figure 51.
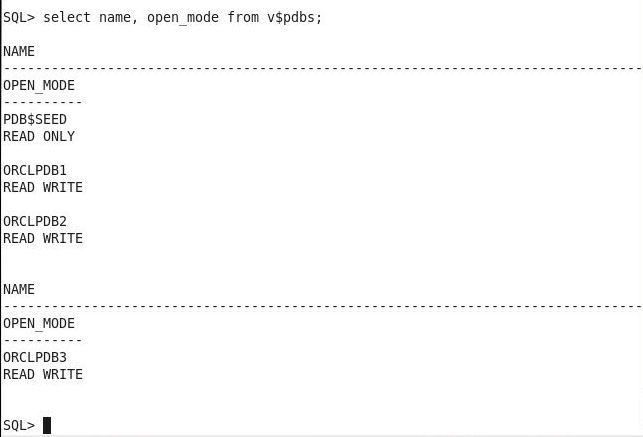
Figure 51. Finding Container ID for new PDB
The new PDB gets assigned a container ID of 5, as shown in Figure 52.
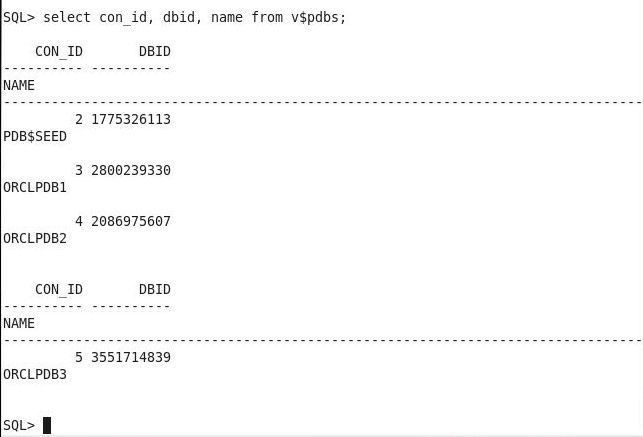
Figure 52. Container ID and DBID for new PDBORCLPDB3
Altering a Pluggable Database
A PDB container may be accessed using the alter session set container statement in a CDB session. As an example, start a SQL*Plus CLI without connecting to a container.
sqlplus sys/oracle as sysdba
Subsequently set the container to ORCLPDB3.
alter session set container = ORCLPDB3;
As indicated by the output in Figure 53, the session gets altered.
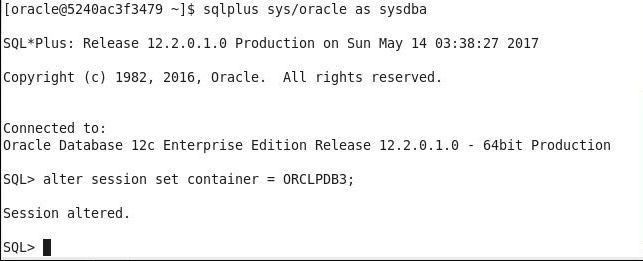
Figure 53. Setting Container as ORCLPDB1
Get the current container name and ID, and ORCLPDB3 gets listed, as shown in Figure 54.
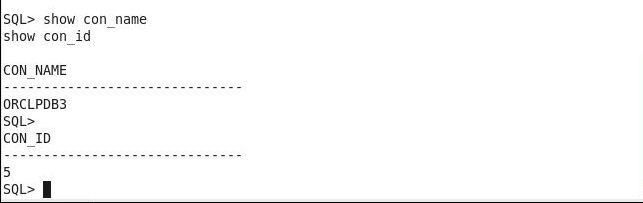
Figure 54. Getting Current Container Name and ID
Other ALTER PLUGGABLE DATABASE commands may be run to alter the current pluggable database. As an example, set storage maximum size to 100GB.
ALTER PLUGGABLE DATABASE STORAGE(MAXSIZE 100G);
Storage of the current PDB gets altered, as shown in Figure 55.

Figure 55. Altering Storage
You can close and open the current PDB.
ALTER PLUGGABLE DATABASE CLOSE IMMEDIATE;
ALTER PLUGGABLE DATABASE OPEN READ WRITE;
The current PDB gets closed and subsequently opened, as shown in Figure 56.
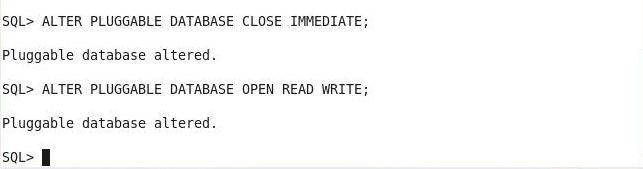
Figure 56. Closing and Opening Current PDB
Connecting to a PDB with CONNECT Command
The CONNECT command may be used to connect to a PDB. First, start a connectionless SQL*Plus CLI session.
sqlplus /nolog
Subsequently, connect to ORCLPDB1 PDB with the CONNECT command as pdbadmin.
CONNECT pdbadmin@ORCLPDB1
The ORCLPDB1 gets connected to, as shown in Figure 57.
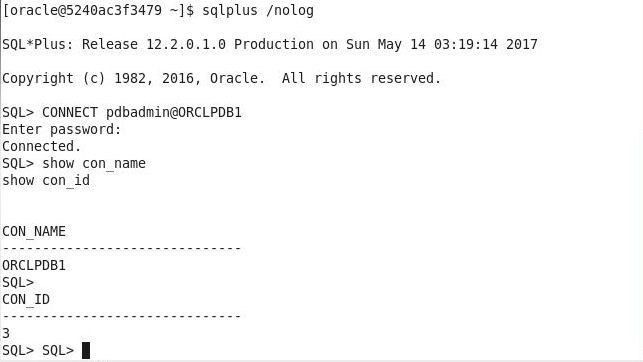
Figure 57. Using the CONNECT Command to connect to a PDB
Dropping a Pluggable Database
A pluggable database may be dropped with the DROP PLUGGABLE DATABASE command. To run the command the following prerequisites must apply.
- Connect to a CDB
- Set current container must be root, CDB$ROOT for this tutorial
- Authenticate as SYSDBA or SYSOPER
- The pluggable database must be unplugged or in open mode MOUNTED. To keep datafiles, the database must be unplugged. Alternatively the datafiles may also be dropped using the INCLUDING DATAFILES clause; which requires that the database be unplugged or in open mode MOUNTED. The default for unplugged is KEEP DATAFILES.
Next, we shall drop the pluggable database ORCLDB2 including datafiles. In order to drop datafiles the database must be unplugged or in open mode MOUNTED. To set in open mode MOUNTED, close the pluggable database.
ALTER PLUGGABLE DATABASE ORCLDB2 CLOSE IMMEDIATE;
Subsequently, drop the database with the DROP PLUGGABLE DATABASE command.
DROP PLUGGABLE DATABASE ORCLPDB2 INCLUDING DATAFILES;
Pluggable database ORCLPDB2 gets dropped, as shown in Figure 58.

Figure 58. Dropping Pluggable Database
As mentioned before, to keep the datafiles the database must be unplugged before dropping and if not unplugged an error gets generated, as shown in Figure 59.

Figure 59. Cannot keep datafiles for a pluggable database that is not unplugged
Stopping and Starting the Docker Container
A Docker container once created is provisioned software that may be stopped and started as required. To stop Docker container orclcdb run the following docker stop command.
docker stop orclcdb
The Docker container orclcdb gets stopped, as shown in Figure 60. A stopped docker container does not get listed with the docker ps command but does with the docker ps –a command, as shown in Figure 60.
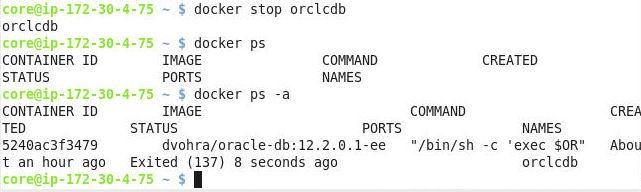
Figure 60. Stopping a Docker Container
Listing the container logs indicates that the database has been closed and dismounted, as shown in Figure 61.
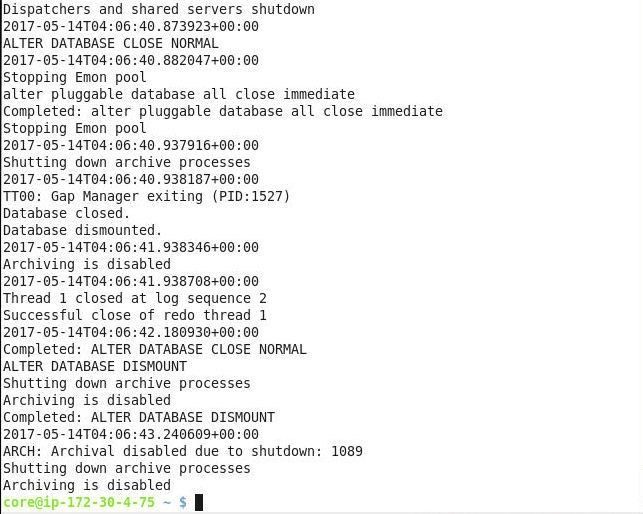
Figure 61. Database Logs indicate that Database has been shutdown
To start the Docker container again run the docker start command.
docker start orclcdb
The Docker container gets started as indicated by the container logs in Figure 62, which indicate that the database has been opened.
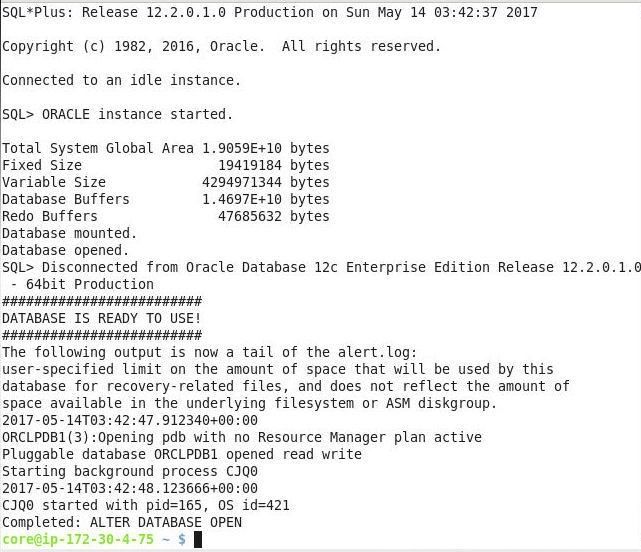
Figure 62. Starting Docker Container
To remove the Docker container run the docker rm orclcdb command as shown in Figure 63. To use Docker container for Oracle Database CDB and PDBs a Docker container has to be created again.

Figure 63. Removing and Creating a Docker Container
In this tutorial we discussed running Oracle Database 12c CDB and PDBs in a Docker Container. Modularization at the database level is provided by the CDB and PDBs. Modularization at the OS level is provided by the Docker Engine and containers. As the scale of Oracle database usage continues to increase, using Oracle Database CDB and PDBs on Docker Engine provides a better alternative than using Oracle Database non-CDBs on a bare metal OS platform.
For Oracle Database 19 c the procedure is the same except for some directory/file names being different. Copy 19c binaries zip LINUX.X64_193000_db_home.zip to 19.3.0 directory with:
cd docker-images/OracleDatabase/SingleInstance/dockerfiles/19.3.0. Run following command from directory docker-images/OracleDatabase/SingleInstance/dockerfiles:sudo ./buildContainerImage.sh -v 19.3.0 –eCommand to run image:
sudo docker run --name orclcdb -p 1521:1521 -p 5500:5500 -e ORACLE_SID=ORCLCDB -e ORACLE_PDB=ORCLPDB1 -e ORACLE_PWD=oracle oracle/database:19.3.0-ee