AWS CloudFormation is a template-based service to provision and manage infrastructure on AWS, consisting of a group of AWS resources such that the overhead tasks, such as describing the dependencies between AWS services or providing runtime parameters, are configurable in the template itself. The template is a reusable and declarative code approach to provisioning AWS infrastructure and is supported by a CloudFormation Designer, a GUI tool with provision to drag-and-drop components onto a diagram representing a template. In this article we shall discuss creating an RDS Oracle Database instance using CloudFormation. This article consists of the following sections:
- Overview of CloudFormation Template
- Setting the Environment
- Configuring a CloudFormation Template
- Creating a CloudFormation Stack
- Finding Status of RDS Instance
- Modifying and Adding Features to RDS Database Instance
- Storing CloudFormation Template in S3
Overview of CloudFormation Template
The CloudFormation template may be specified in JSON or YAML format and the following JSON document represents the structure of a template in which all the key/value pairs that may be specified are listed and the only required key is Resources. Each key value is a JSON object denoted with the {} notation.
{
  "AWSTemplateFormatVersion" : "version date",
  "Description" : "JSON string",
  "Metadata" : {
  },
  "Parameters" : {
  },
  "Mappings" : {
  },
  "Conditions" : {
  },
  "Transform" : {
  },
  "Resources" : {
  },
  "Outputs" : {
  }
}
The following listing represents CloudFormation template in YAML format.
---
AWSTemplateFormatVersion: "version date"

Description:
  String
Metadata:
  template metadata
Parameters:

Mappings:

Conditions:

Transform:

Resources:

Outputs:
Some of the template keys may be specified in any order even if values from keys defined later are used in keys defined earlier, but it is recommended to specify the keys in the order shown above, which follows the logical dependencies between sections. As an example, a Resource may make use of some parameters or mappings which are specified earlier in the template. Other keys are required to be specified in a particular order, as shown below in Table 1, which discusses each of the template keys.
Table 1. CloudFormation Template Keys
|
Key |
Description |
|
AWSTemplateFormatVersion |
Specifies the template version |
|
Description |
Template description as text string. Must be specified subsequent to AWSTemplateFormatVersion. |
|
Metadata |
Provides metadata information about the template. |
|
Parameters |
Specifies values that may be passed to template at runtime when a stack is created or updated. The parameters may be referred in Resources and Output keys. |
|
Mappings |
Mappings of keys/values to specify conditional parameters. The intrinsic function Fn::FindInMap may be used in Resources and Outputs section to look up key values specified in the Mappings. |
|
Conditions |
Specifies conditions for creating resources and assigning resource properties values. Used during stack creation and update. |
|
Transform |
Not relevant to RDS directly. Used for Lambda-based applications to specify the version of the AWS Serverless Application Model. |
|
Resources |
Specifies stack resources and their properties, which are specified with the Properties subsection for each resource. The resources may refer to other resources and resources may be referred in the Outputs. |
|
Outputs |
The stack’s properties that are output when describing stacks. |
Setting the Environment
The only prerequisite is an AWS account ,which may be created at https://aws.amazon.com/resources/create-account/. We need to provide a Virtual Private Cloud (VPC) for the CloudFormation, including Subnets in multiple zones for a Multi-Availability Zone CloudFormation. Create a VPC in AWS Console with Create VPC after selecting the VPC service from AWS services. The VPC ID listed in the Console shown in Figure 1 shall be used to the CloudFormation template.

Figure 1. AWS VPC
Create four Subnets associated with the VPC, one each in Availability Zone: us-east-1a,us-east-1b,us-east-1c, and us-east-1e, as shown in Figure 2.
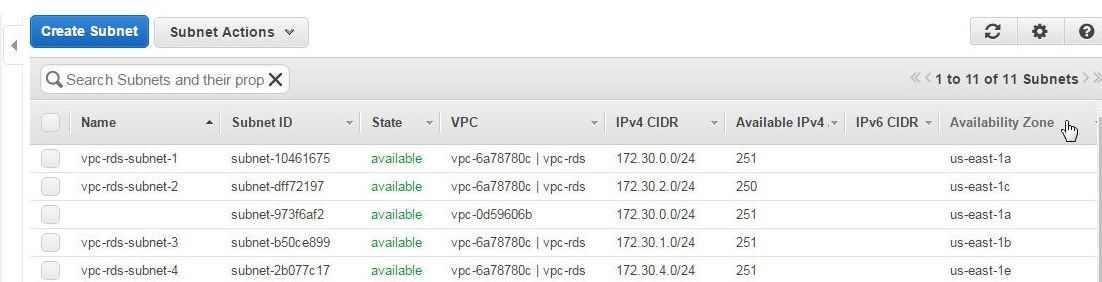
Figure 2. Subnets in VPC
Configuring a CloudFormation Template
In this section we shall create a CloudFormation template (a .template file) to specify the resources, parameters, and other template keys to create an RDS database instance for Oracle Database. Set the "AWSTemplateFormatVersion" key to "2010-09-09" and add a Description, which could be a string to describe the template. In the Parameters section define the following (Table 2) parameters:
Table 2. Parameters
|
Parameter |
Description |
Default Value |
|
VpcId |
VPC ID of your existing Virtual Private Cloud (VPC) |
vpc-6a78780c |
|
Subnets |
The list of Subnet Ids, for at least two Availability Zones in the region in your Virtual Private Cloud (VPC) |
subnet-10461675,subnet-dff72197,subnet-b50ce899,subnet-2b077c17 |
|
DBName |
The Oracle database name |
orcldb |
|
DBUsername |
The Oracle database admin account username |
orcl |
|
DBPassword |
The Oracle database admin account password |
orcl12crds |
Next, define mappings in Mappings section for AWS instance type to architecture AWSInstanceType2Arch. For t2.micro instance type, set mapping as follows.
"t2.micro": {
        "Arch": "64"
             }
In the Resource section define resources listed in Table 3.
Table 3. Resources
|
Resource |
Type |
Description |
|
OrclDBSubnetGroup |
AWS::RDS::DBSubnetGroup |
Subnets available for the RDS DB Instance |
|
OrclVPCSecurityGroup |
AWS::EC2::SecurityGroup |
Security group for RDS DB Instance |
|
OraDB |
AWS::RDS::DBInstance |
RDS Database instance |
|
OrclRDSParamGroup |
AWS::RDS::DBParameterGroup |
Oracle DB Parameter Group |
The properties for each of the resources are specified with the Properties key. The properties for the OrclDBSubnetGroup resource in addition to the DBSubnetGroupDescription property are listed in Table 4.
Table 4. OrclDBSubnetGroup resource Properties
|
Property |
Description |
Value |
|
SubnetIds |
Subnet Ids |
{"Ref": "Subnets"}
|
The properties for the OrclVPCSecurityGroup resource, in addition to GroupDescription, are discussed in Table 5.
Table 5. OrclVPCSecurityGroup resource Properties
|
Property |
Description |
Value |
|
VpcId |
VPC Id |
{"Ref": "VpcId"} |
|
SecurityGroupIngress |
Security group Inbound rules as an array. An inbound rule to allow traffic of any IP protocol from any port and to any port must be included with the “-1” value. |
[{ "IpProtocol": "tcp", "FromPort": "80", "ToPort": "80", "CidrIp": "0.0.0.0/0" }, { "IpProtocol": "tcp", "FromPort": "22", "ToPort": "22", "CidrIp": "0.0.0.0/0" },{ "IpProtocol": "-1", "FromPort": "-1", "ToPort": "-1", "CidrIp": "0.0.0.0/0" }
]
|
The OraDB resource has the properties discussed in Table 6.
Table 6. OraDB resource Properties
|
Property |
Description |
Value |
|
DBName |
Oracle database name |
{"Ref": "DBName"} |
|
DBInstanceIdentifier |
Database instance identifier |
"orcl" |
|
DBSubnetGroupName |
Database Subnet group |
{"Ref": "OrclDBSubnetGroup"} |
|
VPCSecurityGroups |
VPC Security groups |
[{"Ref": "OrclVPCSecurityGroup"}] |
|
AllocatedStorage |
Allocate storage for RDS DB instance |
“100” |
|
DBInstanceClass |
DB Instance Class |
“db.t2.micro” |
|
Engine |
Database Engine |
"oracle-ee" |
|
EngineVersion |
Database Engine version |
"12.1.0.2.v7" |
|
LicenseModel |
License model |
"bring-your-own-license" |
|
Port |
Database listener port |
1521 |
|
MasterUsername |
Database Master user name |
{"Ref": "DBUsername"} |
|
MasterUserPassword |
Database Master Password |
{"Ref": "DBPassword"} |
|
DBParameterGroupName |
Database Parameter Group |
{"Ref": "OrclRDSParamGroup"} |
|
MultiAZ |
Whether the RDS resource is multi availability zone (AZ). In a multi AZ deployment a database update incurs no interruption. |
“true” |
Additionally, the DeletionPolicy for the AWS::RDS::DBInstance type resource is set to Snapshot, which implies that a snapshot is created when the resource is deleted.
The OrclRDSParamGroup resource has the properties discussed in Table 7 along with the Description property.
Table 7. OrclRDSParamGroup resource Properties
|
Property |
Description |
Value |
|
Family |
Parameter group family |
oracle-ee-12.1 |
|
Parameters |
Parameters includes the compatibility version for Oracle database |
{"compatible": "12.1.0.2"} |
The Outputs section defines a connection string for JDBC connection to the RDS database instance. The template for creating a stack for a RDS database instance for Oracle Database is listed:
{
    "AWSTemplateFormatVersion": "2010-09-09",
    "Description": "AWS CloudFormation  Template Oracle RDS",
    "Parameters": {
        "VpcId": {
             "Default": "vpc-6a78780c",
             "Type": "String",
             "Description": "VpcId of your existing Virtual Private Cloud (VPC)"
        },
        "Subnets": {
             "Default": "subnet-10461675,subnet-dff72197,subnet-b50ce899,subnet-2b077c17",
             "Type": "CommaDelimitedList",
             "Description": "The list of SubnetIds, for at least two Availability Zones in the region in your Virtual Private Cloud (VPC)"
        },
        "DBName": {
             "Default": "orcldb",
             "Description": "The Oracle database name",
             "Type": "String",
             "MinLength": "1",
             "MaxLength": "64",
             "AllowedPattern": "[a-zA-Z][a-zA-Z0-9]*",
             "ConstraintDescription": "must begin with a letter and contain only alphanumeric characters."
        },
        "DBUsername": {
             "Default": "orcl",
             "NoEcho": "true",
             "Description": "The Oracle database admin account username",
             "Type": "String",
             "MinLength": "1",
             "MaxLength": "16",
             "AllowedPattern": "[a-zA-Z][a-zA-Z0-9]*",
             "ConstraintDescription": "must begin with a letter and contain only alphanumeric characters."
        },
        "DBPassword": {
             "Default": "orcl12crds",
             "NoEcho": "true",
             "Description": "The Oracle database admin account password",
             "Type": "String",
            "MinLength": "8",
             "MaxLength": "41",
            "AllowedPattern": "[a-zA-Z0-9]*",
             "ConstraintDescription": "must contain only alphanumeric characters."
        }
    },
    "Mappings": {
        "AWSInstanceType2Arch": {
             "t1.micro": {
                 "Arch": "64"
             },
             "t2.micro": {
                 "Arch": "64"
             },
             "m1.small": {
                 "Arch": "64"
             }
        }
    },
    "Resources": {
        "OrclDBSubnetGroup": {
             "Type": "AWS::RDS::DBSubnetGroup",
             "Properties": {
                 "DBSubnetGroupDescription": "Subnets available for the RDS DB Instance",
                 "SubnetIds": {
                     "Ref": "Subnets"
                 }
             }
        },
        "OrclVPCSecurityGroup": {
             "Type": "AWS::EC2::SecurityGroup",
             "Properties": {
                 "GroupDescription": "Security group for RDS DB Instance.",
                 "VpcId": {
                     "Ref": "VpcId"
                 },
                 "SecurityGroupIngress": [{
                         "IpProtocol": "tcp",
                         "FromPort": "80",
                         "ToPort": "80",
                         "CidrIp": "0.0.0.0/0"
                     },
                     {
                         "IpProtocol": "tcp",
                         "FromPort": "22",
                         "ToPort": "22",
                         "CidrIp": "0.0.0.0/0"
                     },{
                         "IpProtocol": "-1",
                         "FromPort": "-1",
                         "ToPort": "-1",
                         "CidrIp": "0.0.0.0/0"
                     }

                 ]
             }
        },
        "OraDB": {
             "Type": "AWS::RDS::DBInstance",
             "Properties": {
                 "DBName": {
                     "Ref": "DBName"
                 },
                 "DBInstanceIdentifier": "orcl",
                 "DBSubnetGroupName": {
                     "Ref": "OrclDBSubnetGroup"
                 },
                 "VPCSecurityGroups": [{
                     "Ref": "OrclVPCSecurityGroup"
                 }],
                 "AllocatedStorage": "100",
                 "DBInstanceClass": "db.t2.micro",
                 "Engine": "oracle-ee",
                 "EngineVersion": "12.1.0.2.v7",
                 "LicenseModel": "bring-your-own-license",
                 "Port": "1521",
                 "MasterUsername": {
                     "Ref": "DBUsername"
                 },
                 "MasterUserPassword": {
                     "Ref": "DBPassword"
                 },
                 "DBParameterGroupName": {
                     "Ref": "OrclRDSParamGroup"
                 },
                 "MultiAZ": "true"
             },
             "DeletionPolicy": "Snapshot"
        },
        "OrclRDSParamGroup": {
             "Type": "AWS::RDS::DBParameterGroup",
             "Properties": {
                 "Family": "oracle-ee-12.1",
                 "Description": "Oracle DB Parameter Group",
                 "Parameters": {
                     "compatible": "12.1.0.2"
                 }
             }
        }
    },
    "Outputs": {
        "JDBCConnectionString": {
             "Description": "JDBC connection string for the Oracle database",
             "Value": {
                 "Fn::Join": [
                     "", [
                         "jdbc:oracle://",
                         {
                             "Fn::GetAtt": [
                                  "OraDB",
                                  "Endpoint.Address"
                              ]
                         },
                         ":",
                         {
                             "Fn::GetAtt": [
                                  "OraDB",
                                  "Endpoint.Port"
                              ]
                         },
                         "/",
                         {
                              "Ref": "DBName"
                         }
                     ]
                 ]
             }
        }

    }
}
Creating a CloudFormation Stack
In this section we shall create a CloudFormation Stack for an RDS database instance. Select the AWS CloudFormation service in the AWS Console or with URL https://console.aws.amazon.com/cloudformation. Click on Create New Stack as shown in Figure 3.
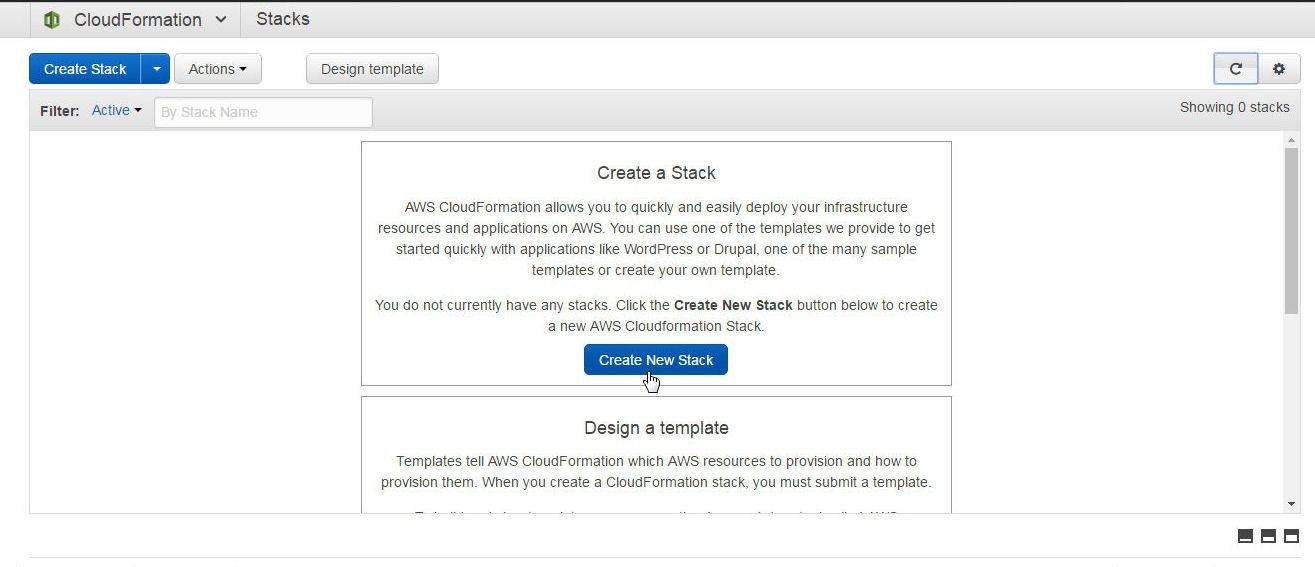
Figure 3. Create New Stack for CloudFormation
In Select Template click on Design a template to design a template as shown in Figure 4. Alternatively, a sample template may be selected or a template may be uploaded to S3, or an S3 template URL may be specified.
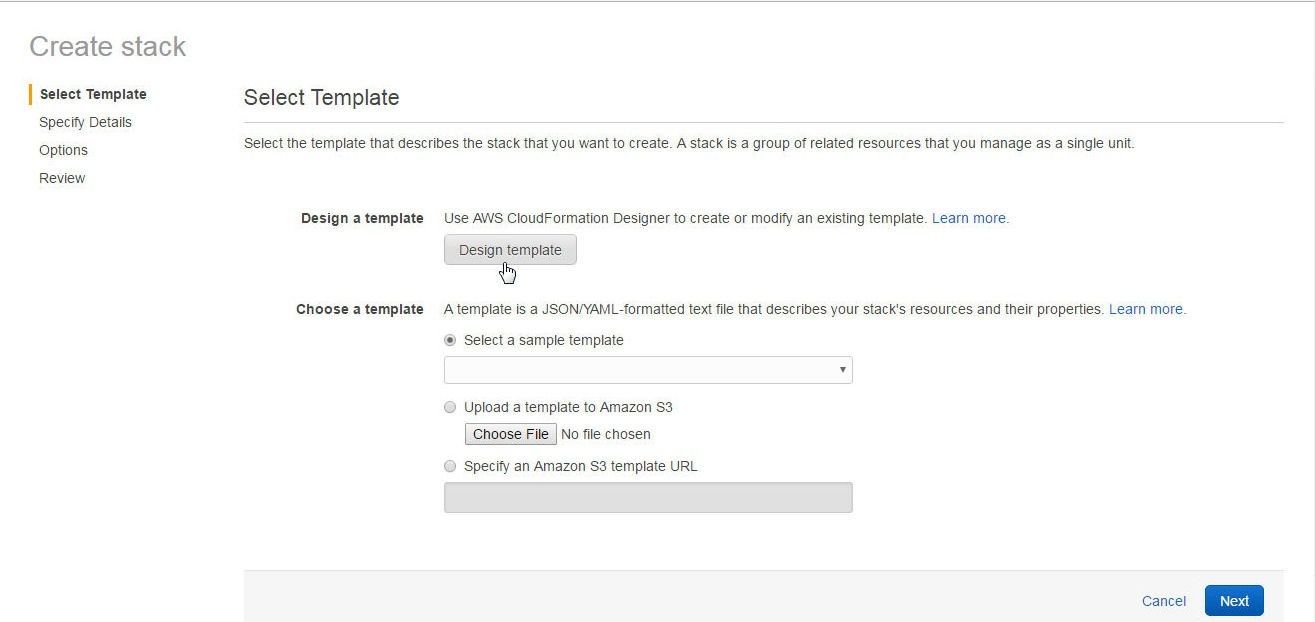
Figure 4. Design Template
The AWS CloudFormation Designer gets started, as shown in Figure 5.

Figure 5. AWS CloudFormation Designer
Several options are available for designing a template:
- A template may be created using the Designer by selecting components from the resource types palette and dragging them on to the Designer Components layout section/region. Resources may be linked in the Designer.
- The template may be copied and pasted into the Designer by selecting the Template tab
- A template may be opened from an AWS S3 Bucket
We shall open a template that is stored in S3 storage. Select the document/file icon and click on Open, as shown in Figure 6.
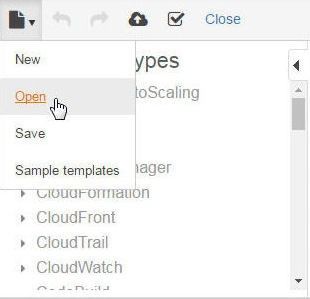
Figure 6. Selecting Open to open a CloudFormation Template
In the Open a template dialog click on Amazon S3 bucket as shown in Figure 7.
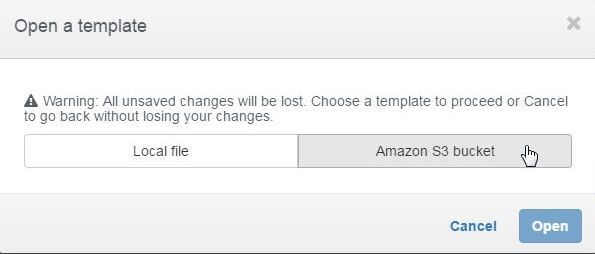
Figure 7. Open a template>Amazon S3 bucket
Two options get listed to select a template, as shown in Figure 8.
- Template URL
- Select a template file
Click the option Select a template file.
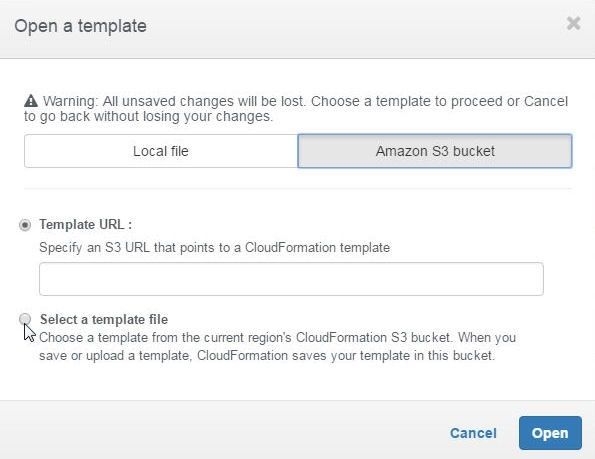
Figure 8. Options for selecting a CloudFormation Template from S3 Bucket
Select the template, and click on Open as shown in Figure 9.
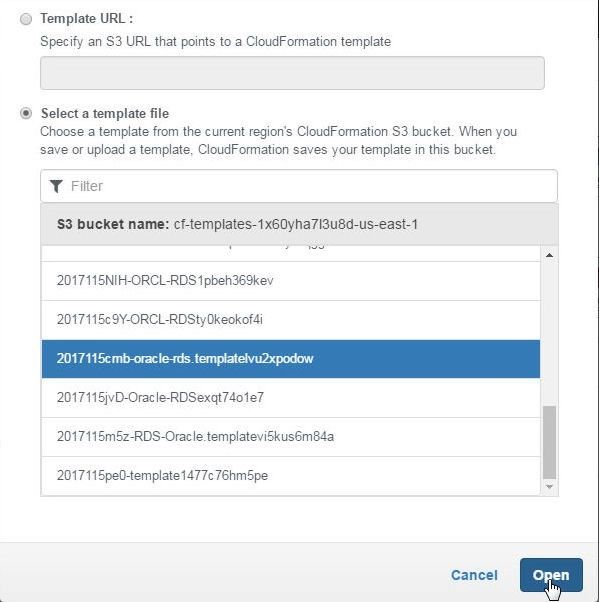
Figure 9. Opening a Template
The template gets opened and a diagram gets displayed in the CloudFormation Designer, as shown in Figure 10. The Template tab is selected by default, the other tab being Components.
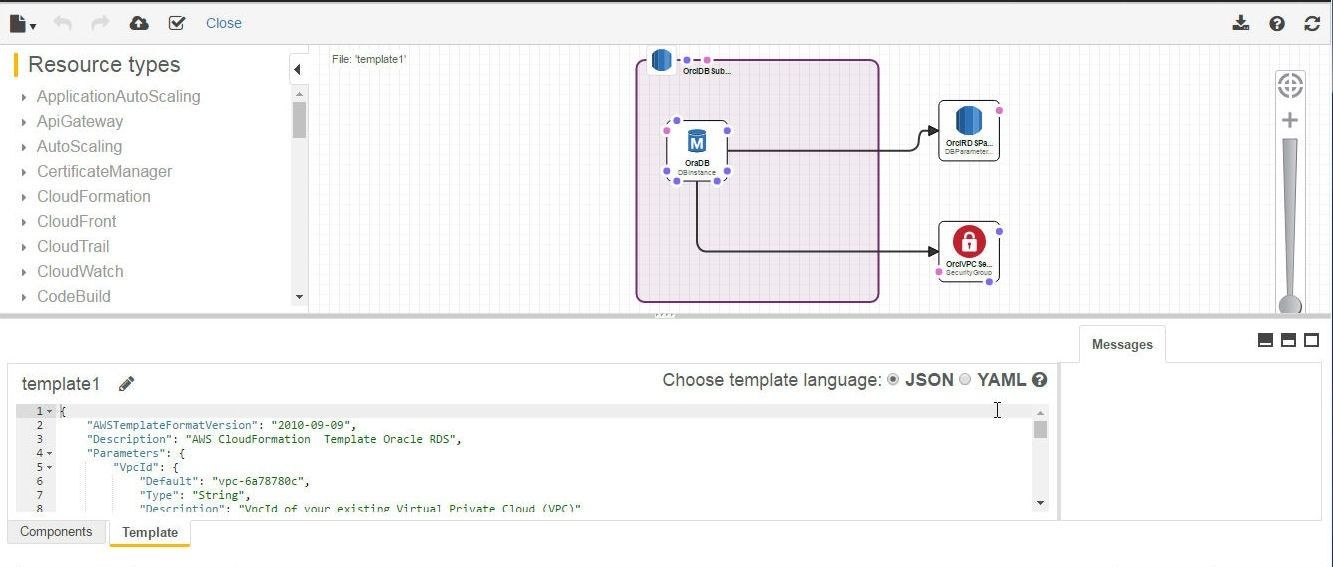
Figure 10. Template in CloudFormation Designer
Specify a file name (oracle-rds.template) for the template and click on Save as shown in Figure 11.
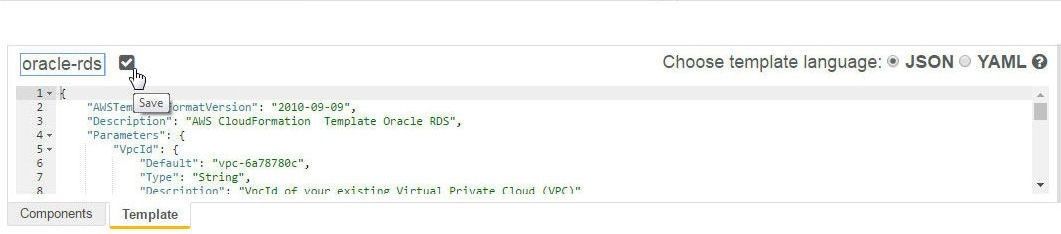
Figure 11. Updating a template file name and saving a Template File
Select the Components tab to display the components. Various tabs are provided for the template components: Parameters, Mappings, Conditions, Metadata, and Outputs. Click on the icon for Validate template to validate the template as shown in Figure 12.
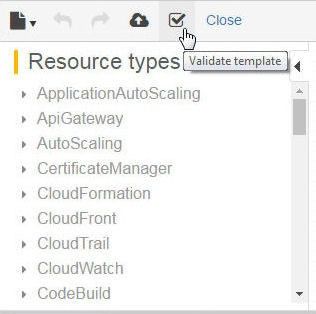
Figure 12. Validating the Template
The template is only a starting blueprint for a CloudFormation stack. Click on Create stack to create a new Stack, as shown in Figure 13.
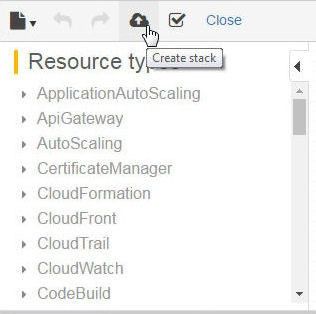
Figure 13. Create stack
The Create stack page from which the Design template option was selected gets re-displayed with the Amazon S3 template URL added to the field, which was previously empty. Click on Next as shown in Figure 14.
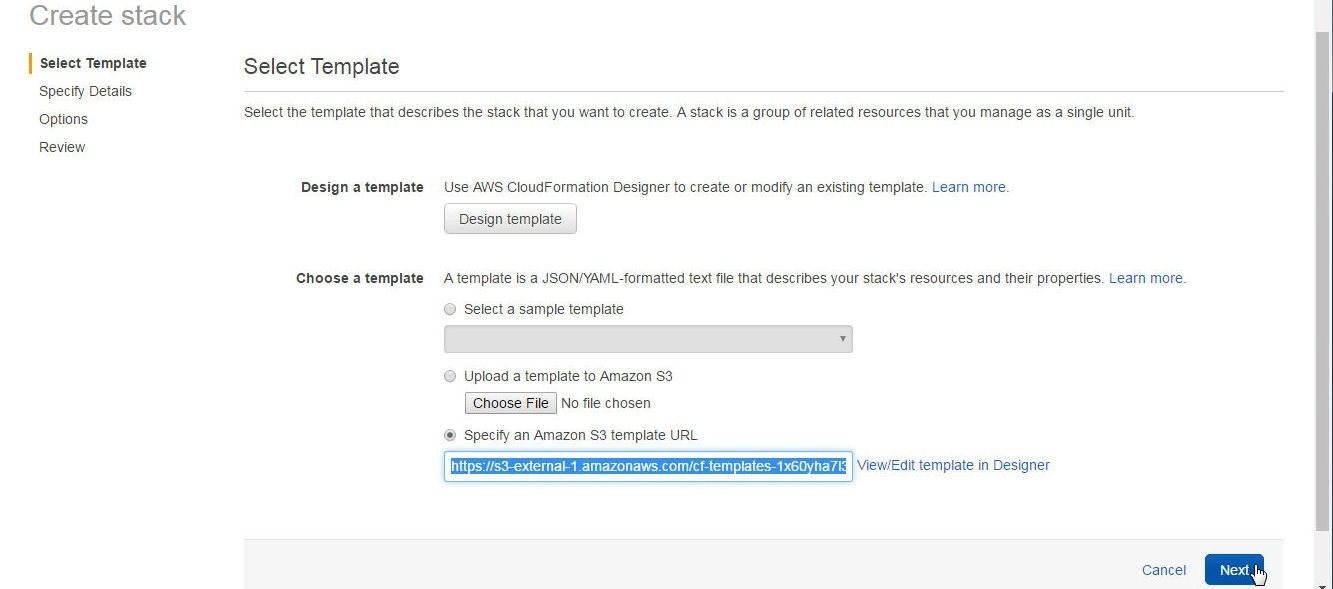
Figure 14. Selecting a Template
In the Specify Details page specify a Stack name (orcl-rds). Most of the other fields are picked from the template if specified in the template, as shown in Figure 15. Click on Next.
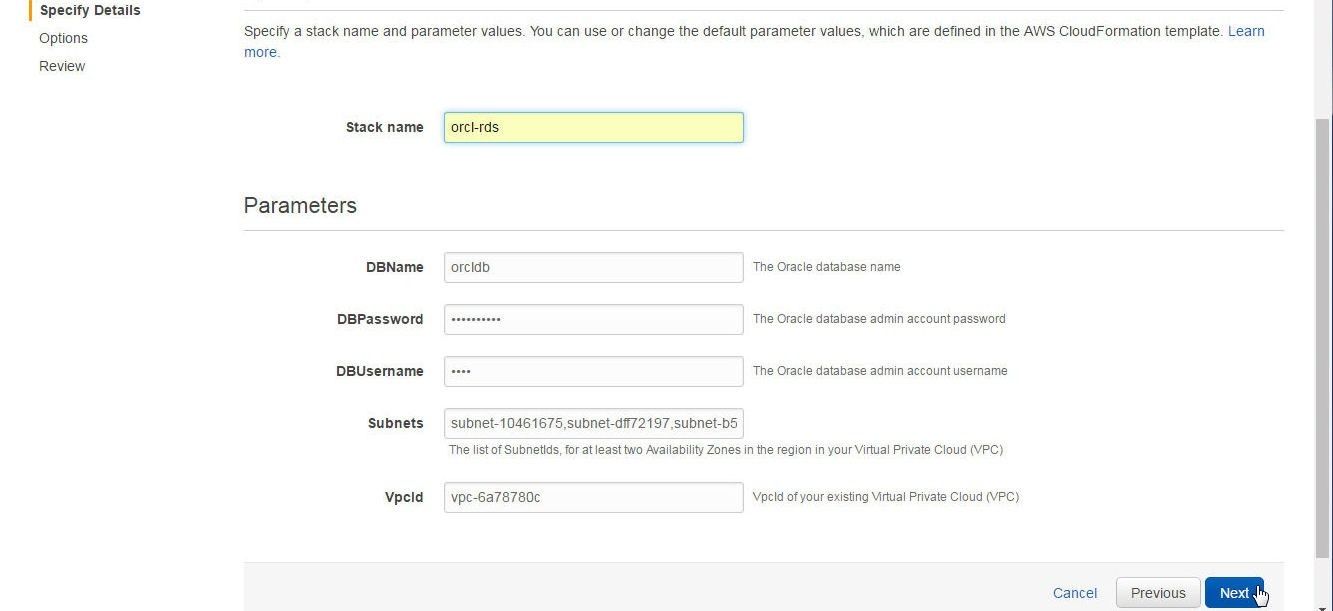
Figure 15. Specifying Stack Details
Specify any Options and click on next as shown in Figure 16. We have not specified any options.
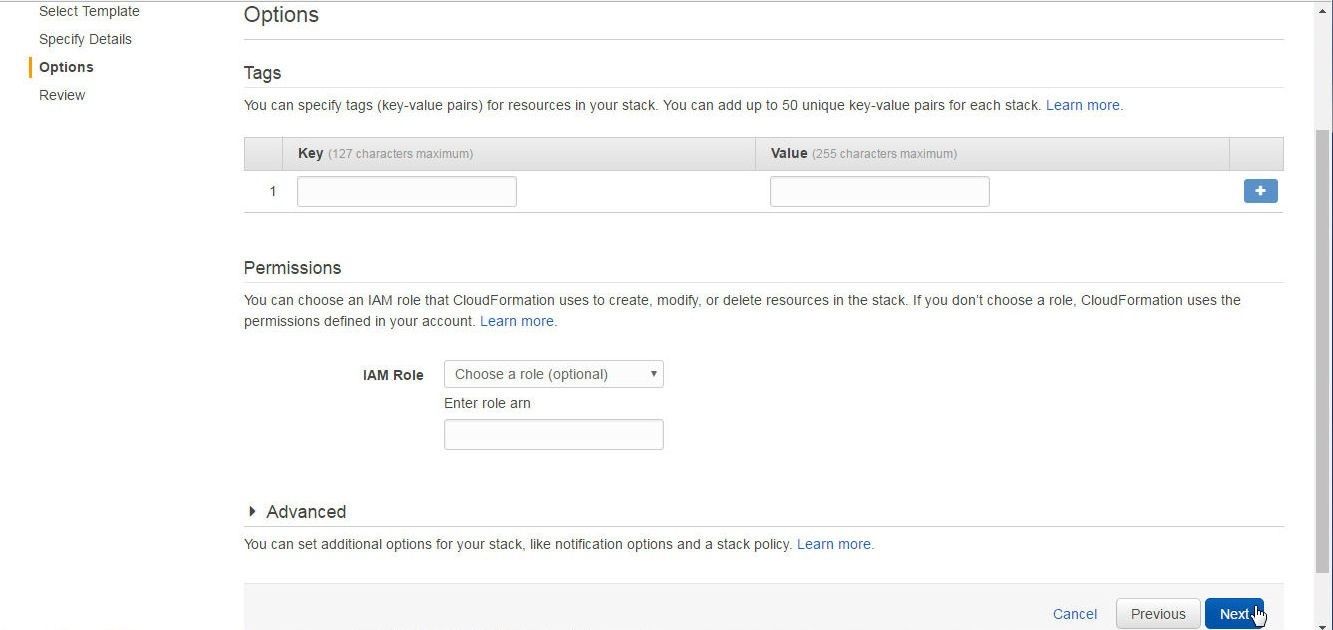
Figure 16. Specifying Options
In the Review page, the Summary of the Stack is displayed. Click on Create as shown in Figure 17.
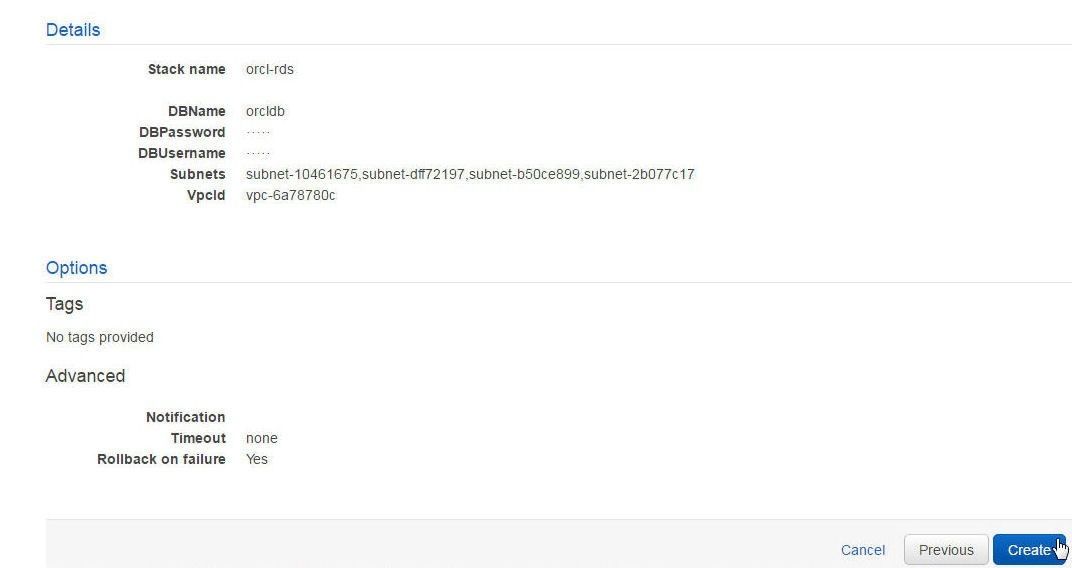
Figure 17. Review>Create
In the page from which Create New Stack was selected, click on the Refresh icon, as shown in Figure 18 to refresh the Stacks.

Figure 18. Refreshing Stacks
The orcl-db Stack is listed with the Status Create_In_Progress, as shown in Figure 19. Click on the stack link.

Figure 19. New Stack
Stack detail gets listed, including Stack name, ID and status as shown in Figure 20. Click on Stacks in the toolbar.
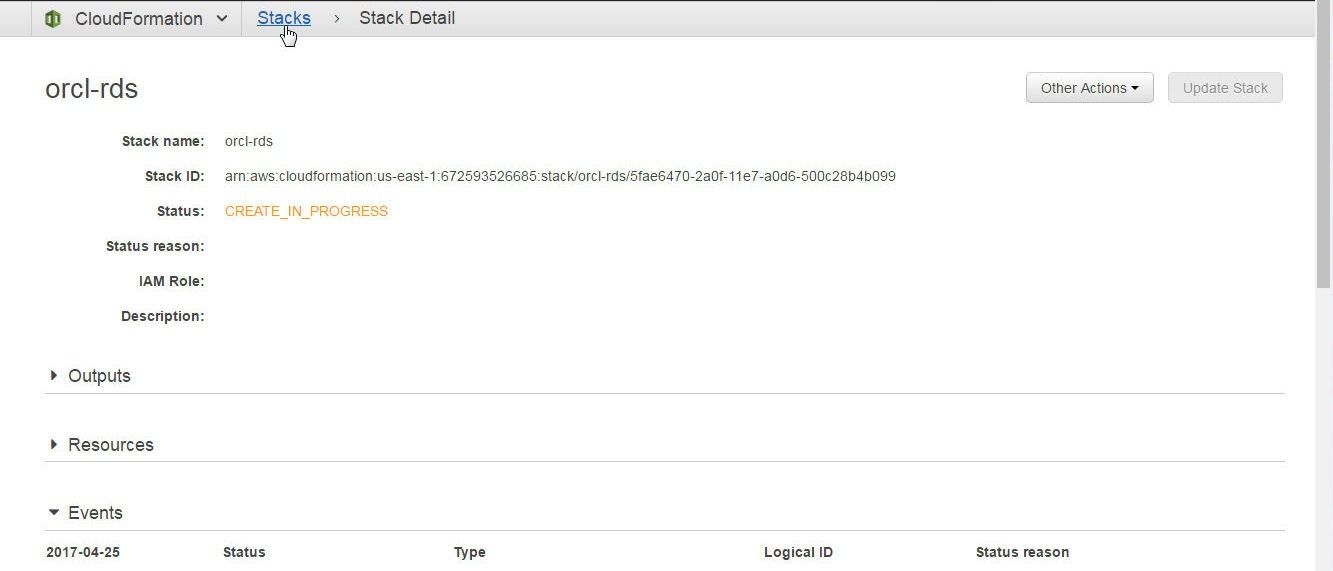
Figure 20. Stack Detail
Tabs for Overview, Outputs, Resources, Events, Template, Parameters, Tags, Stack Policy, and Change Sets get displayed, as shown in Figure 21.The stack Overview is selected by default.
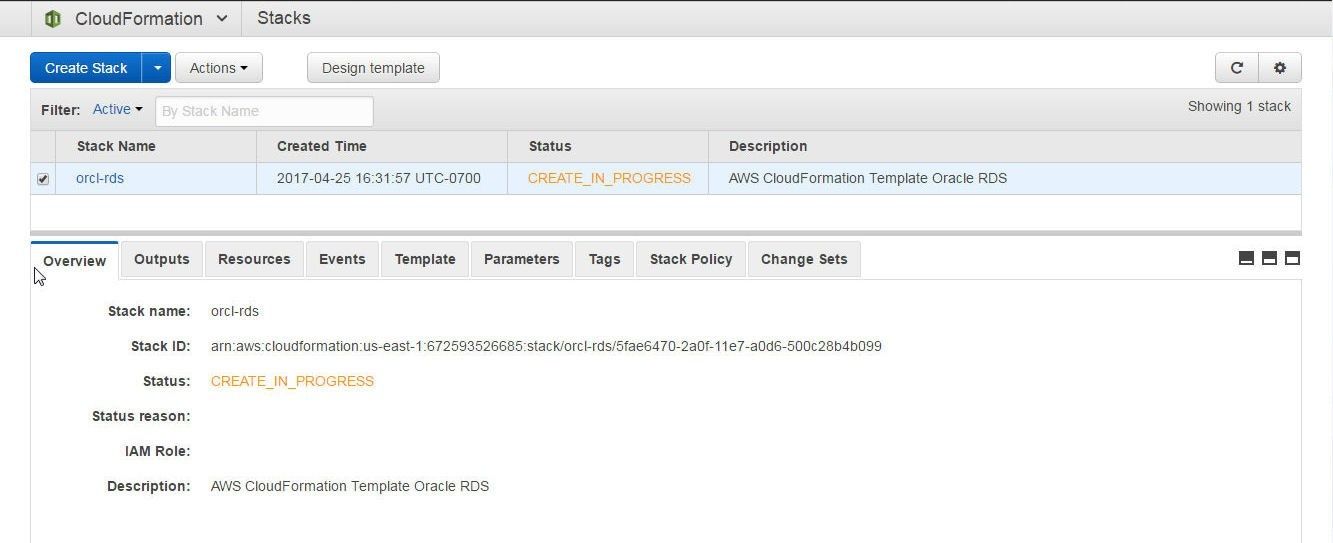
Figure 21. Stack Overview and Tabs for Stack sections
Select the Resources tab for the stack resources. Some of the resources are listed as Completed while others are in the process of being created, as shown in Figure 22.
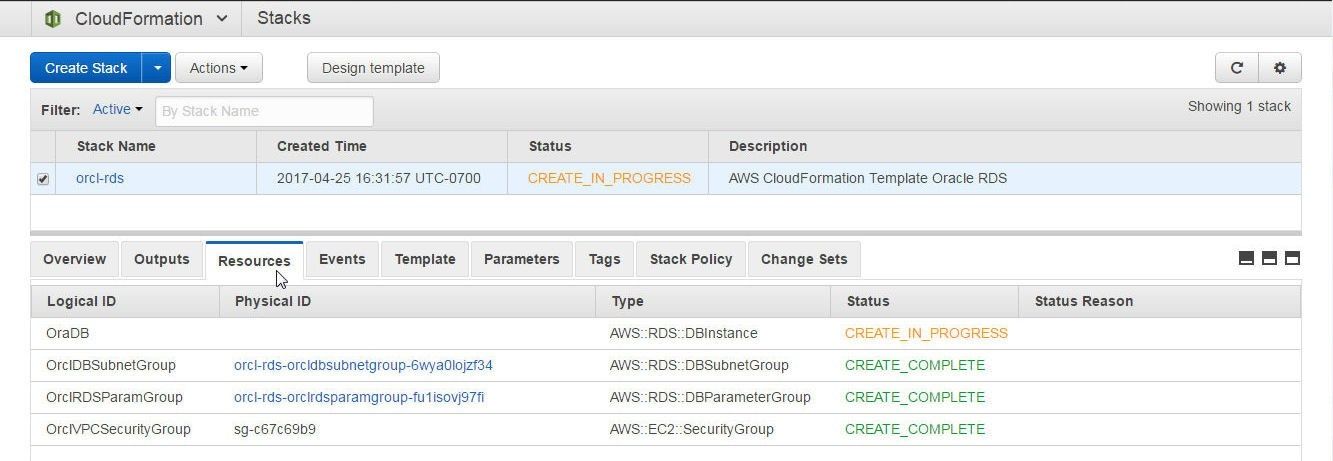
Figure 22. Stack Resources
Click on the Events tab to list the events, as shown in Figure 23. Event information includes a timestamp, Status, Type, and Logical ID.
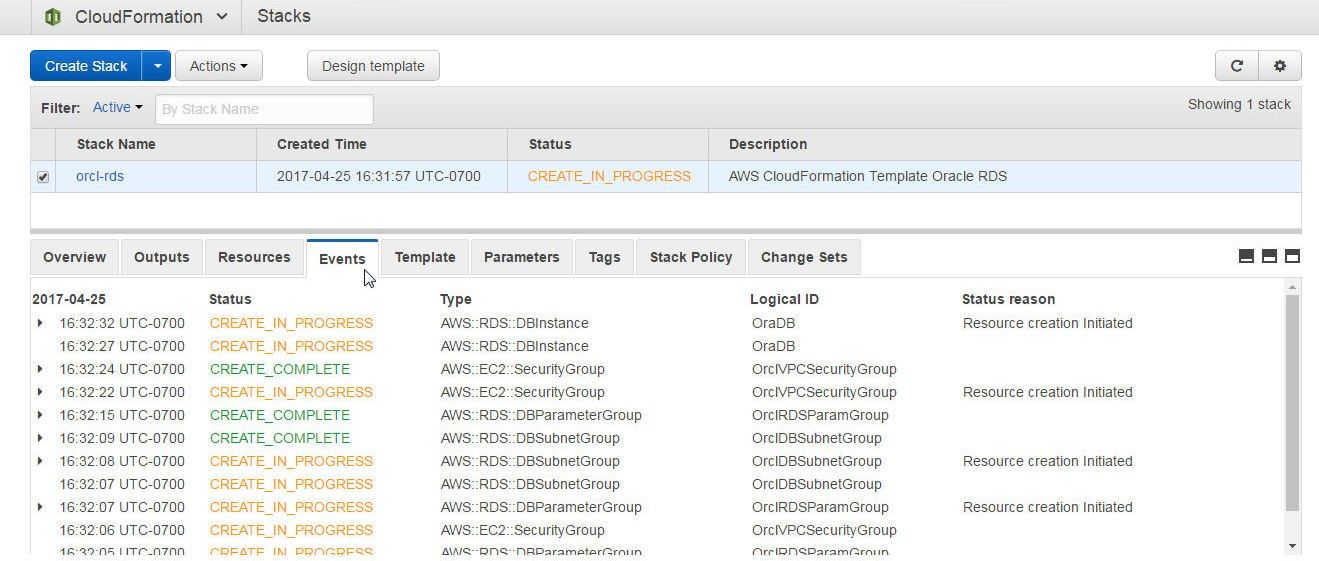
Figure 23. Stack Events
Click on the Parameters tab to list the Stack parameters, as shown in Figure 24.

Figure 24. Stack Parameters
The template may be listed with the Template tab, as shown in Figure 25.
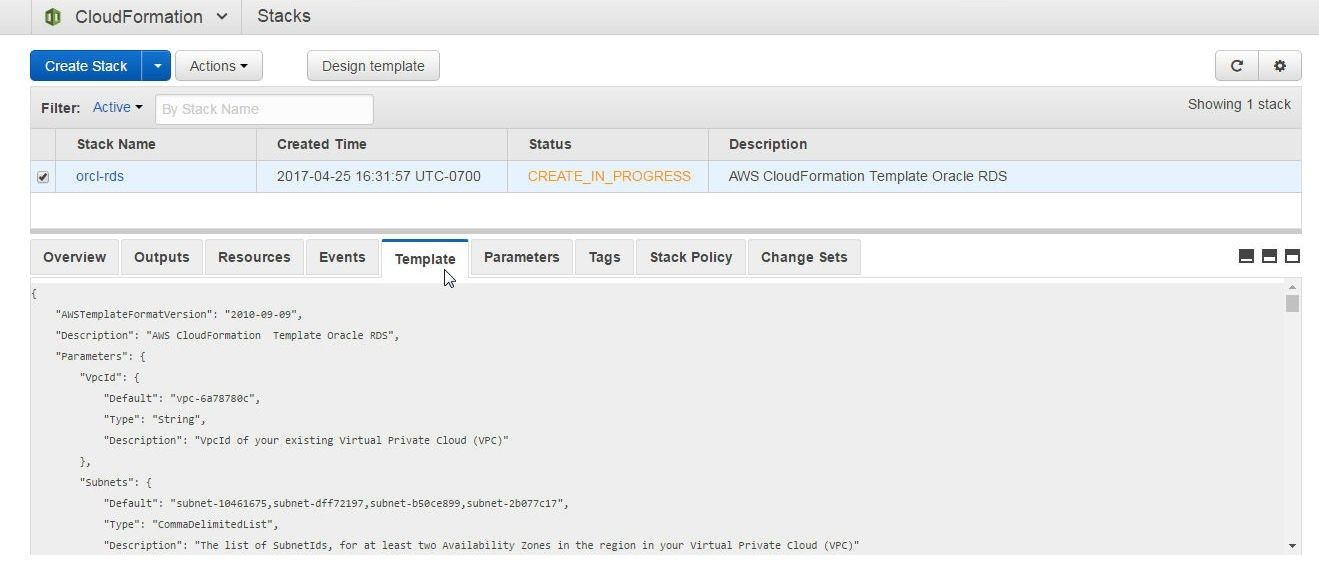
Figure 25. Template Tab
When all the Stack resources have been created the stack Status becomes CREATE_COMPLETE, as shown in Figure 26.
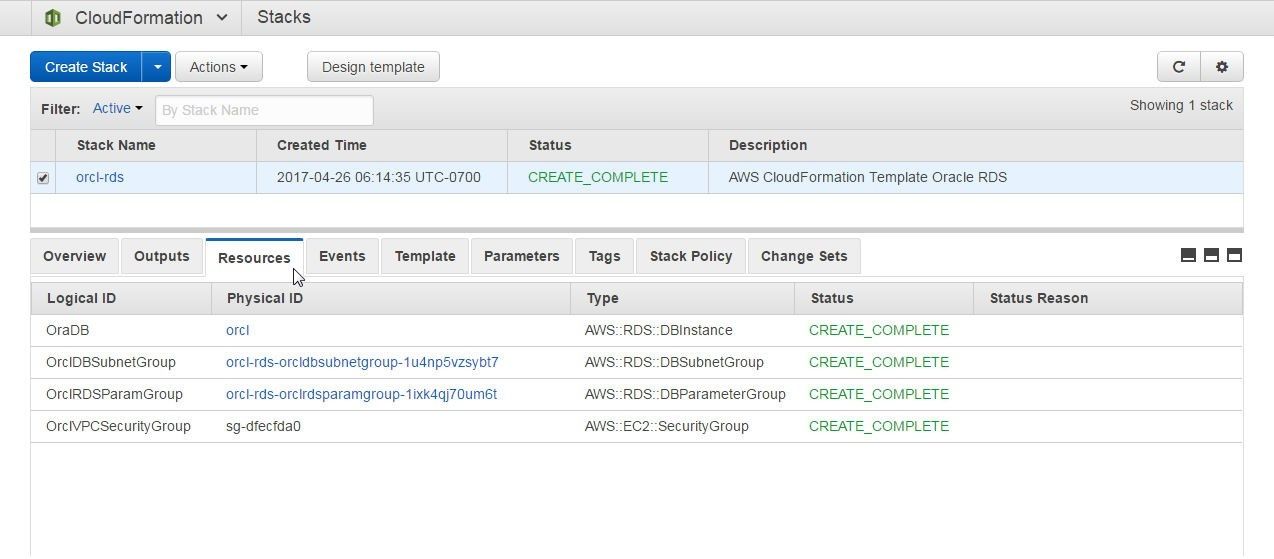
Figure 26. Stack created and all Resources with Status CREATE_COMPLETE
When the stack has been completed the Events should list the Status CREATE_COMPLETE for the AWS::CloudFormation::Stack type event as shown in Figure 27.

Figure 27. All Event Types CREATE_COMPLETE
The Overview also lists the Stack Status as CREATE_COMPLETE, as shown in Figure 28.

Figure 28. Overview Status as CREATE_COMPLETE
Finding Status of RDS Instance
After the Stack lists the status as CREATE_COMPLETE select the RDS service in the AWS Console and click on the refresh icon in the RDS Console to list the RDS DB instances. The orcl DB Instance is listed with Status “creating” as shown in Figure 29.

Figure 29. RDS DB Instance orcl created with CloudFormation
The RDS DB instance creation could take a varying amount of time depending on the RDS service create latency. At times an increased instance create latency may cause up to an hour or more for the RDS DB instance to get created and become available. Select the Notifications to find if any "Increased Instance Create Latencies" exist or have been resolved, as shown in Figure 30.
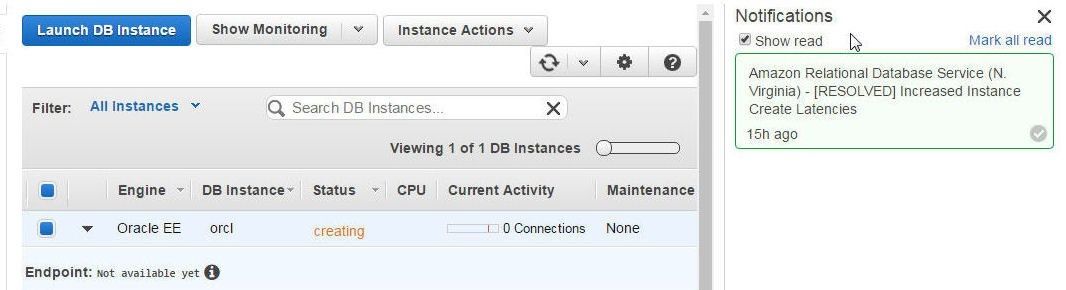
Figure 30. Notifications about Increased Instance Create Latencies
When the RDS instance becomes created the Status becomes “available” and the Endpoint becomes listed, as shown in Figure 31.
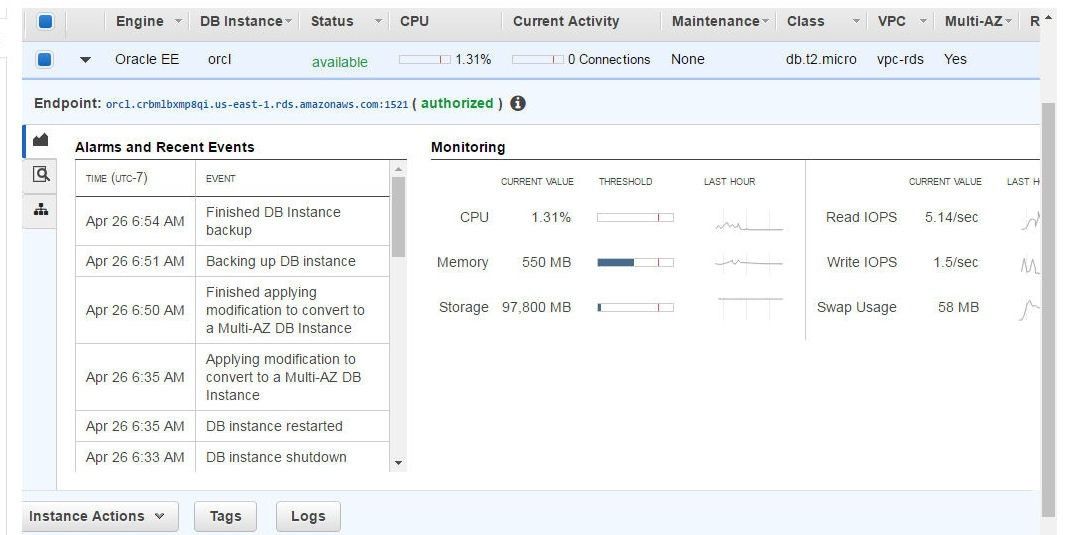
Figure 31. RDS DB Instance Available
The Configuration Details include the DB Name, Availability Zone, VPC, Subnets and the Endpoint, as shown in Figure 32.

Figure 32. Configuration Details
Modifying and Adding Features to RDS Database Instance
An RDS instance that does not get created due the omission of some configuration information in the CloudFormation template may still be created by providing the missing configuration information in the RDS Console itself. As an example, omit the following SecutiryGroupIngress, which is required for Inbound permissions to the RDS instance, from the template from which the stack is created. As the stack was already successfully completed, a new stack would need to be created with the SecurityGroup Ingress omitted.
{
    "IpProtocol": "-1",
    "FromPort": "-1",
    "ToPort": "-1",
    "CidrIp": "0.0.0.0/0"
}
The RDS instance launched from the template would not get created and available and instead the “No Inbound Permissions” error gets displayed in the RDS Console as shown in Figure 33.
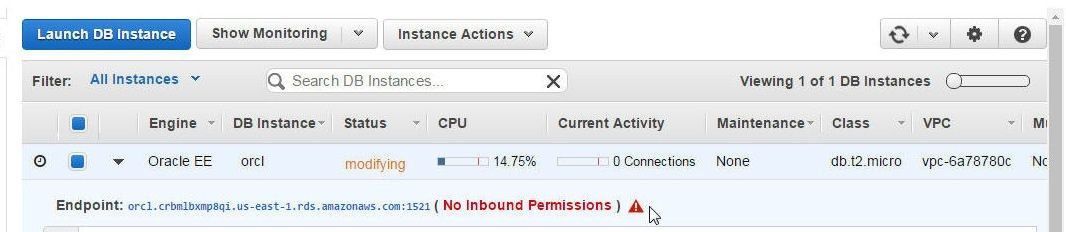
Figure 33. An RDS Instance with No Inbound Permissions
Click on the triangular icon to display detail about the error condition in a dialog as shown in Figure 34. As the dialog indicates, Security Group Configuration Does not Allow Inbound Connections.
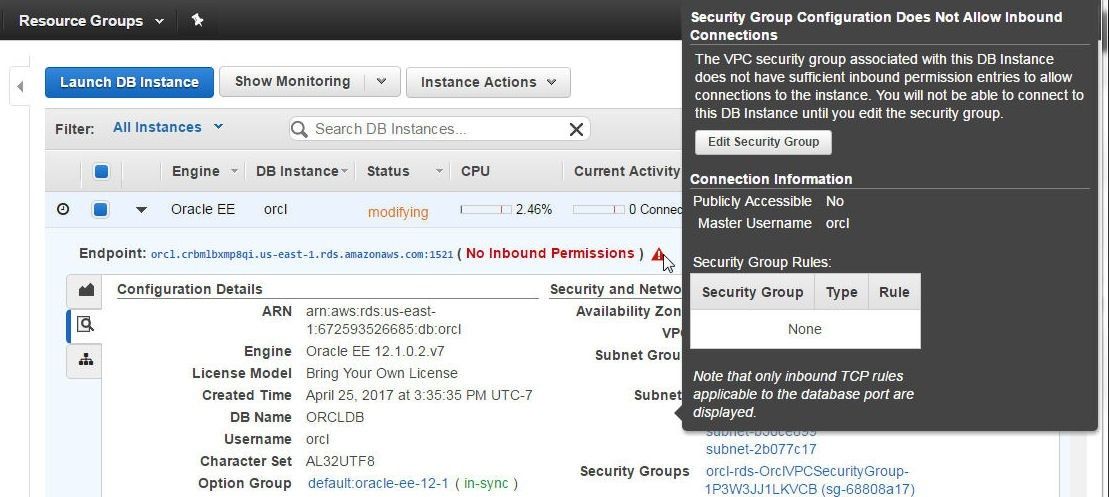
Figure 34. Displaying Error Dialog for No Inbound Permissions
The Security Group may be edited and the required Inbound Permissions added to make the RDS instance available. Click on Edit Security Group as shown in Figure 35.
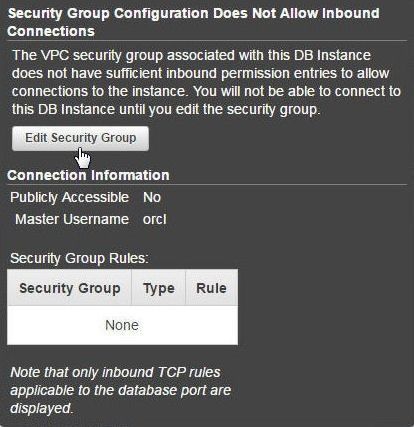
Figure 35. Edit Security Group
The Security Group for the RDS instance gets opened in the RDS Console as shown in Figure 36. Click on the Edit button to add the Inbound Permissions.
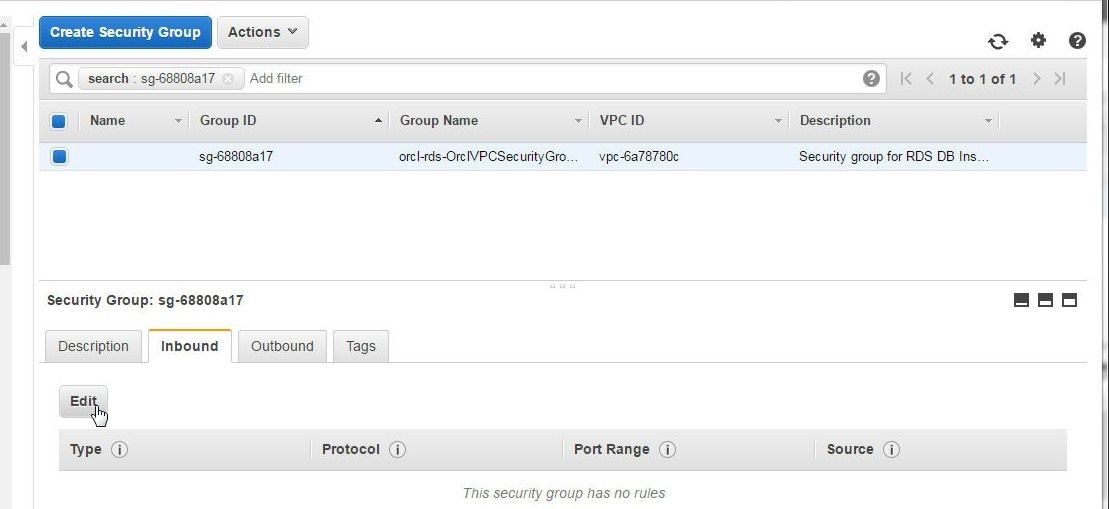
Figure 36. Security Group>Edit
Click on Add Rule to add a new rule or modify the rule listed to make Type as All traffic, Protocol as All, Port Range as 0-65535, Source as Anywhere, as shown in Figure 37. Click on Save.
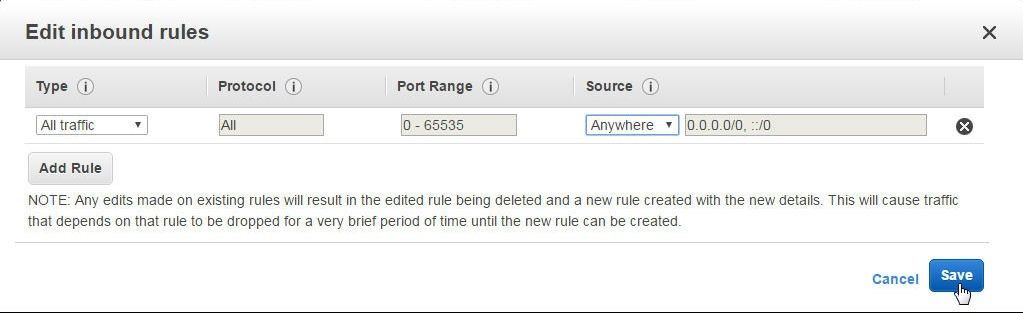
Figure 37. Adding or Modifying Inbound Permissions
The Inbound Rules should include all traffic for all protocols, for all port ranges and all sources as shown in Figure 38.
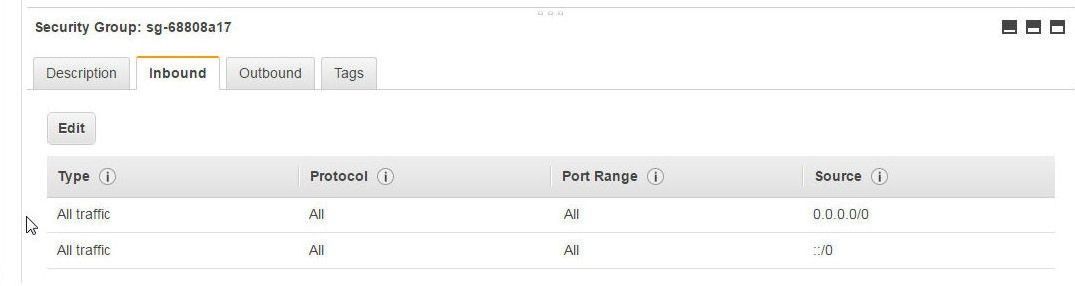
Figure 38. Modified Inbound Rules
Click on the Refresh Data icon as shown in Figure 39.
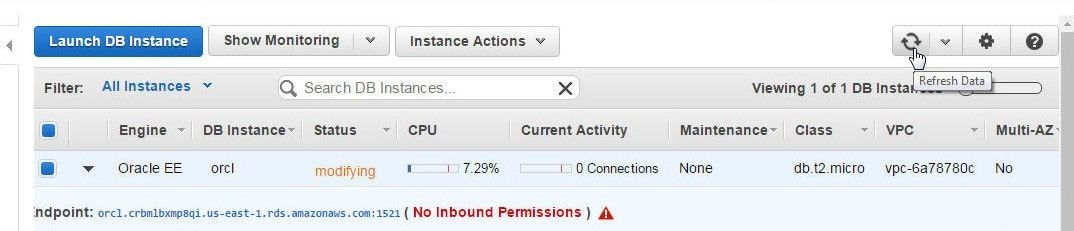
Figure 39. Refreshing Data
The Connection Information gets updated, as shown in Figure 40.

Figure 40. Connection Information Updated
The Endpoint which previously indicated No Inbound Permissions becomes authorized as shown in Figure 41. The RDS instance becomes available.
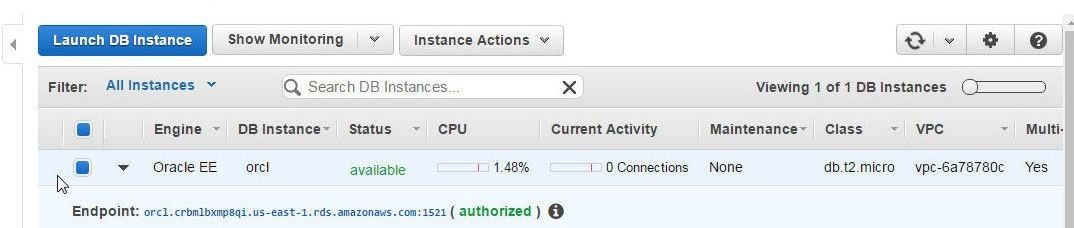
Figure 41. Endpoint and RDS Instance Available
The Stack status which was CREATE_IN_PROGRESS due to the RDS instance not being created due to No Inbound Permissions” becomes CREATE_COMPLETE, as shown in Figure 42.

Figure 42. Stack Status becomes CREATE_COMPLETE
Storing CloudFormation Template in S3
The template for a Stack that is CREATE_COMPLETE may be saved in an S3 Bucket to be reused. Click on Actions>View/Edit template in a Designer as shown in Figure 43.
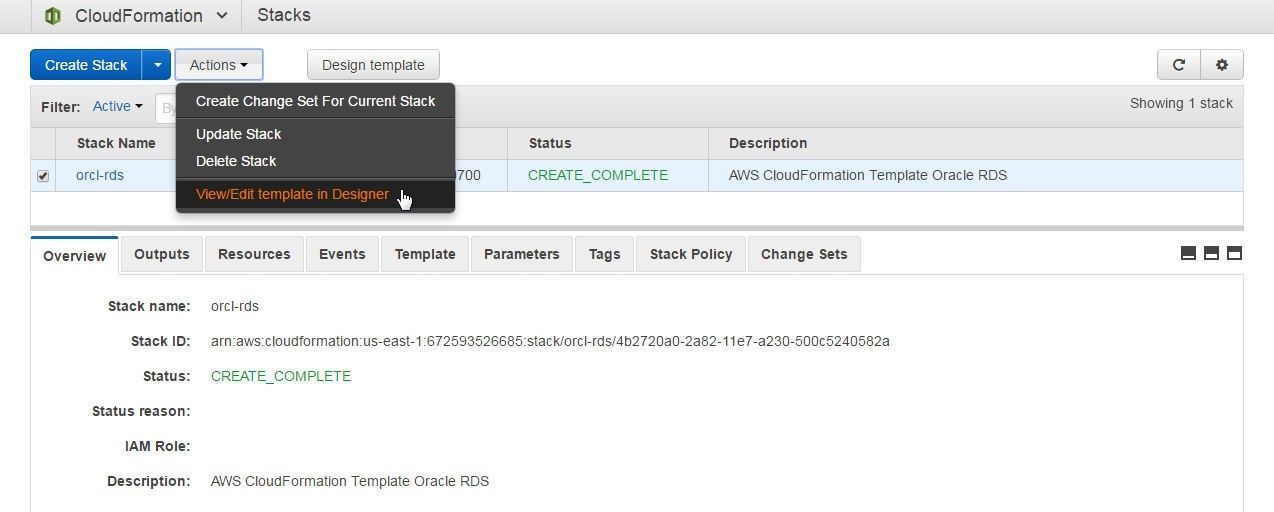
Figure 43. Actions>View/Edit Template in Designer
The template gets opened in CloudFormation Designer. Click on the document icon and select Save as shown in Figure 44.
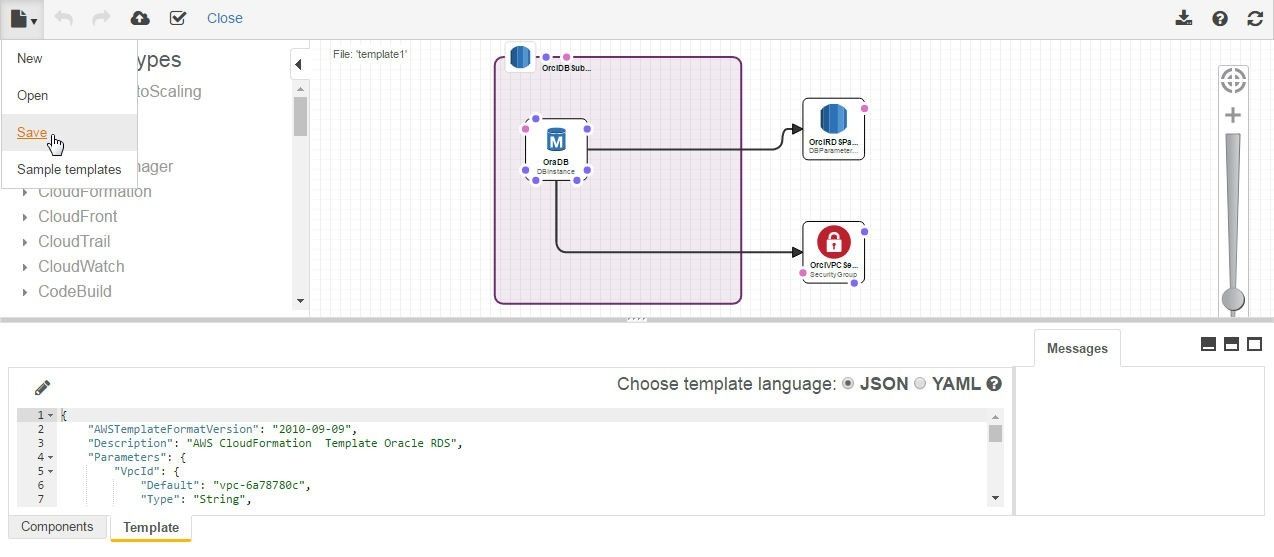
Figure 44. Saving a Template
In the Save your template dialog click on Amazon S3 bucket as shown in Figure 45.
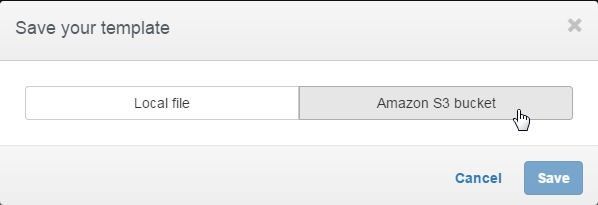
Figure 45. Save your template>Amazon S3 bucket
Specify a File name (orcl-rds) and click on Save as shown in Figure 46.
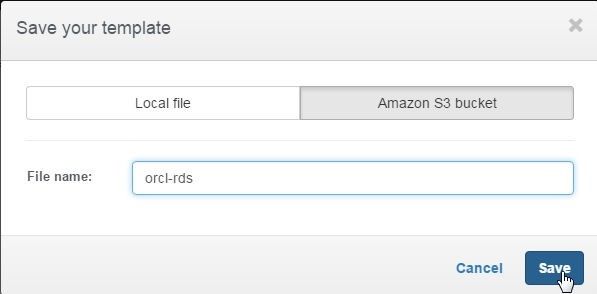
Figure 46. Saving template in Amazon S3 bucket
If the template gets saved the message “Your template has been saved in the following location” gets displayed, as shown in Figure 47.
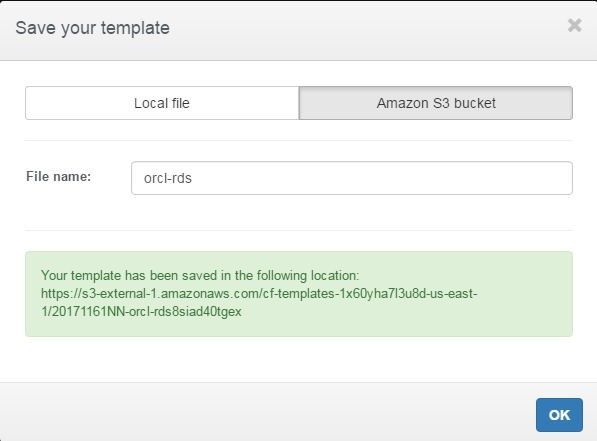
Figure 47. Template Saved in S3 Bucket
In this article we discussed a declarative coding approach to provision AWS Infrastructure for an RDS DB instance. The Infrastructure as Declarative Code approach is suitable if fine-grained configuration of Infrastructure for a database is to be made. AWS CloudFormation may be used not only for an RDS DB instance but also other databases
Start the discussion at forums.toadworld.com