 Some of the commonly used Git-based version control repositories such as GitHub offer features suitable for creating repos (public and private) for distributed version control and source code management (SCM) and are commonly used for storing database and database driver code. In addition to SCM, GitHub offers access control, features requests, and issue tracking.
Problem
GitHub has several limitations on the type and size of files stored in it, which makes it not the most suitable web repo for managing source code for databases and database drivers. GitHub imposes the following limits:
- Total storage size per repo is limited to 1GB.
- Per file size is limited to 100MB. A warning is generated for files exceeding size 50MB.
- For a project release, an individual file size must be kept less than 2GB.
- GitLab, which offers Large File Storage (LFS) for storing large files, has a storage limit of 10GB per repo.
- While GitHub does not have a limit on the number of branches, the number of branches is limited by the total storage space.
- Scalability issues exist when synchronizing a large number of branches.
- Not recommended for storing database dumps, log files, binary files and installers.
- Not integrated with a build tool.
Solution
AWS CodeCommit overcomes all of these problems or limitations. CodeCommit offers unlimited private repos with no limit on the size of a repo or on the size and type of the file stored in a repo. Large number of files and large files may be stored and an unlimited number of branches may be created. CodeCommit is integrated with other AWS services. An AWS IAM User account is more secure than a GitHub user account. AWS CodeBuild is integrated with CodeCommit to build the code in a repo.
In this tutorial we shall discuss creating a CodeCommit repo, connecting to the repo, and uploading source code to the repo. We have used a Hello World source code repo, but a CodeCommit repo is also suitable for database and database driver code. This tutorial has the following sections:
- Setting the Environment
- Creating a Github Repository
- Migrating Github Code to a local folder
- Creating a CodeCommit Repository
- Setting Up SSH Connections to an AWS CodeCommit Repository
- Creating an IAM User
- Installing Git
- Setting up SSH connection for Git and CodeCommit
- Configuring an SSH Configuration File
- Testing the SSH Connection to CodeCommit
- Migrating GitHub Code to CodeCommit
Setting the Environment
We have used Windows OS to create and connect to a CodeCommit repo on AWS. Download and install Git for Windows from https://git-scm.com/download/win. AWS CodeCommit supports Git version 1.7.9 and later. An AWS account is required, which may be created at http://aws.amazon.com. The procedure to migrate a GitHub repo to CodeCommit is as follows:
- Create a Github Repository
- Migrate Github code to a local directory
- Create a CodeCommit repository in AWS Management Console
- Create an IAM User
- Install Git (if not already installed)
- Setup SSH for Git
- Login as IAM user and connect to CodeCommit repository
- Configure SSH connection for CodeCommit
- Configure SSH Configuration File
- Migrate local repo code to CodeCommit
Creating a Github Repository
First, we shall create a GitHub repo with two files as source code for a Docker image; Dockerfile and server.js. The Dockerfile is as follows.
FROM node:4.4
EXPOSE 8080
COPY server.js .
CMD node server.js
The server.js is as follows.
var http = require('http');
var handleRequest = function (request, response) {
  response.writeHead(200);
  response.end('Hello World!');
};
var www = http.createServer(handleRequest);
www.listen(8080);
The dvohra/docker-node-server repo is shown in Figure 1. The same source code may be used to create a repo by a user or a different repo may be used. It is not significant which repo is migrated to CodeCommit.
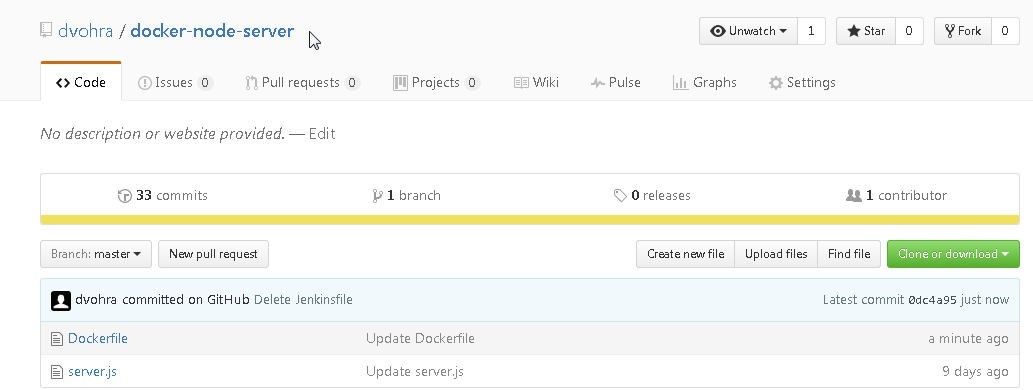
Figure 1. The Github Repo dvohra/docker-node-server
The Dockerfile is shown in Figure 2.
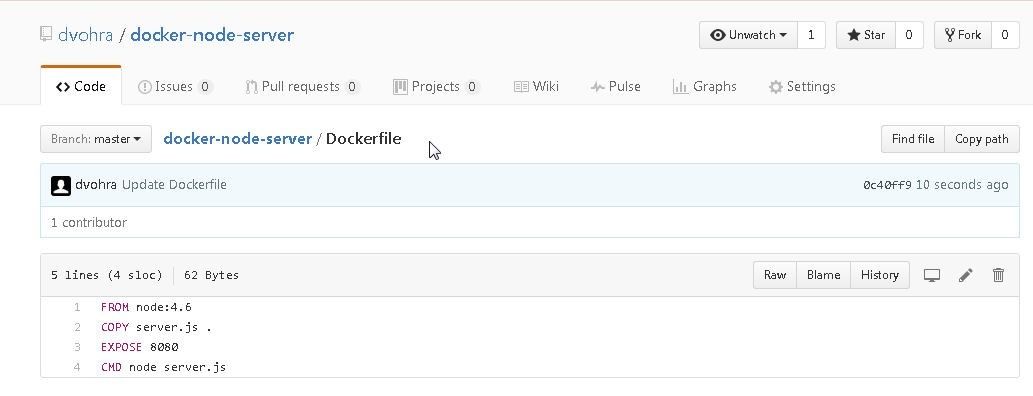
Figure 2. Dockerfile
The server.js is shown in Figure 3.
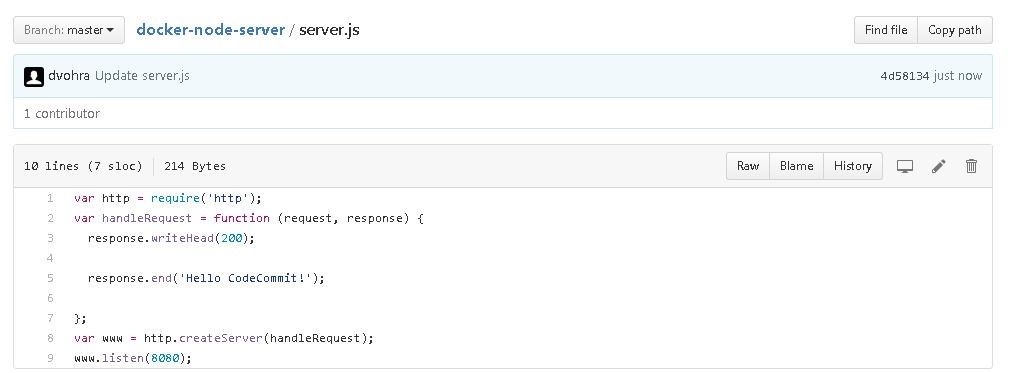
Figure 3. The server.js
Migrating Github Code to a local folder
In this section we shall migrate the GitHub repo to a local directory. Create a local directory for CodeCommit called AWS CodeCommit. Obtain the HTTPS URL to connect to GitHub as shown in Figure 4.
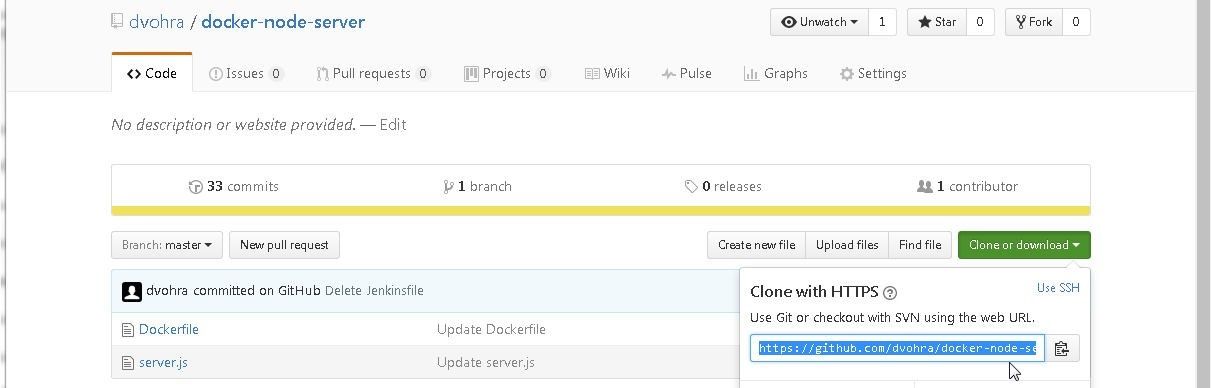
Figure 4. Obtaining the HTTPS URL for GitHub
Run the following command to clone the GitHub repo to the local directory.
C:\DockerDevOps\AWS CodeCommit>git clone --mirror https://github.com/dvohra/docker-node-server.git aws-codecommit-docker-node-server
As the output indicates, the GitHub repo gets cloned to local directory.
Cloning into bare repository 'aws-codecommit-docker-node-server'...
remote: Counting objects: 78, done.
remote: Compressing objects: 100% (78/78), done.
remote: Total 78 (delta 26), reused 2 (delta 0), pack-reused 0
Unpacking objects: 100% (78/78), done.
Creating a CodeCommit Repository
To create a CodeCommit repository, select Services>Developer Tools>CodeCommit or AWS Services>Code Commit as shown in Figure 5.
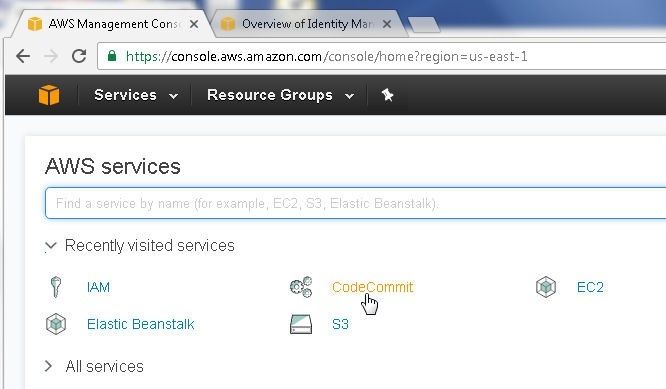
Figure 5. Selecting CodeCommit Service
Click on Get Started as shown in Figure 6.

Figure 6. Get Started
Specify a Repository name (Node-Server) and click on Create repository as shown in Figure 7.
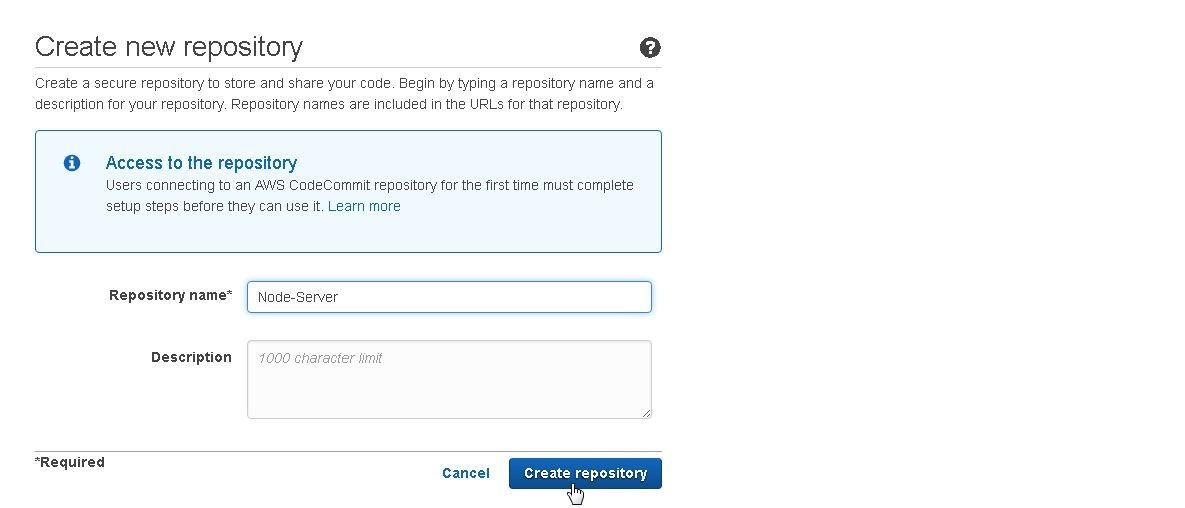
Figure 7. Create repository
The Node-Server repository gets created as shown in Figure 8.
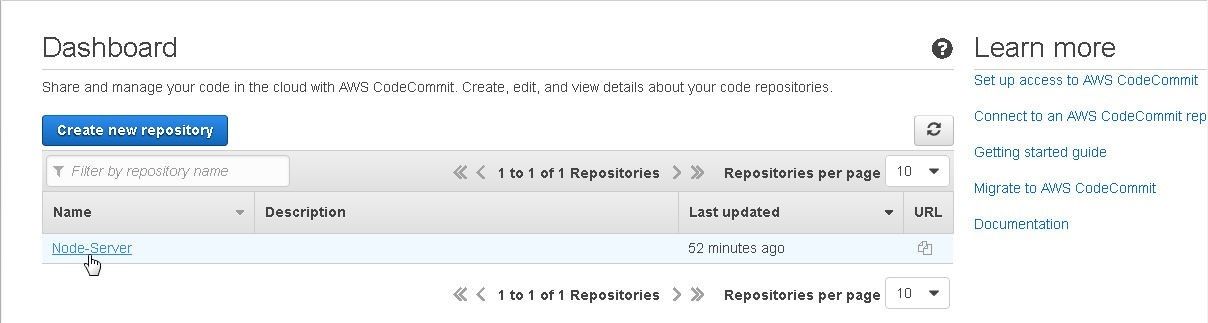
Figure 8. Node-Server CodeCommit Repo
Setting Up SSH Connections to AWS CodeCommit Repository
In the following subsections we shall set up an SSH connection to AWS CodeCommit repository.
Creating an IAM User
First, we need to create an IAM user. The IAM User name may be different for different users but the procedure is the same. Select IAM from the Services catalog or access the Identity and Access Management Console at https://console.aws.amazon.com/iam/. Select the Users selection in the navigation. Click on Add user as shown in Figure 9.

Figure 9. Add user
In the Add user detail page specify User name and select Access type as Programmatic access as shown in Figure 10.
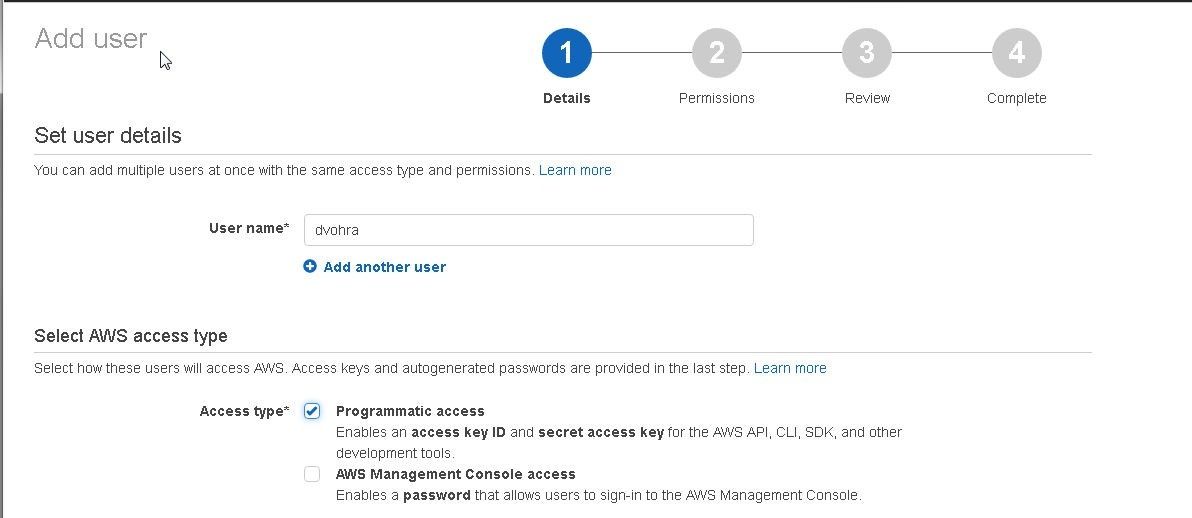
Figure 10. Adding User Detail
Click on Next: Permissions as shown in Figure 11.
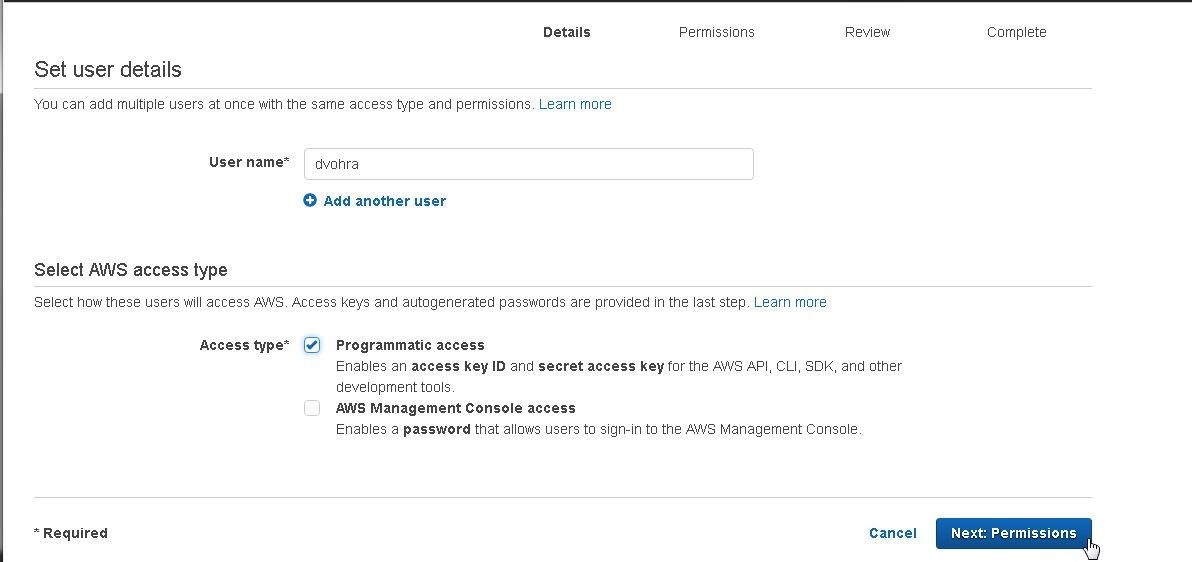
Figure 11. Next:Permissions
Next, set permissions for the IAM user. Click on Attach existing policies directly as shown in Figure 12.
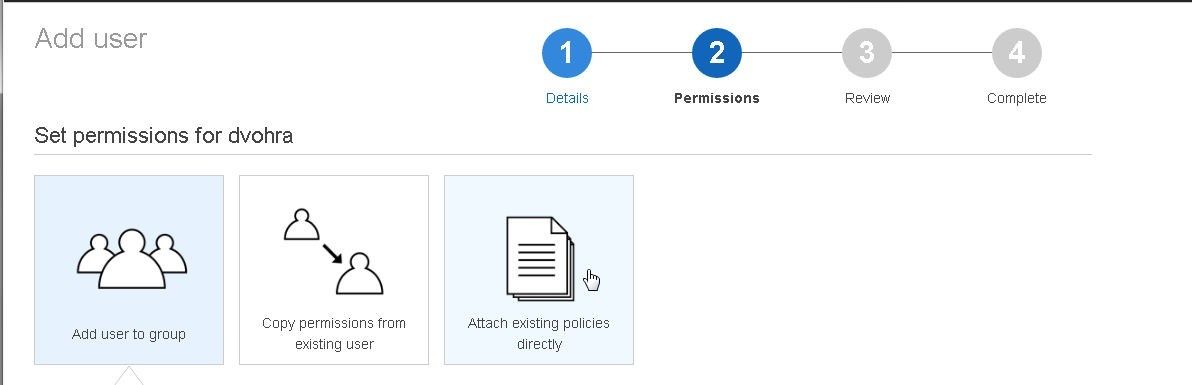
Figure 12. Attach existing policies directly
For AWS CodeCommit access select AWSCodeCommitFullAccess as shown in Figure 13.
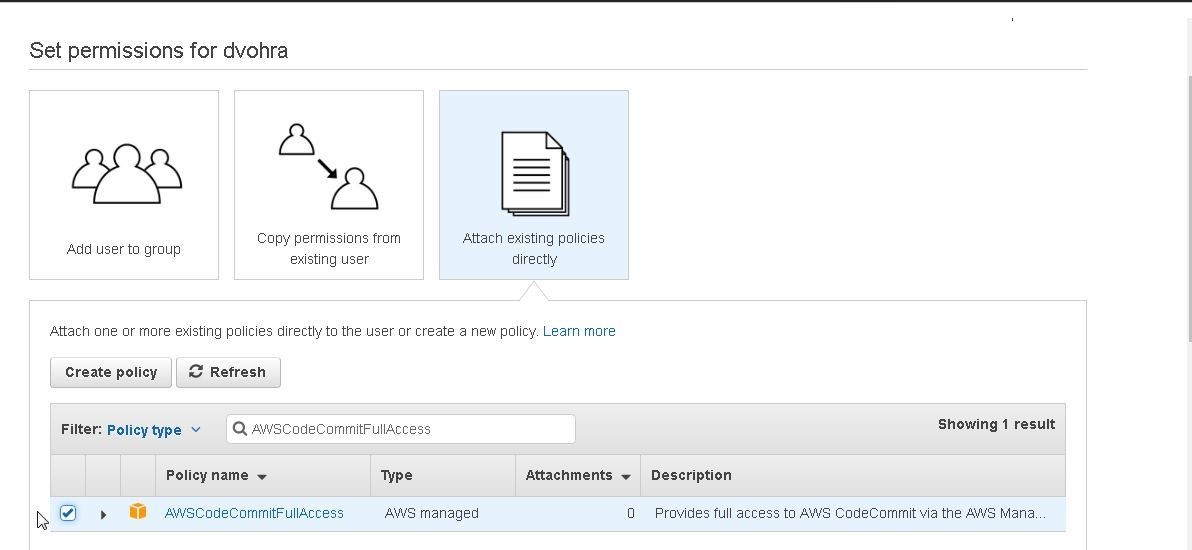
Figure 13. Selecting AWSCodeCommitFullAccess
Click on Next: Review as shown in Figure 14.
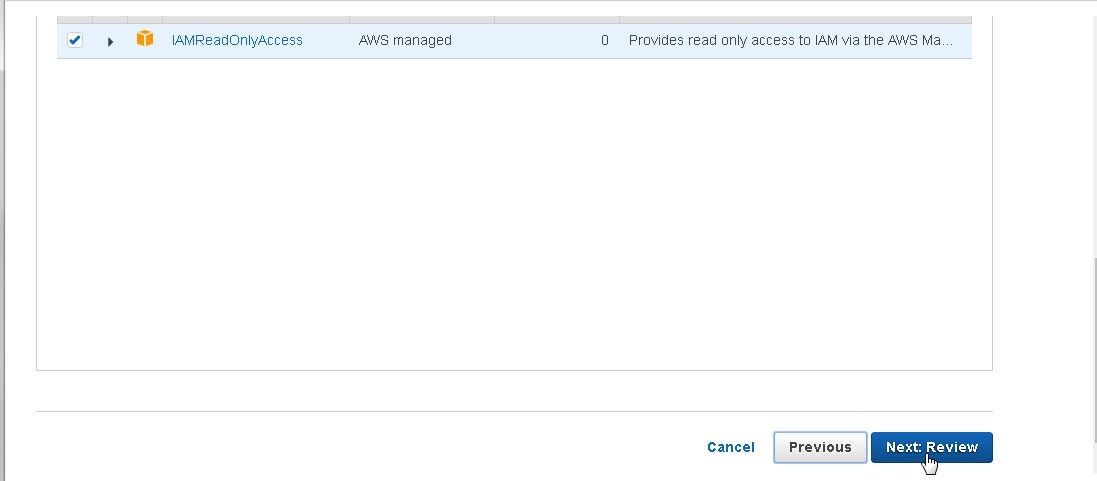
Figure 14. Next:Review
A JSON based permissions policies file gets displayed as shown in Figure 15.
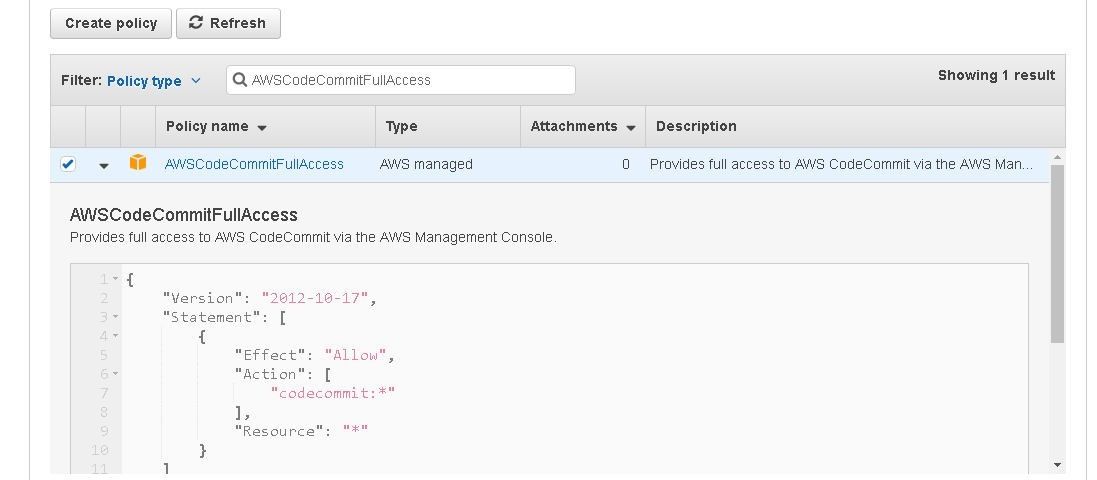
Figure 15. Permissions Policies File for AWSCodeCommitFullAccess
To use SSH to connect to CodeCommit, select the IAMUserSSHKeys policy as shown in Figure 16.
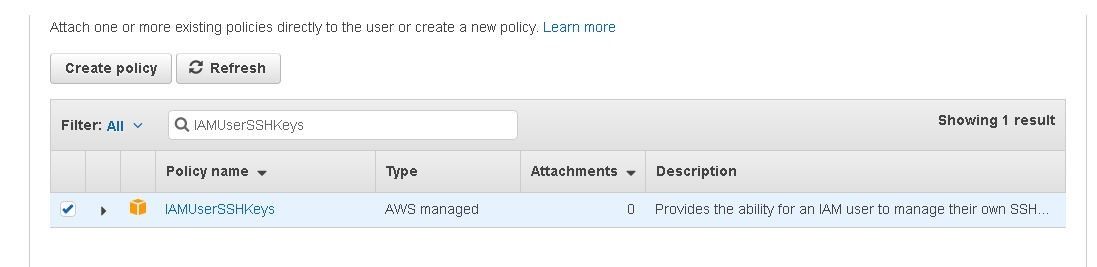
Figure 16. Selecting the IAMUserSSHKeys policy
Also, to use SSH to connect to CodeCommit, select the IAMReadOnlyAccess policy as shown in Figure 17. Click on Next:Review.
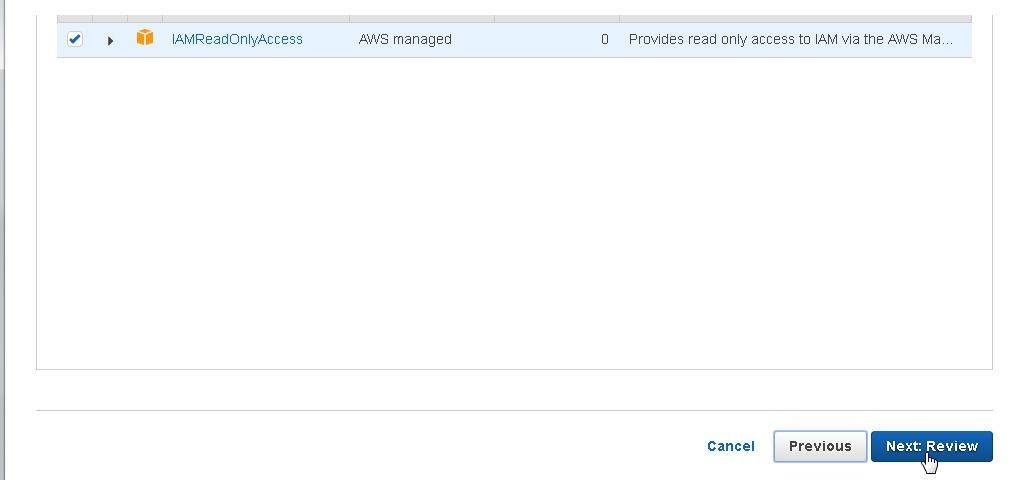
Figure 17. Selecting the IAMReadOnlyAccess Policy
A Summary of permissions gets displayed. Click on Create user as shown in Figure 18.
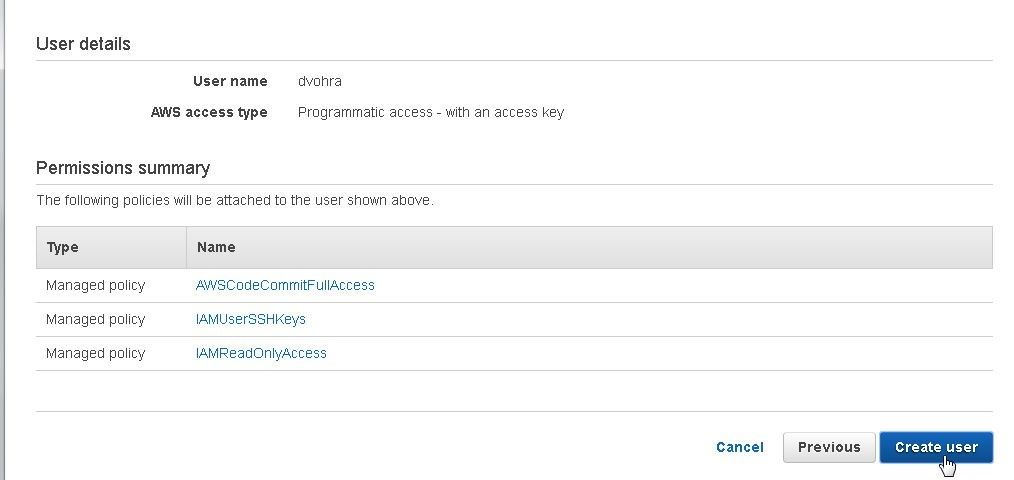
Figure 18. Create user
An IAM user gets created as shown in Figure 19.
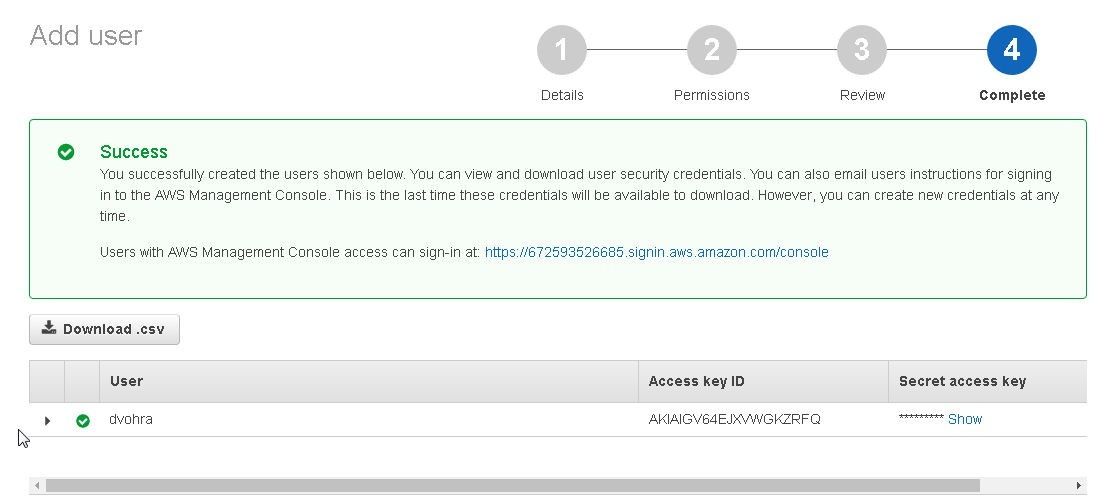
Figure 19. IAM User created
The IAM user gets listed in the Users navigation as shown in Figure 20. Click on the IAM user’s link to access and modify the user detail.
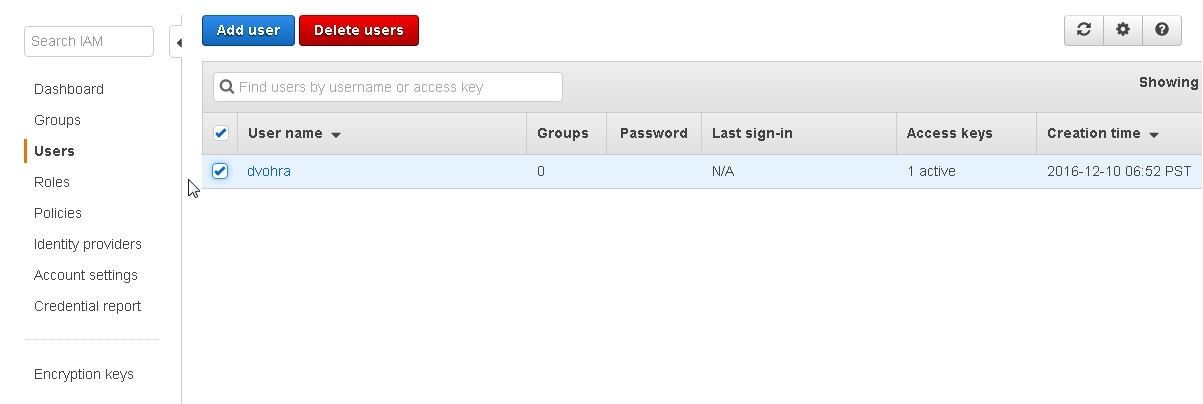
Figure 20. IAM User listed in Dashboard
Manage the Console password. Click on Security Credentials and select the link Console password>Manage password as shown in Figure 21.
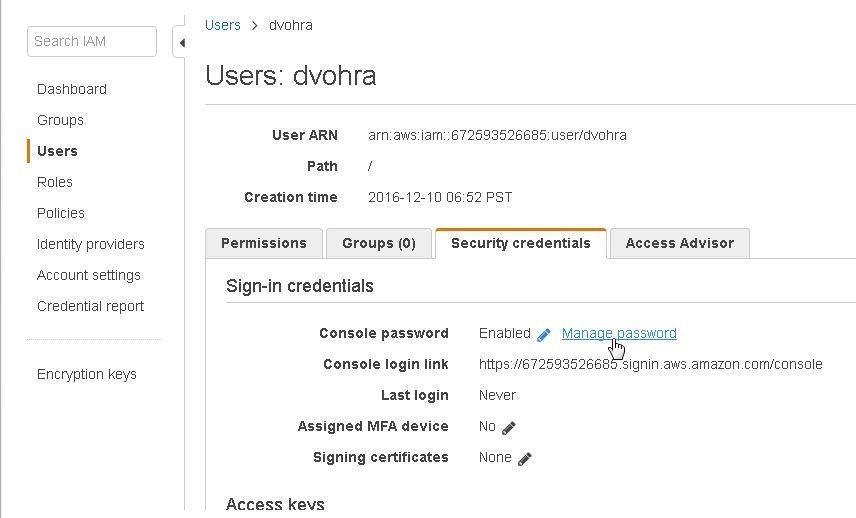
Figure 21. Manage password
Select Enable for Console access and select Custom password for Set password as shown in Figure 22. Click on Apply.
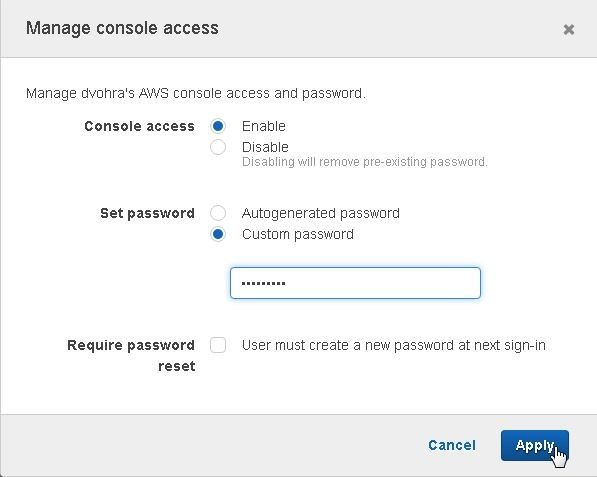
Figure 22. Manage console access
A New password dialog gets displayed to view the new password and download the .csv file as shown in Figure 23. Click on Close.
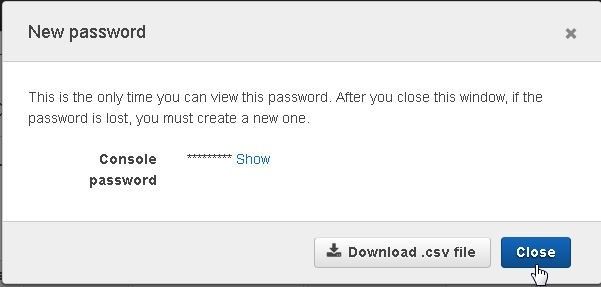
Figure 23. New password
Setting Up SSH connection for Git and CodeCommit
Git has already been installed. Next, we shall set up a SSH Connection for Git. First, we need to set up the public and private keys for Git and AWS CodeCommit. Open a Windows command terminal and change directory (cd) to the C:\Users\Deepak Vohra\.ssh directory. Run the ssh-keygen command to create a public and private keys. At the prompt “Enter file in which to save the key” specify “/c/Users/Deepak Vohra/.ssh/codecommit_rsa”. At the command prompt “Enter passphrase” keep empty and click on “Enter”. At the command prompt “Enter same passphrase again” keep empty and click on “Enter”. A public and a private key get generated. The output from the ssh-keygen command is shown.
C:\Users\Deepak Vohra\.ssh>ssh-keygen
Generating public/private rsa key pair.
Enter file in which to save the key (/c/Users/Deepak Vohra/.ssh/id_rsa): /c/User
s/Deepak Vohra/.ssh/codecommit_rsa
Enter passphrase (empty for no passphrase):
Enter same passphrase again:
Your identification has been saved in /c/Users/Deepak Vohra/.ssh/codecommit_rsa.
Your public key has been saved in /c/Users/Deepak Vohra/.ssh/codecommit_rsa.pub.
The key fingerprint is:
SHA256:ZTlo9FvGPEbeE4LVhhQCv5Cu+aQqsJbF2xx+QlI3h9Q Deepak Vohra@dvohra-PC
The key's randomart image is:
+---[RSA 2048]----+
|        +..+*+.  |
|       o E.B.oo. |
|      . * B O.o  |
|     . * = B . . |
|  . . . S o      |
|.  + o o         |
| oo B + .        |
|.o.. = =         |
|.  ...+ .        |
+----[SHA256]-----+
The public and private keys are shown in the C:\Users\Deepak Vohra\.ssh directory in Figure 24.

Figure 24. The public and private keys
Logout of AWS Console if logged in as a user other than the IAM user dvohra created in an earlier section.-Re-Login as the IAM user dvohra created earlier as shown in Figure 25.
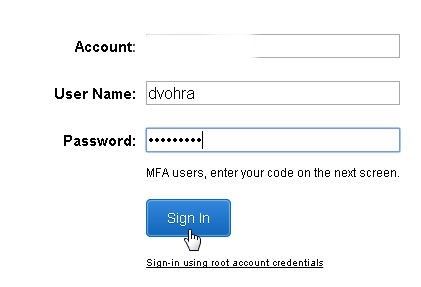
Figure 25. Logging In as IAM User dvohra
Click on the IAM user link to access and modify the user detail. Click on Security Credentials and scroll down. Click on the Upload SSH public key button as shown in Figure 26.
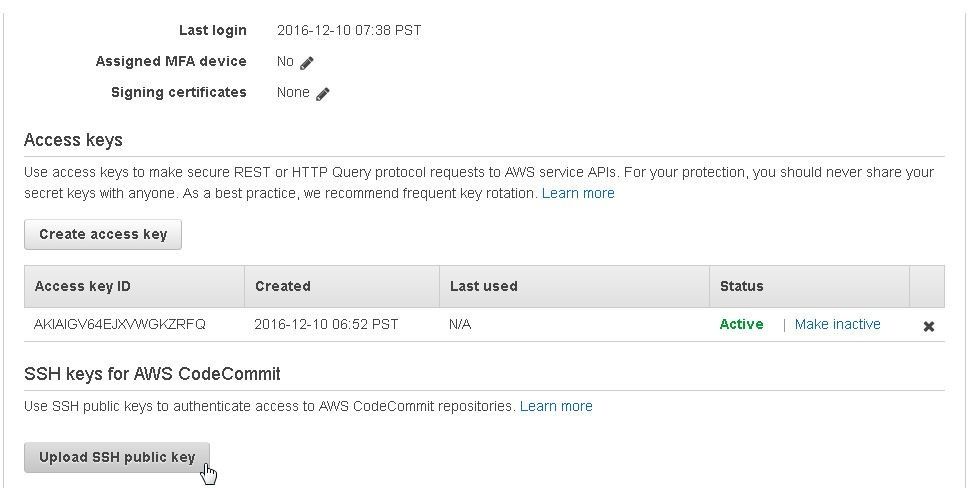
Figure 26. Upload SSH public key
Open the C:\Users\Deepak Vohra\.ssh>codecommit_rsa.pub file in a text editor such as notepad and copy the SSH public key.
Copy and Paste the SSH public key to the Upload SSH public key field and click on Upload SSH Public Key as shown in Figure 27.
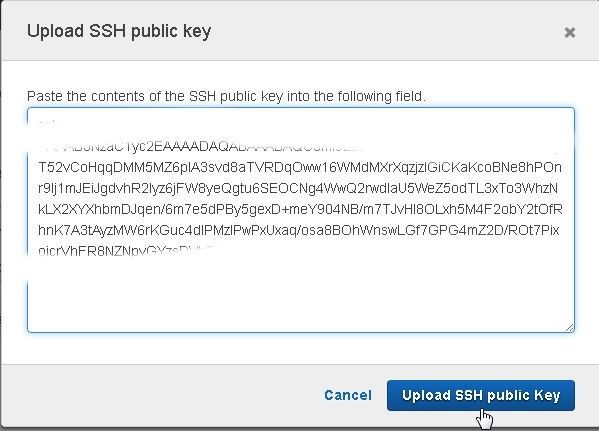
Figure 27. Upload SSH Public Key
The SSH public key gets uploaded and an SSH key ID AKIAIGV64EJXVWGKZRFQ gets generated as shown in Figure 28.
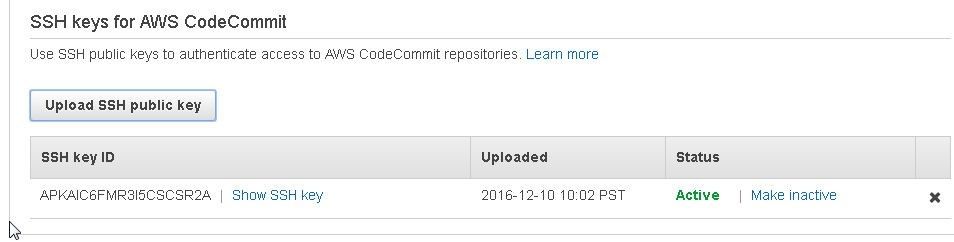
Figure 28. SSH key ID
Copy the SSH key id as shown in Figure 29.
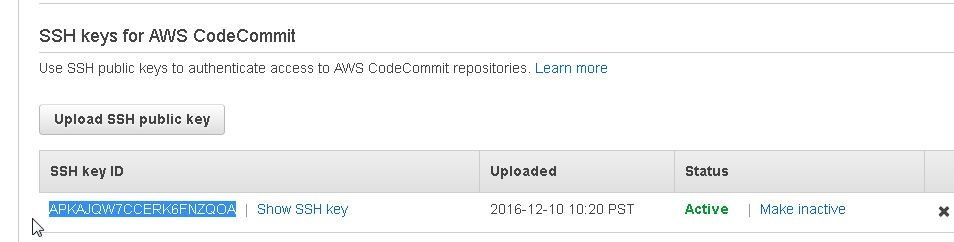
Figure 29. Copying the SSH key ID
Configuring SSH Configuration File
Next, we need to add a config file to the ~/.ssh directory. In a Windows terminal, run the following notepad command to create a config file without a file extension. Note the “.” At the end of the command, which is required to create a new file without an extension. In the dialog prompt “Do you want to create a new file?” click on Yes.
C:\Users\Deepak Vohra\.ssh>notepad config.
A config file gets created as shown in Figure 30.
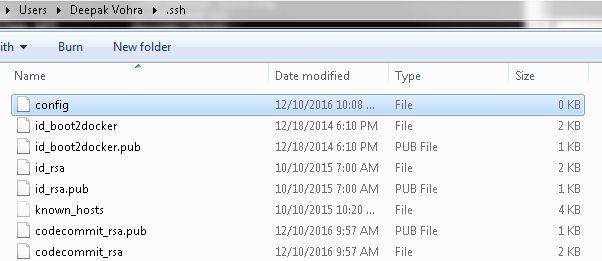
Figure 30. Creating the config file
Copy the following listing, which includes the SSH key id for the IAM user and the SSH private key file directory path to the config file and save the file.
Host git-codecommit.*.amazonaws.com
User APKAJ57XBTD4QIODQ3HQ
IdentityFile "/c/Users/Deepak Vohra/.ssh/codecommit_rsa"
The config file is shown in Figure 31.
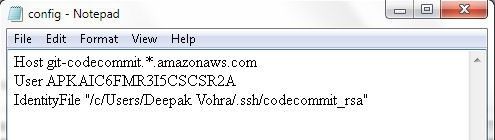
Figure 31. The config File
Set the permissions for the config file to 600 (Only the owner may read and write the file).
chmod 600 config
Testing the SSH Connection to CodeCommit
We have configured an SSH connection for Git and CodeCommit. Next, we shall test the connection. First, we need to obtain the CodeCommit repo Git URL. Click on the CodeCommit repo link in the dashboard as shown in Figure 32.
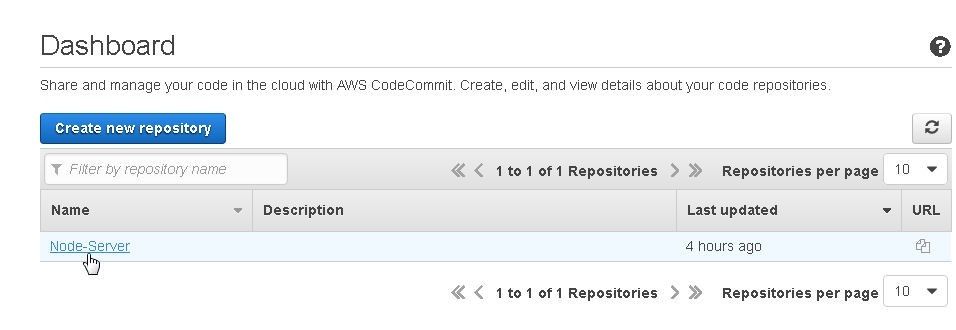
Figure 32. Node-Server CodeCommit Repo
Initially the repo is empty as shown in Figure 33.
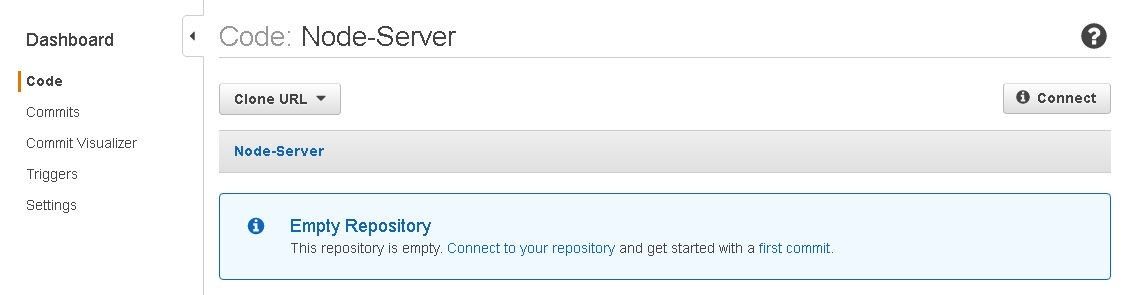
Figure 33. Empty CodeCommit Repo
Click on the link in the URL column as shown in Figure 34.
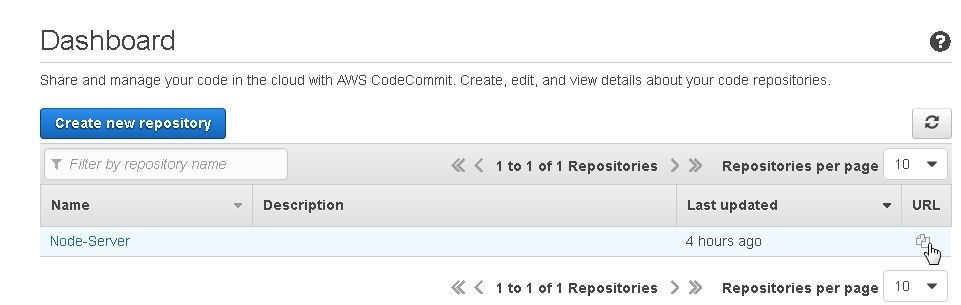
Figure 34. Selecting the link in the URL Column
Click on SSH as shown in Figure 35.
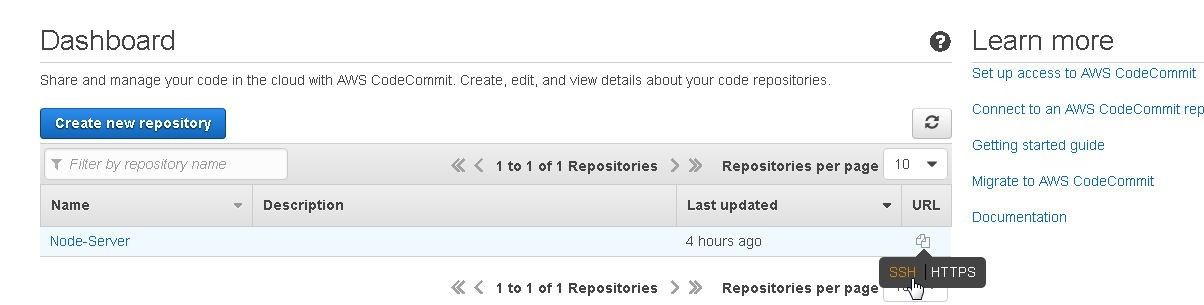
Figure 35. Selecting SSH
Copy the Repository SSH URL as shown in Figure 36.
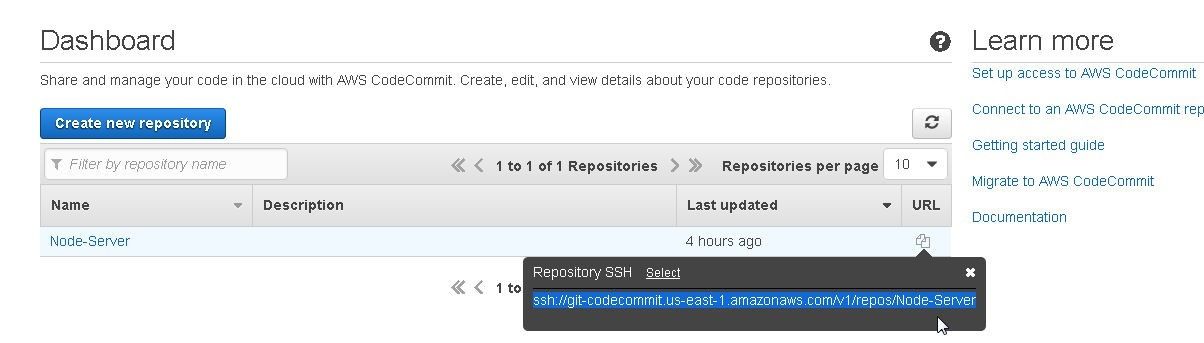
Figure 36: Copying the Repository SSH URL
Alternatively, click on Clone URL and select SSH as shown in Figure 37.
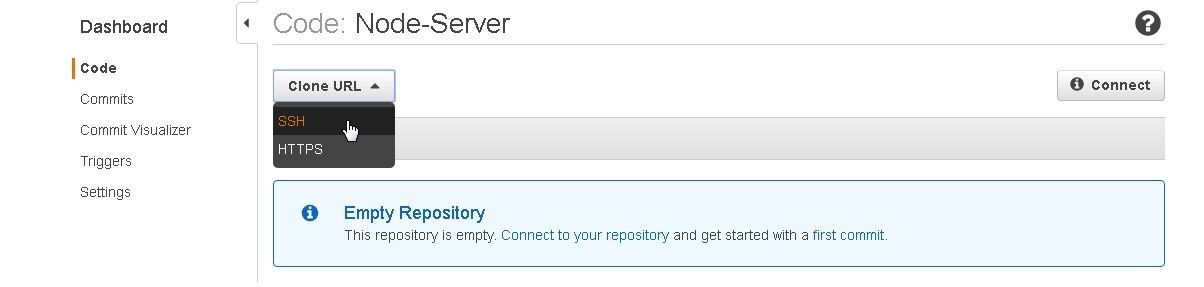
Figure 37. Selecting Clone URL>SSH
Copy the Repository URL as shown in Figure 38.

Figure 38. Copying the Repository URL
Run one of the following commands to test the SSH connection. The first command generates a verbose output.
ssh -v git-codecommit.us-east-1.amazonaws.com
ssh git-codecommit.us-east-1.amazonaws.com
As the output from the first command indicates in Figure 39, a connection gets established.
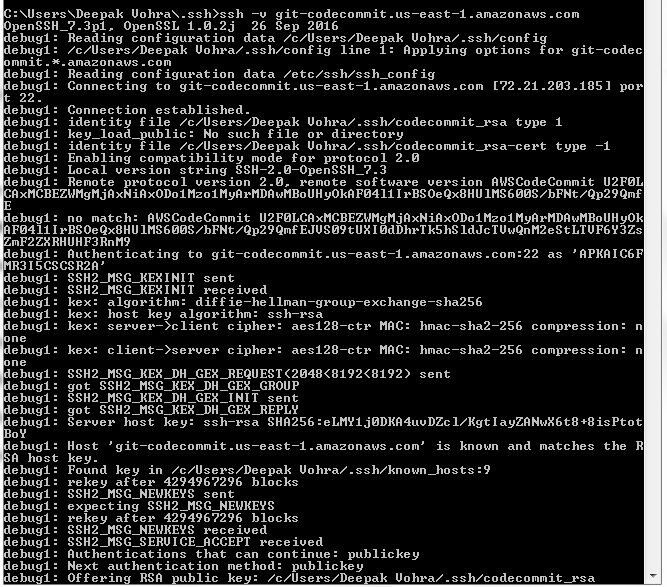
Figure 39. Testing SSH Connection
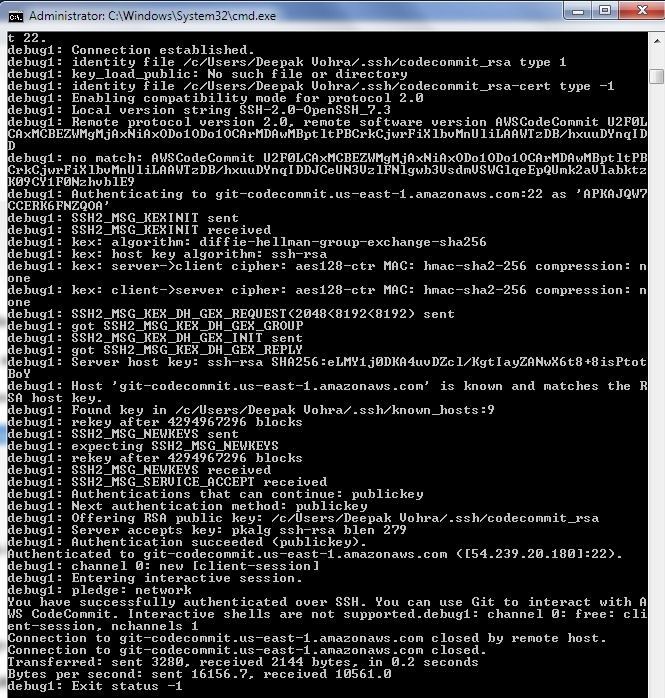
The output should include "You have successfully authenticated over SSH. You can use Git to interact with AWS CodeCommit." as shown in Figure 40.
Figure 40. SSH Connection Established and Validated
The SSH command may also include the SSH key id for the IAM user.
ssh APKAJQW7CCERK6FNZQOA@git-codecommit.us-east-1.amazonaws.com
As the message in Figure 41 indicates, “You have successfully authenticated over SSH. You can use Git to interact with AWS CodeCommit.”.

Figure 41. Authenticating over SSH
The following is the verbose command using –v option with SSH key id included.
ssh -v APKAJQW7CCERK6FNZQOA@git-codecommit.us-east-1.amazonaws.com
The same message gets output as shown in Figure 42: “You have successfully authenticated over SSH. You can use Git to interact….”
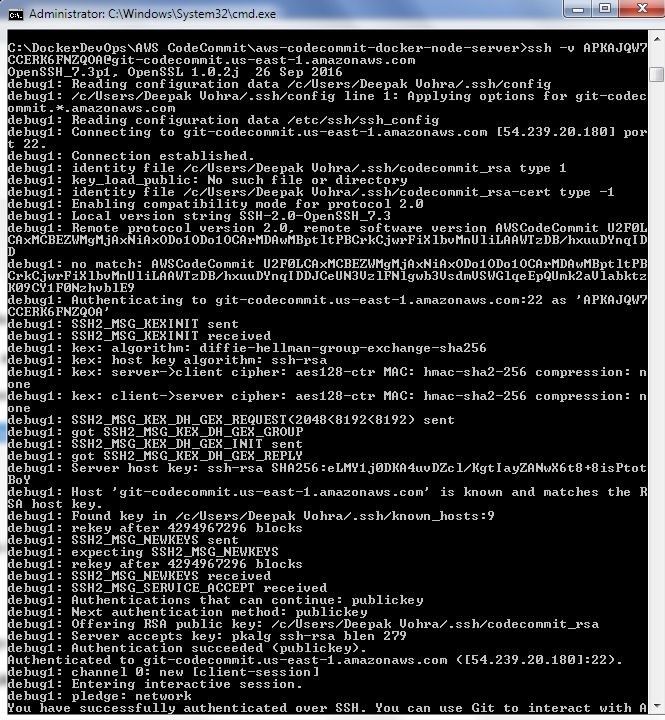
Figure 42. Verbose Command Output
Migrating GitHub Code to CodeCommit
Next, we shall migrate the code in the local repo directory to the CodeCommit repo. Change directory (cd) to the local repo directory aws-codecommit-docker-node-server.
cd aws-codecommit-docker-node-server
Using the CodeCommit repo clone URL ssh://git-codecommit.us-east-1.amazonaws.com/v1/repos/Node-Server run the following git push command to upload local repo code to CodeCommit repo.
git push ssh://APKAJQW7CCERK6FNZQOA@git-codecommit.us-east-1.amazonaws.com/v1/repos/Node-Server --all
The local repo gets migrated to CodeCommit repo as shown in Figure 43.
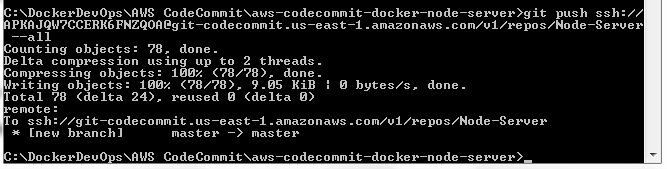
Figure 43. Migrating local repo to CodeCommit
The files uploaded to CodeCommit get listed as shown in Figure 44.
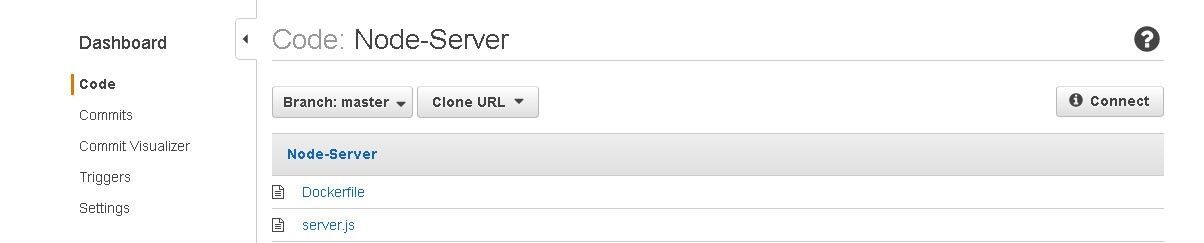
Figure 44. CodeCommit Repo Files
Click on a CodeCommit file to display the file as shown in Figure 45.
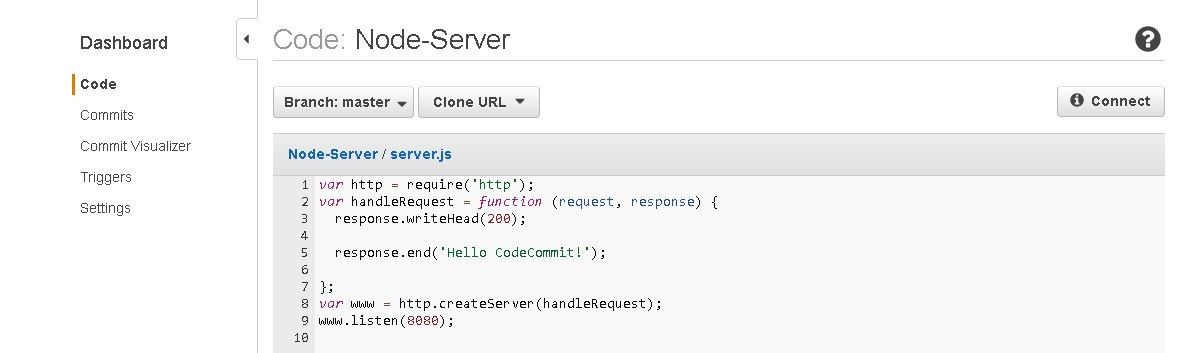
Figure 45. Displaying a CodeCommit File
To be able to use CodeCommit with AWS CodeBuild we need to add another permission for the IAM user. Click on Add permissions for the IAM user as shown in Figure 46.
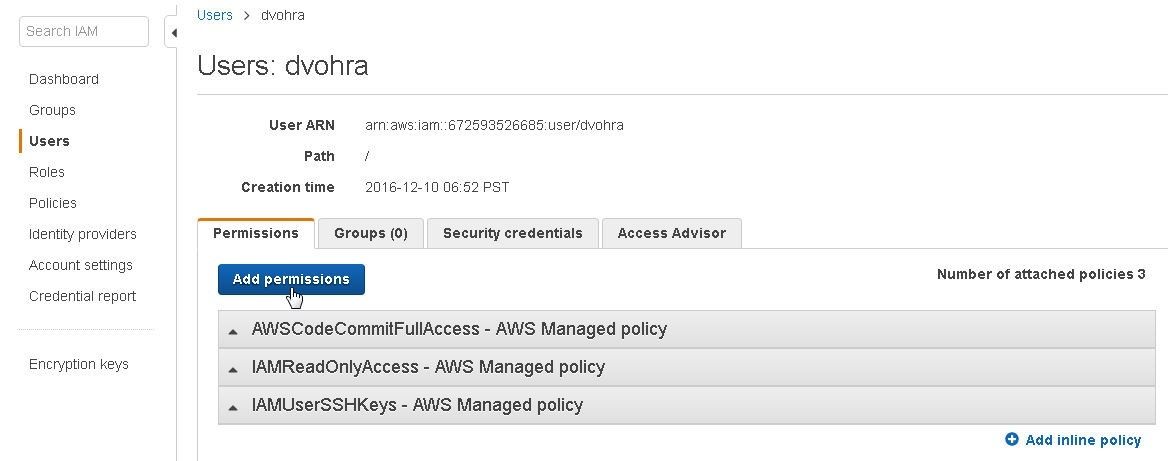
Figure 46. Add permissions
Click on Attach existing policies directly as shown in Figure 47.
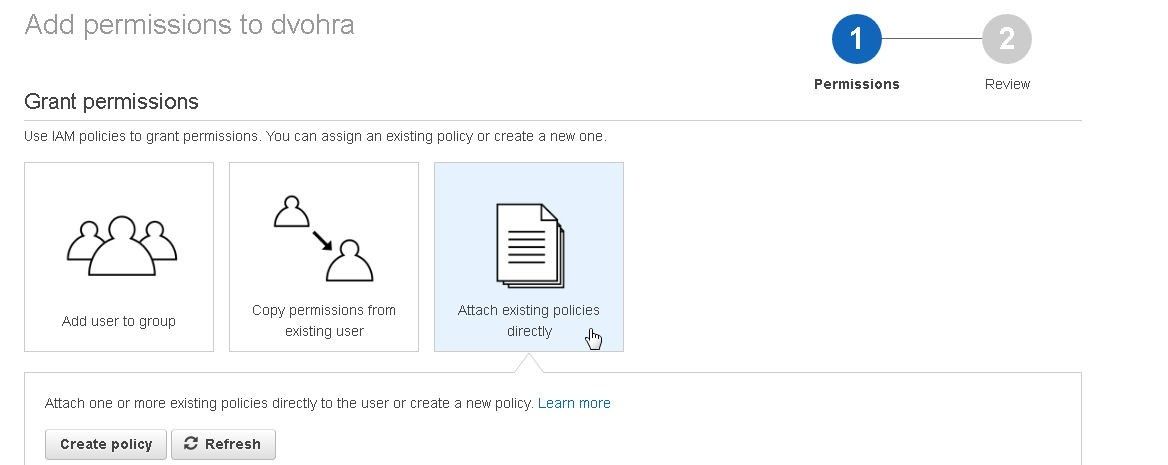
Figure 47. Attach existing policies directly
Add the AWSCodeBuildAdminAccess permission as shown in Figure 48.
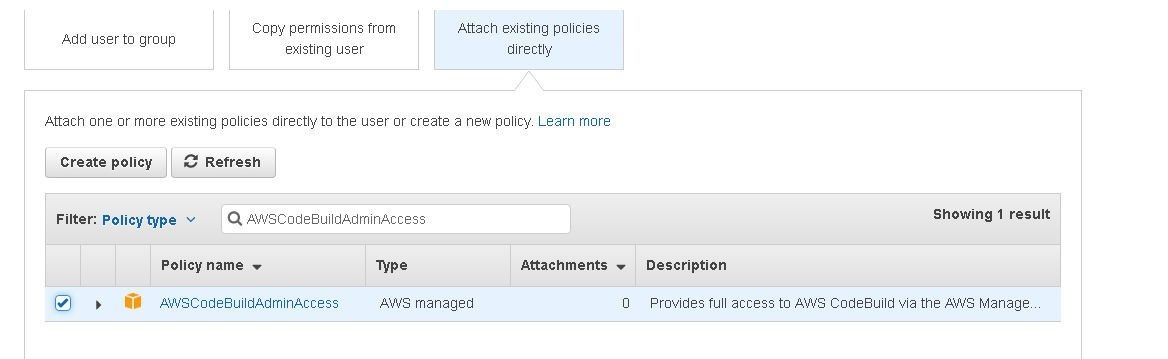
Figure 48. Adding the AWSCodeBuildAdminAccess permission
Summary
In this tutorial we introduced the AWS CodeCommit developer tool. We discussed setting up a CodeCommit repo and configuring SSH for Git and CodeCommit. Starting from a GitHub repo, we migrated the code to CodeCommit repo. In a subsequent article we shall explore continuous integration of CodeCommit code with AWS CodeBuild.
Start the discussion at forums.toadworld.com