Toad Edge,Toad Edge 1.0 is the latest offering from Quest Software. Toad Edge is a lightweight and flexible one-stop toolset for open source databases with initial support for MySQL Database, and designed for all the development and management needs of a DBA.
Toad Edge is a a lightweight, reliable desktop toolset that simplifies the development and management of open source relational databases.
 Check out Toad Edge in the eStore.
Toad Edge adds support for several features not provided by TOAD for MySQL. Some of the features unique to Toad Edge are support for MySQL 5.7.x, support for Mac OS X, support for JSON with data types and data editor, support for MySQL events, advanced user privilege management, statement run from/to a specification position in a SQL script, SQL diffs and object timestamp-based comparison with detailed schema compare reports, database and filesystem comparison, support for file system synchronization, DevOps features such as team collaboration, CI/CD, Jenkins and automation.
In this article we shall test drive Toad Edge Preview 1.0. Some of the features, such as DevOps feature support for Jenkins, CI/CD and automation are not included in the preview version.
This article introduces Toad Edge and discusses its benefits with MySQL Database as an example. This article has the following sections:
- Setting the Environment
- Installing Toad Edge Preview
- Launching Toad Edge
- Creating a Connection to MySQL Database
- Using the SQL Worksheet to Create a Database Table
- Using the SQL Worksheet to Add Table Data
- Committing and Rolling back a Transaction
- Running Multiple SQL Statements
- Using SQL Worksheet IntelliSense
- Creating a New Database
- Setting Active Database
- Dropping a Database
- Dropping a Table
- Copying a Table
- Comparing Schemas
- Searching for Objects
- Working with Sample Data in Object Details
- Exporting and Importing Table Data
- User Privilege Management
- Creating a New User
- Creating Snapshots
- Using Templates
- Connecting to MySQL on RDS
- Disconnecting from a Database
Setting the Environment
Download the following software (Windows OS or Mac OS X):
-MySQL 5.7 from https://dev.mysql.com/downloads/mysql/.
Install MySQL 5.7. Start the MySQL CLI and list the databases with the show databases command, as we would need to provide a database name when connecting to MySQL from Toad Edge.
Create an AWS account at https://aws.amazon.com/resources/create-account/ to use AWS RDS MySQL.
Installing Toad Edge Preview 1.0
After downloading the binaries for Toad Edge Preview 1.0, double-click on ToadEdge_1.0_x64_En_Preview.msi and click on Run in Open File. The Toad Edge Setup wizard gets launched. Click on Next as shown in Figure 1.
Figure 1. Toad Edge Setup wizard
Accept the End-User License Agreement and click on Next. Select a destination folder to install Toad Edge and click on Next. Click on Install to start installation. The Installing Toad Edge dialog displays for a few minutes while the software gets installed. When the installation has completed click on Finish.
Launching Toad Edge
Select the Toad Edge icon to launch the toolset. If a connection had been previously configured with MySQL database an Enter Password dialog gets displayed as shown in Figure 2. Provide the Password and click on OK.
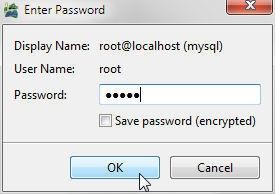
Figure 2. Specifying Password for MySQL root
The Toad Edge toolset gets launched after verifying connection. The Toad Edge graphical user interface gets launched, as shown in Figure 3.
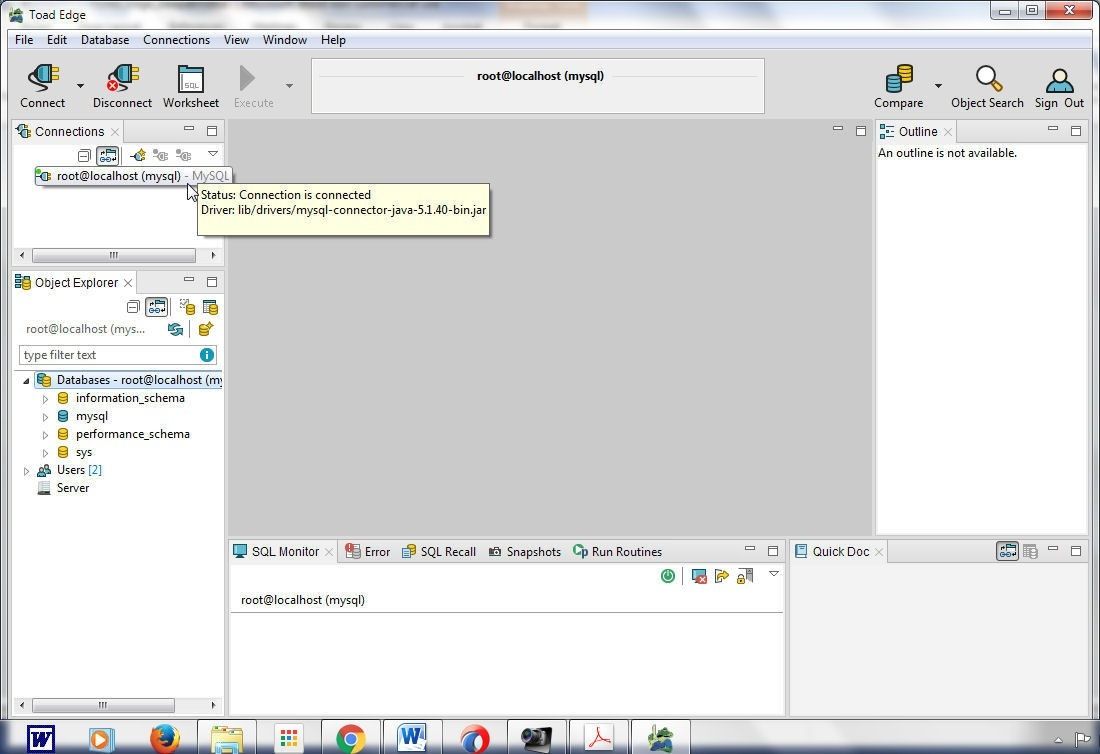
Figure 3. Toad Edge GUI
Toad Edge provides several Views of which Connections, Object Explorer, and Outline are open by default. All the different Views may be opened from View, as shown in Figure 4.
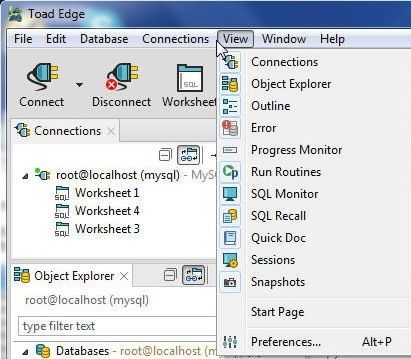
Figure 4. View
Creating a Connection to MySQL Database
To connect to MySQL database, click on Connect in the toolbar and select New Connection, as shown in Figure 5.
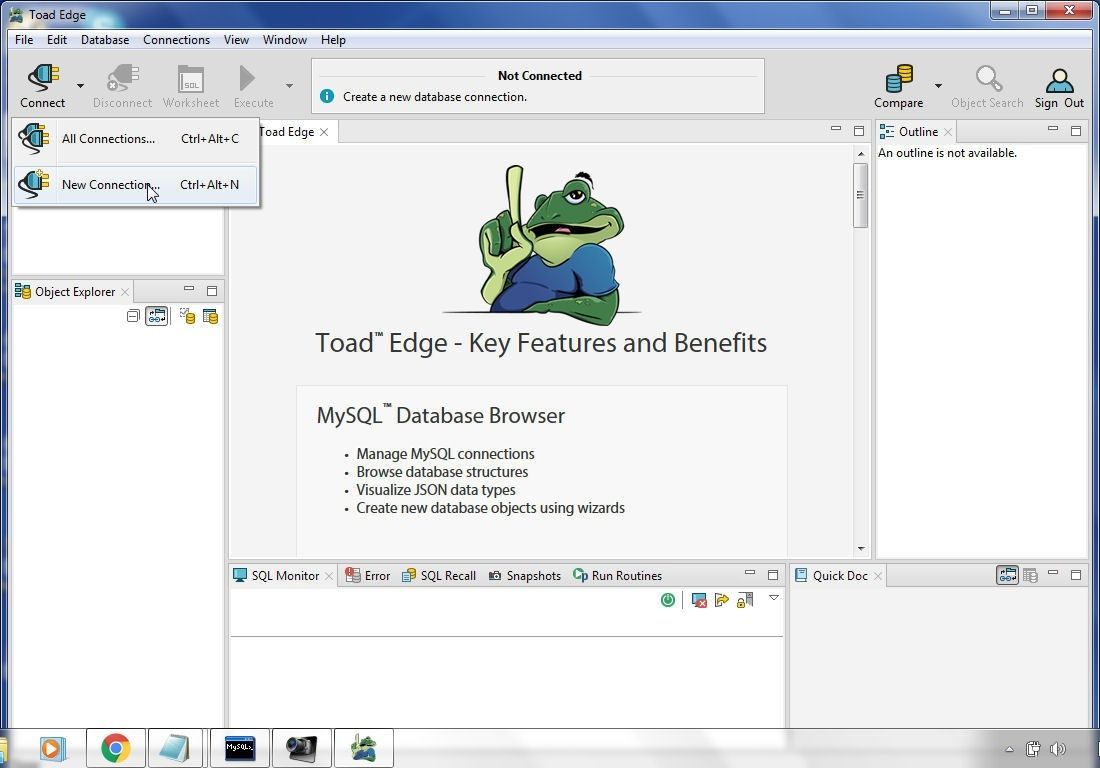
Figure 5. Connect>New Connection
In the New MySQL Connection dialog three tabs are provided to specify the connection parameters: Connection Settings, SSL and SSH. In Connection Settings specify Host (localhost), Database (mysql), User (root) and Password, as shown in Figure 6. The Options Enable AutoCommit and Restore previous work after login are selected by default. We shall be demonstrating committing a transaction with AutoCommit Off,for which the Enable AutoCommit should be de-selected. The Connection Name, which gets auto-generated, must be unique. Connection String Preview lists the connection URL. Click on Test Connection and if the message is “Connection is OK” click on OK.
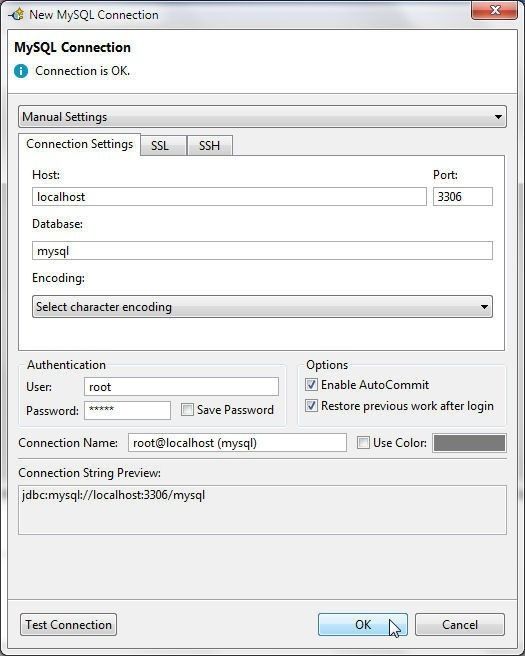
Figure 6. New MySQL Connection
A new connection gets created and gets listed in Connections view as shown in Figure 7. A SQL worksheet also gets added.
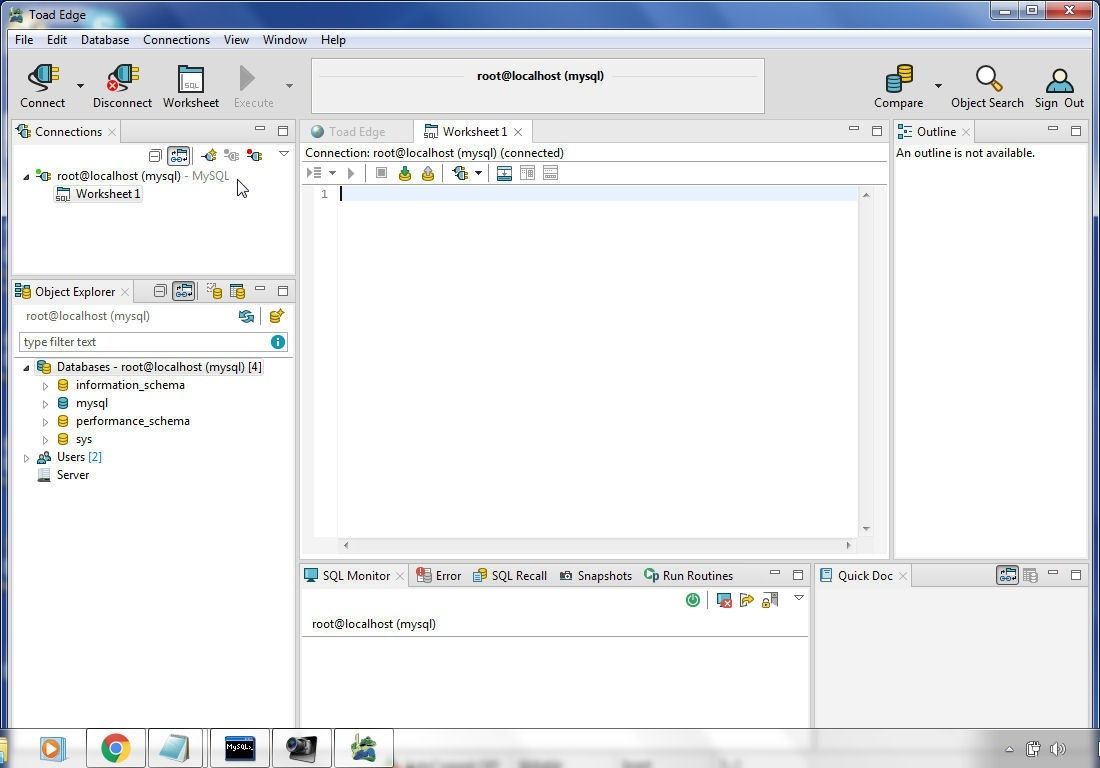
Figure 7. New Connection
If multiple connections are created one of the connections may be selected with Connect Selected, as shown in Figure 8.
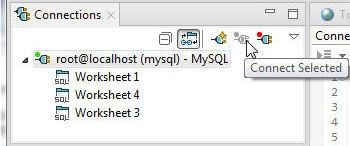
Figure 8. Connect Selected
The Object Explorer view lists all the Databases and Users, as shown in Figure 9. The databases listed are information_Schema, mysql, performance_schema and sys with the active database shown in blue as mysql. All the SQL statements run in a worksheet are run on the active database. Setting active database is discussed in a later section.
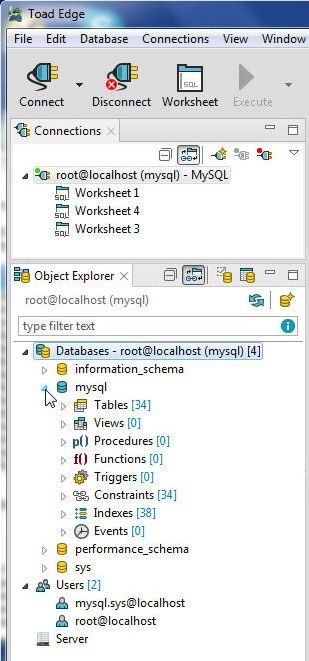
Figure 9. Object Explorer View
Using the SQL Worksheet to create a Database Table
In this section we shall discuss creating a database table using the Worksheet1. Additional worksheets may be added by selecting Worksheet from the toolbar. Specify the following CREATE TABLE SQL statement in the worksheet, as shown in Figure 10, below.
CREATE TABLE wlslog(time_stamp varchar(255) PRIMARY KEY,category varchar(255),type varchar(255),
servername varchar(255), code varchar(255),msg varchar(255));
For DDL (Data definition language) statements such as CREATE TABLE we don’t need to commit the transaction with AutoCommit or by selecting Commit Transaction, since MySQL database implicitly commits the transaction after the statement is run.
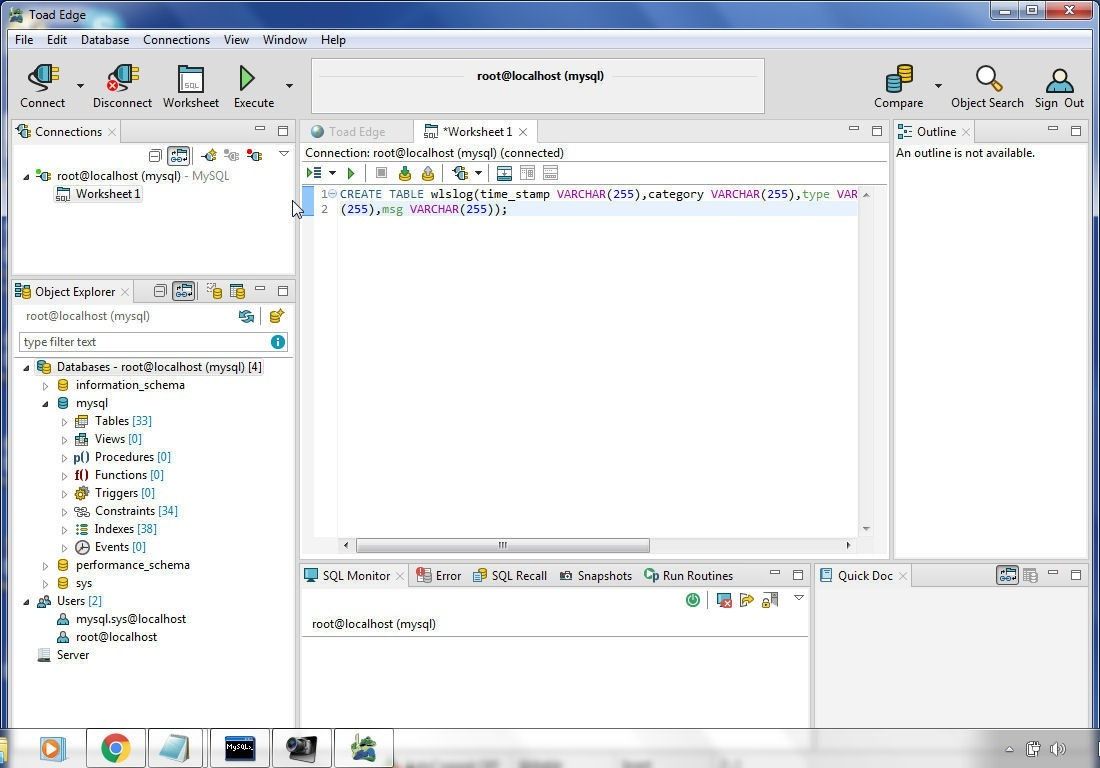
Figure 10. Adding CREATE TABLE Statement in Worksheet
Click on Execute SQL Statement as shown in Figure 11.

Figure 11. Execute SQL Statement
As the message Create table processed in Figure 12 indicates, a database table gets created. The AutoCommit Off setting shown below all the view tabs comes into significance when DML statements such as INSERT INTO are run.
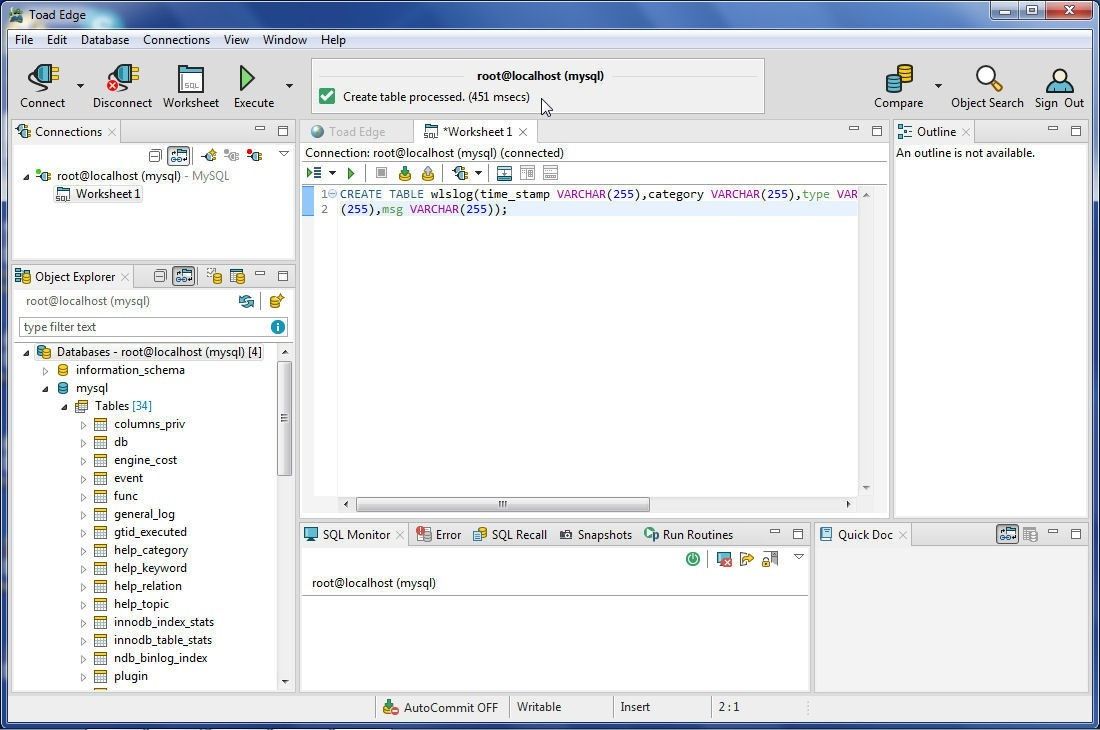
Figure 12. Create Table Processed
The wlslog table gets created in mysql database and gets listed in Object Explorer, as shown in Figure 13. The SQL Recall view lists the CREATE TABLEstatement run.
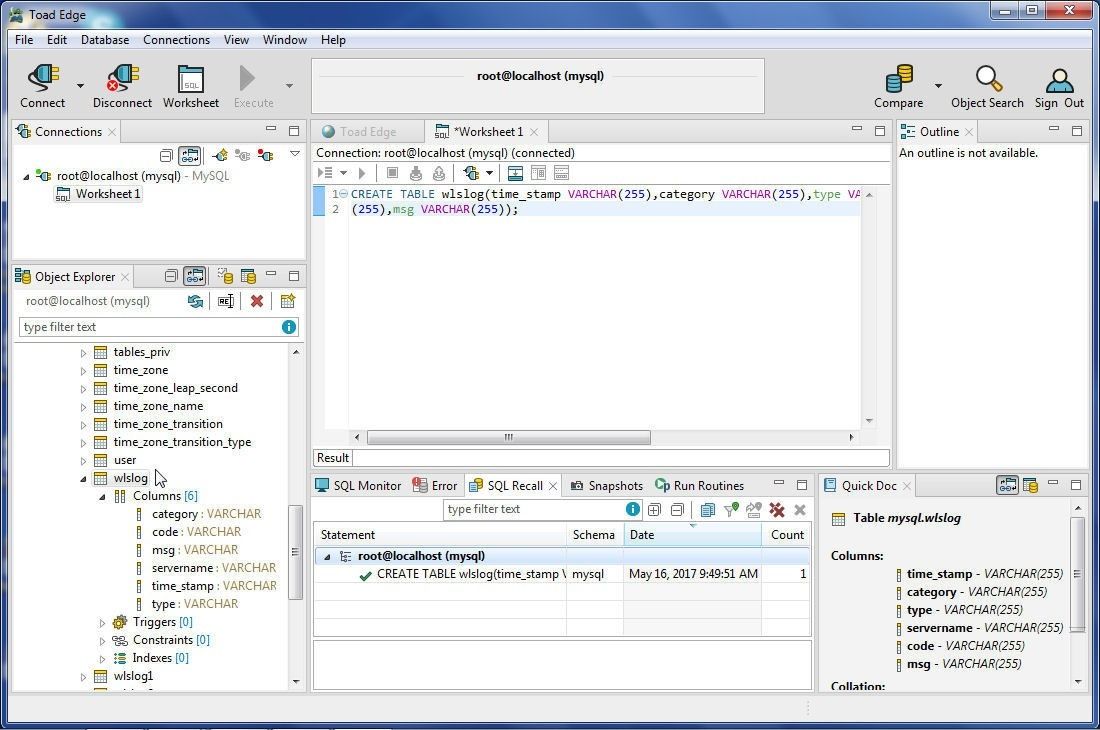
Figure 13. New table wlslog
The MySQL CLI lists the wlslog table with the show tables command, as shown in Figure 14. Select the database with use mysql command before listing tables.
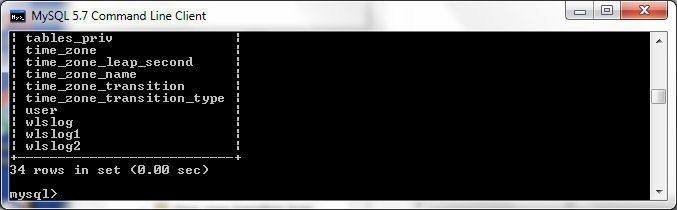
Figure 14. New Table wlslog
Using the SQL Worksheet to Add Table Data
Next, we shall run DML SQL statements to add/update data to the wlslog table. The INSERT INTO statement/s may be run in the same SQL Worksheet or a new Worksheet may be opened by selecting Open SQL Worksheet as shown in Figure 15.
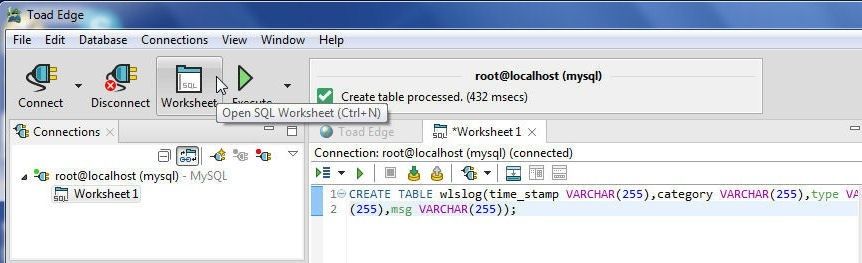
Figure 15. Open SQL Worksheet
Add an INSERT INTO statement in the new Worksheet, as shown in Figure 16.
INSERT INTO wlslog(time_stamp,category,type,servername,code,msg) VALUES('Apr-8-2014-7:06:16-PM-PDT',
'Notice','WebLogicServer','AdminServer','BEA-000365','Server state changed to STANDBY');
Right-click on the SQL Worksheet and select Format to format the SQL, also shown in Figure 16.
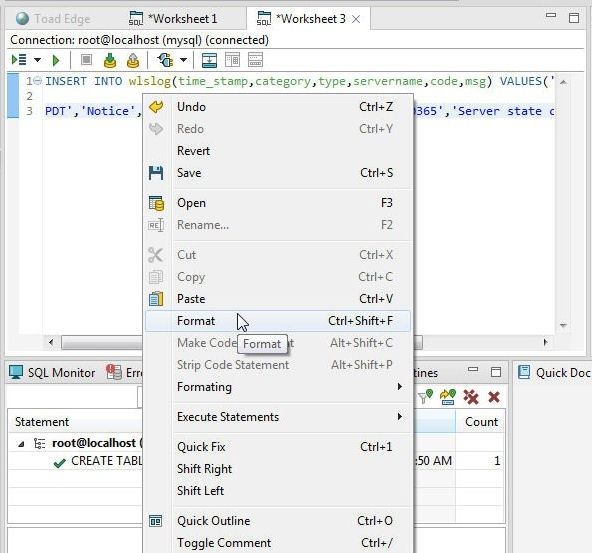
Figure 16. Formatting SQL Statement
Some additional formatting options are provided with Formatting as shown in Figure 17.
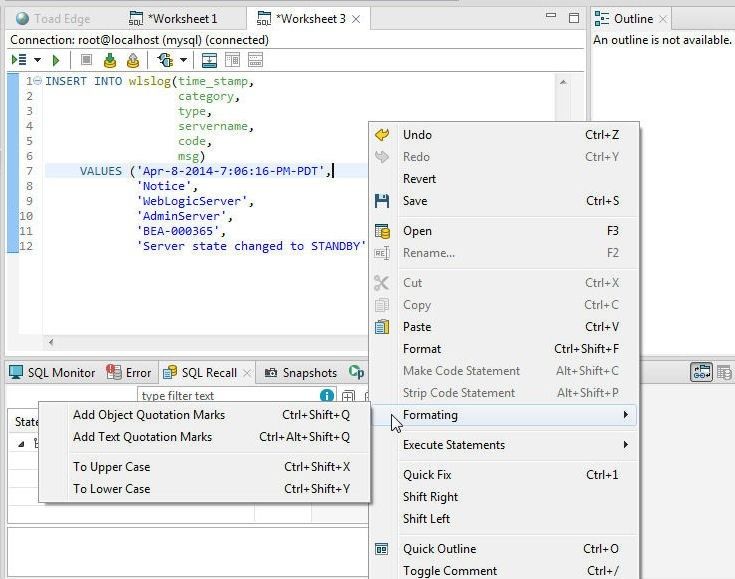
Figure 17. Formatting Options
Click on Execute SQL Statement as shown in Figure 18 to run the DML statement.
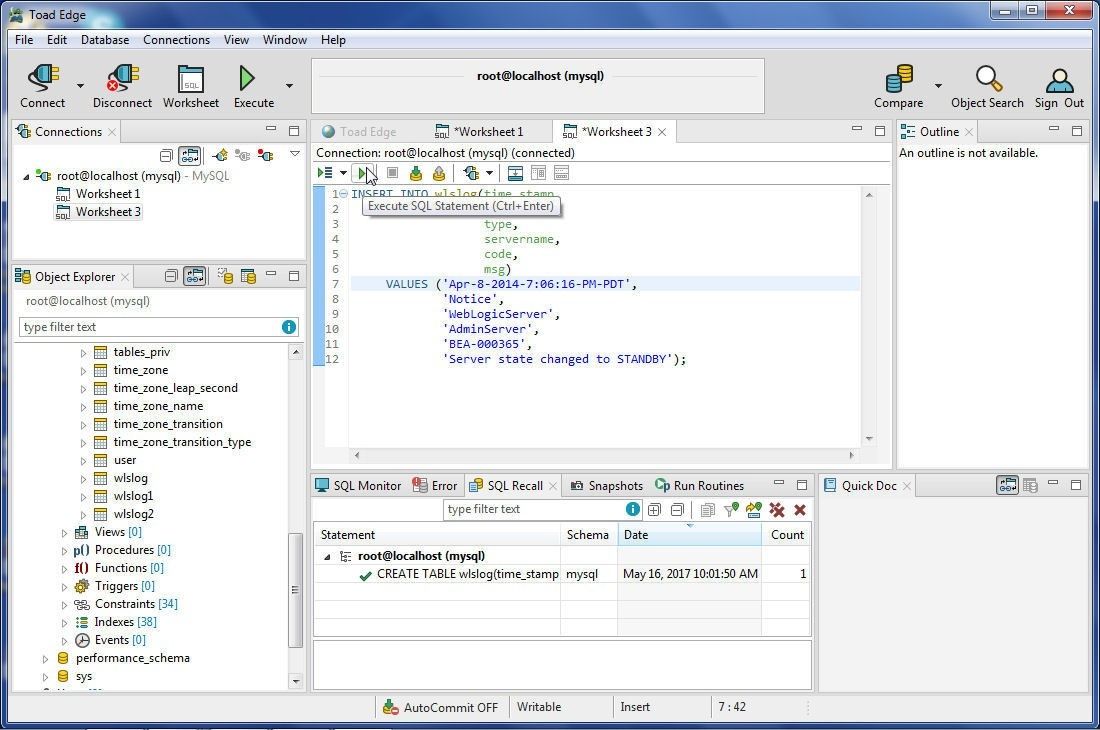
Figure 18. Running SQL Statement
As the message in Figure 19 indicates, one row gets added.
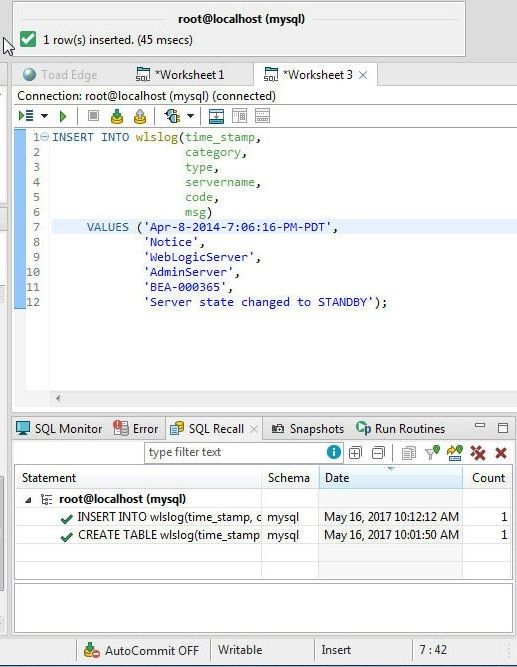
Figure 19. INSERT INTO statement run
As the AutoCommit is Off, the transaction is not yet committed. But the data added gets listed with a SQL query run from a Worksheet, as shown in Figure 20.
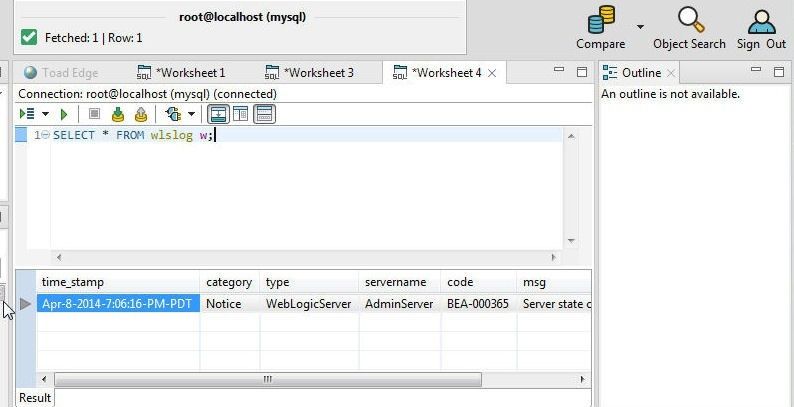
Figure 20. SQL Query returns the data added
Committing and Rolling back a Transaction
The INSERT INTO statement has run but not yet been committed to the database. An SQL query on the wlslog table in MySQL CLI does not list any data, as shown in Figure 21.
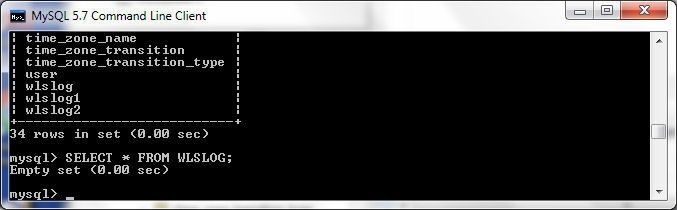
Figure 21. Table Data not Committed with AutoCommit Off
To commit the transaction click on Commit Transaction as shown in Figure 22.
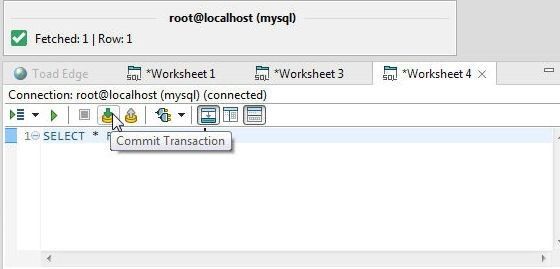
Figure 22. Commit Transaction
The transaction gets committed and a SQL query in MySQL CLI returns the data added, as shown in Figure 23.
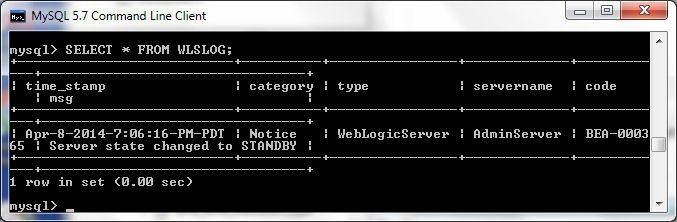
Figure 23. SQL Query in MySQL CLI returns result set after transaction has been committed
Next, we shall demonstrate rolling back a transaction; for which, run another INSERT INTO statement, as shown in Figure 24.
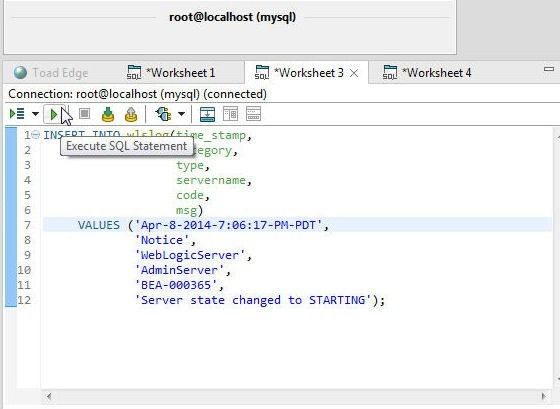
Figure 24. Running another INSERT INTO Statement
Run a SQL query in a Worksheet and two rows of data get returned, as shown in Figure 25.
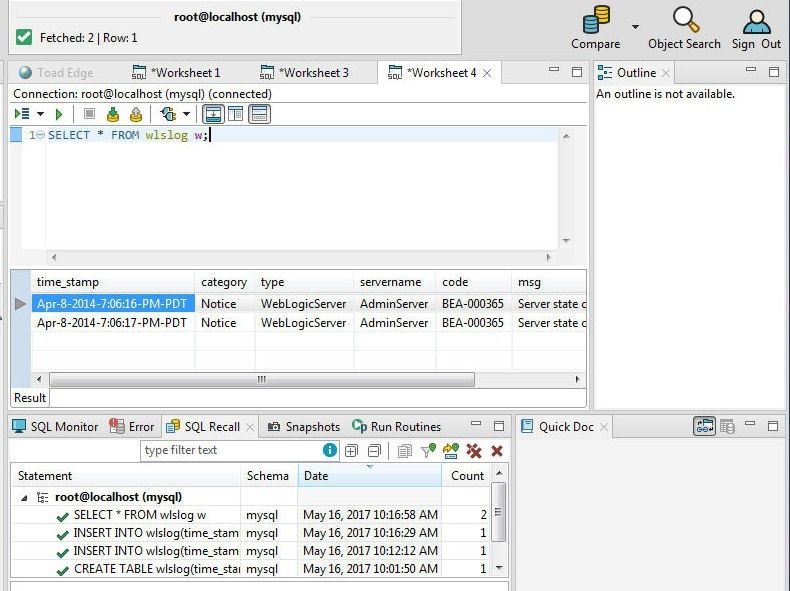
Figure 25. SQL Query in Worksheet returns two rows
But the second transaction has not yet been committed. To roll back the second transaction, click on Rollback Transaction as shown in Figure 26.
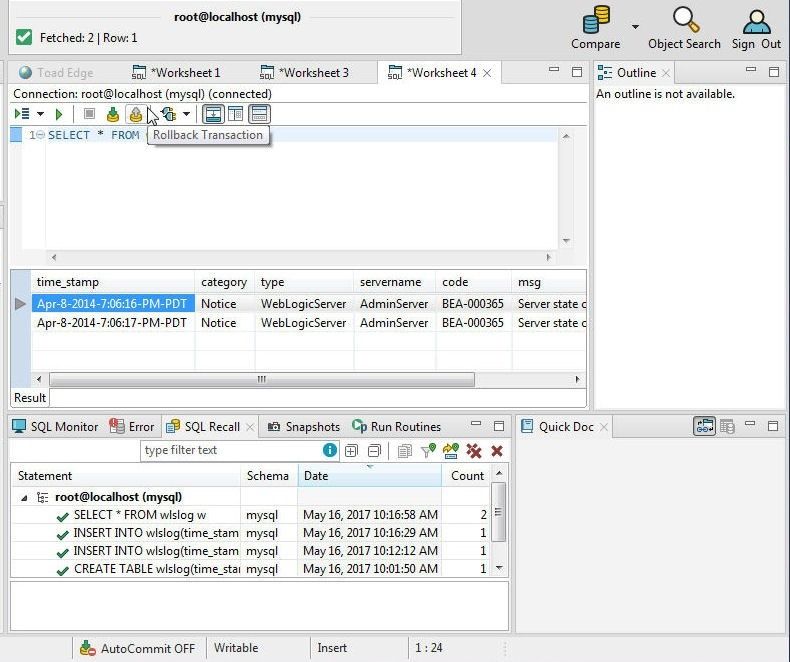
Figure 26. Rollback Transaction
AutoCommit may be enabled by selecting Database>Enable AutoCommit, as shown in Figure 27.
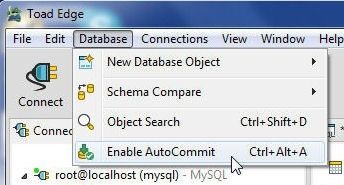
Figure 27. Database>Enable AutoCommit
Running Multiple SQL Statements
Next, we shall run multiple SQL statement in a single transaction. In a new Worksheet, add multiple INSERT INTO statements including the statement that was rolled back.
INSERT INTO wlslog(time_stamp,category,type,servername,code,msg) VALUES('Apr-8-2014-7:06:17-PM-PDT',
'Notice','WebLogicServer','AdminServer','BEA-000365','Server state changed to STARTING');

INSERT INTO wlslog(time_stamp,category,type,servername,code,msg) VALUES('Apr-8-2014-7:06:18-PM-PDT',
'Notice','WebLogicServer','AdminServer','BEA-000365','Server state changed to ADMIN');

INSERT INTO wlslog(time_stamp,category,type,servername,code,msg) VALUES('Apr-8-2014-7:06:19-PM-PDT',
'Notice','WebLogicServer','AdminServer','BEA-000365','Server state changed to RESUMING');

INSERT INTO wlslog(time_stamp,category,type,servername,code,msg) VALUES('Apr-8-2014-7:06:20-PM-PDT',
'Notice','WebLogicServer','AdminServer','BEA-000361','Started WebLogic AdminServer');

INSERT INTO wlslog(time_stamp,category,type,servername,code,msg) VALUES('Apr-8-2014-7:06:21-PM-PDT',
'Notice','WebLogicServer','AdminServer','BEA-000365','Server state changed to RUNNING');

INSERT INTO wlslog(time_stamp,category,type,servername,code,msg) VALUES('Apr-8-2014-7:06:22-PM-PDT',
'Notice','WebLogicServer','AdminServer','BEA-000360','Server started in RUNNING mode');
Click on the Execute All Statements and select from one of the options as shown in Figure 28. The unique feature of being able to Execute from Current Position and Execute to Current Position is available in Toad Edge.
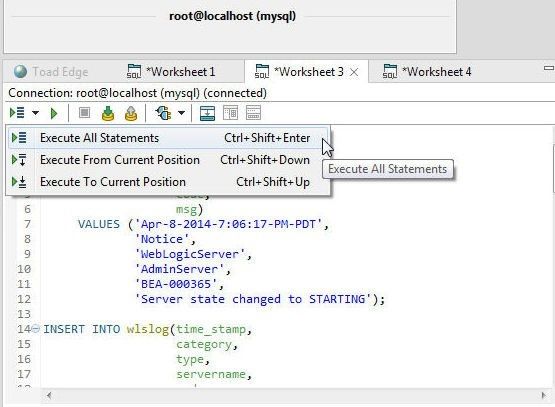
Figure 28. Execute All Statements
As the message in Figure 29 indicates, six statements get processed. If AutoCommit is Off click on Commit Transaction.
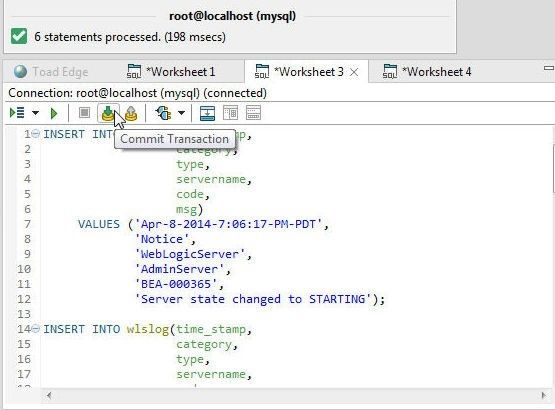
Figure 29. Commit Transaction for multiple SQL Statements
The MySQL CLI lists the newly added data, as shown in Figure 30.
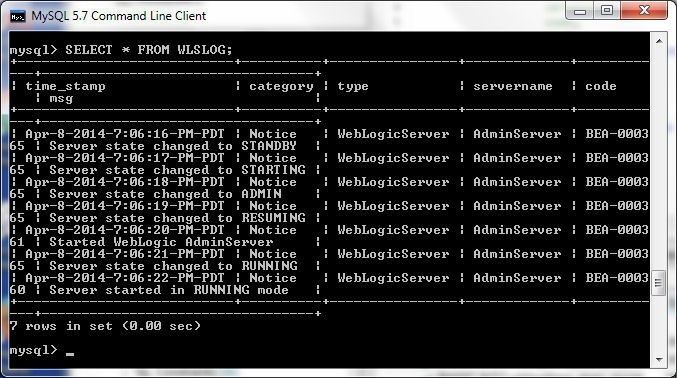
Figure 30. MySQL CLI returns all Data added
Using SQL Worksheet IntelliSense
SQL Worksheet provides IntelliSense to auto-suggest SQL statement completion options. As an example, add SELECT in a worksheet, and options to add the subsequent SQL object or clause get listed, as shown in Figure 31. Select ‘*’ as an example.

Figure 31. SQL Worksheet IntelliSense
After SELECT * has been added Worksheet IntelliSense provides further options for SQL objects and clause to, as shown in Figure 32. Select FROM as an example.
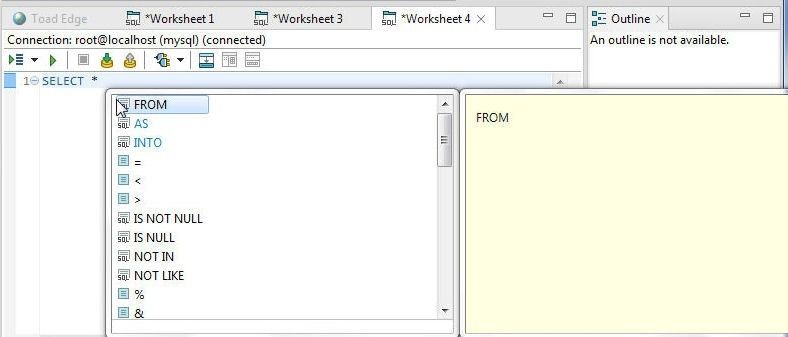
Figure 32. Figure 32. SQL Worksheet Intellisense after adding each SQL statement construct
With further Worksheet IntelliSense, select a table (wlslog w) to query as shown in Figure 33.
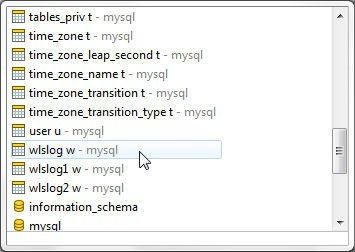
Figure 33. Selecting a Table to query with SQL Worksheet Intellisense
The complete SQL statement gets added using Worksheet IntelliSense, as shown in Figure 34.
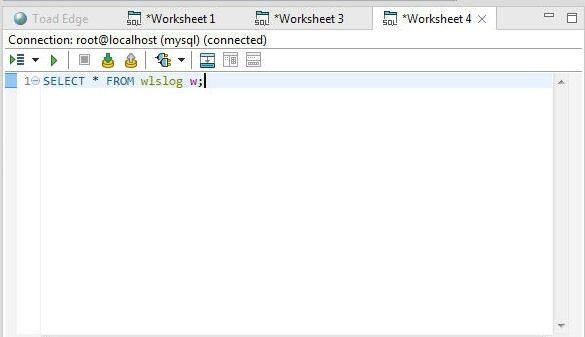
Figure 34. Complete SQL Statement constructed with Worksheet IntelliSense
Run the SQL statement to return one row of data, as shown in Figure 35.
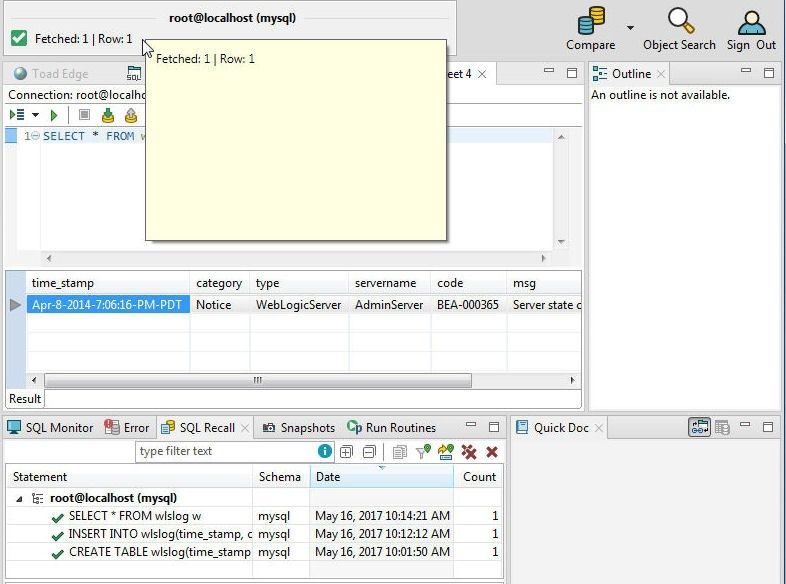
Figure 35. Resultset returned with SQL Query
Creating a New Database
To create a new database, right-click on Databases in Object Explorer and select New Database as shown in Figure 36.
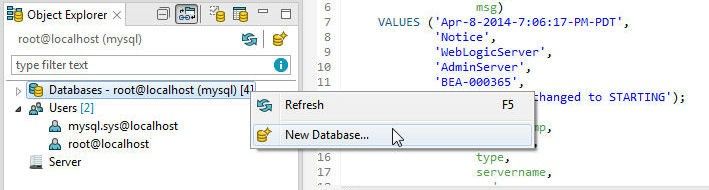
Figure 36. Databases>New Database
In the New Database dialog specify a database Name (wlslog) as shown in Figure 37. Click on Code Preview to preview the code used to create the new database.
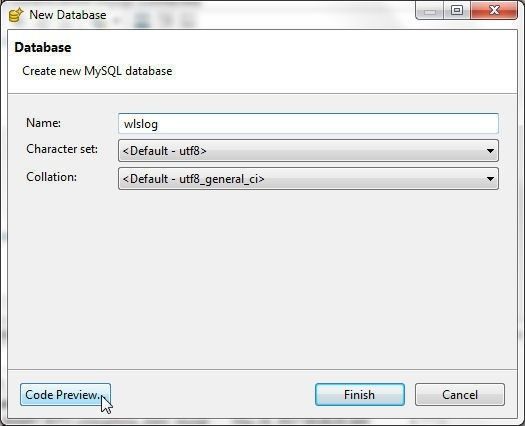
Figure 37. New Database
The New Database Preview lists the code used to create the new database, as shown in Figure 38. Click on Close to close the New Code preview.
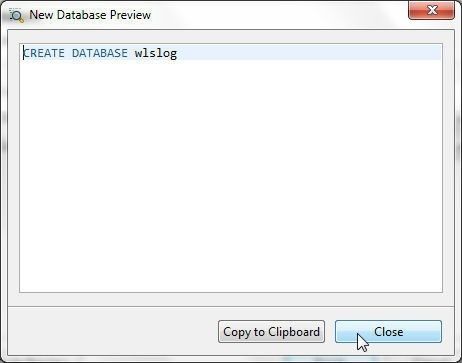
Figure 38. New Database Preview
Click on Finish in the New Database to create the new database as shown in Figure 39.
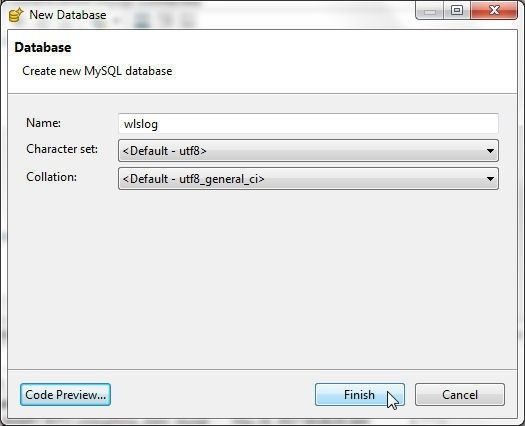
Figure 39. New Database>Finish
The new database wlslog gets created and gets added to Object Explorer, as shown in Figure 40.
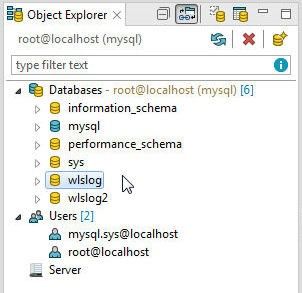
Figure 40. New Database wlslog created
Setting Active Database
The active database is indicated in blue, the weblogiclog database is active in Figure 41. Only one database may be active at a time. To make the wlslog database the active database, right-click on wlslog in Object Explorer and select Set Active Database as shown in Figure 41.
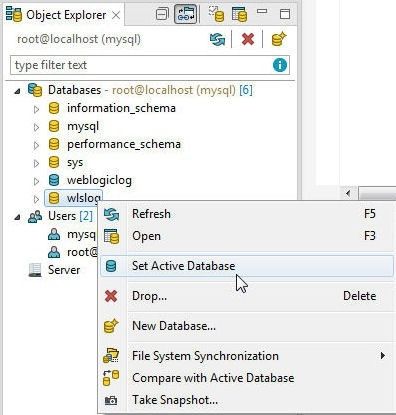
Figure 41. Setting Active Database
With the wlslog database as the active database, in a SQL Worksheet run a CREATE TABLE SQL statement to create a table, as shown in Figure 42.

Figure 42. Running an SQL Statement to create a database table
The wlslog table gets added to the active database wlslog, as shown in Figure 43.
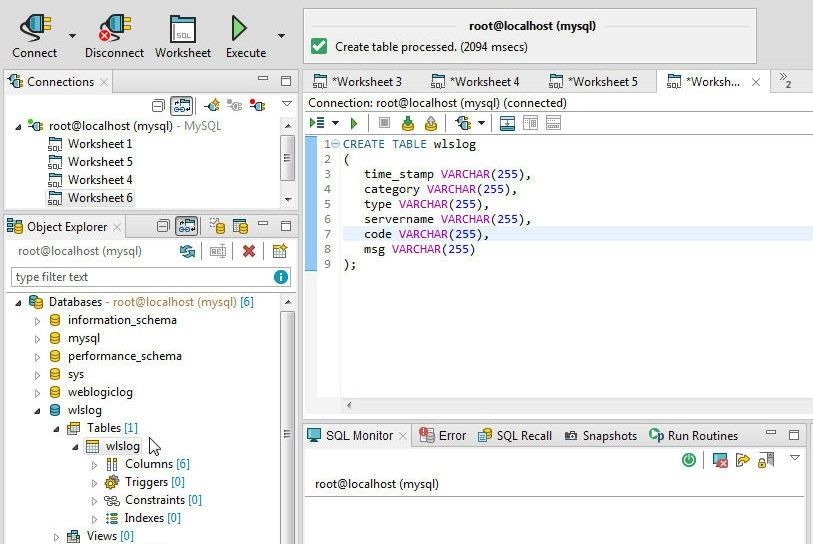
Figure 43. New Database Table gets added to Active Database
Dropping a Database
To drop a database, right-click on the database in the Object Explorer and select Drop as shown in Figure 44.
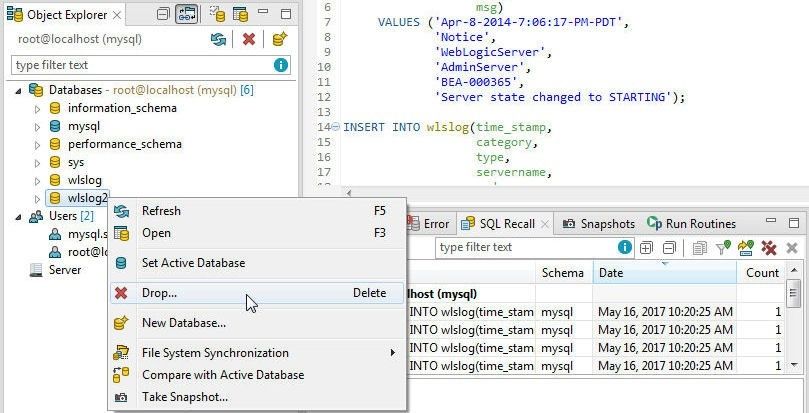
Figure 44. Drop
Click on OK in a Confirm dialog. The database gets dropped. If the database did not exist before being dropped an error message gets displayed, as shown in Figure 45.
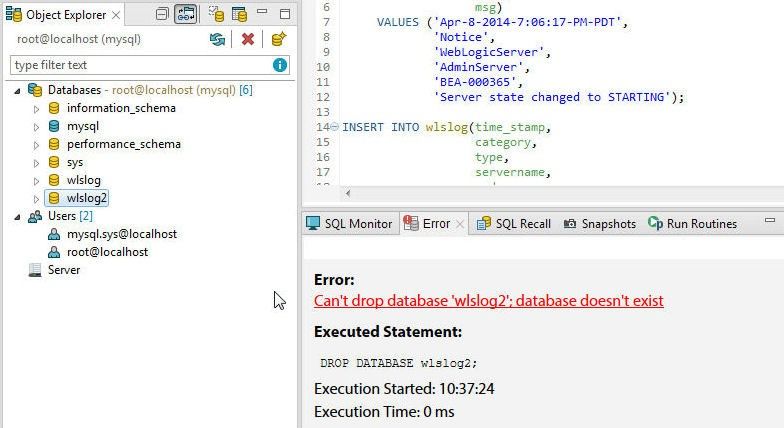
Figure 45. Database can’t be dropped as it does not exist
A database could not exist and still could be listed in Object Explorer>Databases if the database has been dropped on MySQL CLI since the previous time the Databases list was refreshed. To refresh the Databases list right-click on Databases and select Refresh as shown in Figure 46.
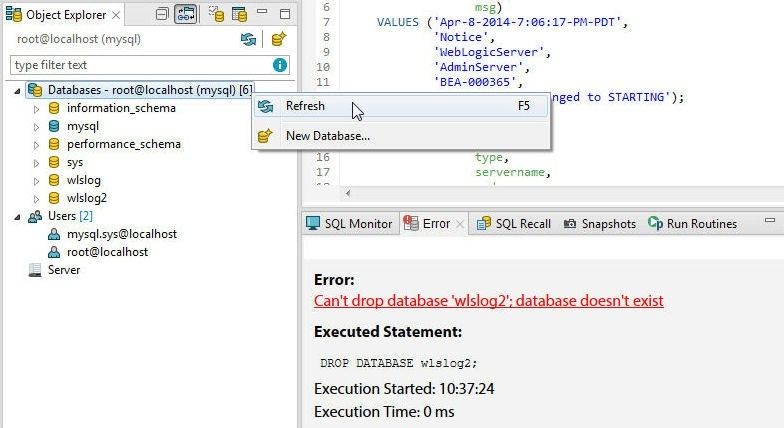
Figure 46. Databases>Refresh
The Databases get refreshed and the wlslog2 database is removed, as shown in Figure 47.

Figure 47. Refreshed Databases List
Dropping a Table
To drop a database table, right-click on the table in Object Explorer and select Drop as shown in Figure 48.
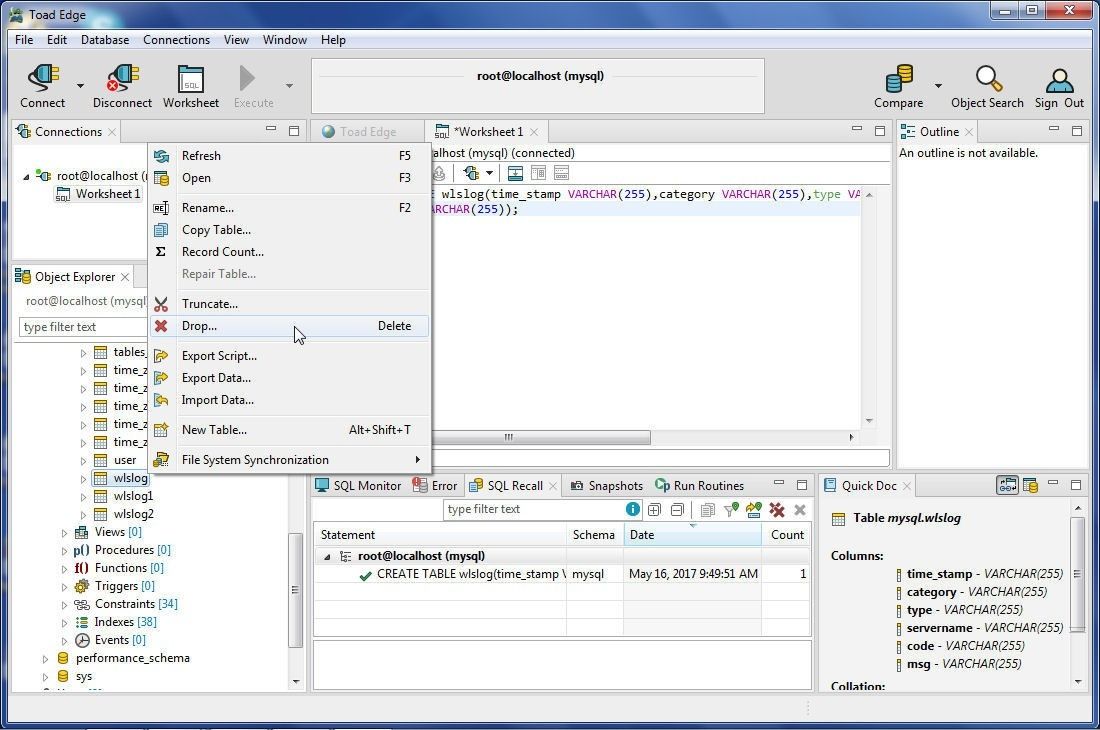
Figure 48. Object Explorer>Table>Right-click>Drop
Click on OK in a Confirm dialog. The wlslog table gets dropped and gets removed in Object Explorer, as shown in Figure 49.

Figure 49. Object Explorer does not list the dropped table wlslog
A table may also be dropped with the DROP TABLE SQL statement in a worksheet, as shown in Figure 50.
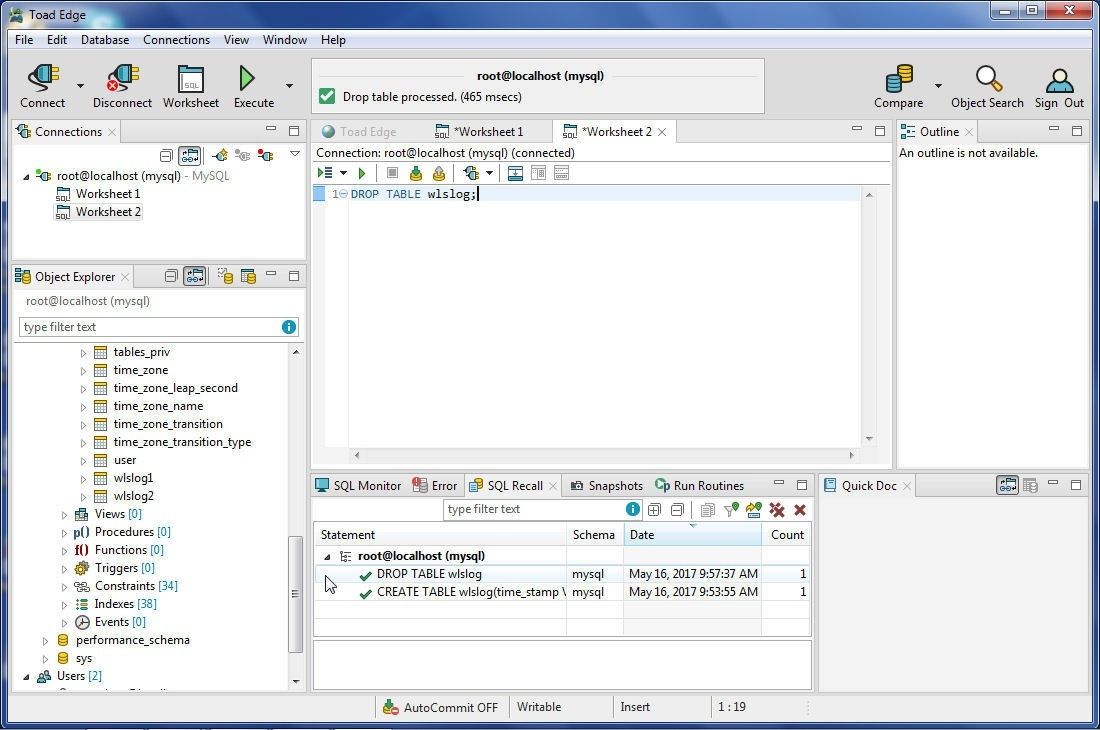
Figure 50. DROP TABLE in SQL Worksheet
Copying a Table
To copy a database table right-click on the table (wlslog) in Object Explorer and select Copy Table as shown in Figure 51.
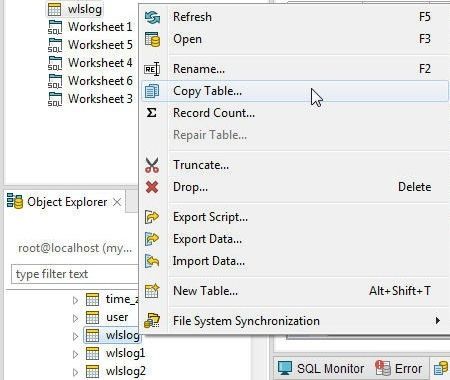
Figure 51. wlslog>Copy Table
In the Copy Table dialog specify the table destination in terms of Database and table name as shown in Figure 52. Click on Next.
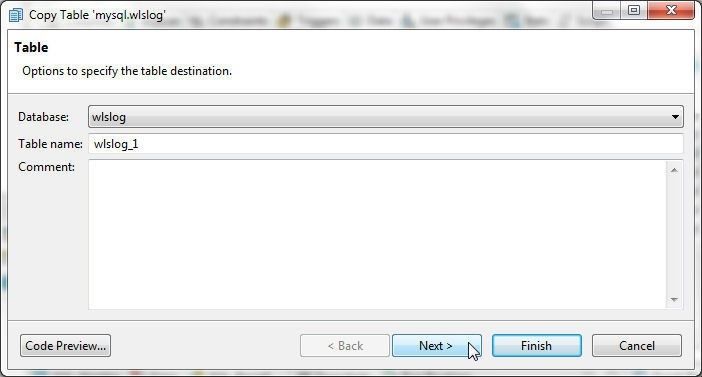
Figure 52. Specifying Table Destination
In Table Columns select the columns to copy as shown in Figure 53. At least one column must be selected.
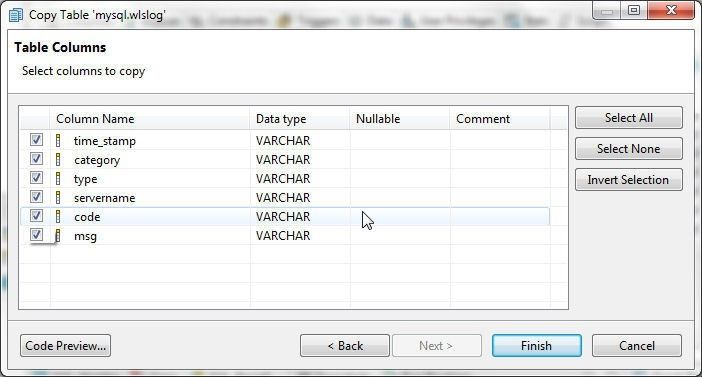
Figure 53. Selecting Columns to Copy
As the Code Preview indicates in Figure 54, the Create Table as Select (CTAS) is used to copy the table.
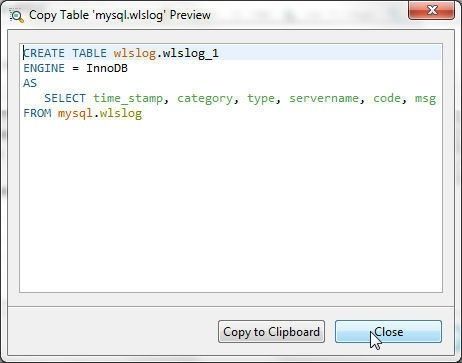
Figure 54. Code Preview
Click on Finish in Copy Table. Click on OK in confirmation prompt. The wlslog table in mysql database gets copied to wlslog_1 table in wlslogdatabase, as shown in Object Explorer in Figure 55.
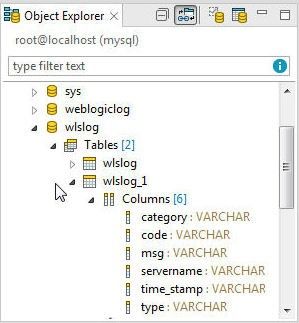
Figure 55. Copied Table wlslog.wlslog_1
The table data also gets copied when a table is copied, as shown in Figure 56.
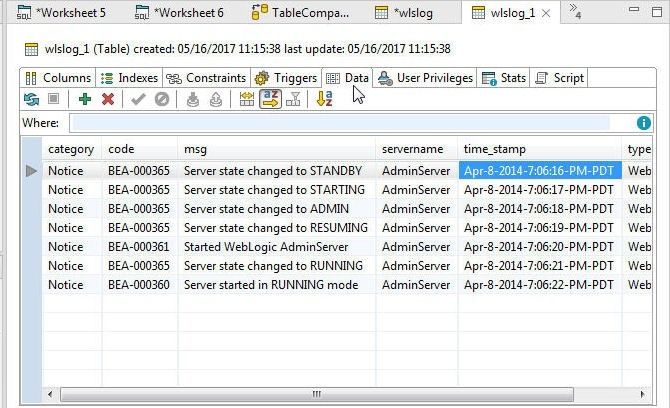
Figure 56. Table data also copied to wlslog_1
If only the table definition is required to be copied the table data may be deleted with Delete Rows, as shown in Figure 57.
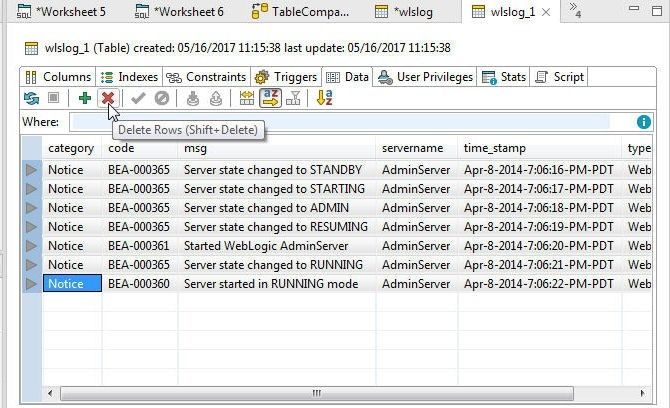
Figure 57. Delete Rows
An empty table wlslog.wlslog_1 with same table definition as mysql.wlslog is shown in Figure 58.
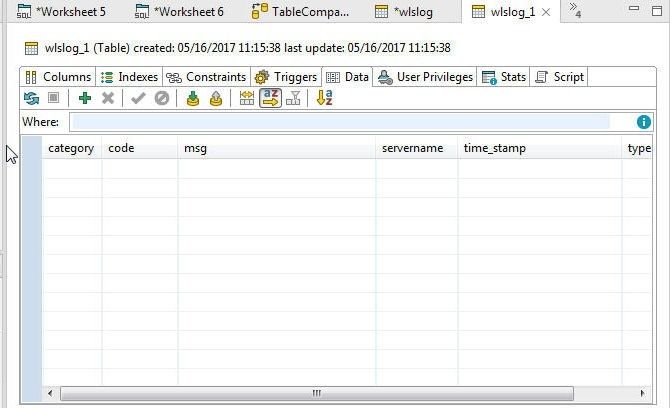
Figure 58. Empty Table wlslog.wlslog_1
Comparing Schemas
To compare table schemas the Compare Schemas feature is provided, as shown in Figure 59.
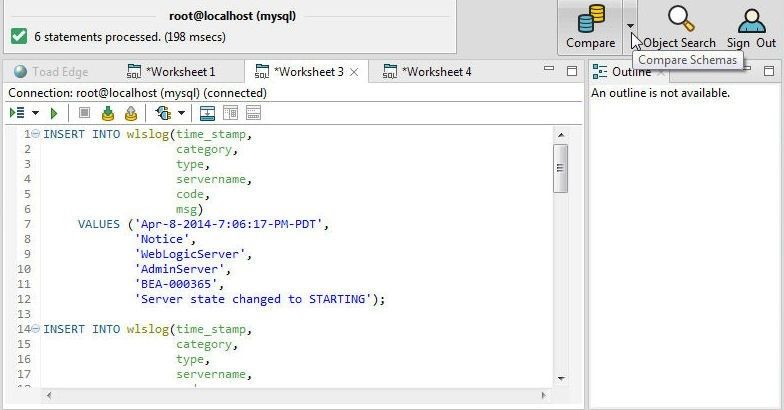
Figure 59. Compare Schemas
Click on the Compare drop-down and select New as shown in Figure 60.
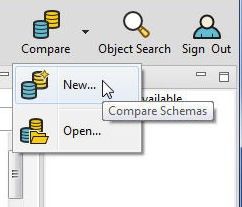
Figure 60. Compare>New
To compare schemas the source and target databases should not be the same. In Schema Compare, specify a Comparison Name and select a Sourcedatabase (weblogiclog) and a Target database (wlslog). In Comparison Settings select the Object Types (Tables). For the example comparison both the source and target databases have a single table wlslog. Select the Comparison Rules and SQL Objects and click on Compare as shown in Figure 61.
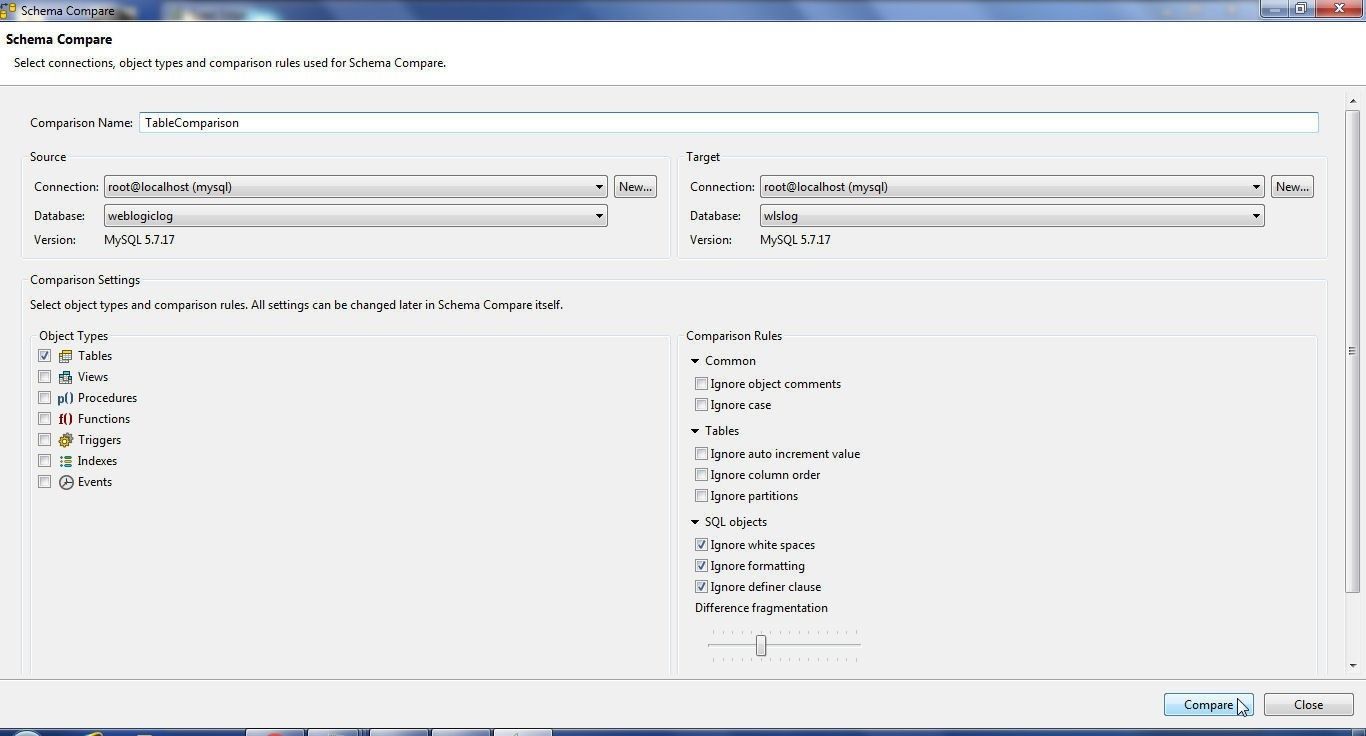
Figure 61. Schema Compare
The Compare gets completed, as indicated by the message in Figure 62. A Script Definition highlighting the differences in the schemas gets generated.
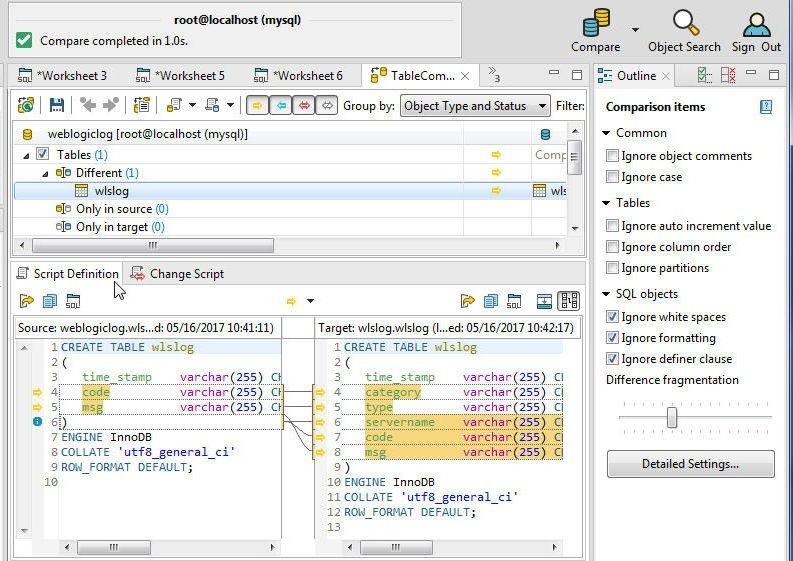
Figure 62. Script Definition
The script may be exported or imported in a SQL Worksheet. A Change Script also gets generated, as shown in Figure 63. The Change Script is a SQL script to make the target table the same schema definition as the source table.
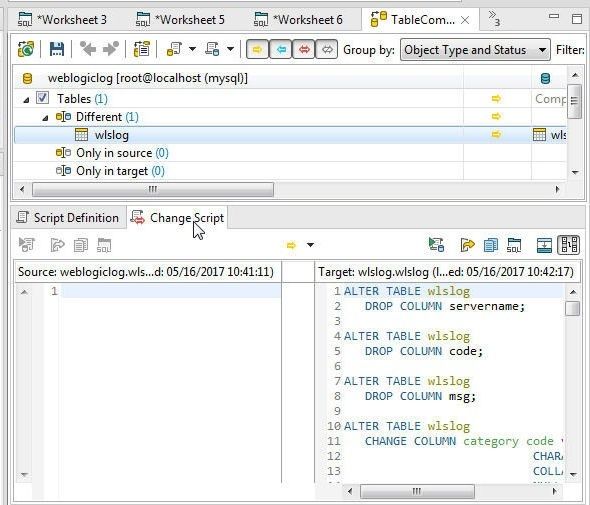
Figure 63. Change Script
To apply or run the change script, click on Deploy as shown in figure 64.
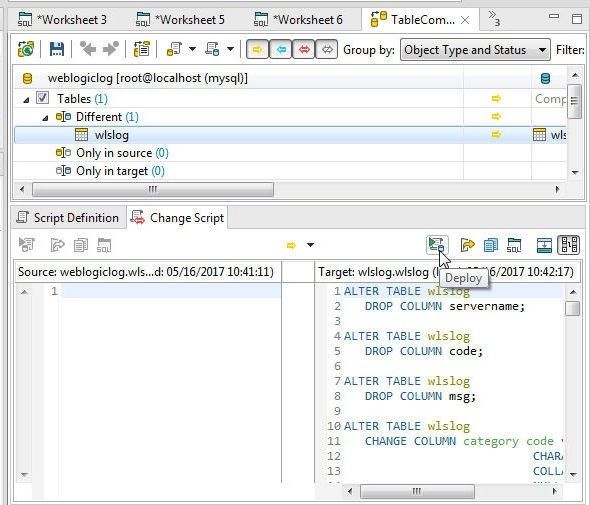
Figure 64. Running the Change Script
An Apply Differences dialog gets displayed and the target table is made the same as the source table. Click on Databases>Refresh to refresh the databases as shown in Figure 65.
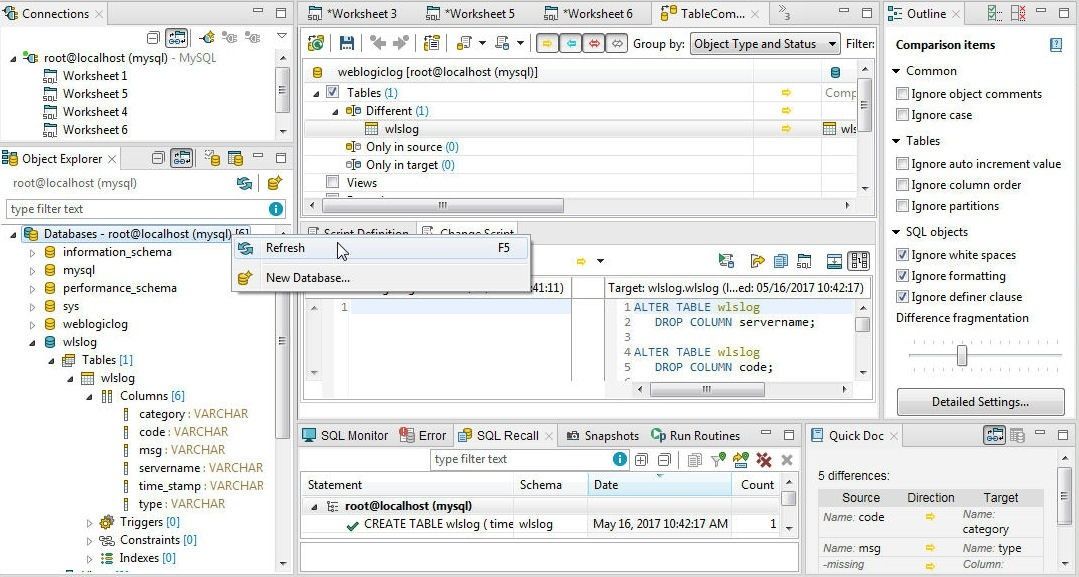
Figure 65. Databases>Refresh
As shown in Figure 66, the target database table wlslog.wlslog has three columns instead of the six before applying the differences with the weblogiclog.wlslog table.
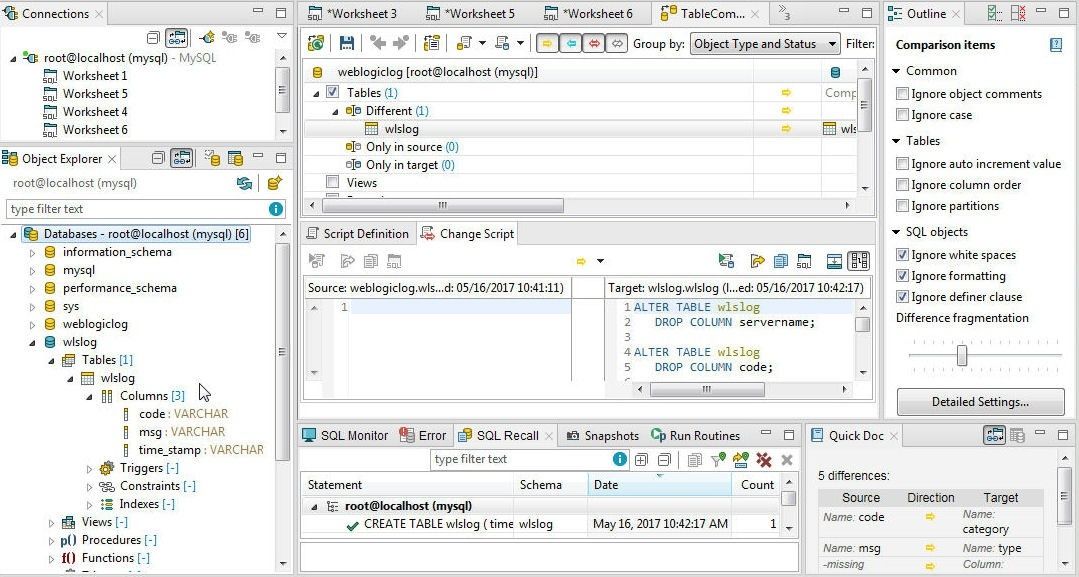
Figure 66. Target Table wlslog.wlslog with same Schema as Source database table
The database table columns for the Source database table weblogiclog.wlslog are shown in Figure 67.
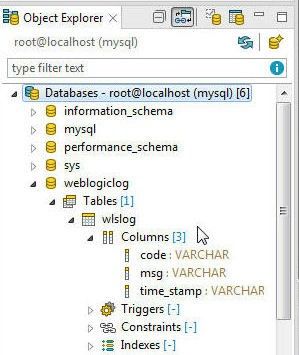
Figure 67. Database Table Schema for Source Database Table weblogiclog.wlslog
Searching for Objects
To search for database objects click on Object Search in the toolbar as shown in Figure 68.
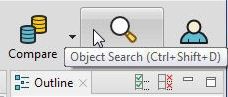
Figure 68. Object Search
Alternatively, select Database>Object Search, as shown in Figure 69.
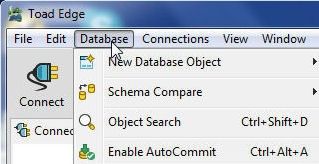
Figure 69. Database>Object Search
In Object Search select the Databases to search and the Object Types to search for, as shown in Figure 70. Add a name prefix or pattern to search for and the objects get listed.
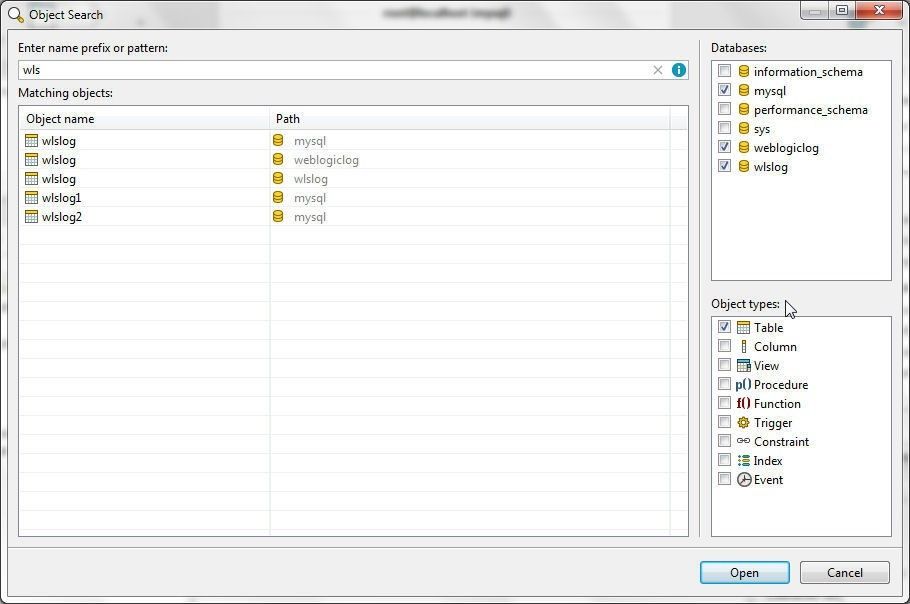
Figure 70. Object Search
The objective of an object search would be typically to open and use the object; for which, select an object from Matching Objects and click on Open as shown in Figure 71.

Figure 71. Object Search>Open
The selected object gets opened, as shown in Figure 72.
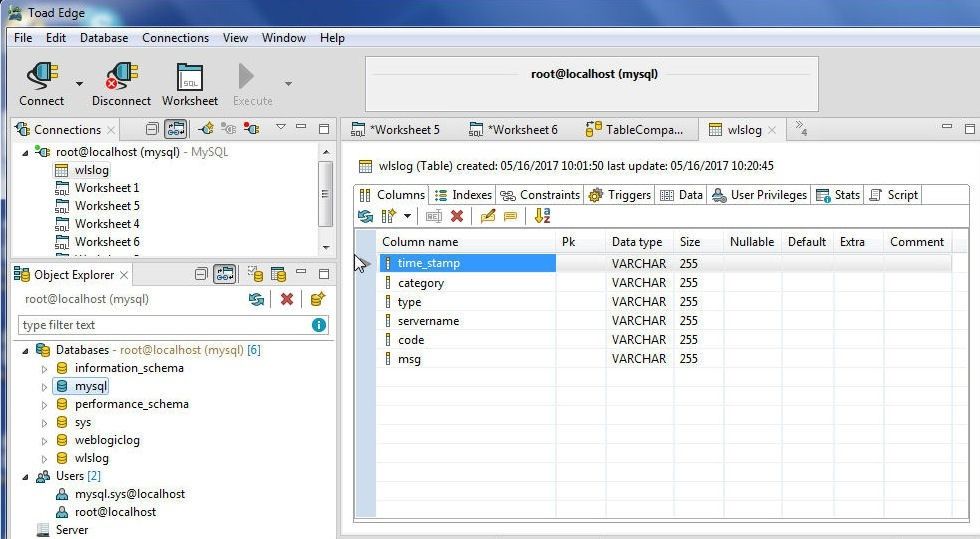
Figure 72. Selected Object Opened
Working with Sample Data in Object Details
For a table, data may be sorted with Sort Data, as shown in Figure 73.
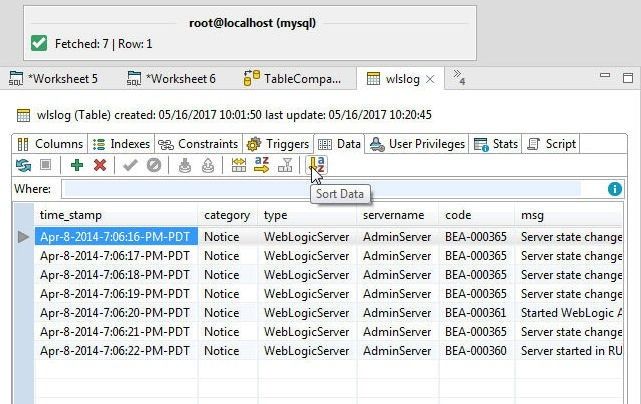
Figure 73. Sort Data
In Sort Options define the sort options as shown in Figure 74 and click on OK.
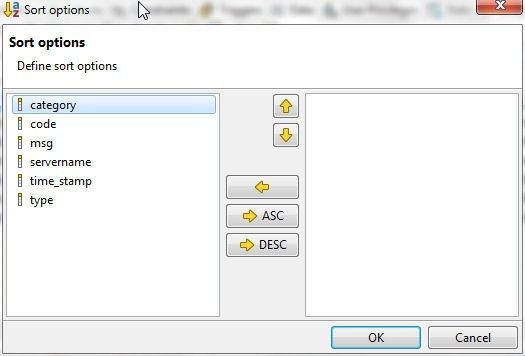
Figure 74. Sort Options
Some of the other features are Sort Columns Alphabetically, Resize Columns to Data, Insert Row, and display the Script for the table CREATE TABLE DDL, as shown in Figure 75. The script may be selected and copied with right-click>Select All and Copy.
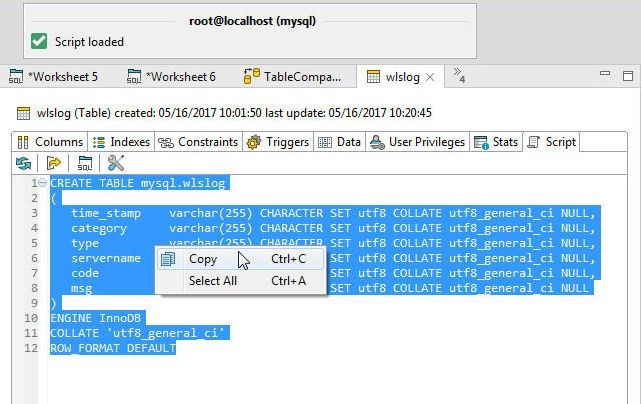
Figure 75. Create Table DDL Script
A WHERE condition may be specified to filter the result set, as shown in Figure 76.
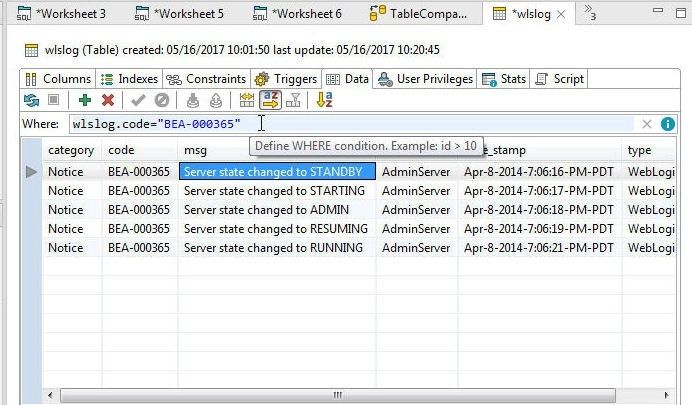
Figure 76. Using a WHERE Condition to filter Resultset
Exporting and Importing Table Data
Table data may be exported or data may be imported into a table. To export table data right-click on the table in the Object Explorer and select Export Data as shown in Figure 77.
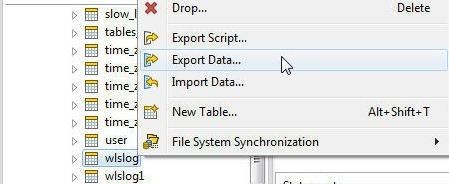
Figure 77. Export Data
In the Export Data dialog select tables to include in the export and click on Next, as shown in Figure 78.
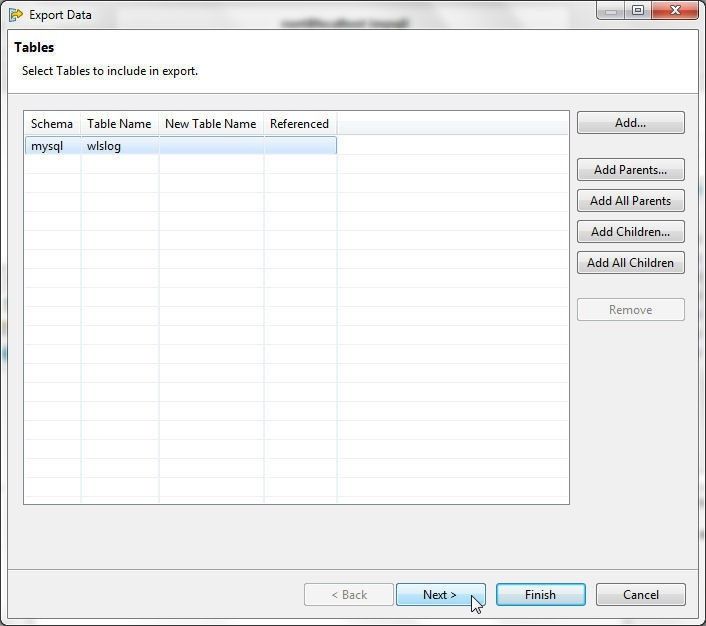
Figure 78. Selecting Tables to include in Export
In Destination and Format select Export As format as CSV to generate a Spreadsheet, as shown in Figure 79. Select Destination for Exported Data as a Single File to export to a file. Provision to export to separate files if multiple tables are selected for export is available. In Settings select Compress File in Zip Format to export to a Zip file.
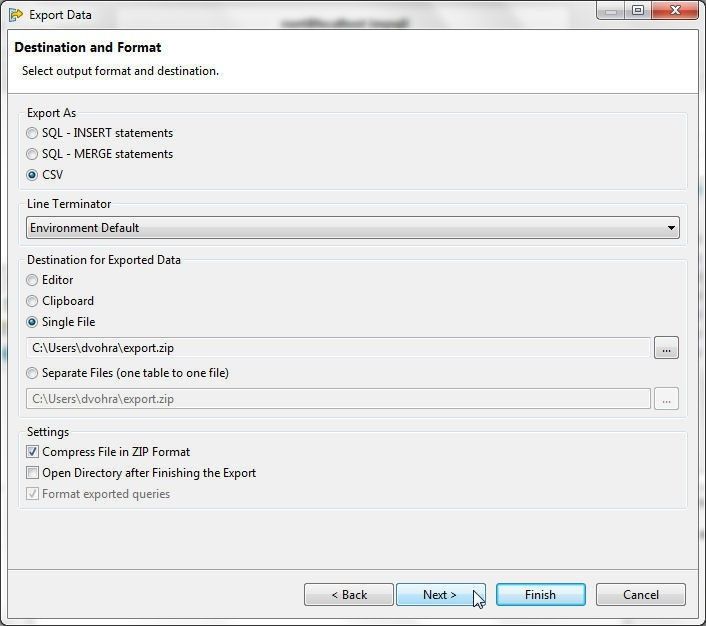
Figure 79. Destination and Export
In Exclude Data Types select the data types to exclude from export, as shown in Figure 80. The GEOMETRY AND GEOMETRY COLLECTION data types are excluded by default for export to CSV. The number of records to export may be limited with Limit Number of Records. Click on Next.
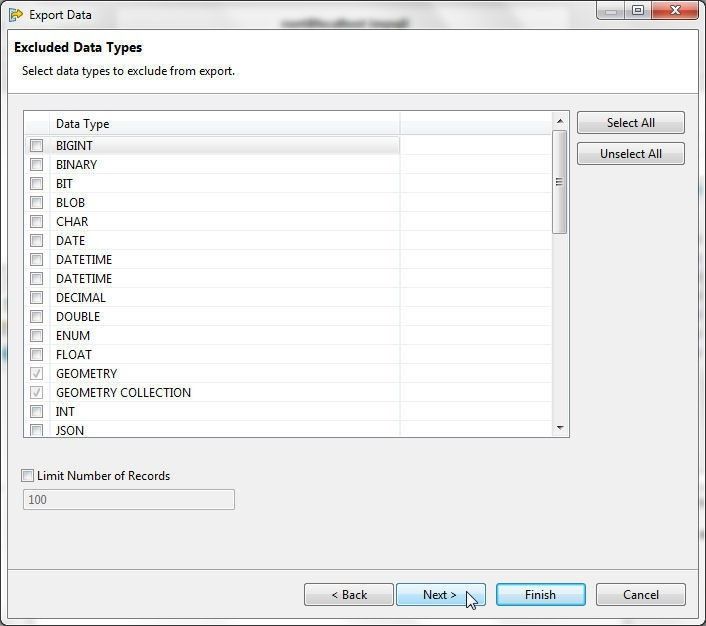
Figure 80. Exclude Data Types
Select Columns to include in export and click on Next as shown in Figure 81.
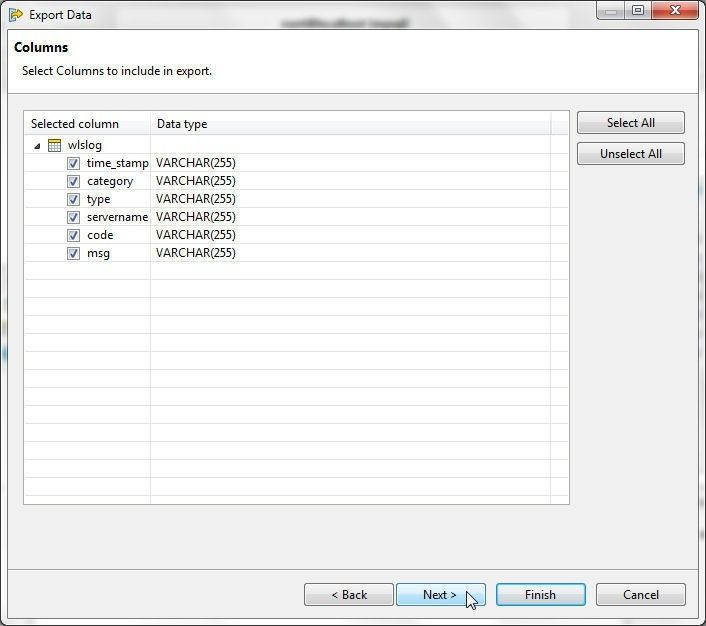
Figure 81. Columns to Include in Export
In CSV Settings the CSV Format Settings include Field Delimiter, Text Delimiter, and Escape Character as shown in Figure 82. Select Include Column Headers to include column headers in the exported data and select Numbers in Quotations option to quote numbers in exported data. The Data Format Preview lists the data that shall get exported. Click on Finish.
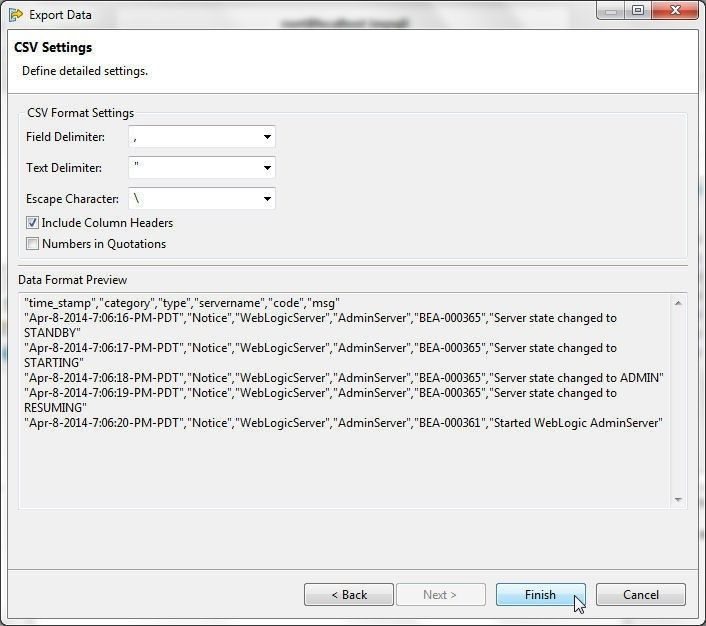
Figure 82. CSV Settings
An Export Data finished dialog indicates that the data has been exported and also provides the file to which the data is exported, as shown in Figure 83. Click on OK.
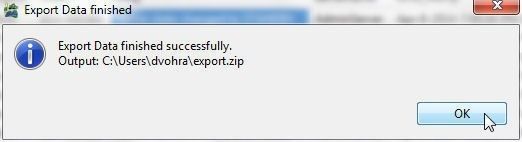
Figure 83. Export Data Finished
The exported Spreadsheet is shown in Figure 84.
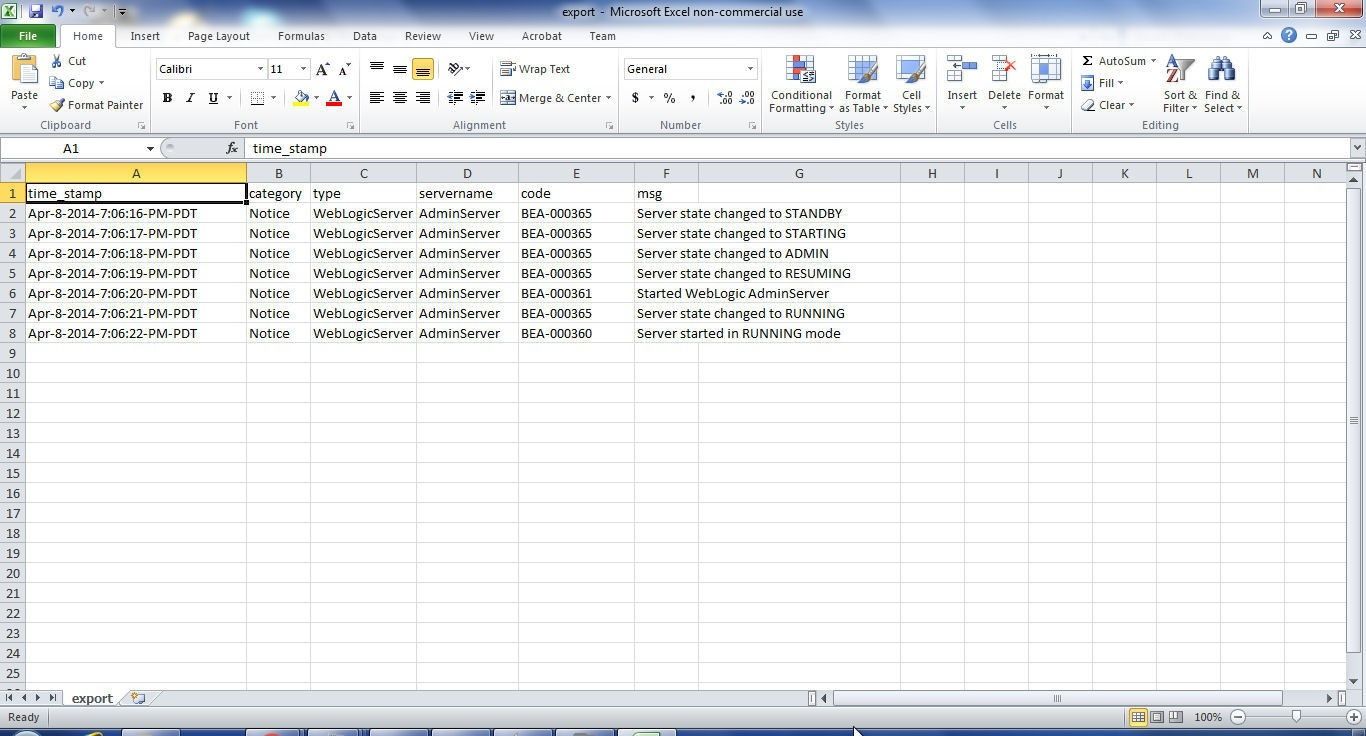
Figure 84. Exported Data Spreadsheet
To import data select an empty table (wlslog_1, which was copied from wlslog and data deleted) in Object Explorer, right-click on the table and select Import Data as shown in Figure 85.

Figure 85. Import Data
In Import Data dialog select an Import Format (CSV file or Zip archive with CSV) and select a data file to import, as shown in Figure 88. Select the same data file export.zip that was exported previously. The number of columns in the CSV file imported must match the number of columns in the table. Click on Next.
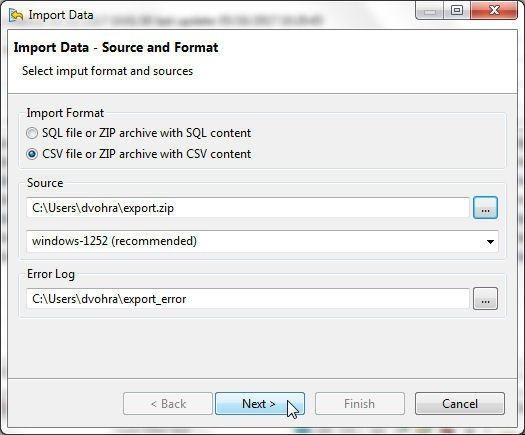
Figure 86. Import Data
In CSV Settings click on Finish as shown in Figure 87.
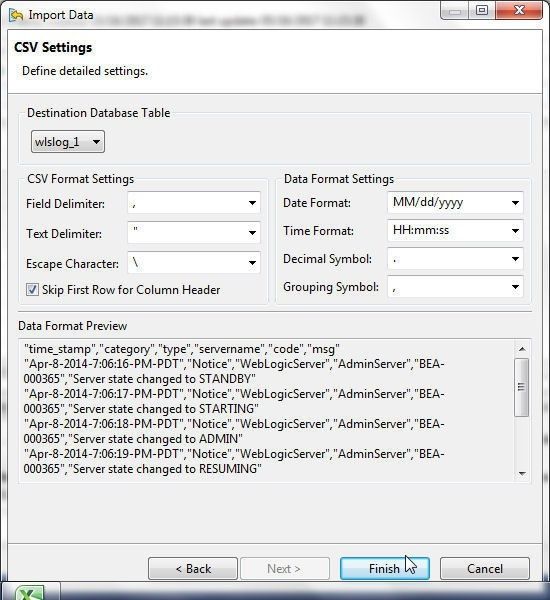
Figure 87. CSV Settings for Import
When the data import completes, the Data Import Result dialog displays a message to indicate the same and also includes an option to refresh table data, as shown in Figure 88.
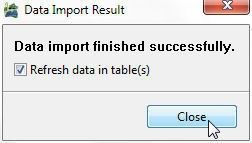
Figure 88. Data Import Result
In the table wlslog_1 to which data is imported click on Refresh Query to list the imported data as shown in Figure 89.
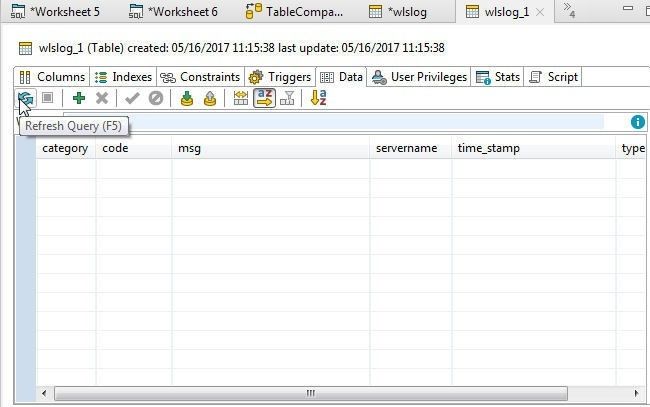
Figure 89. Refresh Query
The data imported into the previously empty table wlslog_1 gets displayed, as shown in Figure 90.
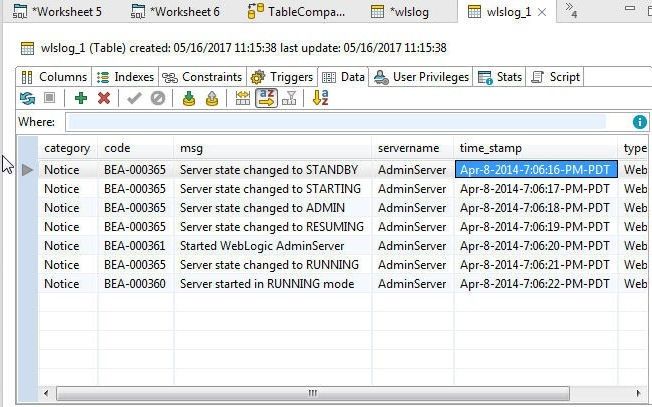
Figure 90. Data imported into wlslog_1
User Privileges Management
The User Privileges tab lists the user privileges for the different users. The root@localhost user has all the privileges granted as inherited as shown in Figure 91.
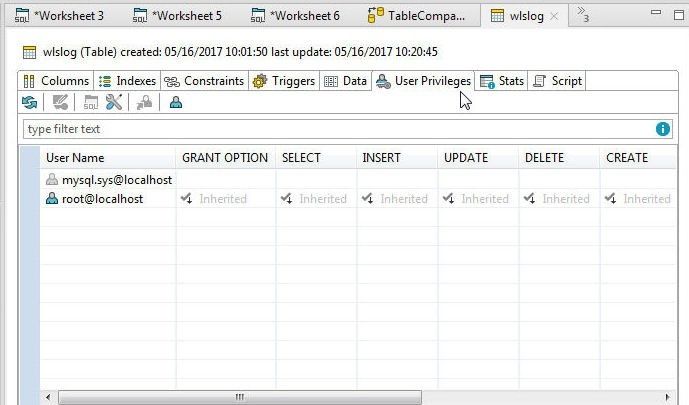
Figure 91. User Privileges
To modify user privileges for another user right-click on the user and select Modify Privileges as shown in Figure 92.
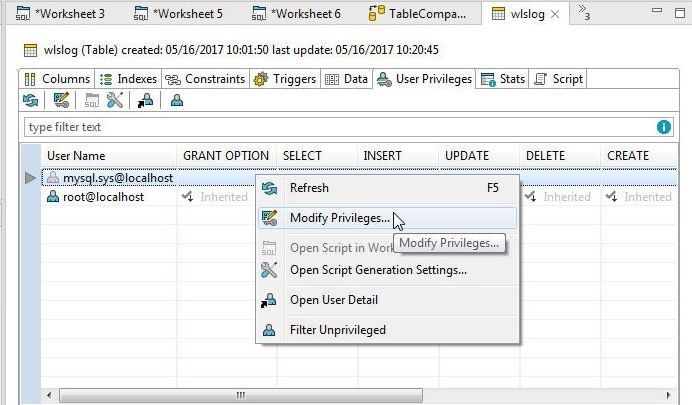
Figure 92. Modify Privileges
In Edit Table Privileges select the privileges to grant and click on OK, as shown in Figure 93.
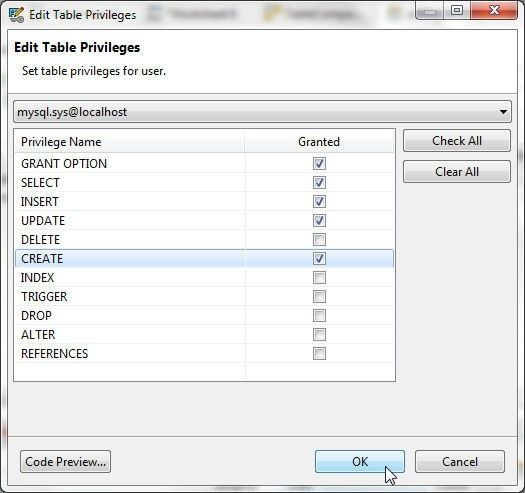
Figure 93. Edit Table Privileges
The user privileges get granted, as shown in Figure 94.
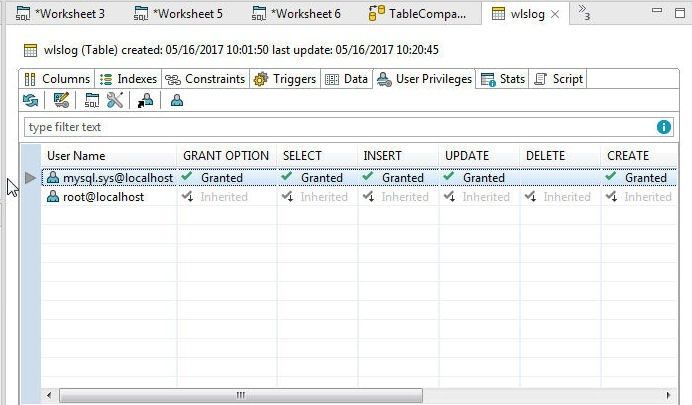
Figure 94. User Privileges Granted
Creating a New User
To create a new user right-click on Users and select New User as shown in Figure 95.
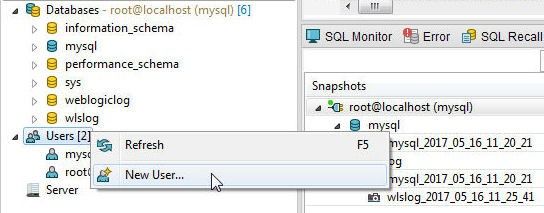
Figure 95. Users>New User
In New User specify Host, user Name and Password and click on Next as shown in Figure 96.
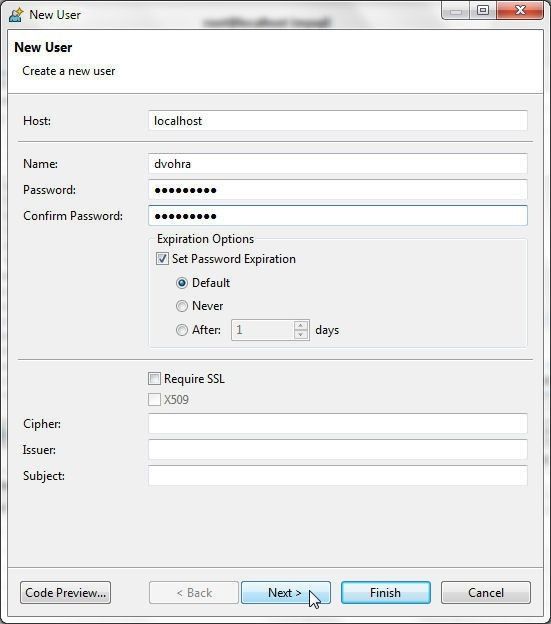
Figure 96. New User
In Define System Privileges click on Grant All to grant all system privileges and click on Next as shown in Figure 97.
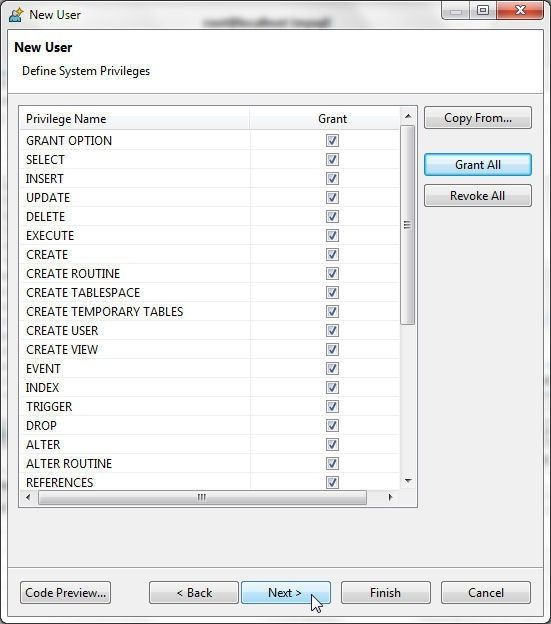
Figure 97. Granting System Privileges
In Limitations select the default settings and click on Finish. A new user gets added, as shown in Figure 98.
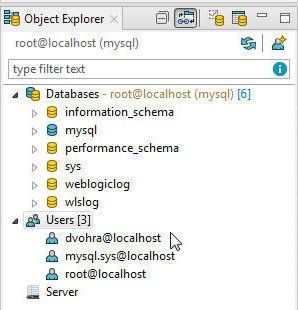
Figure 98. New User
Creating Snapshots
A database snapshot may be used to back up a database. To create a snapshot right-click on a database and select Take Snapshot as shown in Figure 99.
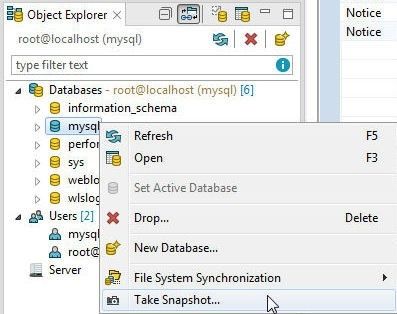
Figure 99. Take Snapshot
In Take Snapshot specify a snapshot Label and click on OK as shown in Figure 100.
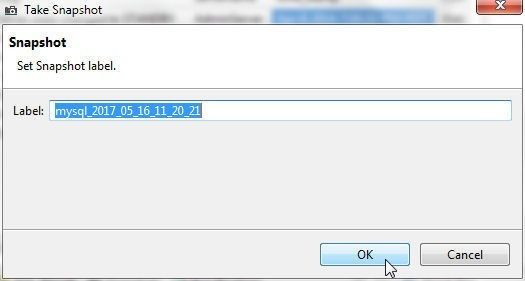
Figure 100. Take Snapshot
A new snapshot gets created. The Snapshots tab or view lists all the snapshots, as shown in Figure 101.
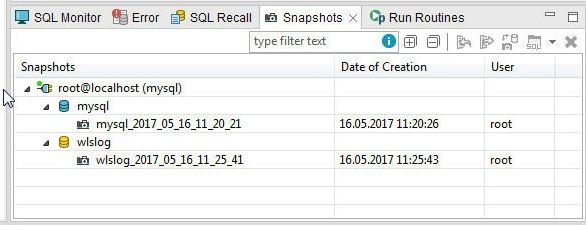
Figure 101. Snapshots
A snapshot may be exported with Export Snapshot, as shown in Figure 102.
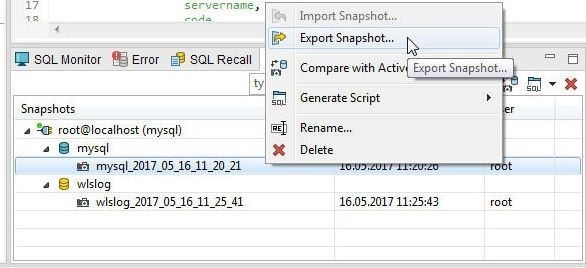
Figure 102. Export Snapshot
Specify a JSON file name in Save As and click on Save. An exported snapshot JSON file is shown in Figure 103.
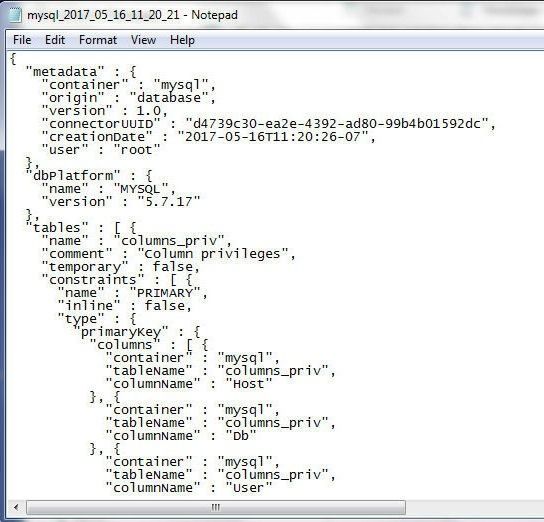
Figure 103. Exported Snapshot JSON File
An SQL script may be generated from a snapshot with Generate Script>Generate Script to File, as shown in Figure 104.
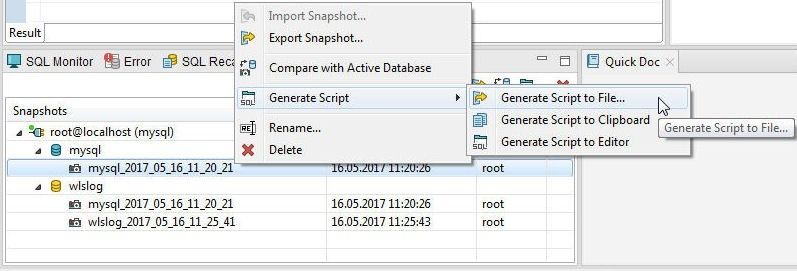
Figure 104. Generating SQL Script from Snapshot
In Save As specify a File name and click on Save. A SQL script gets generated from the Snapshot, as shown in Figure 105.
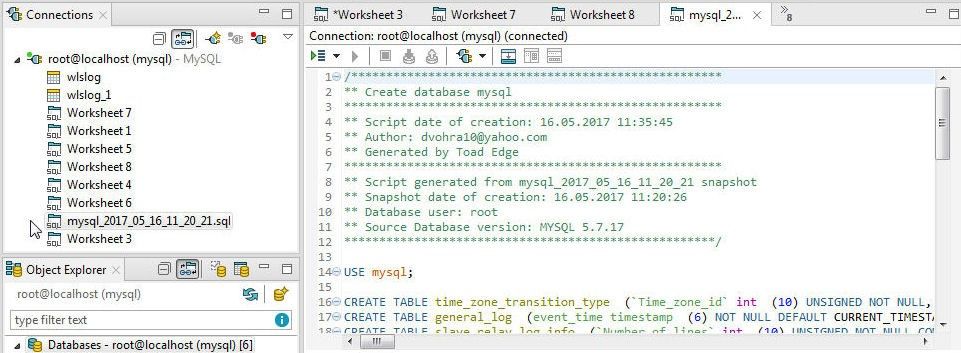
Figure 105. SQL Script generated from a Snapshot
Using Templates
The SQL Worksheet IntelliSense discussed earlier is based on built-in templates. To explore or create a template, right-click in a SQL Worksheet and select Preferences. In Preferences select Templates as shown in Figure 106.
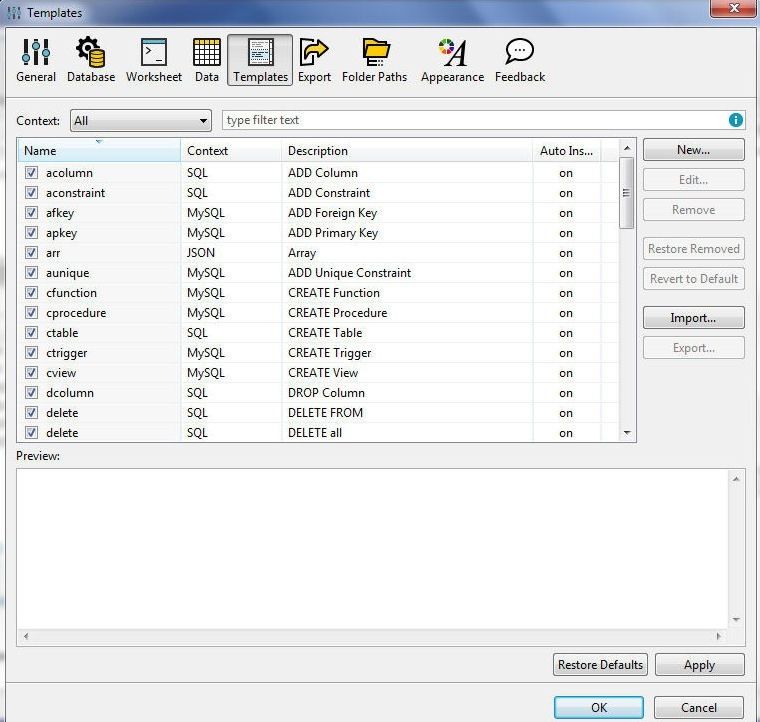
Figure 106. Preferences>Templates
Templates are based on patterns with variables as placeholders for the IntelliSense to be provided dynamically. The SELECT * FROM IntelliSense that we discussed earlier to auto-suggest table and other database objects is based on a template. Select the “select” template for the “SELECT * FROM” pattern and click on Edit as shown in Figure 107.
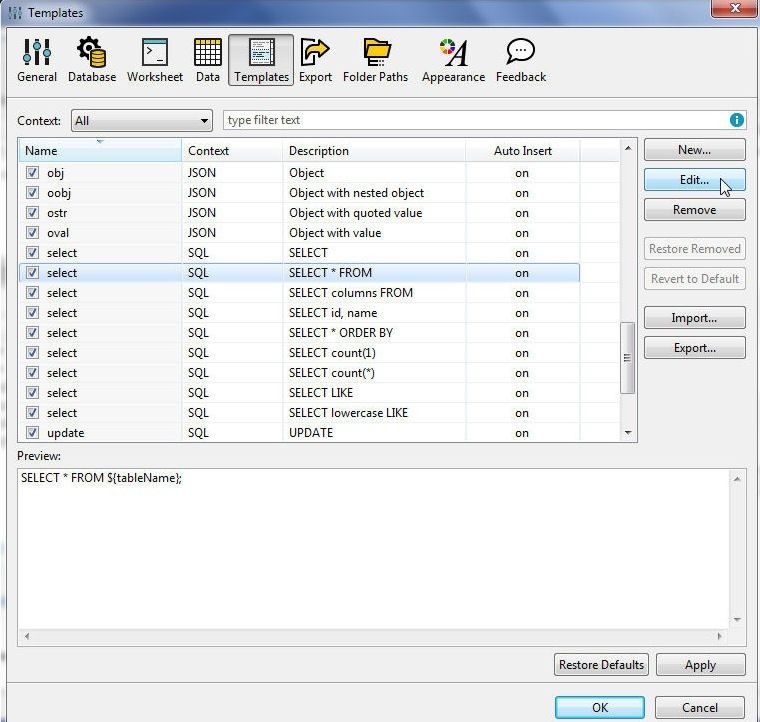
Figure 107. Selecting the “select” Template
The pattern, context and whether to automatically insert are shown in Figure 108.
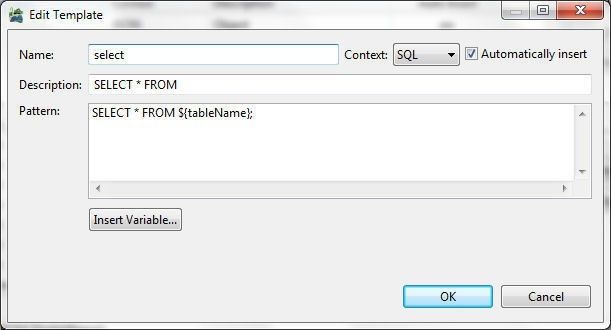
Figure 108. Template for “select * from” pattern
A new template may be created with New in Templates. In the New Template select a Context from JSON, MySQL and SQL as shown in Figure 109. A Pattern may be specified using variables from Insert Variables.
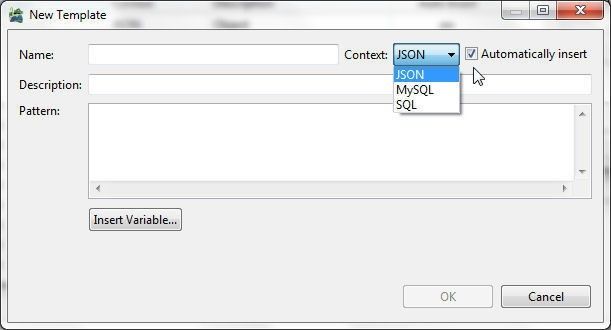
Figure 109. New Template
Connecting to MySQL on AWS RDS
Toad Edge may be used to connect to manage not only a standalone MySQL database but also AWS RDS based MySQL database. In this section we shall discuss connecting to RDS based MySQL database. Create an RDS DB instance for MySQL database, as shown in RDS Console in Figure 110. To connect to MySQL database, copy the Endpoint for MySQL instance from the RDS Console as shown in Figure 110.
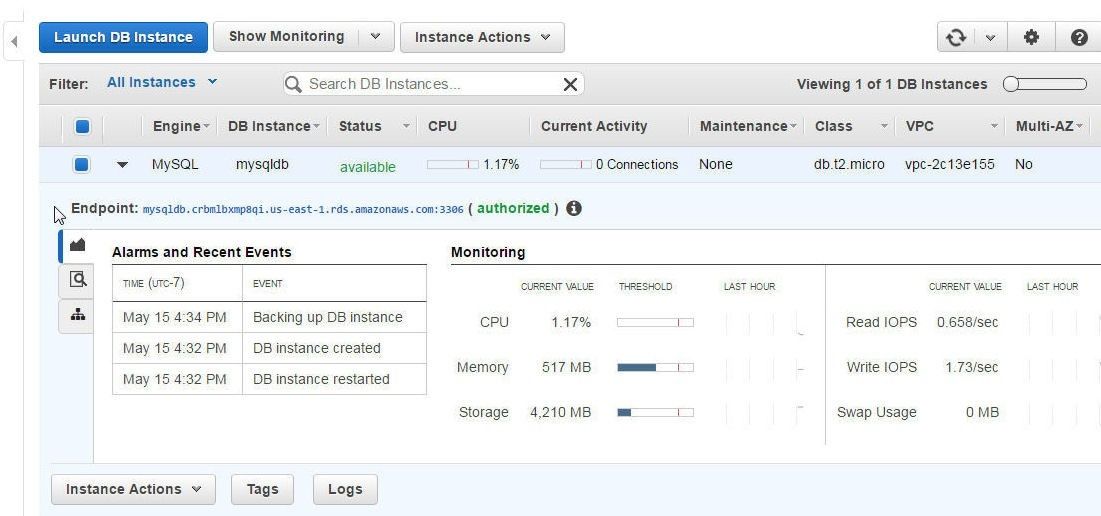
Figure 110. RDS Instance for MySQL database
Click on Connect>New Connection in Toad Edge and in the New MySQL Connection specify the Endpoint without the Port number suffix (:3306) in the Host field as shown in Figure 111. Specify the port separately in the Port field. In the Database field specify the RDS DB Instance. Specify User and Password used to create the RDS DB instance and click on OK.
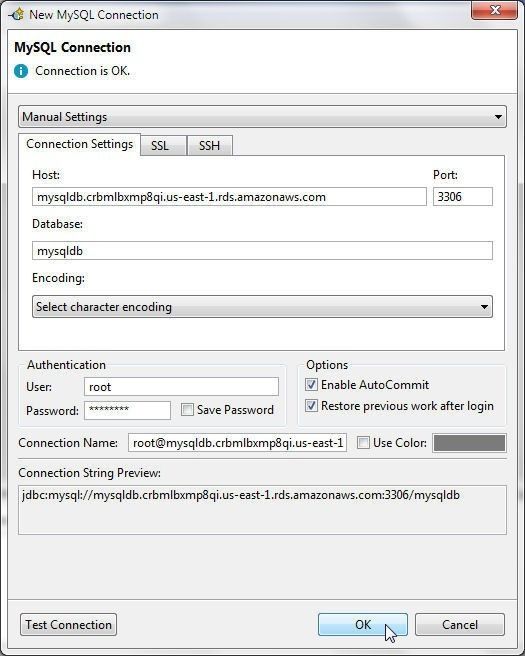
Figure 111. Configuring Connection Detail for the RDS MySQL DB Instance
A new connection gets added to the Connections view, as shown in Figure 112.
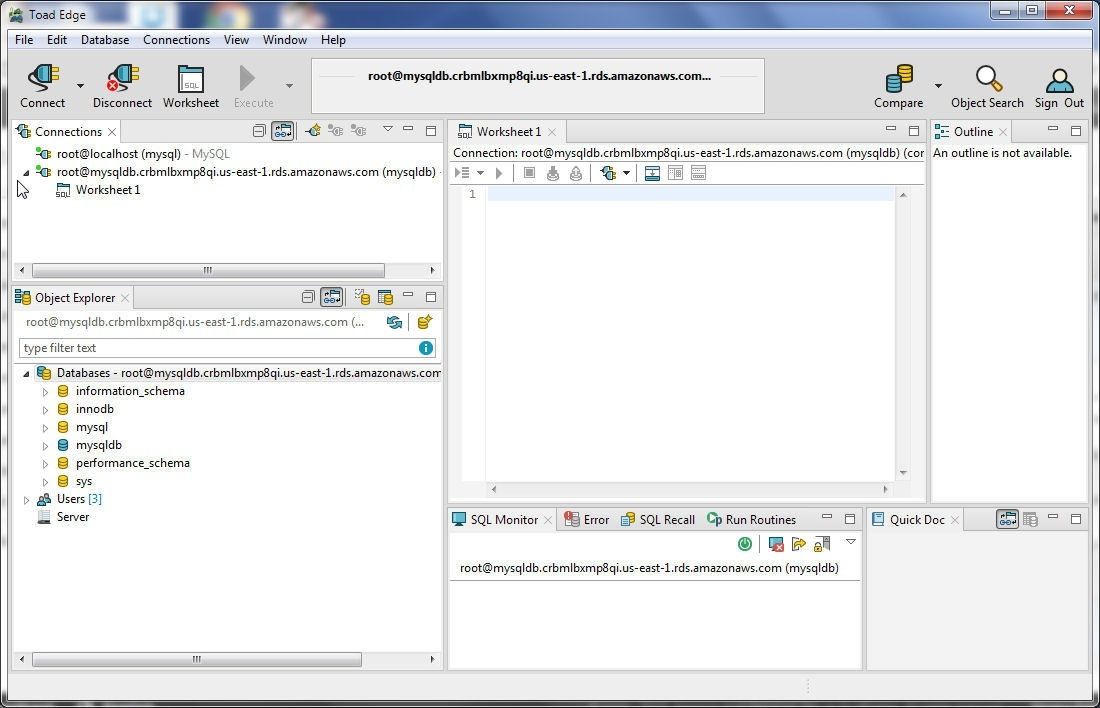
Figure 112. Connection for RDS MySQL Database
Disconnecting from a Database
To disconnect a database connection, right-click on the connection in Connections and select Disconnect as shown in Figure 113.
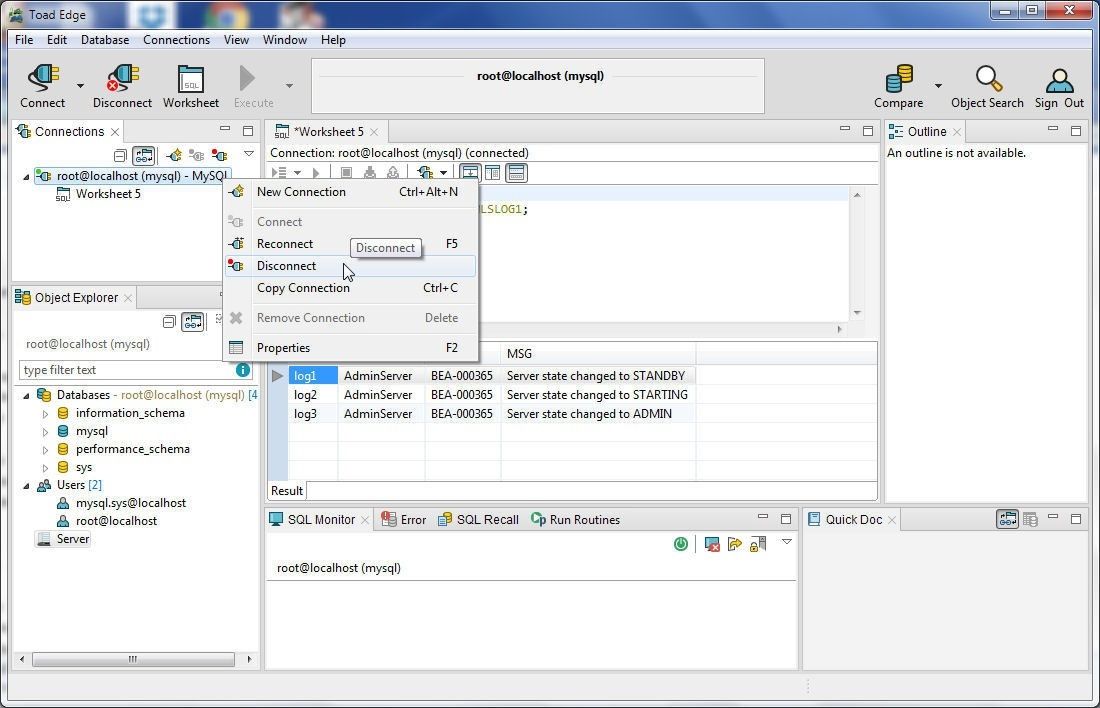
Figure 113. Disconnect
Alternatively, select the connection in Connections and click on Disconnect Selected as shown in Figure 114.
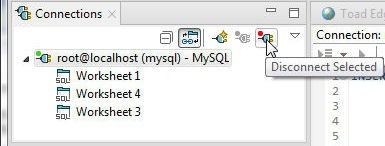
Figure 114. Disconnect Selected
A disconnected connection may be connected to again by selecting Connect in the same option list in which Disconnect is selected. To remove a connection select Remove Connection as shown in Figure 115. A connection must be disconnected before removing.
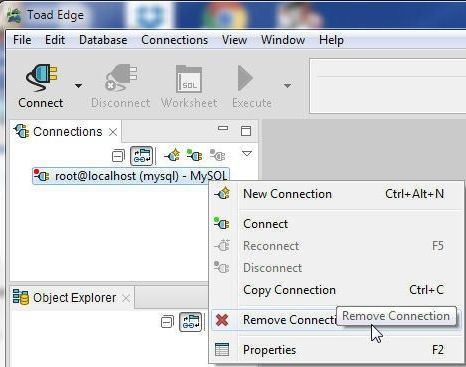
Figure 115. Remove Connection
Subsequently, click on OK in the Confirm dialog.
A connection that is already connected may be reconnected with Reconnect, as shown in Figure 116.
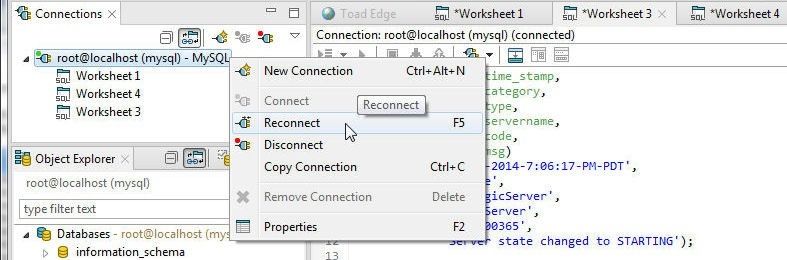
Figure 116. Reconnect
In this article we discussed the Toad Edge management toolset designed for open source databases with initial support for MySQL database.
Want to learn more?User guide: Access the Toad Edge User Guide. Product page: Click the following link to watch a video on our product page and learn how Toad Edge can help you simplify development and management tasks for open source databases. Blog: 7 hacks to use Toad Edge like a boss Blog: 5 blogs that teach you to effectively work in Toad Edge® Try Toad Edge free for 30 daysFree 30-day trial of Toad Edge Already in a trial? If Toad Edge has helped you ramp up on open source RDBMSs fast, buy it now or contact a sales representative. |
Start the discussion at forums.toadworld.com