The new IBM DB2 11.x collaboration features are provisioned by IBM’s cloud platform called Bluemix. IBM’s Bluemix provides several IaaS (Infrastructure as a Service) and PaaS (Platform as a Service) cloud services. IBM’s Bluemix offers a cloud service for DB2 11.x called DB2 on Cloud. In addition to the benefits inherent to a cloud platform, such as providing a scalable, reliable, fully managed service, Bluemix offers some collaboration features for team development.
IBM’s DB2 on Cloud is a DB2 database on IBM’s SoftLayer cloud platform. Secure SSL connections, high availability, and support for all native DB2 drivers, SQL, JDBC, ODBC and .NET are some of its other features. DB2 on Cloud is SQL compatible with Oracle, which makes it easier to integrate with Oracle database based applications. DB2 on Cloud supports AWS S3 backups. The DB2 database version on DB2 on Cloud is 11.1 by default. This article has the following sections:
- Overview of Bluemix Collaboration Features
- Setting the Environment
- Creating the DB2 on Cloud Service
- Creating an Application with DB2 on Cloud
- Modifying the Cloud Foundry Application locally
- Collaboration in a Bluemix User Account
- Inviting a User
- Adding an Organization
- Adding Team Members
- Adding a Space
- Creating another Application as a different User
Overview of Bluemix Collaboration Features
Bluemix provides several collaboration features for an organization and its team members. First, to get familiar with the terminology used by Bluemix, we shall discuss some collaboration entities or terms. When a Bluemix account is created,an AccountOwner gets created, and an Organization gets registered with Bluemix. When logging into a new Bluemix account, a dialog prompt “Create organization” to create an Organization is displayed, as shown in Figure 1. Select from the suggested Organization names or specify a different name and click on Create to create a top-level Organization associated with the Bluemix account owner. The Organization name must be unique in Bluemix (not just for a Bluemix account) and consist of at least a single character.
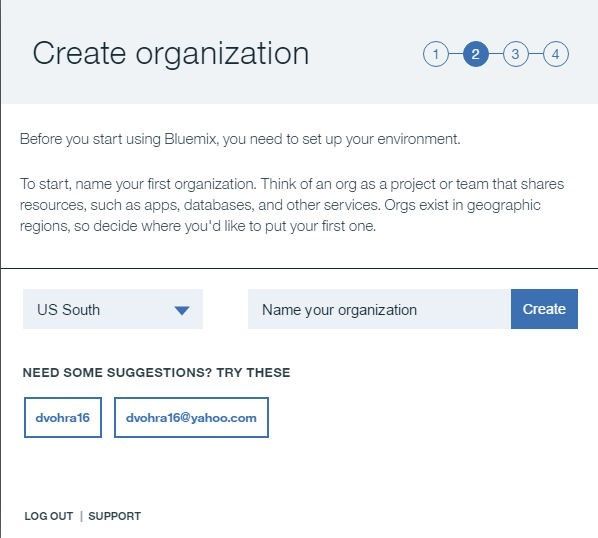
Figure 1. Create Organization
Next, a dialog prompt “Create space” to create a Space gets displayed, as shown in Figure 2. Select from one of the suggested Space names or specify a different name and click on Create.
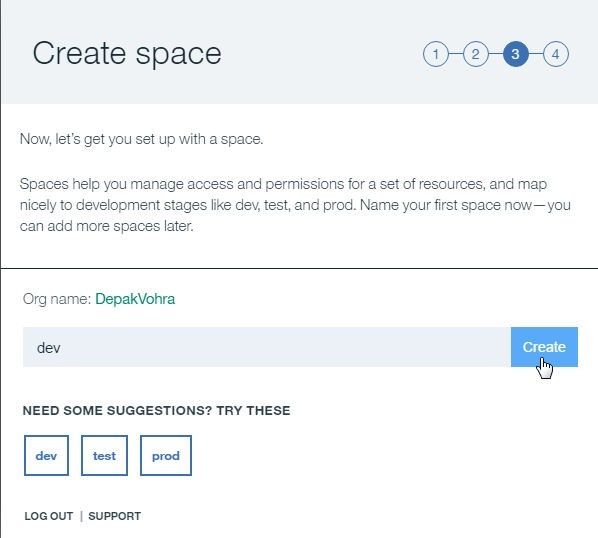
Figure 2. Create space
An Organization and a Space get created and a Summary dialog prompt gets displayed, as shown in Figure 3. Click on I’m Ready to start using Bluemix.
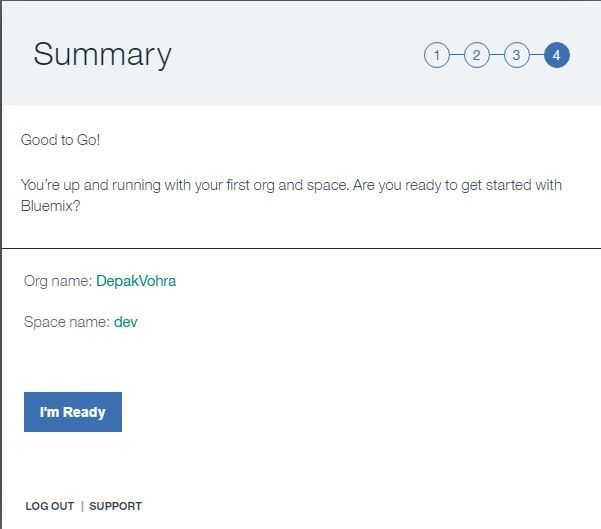
Figure 3. Summary – Organization and Space created
The Bluemix Dashboard gets displayed. Initially a Bluemix account does not include any apps. An “Organization” is the fundamental unit of collaboration and consists of team members, spaces, applications, services, domains, and routes as a single unit for management. Although to start with an Organization is associated with a single geographical region, an Organization may span multiple geographical regions. A domain is an Internet route allocated to an organization. By default, a domain is a system domain and custom domains may be added. An application created in an Organization is assigned a sub-domain. Each Organization has a Quota that represents the resource limits for the memory and number of services for the organization. A Quota is created when an Organization is created and may be modified as required as new services and applications are created. By default, a single Bluemix Account Owner is associated with a single Organization and the account owner may add multiple Organizations. To manage Organizations click on Manage Organizations from the account drop-down, as shown in Figure 4.
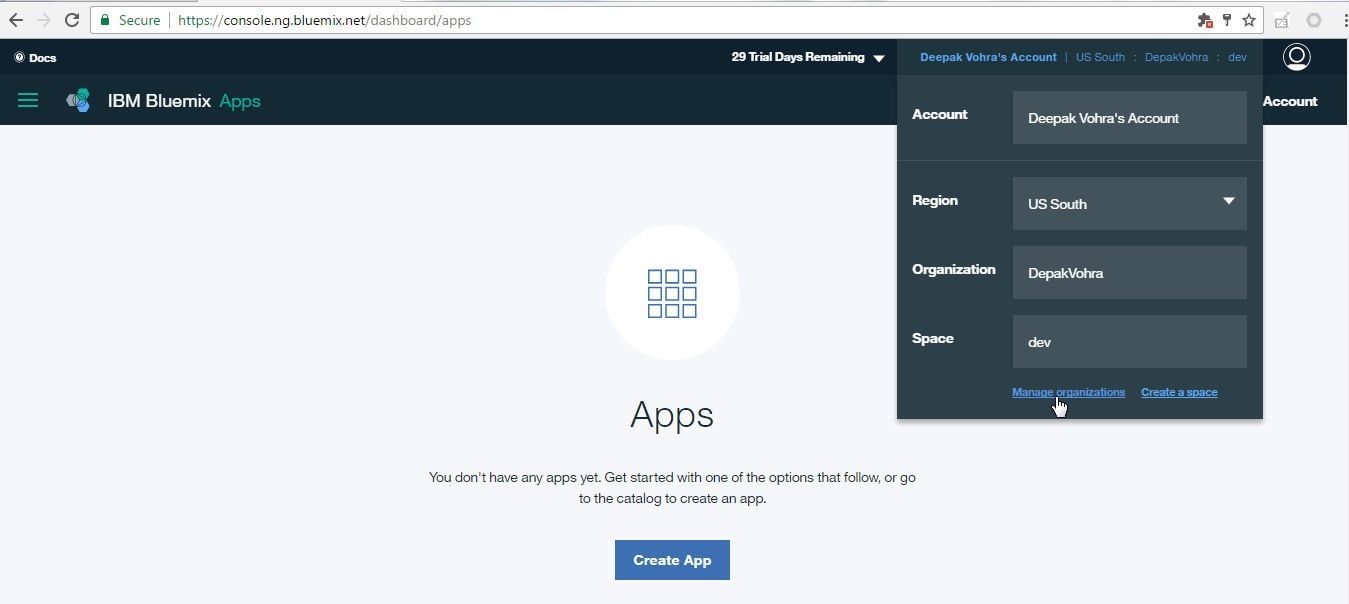
Figure 4. Account>Manage Organization
The Manage Organizations page in the Bluemix Dashboard gets displayed, as shown in Figure 5.
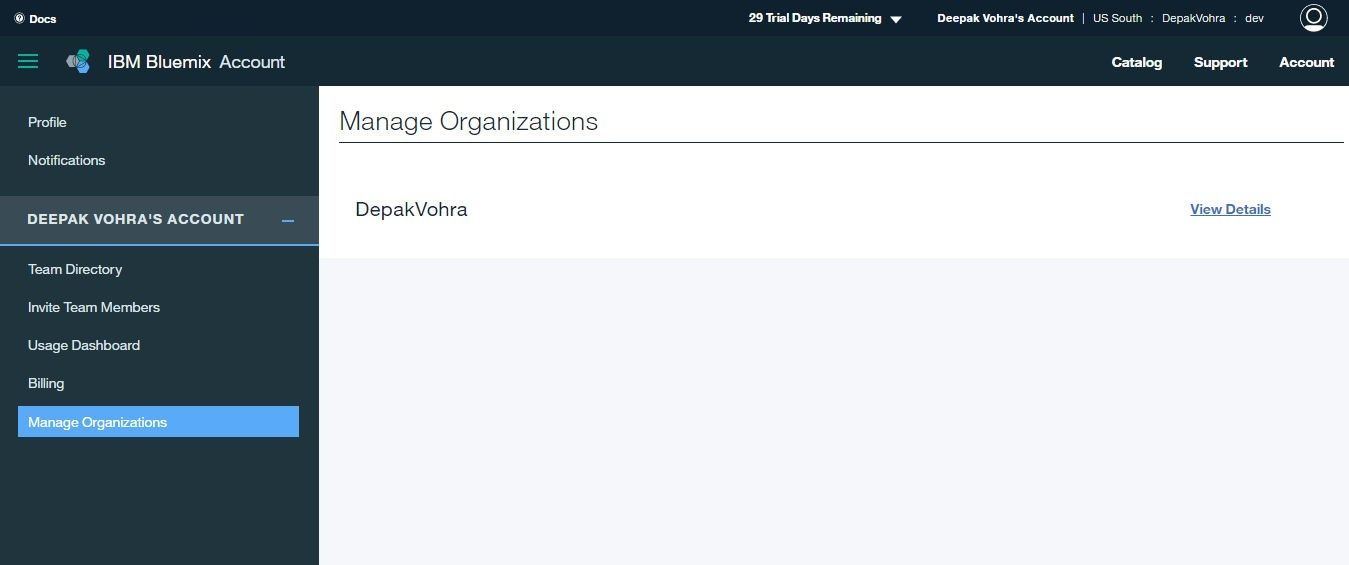
Figure 5. Manage Organizations
The Organization may be edited by selecting View Details and subsequently Edit Org, as shown in Figure 6.
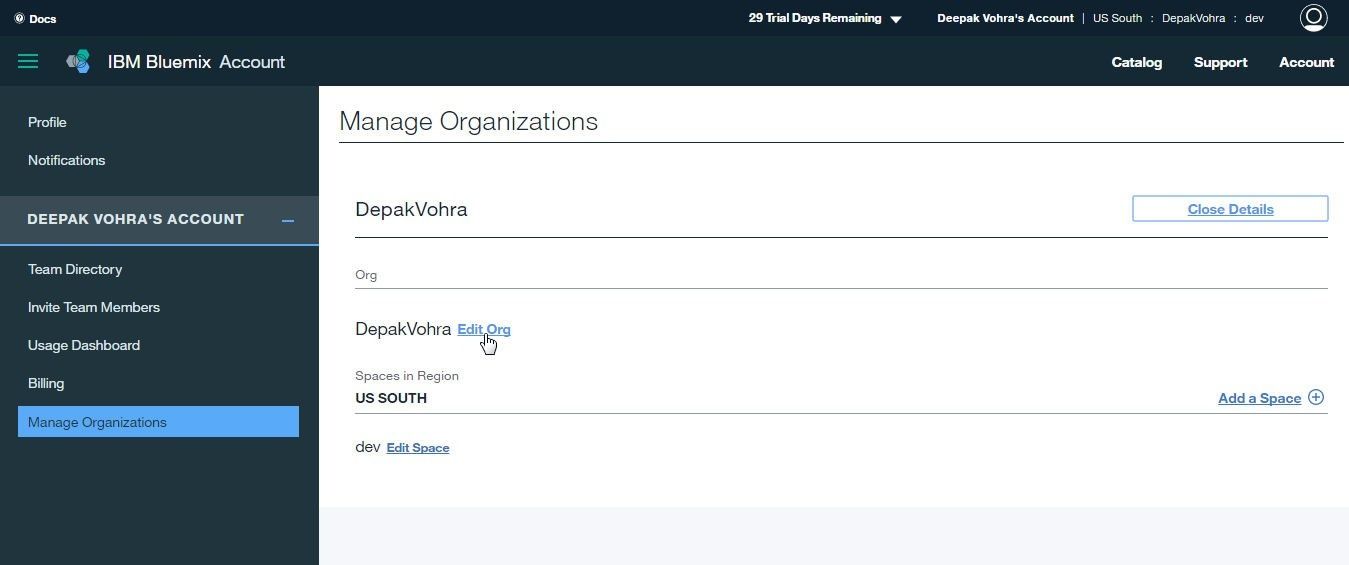
Figure 6. View Details>Edit Org
While the top level collaboration or grouping unit is called an Organization, the next level below it is called a Space. When a new Bluemix account is created a new Organization and a Space called “dev” associated with it are also created. A Space consists of a set of applications, services, and team members. Team members exist in an Organization and in a Space. Team members in an Organization and a Space have user roles, with each user role being associated with a set of permissions. The user roles at the Organization level are Manager, Billing Manager, and Auditor; and the user roles at the Space level are Manager, Developer, and Auditor. The different roles are discussed in Table 1.
Table 1. Roles that may be assigned to a Team Member in an Organization and a Space
| Role | Description and Privileges |
| Organization Manager | An Organization Manager is able to update the organization |
| Organization Billing Manager | A read-only role; a Billing Manager is able to view billing related information |
| Organization Auditor | A read-only role; an Organization Auditor is able to view the organization |
| Space Manager | A Space manager is able to update the Space |
| Space Developer | A Space Developer is able to manage applications and services in a Space |
| Space Auditor | A read-only role; a Space Auditor is able to view a Space |
The roles with write privileges are Organization Manager, Space Manager and Space Developer. An Organization Manager has the following permissions:
– Create, view, edit, or delete Spaces
– View the Organization’s resource usage and Quota
– Invite team members to the organization
– Manage who has access to the Organization and their roles
– Manage custom domains
A Space Manager has the following permissions:
– Add existing team members to a Space and manage their roles within a Space. A Space Manager cannot invite new team members.
– View the number of instances, service bindings, and resource usage for each application within a Space.
A Space Developer has the following permissions:
– Create, delete, and manage applications within a Space, including starting, stopping, and deploying apps.
– Create, delete, and manage services within a Space, including binding or unbinding a service to an application.
– View the number of instances, service bindings, and resource usage for each application.
– Associate an internal or external URL with an application.
All user role assignments are editable, except that the Account Owner must be assigned the Organization Manager role and that each Space must have at least one Space Manager. Each new team member could be assigned the Manager role in an Organization but does not have to be. With multiple team members as Managers in an Organization, if removal of the Manager role is from the Account Owner is attempted, the message, “You cannot remove yourself as a manager of the <Organization name> Organization.” gets displayed; <Organization name> being that particular Organization name. Each Space must have at least one team member assigned to manage the Space (Space Manager) but it does not have to be the Account Owner. Any team member could be made a Manager for a Space. With multiple team members as Space Managers, if the Space Manager role is removed from the Account Owner, a confirmation prompt, “Are you sure you want to remove yourself as a manager of the Space?” is displayed; being that particular Space name. Organization and Space Auditor have read-only or view-only permissions in a Space, as mentioned before.
When a Bluemix account is created it is associated with a single Organization to start with, and the Account Owner may add other Organizations, which inherit the team members (also called users), domains, and Quota from the starter Organization. Once an Organization is created it cannot be deleted from the Dashboard. The Account Owner is also a team member but with a difference from other team members in that the Account Owner cannot be removed from the team.
While a new Organization inherits team members from the top level Organization the team members in each Organization may be edited independent of other Organizations. A Space may be edited or deleted. While an Organization name is unique across all Bluemix accounts, a Space name is unique only within an Organization.
Setting the Environment
An IBM Bluemix account is required as a prerequisite and a subscription to DB2 on Cloud service is required. To create a Bluemix account, navigate to https://www.ibm.com/cloud-computing/bluemix/. Click on the icon for IBM Cloud>Bluemix as shown in Figure 7.

Figure 7. IBM Cloud>Bluemix
Select Sign up from the drop down menu as shown in Figure 8.
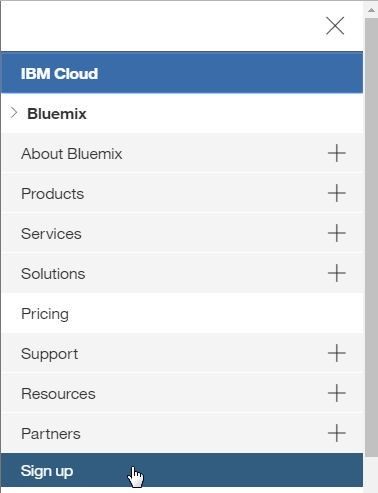
Figure 8. Sign Up
The Join IBM Bluemix input form gets displayed. Provide the requested information and click on Join Org. A confirmation message gets sent to the email provided. Confirm the account in the email message. A Bluemix account gets created and activated. To sign into a Bluemix account, select Sign In from the user account drop down menu as shown in Figure 9.
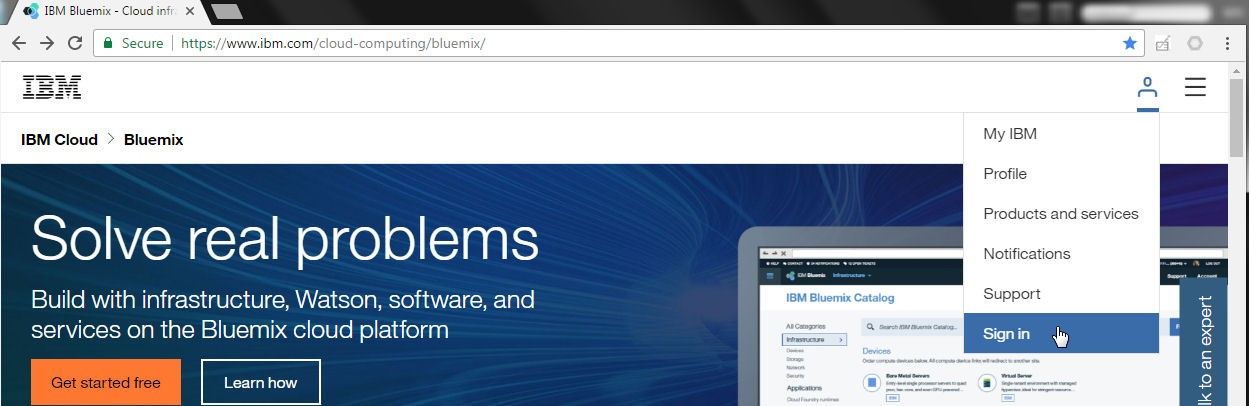
Figure 9. Sign In
In the Sign in to IBM field, specify an IBM ID or email and click on Continue. Specify the password in the Password field and click on Sign In.
The IBM DB2 on Cloud requires a subscription; for which, click on Catalog in the Bluemix account. Select the IBM DB2 on Cloud service from the Catalog. Select a Pricing Plan and click on Upgrade to subscribe to DB2 on Cloud.
Creating the DB2 on Cloud Service
Select Catalog in the Bluemix account, as shown in Figure 10.

Figure 10. Selecting Catalog
In the IBM Bluemix Catalog, select Services in the All Categories and select IBM DB2 on Cloud, as shown in Figure 11.
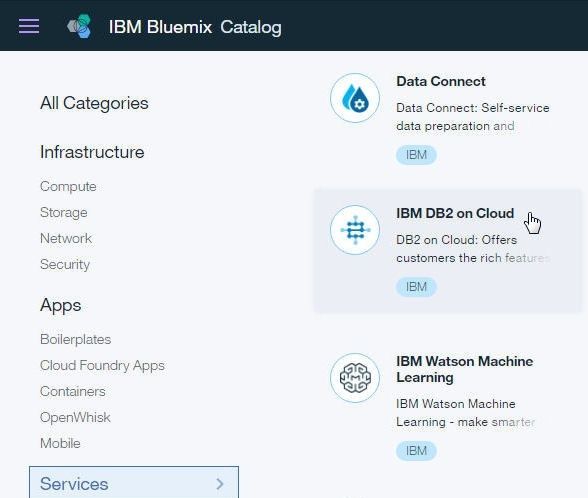
Figure 11. Selecting IBM DB2 on Cloud
Specify a Service name (IBM DB2 on Cloud-rb), Credential name, and select a Datacenter Location, and click on Create as shown in Figure 12.
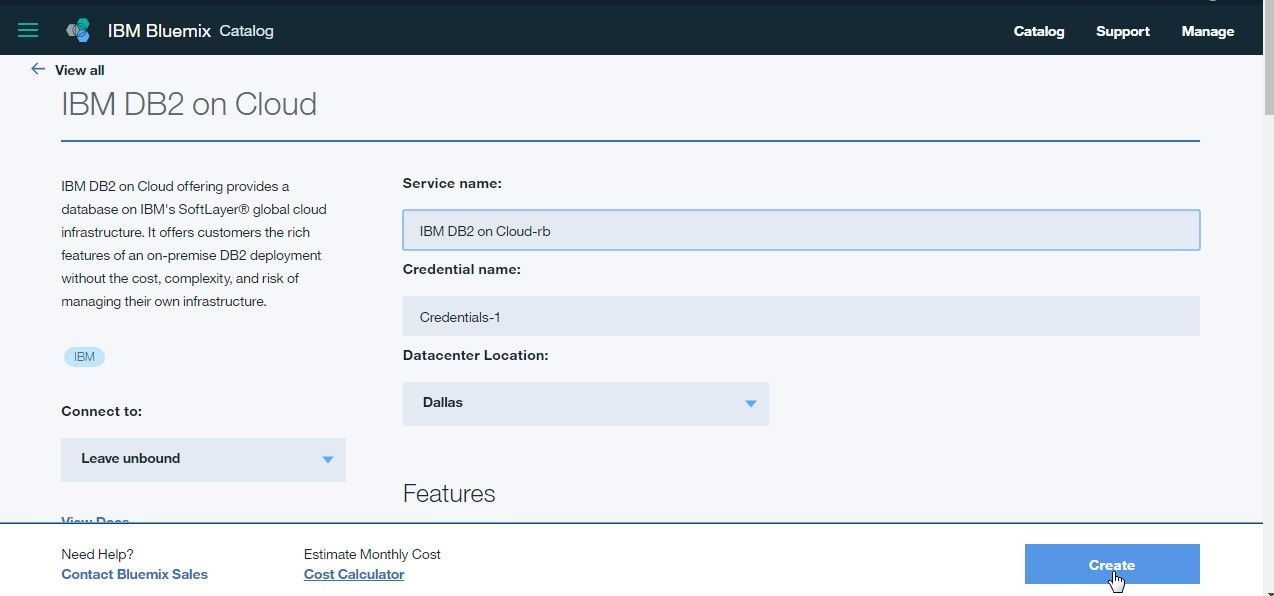
Figure 12. Creating a DB2 on Cloud Service
A Service IBM DB2 on Cloud-rb starts to get created and gets listed in the All Services table. The DB2 on Cloud service is not available while ACTIONS lists the service as “Creating Service”, as shown in Figure 13.
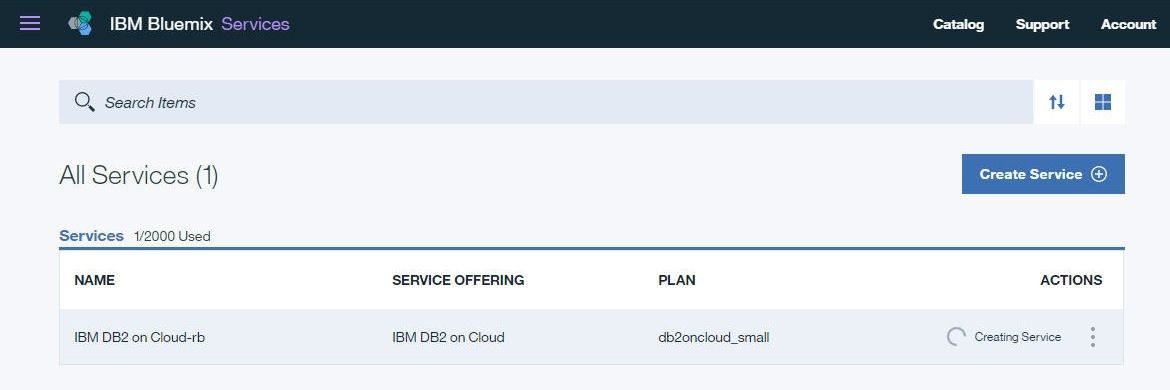
Figure 13. Creating Service
A dialog message “Service is being created” also gets displayed, as shown in Figure 14.
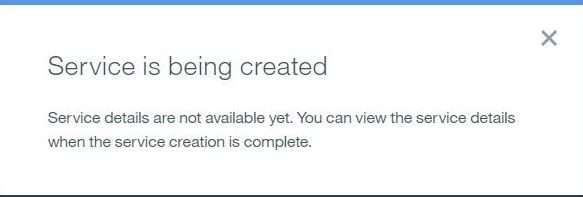
Figure 14. Service is being created
When the DB2 on Cloud-rb gets created the, “Creating service” message gets removed from the ACTIONS column, as shown in Figure 15.
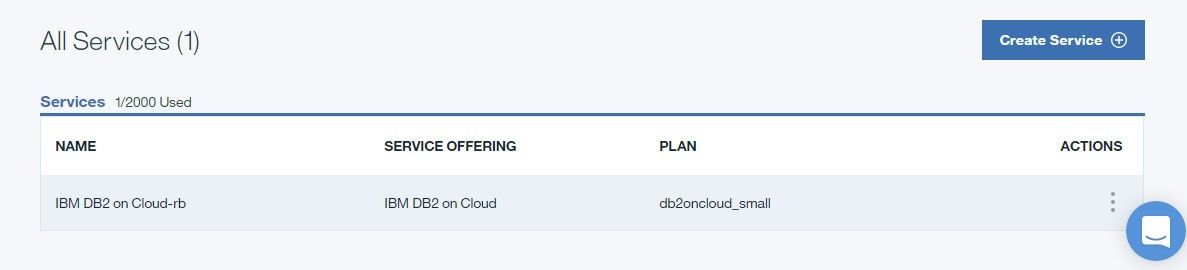
Figure 15. Service created
Creating an Application with DB2 on Cloud
Next, we shall add an app to the DB2 on Cloud service. Click on Create App as shown in Figure 16.
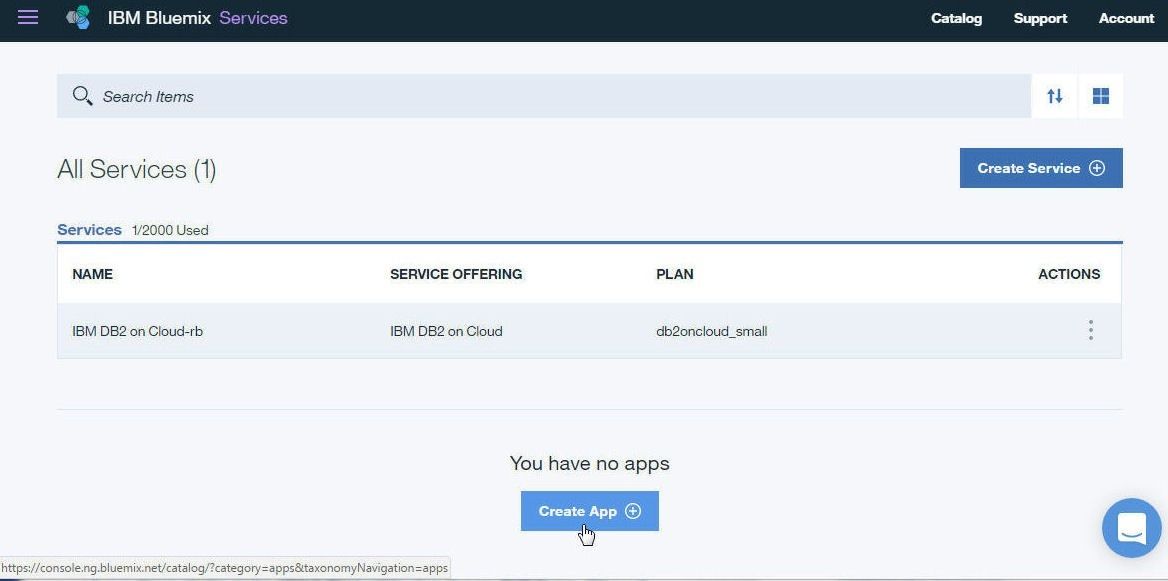
Figure 16. Create App
Select Apps>Cloud Foundry Apps>SDK for Node.js application, as shown in Figure 17. SDK for Node.js is a starter, reusable Node.js web application based on the Express framework.
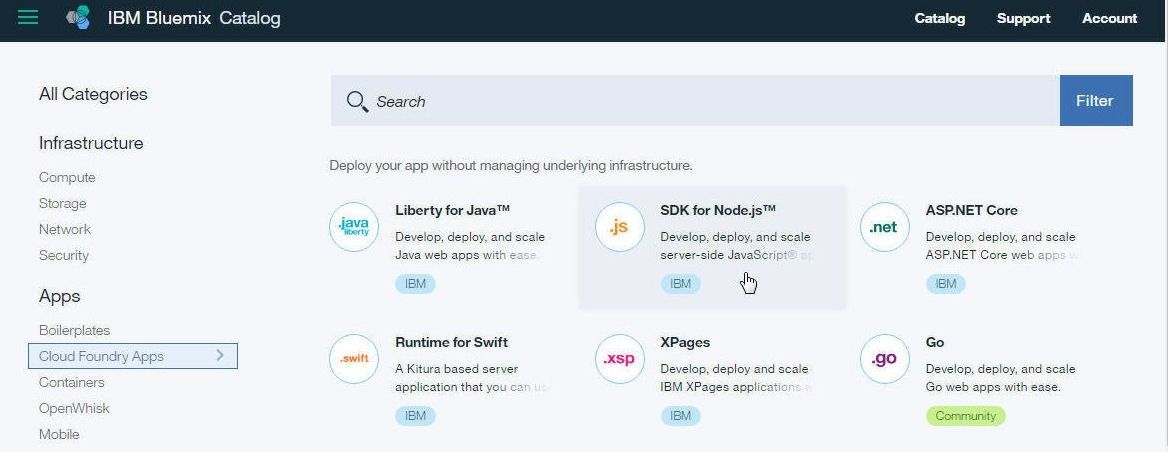
Figure 17. SDK for Node.js
Cloud Foundry is an industry-standard cloud application platform. In the Create Cloud Foundry App input form, specify an App name (NodeJS-DB2) and Host name (NodeJS-DB2), as shown in Figure 18. A default domain mybluemix.net is pre-selected. Click on Create.
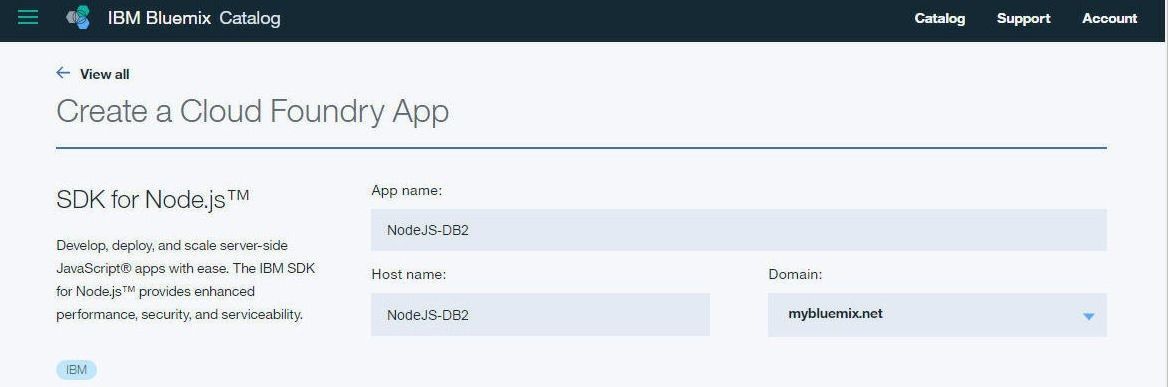
Figure 18. Create a Cloud Foundry App
The NodeJS-DB2 application begins to get created, as shown by the Status of Starting in Figure 19.
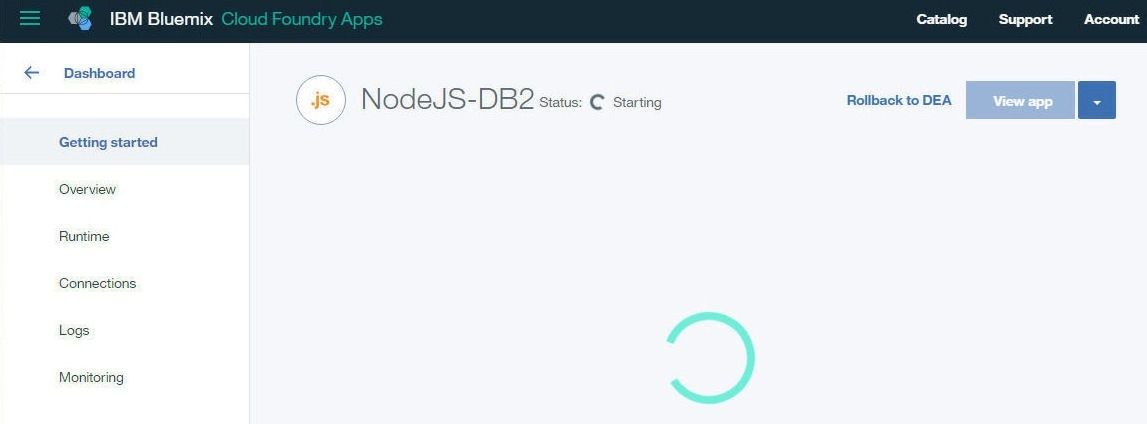
Figure 19. Starting NodeJS-DB2
When the application gets created and started, a “Running” Status should be indicated on the Dashboard, as shown in Figure 20. Click on View app to view the application.

Figure 20. NodeJS-DB2 Running
The application output gets displayed in a browser as shown in Figure 21.
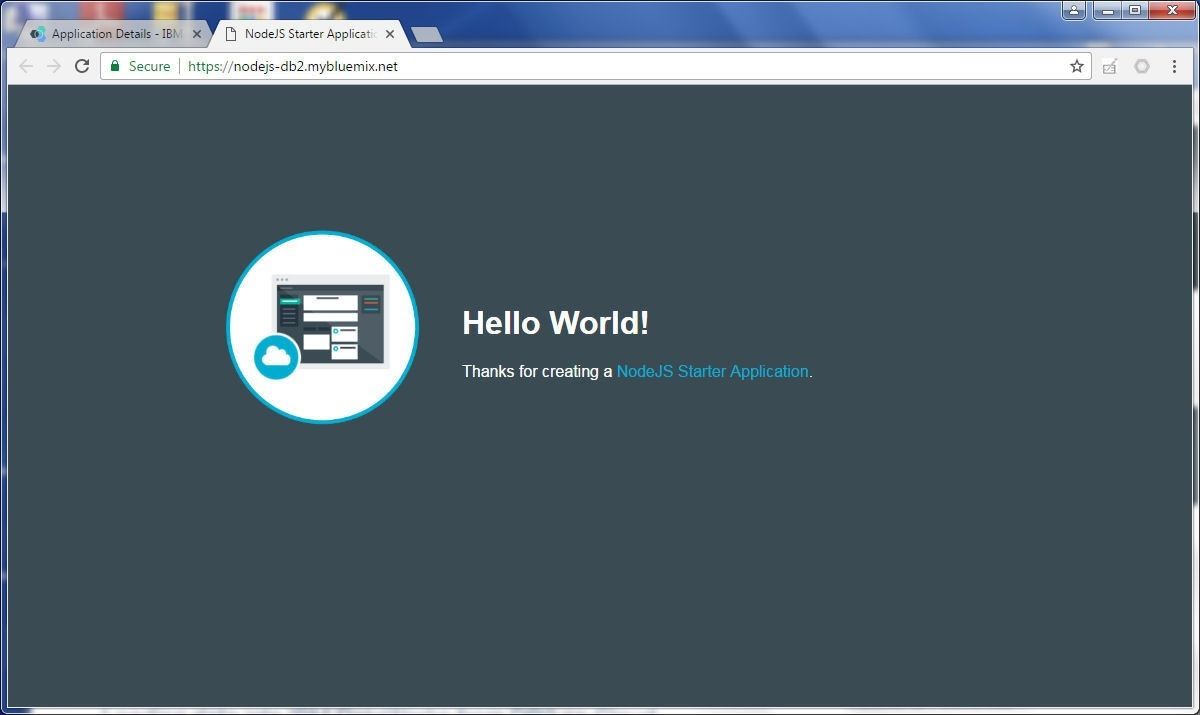
Figure 21. Hello World Application output
Modifying the Cloud Foundry Application Locally
A user may download the application code to modify the Cloud Foundry application and upload it back to DB2 on Cloud. First, a user would need to download and install the Cloud Foundry command line interface, for which a link is provided on the application page in DB2 on Cloud. Extract the downloaded cf-cli-installer_6.24.0_winx64.zip and run the .exe file extracted to install the Cloud Foundry command line interface. Next, download the application code zip file NodeJS-DB2.zip, for which a link is provided, as shown in Figure 22.
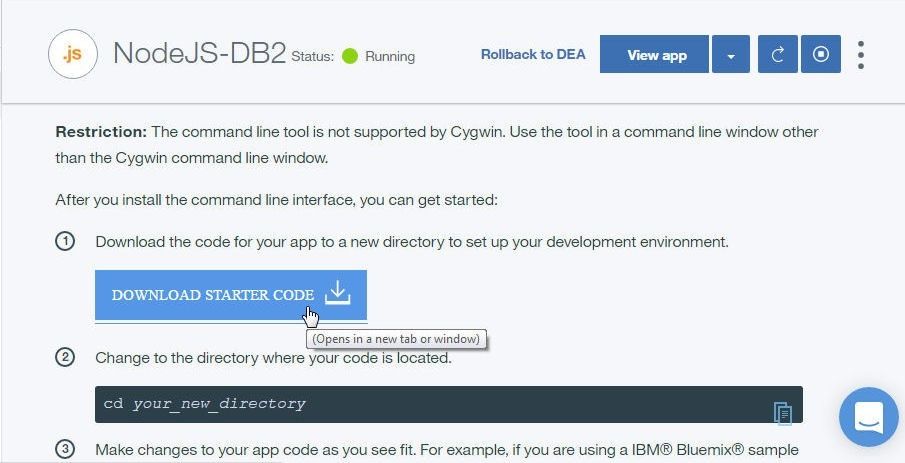
Figure 22. Downloading Starter Code
Extract the application code from the NodeJS-DB2.zip file to a directory. Subsequently, change the directory to the code directory.
C:DB2 OnCloud>cd C:DB2 OnCloudNodeJS-DB2
Modify the code. As an example, modify the message in the src/main/webapp/index.html. The manifest.yml file includes settings for application’s URL, memory allocation, and number of instances. Modify the manifest.yml to make the number of instances 3 and increase the memory parameters, as shown in Figure 23.
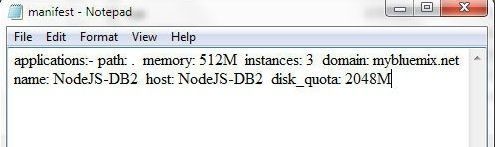
Figure 23. Modifying manifest.yml
The application may be tested locally, for which run `npm install` to install the app’s dependencies, as shown in Figure 24.

Figure 24. Running npm install
The application gets installed, as shown in Figure 25.
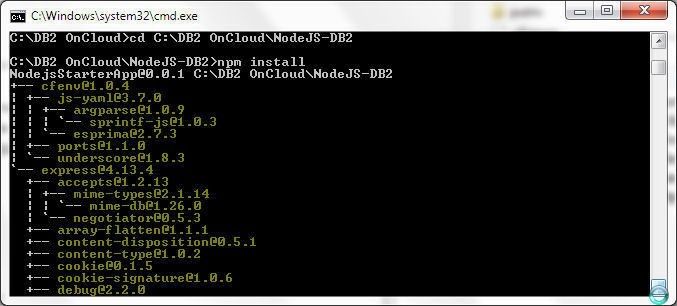
Figure 25. Create a Cloud Foundry App
Run `npm start` to start the app locally, as shown in Figure 26.
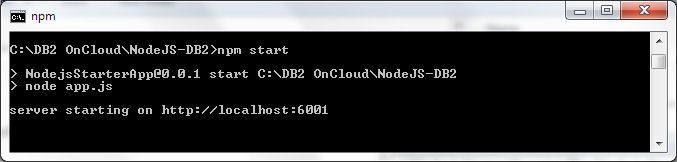
Figure 26. Create a Cloud Foundry App
Access the running app in a browser at http://localhost:6001 as shown in Figure 27.
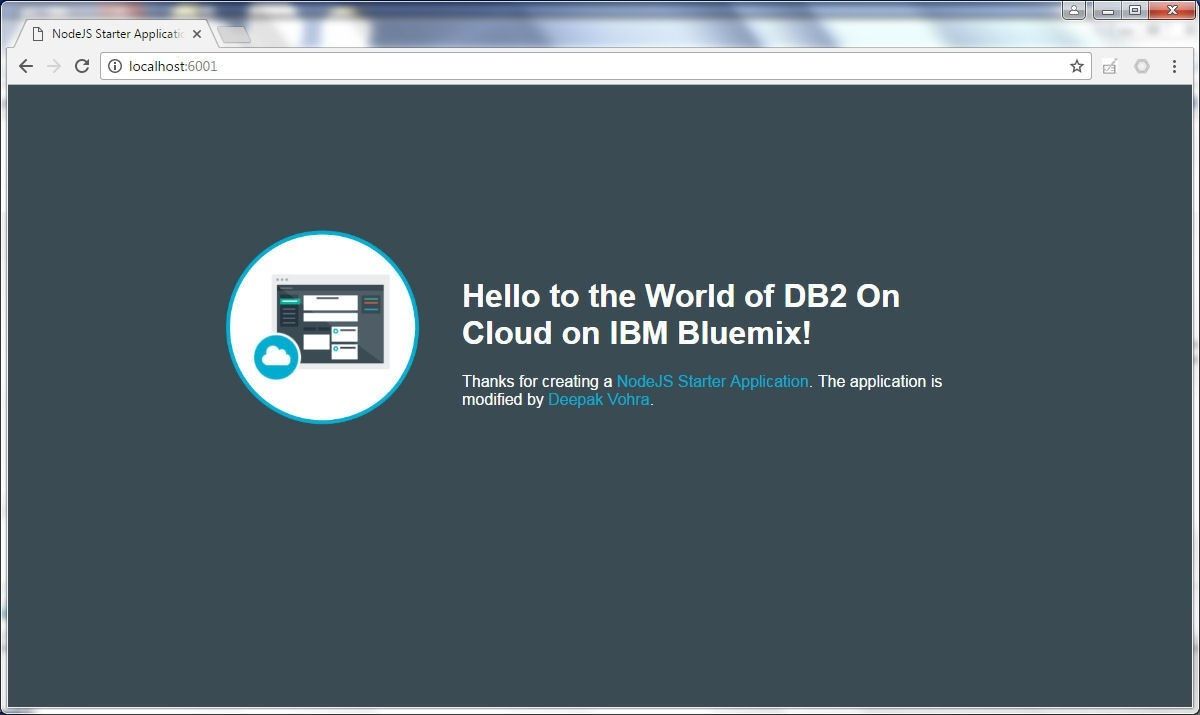
Figure 27. Modified App in Web Browser
Having tested the app locally, upload the app to DB2 on Cloud, for which first connect and log in to Bluemix with the commands listed on the application page.
C:DB2 OnCloudNodeJS-DB2>cf api https://api.ng.bluemix.net
C:DB2 OnCloudNodeJS-DB2>cf login -u dvohra10@yahoo.com -o dvohra10@yahoo.com -s dev
C:DB2 OnCloudNodeJS-DB2>cf push NodeJS-DB2
The modified application code gets uploaded to DB2 on Cloud. The application may need to be stopped and restarted, as shown in Figure 28, for the modifications to take effect.

Figure 28. Restarting NodeJS-DB2
Click on View app as shown in Figure 29 to display the modified application in a browser. The app may also be accessed via the URL https://nodejs-db2.mybluemix.net.

Figure 29. View app
Alternatively, select the app from the All Apps table, as shown in Figure 30.
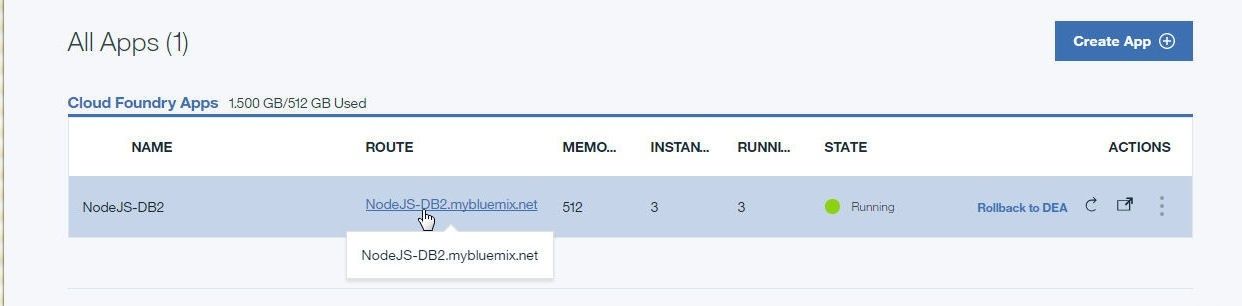
Figure 30. Create a Cloud Foundry App
The modified app gets displayed on DB2 on Cloud, as shown in Figure 31.
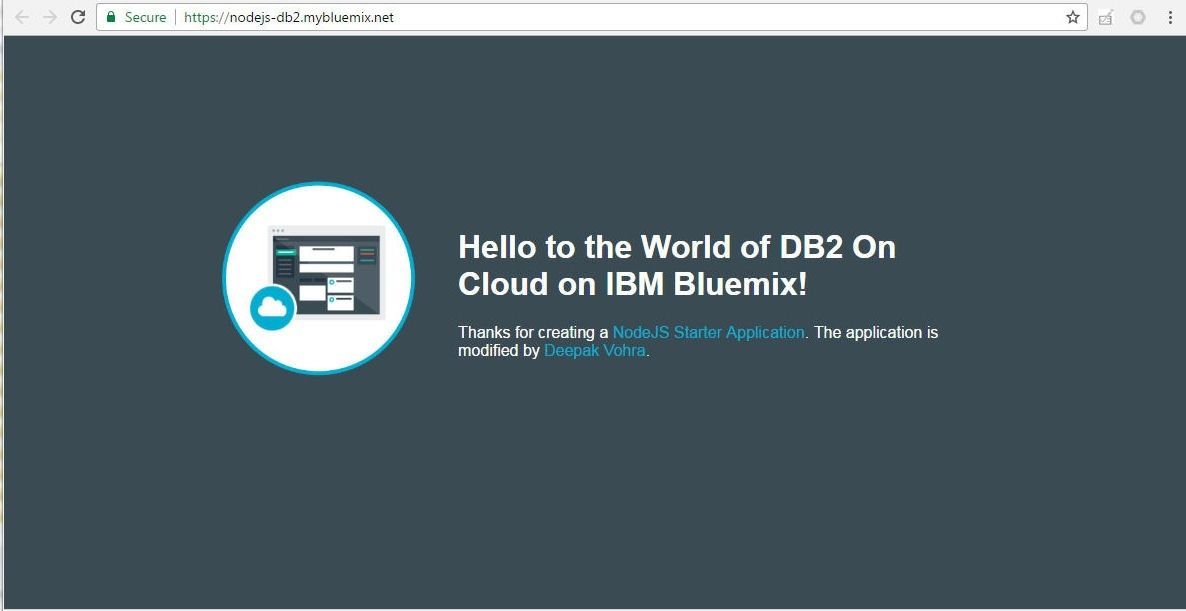
Figure 31. Modified Application
The IBM Bluemix IBM DB2 on Cloud Dashboard provides all the detail about the application. Click on Overview to display the application overview, such as the Buildpack, number of instances running, and memory per instance, and total GB allocated. Scroll for additional application info such as Activity feed and Continuous delivery setting. The Runtime tab provides additional runtime information, including the memory and instances info. Select the Environment variables tab for the environment variables used. Scroll for User defined environment variables. The Runtime tab also lists the Instances details, including their status, CPU usage, memory usage and disk usage, as shown in Figure 32.
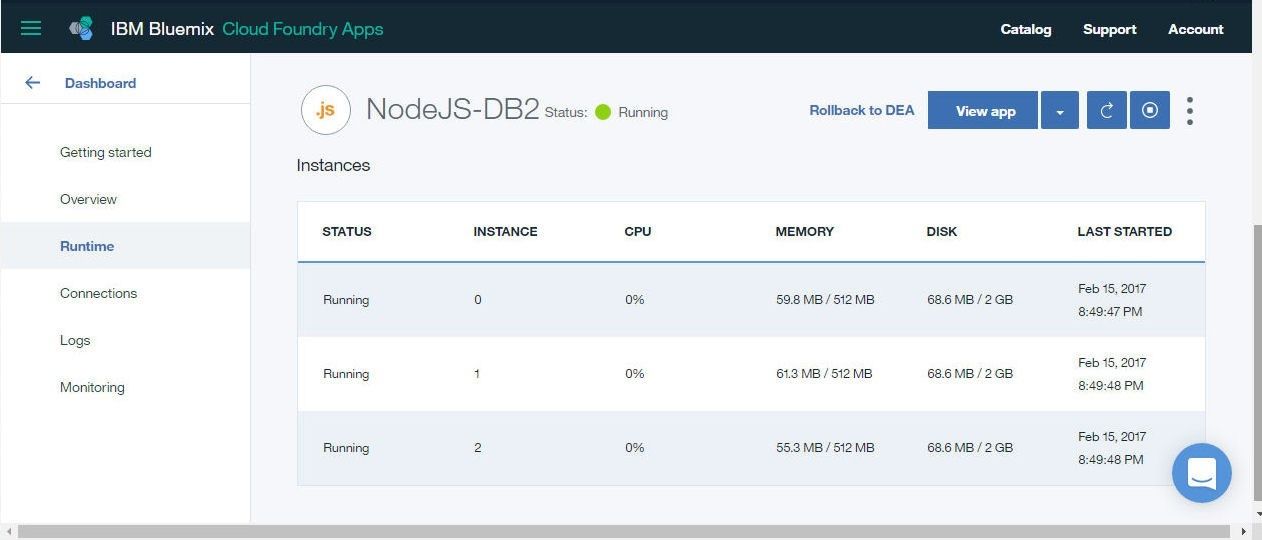
Figure 32. Instances
The Logs selection lists the application logs. Click on Advance view for an advanced view of logs, as shown in Figure 33.
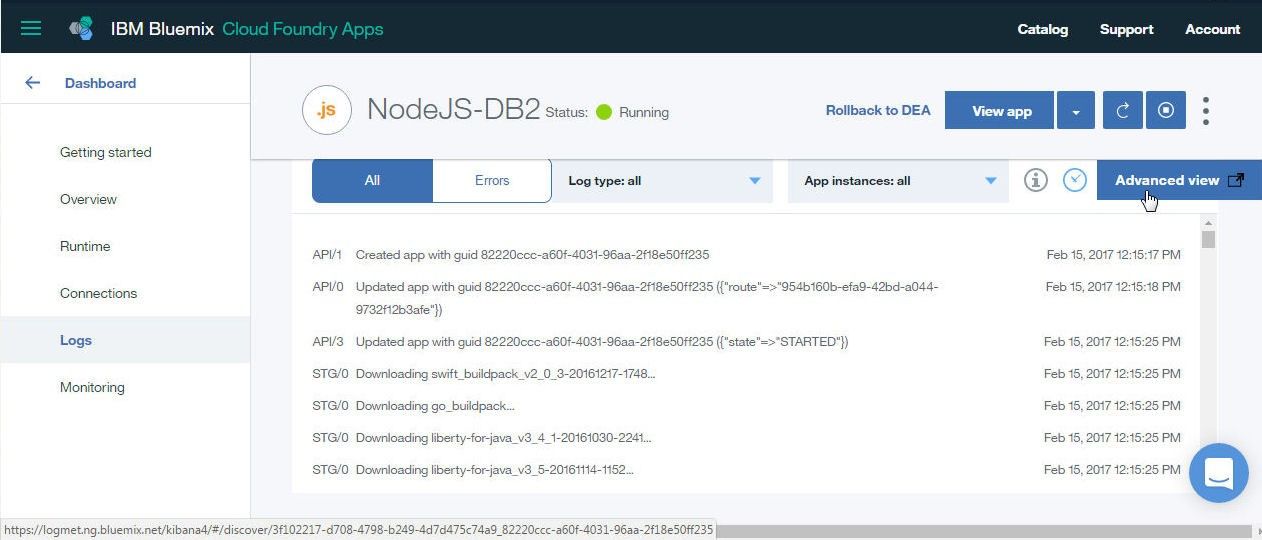
Figure 33. Application Logs
The application logs get displayed in Kibana, as shown in Figure 34.
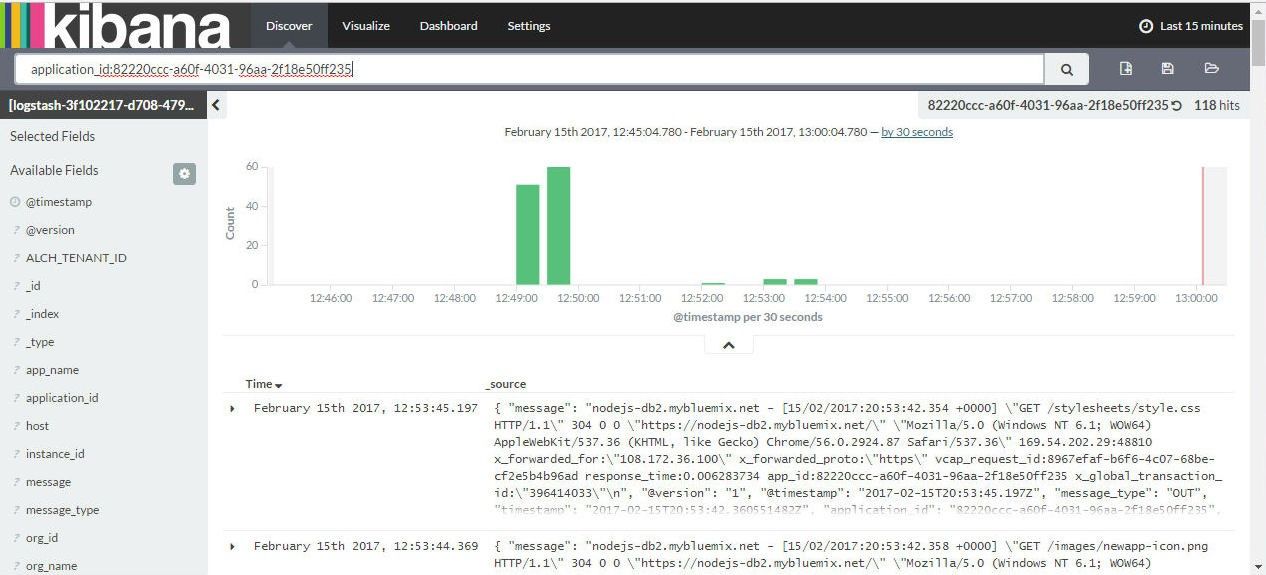
Figure 34. Kibana Dashboard
Select the Monitoring tab to display the availability monitoring. Application issues may be found with monitoring that fits into a team’s DevOps processes. The information about the availability monitoring information itself is obtained using a separate service called “availability-monitoring-auto”, which is listed in the All Services.
Collaboration in a Bluemix Account
As discussed earlier, Bluemix provides several collaboration features. An Organization is allocated a route on the Internet called a domain. To manage the domains select the drop-down button for the NodeJS-DB2 app as shown in Figure 35 and click on Manage domains.
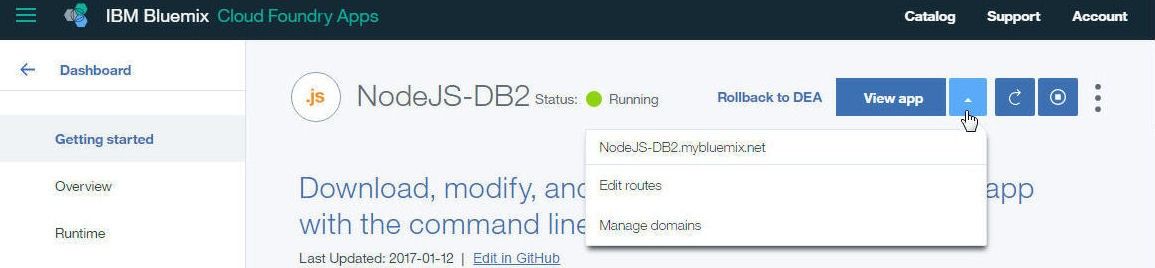
Figure 35. Manage domains
The domains for the organization get listed. By default, the System Domain mybluemix.net is created. Custom domains may be added with the ADD DOMAIN button, shown in Figure 36.
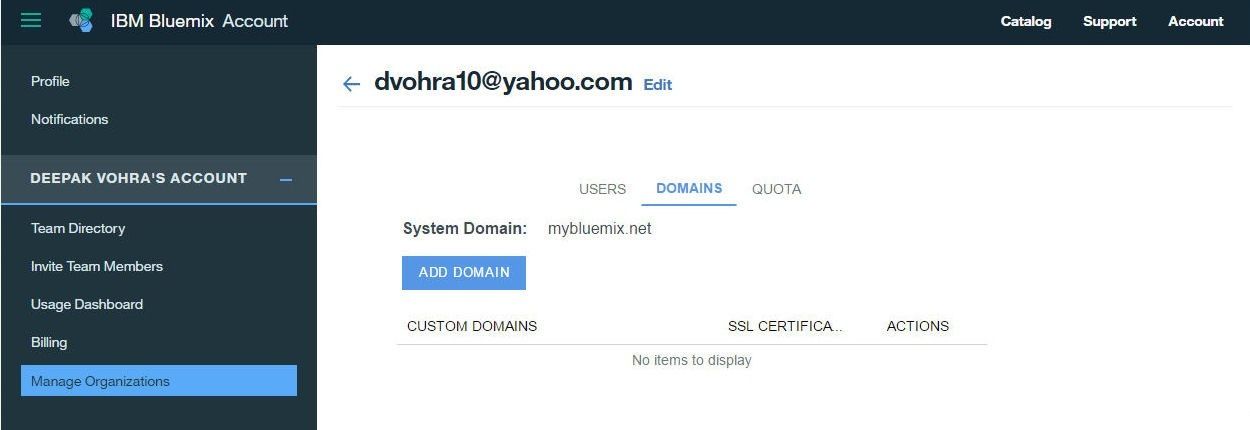
Figure 36. ADD DOMAIN
The QUOTA tab lists the Quota for Cloud Foundry and Containers apps, as shown in Figure 37.

Figure 37. QUOTA>Cloud Foundry
The Users tab lists the users or team members in an Organization, as shown in Figure 38.
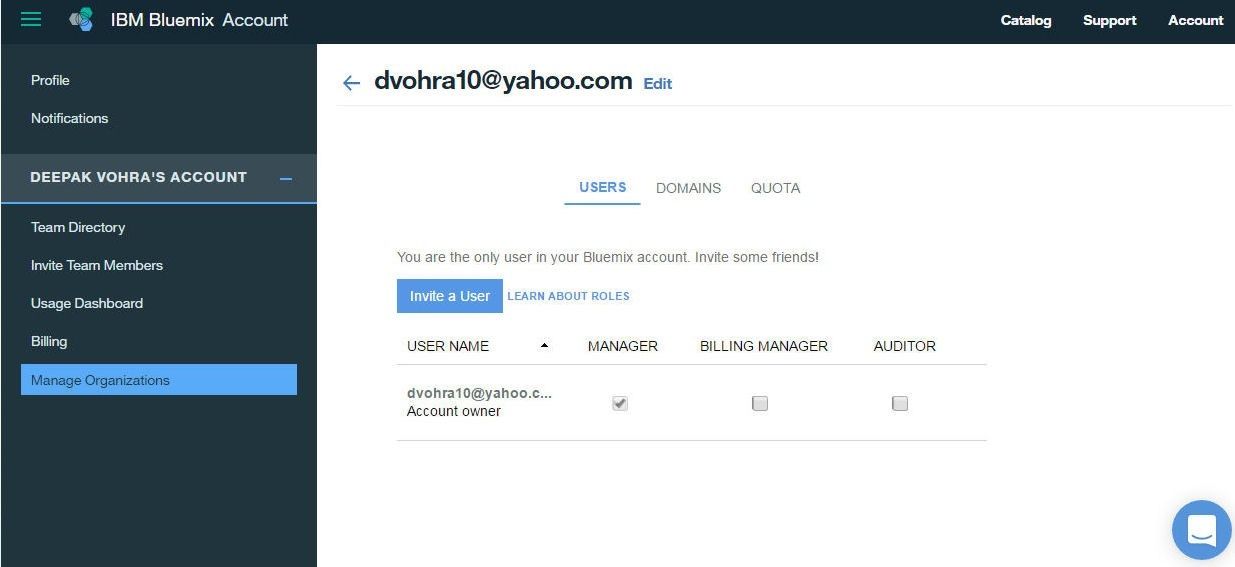
Figure 38. QUOTA>Cloud Foundry
The Usage Dashboard displays usage information by the different apps by All Organizations or for a specific Organization, as shown in Figure 39.
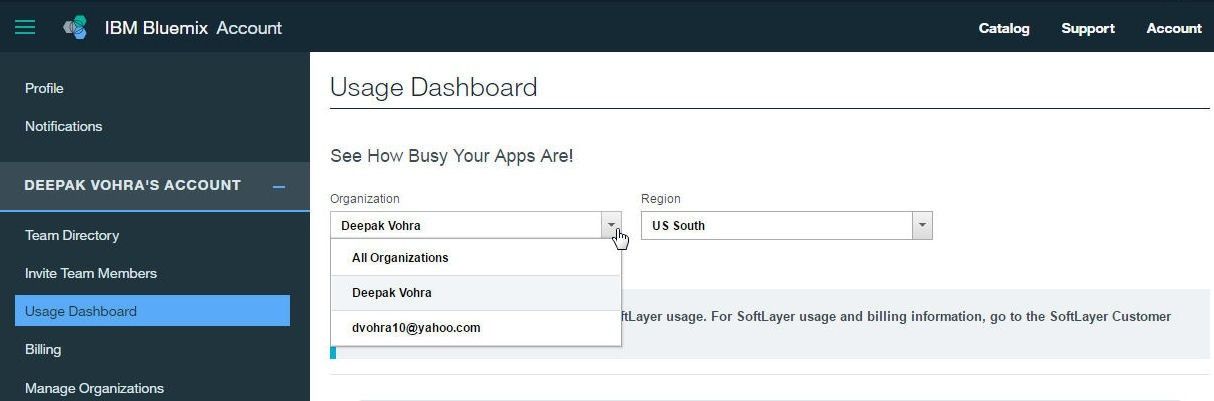
Figure 39. Usage Dashboard
Inviting a User
A user and a team member are the same and the terms are used interchangeably. An invitation to a new user to join an Organization may be sent from the Users tab in the Manage Organizations node. Click on Invite a User to send an invitation, as shown in Figure 40.
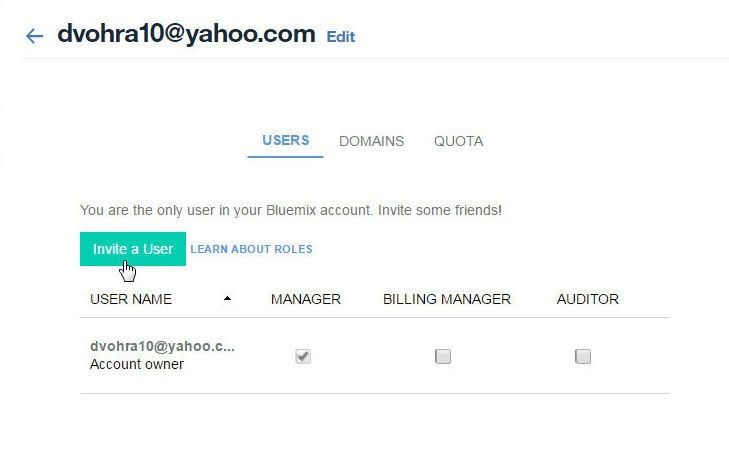
Figure 40. Invite a User
A valid email address is required to invite a user. One or more roles in an Organization or a Space must be assigned to invite users. Click on INVITE to invite a user, as shown in Figure 41.
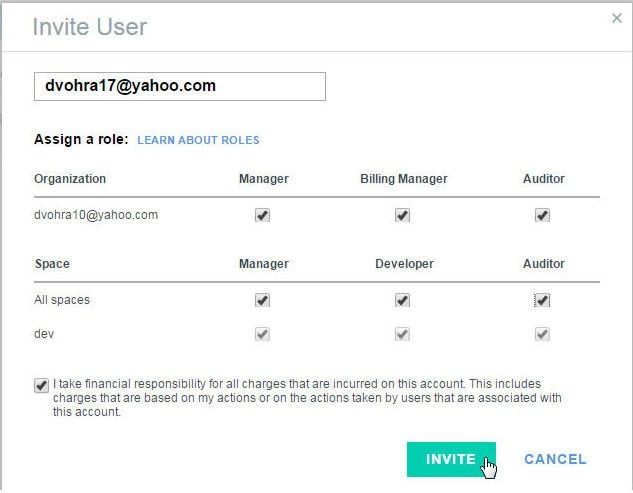
Figure 41. INVITE
A confirmation dialog message gets displayed, as shown in Figure 42.
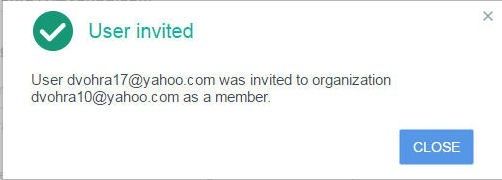
Figure 42. User invited
The user invited must accept the invitation before being added to an Organization.
Adding an Organization
Only a Bluemix Account Owner or a team member with Manager user role permission in an Organization may add a new Organization and, once added, an Organization cannot be deleted. Select Manage Organizations to add a new Organization, as shown in Figure 43.

Figure 43. Manage Organizations
To add a new Organization click on Add new Org as shown in Figure 44.
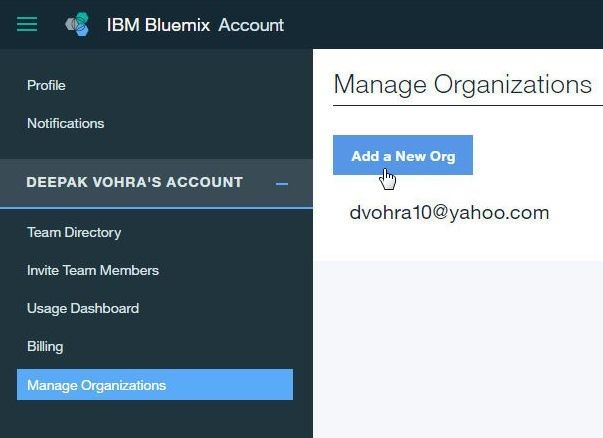
Figure 44. Add a New Org
In the Add a New Org specify an Organization name and click on Add as shown in Figure 45.
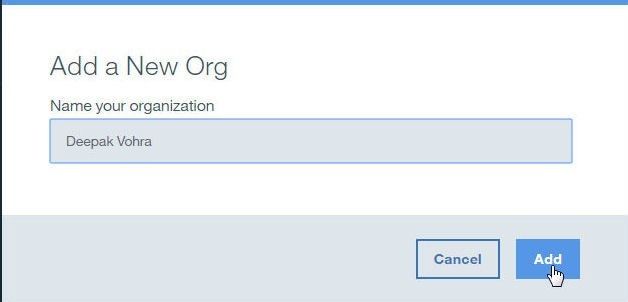
Figure 45. Adding a new Organization
A new Organization gets added, as shown in the Confirmation message in Figure 46.

Figure 46. New Organization Added
The new Organization added gets listed in Manage Organizations, as shown in Figure 47.
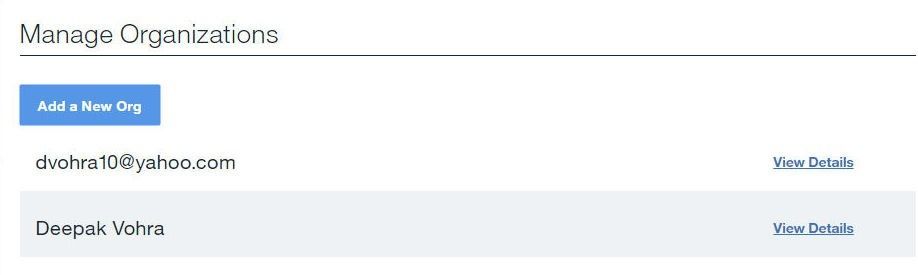
Figure 47. Manage Organizations
Click on View Details to view the details of an Organization and click on Close Details to close, as shown in Figure 48. An Organization detail includes the Organization itself with a link (Edit Org) to edit the Organization; for instance, to add or remove users and add or remove domains. Spaces in each region associated with an Organization are also listed with the provision to edit a Space with the Edit Space link. New Spaces may be added with the Add Space link.
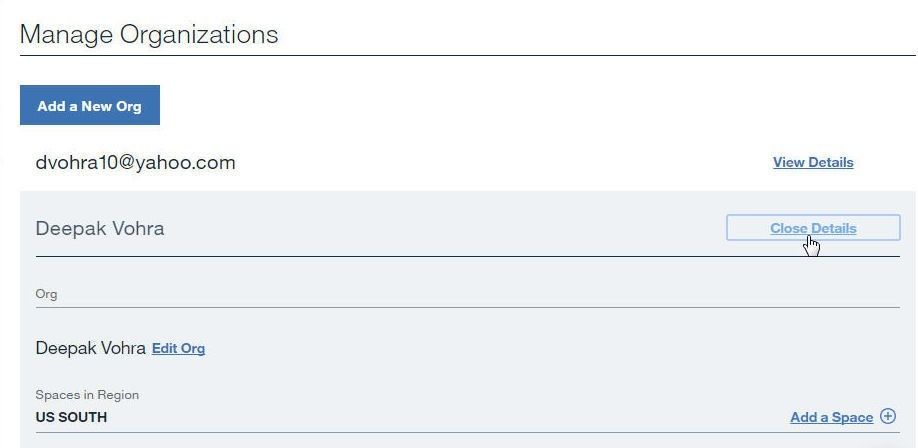
Figure 48. Organization Details
Adding Team Members
The Team Directory lists all the team members in a Bluemix account. The Account Owner is listed in the Team Directory as “Owner”, as shown in Figure 49.
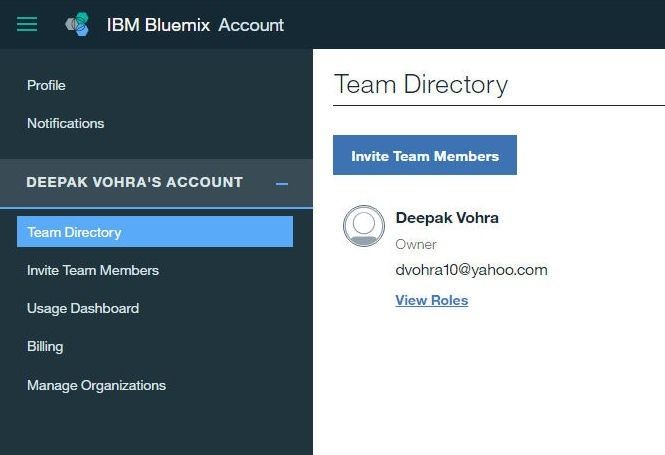
Figure 49. Team Directory
To display the roles associated with a team member, click on View Roles. In our example, the team member is listed as the Account Owner with the Manager user role in the dvohra10@yahoo.com Organization, as shown in Figure 50. The Spaces and the user roles associated with the Spaces in an Organization may be displayed with the View Space link.
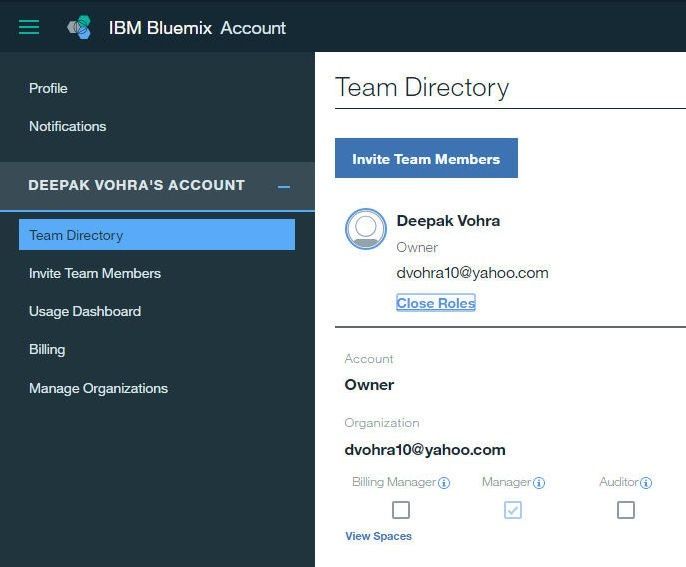
Figure 50. View Details
To invite team member/s click on Invite Team Members as shown in Figure 51.
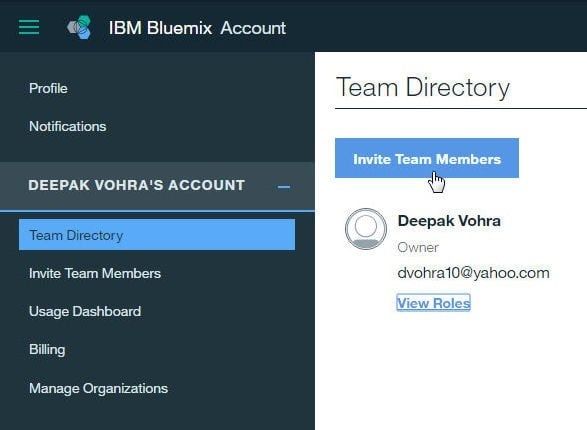
Figure 51. Invite Team Members
Team members may also be invited from the Account drop down selection with Invite Team Members. In the Invite Team Members, page select an Organization for the new team member/s, as shown in Figure 52. Click on Next.
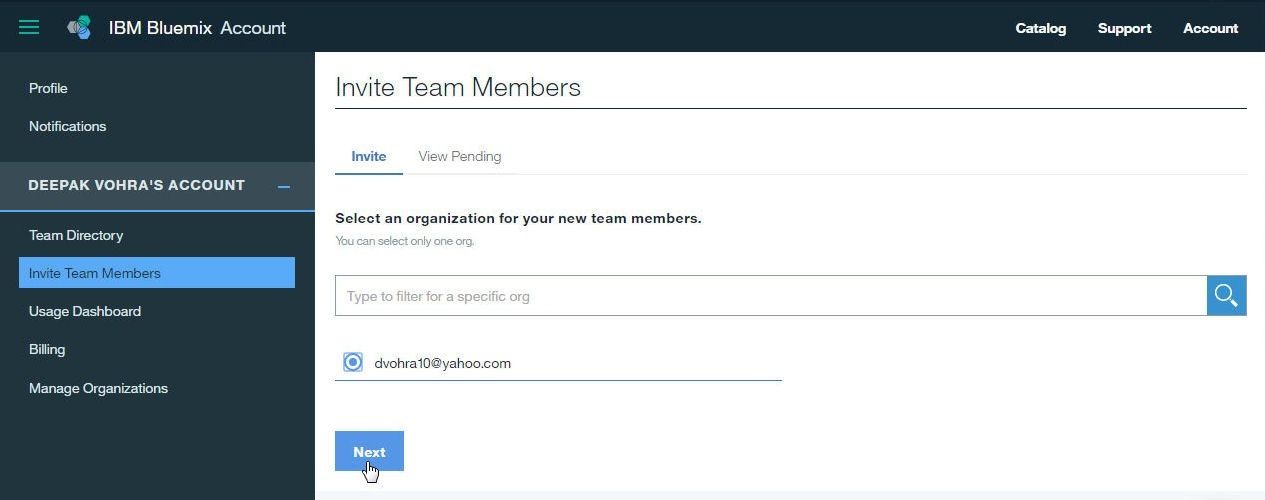
Figure 52. Inviting a New Team Member
Select one or more Spaces for the new team member/s, as shown in Figure 53. Click on Next.
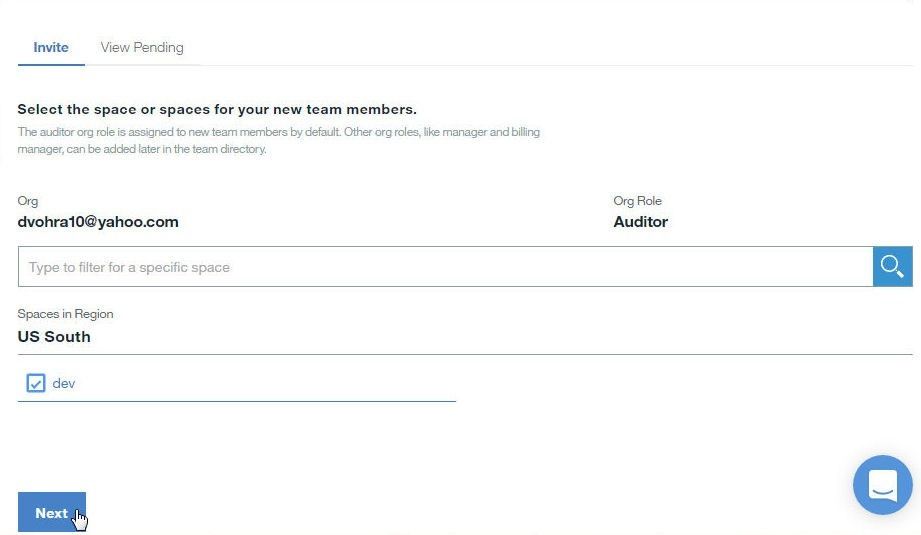
Figure 53. Inviting a New Team Member
As shown in Figure 54, a new team member has the Auditor role, which has read-only privileges, assigned in an Organization and this role is not modifiable to a different role when adding a new team member. Subsequent to adding a new team member, its role in an Organization may be modified by selecting Manage Organizations and Edit Org for the Organization. A new team member may be assigned only the Auditor role or the Developer role, which provides write access, in a Space when adding a new Space. Subsequently the team member roles in a Space may be modified as required. Select the checkbox, specify an email to send the new team member an invitation, and click on Send. The Organization Owner is already a team member by default and may be assigned the roles discussed earlier, the Manager role in the Organization being mandatory for an Owner. Because the Owner is associated with the mandatory Manager role, the individual designated as Owner may want to be added again as a new team member to function in another capacity, as a team member without the mandatory Manager role. As this fact implies, the Owner may be sent an invitation to be added as a new team member and, furthermore, the invitation may be sent to the same email address as was registered by Owner when creating the Bluemix account, as shown in Figure 54.
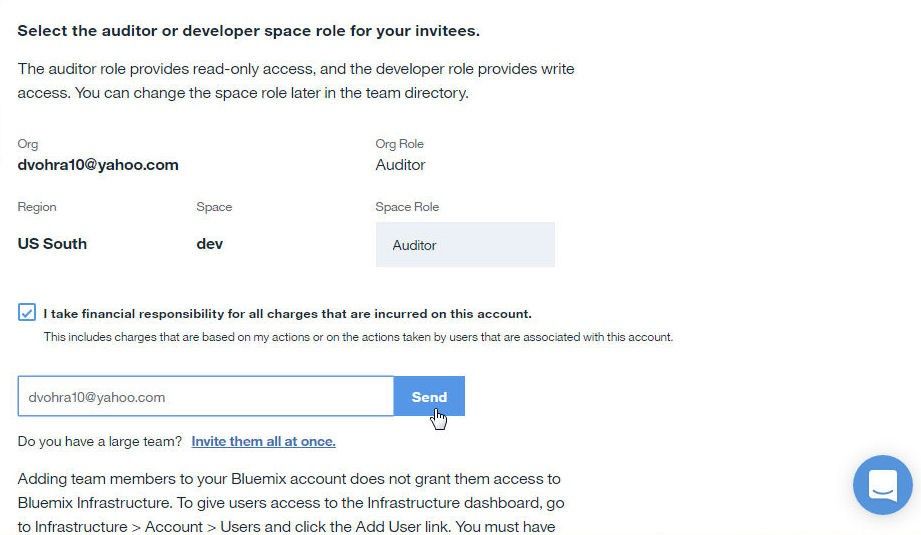
Figure 54. Sending Invitation to a New Team Member
An invitation gets sent, as shown in Figure 55.
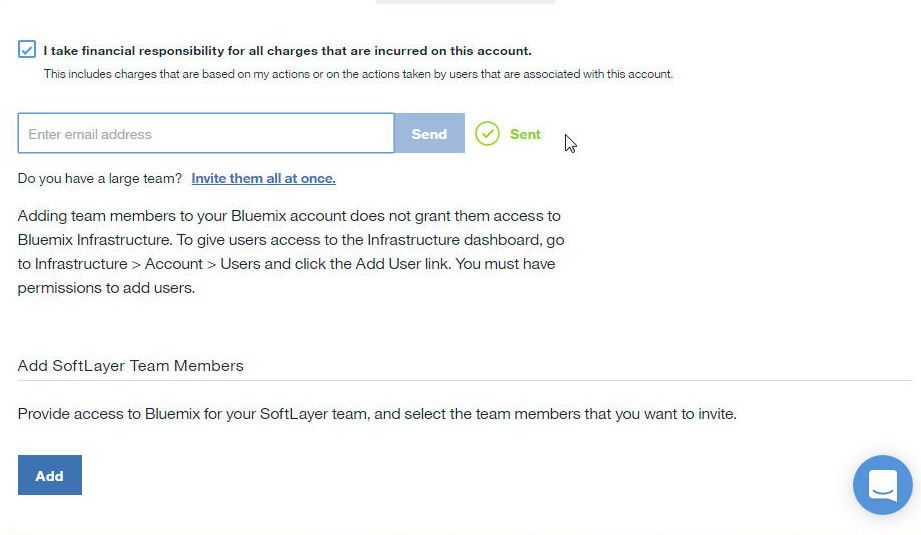
Figure 55. Invitation Sent
Multiple team members may be invited with the “invite them all at once” link. Specify multiple email addresses separated by a “,” and click on Next as shown in Figure 56.
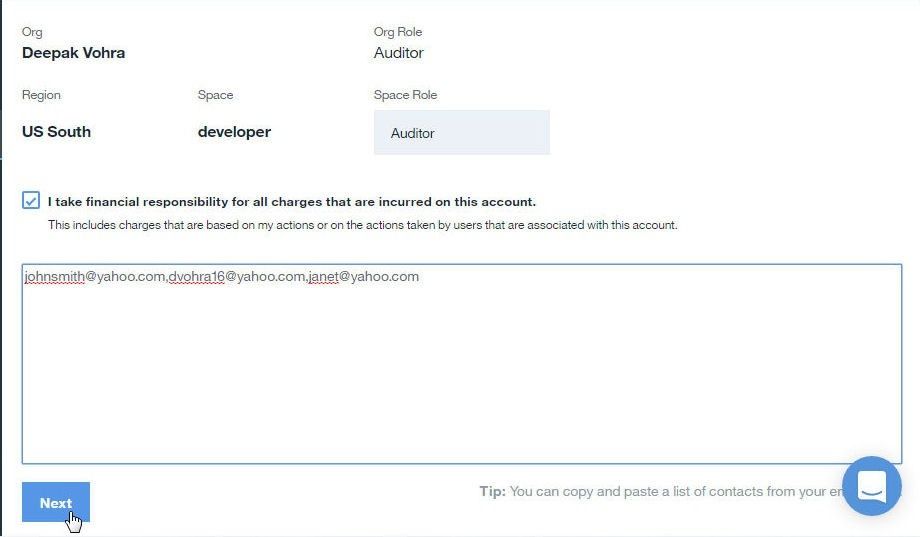
Figure 56. Specifying Multiple Emails to send invitation to
Click on Send to send invitations, as shown in Figure 57.
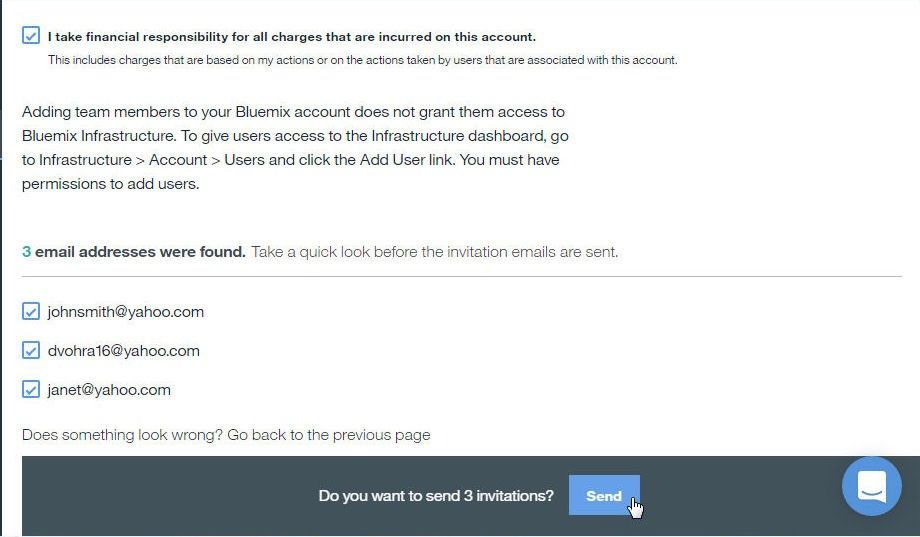
Figure 57. Sending Invitation to a New Team Member
The new team member gets listed in the Team Directory but the status is Pending, as shown in Figure 58, until the team member accepts the invitation.
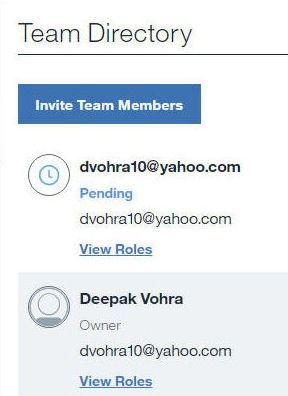
Figure 58. New Team Member with Pending Status
Other than re-adding the Owner as a team member to function in a limited capacity, other new team members cannot be added as new team members more than once because all team member roles are editable (add/remove) as required. A new team member who is not also the Owner is shown in Figure 59.
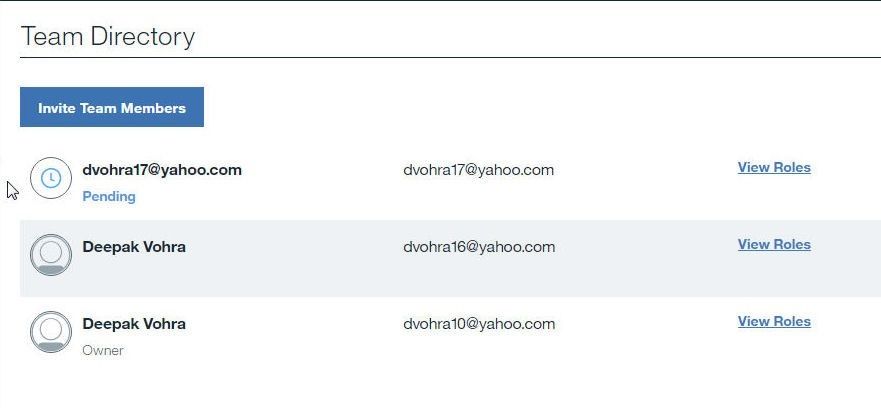
Figure 59. New Team Member with Pending Status
An invited team member has to click on the Join Org link in an email message sent to the team member to be added to the Organization. The Pending status gets removed when a new team member accepts an invitation to join, as shown in Figure 60.
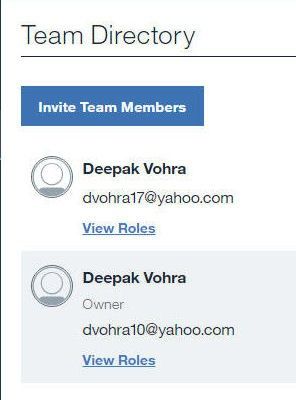
Figure 60. Pending Status Removed
The team member’s user roles may be listed with View Roles, as shown in Figure 61.
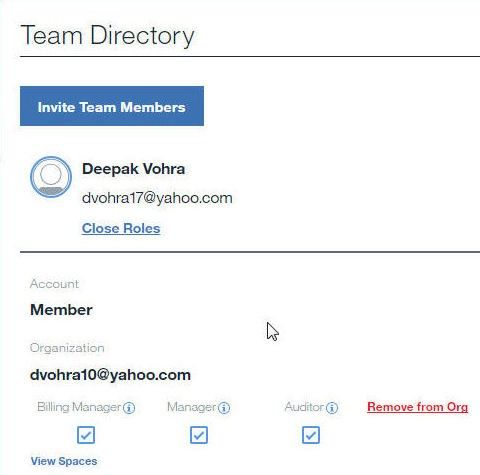
Figure 61. User Roles
The Invite Team Members window lists the invitation status of team members in three categories: Pending, Accepted, and All. The Accepted view lists the team members who have accepted the invitation to join an organization, as shown in Figure 62. The All view lists all team members including pending and accepted.
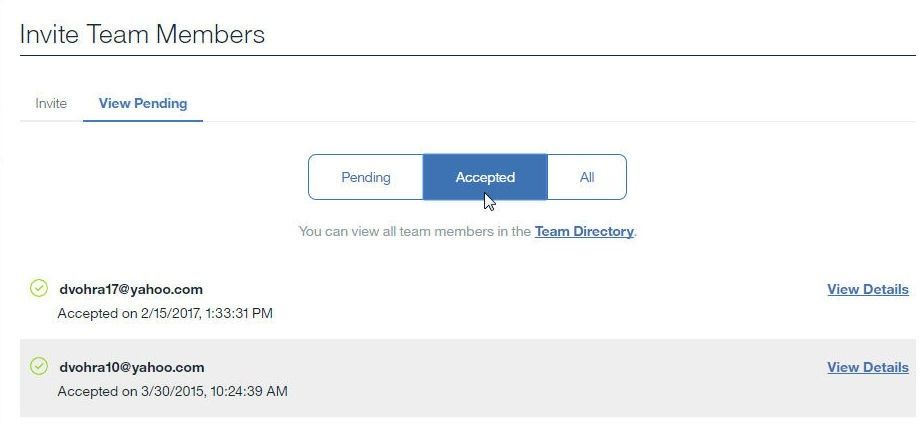
Figure 62. Pending, Accepted and All Invitation Statuses
Adding a Space
A new Space may be added to an Organization from the View Details link for the Organization in Manage Organizations. Click on Add a Space to add a new Space as shown in Figure 63.
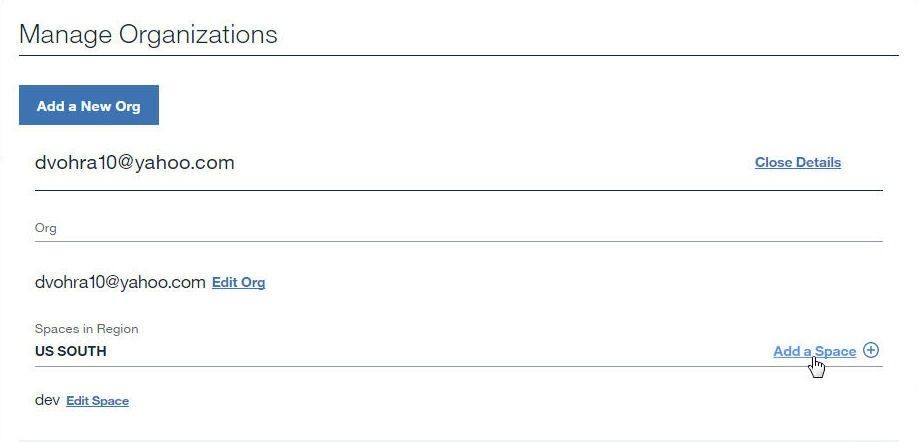
Figure 63. Add a Space
Specify a Space name and select a region to which to add the Space. Click on Add as shown in Figure 64.

Figure 64. Add a New Space
A new Space gets added, as indicated by the confirmation dialog in Figure 65.

Figure 65. Confirmation message for new Space
The new Space gets listed in the Organization to which it is added, as shown in Figure 66.
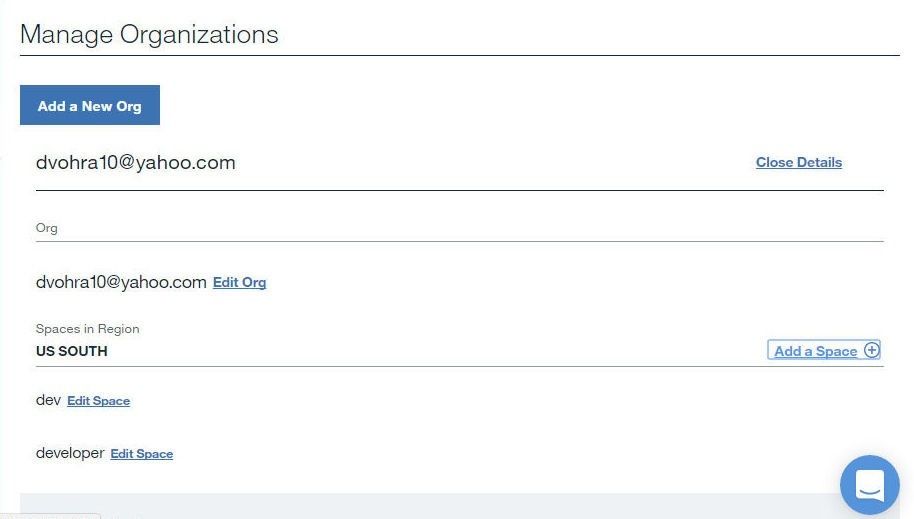
Figure 66. New Space Added
Team members are not assigned user roles in a new Space. To assign user roles to team members in a new Space, select the team member in Team Directory and select the Spaces for the team member with View Spaces, as shown in Figure 67. Select the user roles to add for the Space.
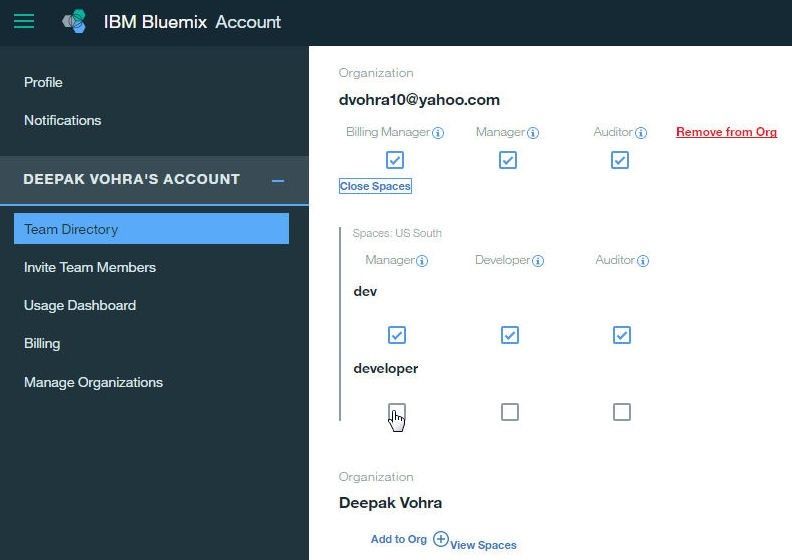
Figure 67. Assigning user roles to team members in a new Space
A Space may be edited or deleted with the Edit Space link. Click on Save as shown in Figure 68. User roles for the Space get assigned to the team member.
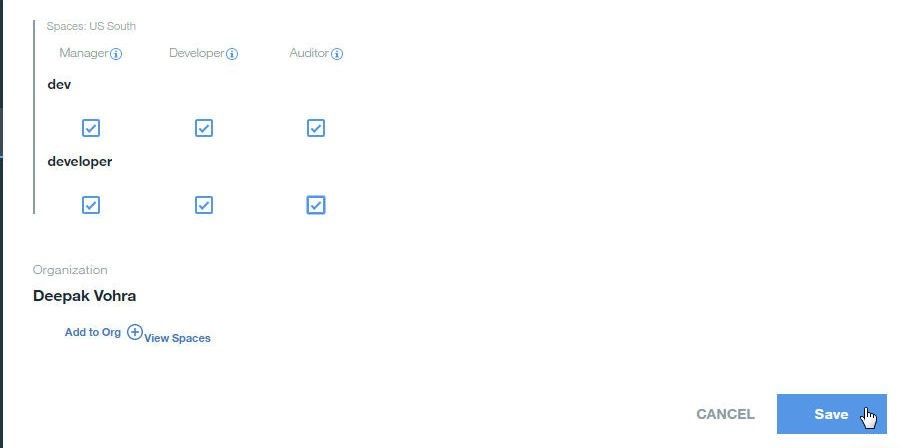
Figure 68. Saving Space Assignments to a User Role
A new Space may also be added from the account drop-down form by selecting an Organization, as shown in Figure 69, and clicking on the Create a space link.
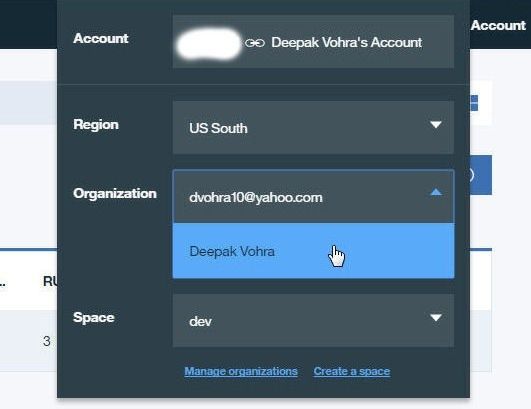
Figure 69. Selecting an Organization to add a Space to
As before, select a region, specify a Space name, and click on Create, as shown in Figure 70.
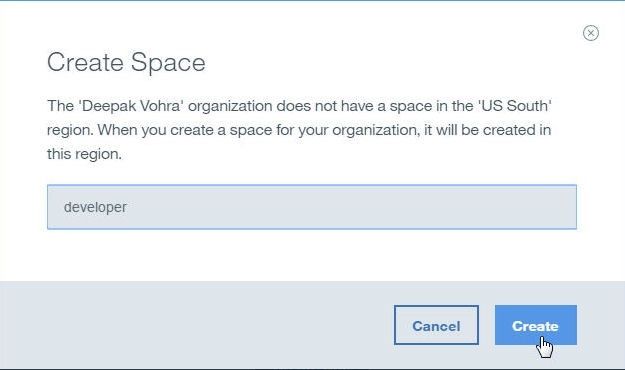
Figure 70. Create Space
The new Space created may be selected in the same drop-down form, as shown in Figure 71.
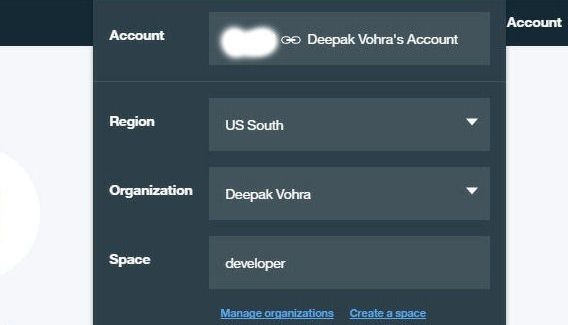
Figure 71. Selecting the new Space
Creating another Application as a different User
You create a new application in an Organization>Space. A team member may add an application to multiple Organization>Spaces. As an example, create a Ruby application in the developer Space as shown in Figure 72.
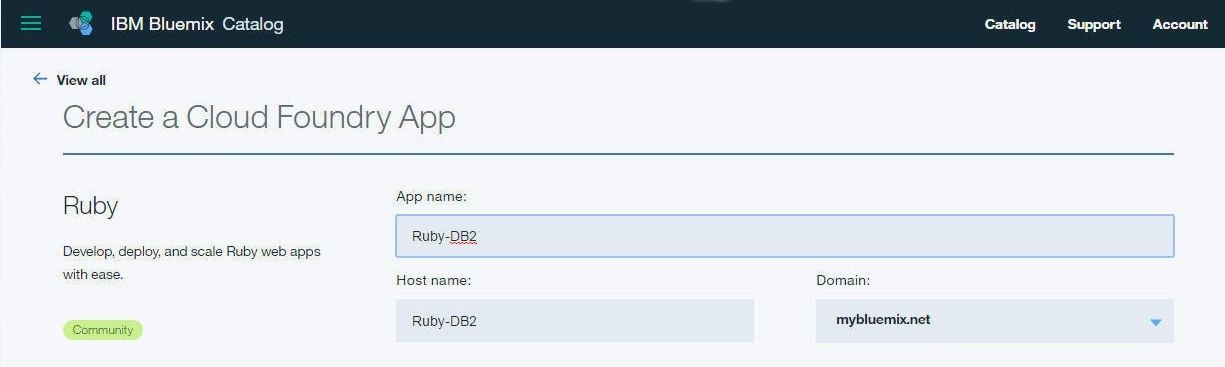
Figure 72. Creating an Application in developer Space
Click on View app to view the app as shown in Figure 73.

Figure 73. View app
The application gets displayed in a browser, as shown in Figure 74.

Figure 74. Ruby-DB2 App in a Browser
In this article we discussed the collaboration features in Bluemix that can be used by a DB2 on Cloud service.
Start the discussion at forums.toadworld.com