By Deepak Vohra
Most applications store their related data in a relational database such as the Oracle Database, and indexing Oracle Database data from multiple database users or tables is a commonly used collaborative data preparation task. While the Oracle Database data may be accessed with a Oracle Database utility such as SQL*Plus using SQL statements such as the SELECT statement, the Apache Solr search engine provides a search platform for efficient full-text search and indexing. For the Oracle Database data to be used with Solr the database data has to be imported into Solr. The DataImportHandler is a configuration-based Solr utility to import and index data from a relational database such as Oracle Database into Solr. Solr documents may be built by aggregating data from multiple columns and tables. DataImportHandler supports full and delta (partial) imports. In this article we shall import and index Oracle Database data into Apache Solr. Subsequently the data imported into Solr may be queried using Solr Query parser. This article has the following sections:
- Setting the Environment
- Starting Apache Solr Server
- Creating a Solr Core
- Creating Oracle Database Table
- Configuring the Solr Schema
- Configuring the DataSource
- Configuring the Oracle Database DataSource in Solr
- Configuring the Request Handler
- Adding Jars to Solr Server Classpath
- Configuring AutoCommit
- Restarting Solr Server
- Running the Data Import in Solr
- Querying Imported Data
Setting the Environment
We need to download and install the following software:
- Oracle Database 11g or 12c from http://www.oracle.com/technetwork/database/enterprise-edition/downloads/index-092322.html
- Apache Solr from http://lucene.apache.org/solr/downloads.html
- Java 7 from http://www.oracle.com/technetwork/java/javase/downloads/jre7-downloads-1880261.html
We have used Oracle Linux 6.6 OS in this article. Download the solr-5.3.1.tgz file for the Linux OS. Extract the solr-5.3.1.tgz file to a directory, for example /solr, which has been used previously in other articles as well. If the /solr directory does not exist create the directory.
mkdir /solr
chmod 777 /solr
cd /solr

wget http://apache.mirror.vexxhost.com/lucene/solr/5.3.1/solr-5.3.1.tgz
tar -xvf solr-5.3.1.tgz
The /solr/solr-5.3.1/server/solr/configsets/ directory contains different example instances of the Jetty servlet container used to run Solr using an example configuration. We shall use the example instance in the /solr/solr-5.3.1/server/solr/configsets/basic_configs directory. Set the environment variables for Apache Solr, Java and Oracle Database in the bash shell file.
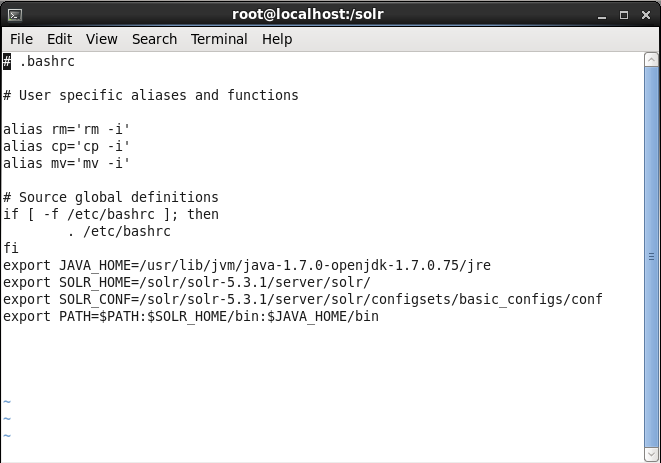
>vi ~/.bashrc
export JAVA_HOME=/usr/lib/jvm/java-1.7.0-openjdk-1.7.0.75/jre
export SOLR_HOME=/solr/solr-5.3.1/server/solr/
export SOLR_CONF=/solr/solr-5.3.1/server/solr/configsets/basic_configs/conf
export PATH=$PATH:$SOLR_HOME/bin:$JAVA_HOME/bin
The bash shell script is shown in Figure 1.
Starting Apache Solr Server
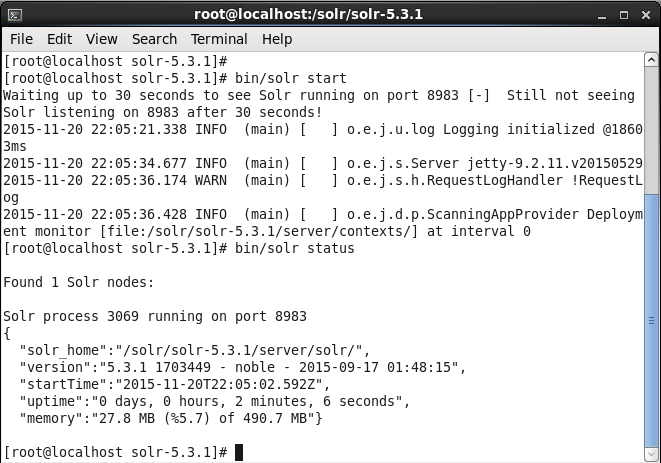
To start Solr server run the following command from the /solr/solr-5.3.1 directory.
bin/solr start
The Solr Jetty server gets started. Subsequently run the following command to find the status of the Solr server.
bin/solr status
As the output in Figure 2 indicates, an instance of Solr server is running on port 8983. The SOLR_HOME directory is output as /solr/solr-5.3.1/server/solr/.
Creating a Solr Core
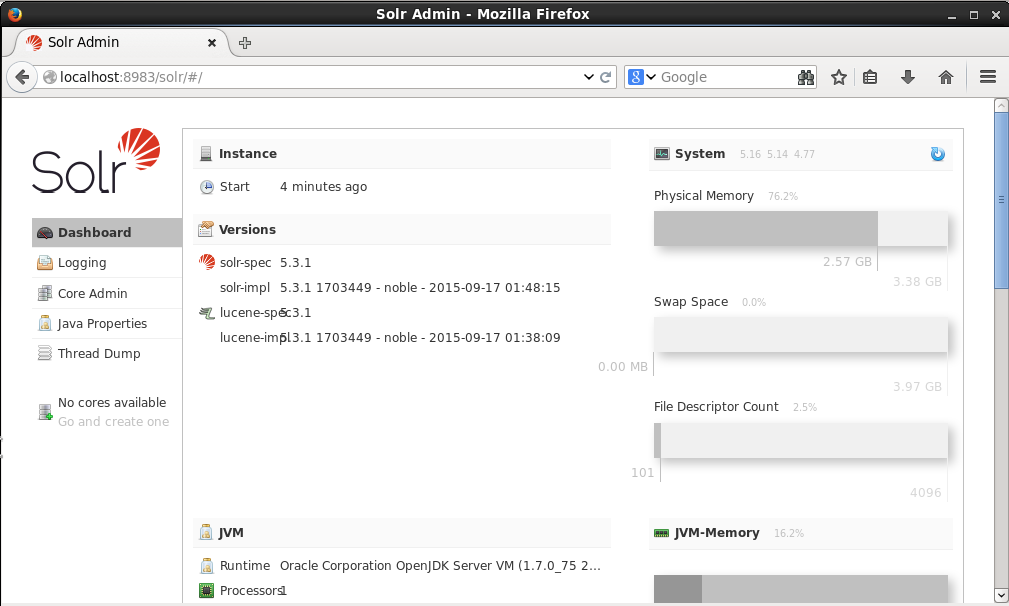
Apache Solr is used to index data and a Solr core refers to single instance of a Lucene physical index, complete with its own configuration files (solrschema.xml and schema.xml). A Solr collection refers to a single logical search index, which may consist of one or more shards. In this section we shall create Solr core. Login to the Solr Admin Console with the URL http://localhost:8983/solr/. The Solr Admin Console Dashboard gets displayed as shown in Figure 3.
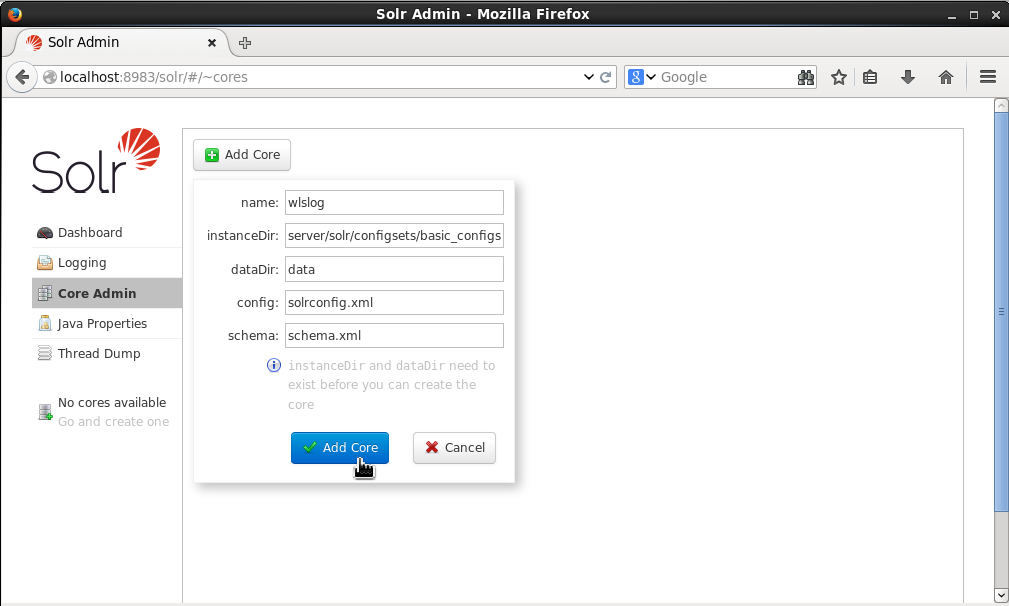
To create a new Solr core select the Core Admin tab in the margin. An input dialog gets displayed to create a new core. Specify a Core name (wlslog for example). Specify the instanceDir as /solr/solr-5.3.1/server/solr/configsets/basic_configs. Specify the dataDir as data. The instanceDir and the dataDir must exist before creating a Solr core. Select the default settings for config (solrconfig.xml) and schema (schema.xml). Click on Add Core to create a new Solr core as shown in Figure 4.
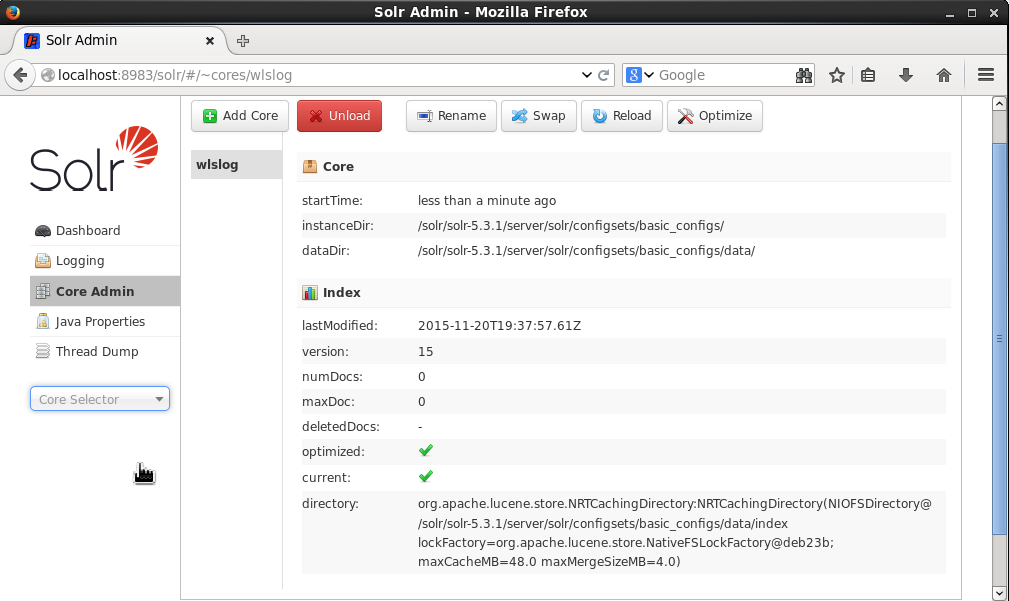
The Solr core called ‘wlslog’ gets created and the statistics about the core displayed as shown in Figure 5.
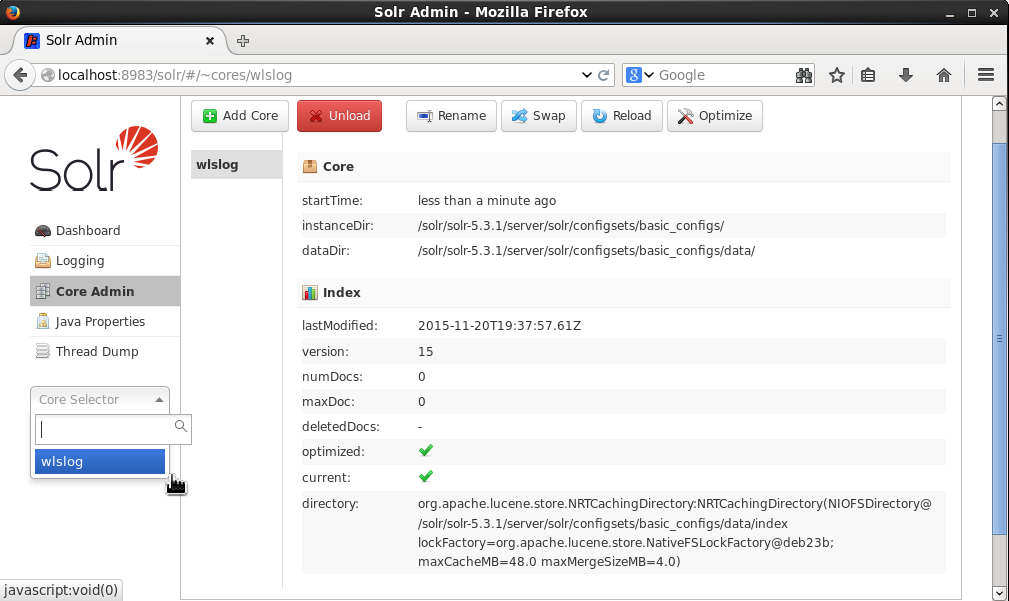
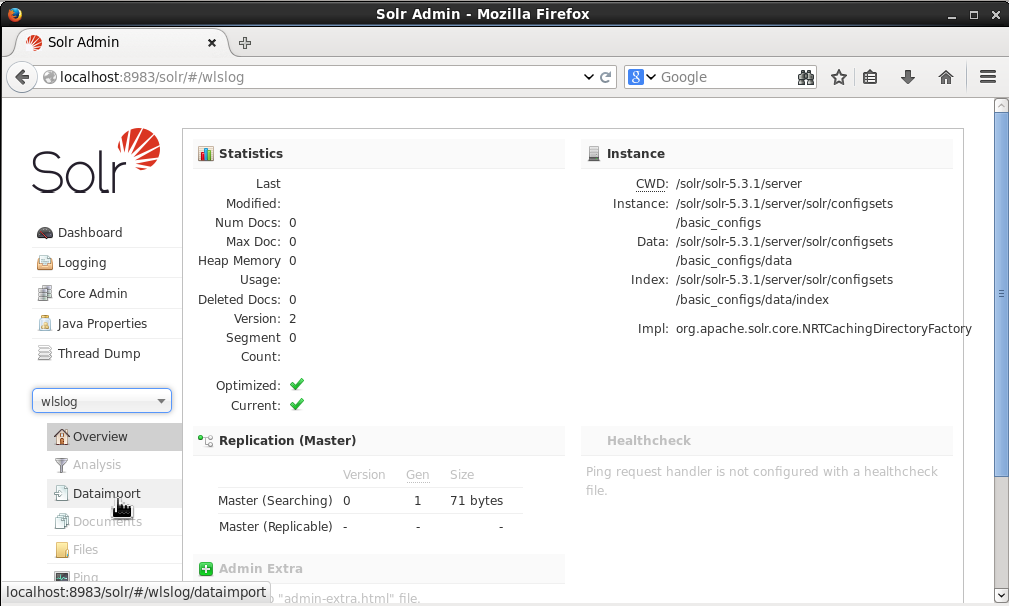
In the Core Selector select the wlslog core as shown in Figure 6.
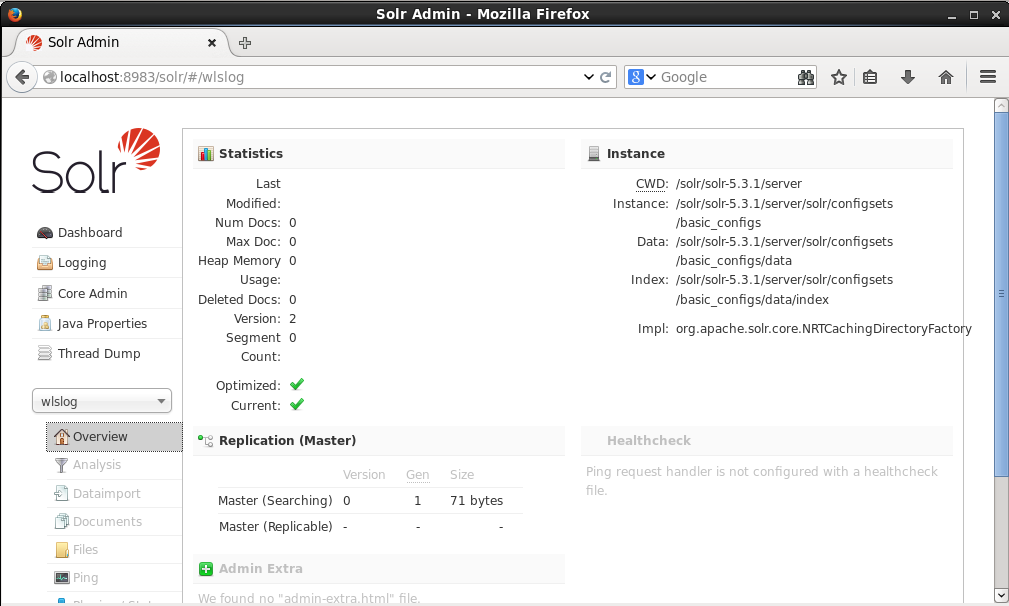
The statistics and instance directories for the core get displayed as shown in Figure 7.
Creating an Oracle Database Table
In this section we shall create an Oracle Database table and add the following data to the table to be later imported into Solr search engine.
Apr-8-2014-7:06:16-PM-PDT Notice WebLogicServer AdminServer BEA-000365 Server state changed to STANDBY
Apr-8-2014-7:06:17-PM-PDT Notice WebLogicServer AdminServer BEA-000365 Server state changed to STARTING
Apr-8-2014-7:06:19-PM-PDT Notice WebLogicServer AdminServer BEA-000365 Server state changed to ADMIN
Apr-8-2014-7:06:20-PM-PDT Notice WebLogicServer AdminServer BEA-000365 Server state changed to RESUMING
Apr-8-2014-7:06:22-PM-PDT Notice WebLogicServer AdminServer BEA-000331 Started WebLogic AdminServer
Apr-8-2014-7:06:23-PM-PDT Notice WebLogicServer AdminServer BEA-000365 Server state changed to RUNNING
Apr-8-2014-7:06:24-PM-PDT Notice WebLogicServer AdminServer BEA-000360 Server started in RUNNING mode
Run the following command in SQL*Plus to create Oracle Database table OE.WLSLOG.
CREATE TABLE OE.WLSLOG (ID VARCHAR2(255) PRIMARY KEY, TIME_STAMP VARCHAR2(255), CATEGORY VARCHAR2(255),
 TYPE VARCHAR2(255), SERVERNAME VARCHAR2(255), CODE VARCHAR2(255), MSG VARCHAR2(255));
Run the following SQL statements to add data to the OE.WLSLOG table.
INSERT INTO OE.WLSLOG (ID, TIME_STAMP, CATEGORY, TYPE, SERVERNAME, CODE, MSG)
 values ('logentry1','Apr-8-2014-7:06:16-PM-PDT','Notice','WebLogicServer',
'AdminServer','BEA-000365','Server state changed to STANDBY');

INSERT INTO OE.WLSLOG (ID, TIME_STAMP, CATEGORY, TYPE, SERVERNAME, CODE, MSG)
 values ('logentry2','Apr-8-2014-7:06:17-PM-PDT','Notice','WebLogicServer',
'AdminServer','BEA-000365','Server state changed to STARTING');

INSERT INTO OE.WLSLOG (ID,TIME_STAMP, CATEGORY, TYPE, SERVERNAME, CODE, MSG)
 values ('logentry3','Apr-8-2014-7:06:18-PM-PDT', 'Notice', 'WebLogicServer',
 'AdminServer', 'BEA-000365', 'Server state changed to ADMIN');

INSERT INTO OE.WLSLOG (ID,TIME_STAMP, CATEGORY, TYPE, SERVERNAME, CODE, MSG)
 values ('logentry4','Apr-8-2014-7:06:19-PM-PDT', 'Notice', 'WebLogicServer',
 'AdminServer', 'BEA-000365', 'Server state changed to RESUMING');

INSERT INTO OE.WLSLOG (ID,TIME_STAMP, CATEGORY, TYPE, SERVERNAME, CODE, MSG)
 values ('logentry5','Apr-8-2014-7:06:20-PM-PDT', 'Notice', 'WebLogicServer',
 'AdminServer', 'BEA-000361', 'Started WebLogic AdminServer');

INSERT INTO OE.WLSLOG (ID,TIME_STAMP, CATEGORY, TYPE, SERVERNAME, CODE, MSG)
 values ('logentry6','Apr-8-2014-7:06:21-PM-PDT', 'Notice', 'WebLogicServer',
 'AdminServer', 'BEA-000365', 'Server state changed to RUNNING');

INSERT INTO OE.WLSLOG (ID,TIME_STAMP, CATEGORY, TYPE, SERVERNAME, CODE, MSG)
 values ('logentry7','Apr-8-2014-7:06:22-PM-PDT', 'Notice', 'WebLogicServer',
 'AdminServer', 'BEA-000360', 'Server started in RUNNING mode');
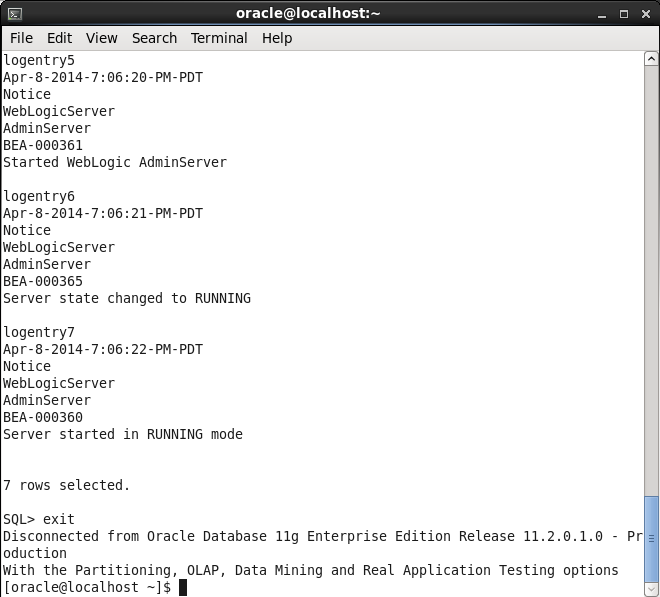
The Oracle Database table OE.WLSLOG gets created and data gets added to the table as shown in Figure 8.

Run the following query to list the data added.
SELECT * FROM OE.WLSLOG
The output from the SQL query is shown in Figure 9.
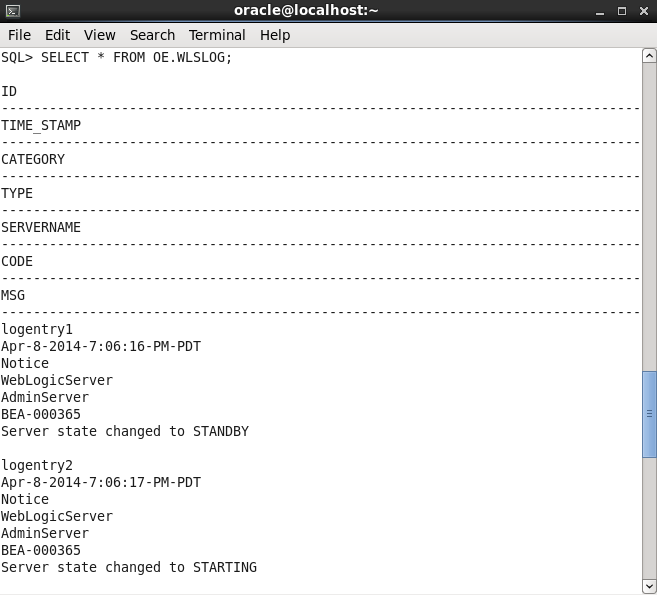
The 7 rows of data added are listed as shown in Figure 10. Exit SQL*Plus after creating the table.
Next, we shall configure Apache Solr to connect to Oracle Database and import the data into Solr.
Configuring the Oracle Database Datasource in Solr Server
The Oracle Database datasource needs to be configured in the Solr configuration file solrconfig.xml. In this section we shall configure the following:
- Copy the Oracle Database JDBC driver jar into the Solr instance classpath.
- Configure the Solr schema.xml (in the /solr/solr-5.3.1/server/solr/configsets/basic_configs/conf directory) to add fields used in the document indexed in Solr from data imported from Oracle Database.
- Configure the Oracle Database data source in a Solr configuration file data-config.xml, which is in the same directory as the other configuration files; the /solr/solr-5.3.1/server/solr/configsets/basic_configs/conf directory. The data source configuration includes the connection information such as the Oracle Database JDBC driver class, the connection URL, and username and password. The data-config.xml file also specifies the SQL query used to fetch data in full import and delta import. The mapping of the Oracle Database table columns to Solr document fields is also configured in data-config.xml.
- Configure the data-config.xml file in the solrconfig.xml file.
- Configure a request handler for the DataImportHandler in the solrconfig.xml file.
- Add the directory (/solr/solr-5.3.1/dist) containing the DataImportHandler jar files to the classpath of Solr. Alternatively, copy the jars from the (/solr/solr-5.3.1/dist) directory to the Solr instance lib directory. We have used the latter option to create the lib directory in the Solr instance directory and copy the jars from the dist directory to the lib directory. The Solr instance directory was specified when the wlslog core was created as /solr/solr-5.3.1/server/solr/configsets/basic_configs.
Download the Oracle Database JDBC driver JAR file ojdbc6.jar from http://www.oracle.com/technetwork/database/features/jdbc/index-091264.html . Copy the ojdbc6.jar to the /solr/solr-5.3.1/dist directory, which contains all the Solr server jars. In the next few sections we shall add the configuration listed.
Configuring the Solr Schema
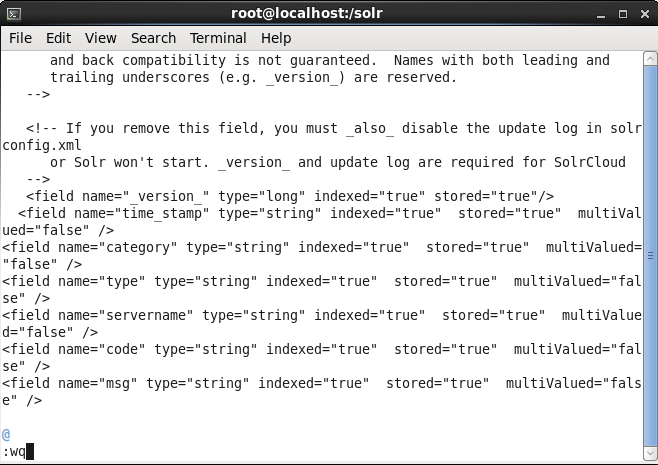
The field names to be used in a Solr document must be configured in the schema.xml file, which is in the /solr/solr-5.3.1/server/solr/configsets/basic_configs/conf directory. Add <field/> elements for fields time_stamp, category, type, servername, code, and msg. The schema.xml must not contain duplicate field configurations. If any of these fields has been previously configured or is configured by default, remove the duplicate configuration. The category field name is also configured by default in schema.xml in earlier versions of Solr (not the version solr-5.3.1 used in this article) Remove the duplicate configuration for the category field. Add the following <field/> elements to schema.xml.
<field name="time_stamp" type="string" indexed="true"  stored="true"  multiValued="false" />
<field name="category" type="string" indexed="true"  stored="true"  multiValued="false" />
<field name="type" type="string" indexed="true"  stored="true"  multiValued="false" />
<field name="servername" type="string" indexed="true"  stored="true"  multiValued="false" />
<field name="code" type="string" indexed="true"  stored="true"  multiValued="false" />
<field name="msg" type="string" indexed="true"  stored="true"  multiValued="false" />
The schema.xml is shown in Figure 11. Save the schema.xml with :wq.
Configuring the DataSource
Next, create a data-config.xml in the /solr/solr-5.3.1/server/solr/configsets/basic_configs/conf directory. An empty data-config.xml may be created in the vi editor (or some other editor).
vi /solr/solr-5.3.1/server/solr/configsets/basic_configs/conf/data-config.xml
The root element of data-config.xml is <dataConfig/>. The datasource may be configured in the data-config.xml file or the solrconfig.xml file. We shall be configuring the datasource in the data-config.xml file. Add a <dataSource/> tag within the root element <dataConfig/>. The type attribute in <dataSource/> tag specifies the type of the datasource. For a JDBC datasource specify type attribute as ‘JdbcDataSource’, which is also the default for type attribute. The name attribute may be specified and is required if using multiple datasources. The other attributes supported for a JdbcDataSource are the following:
| Attribute | Description | Required/Optional |
| driver | The JDBC driver class | Required |
| url | The connection URL | Required |
| user | The user name | Optional |
| password | The password | Optional |
| jndiName | JNDI name for a pre-configured data source | Optional |
| batchSize | Batch size used in JDBC connection | Optional |
| convertType | Converts the type of the data read to the type of the target Solr data type (true/false); false by default. | Optional |
| autoCommit | Specifies auto commit mode (true/false); false by default. | Optional |
| readOnly | Enables read only mode. (true/false); false by default. | Optional |
| transactionIsolation | Specifies the transaction isolation level. | Optional |
Specify the following dataSource element attributes for Oracle Database datasource.
| Attribute | Value |
| name | jdbc (The value may vary) |
| driver | oracle.jdbc.OracleDriver |
| url | jdbc:oracle:thin:@127.0.0.1:1521:ORCL (The value may vary based on the host name and Oracle service name or SID used) |
| user | OE (The value may vary) |
| password | OE (The value may vary) |
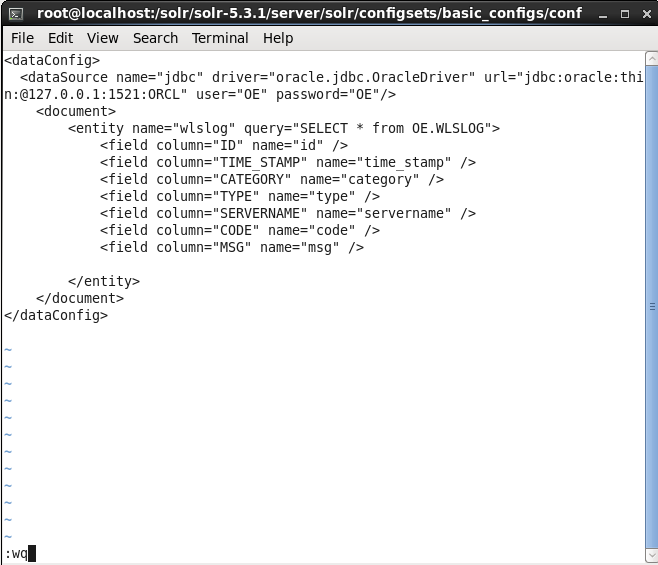
A Solr document to be created is configured using the <document/> element. A <document/> element may specify one or more <entity/> elements, with each <entity/> element representing a database table or view. The only required attribute in an <entity/> element is name. The processor attribute in <entity/> is required for non RDBMS datasource, the default processor being the RDBMS datasource processor SqlEntityProcessor. The SqlEntityProcessor processor requires the query attribute to be specified. The query attribute specifies the SQL query statement used to query the database. Each entity may specify one or more fields to be created in the document. Each field is mapped from a result set column, with the field name being the same as the column name, which is specified with the column attribute in the <field/> element. The name attribute in the field element may be used to specify the field name. We also configured the fields in the solrconfig.xml. Therefore we don’t need to configure the field type or other attributes such as whether the field is indexed, stored, and multi valued, all of which are inferred from solrconfig.xml. In the data-config.xml specify the column/field mapping for the Oracle Database table OE.WLSLOG columns ID, TIME_STAMP, CATEGORY, TYPE, SERVERNAME, CODE, and MSG. A few configuration aspects to be noted are that the URL should conform to the required URL syntax, which is different if the Oracle SID is used (as we have used) and different if the Oracle service name is used. If Oracle SID is used the syntax is as follows.
jdbc:oracle:thin:@[HOST][:PORT]:SID
If the Oracle service name is used the URL syntax is as follows:
jdbc:oracle:thin:@//[HOST][:PORT]/SERVICE
The second configuration aspect is to specify the table name prefixed with the schema name (OE.WLSLOG) instead of just the table name (WLSLOG) in the query attribute of the entity element.
The data-config.xml is listed below.
<dataConfig>
  <dataSource name="jdbc" driver="oracle.jdbc.OracleDriver" url="jdbc:oracle:thin:@127.0.0.1:1521:ORCL" user="OE" password="OE"/>
    <document>
        <entity name="wlslog" query="select * from OE.WLSLOG">
            <field column="ID" name="id" />
            <field column="TIME_STAMP" name="time_stamp" />
            <field column="CATEGORY" name="category" />
            <field column="TYPE" name="type" />
            <field column="SERVERNAME" name="servername" />
            <field column="CODE" name="code" />
            <field column="MSG" name="msg" />

        </entity>
    </document>
</dataConfig>
Copy the data-config.xml to the /solr/solr-5.3.1/server/solr/configsets/basic_configs/conf directory if the preceding listing is copied. The data-config.xml is shown in the vi editor in Figure 12.
Configuring the Request Handler
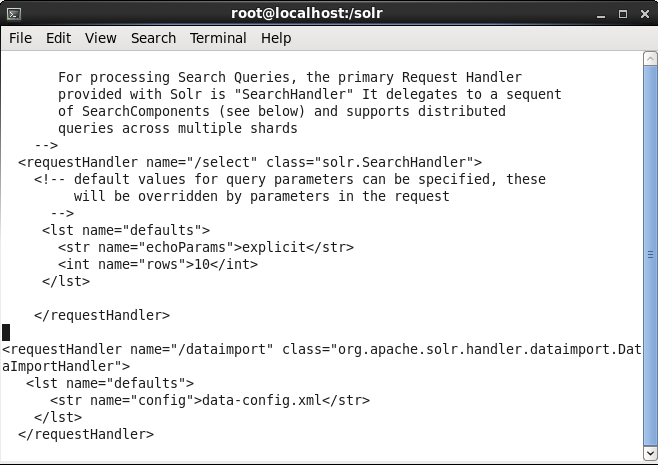
We need to configure a request handler for data import in solrconfig.xml (/solr/solr-5.3.1/server/solr/configsets/basic_configs/conf directory). A request handler is configured using the <requestHandler/> element and specifies the URL mapping used to invoke the request handler, and the request handler class. The request handler class for the data import request handler is org.apache.solr.handler.dataimport.DataImportHandler. In the solrconfig.xml specify the following <requestHandler/> element in which the URL mapping used to invoke the handler is specified with the name attribute as /dataimport and the request handler class is specified using the class attribute. The data-config.xml file relative path is also configured in the solrconfig.xml file.
<requestHandler name="/dataimport" class="org.apache.solr.handler.dataimport.DataImportHandler">
   <lst name="defaults">
      <str name="config">data-config.xml</str>
    </lst>
  </requestHandler>
The solrconfig.xml with the request handler configuration is shown in Figure 13.
Adding Jars to Solr Server Classpath
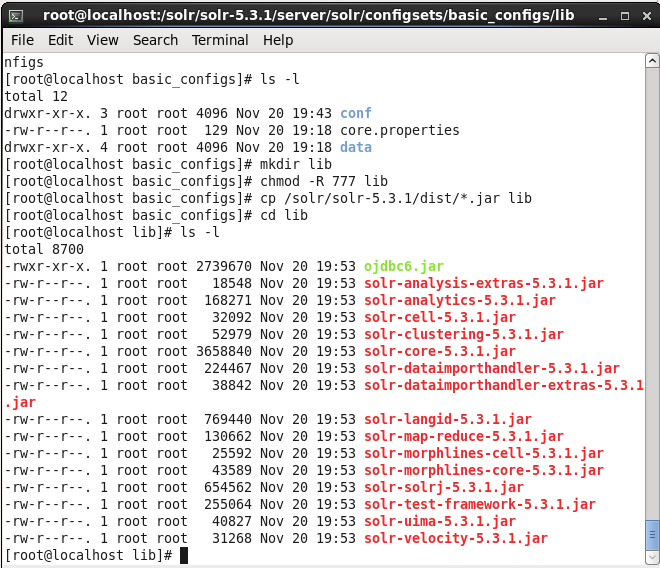
The data import request handler class and the dependencies are in the solr-dataimporthandler-*.jars, which are in the /solr/solr-5.3.1/dist directory. We also copied the ojdbc6.jar to the /solr/solr-5.3.1/dist directory. We need to add these jars to the classpath of Solr. Create a directory called lib in the instance directory /solr/solr-5.3.1/server/solr/configsets/basic_configs. Jars in the /solr/solr-5.3.1/server/solr/configsets/basic_configs/lib directory are added to the Solr server classpath automatically. Set the directory access permissions to global (777).
cd /solr/solr-5.3.1/server/solr/configsets/basic_configs
mkdir  lib
chmod –R 777 lib
Copy the jars from the dist directory to the lib directory.
cp /solr/solr-5.3.1/dist/*.jar lib
The lib directory should list the ojdbc6.jar and the Solr server jars including the dataimporthandler jars if the ls –l command is run from the lib directory as shown in Figure 14.
Alternatively, to add the dist jars to the Solr classpath add a <lib/> element in solrconfig.xml for the Solr classloader to load the jars from the /solr/solr-5.3.1/dist directory. The relative path to the /solr/solr-5.3.1/dist directory should start from the directory containing the conf directory and not the conf directory, which has the solrconfig.xml.
<lib dir="../../../../dist/" regex=".*.jar" />
<lib dir="../../../../dist/" regex="apache-solr-dataimporthandler-.*.jar" />
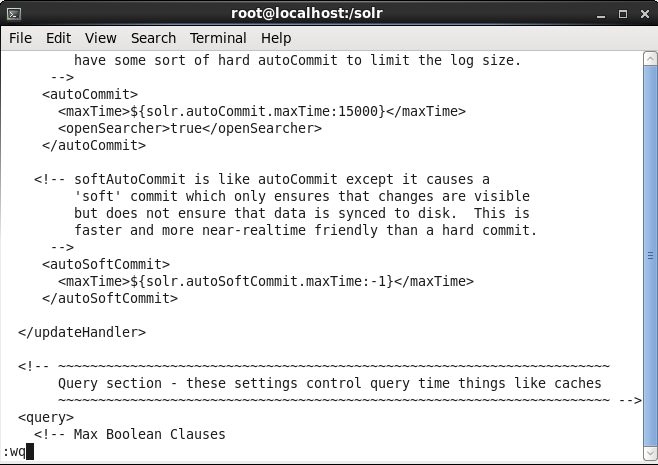
Configuring AutoCommit
By default, Solr server does not auto commit changes made using the /update request handler automatically. Either the Solr server has to be restarted or the commit has to be performed explicitly from a script. To auto commit all updates made to the Solr server, set the updateHandler/autoCommit/openSearcher element to true.
<autoCommit>
    <maxTime>15000</maxTime>
    <openSearcher>true</openSearcher>
  </autoCommit>
The maxTime element specifies the maximum time delay from when the update request is sent to when the update is actually committed in the server and is 15000 ms by default, as shown in Figure 15.
Restarting Solr Server
The Solr server must be restarted after any of the configuration files schema.xml, data-config.xml and solrconfig.xml are modified in order for the new configuration to take effect. Restart the Solr server with the following command:
bin/solr restart
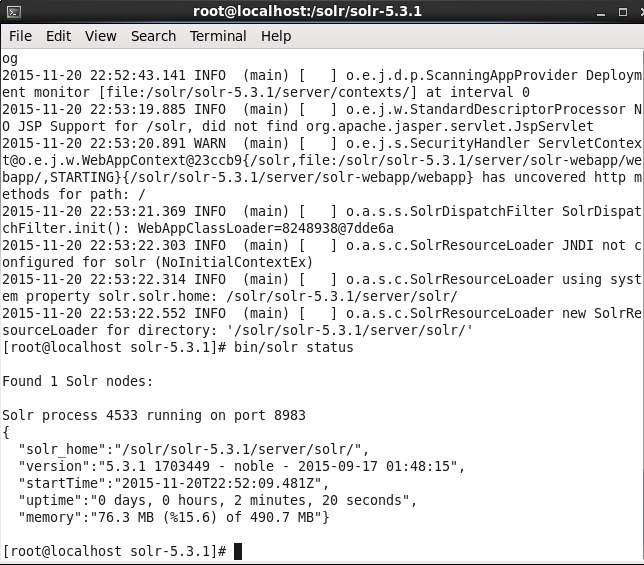
The output from the preceding command is shown in Figure 16, which shows the Solr server having been restarted. Run the bin/solr status command to find the status of the Solr server.
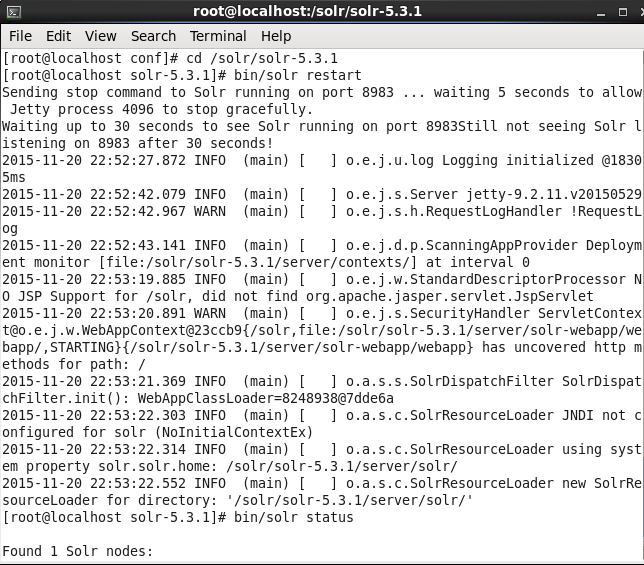
The Solr server should be indicated as running, as shown in Figure 17.
Running the Data Import in Solr
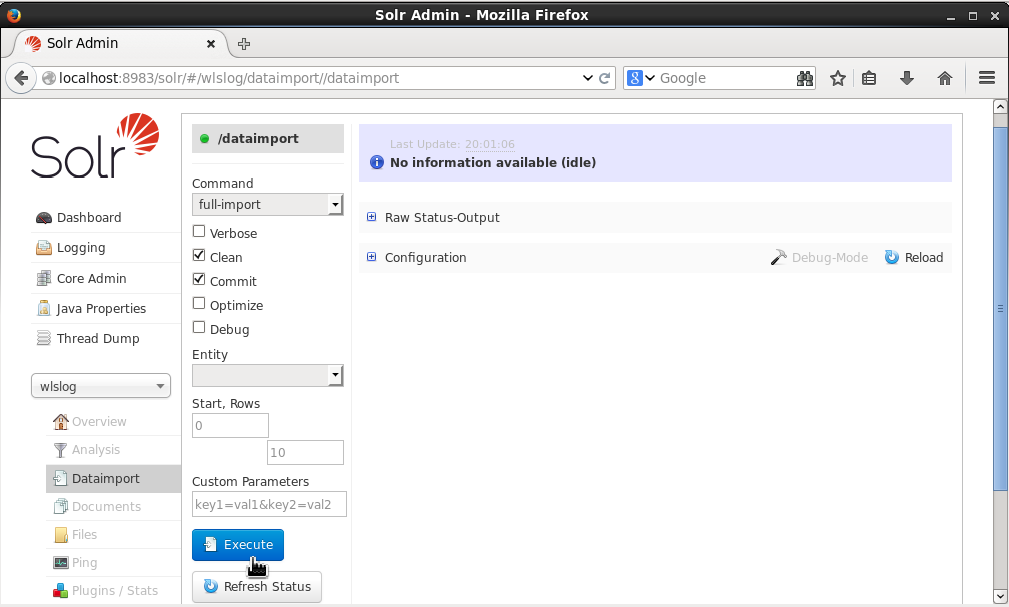
In this section we shall run the data import from Oracle Database to Solr. When the data is imported, the data is indexed in Solr and becomes available for querying. Login to the Solr Admin Console with the URL http://localhost:8983/solr/ if not already logged in. Select Dataimport from the list of options, as shown in Figure 18.
The /dataimport gets added to the URL, which invokes the DataImportHandlerrequest handler class as we configured it in the solrconfig.xml earlier. Incoming queries are dispatched to a request handler by name based on the path specified in the request. With /dataimport in the URL path the request is dispatched to the /dataimport request handler, which is configured in the solrconfig.xml to invoke the org.apache.solr.handler.dataimport.DataImportHandler class.
In the Command selection list, select full-import for a full import of the database table using the query specified in the data-config.xml. The other option is delta-import for an incremental import for new insert/updates made on a database table since the previous query was run on the database table, based on the timestamp. Click on Execute to start the import and indexing, as shown in Figure 19.
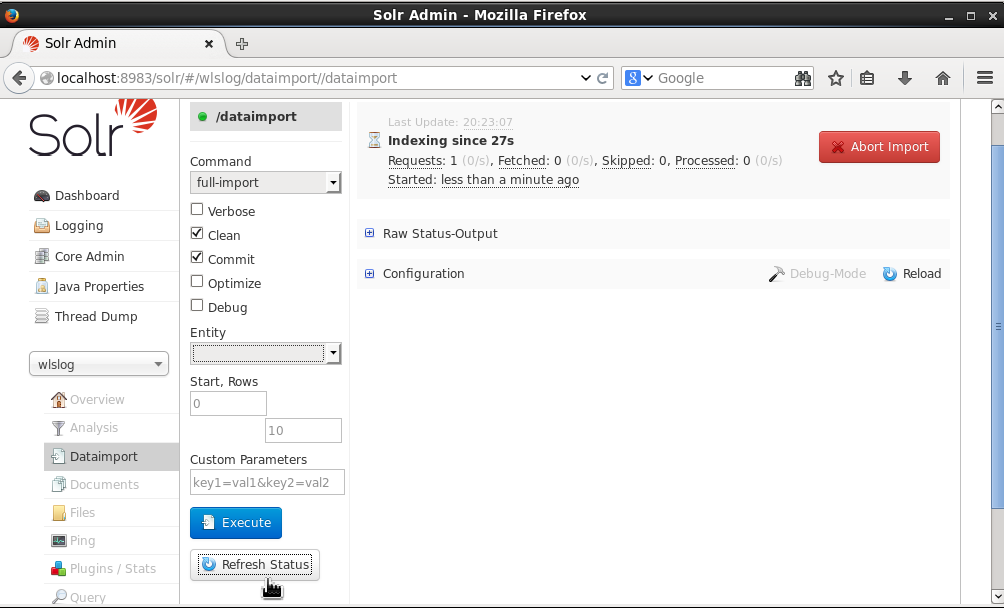
An “Indexing…” message gets displayed to indicate the status of the import, as shown in Figure 20.

The indexing status does not get updated automatically. To update the Indexing status click on the Refresh Status button as shown in Figure 21.
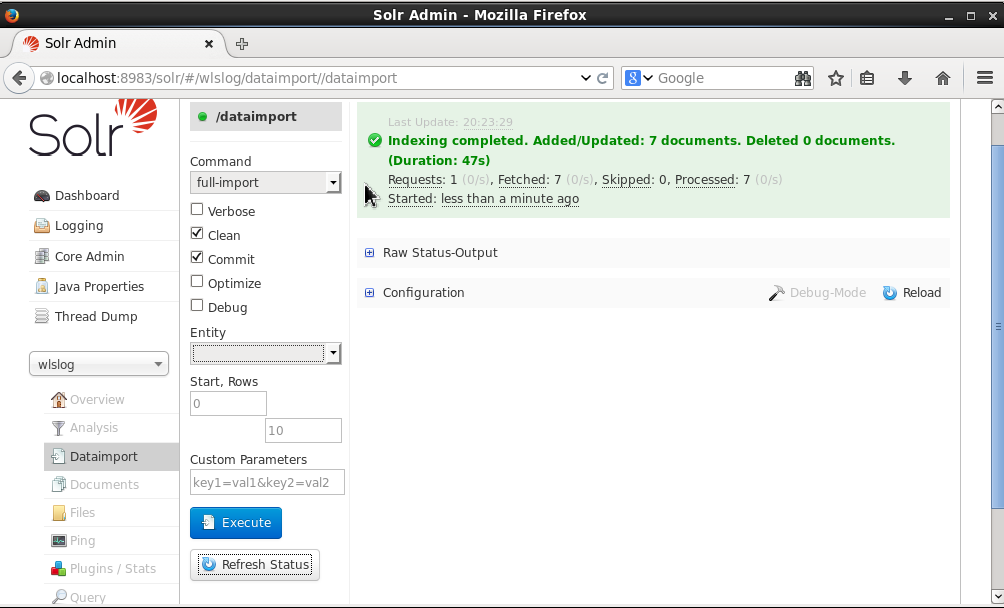
When the indexing has completed the Indexing completed message gets displayed, as shown in Figure 22. The number of Requests processed and records Fetched, Skipped and Processed also get listed.
Querying Imported Data
Once it is indexed in Solr, the Oracle Database data may be queried. Click on the Query option for the wlslog core. Using the default query of *:* (q field), which fetches all the documents, click on the Execute Query button as shown in Figure 23.
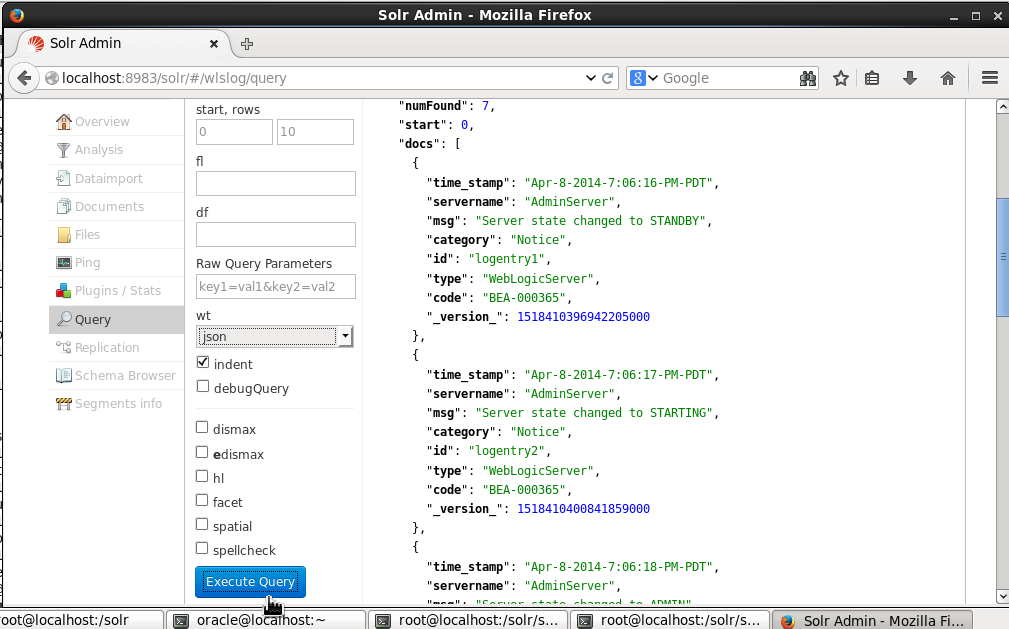
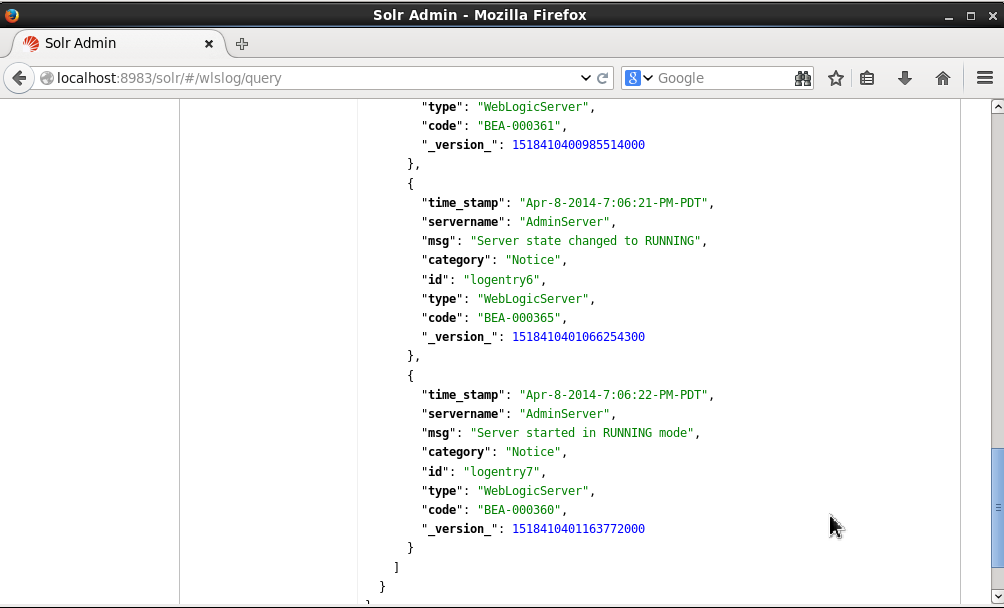
The seven documents indexed in Solr from Oracle Database get listed as indicated by the numFound field in the response, as shown in Figure 24.
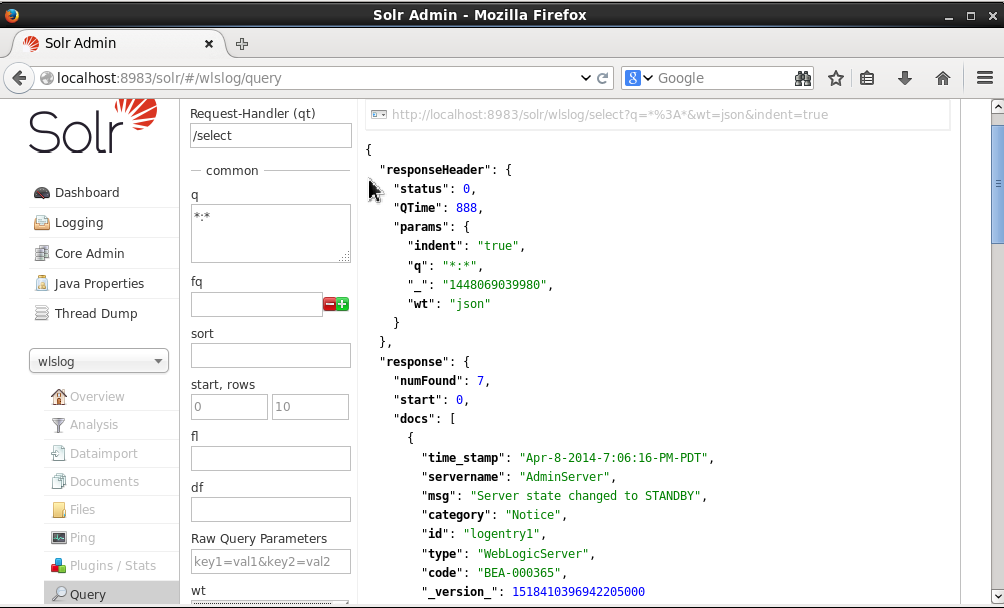
A Solr document was indexed for each row of data in Oracle Database table OE.WLSLOG. Each document has a _version_ field for the update log associated with it, as shown in Figure 25. The version field is added to each record (JSON document if json is selected as the wt) automatically as shown in Figure 25.
In this article we imported and indexed data from Oracle Database, the # 1 database, into Apache Solr, the #1 enterprise search engine. Subsequently we queried the indexed data in Solr Admin Console.
Deepak Vohra is the author of a recent books Practical Hadoop Ecosystem and Apache HBase Primer.
Start the discussion at forums.toadworld.com