Introduction
PostgreSQL, or Postgres, has proven to be a powerful open source RDBMS with lightweight software which is free of charge. Postgres is supported in nearly all operating systems including Linux, UNIX, and Windows. In this article we will learn how to create and manage a Postgres instance through Amazon RDS, as well as how to manage a database with the PGAdmin utility. We will cover a few additional features of RDS.
Amazon Cloud
Amazon Cloud offers an easy-to-adopt cloud services platform with compute, storage, and support for various services including database support, game development, application services, developer tools, and so on. This article is focuses on hosting a Postgres database on the Amazon Web Services (AWS) cloud. When considering hosting a database in the Amazon cloud two major options for where to host are available. Amazon introduced RDS – Relational Data Services—specifically for hosting relational databases such as Oracle database, MS SQL server, MySQL and Postgres. Amazon RDS offers great flexibility; you simply select which database and what version and so on, and it can directly launch the database. The other option is EC2 – Elastic Cloud, which gives direct host access, and here we can install either Windows or Linux or UNIX and on top of that, we can install compatible database software or applications. In this article, our example shows how to launch a database instance in Amazon RDS and how to access and manage it.
Launching Postgres – RDS
Initially you should have access to the Amazon Cloud and make sure that you are fully aware of how to use its resources and how they will be charged. After successfully subscribing to the Amazon cloud you will have access to the RDS dashboard via the link https://console.aws.amazon.com/rds/home
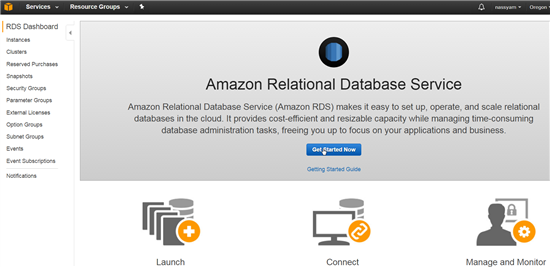
Click on “Get Started Now”; this will take us to the list of database offerings in Amazon cloud; in our scenario we are going to select “PostgreSQL” and click on “Select”.

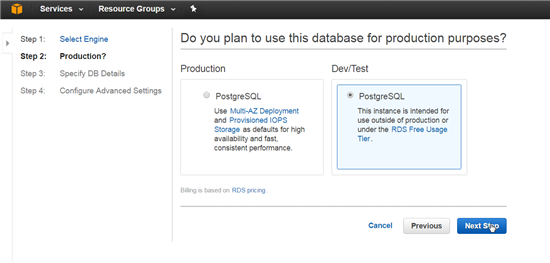
After selecting the desired database engine, Postgres, we can select the database purpose: Production or Dev/Test. Production Database offers a few more features such as multi AZ (Availability zone), which creates the primary database in one zone and replicates it in a different zone for high availability. Using this feature RDS can perform failover anytime automatically. In this article, however, we are selecting Dev/Test.
Next we can specify the Postgres version, instance details, instance shape/class information, how much storage is required, and so on. Provide the master username and password to manage this service. Using this we will connect to the service.

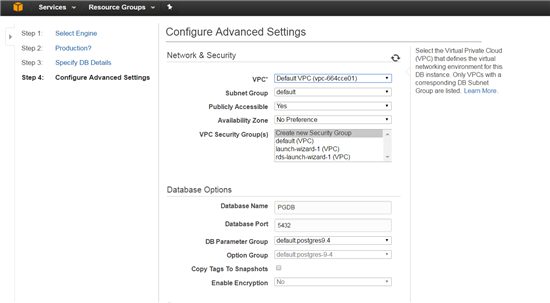
After crosschecking the entered details, click on “Next Step”. You will be prompted to enter security group information (Virtual Private cloud – VPC), port information, and so on. You can also choose an option to “Create new VPC”.
In the Backup section, shown below, we need to select the retention period, backup window and so on, as shown below. Use these settings for comprehensive availability of database backups; you can also enable enhanced monitoring.
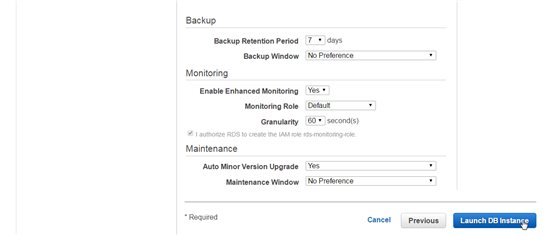
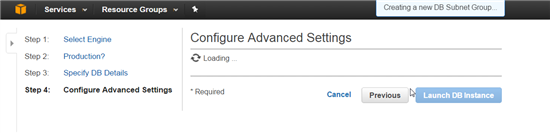
After all the fields are entered, now we can click on “Launch DB instance”. An acknowledgement appears, as shown below, as instance creation is started.
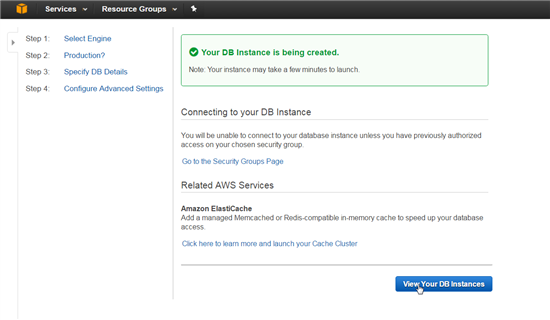
This total process takes barely a few minutes. In order to view the created instance we can click on “View your DB instances”. As shown below, we can see the status as “Creating” and as soon as this process is completed the status changes to “Available”.
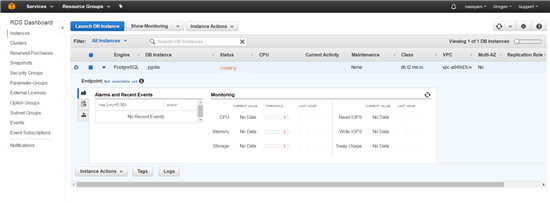
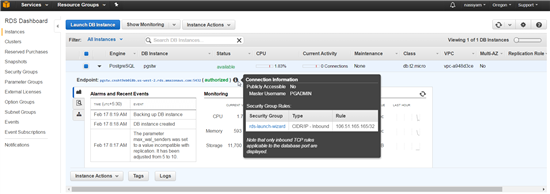
After a few minutes of waiting, we can see the instance is available and we can see all the information such as Public DNS, utilization information, and connection information.
Enable Connectivity
So far, we have just created the database instance; now we need to enable the port and enable the traffic so that we can connect to the database engine from an external network. This can be done by enabling the traffic from “VPC Security Groups”, however to access and use this option, we need to go to the EC2 console. Note that we have to perform the changes for the VPC we have selected/created related to our instance.

Connecting to a Postgres Database
Now we have deployed our database and now we can connect to the Postgres instance using the database client software.
Note that Amazon offers various tiers of cloud services. If we used EC2, we could deploy the host with Linux or Windows, download and install Postgres manually—and then we would have direct host access. For Amazon EC2 Linux/Unix servers, we would use If we have a dedicated host and we can directly connect to the instance by using PuTTY/SSH or RDP, and for Windows systems we would use RDP.
Because we are using an RDS instance, we don’t know where out database is hosted, so we need to use a client utility to connect to it. There are various client utilities available:
- pgAdmin – management tool for Postgres
- psql – Postgres client.
In this example we will explore pgAdmin. First we need to gather the RDS information which we specified when creating the instance:
- Public DNS
- Port
- Database name
- Username
- Password
- SSL Mode à Allow
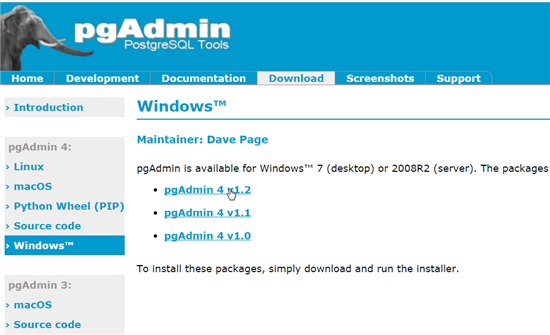
Now we will download the pgAdmin utility from www.pgadmin.org.
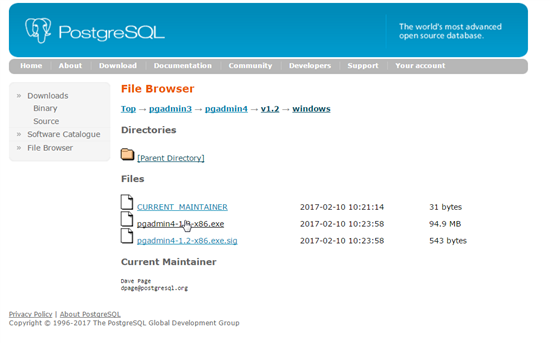
We select the desired version for Windows; we can download the file directly without any signups.
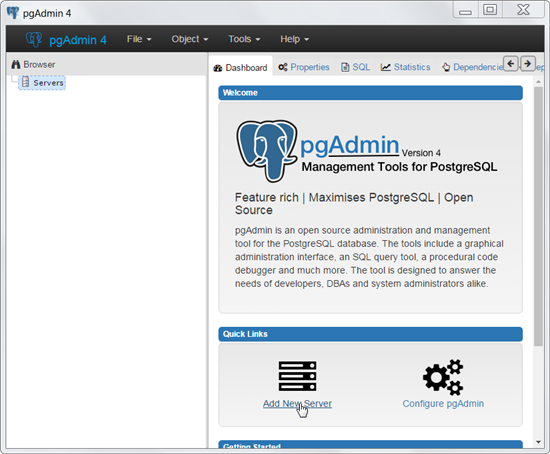
This is a direct installer typical for Windows. The screen confirms that the installation of pgAdmin is completed. Now we will add the new server to connect our previously created Postgres Instance. Click on “Add New Server”.
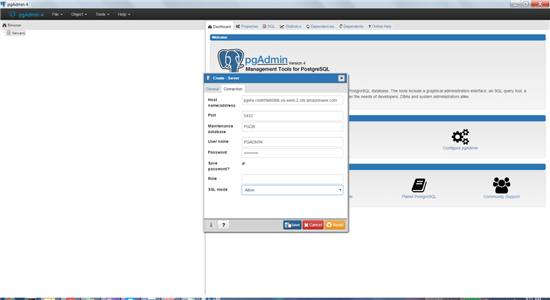
This will prompt us to enter the fields of DNS/Host, Port, username, password, database name, and so on. Before clicking on Save, we can test the connection and if it is successful then click on Save to save our configuration.
After successfully connecting, we can click on our PGDB database, which we created in RDS. The dashboard shows such information as transactions per second, user information and various other important information.
The utility pgAdmin provides many features we can use to comprehensively monitor the connection; also we can run any queries/transactions from Query Launcher, which can be accessed from Tools.
AWS additional support to RDS Instances
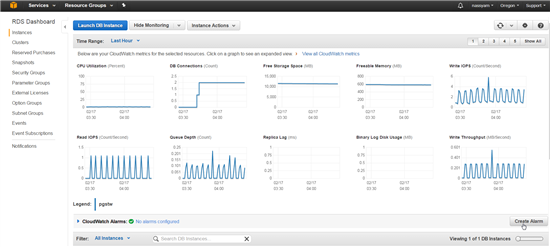
Apart from Postgres database administration, AWS provides some additional support to the created instances such as enhanced monitoring and alarms. In enhanced monitoring, we can review CPU utilization, memory usage, storage space usage, read/write IOPS, and so on, for our instances at a glance. To do this, select the instance name and click on “Show Monitoring”.
Creating Alarms
After the deployment of the database, Monitoring of the server or the database is highly recommended to know the database availability or to track the usages of the resources such as high utilization in server or mount point usage. Amazon supports a few built-in alarms, which is very critical to the instance. Let’s suppose we need to be notified whenever the user connections reach a specified limit; we can do this with Amazon Alarm. You can explore this option by clicking “Create Rules” and selecting the instance. Once we click on “Create Alarm” the console enables us to set the notification type, what metrics we prefer to configure and the limit. We can create an alarm based on our specifications.
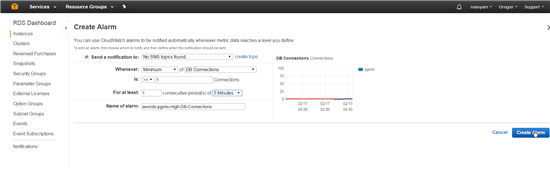
After scheduling the alarm, we can see the created alarm and also a warning that the database connections are greater than 1.
We can click on “View” to check on more information about this alert.
Summary
Amazon provides an easy way to host databases in the cloud. In this article, we learned we have learned how to create a Postgres database engine in the cloud, as well as how to access it from an external network.
We have also covered various utilities available to access our Postgres database such as pgAdmin with systematically on how to connect. Finally we have explored of AWS RDS enhanced monitoring and creating alarms based on thresholds.
Start the discussion at forums.toadworld.com