In a previous article we learned how to create an account in Amazon Web Services (AWS). Besides knowing what Amazon RDS is, we learned how to configure an Oracle Database Instance in Amazon RDS. Here are the links for each installment of the article (Spanish language only): Part I and Part II.
In the current article we will learn how to create an instance of the MySQL database for development and testing using the Amazon RDS service.
MySQL is a relational database developed under a dual GPL/Business License by Oracle Corporation and is considered to be the most popular open source database in the world, and one of the most popular databases in general, along with Oracle and Microsoft SQL Server. MySQL is mainly used in web development environments.
In the Part I of the previous article we created an IAM user in our AWS so that we do not have to work with the root account.
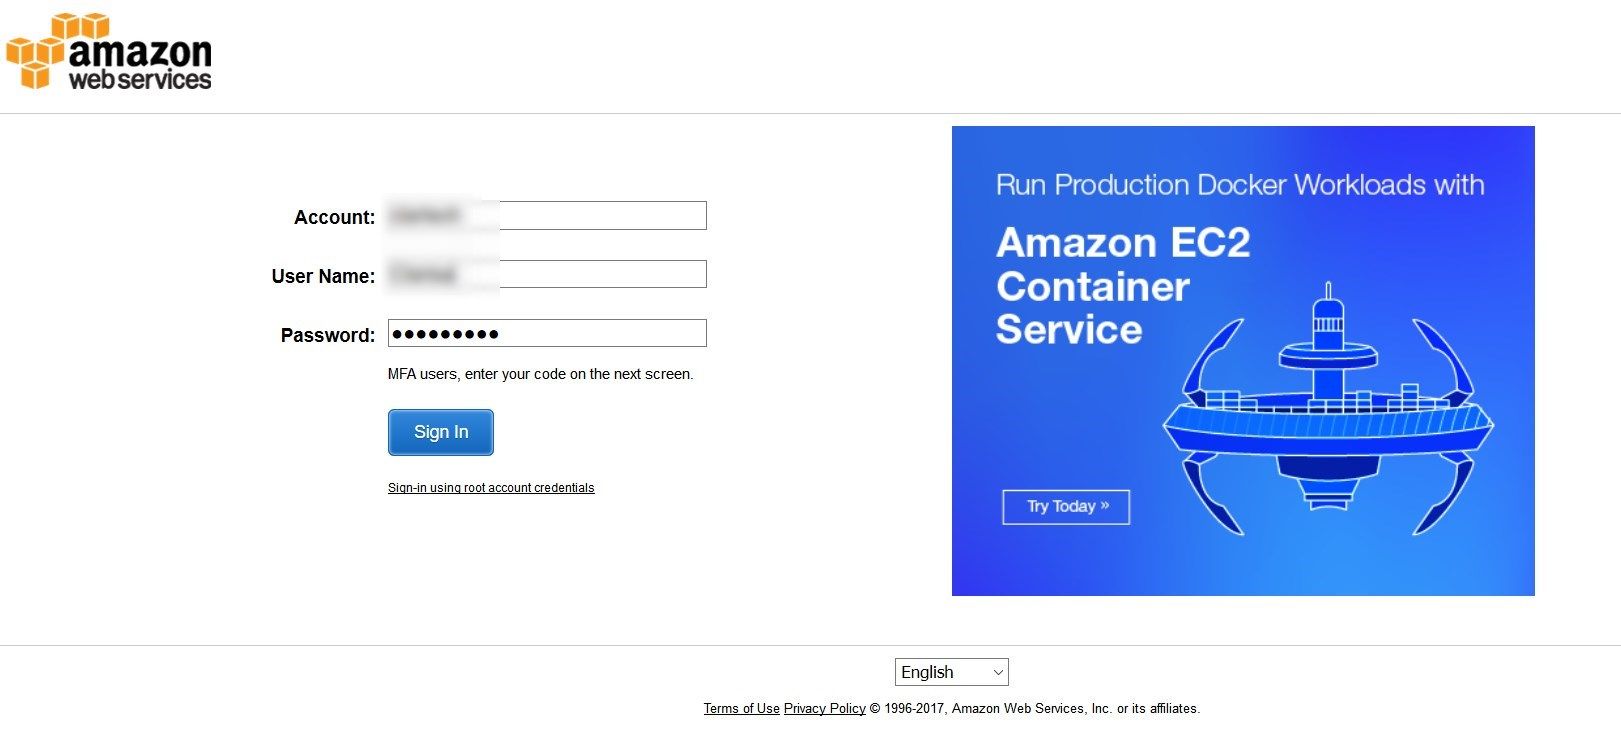
To login to the AWS admin console, we access the custom URL that was given to us when we created the IAM user:
- Account: our alias
- User Name: the user we created as an administrator in the IAM
- Password: we enter the password of the IAM user
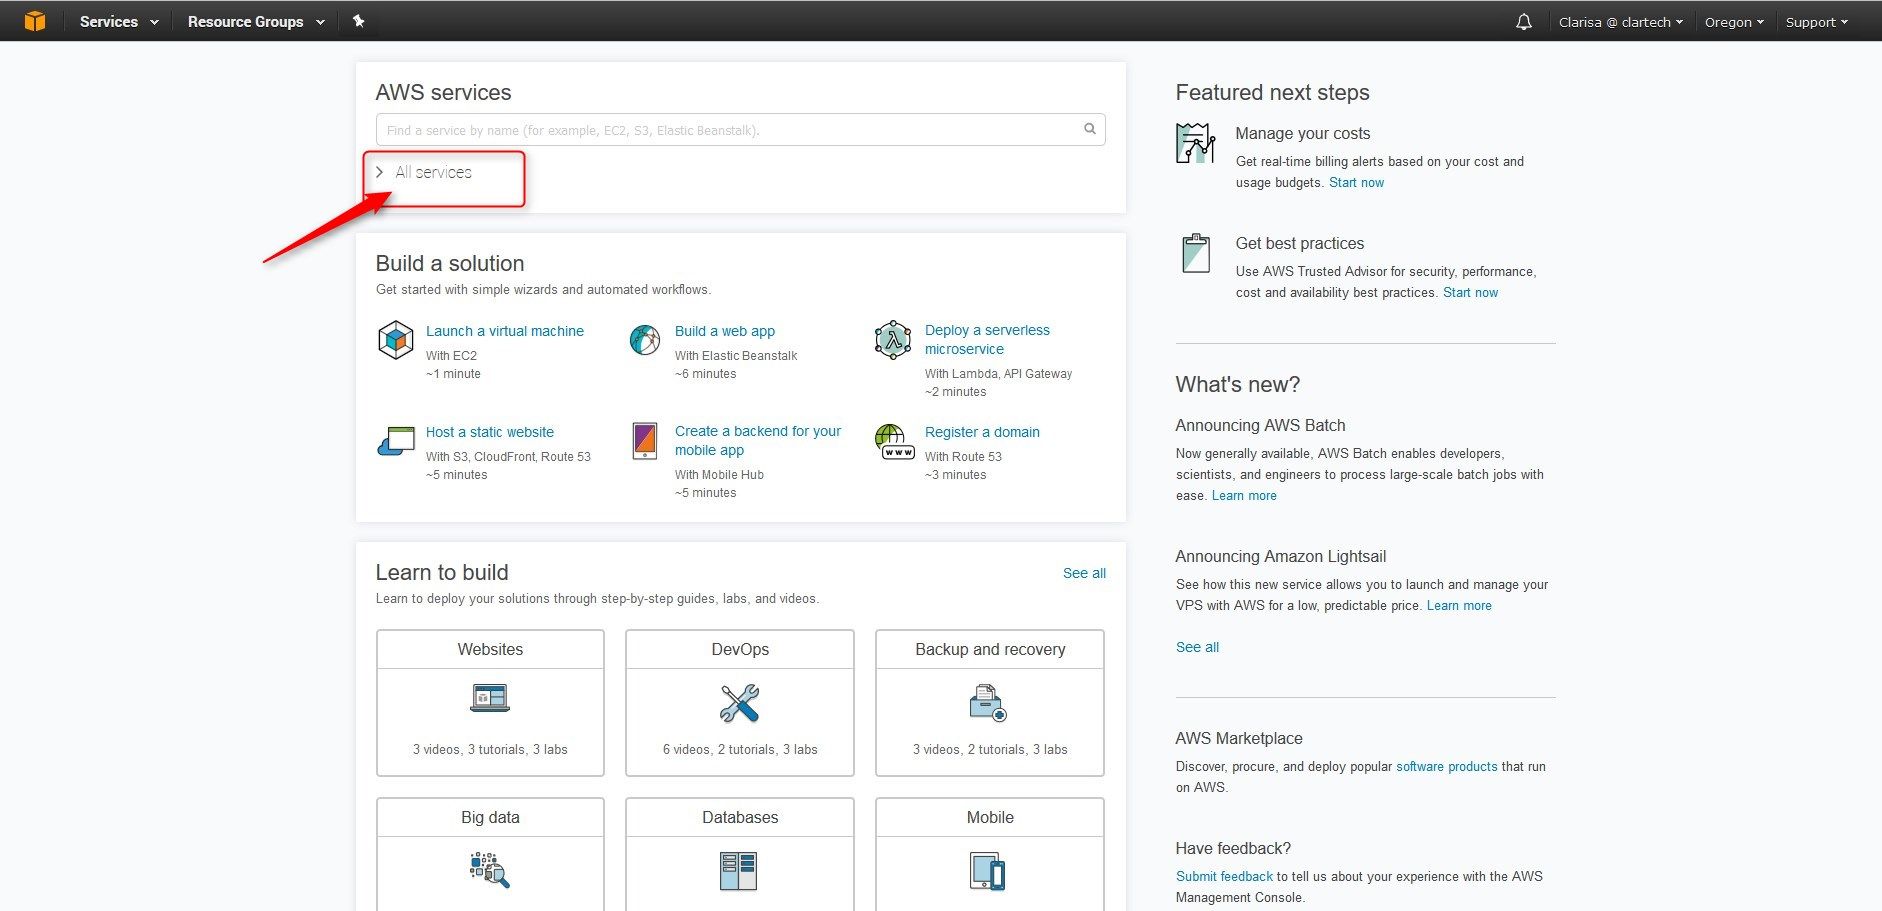
We access the AWS homepage, and then expand the "All services" link:
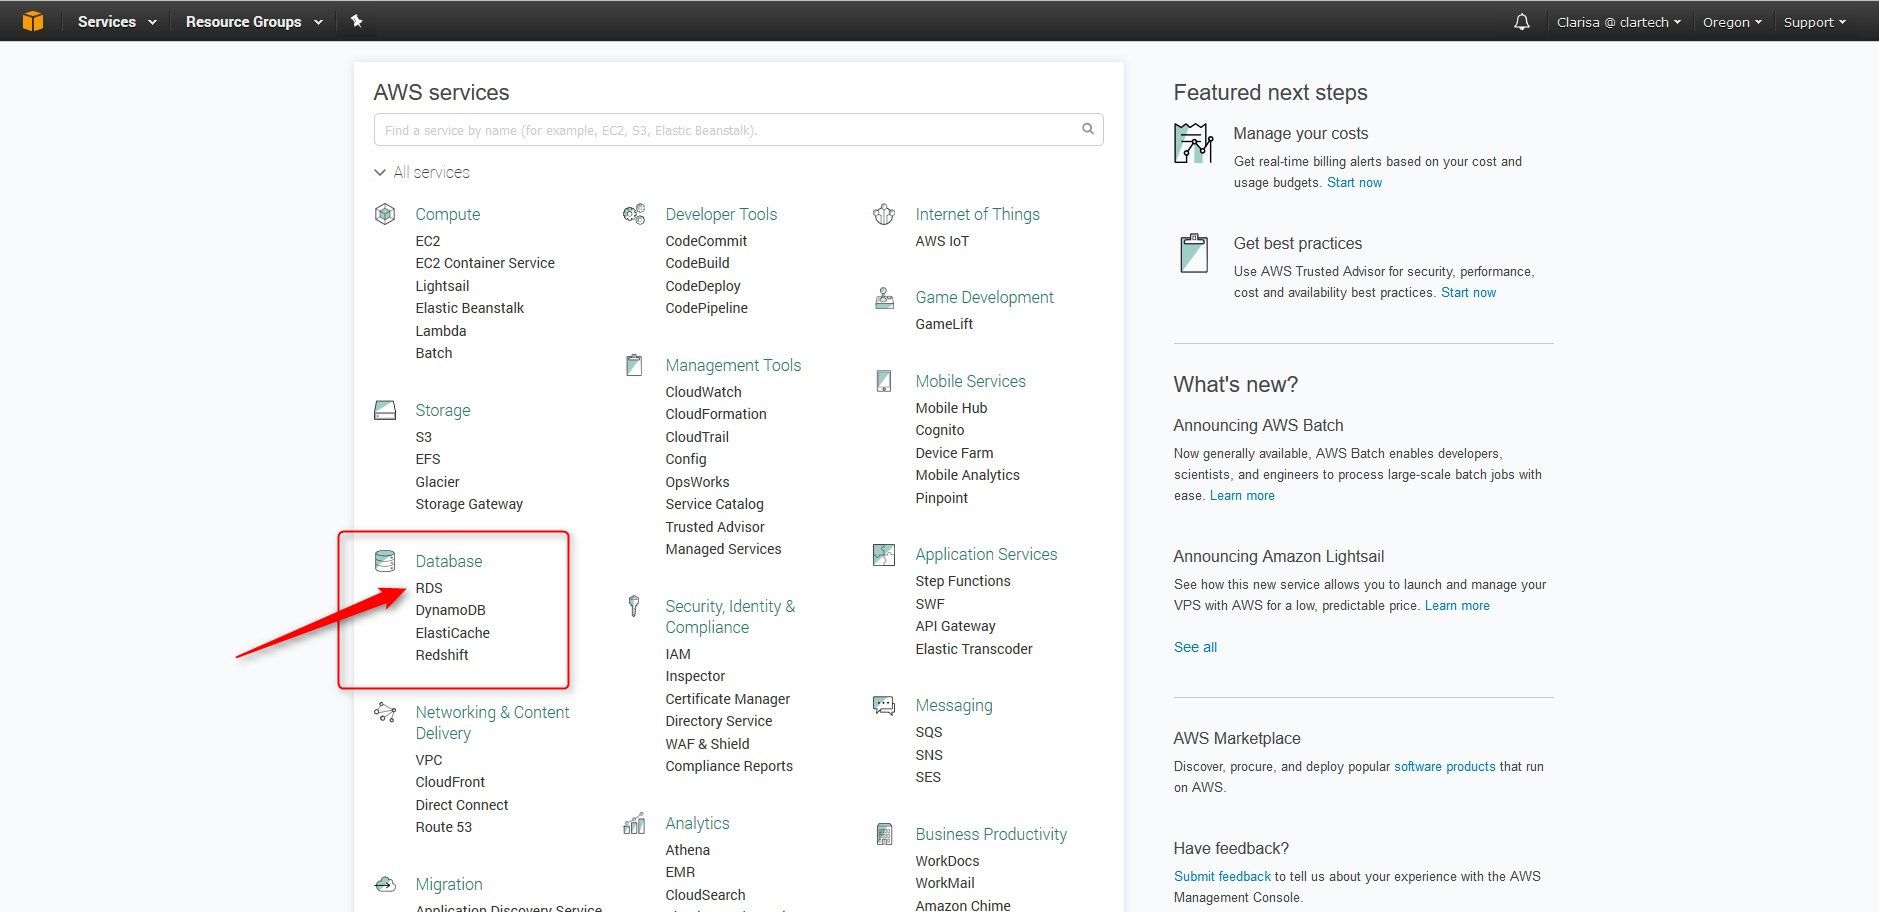
In the Database section, select the RDS option:
The Amazon Relational Database Service home page appears:
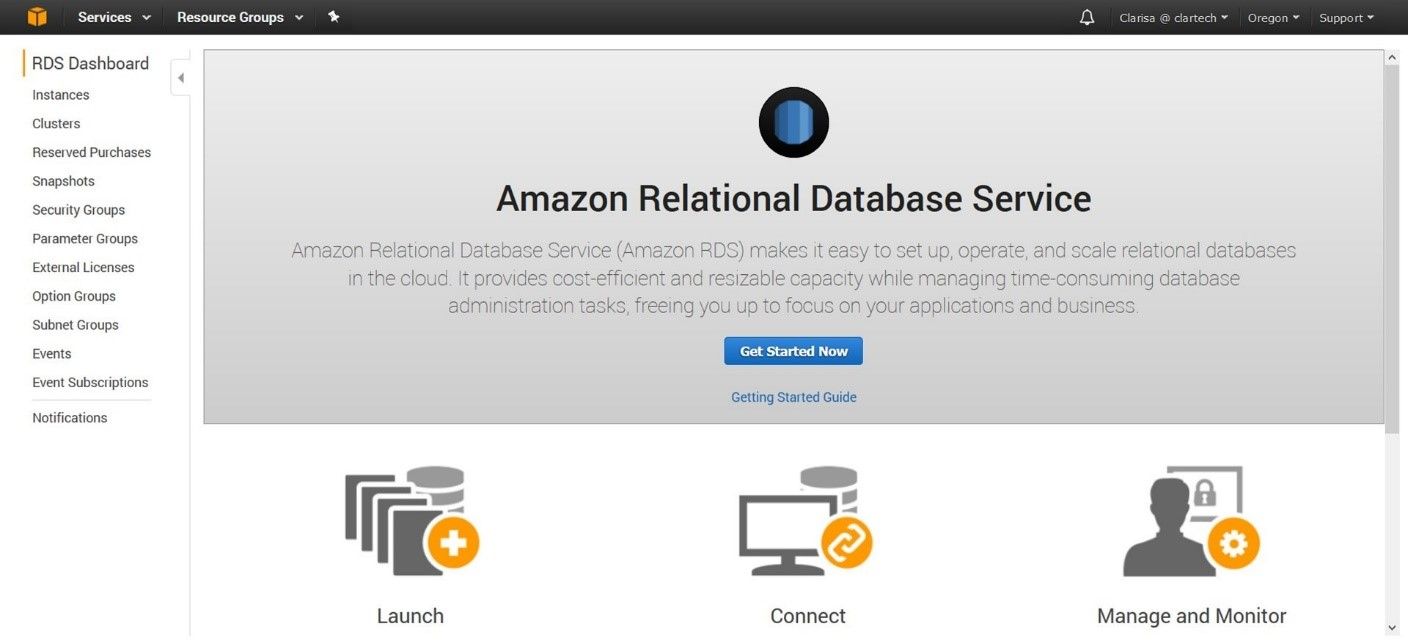
To create an Instance of the MySQL database, we click on the "Get Started Now" button.
A page appears where we can select the database engine that we want to use. We select MySQL.
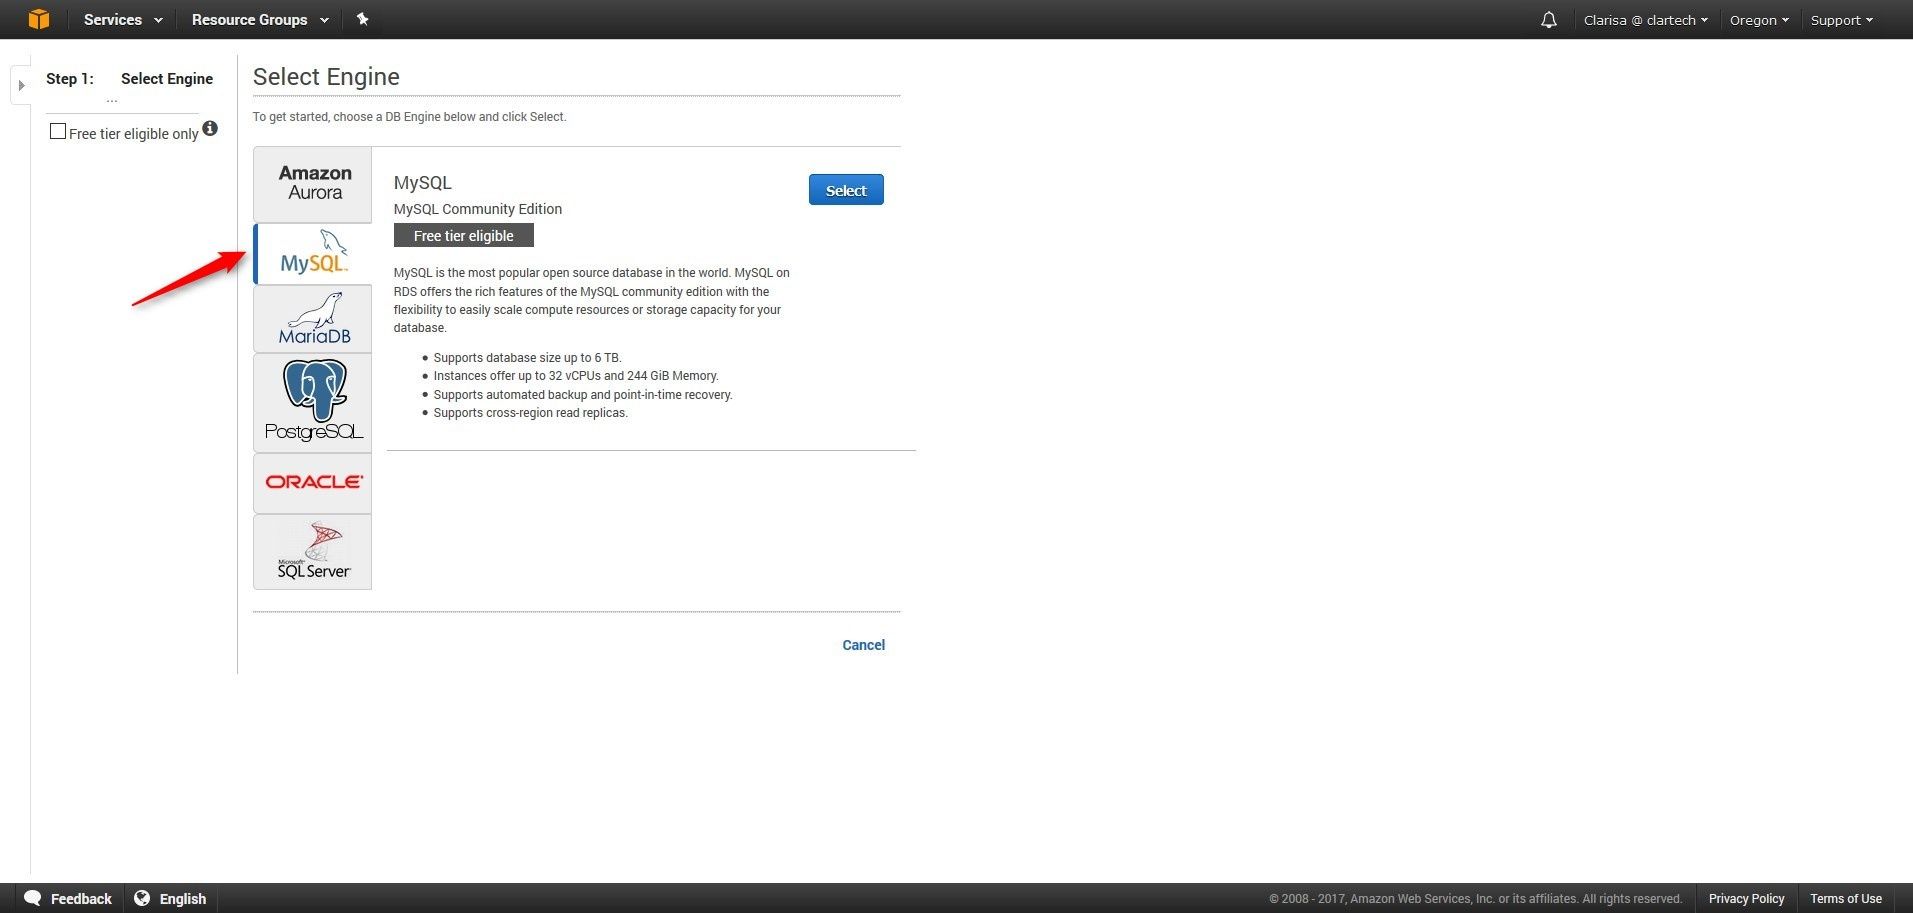
We click the Select button.
A page appears where we can select the type of use that we are going to give to the database. In this demo we will select Dev/Test.
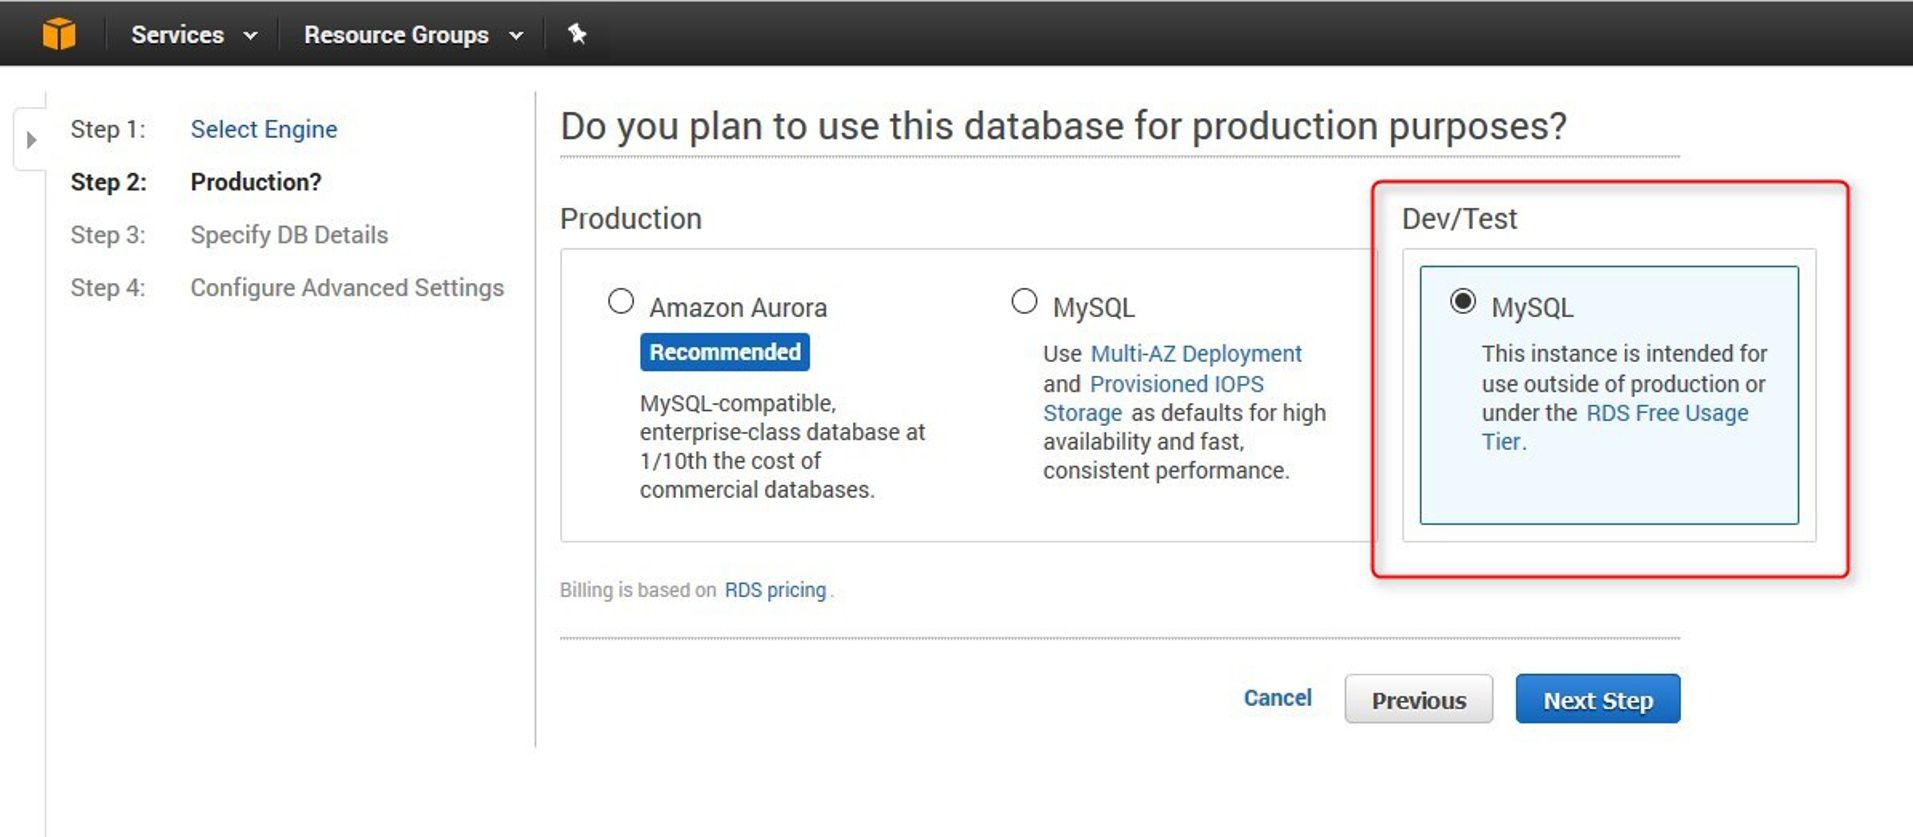
We click the Next Step button.
We set the option "Only show options that are eligible for RDS Free Tier” to show us the options that are free in the first year of use of AWS services. If we would like to see all the options that are presented, we don’t check this option.
The Amazon RDS Free Tier provides a single db.t2.micro instance as well as up to 20GB of storage, allowing new AWS customers to gain hands-on experience with Amazon RDS.
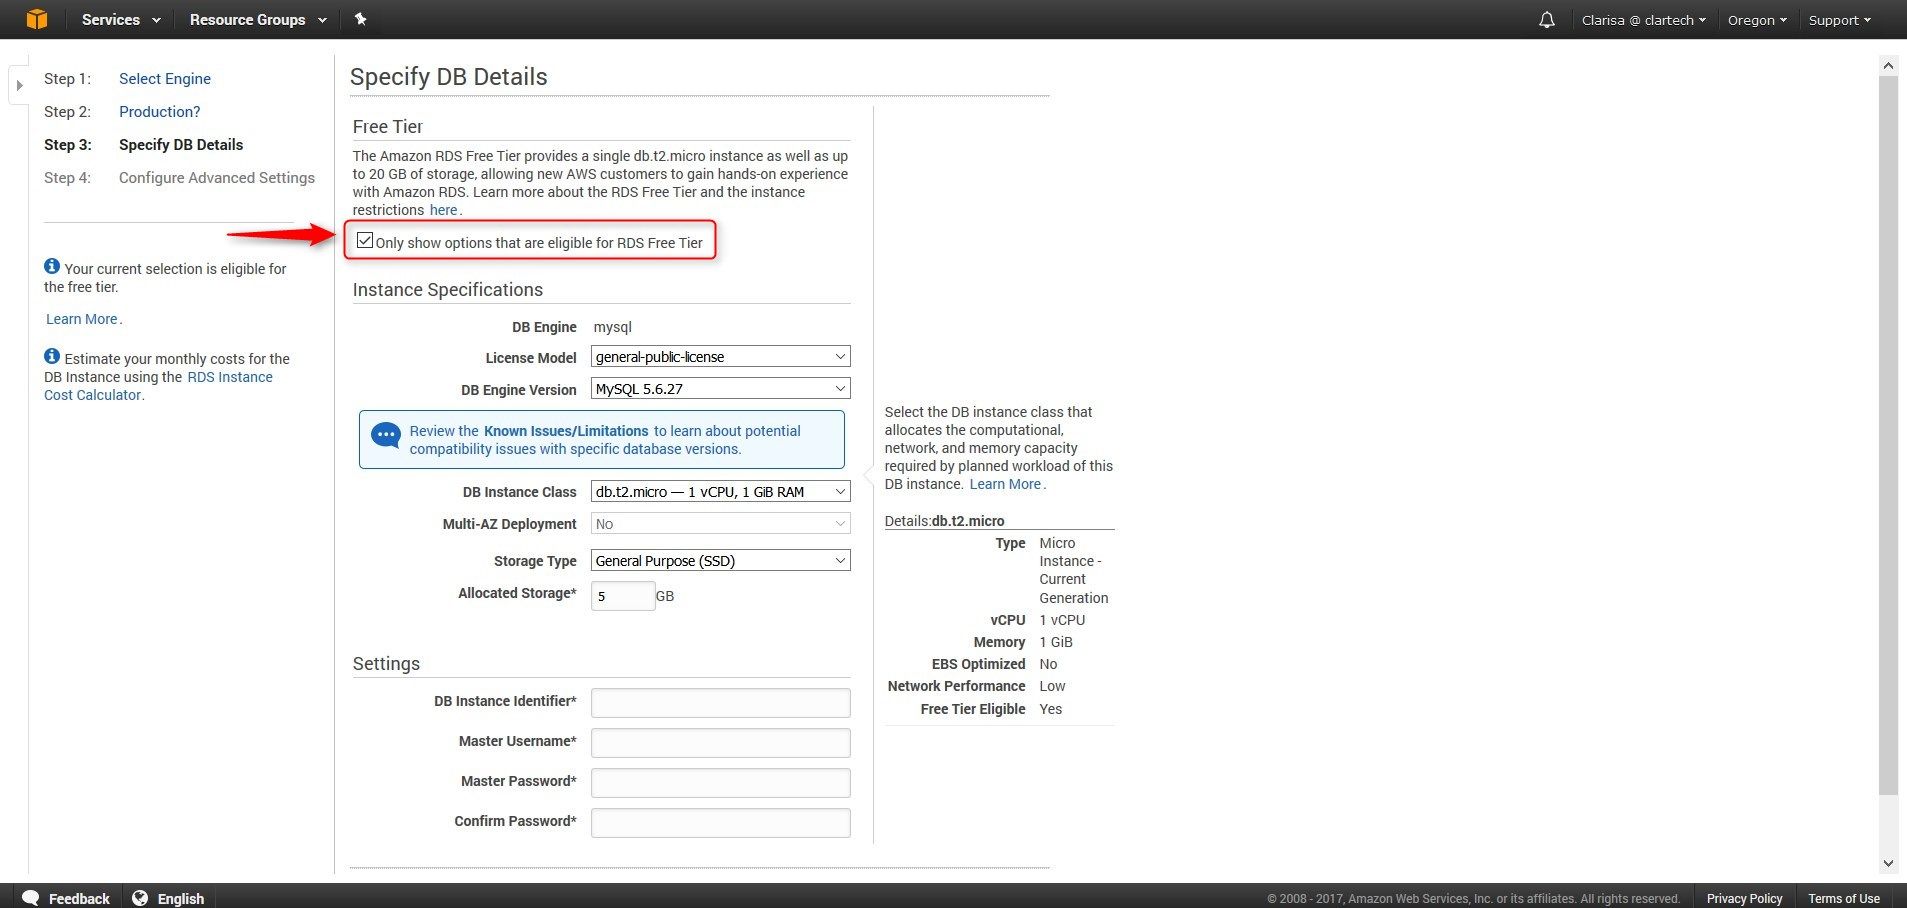
We select the class of the Database Instance:
Details: db.t2.micro
Type: Micro Instance - Current Generation
vCPU: 1 vCPU
Memory: 1
EBS Optimized: No
Network Performance: Low
Free Tier Eligible: Yes
|
Instance Type |
Current Generation DB Instance Classes |
|
Standard (Latest Generation) |
db.m4.large | db.m4.xlarge | db.m4.2xlarge | db.m4.4xlarge | db.m4.10xlarge |
|
Standard (Previous Generation) |
db.m3.medium | db.m3.large | db.m3.xlarge | db.m3.2xlarge |
|
Memory Optimized |
db.r3.large | db.r3.xlarge | db.r3.2xlarge | db.r3.4xlarge | db.r3.8xlarge |
|
Burst Capable |
db.t2.micro | db.t2.small | db.t2.medium | db.t2.large |
Note: For MySQL .m4 = 5.5,5.6,5.7
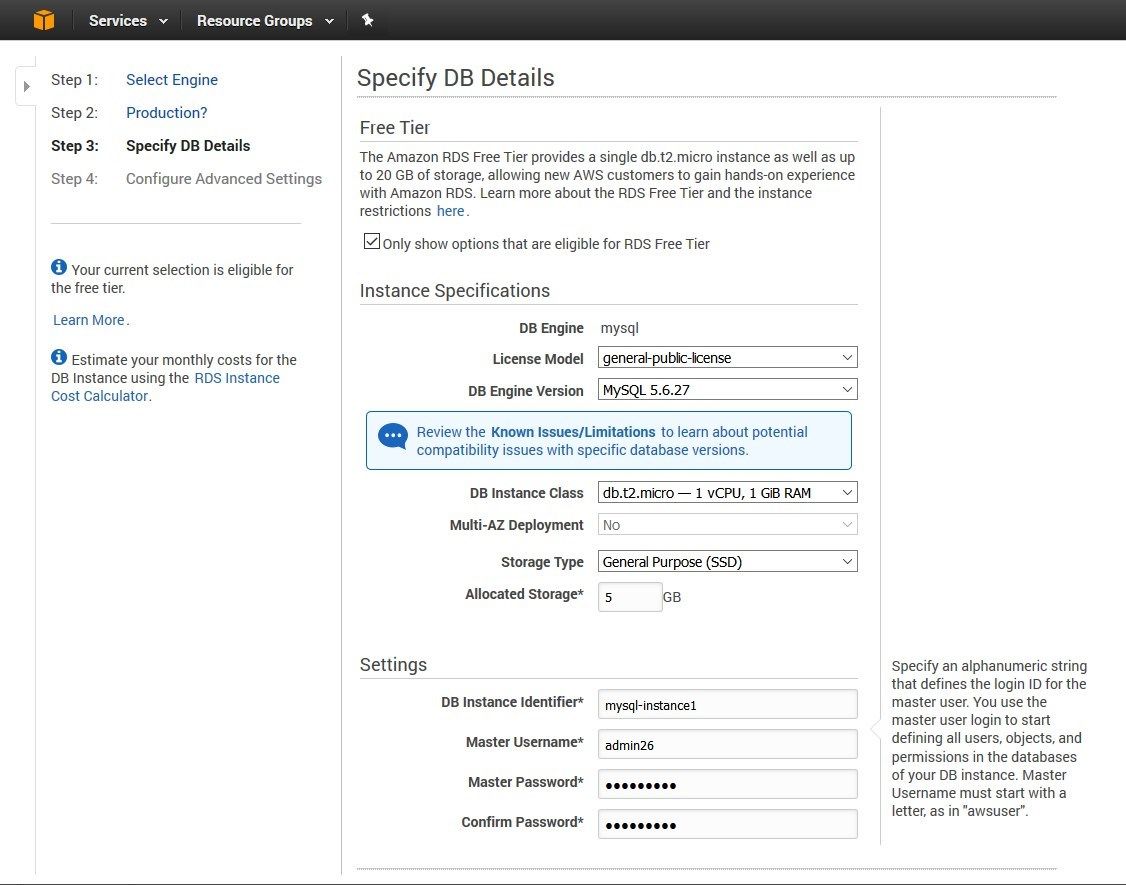
Storage Type: select “General Purpose (SSD)”
Amazon RDS provides three storage types: Magnetic, General Purpose (SSD), and Provisioned IOPS (input/output operations per second). They differ in performance characteristics and price, allowing us to adapt storage performance and cost to the workload needs of our database. In our example, we are only showing the features that are free, so only the options of General Purpose (SSD) and Magnetic are enabled.
Once we have selected the specifications of the Instance, we need to enter the following configurations at the bottom of the page:
- DB Instance Identifier: We need to specify a name for the DB instance that is unique for our account in the region we chose. We can add some intelligence to the name, such as including the region and DB engine we chose, for example, “west2-mysql-instance1”. Remember that in our AWS we can have different database engines running simultaneously.
- Master Username: We need to specify a name using alphanumeric characters that we will use as the master username to log on to our DB instance. This will be the username we use to log on to our database on the DB instance for the first time. The default privileges granted to the master user account include: create, delete, references, events, alter, drop, index, insert, select, update, create temporary tables, lock tables, trigger, create view, create routine, execute , create user, process, display databases, grant option. The primary username must begin with a letter, such as “adminXX”.
- Master Password: We need to specify a password that contains from 8 to 41 printable ASCII characters (excluding /,”, and @) for our master user password. This will be the password we will use when we use the username to log on to our database.
- Confirm Password: We need to type the password again in the “Confirm Password” box.
We click the Next Step button.
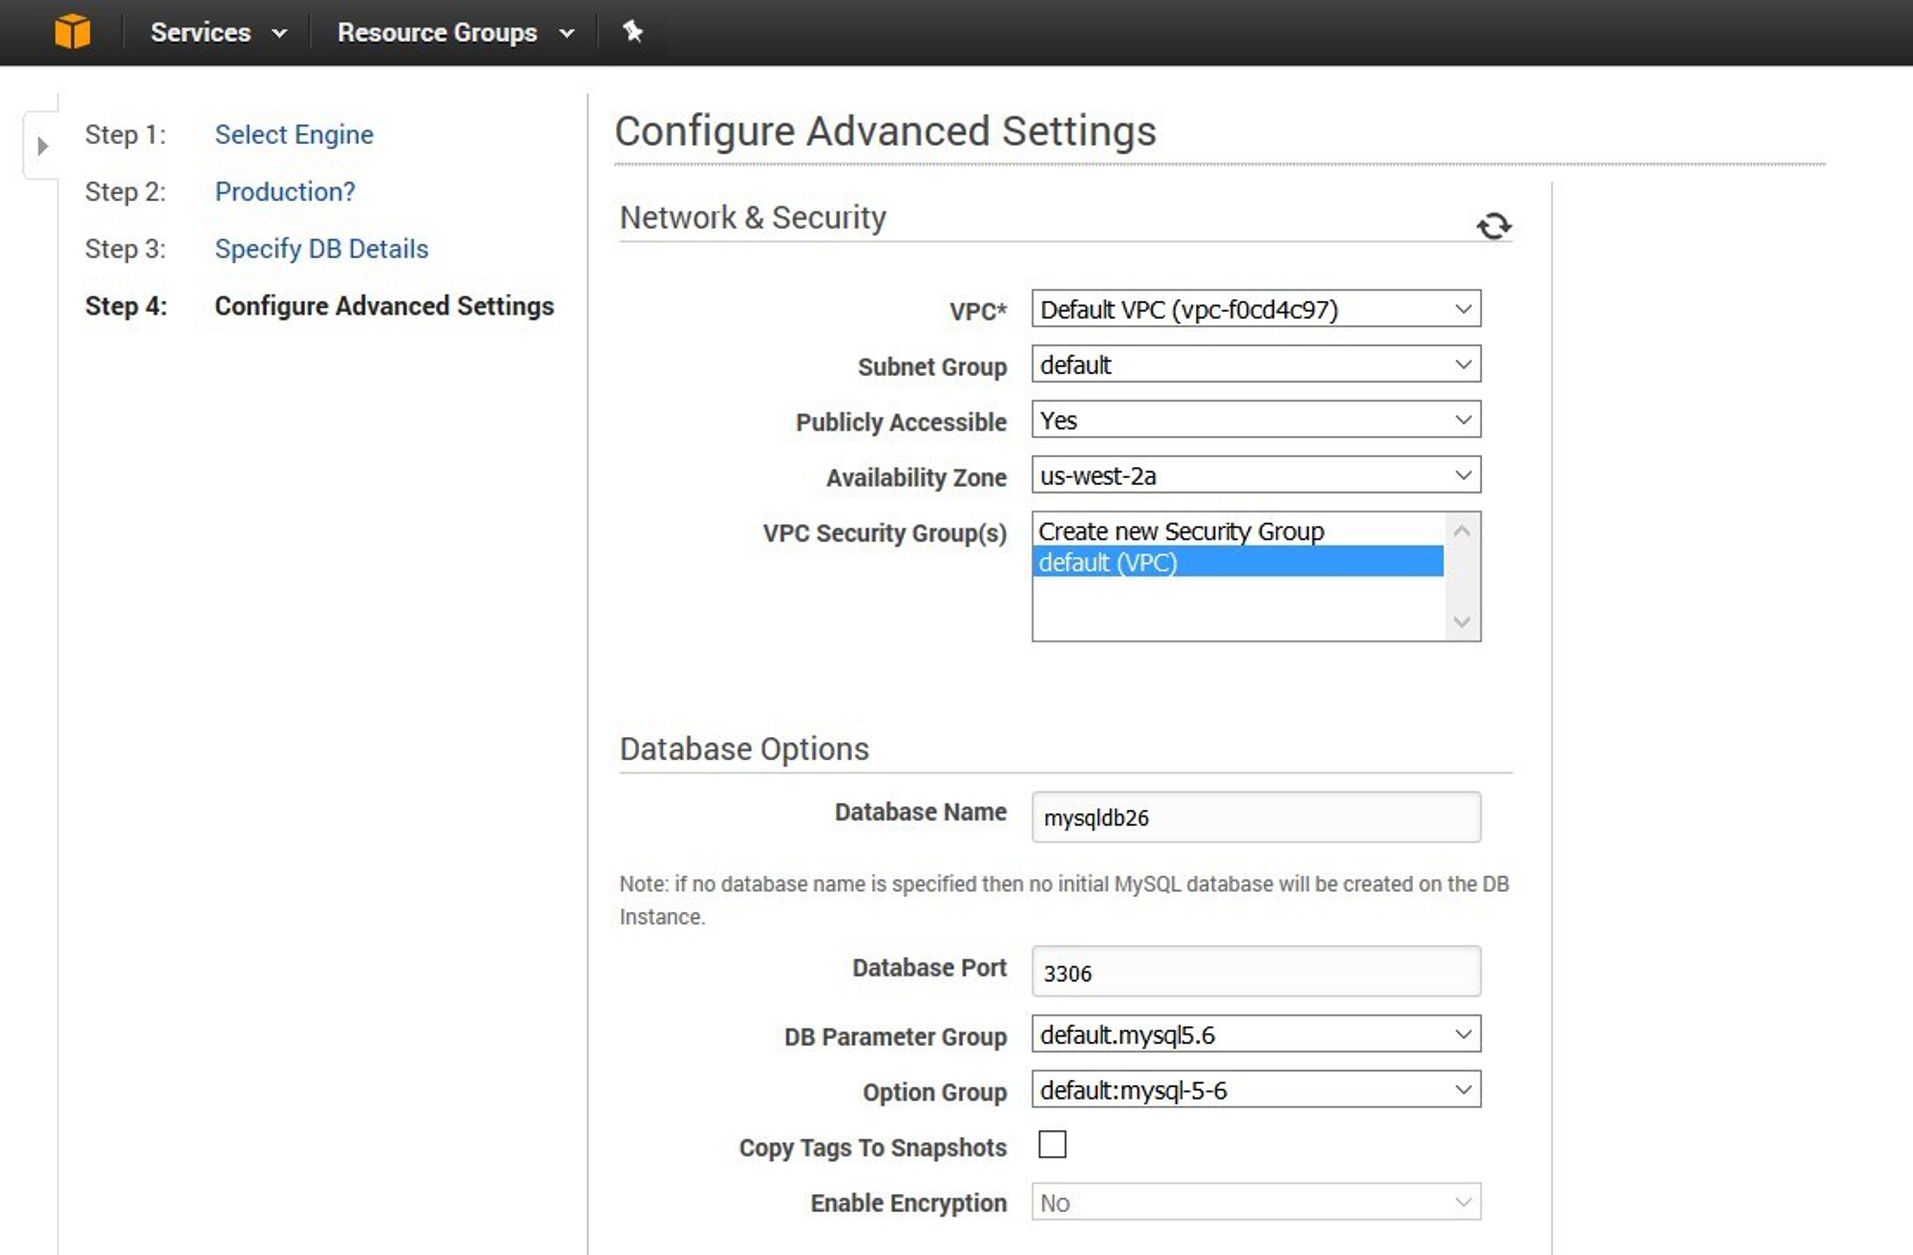
We can view the advanced settings page. As the page shows, we have configured the following:
In the section “Network & Security”:
- VPC: Select the Virtual Private Cloud (VPC) that defines the virtual networking environment for this DB instance. Only VPCs with a corresponding DB Subnet Group are listed.
- Publicly Accessible: Select “Yes” if you want EC2 instances and devices outside of the VPC hosting the DB instance to connect to the DB instance. If you select No, Amazon RDS will not assign a public IP address to the DB instance, and no EC2 instance or devices outside of the VPC will be able to connect. If you select “Yes”, you must also select one or more VPC security groups that specify which EC2 instances and devices can connect to the DB instance.
- Availability Zone: Select the availability zone.
- VPC Security Group(s): Select the security group or groups that have rules authorizing connections from all of the EC2 instances and devices that need to access the data stored in the DB instance. By default, security groups do not authorize any connections; you must specify rules for all instances and devices that will connect to the DB instance.
In the section “Database Options”:
- Database Name: We need to specify a string of up to 64 alpha-numeric characters that define the name given to a database that Amazon RDS creates when it creates the DB instance, as in “mydb”. If we don’t specify a database name, Amazon RDS does not create a database when it creates the DB instance.
- Database Port: We need to specify the port. For MySQL the port commonly used is 3306.
- DB Parameter Group: This group defines the configuration settings you want applied to this DB instance.
- Option Group: Some DB engines offer additional features that make it easier to manage data and databases and to provide additional security for your database. Amazon RDS uses option groups to enable and configure these features. An option group can specify features, called options, that are available for a particular Amazon RDS DB instance. Options can have settings that specify how the option works. When you associate a DB instance with an option group, the specified options and option settings are enabled for that DB instance.
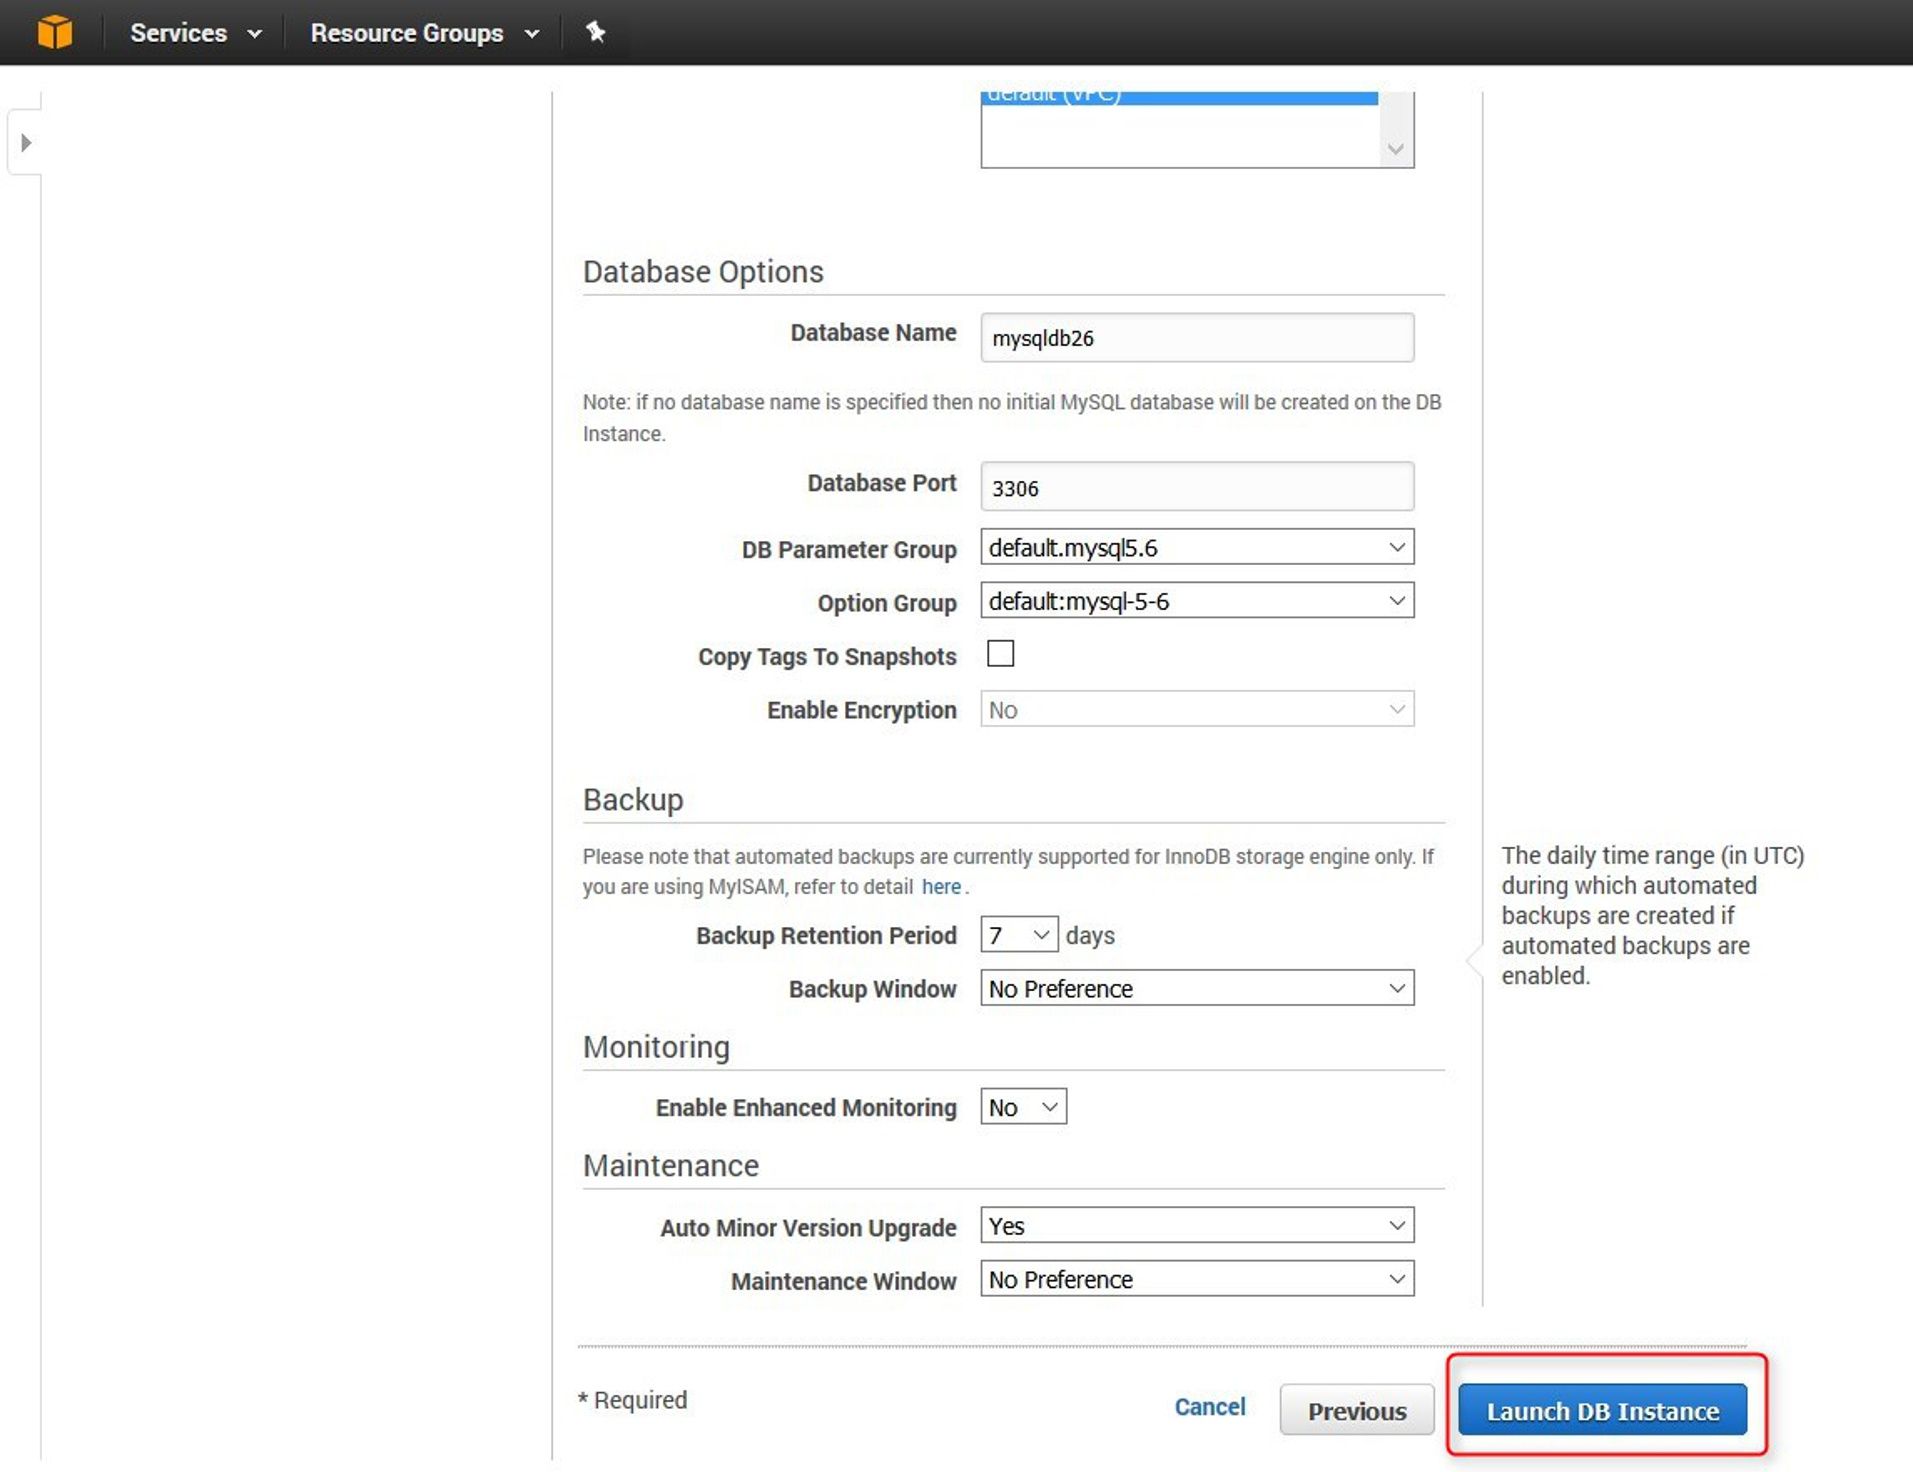
In the “Backup” section:
- Backup Retention Period: 7 days
- Backup Windows: No Preference. (In case we want to configure a window of time we select Windows.)
The rest of the options are on default and we click on the “Launch DB Instance” button.
Now we can see that the Instance has been created successfully.
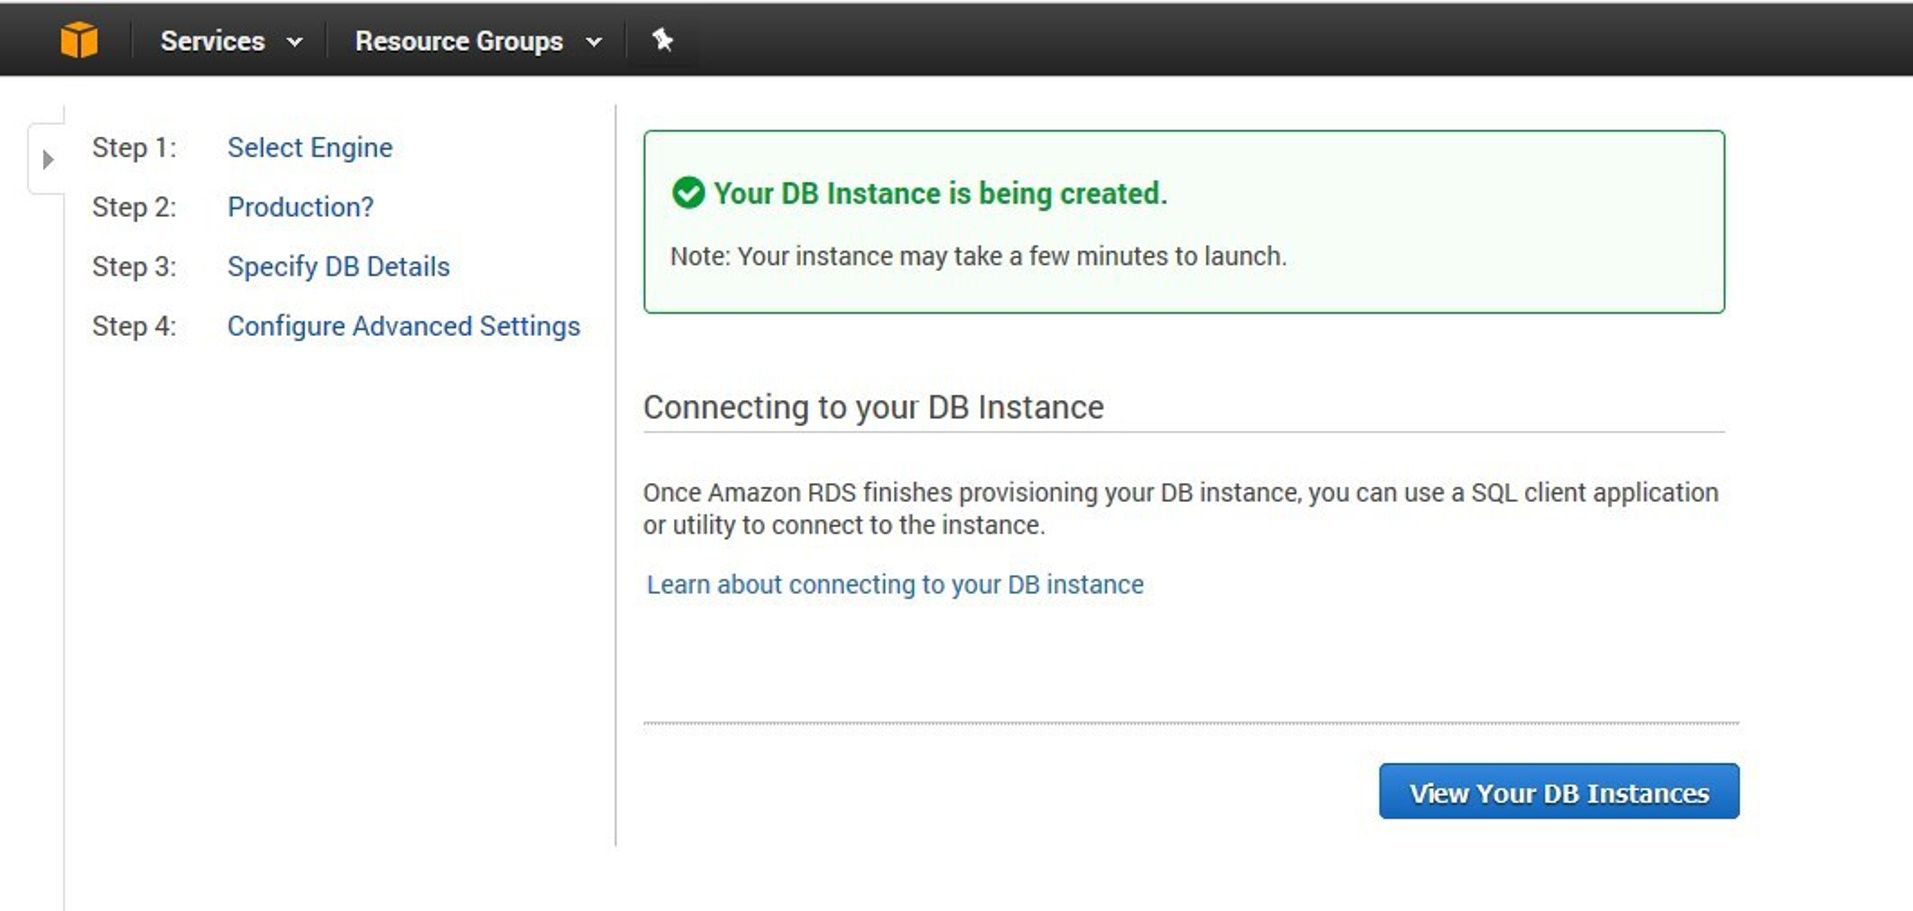
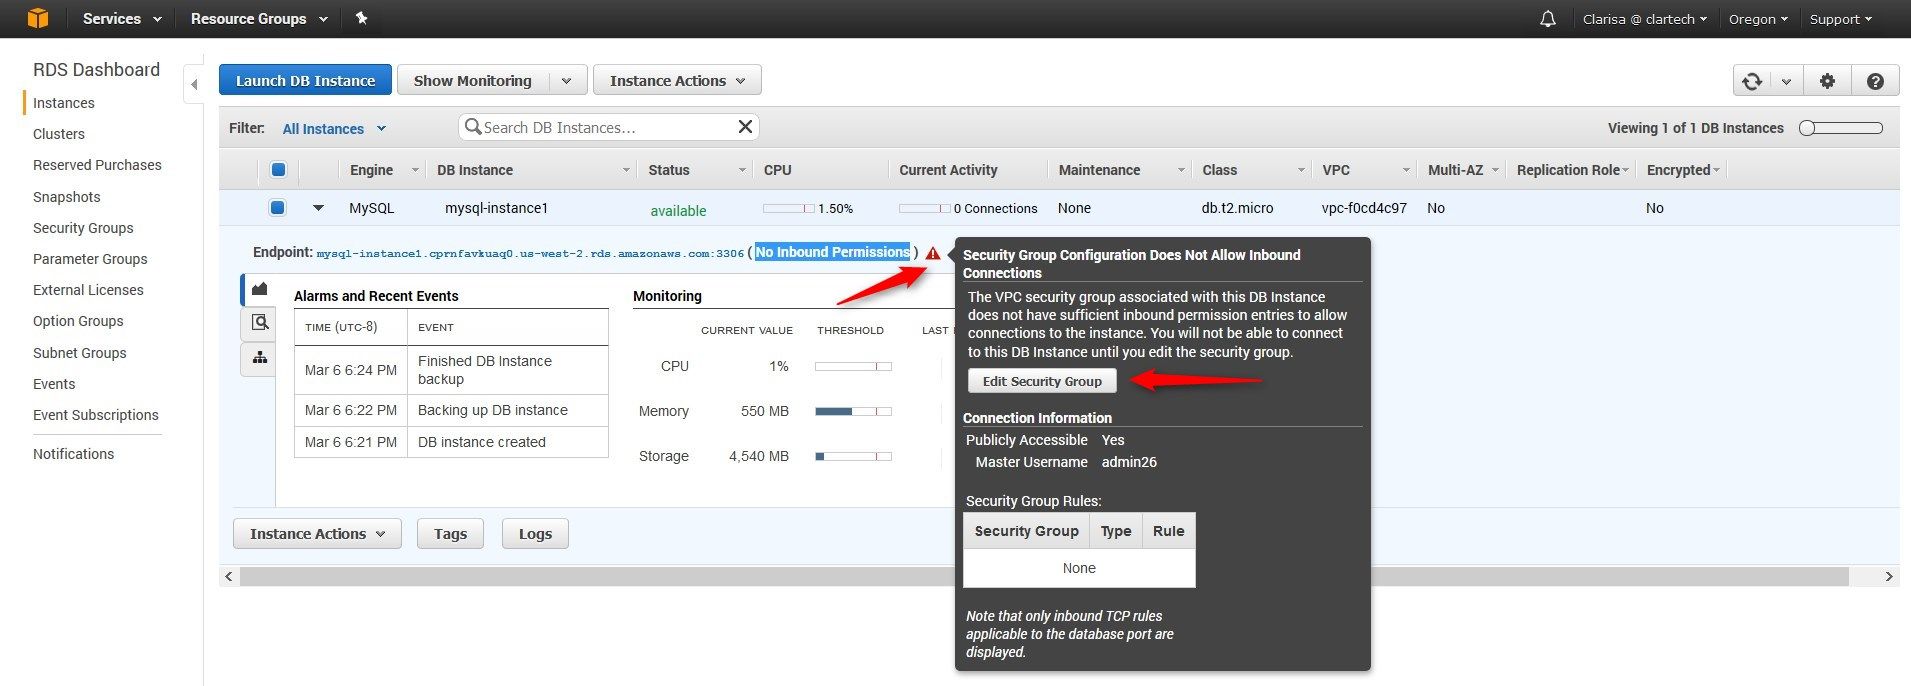
To access the newly created instance we click on the “View Your DB Instances” button and then click on the arrow to expand the information about the Instance.
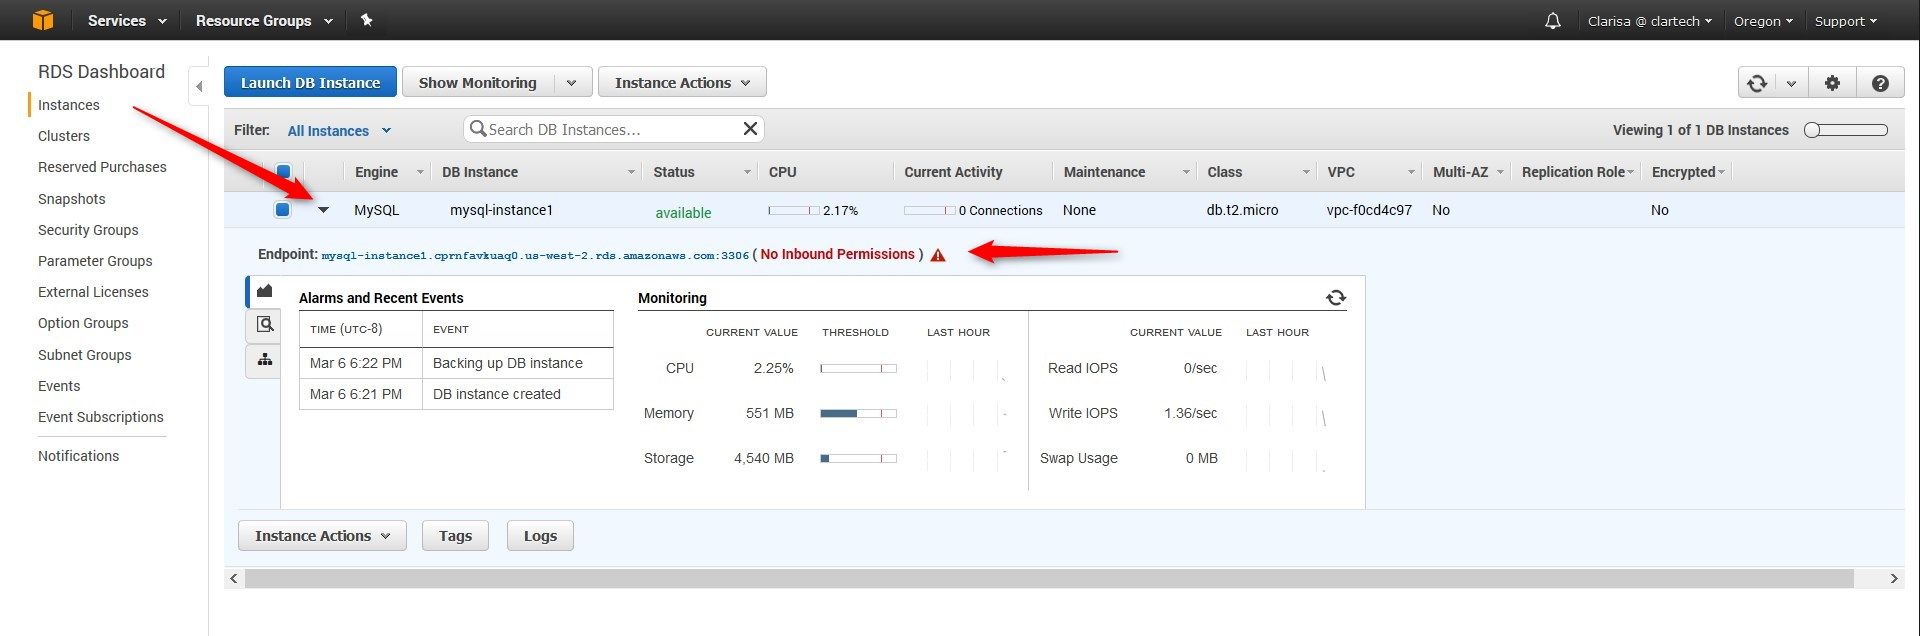
We can see that the instance is available, but there is not access permission. To solve this problem, we click on the triangle icon and then on the “Edit Security Group” button of the tooltip.
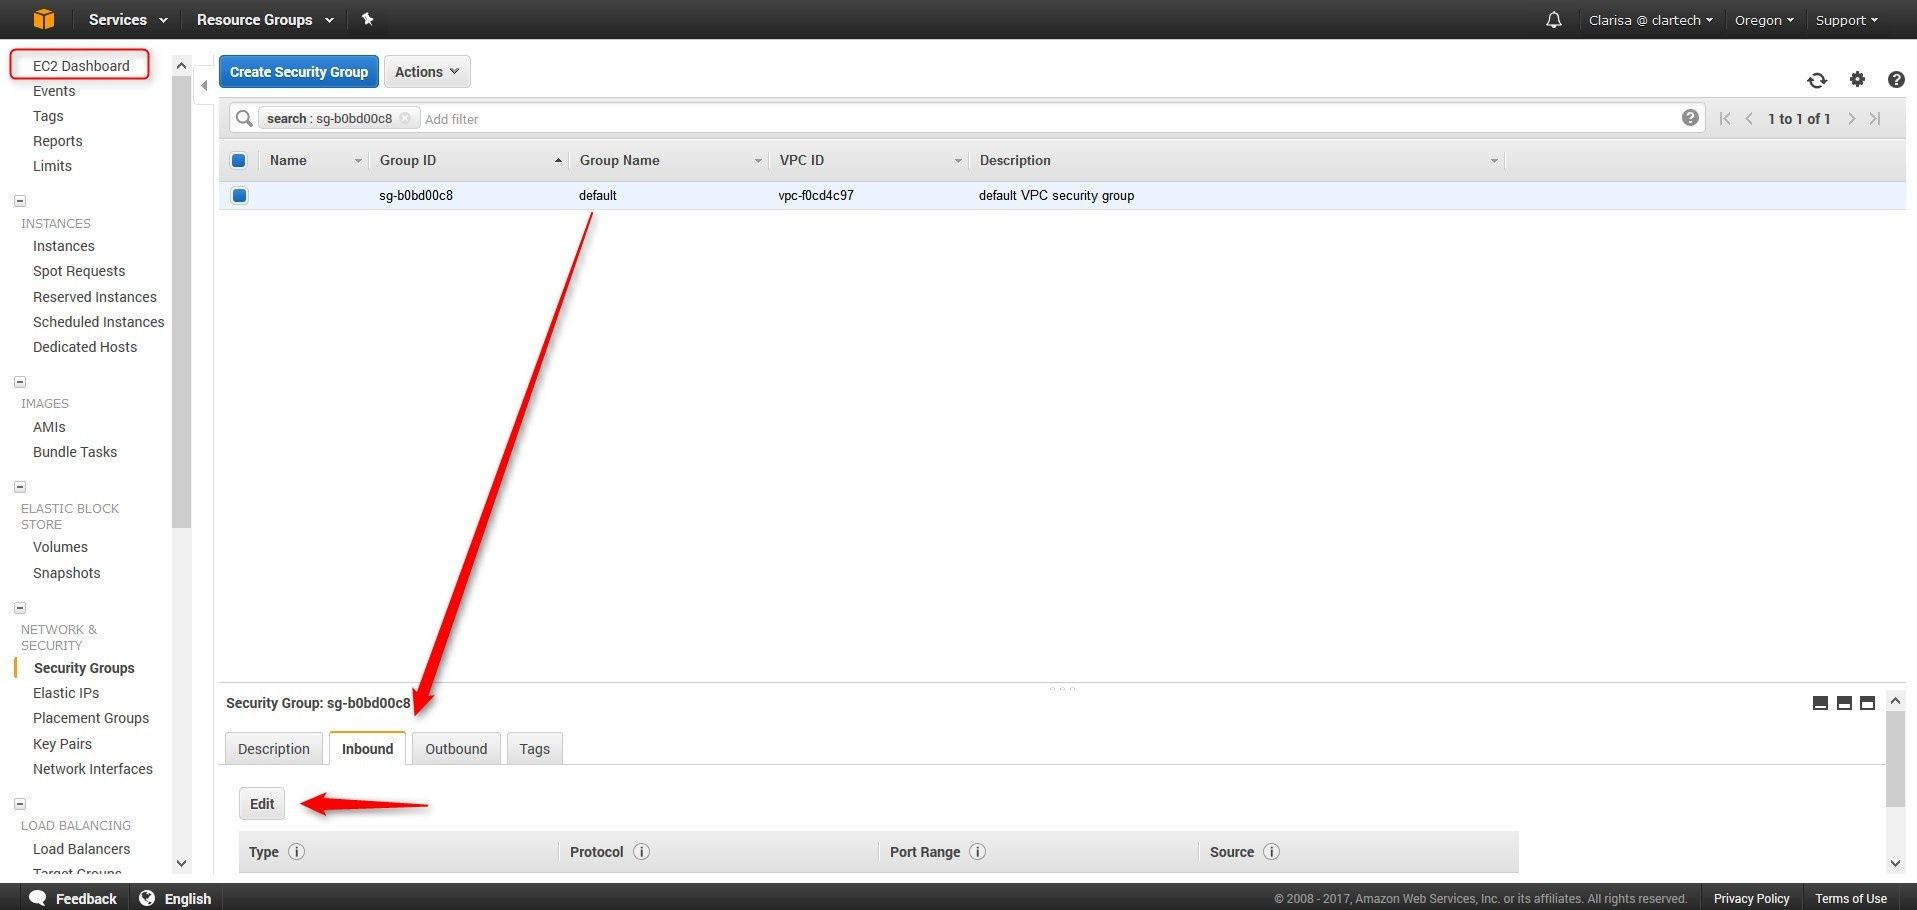
We access the EC2 Dashboard, where we can see the Security Group “default”, which is the one we use for this demonstration. At the bottom of the screen we can see 4 tabs. Select the second ("Inbound") tab and click on the Edit button.
We add a new rule by clicking the “Add Rule” button:
- Type: MYSQL/Aurora
- Protocol: TCP
- Port Range: 3306
- Source: My IP
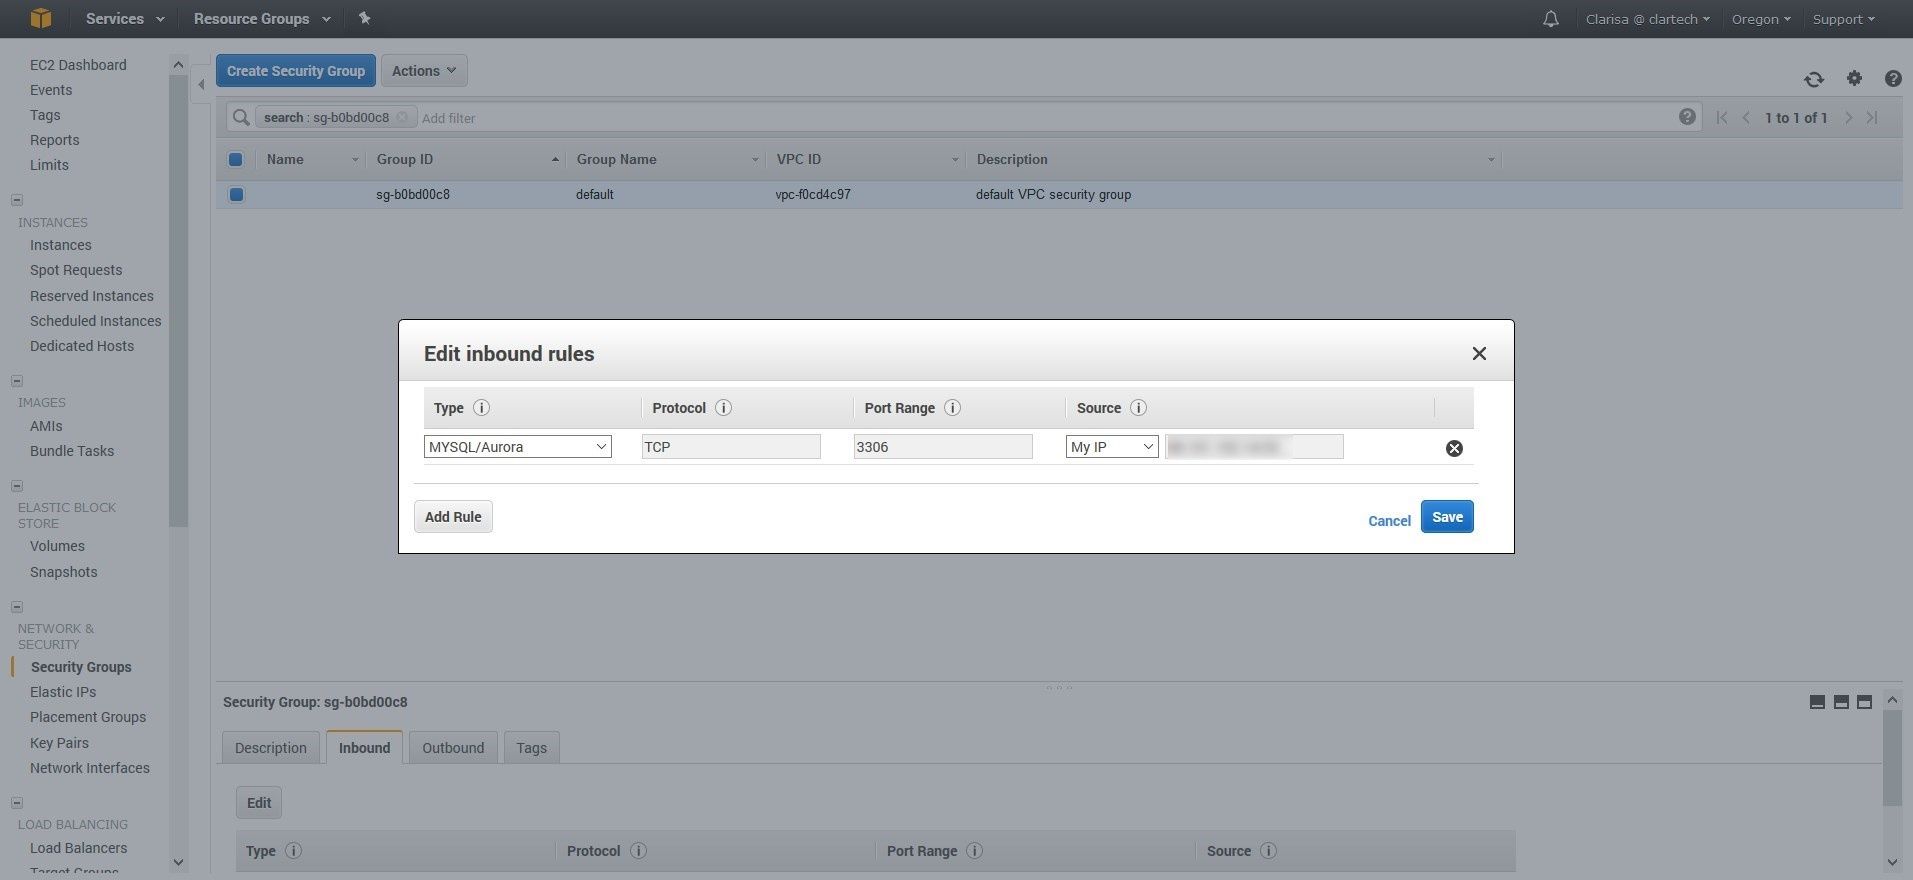
We now click the Save button.
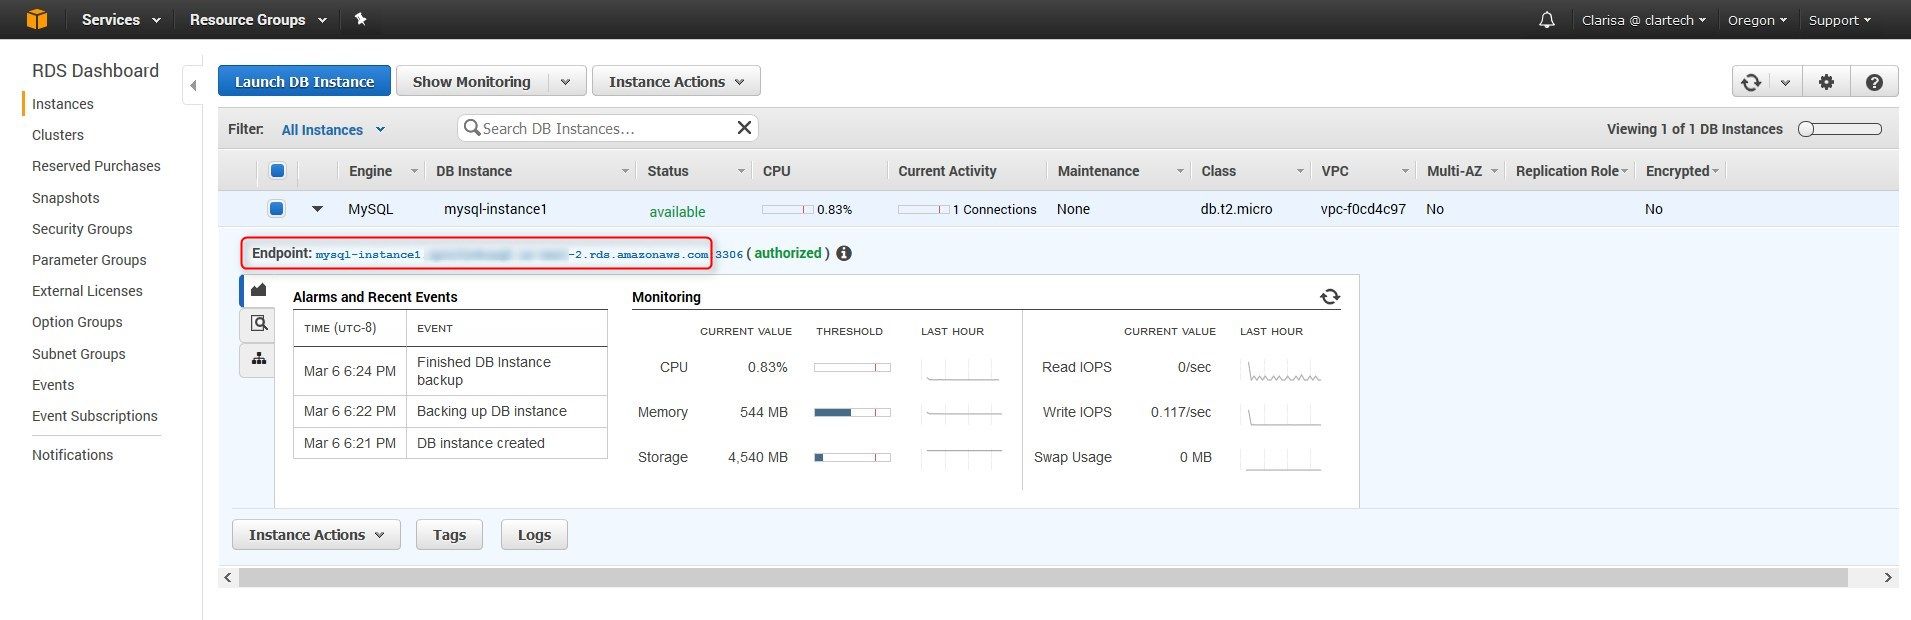
Return to the instance page and refresh. Now we can see that access is authorized.

Connect to the MySQL database from our PC with SQL Developer
It is necessary that our SQL Developer has the JDBC driver for MYSQL, if we don’t have it we can download it from here.
Unzip the file and save the ".jar" file path.
Open SQL Developer and go to the "Tools/Preferences …" menu and then in the modal window that opens, click on the "Database" section to expand the section and select the option "Third Party JDBC Drivers". We need to add a new entry and then add the path for the .jar file we had previously downloaded and unzipped. This way, we can add the option of connecting to MySQL databases in our SQL Developer.
We are now in a position to create a new connection.
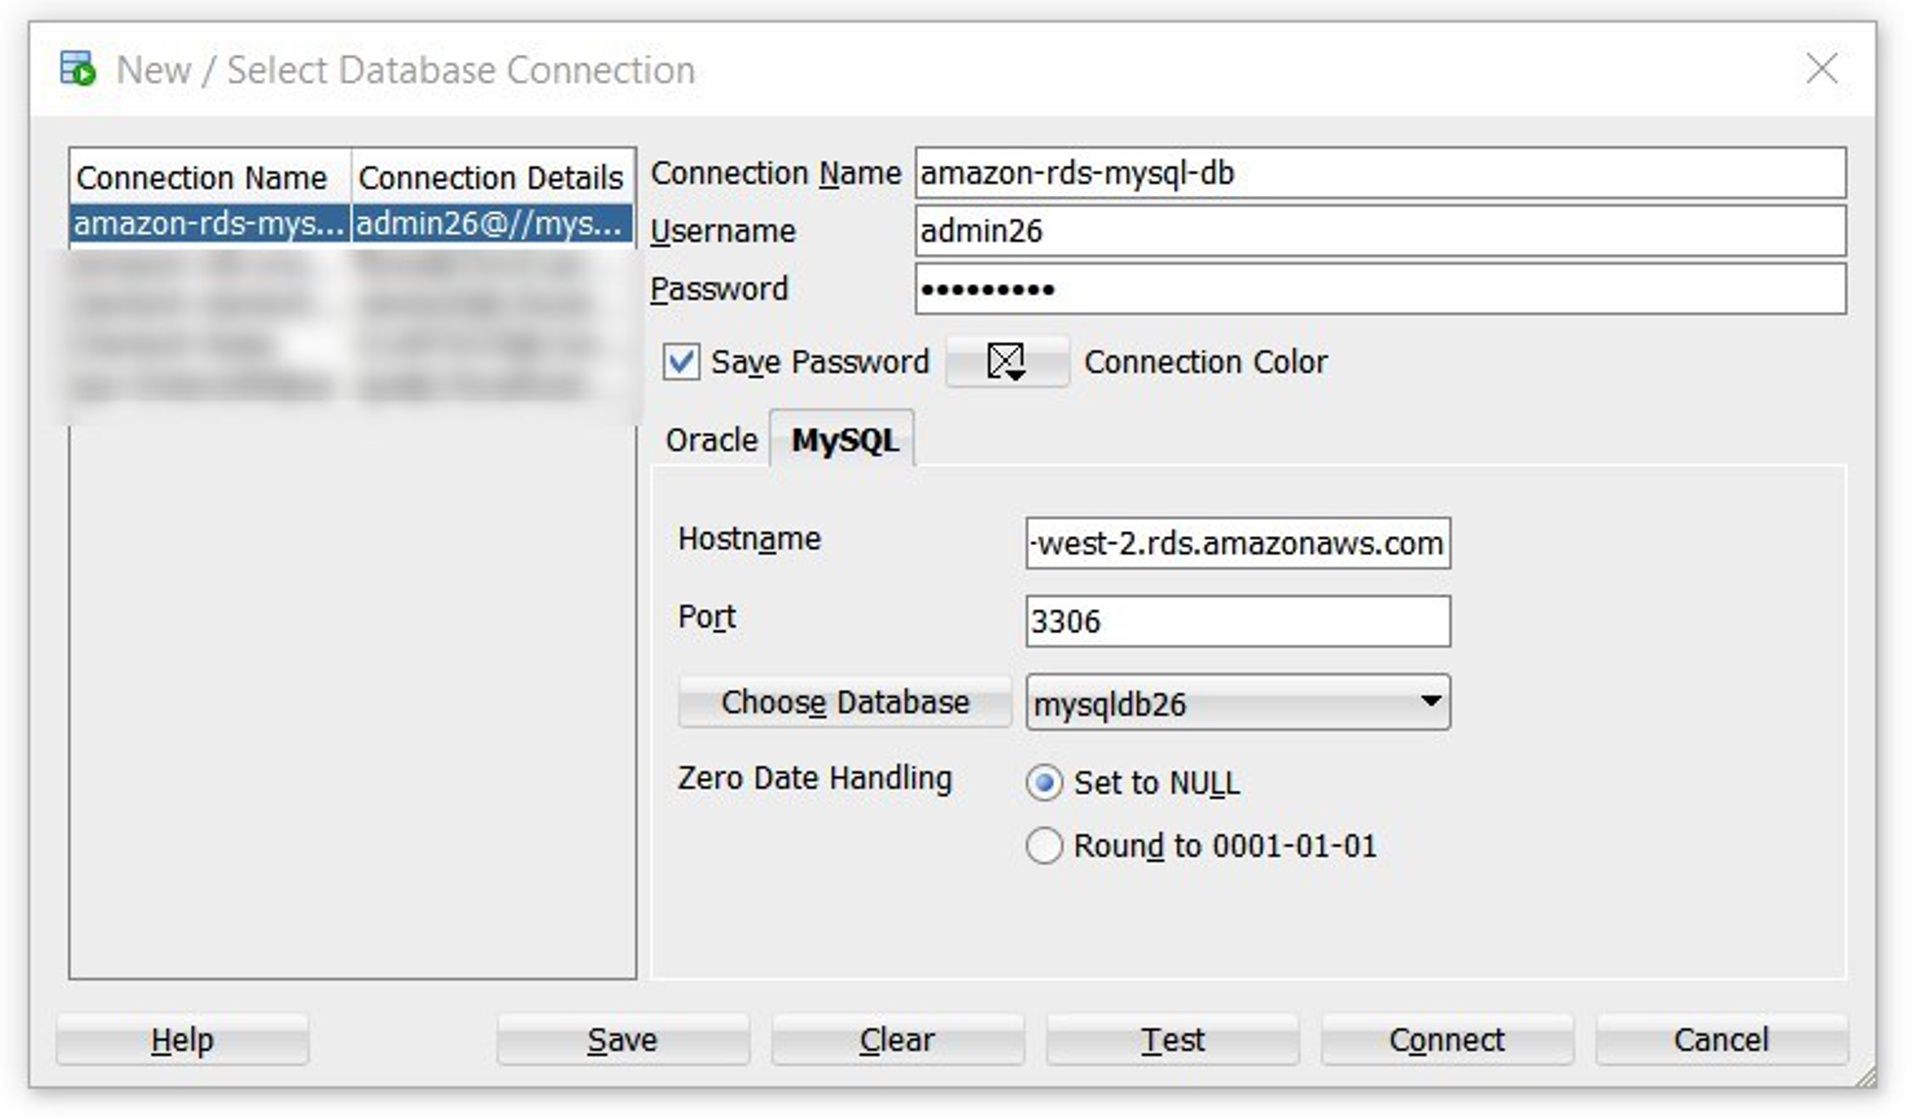
We Select:
- Connection Name: we give the connection a name
- Username: the user of the MySQL database with which we are going to connect
- Password: the user's password
- Hostname: we enter the Endpoint link provided by Amazon RDS on the instance page
- Port: by default 3306
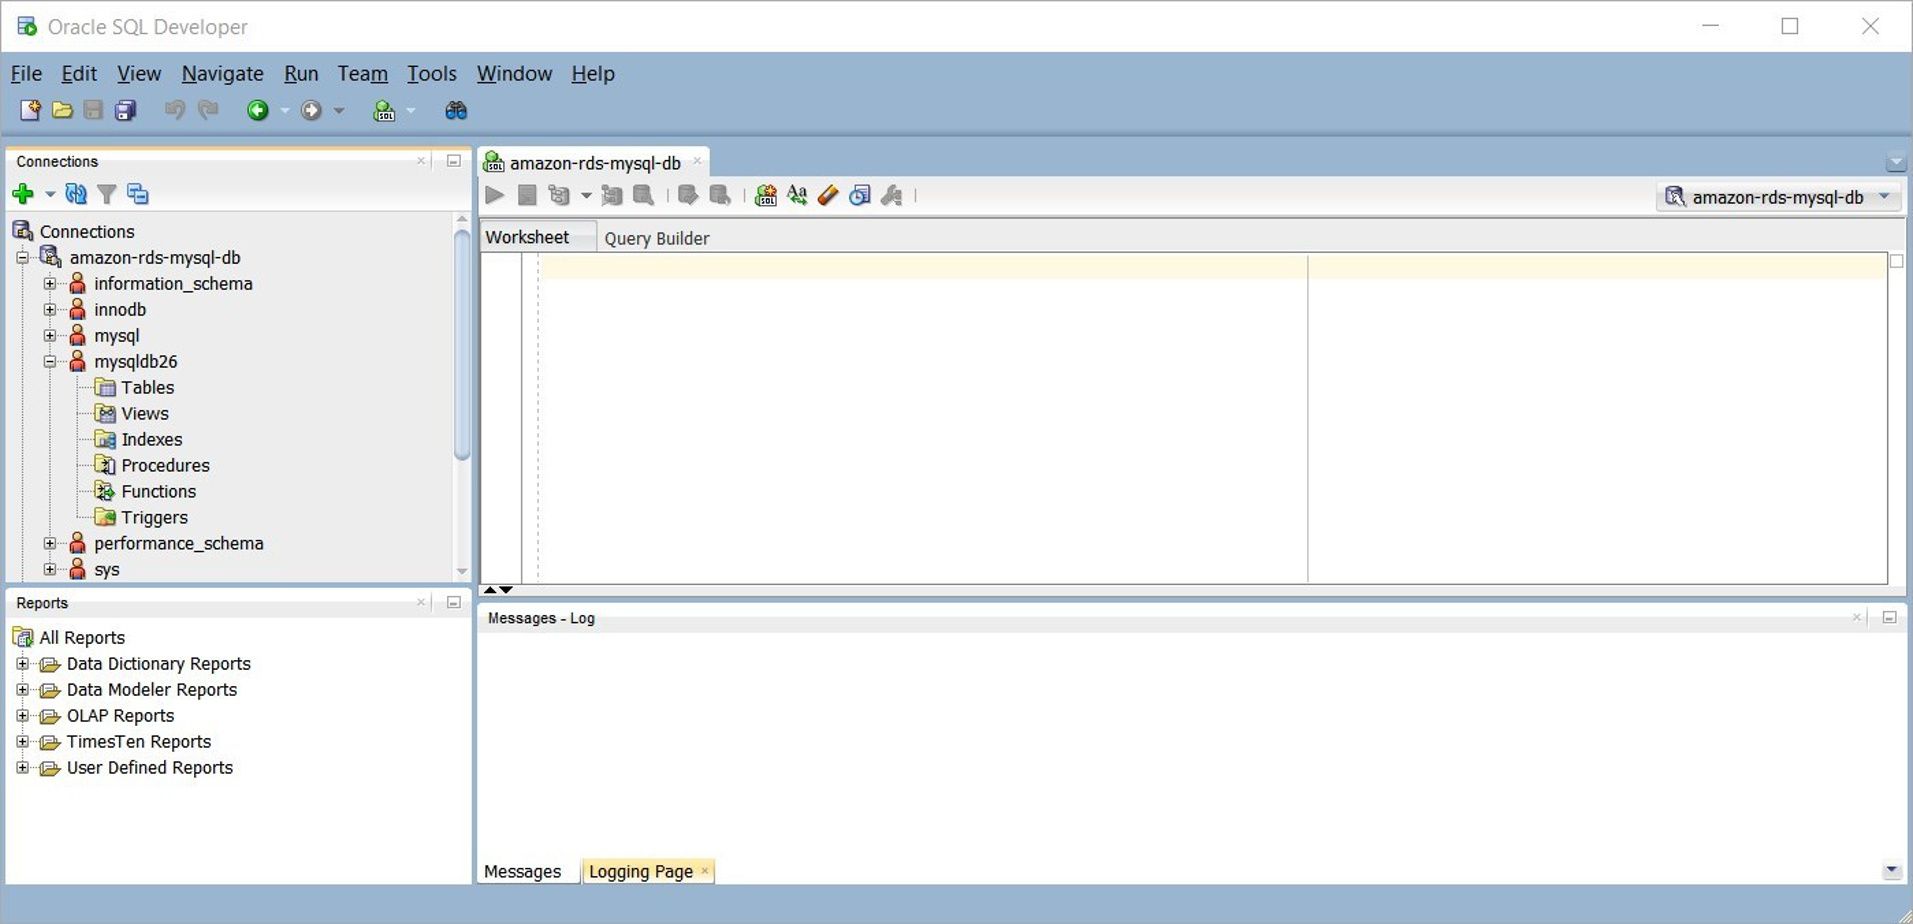
Then we connect to the MySQL database we created in Amazon RDS.
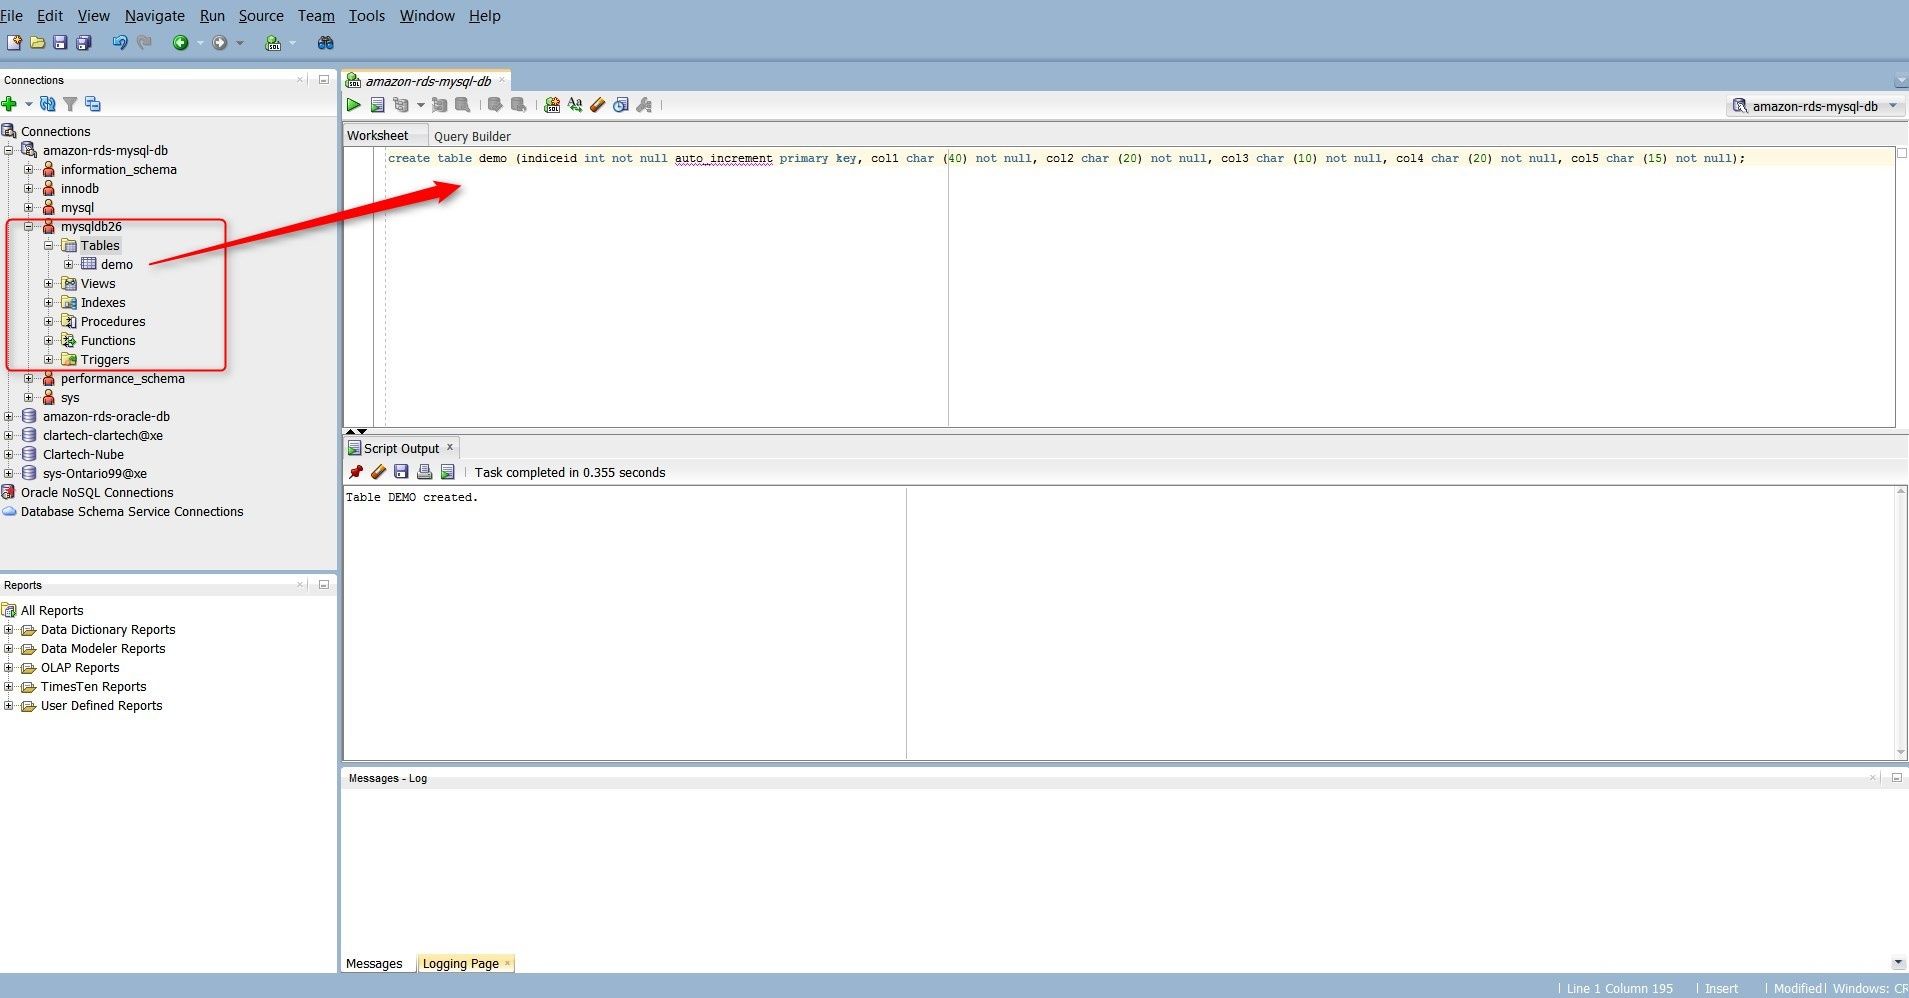
Finally, we can create a demo table in the database as an example:
Following these very simple steps, we have created an instance of the MySQL database in Amazon RDS using an Amazon Web Services account, through which we can connect to it from our local PC using SQL Developer.
Start the discussion at forums.toadworld.com